> ## Documentation Index
> Fetch the complete documentation index at: https://docs.ale.run/llms.txt
> Use this file to discover all available pages before exploring further.
# Google
> Guide to adding Google OAuth to `ale`.
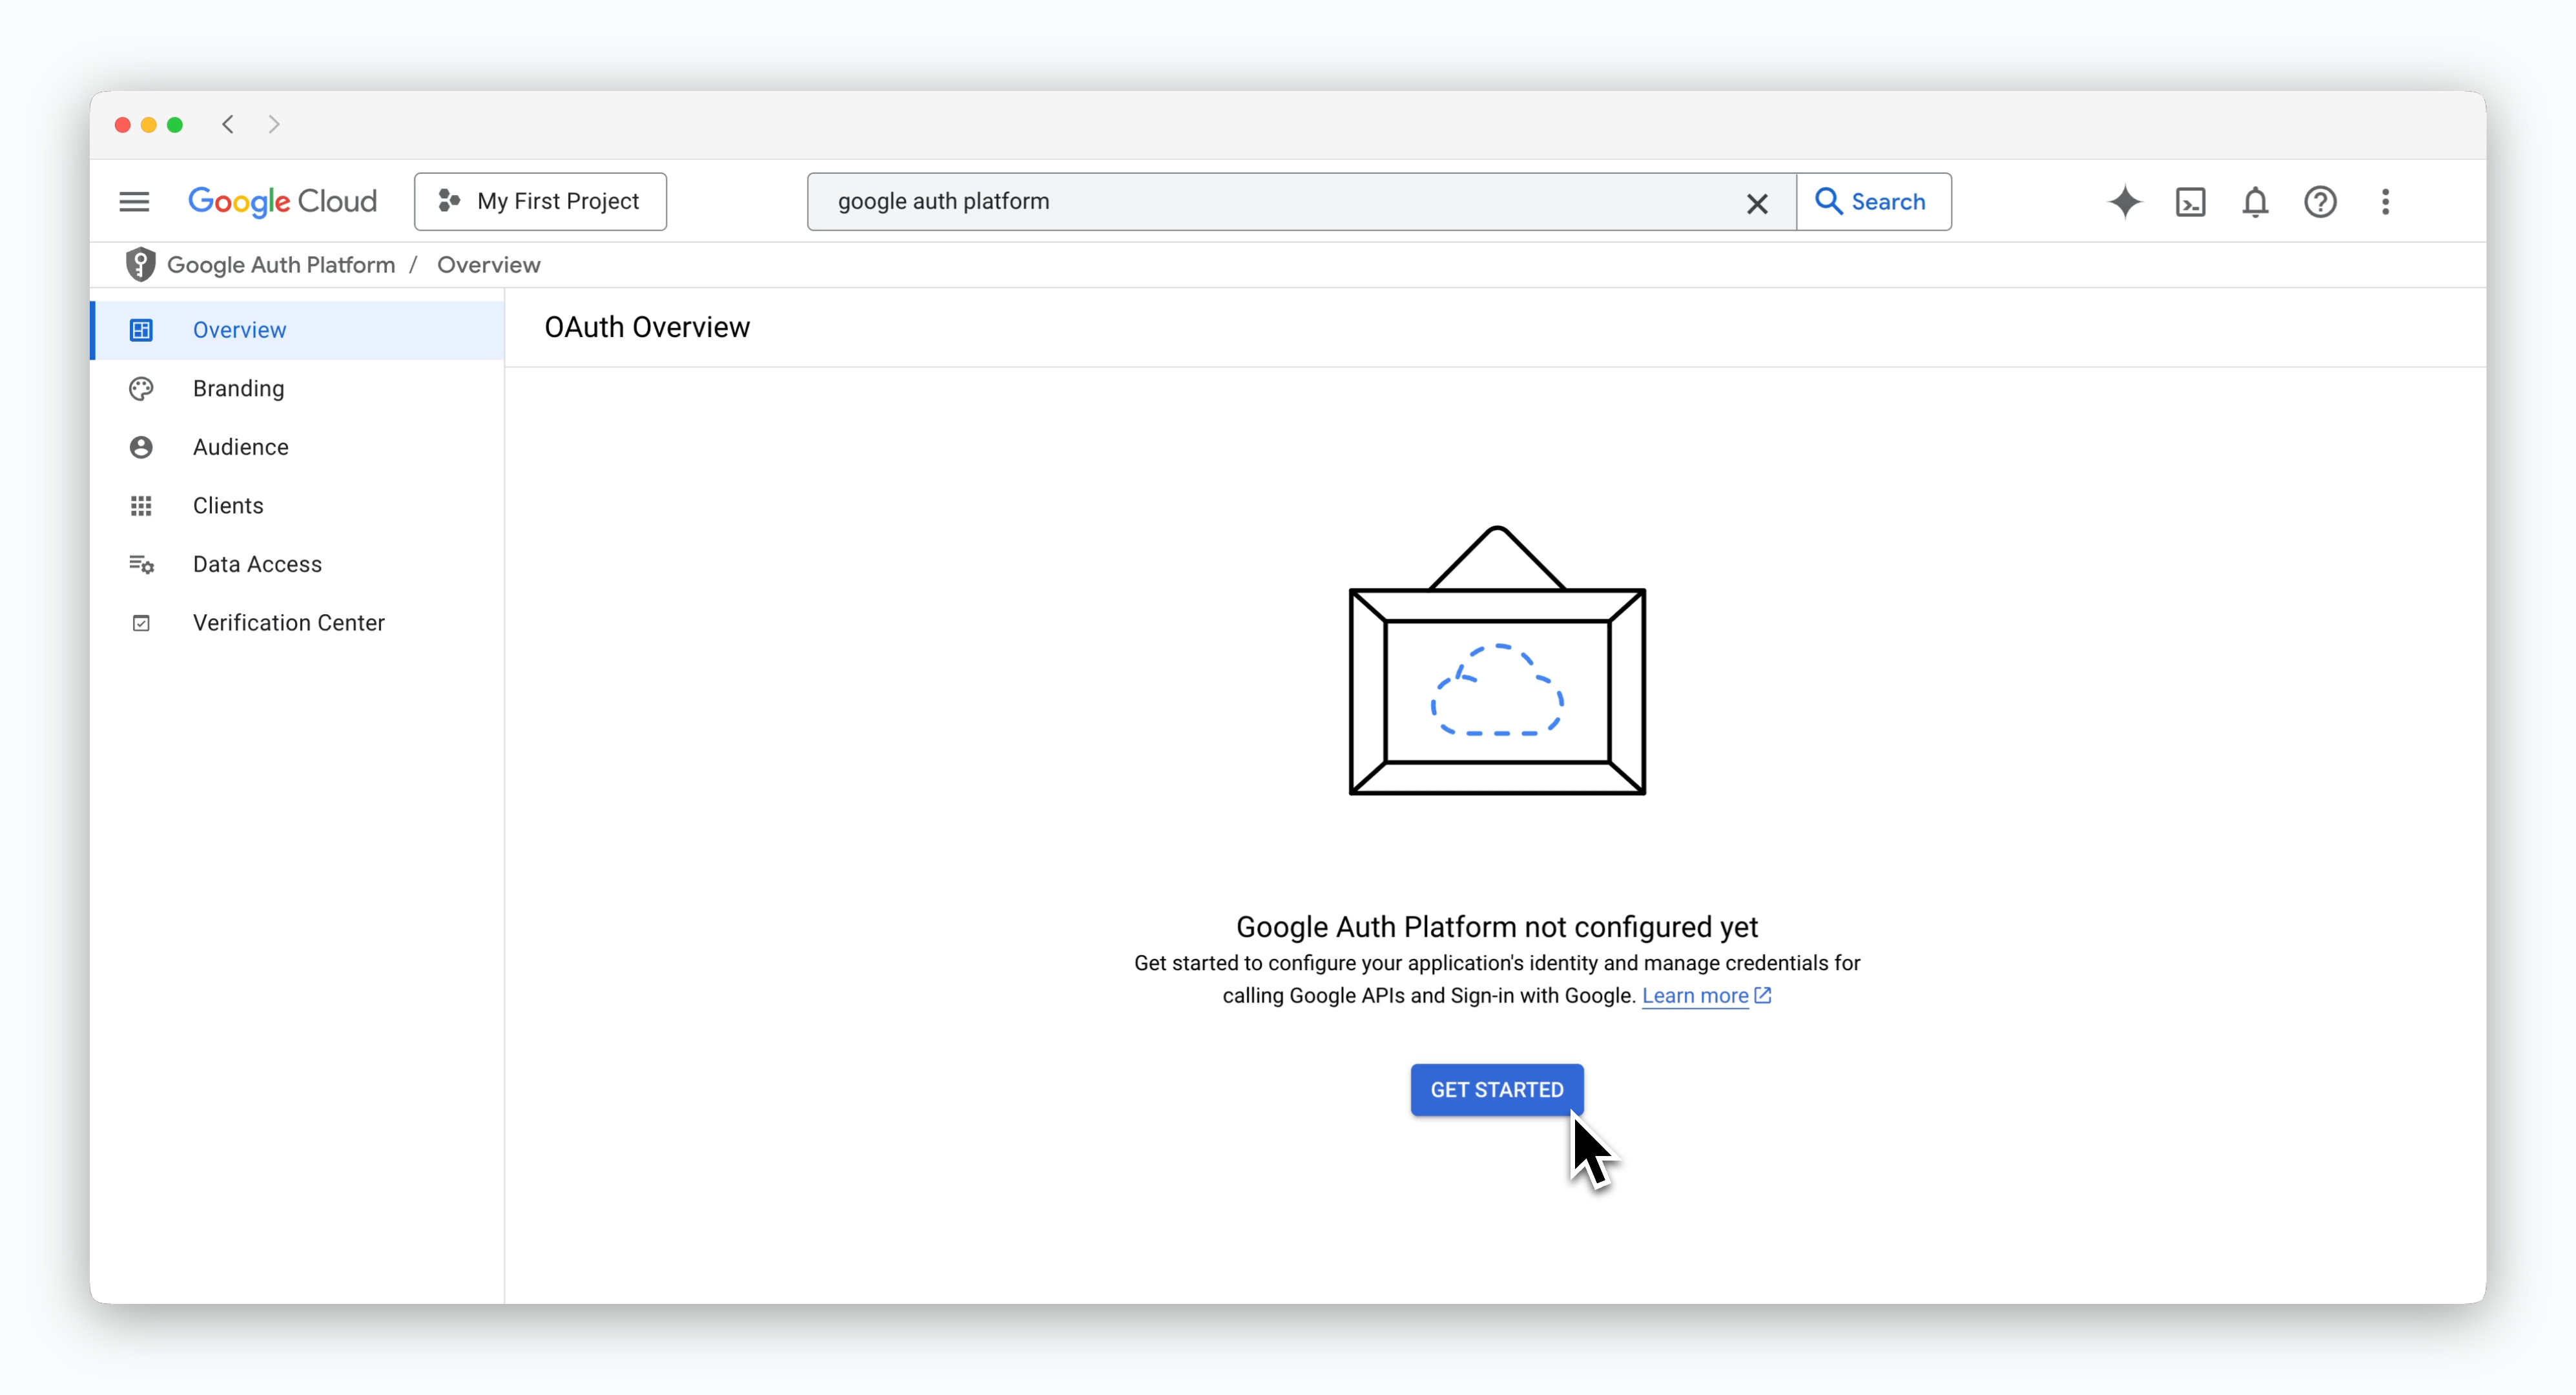 > Start by clicking `GET STARTED` on the **Google Auth Platform** page in the Google Cloud Console.
***
## Overview
> Start by clicking `GET STARTED` on the **Google Auth Platform** page in the Google Cloud Console.
***
## Overview
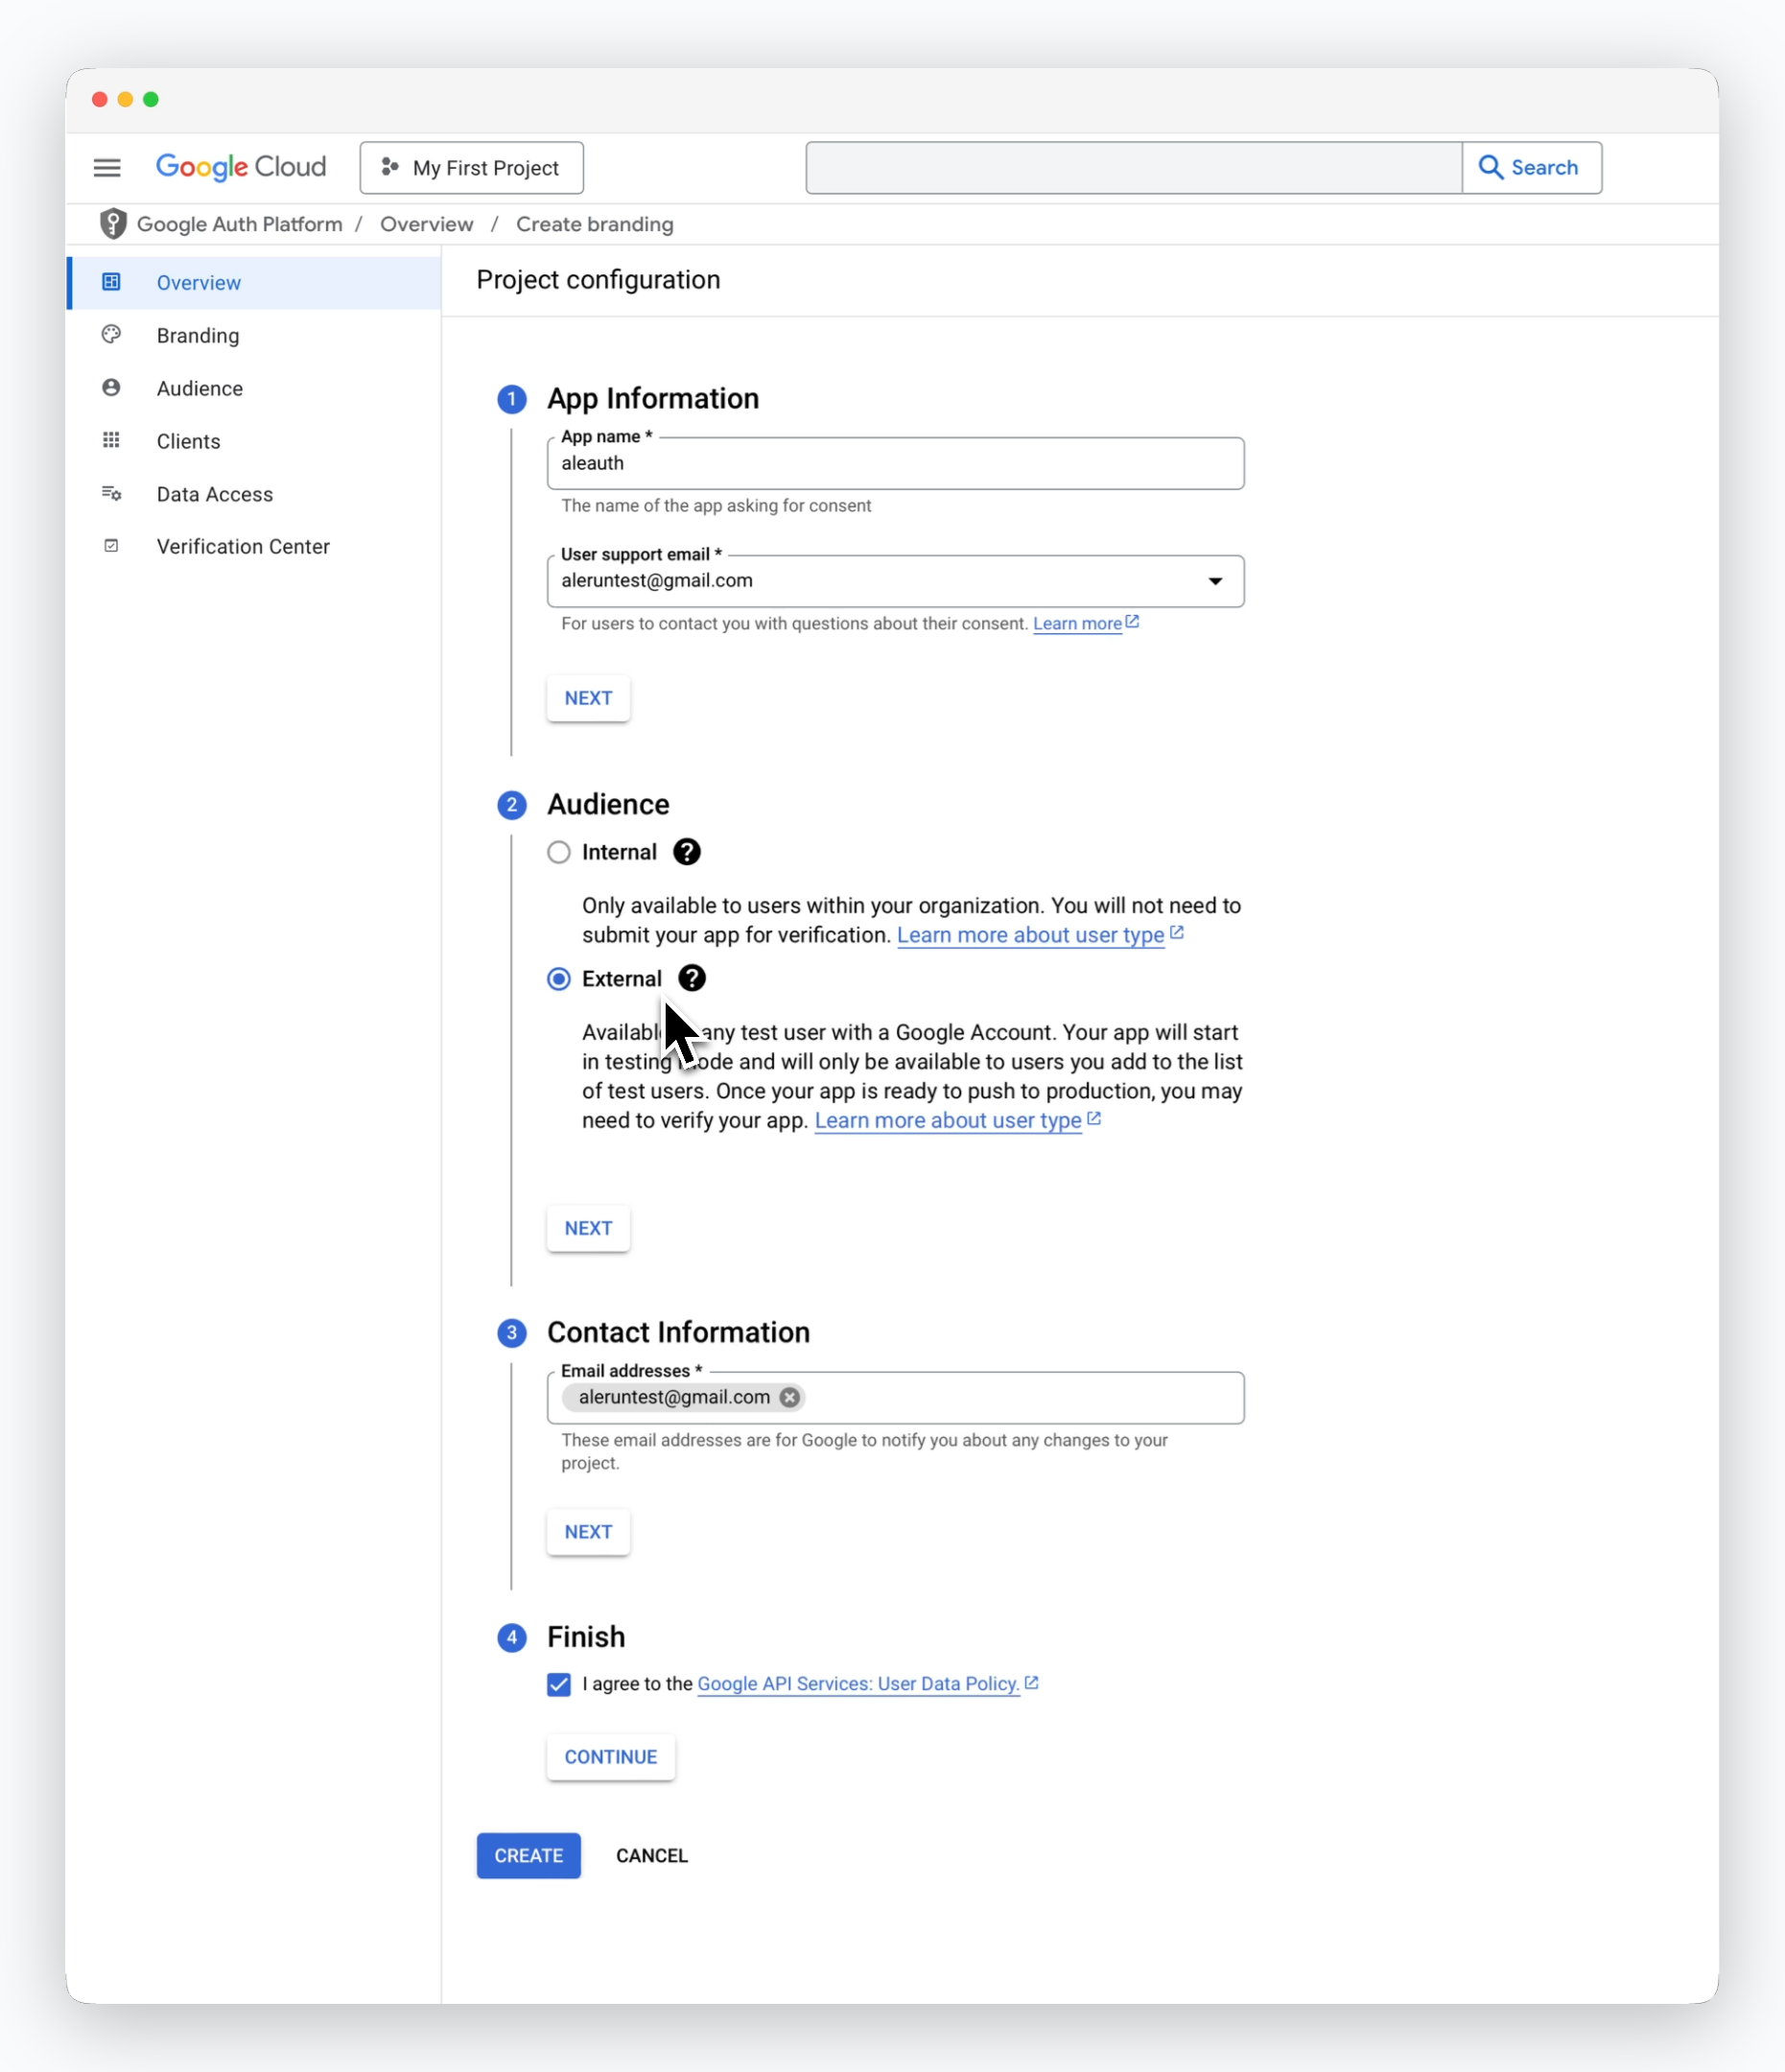 > On the Overview page, enter the following values and click `CREATE`:
* **App Information:** App name and email for Google OAuth consent-related inquiries.
* **Audience:** External
* **Contact Information:** Email to receive notifications about changes in the project.
* **Finish:** Check the box to agree to Google's policies.
## Branding
> On the Overview page, enter the following values and click `CREATE`:
* **App Information:** App name and email for Google OAuth consent-related inquiries.
* **Audience:** External
* **Contact Information:** Email to receive notifications about changes in the project.
* **Finish:** Check the box to agree to Google's policies.
## Branding
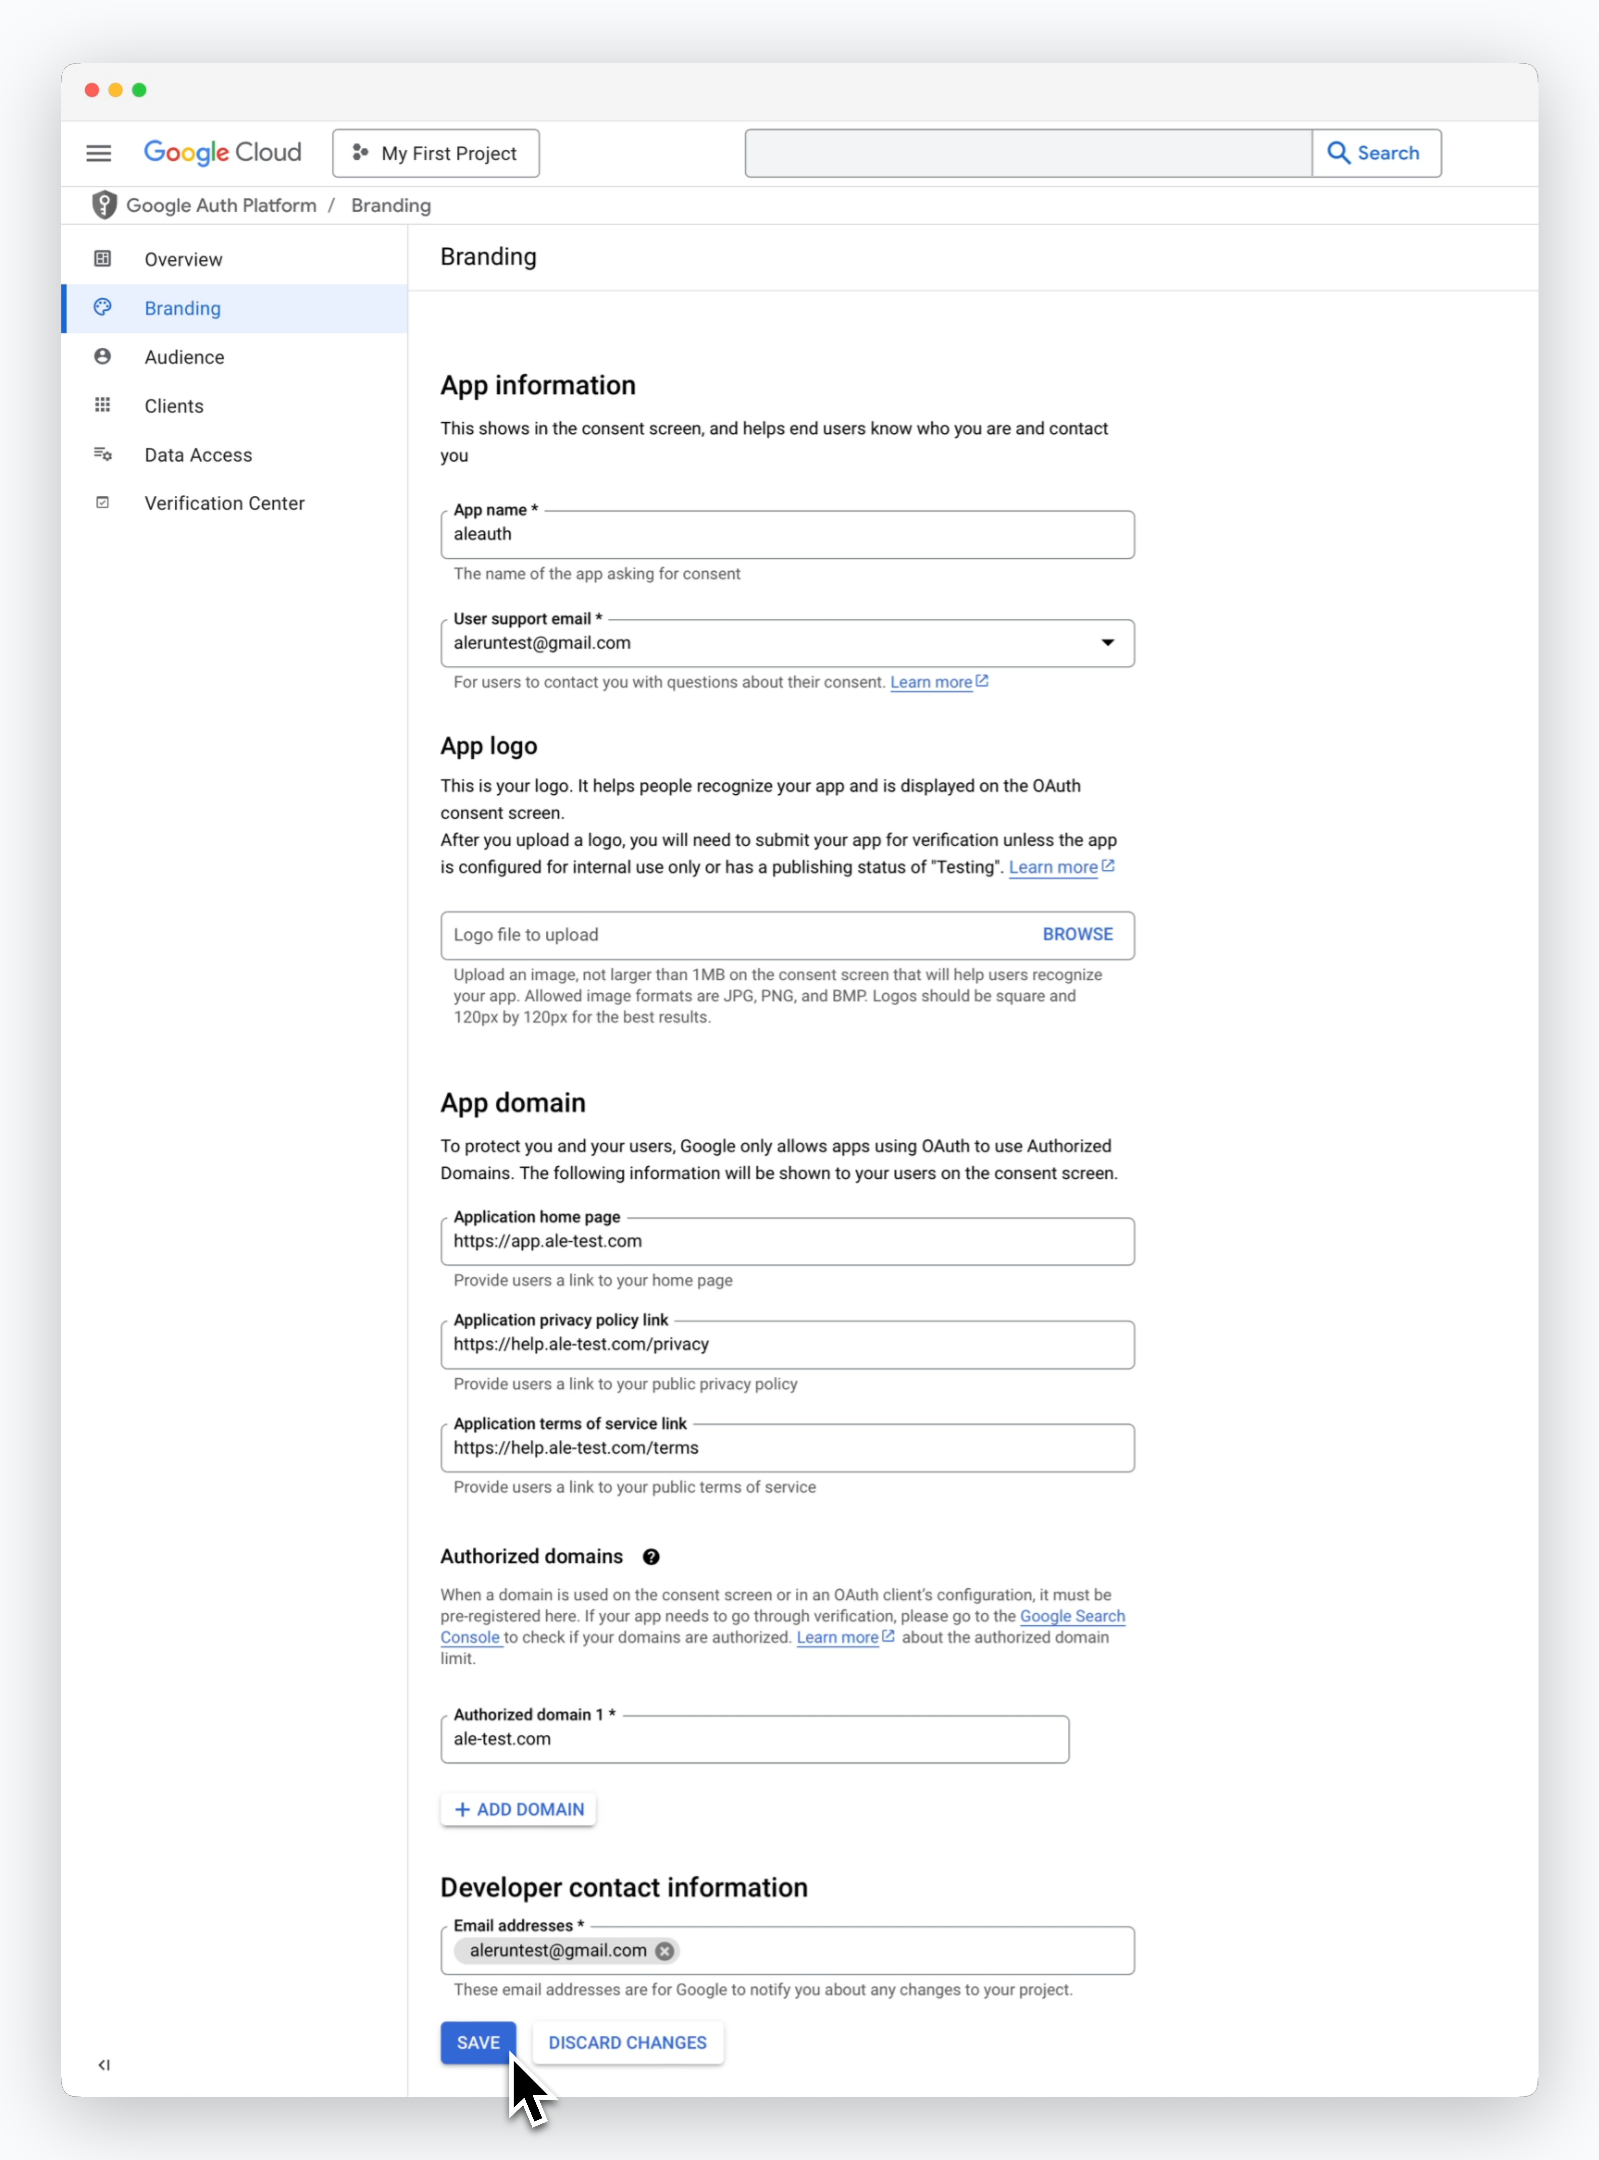 > On the Branding page, enter the following information about your app domain:
* **Application home page:** `https://app.[domain]`
* **Application privacy policy link:** The privacy policy URL for the service using Google OAuth.
* **Application terms of service link:** The terms of service link.
* **Authorized domains:**
* Enter the domains used in the application home page, privacy policy link, and terms of service link.
* If different domains are used, click `ADD DOMAIN` to include all relevant domains.
You can use Google OAuth without uploading a logo. If you upload a logo, it will require verification.
## Audience
> On the Branding page, enter the following information about your app domain:
* **Application home page:** `https://app.[domain]`
* **Application privacy policy link:** The privacy policy URL for the service using Google OAuth.
* **Application terms of service link:** The terms of service link.
* **Authorized domains:**
* Enter the domains used in the application home page, privacy policy link, and terms of service link.
* If different domains are used, click `ADD DOMAIN` to include all relevant domains.
You can use Google OAuth without uploading a logo. If you upload a logo, it will require verification.
## Audience
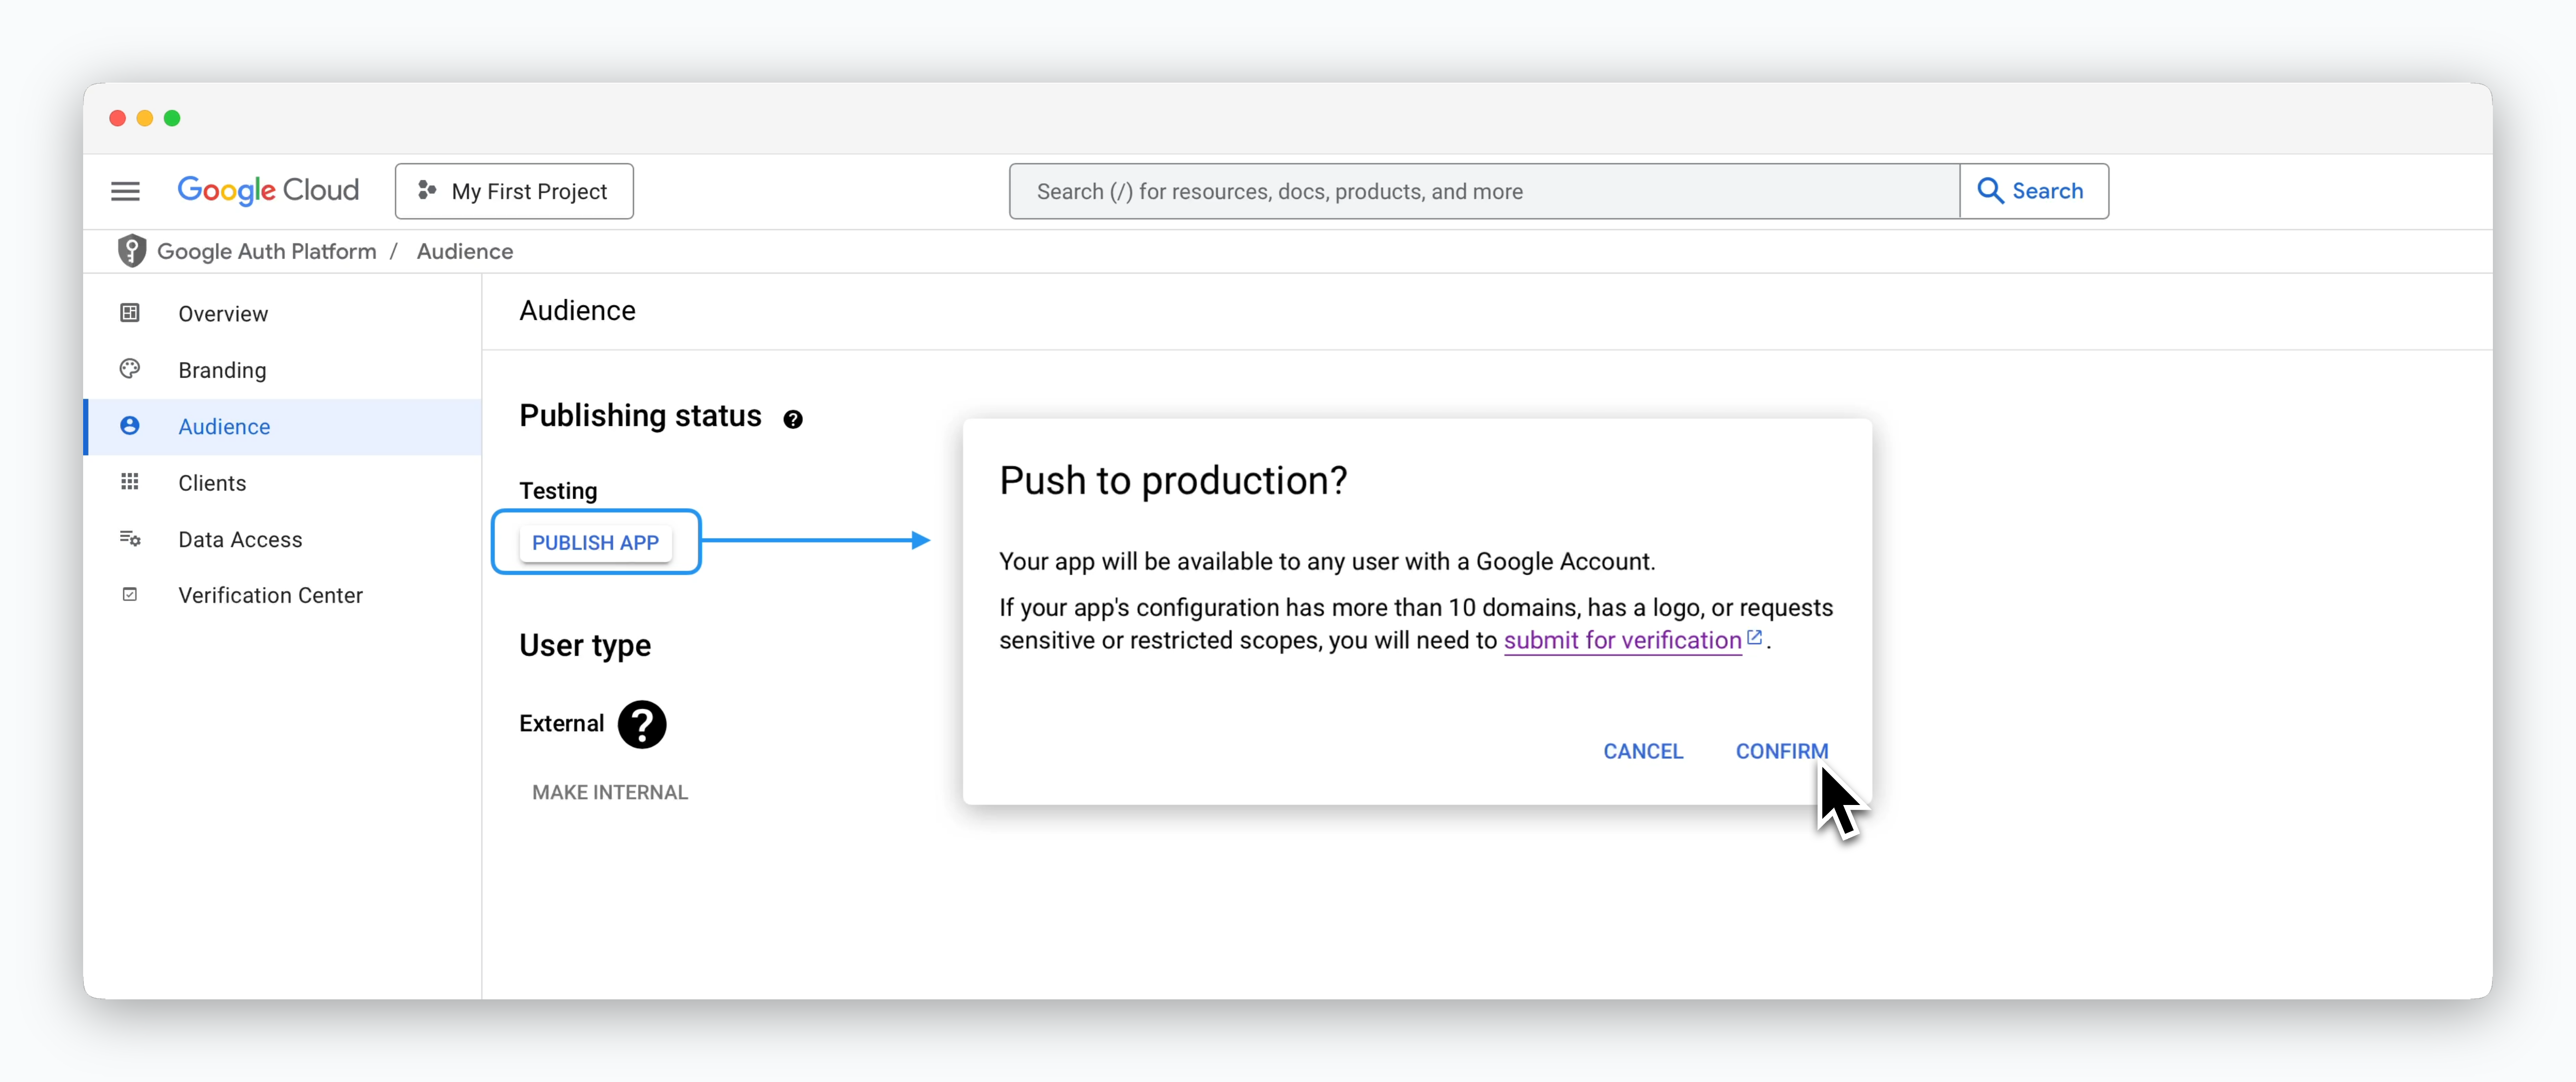 > On the Audience page, click `PUBLISH APP` to make the app available for use.
## Client
> On the Audience page, click `PUBLISH APP` to make the app available for use.
## Client
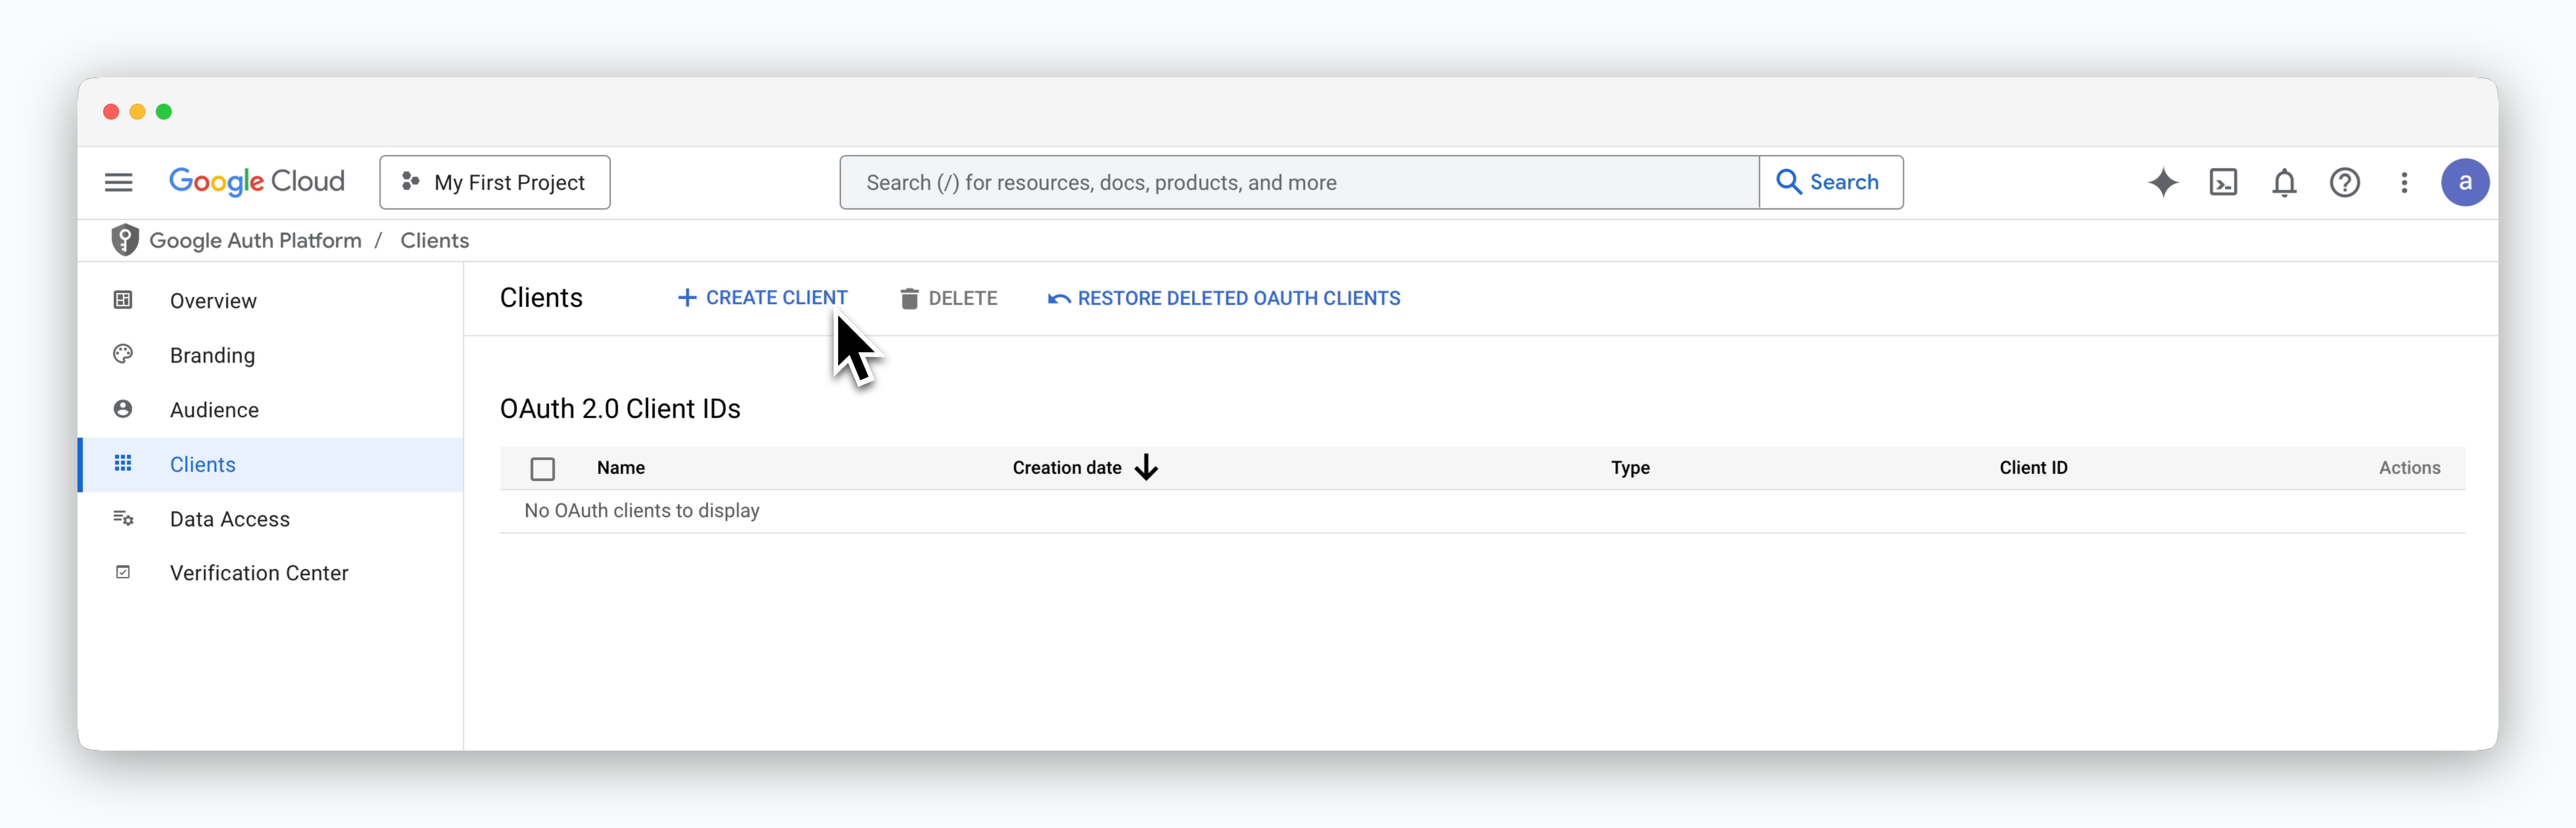 > On the Client page, click `CREATE CLIENT` and configure the OAuth Client ID as follows:
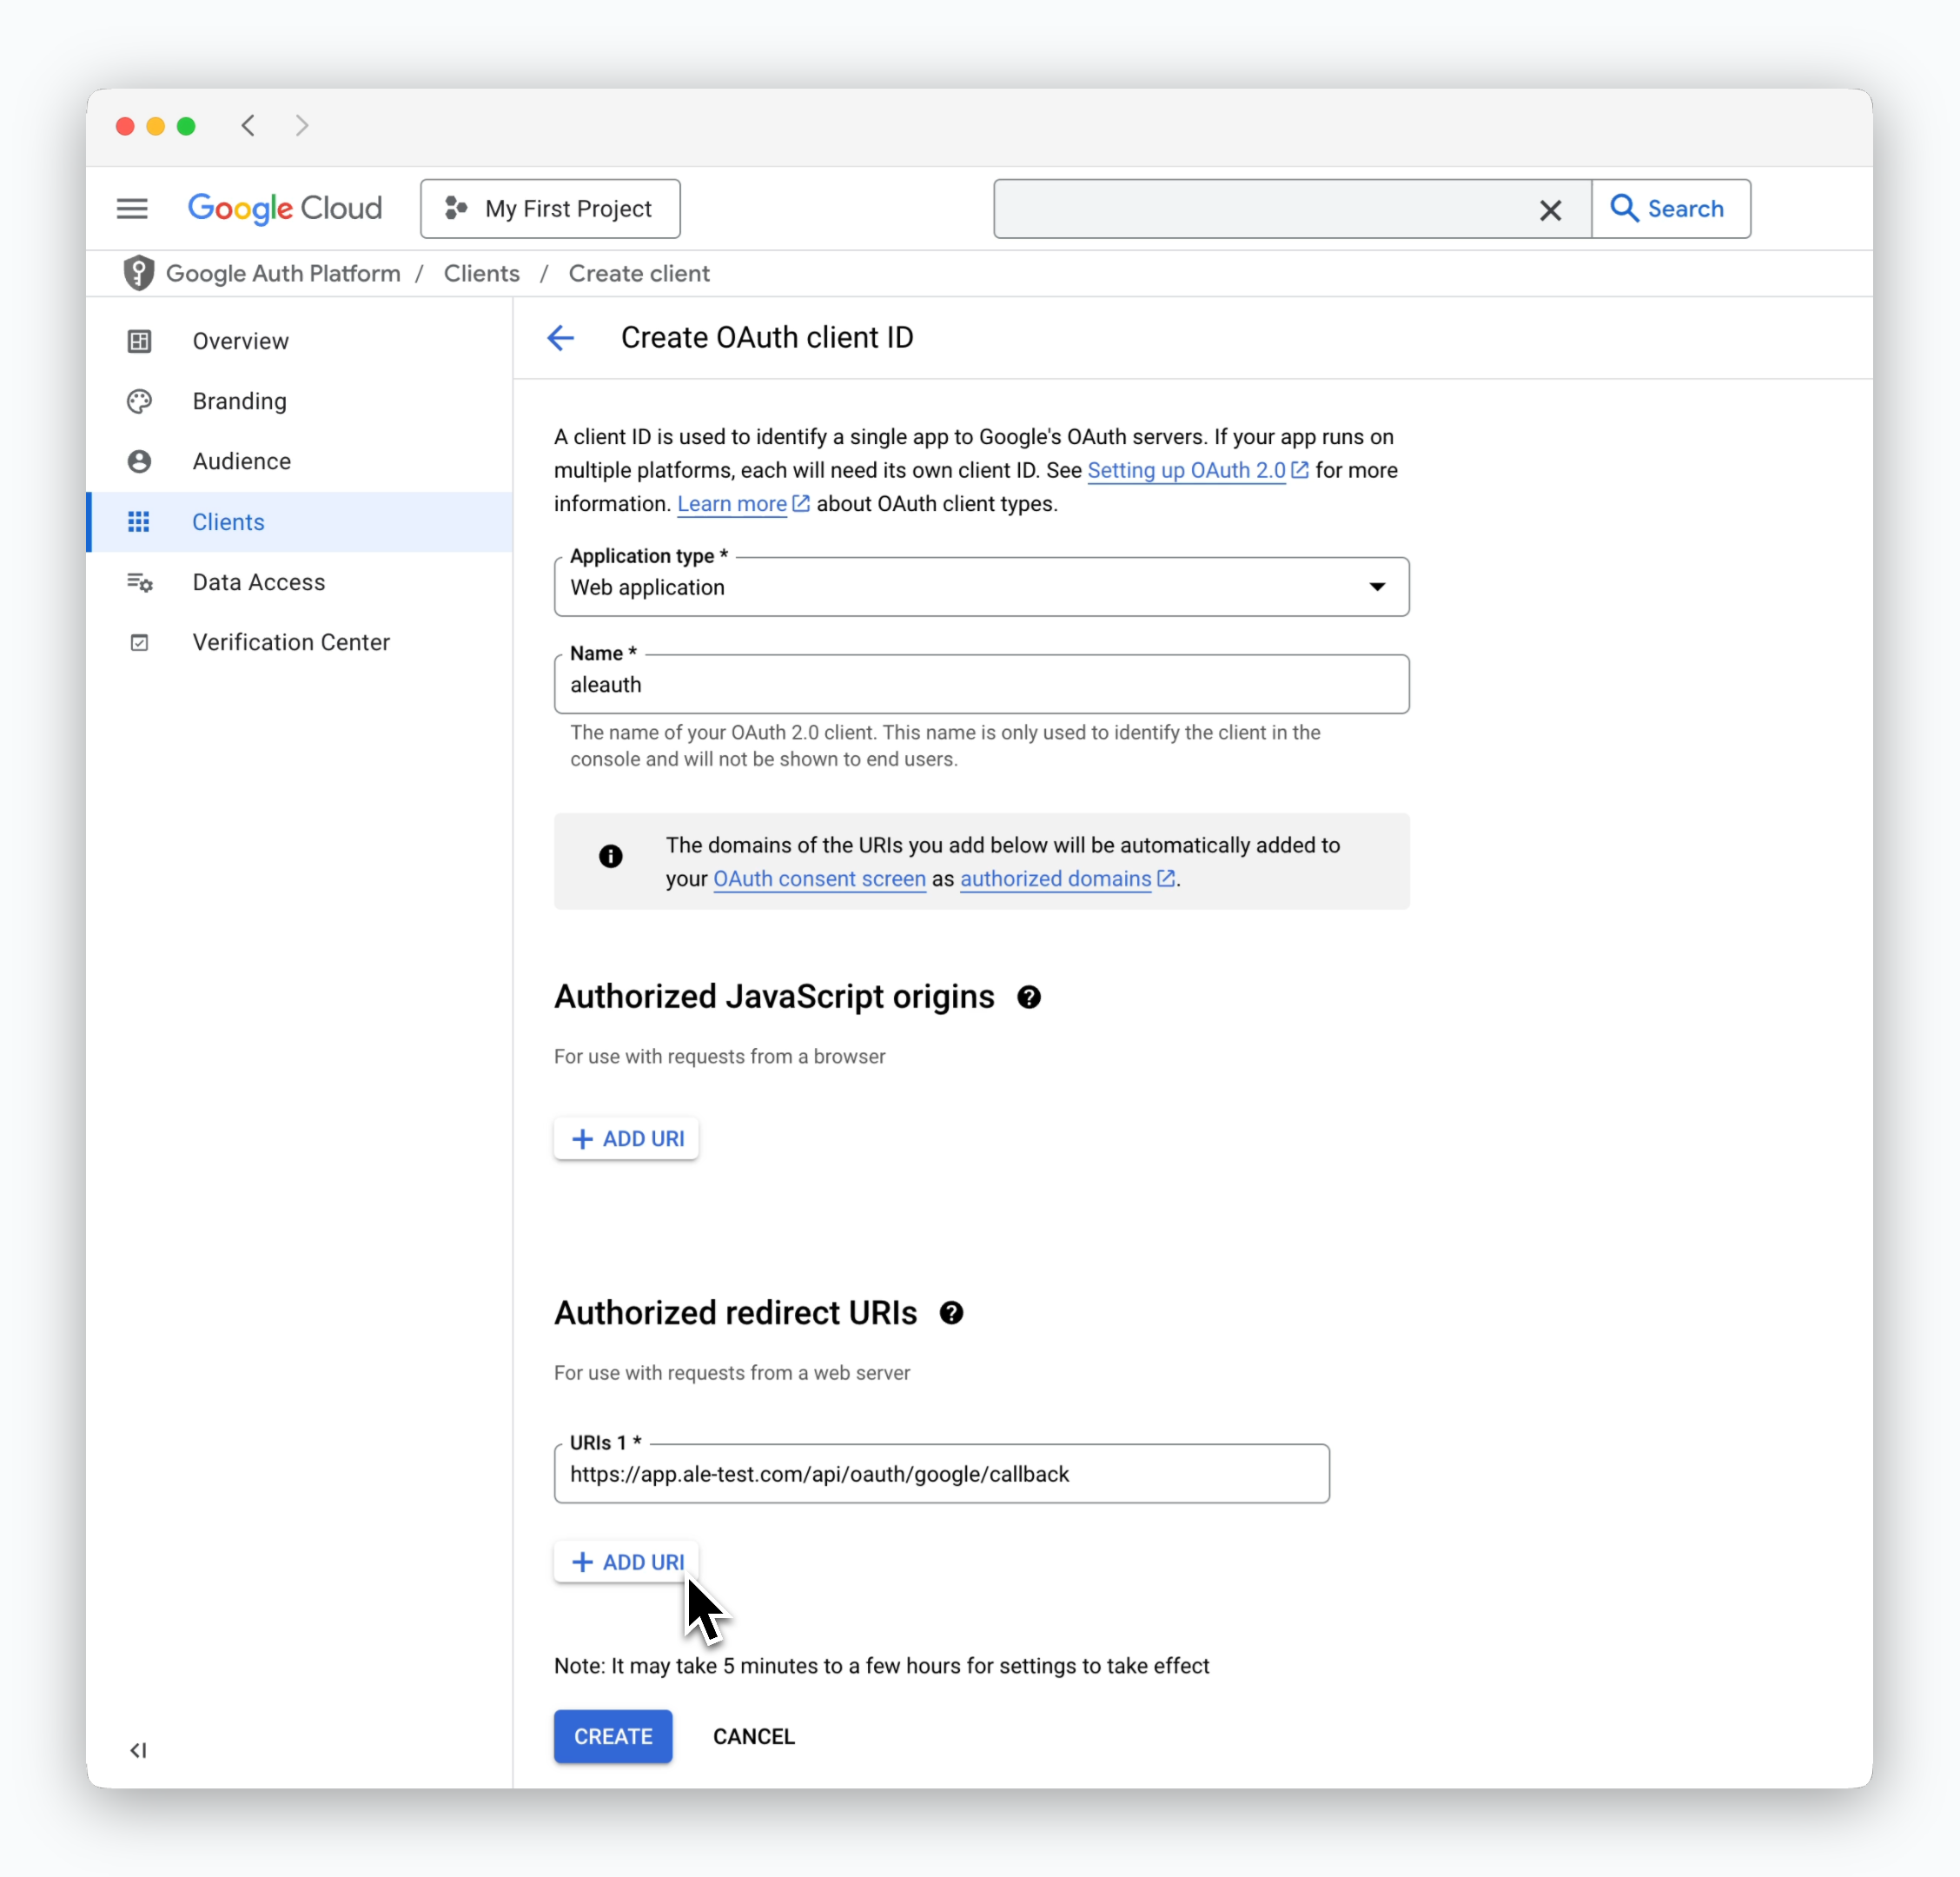 * **Application type:** Web application
* **Authorized redirect URIs:** `https://app.[domain]/api/oauth/google/callback`
## Data Access
* **Application type:** Web application
* **Authorized redirect URIs:** `https://app.[domain]/api/oauth/google/callback`
## Data Access
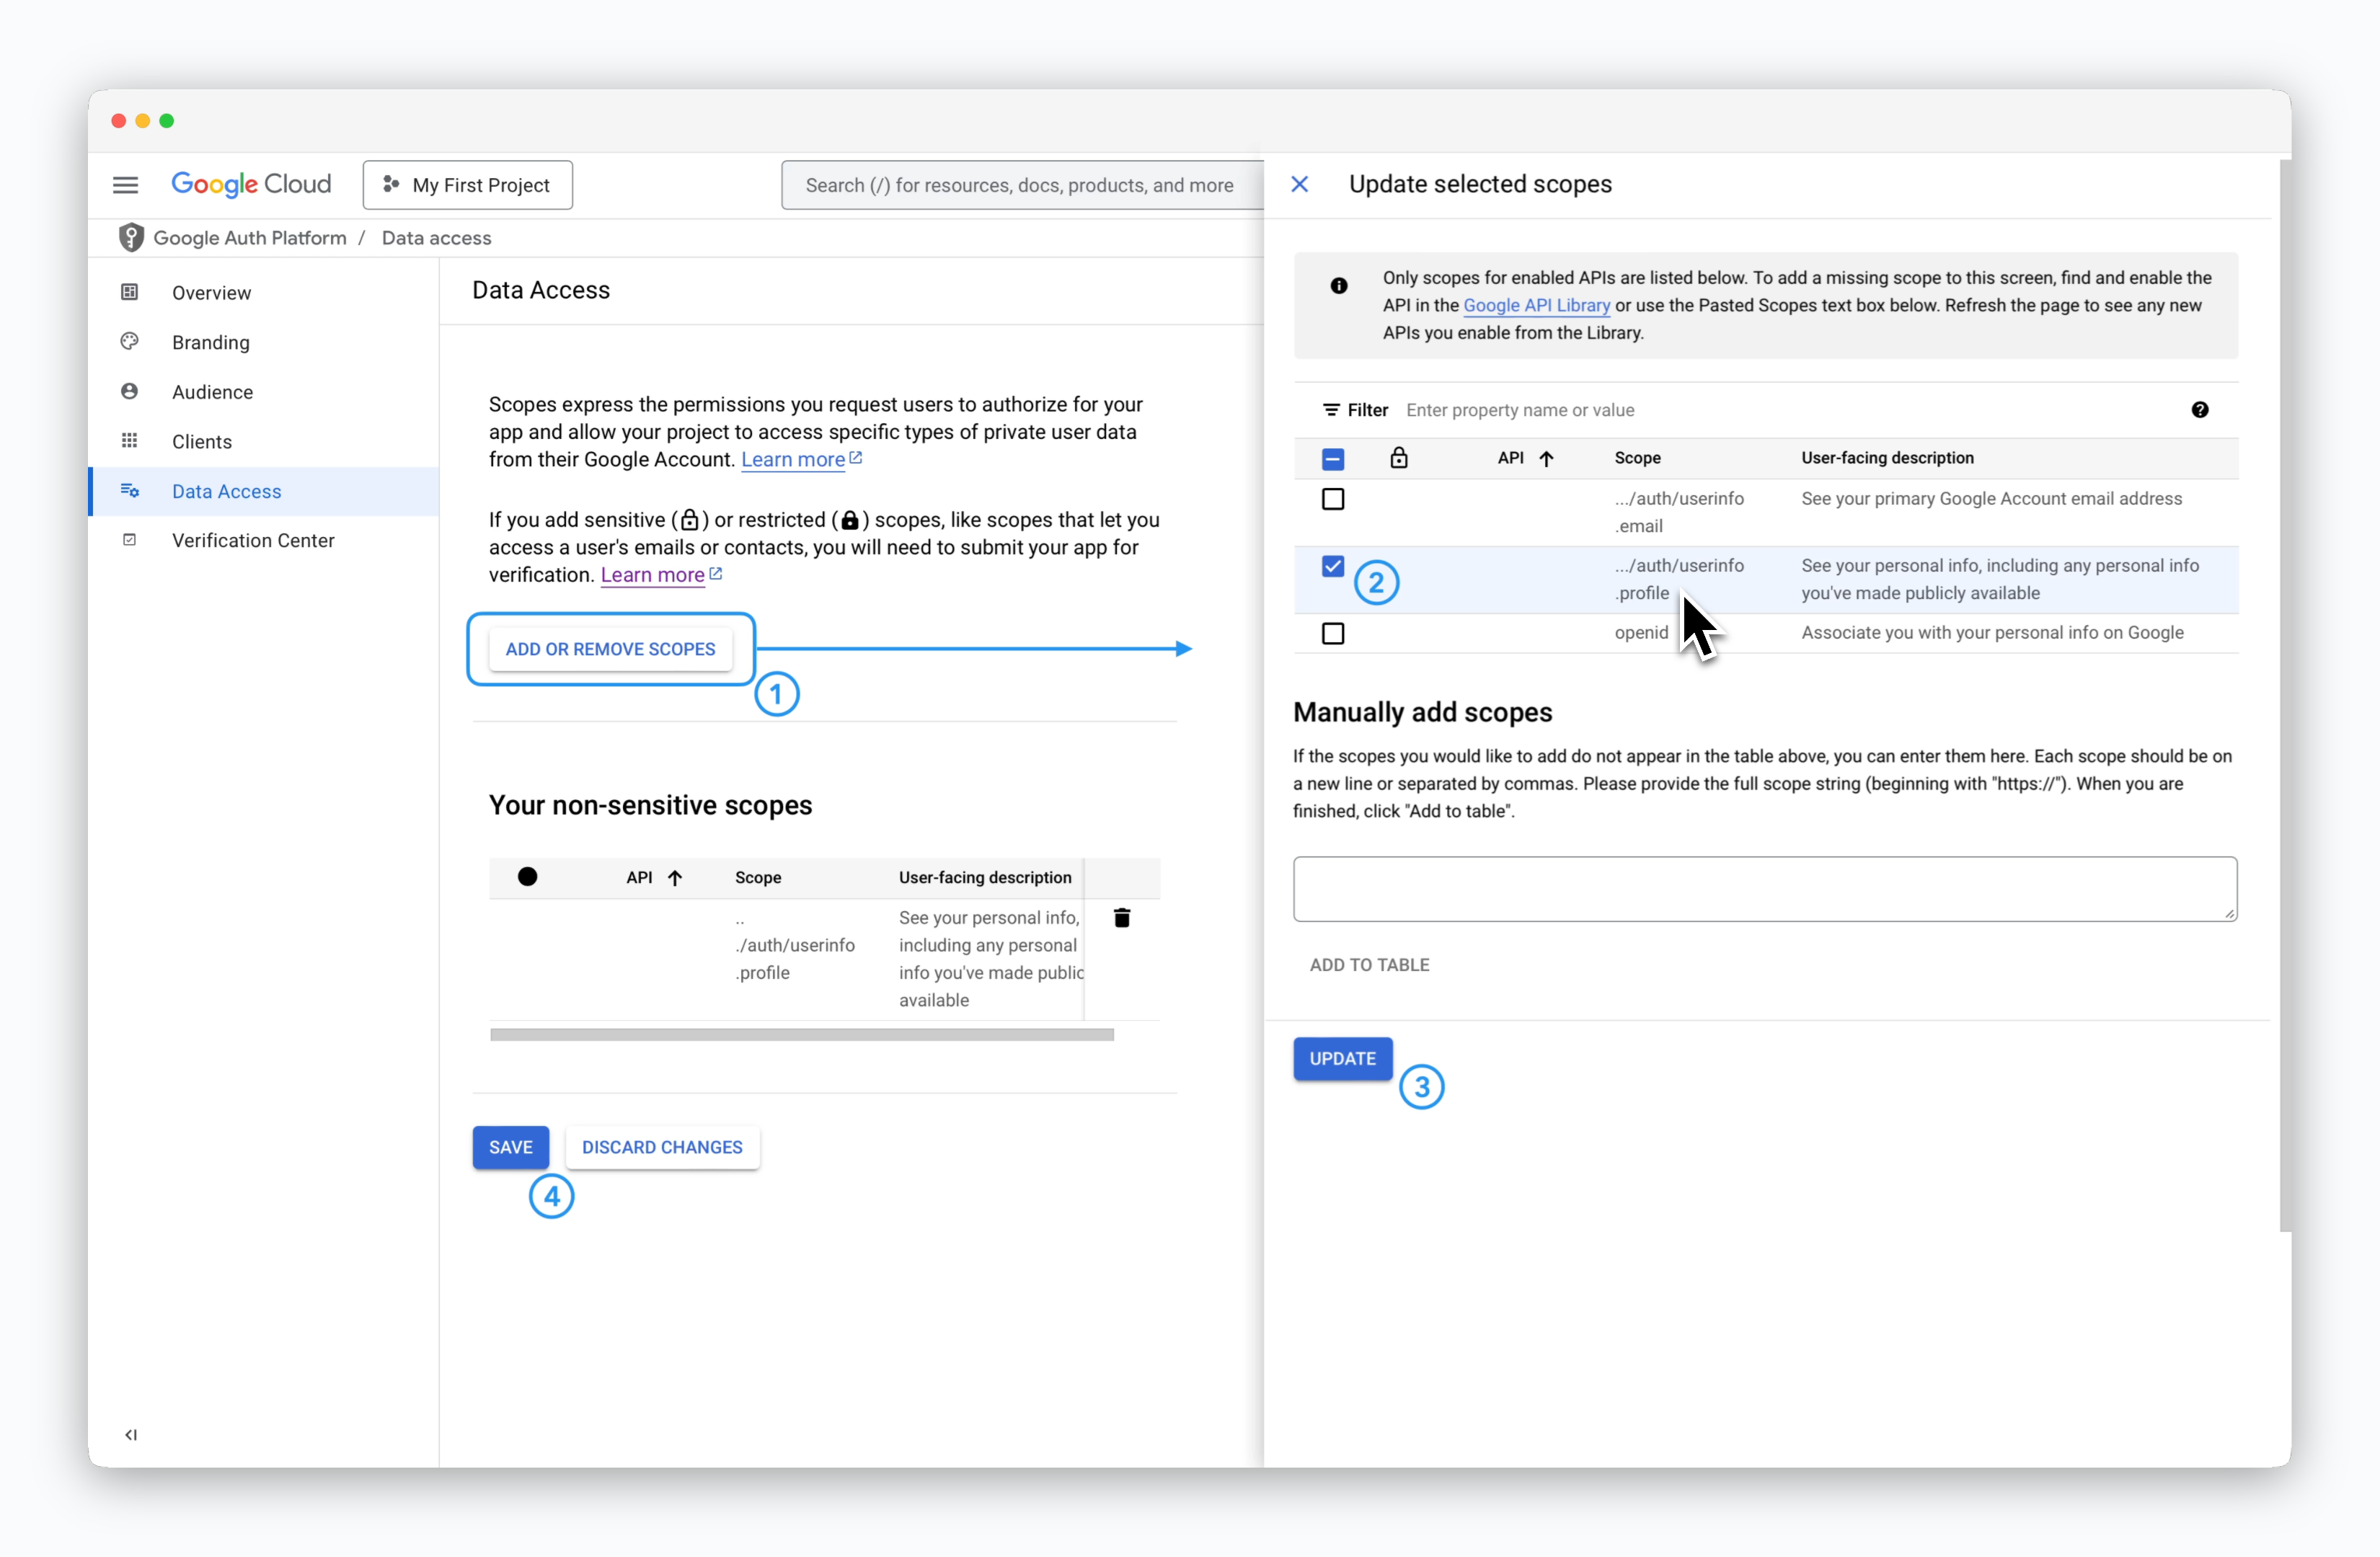 > On the Data Access page, add the required scope as shown in the screenshot above.
The scope to add is `.../auth/userinfo.profile`.
## Retrieve Client ID and Secret
> On the Data Access page, add the required scope as shown in the screenshot above.
The scope to add is `.../auth/userinfo.profile`.
## Retrieve Client ID and Secret
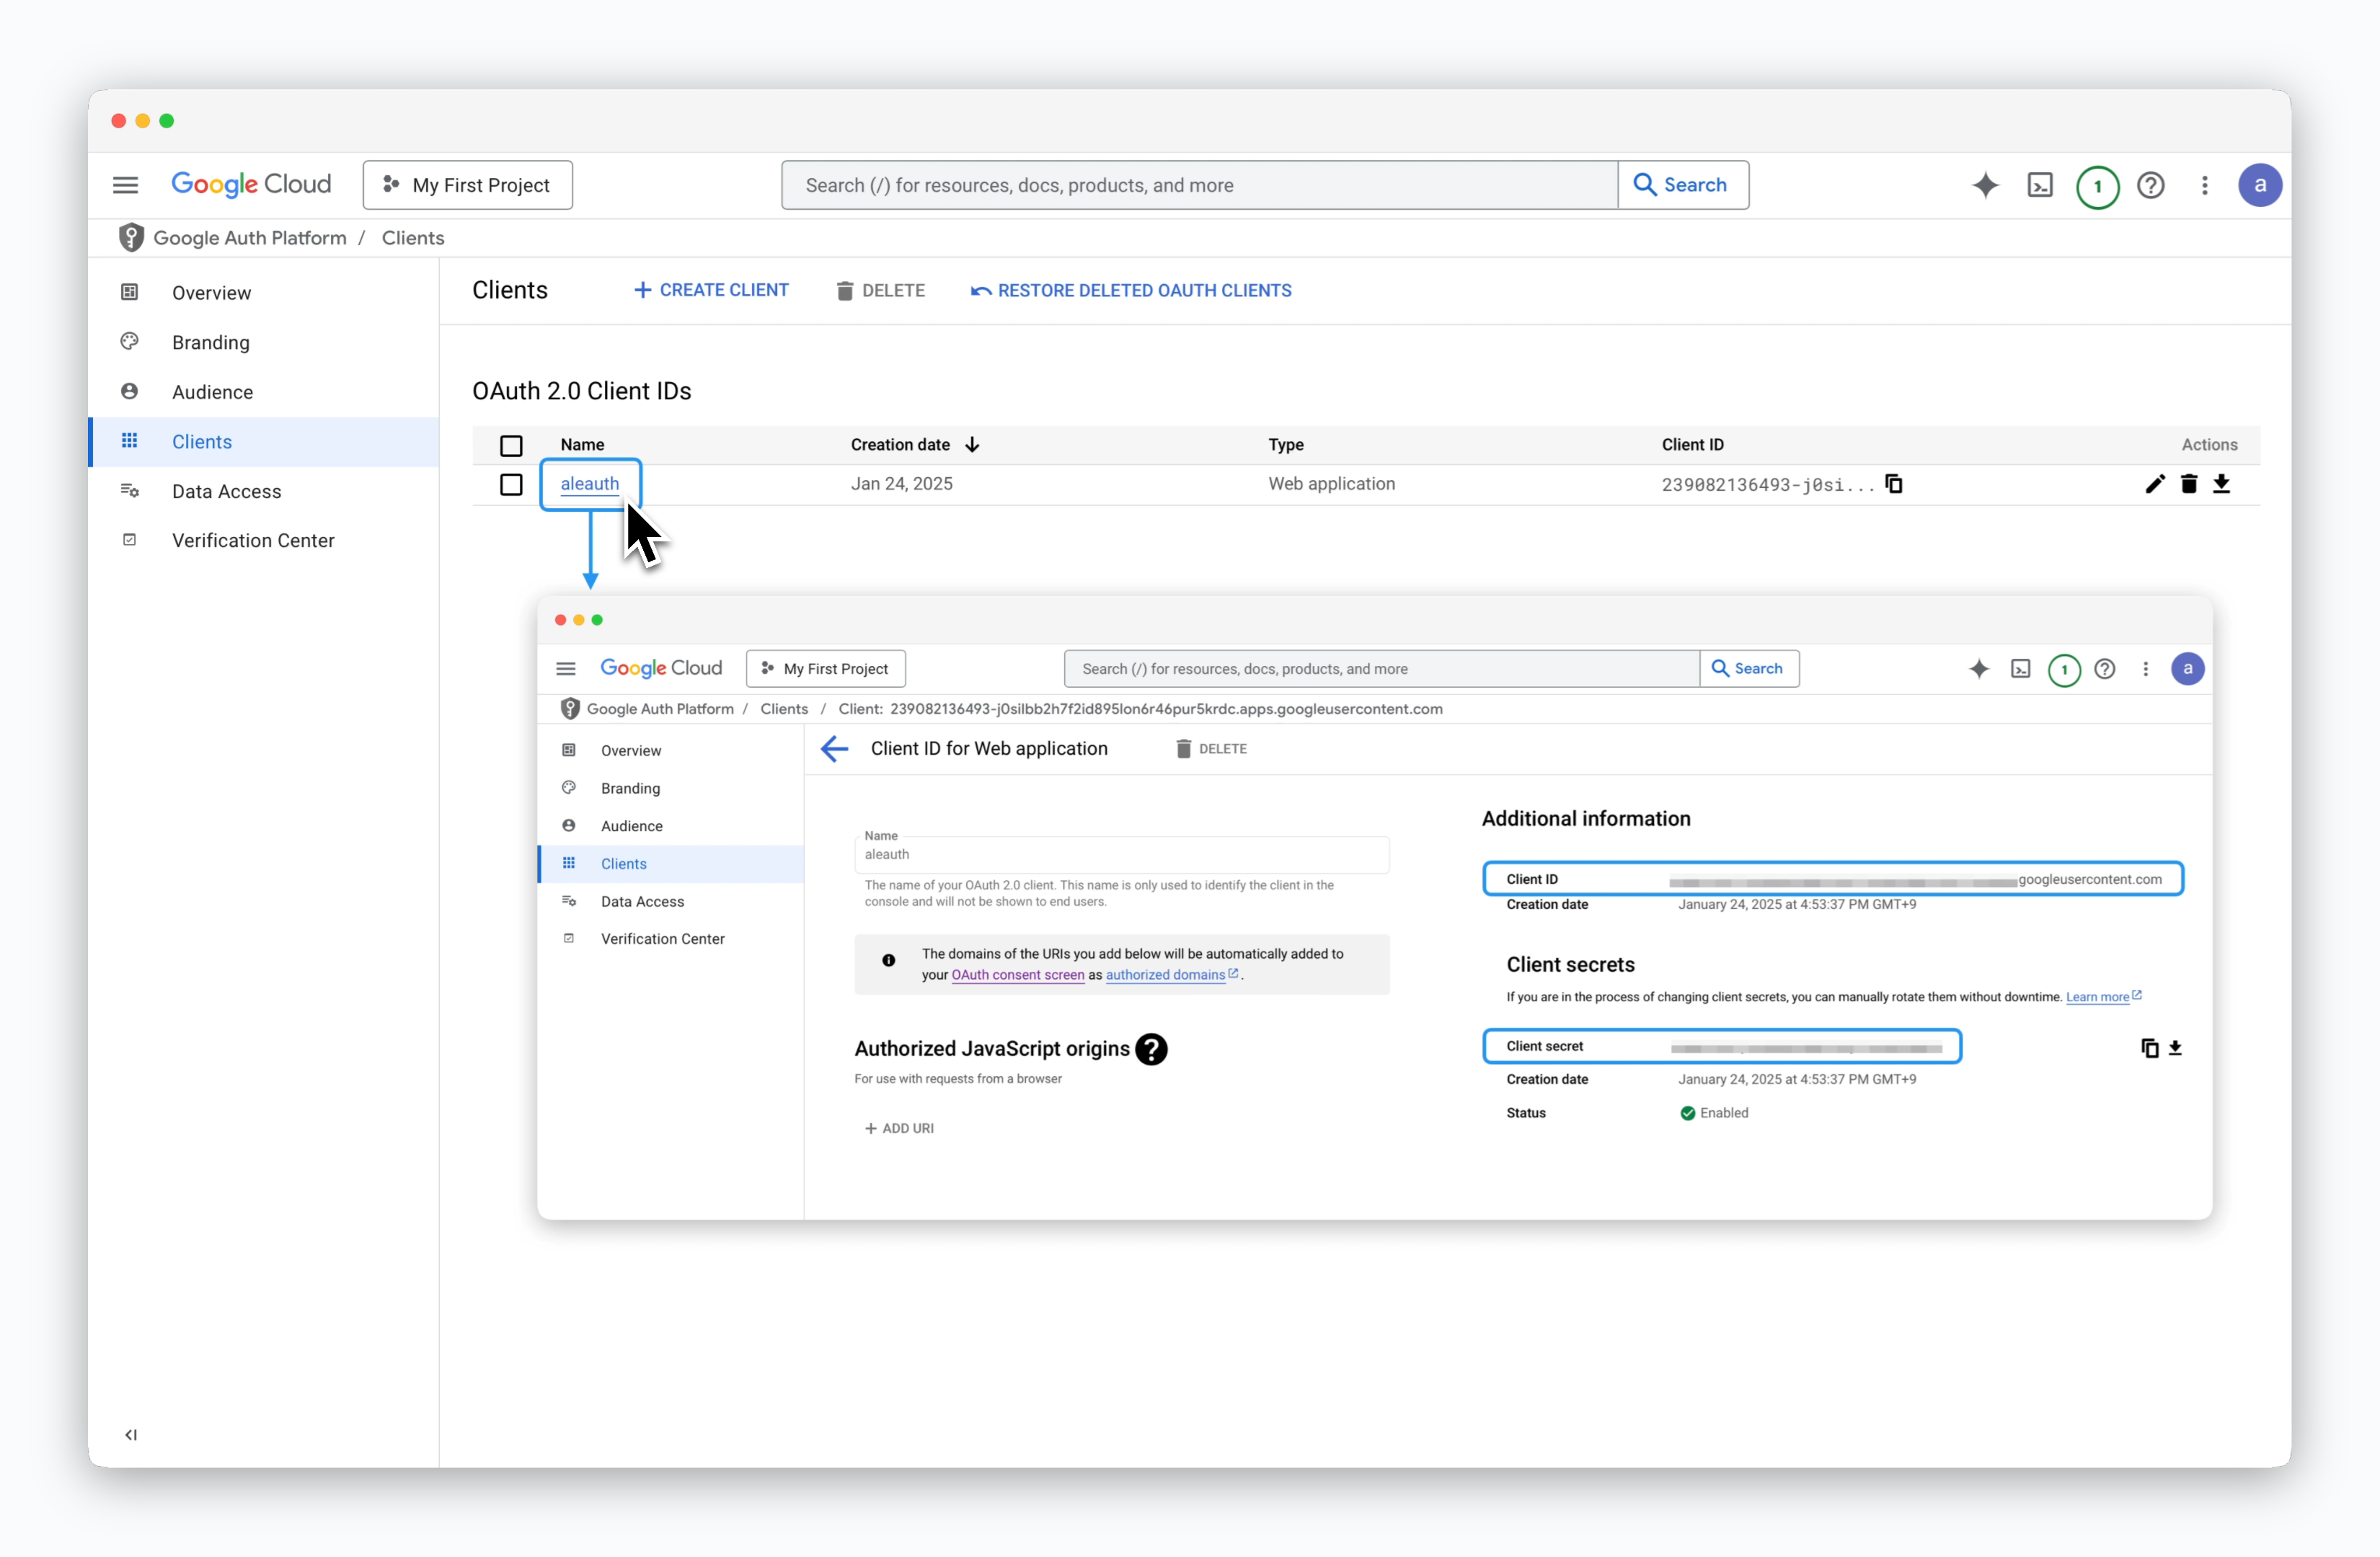 > On the Clients page in the left sidebar, click the name of the client to retrieve the **Client ID** and **Client Secret**.
***
## Integrate Google OAuth in ale
> On the Clients page in the left sidebar, click the name of the client to retrieve the **Client ID** and **Client Secret**.
***
## Integrate Google OAuth in ale
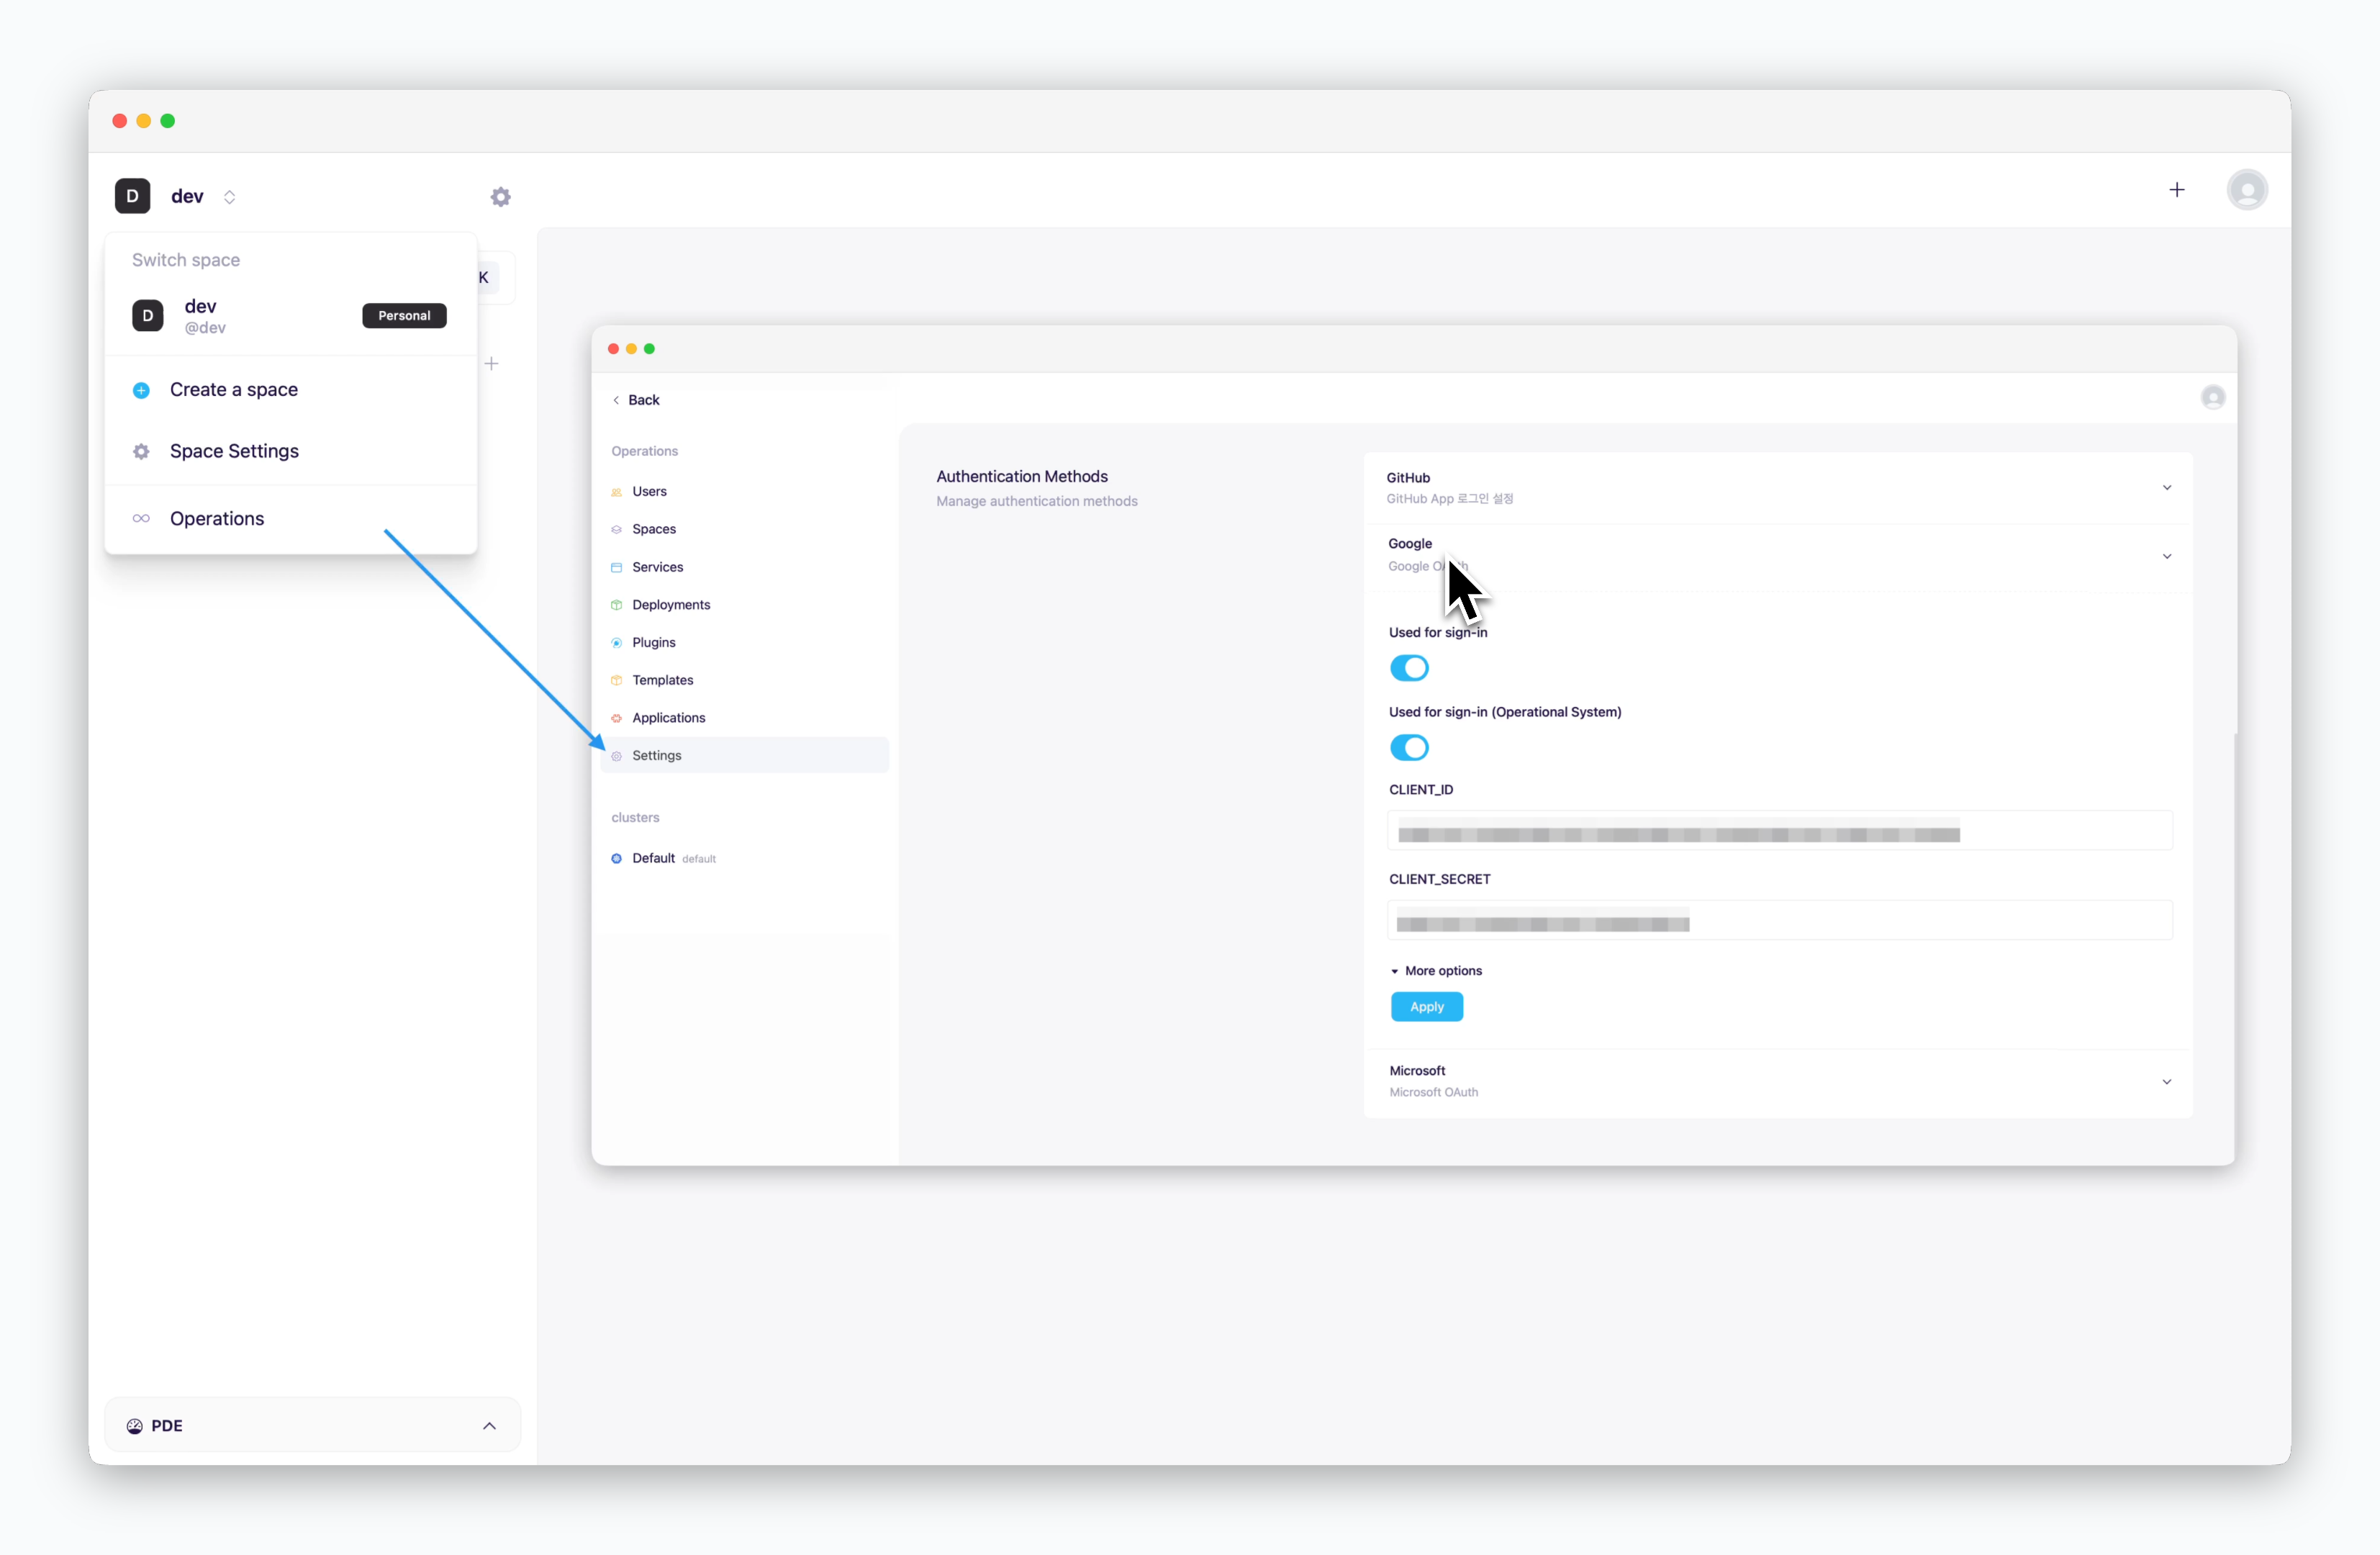 > Access the operations system, go to **Settings > Authentication > Google dropdown**, and enter the values retrieved in the previous steps into each field. Then, click `Apply`.
If the **Enable Login** option is disabled, Google login will be deactivated.
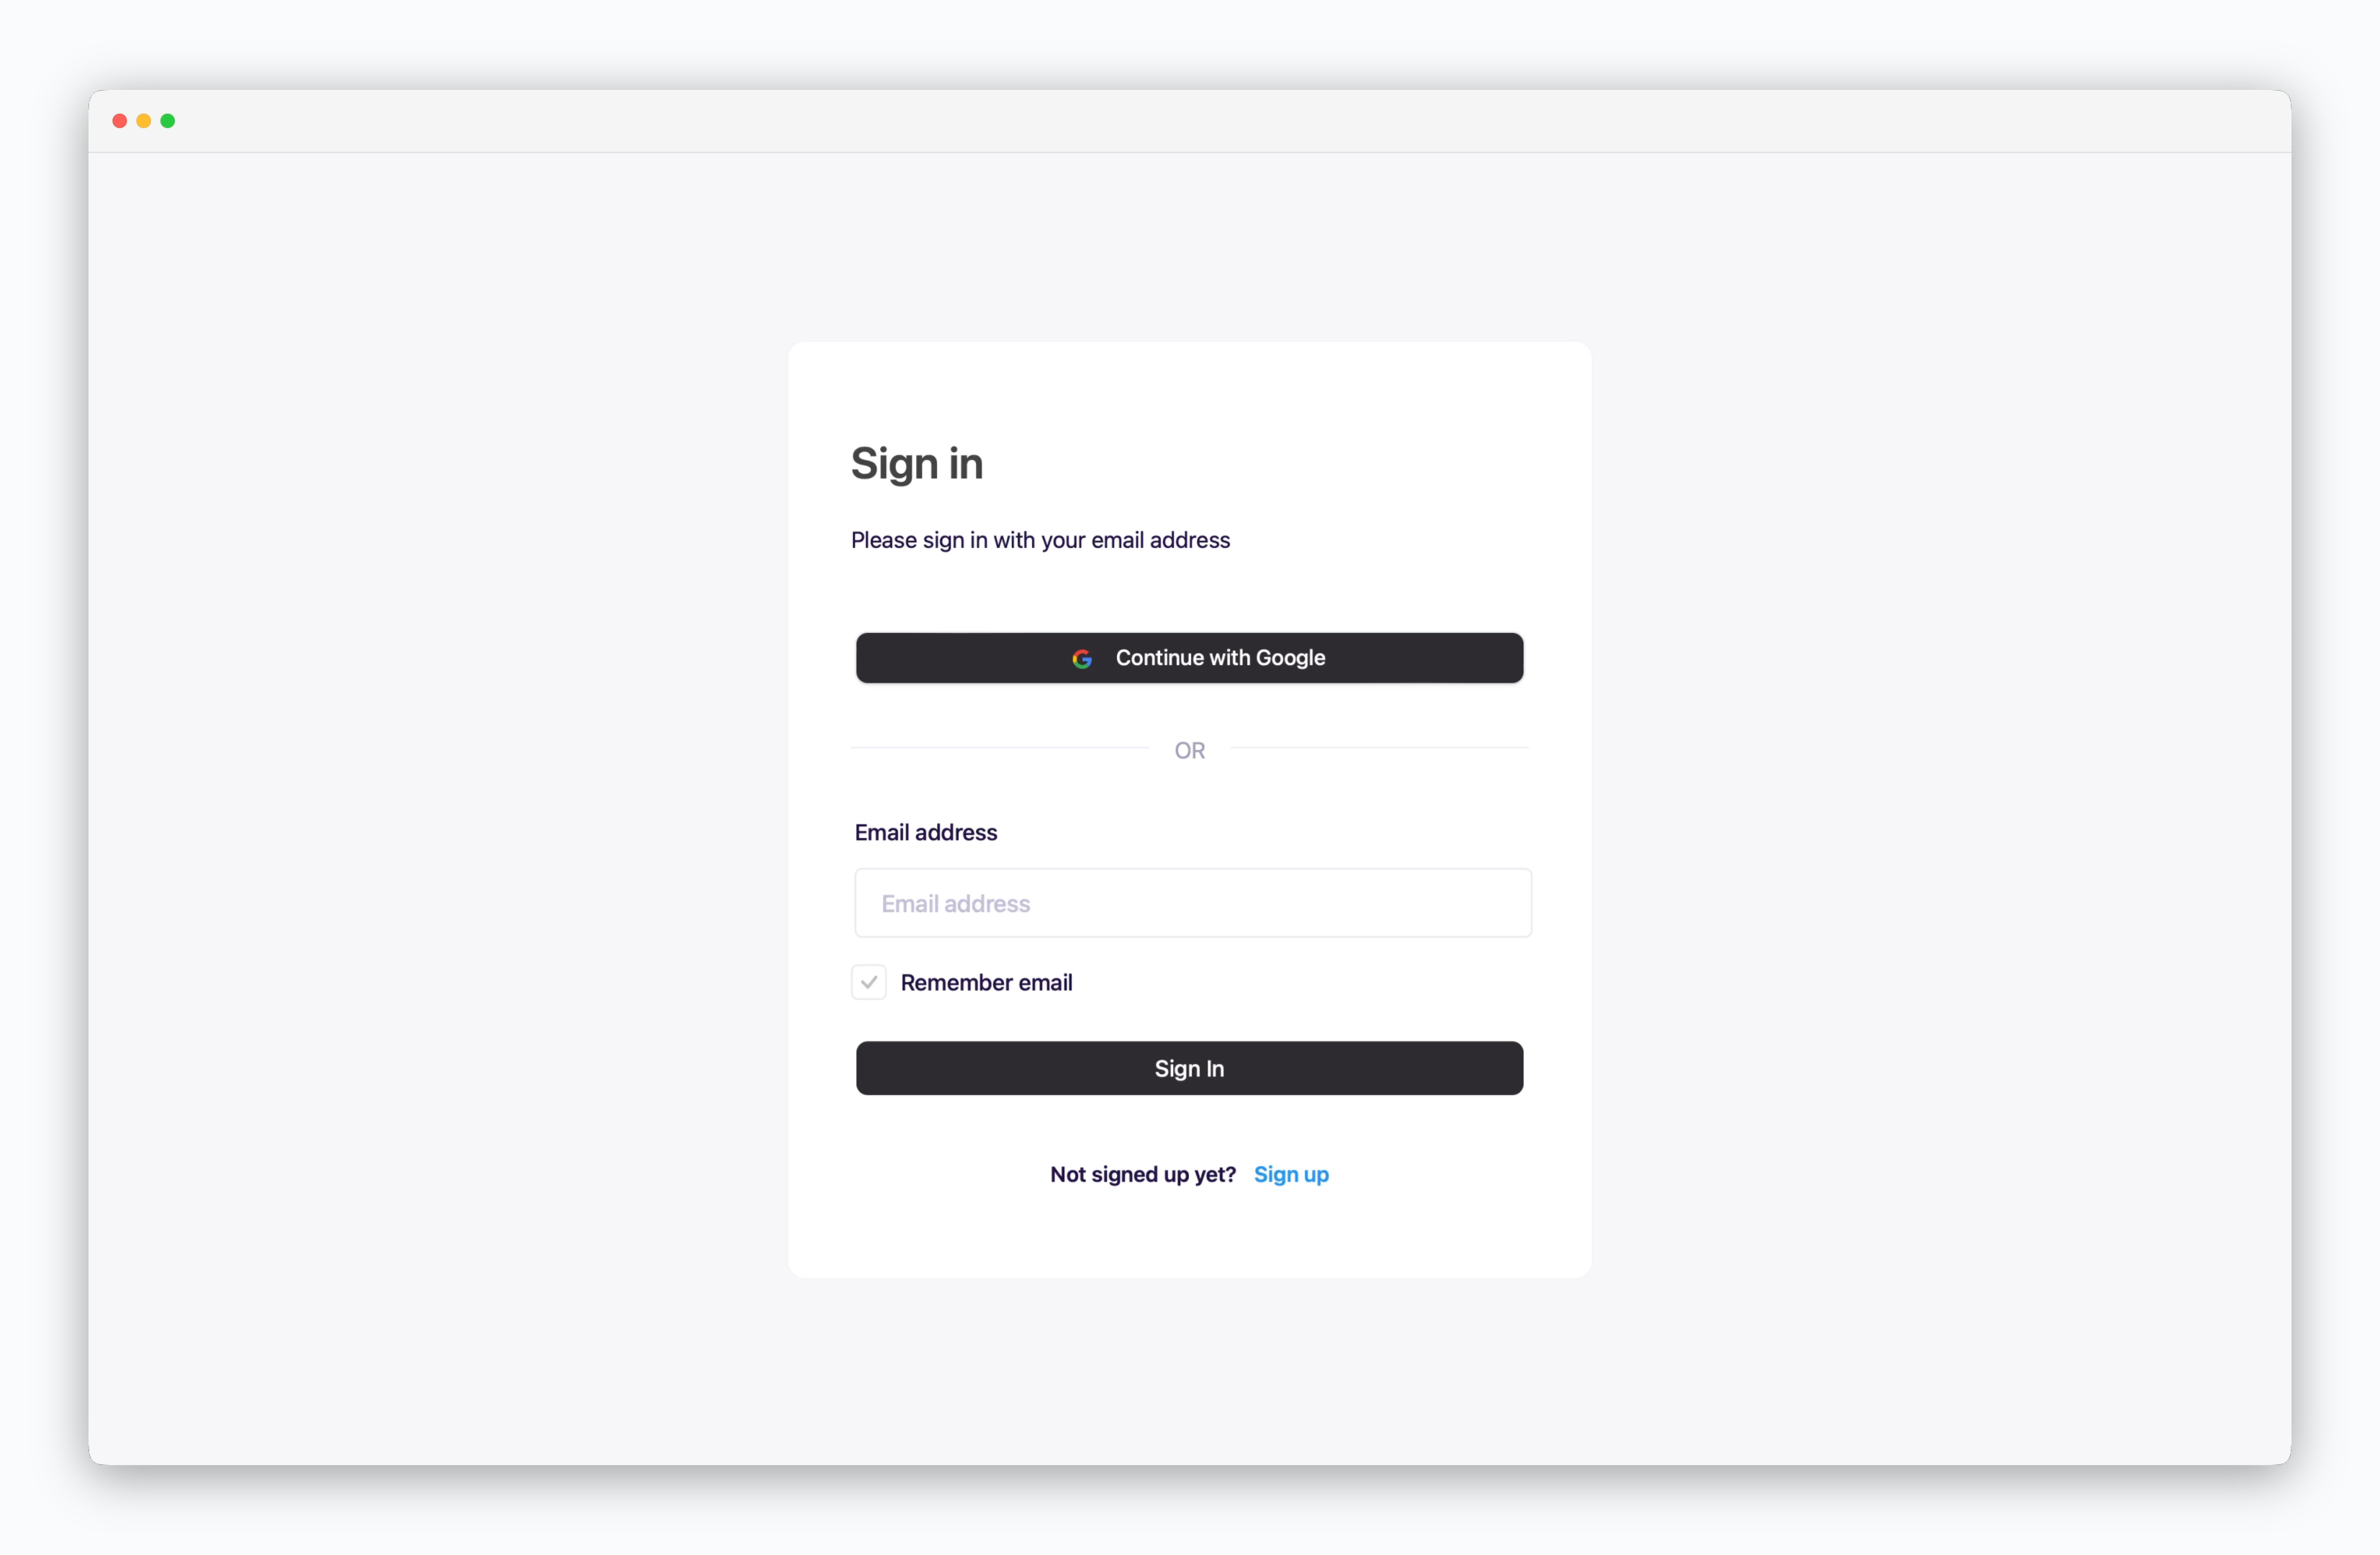
After applying, the **Sign in with Google** button will appear as shown below:
> Access the operations system, go to **Settings > Authentication > Google dropdown**, and enter the values retrieved in the previous steps into each field. Then, click `Apply`.
If the **Enable Login** option is disabled, Google login will be deactivated.
After applying, the **Sign in with Google** button will appear as shown below:
 ## Sign in with Google
### Sign Up
## Sign in with Google
### Sign Up
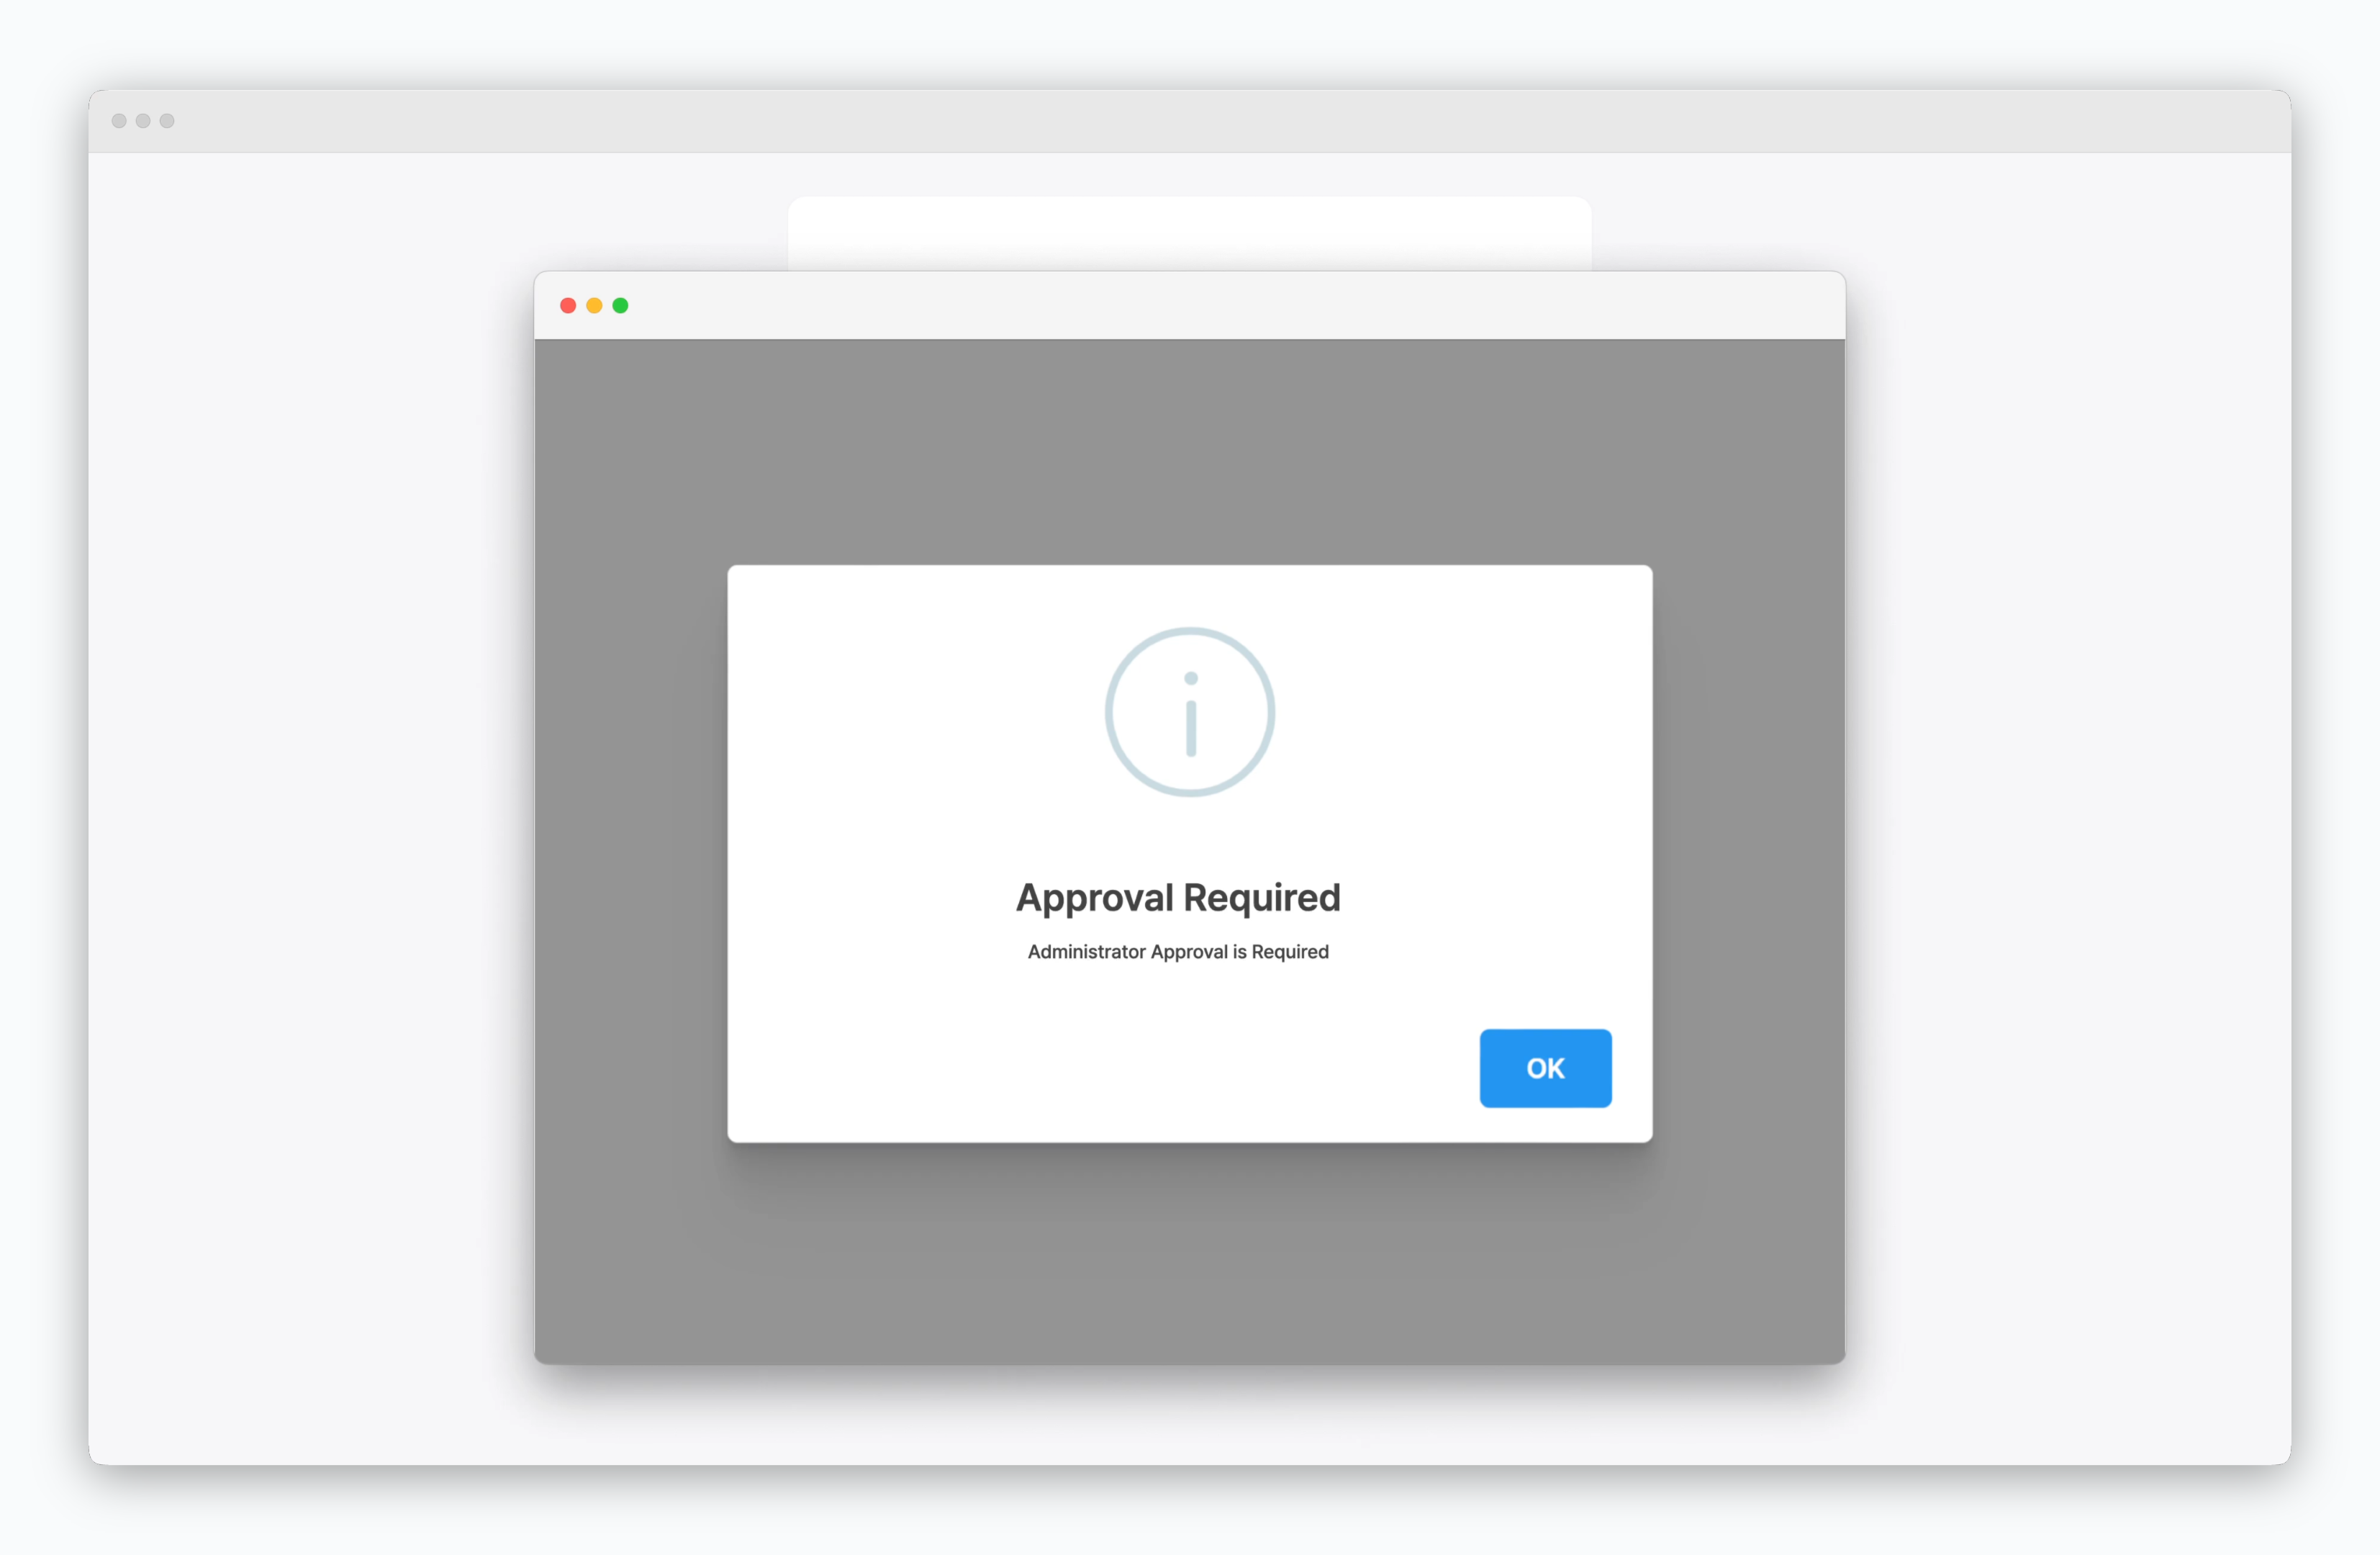 > After completing the Google login process, the user will be in a pending state, and a message about admin approval will be displayed. Once approved by the admin, the user can log in to `ale`.
To approve (activate) pending users, refer to the [User Management page](/en/operations/user-management#activation).
### Sign In
> After completing the Google login process, the user will be in a pending state, and a message about admin approval will be displayed. Once approved by the admin, the user can log in to `ale`.
To approve (activate) pending users, refer to the [User Management page](/en/operations/user-management#activation).
### Sign In
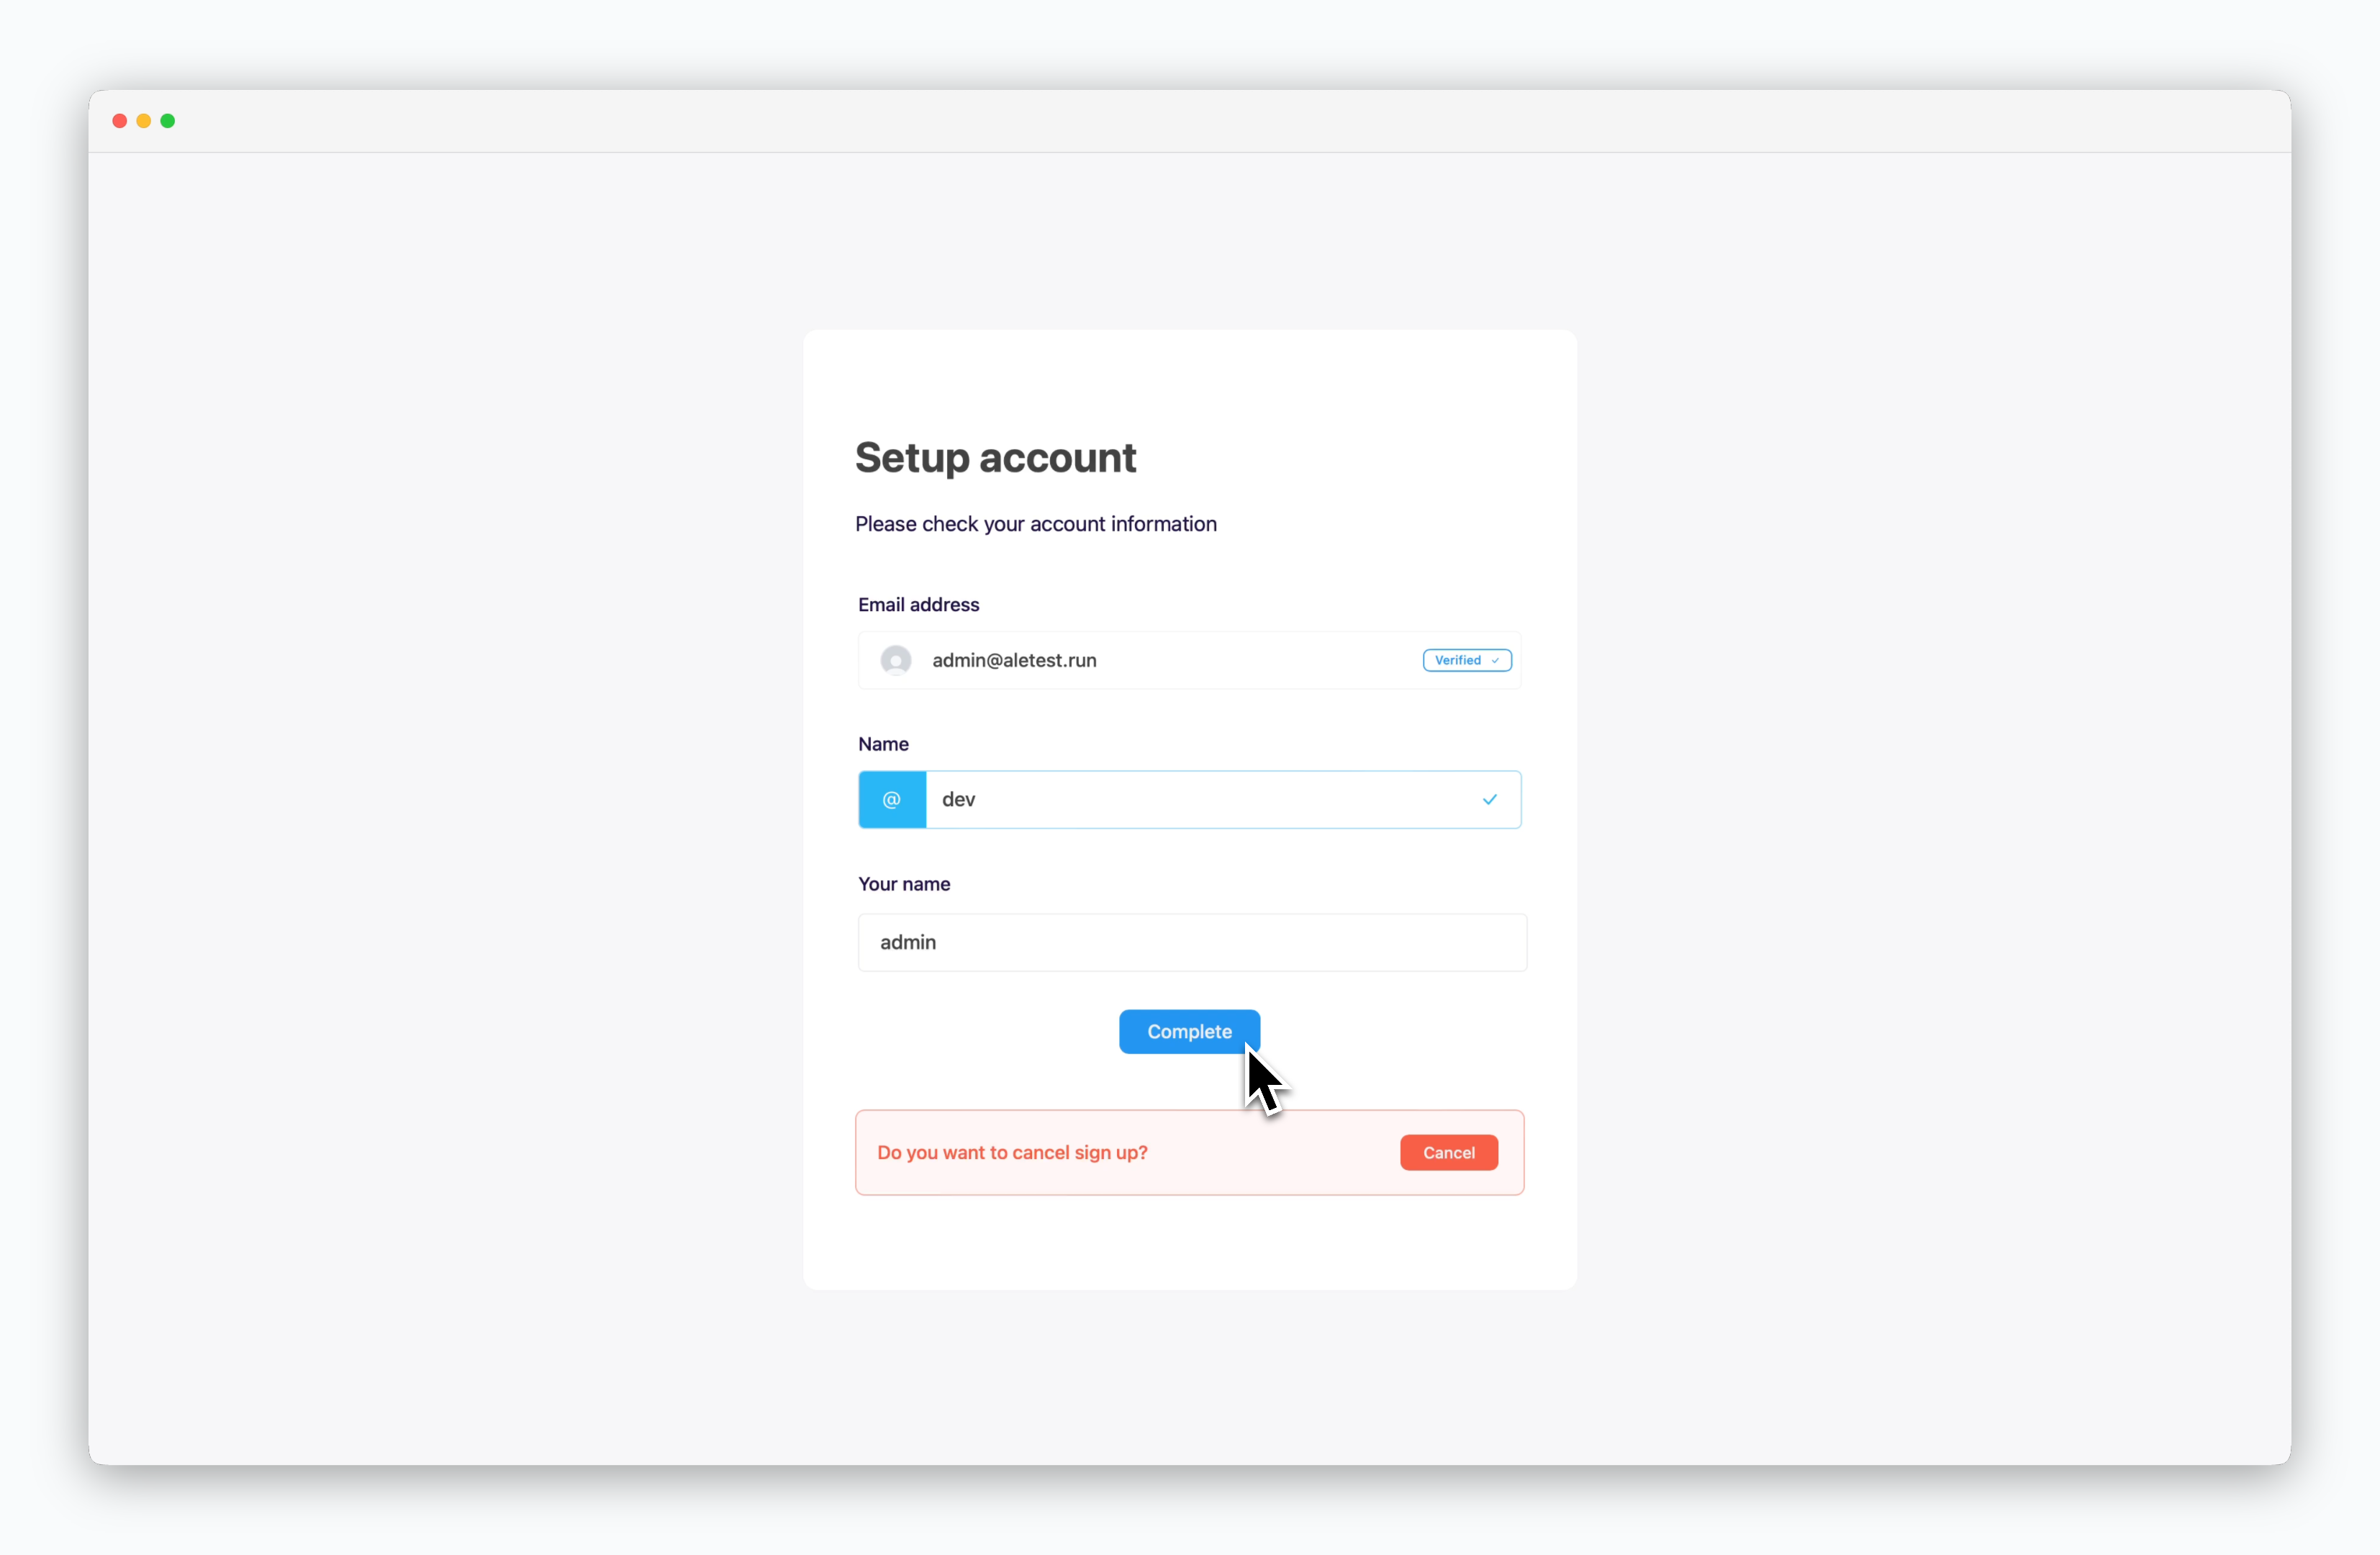 > After admin approval, when attempting to log in with Google, the **Complete Registration** page will be displayed. Enter the appropriate space and name, then click `Complete`.
Upon accessing the dashboard, a space with the specified name will be created, and the [default resources predefined in the operations system](/en/operations/settings#resource-profile-management) will be assigned.
For details on user registration and management, refer to the [User Management page](/en/operations/user-management).
> After admin approval, when attempting to log in with Google, the **Complete Registration** page will be displayed. Enter the appropriate space and name, then click `Complete`.
Upon accessing the dashboard, a space with the specified name will be created, and the [default resources predefined in the operations system](/en/operations/settings#resource-profile-management) will be assigned.
For details on user registration and management, refer to the [User Management page](/en/operations/user-management).