> ## Documentation Index
> Fetch the complete documentation index at: https://docs.ale.run/llms.txt
> Use this file to discover all available pages before exploring further.
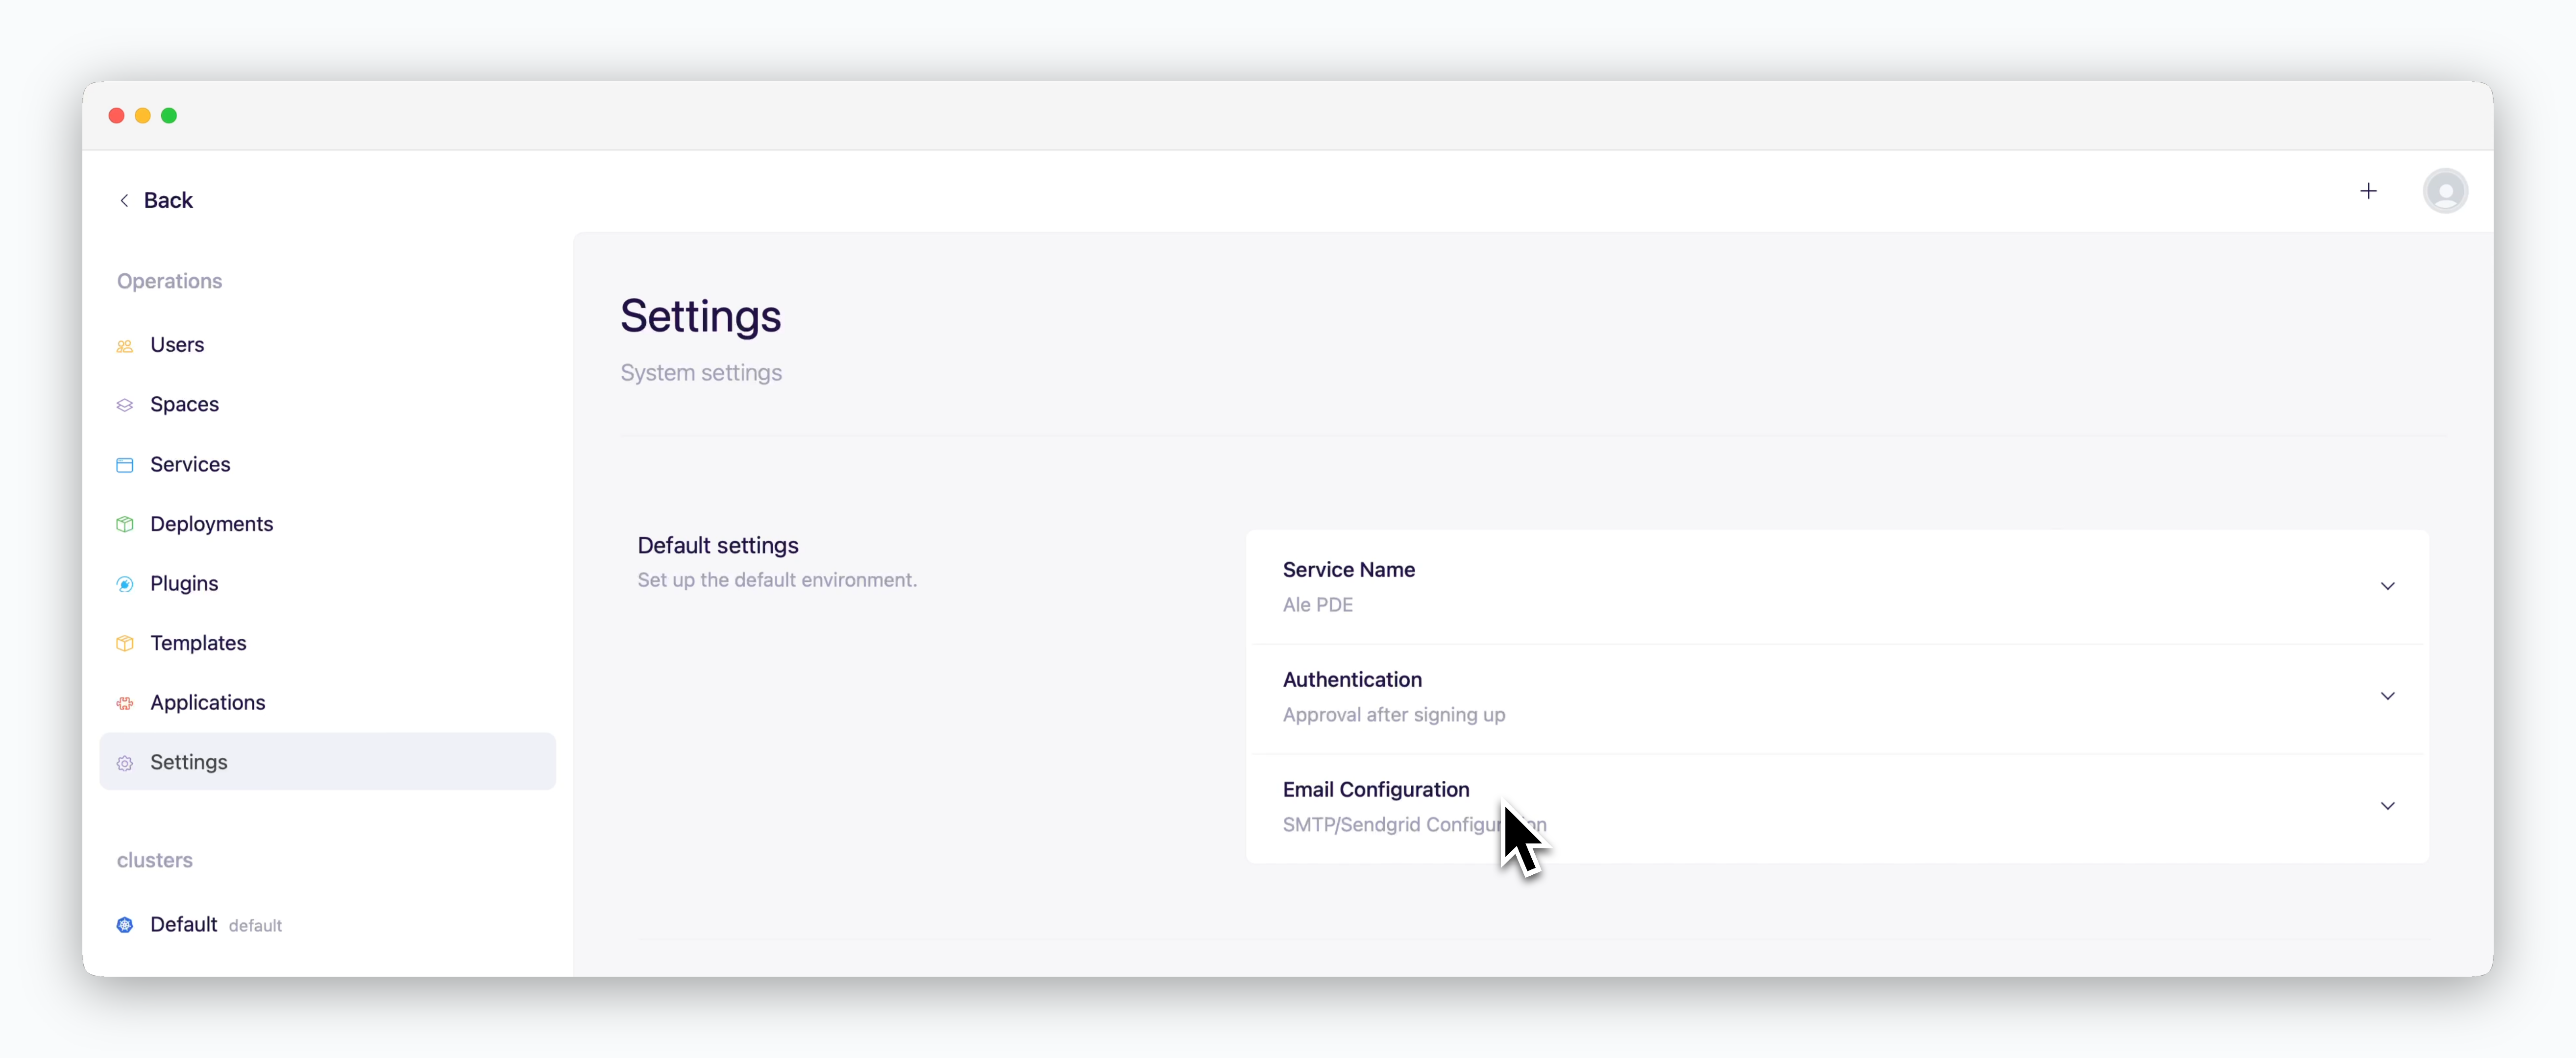
# Settings
> The Settings page allows you to view and configure various options for the operations system.
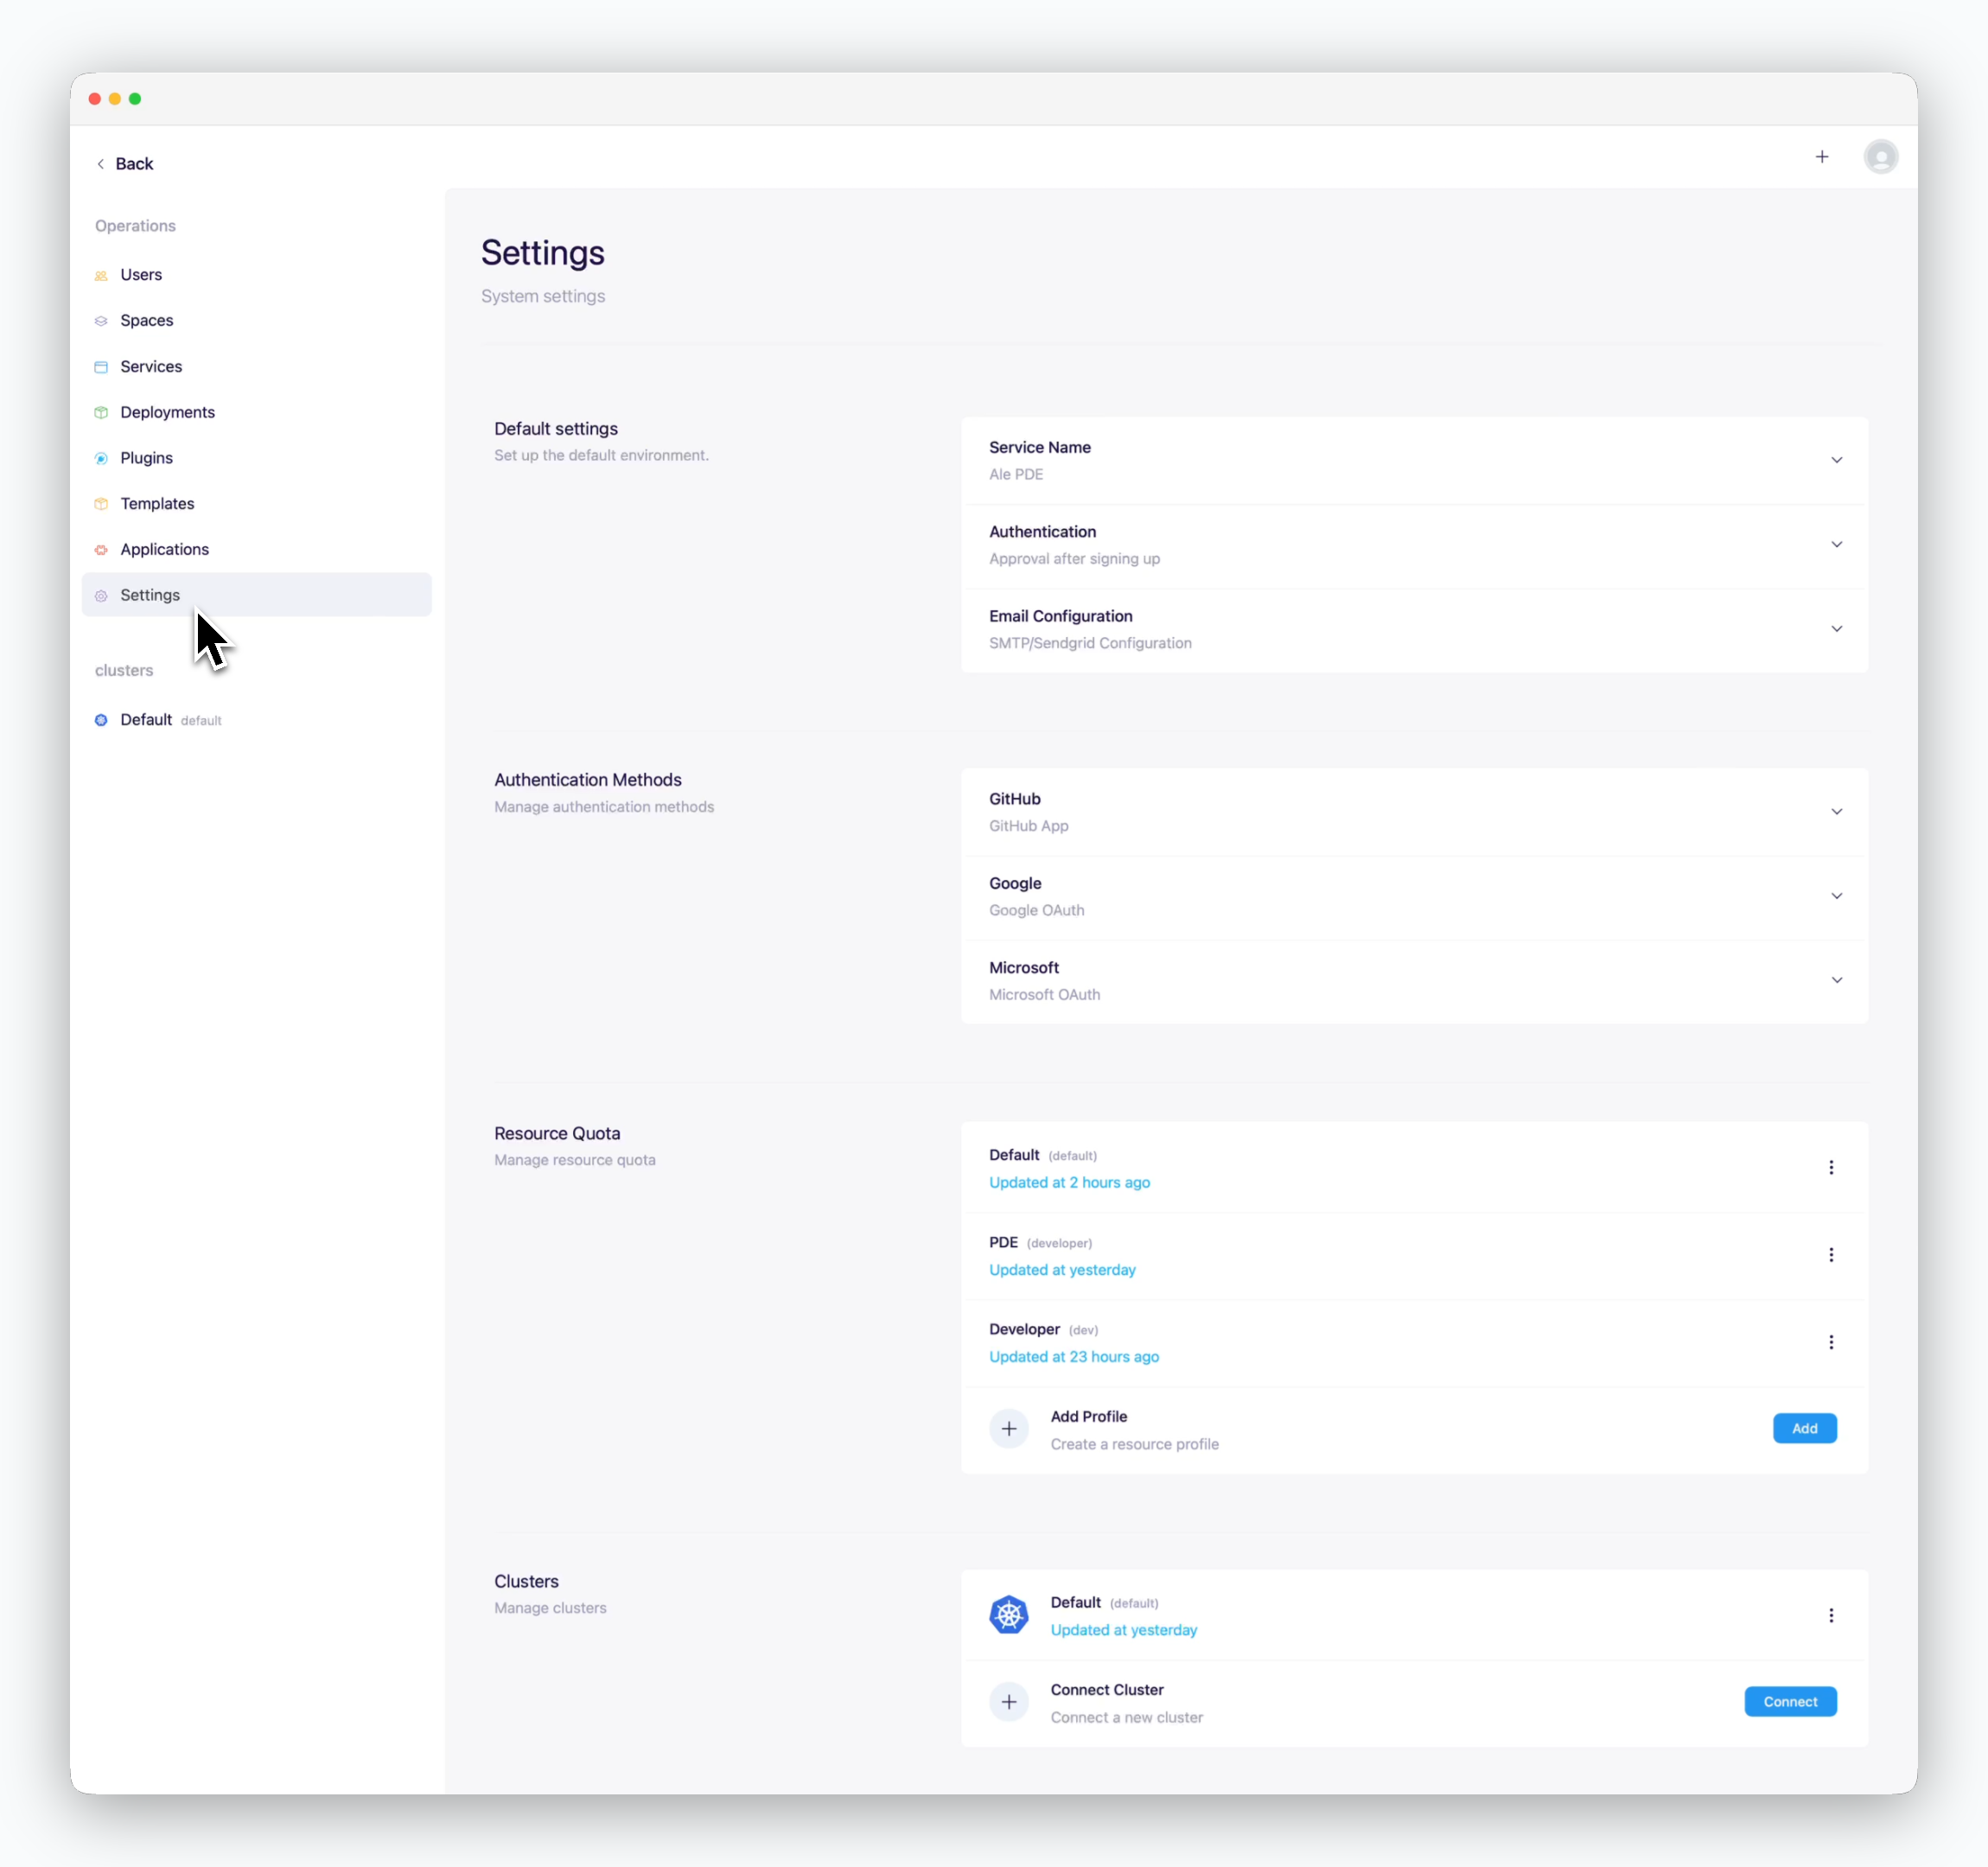 ***
## Default Settings
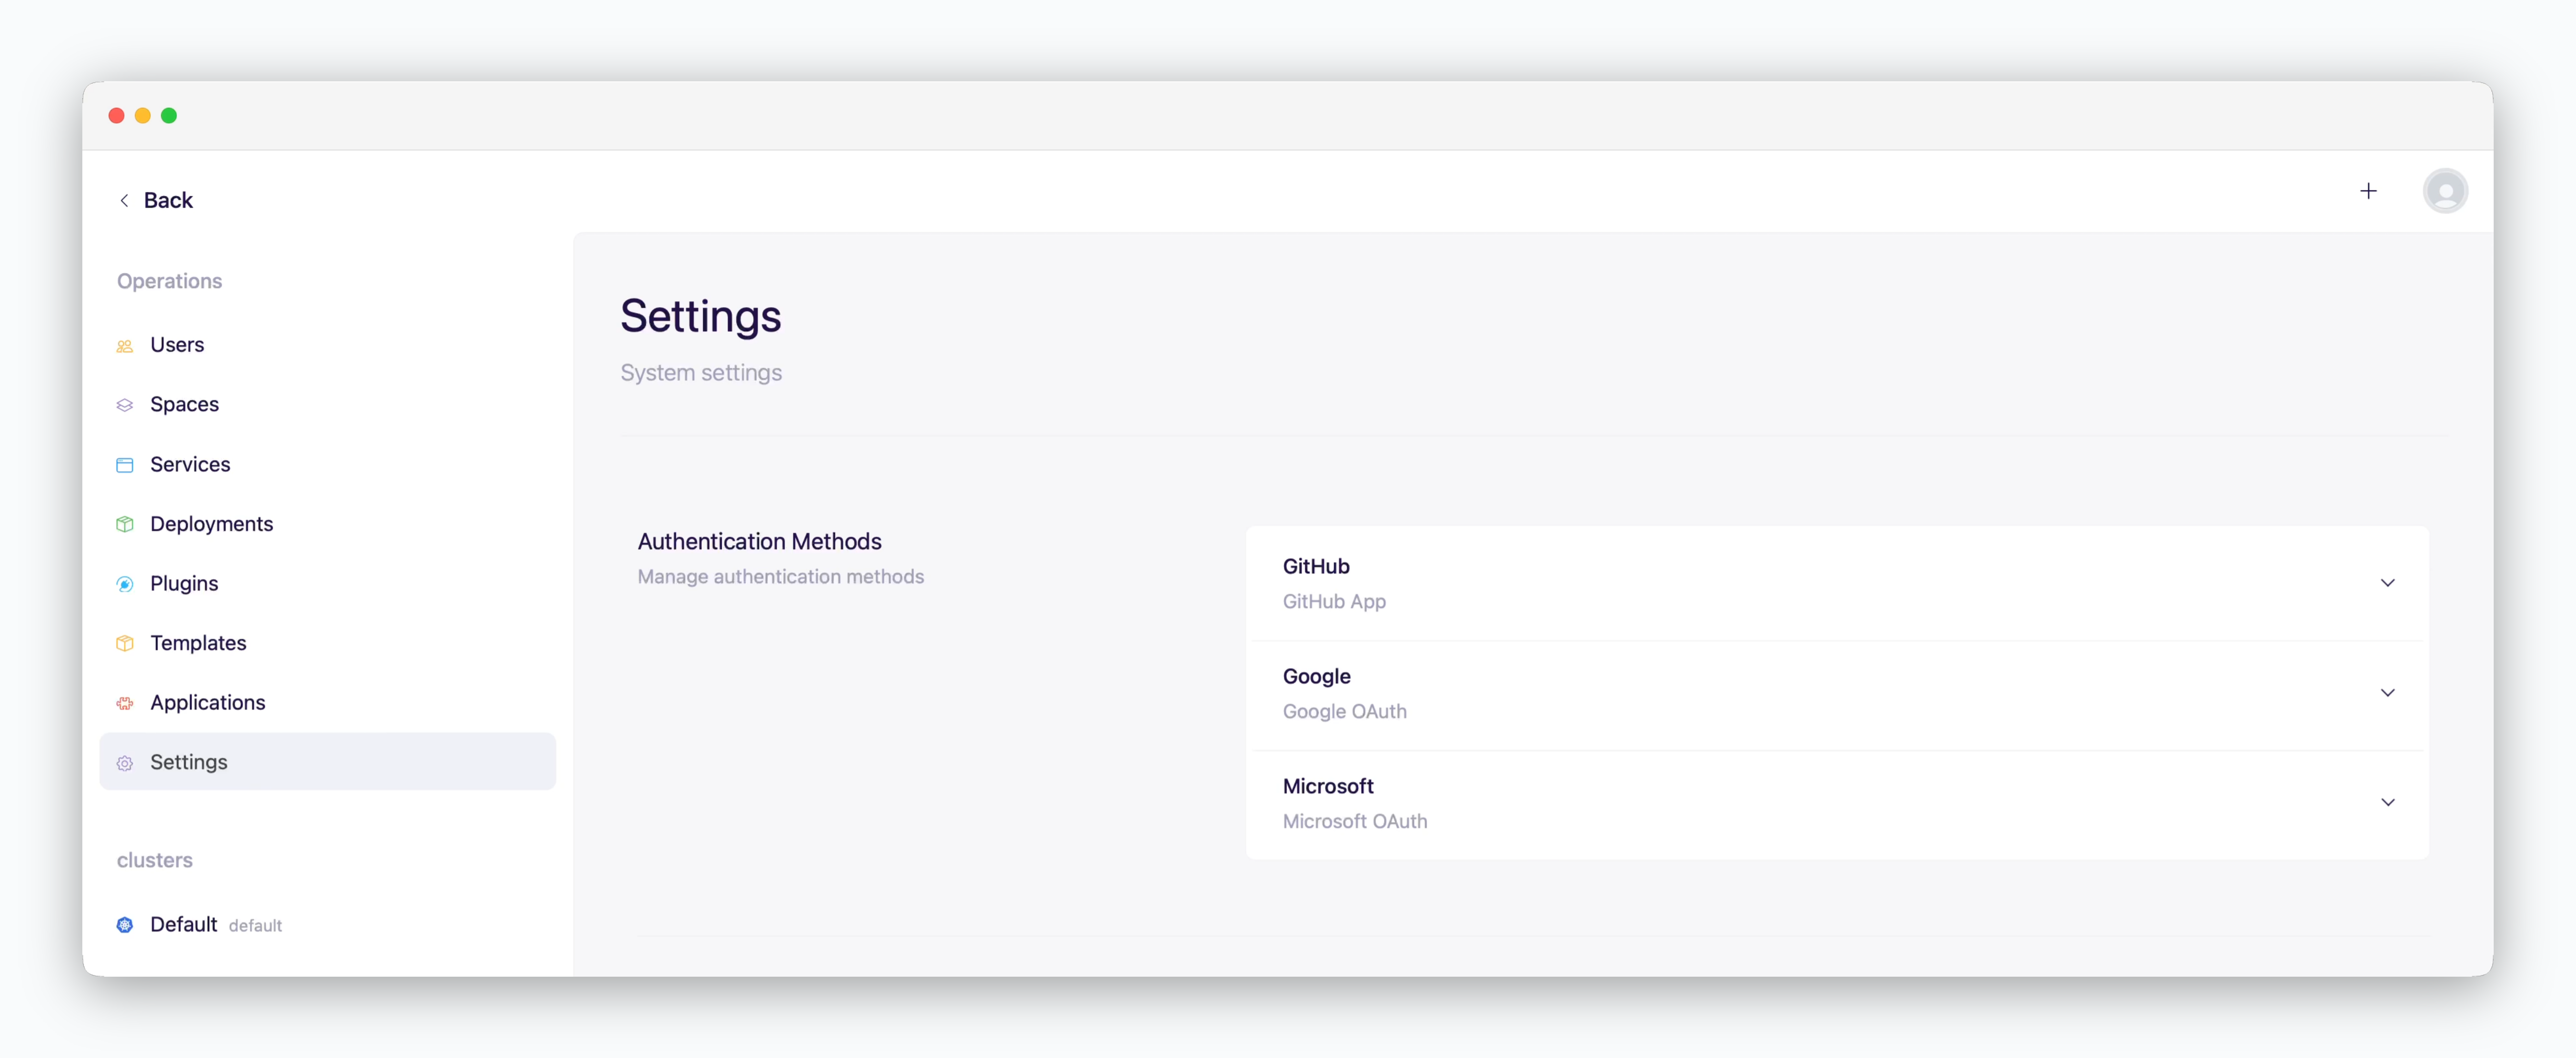
### Authentication / Access Control
***
## Default Settings
### Authentication / Access Control
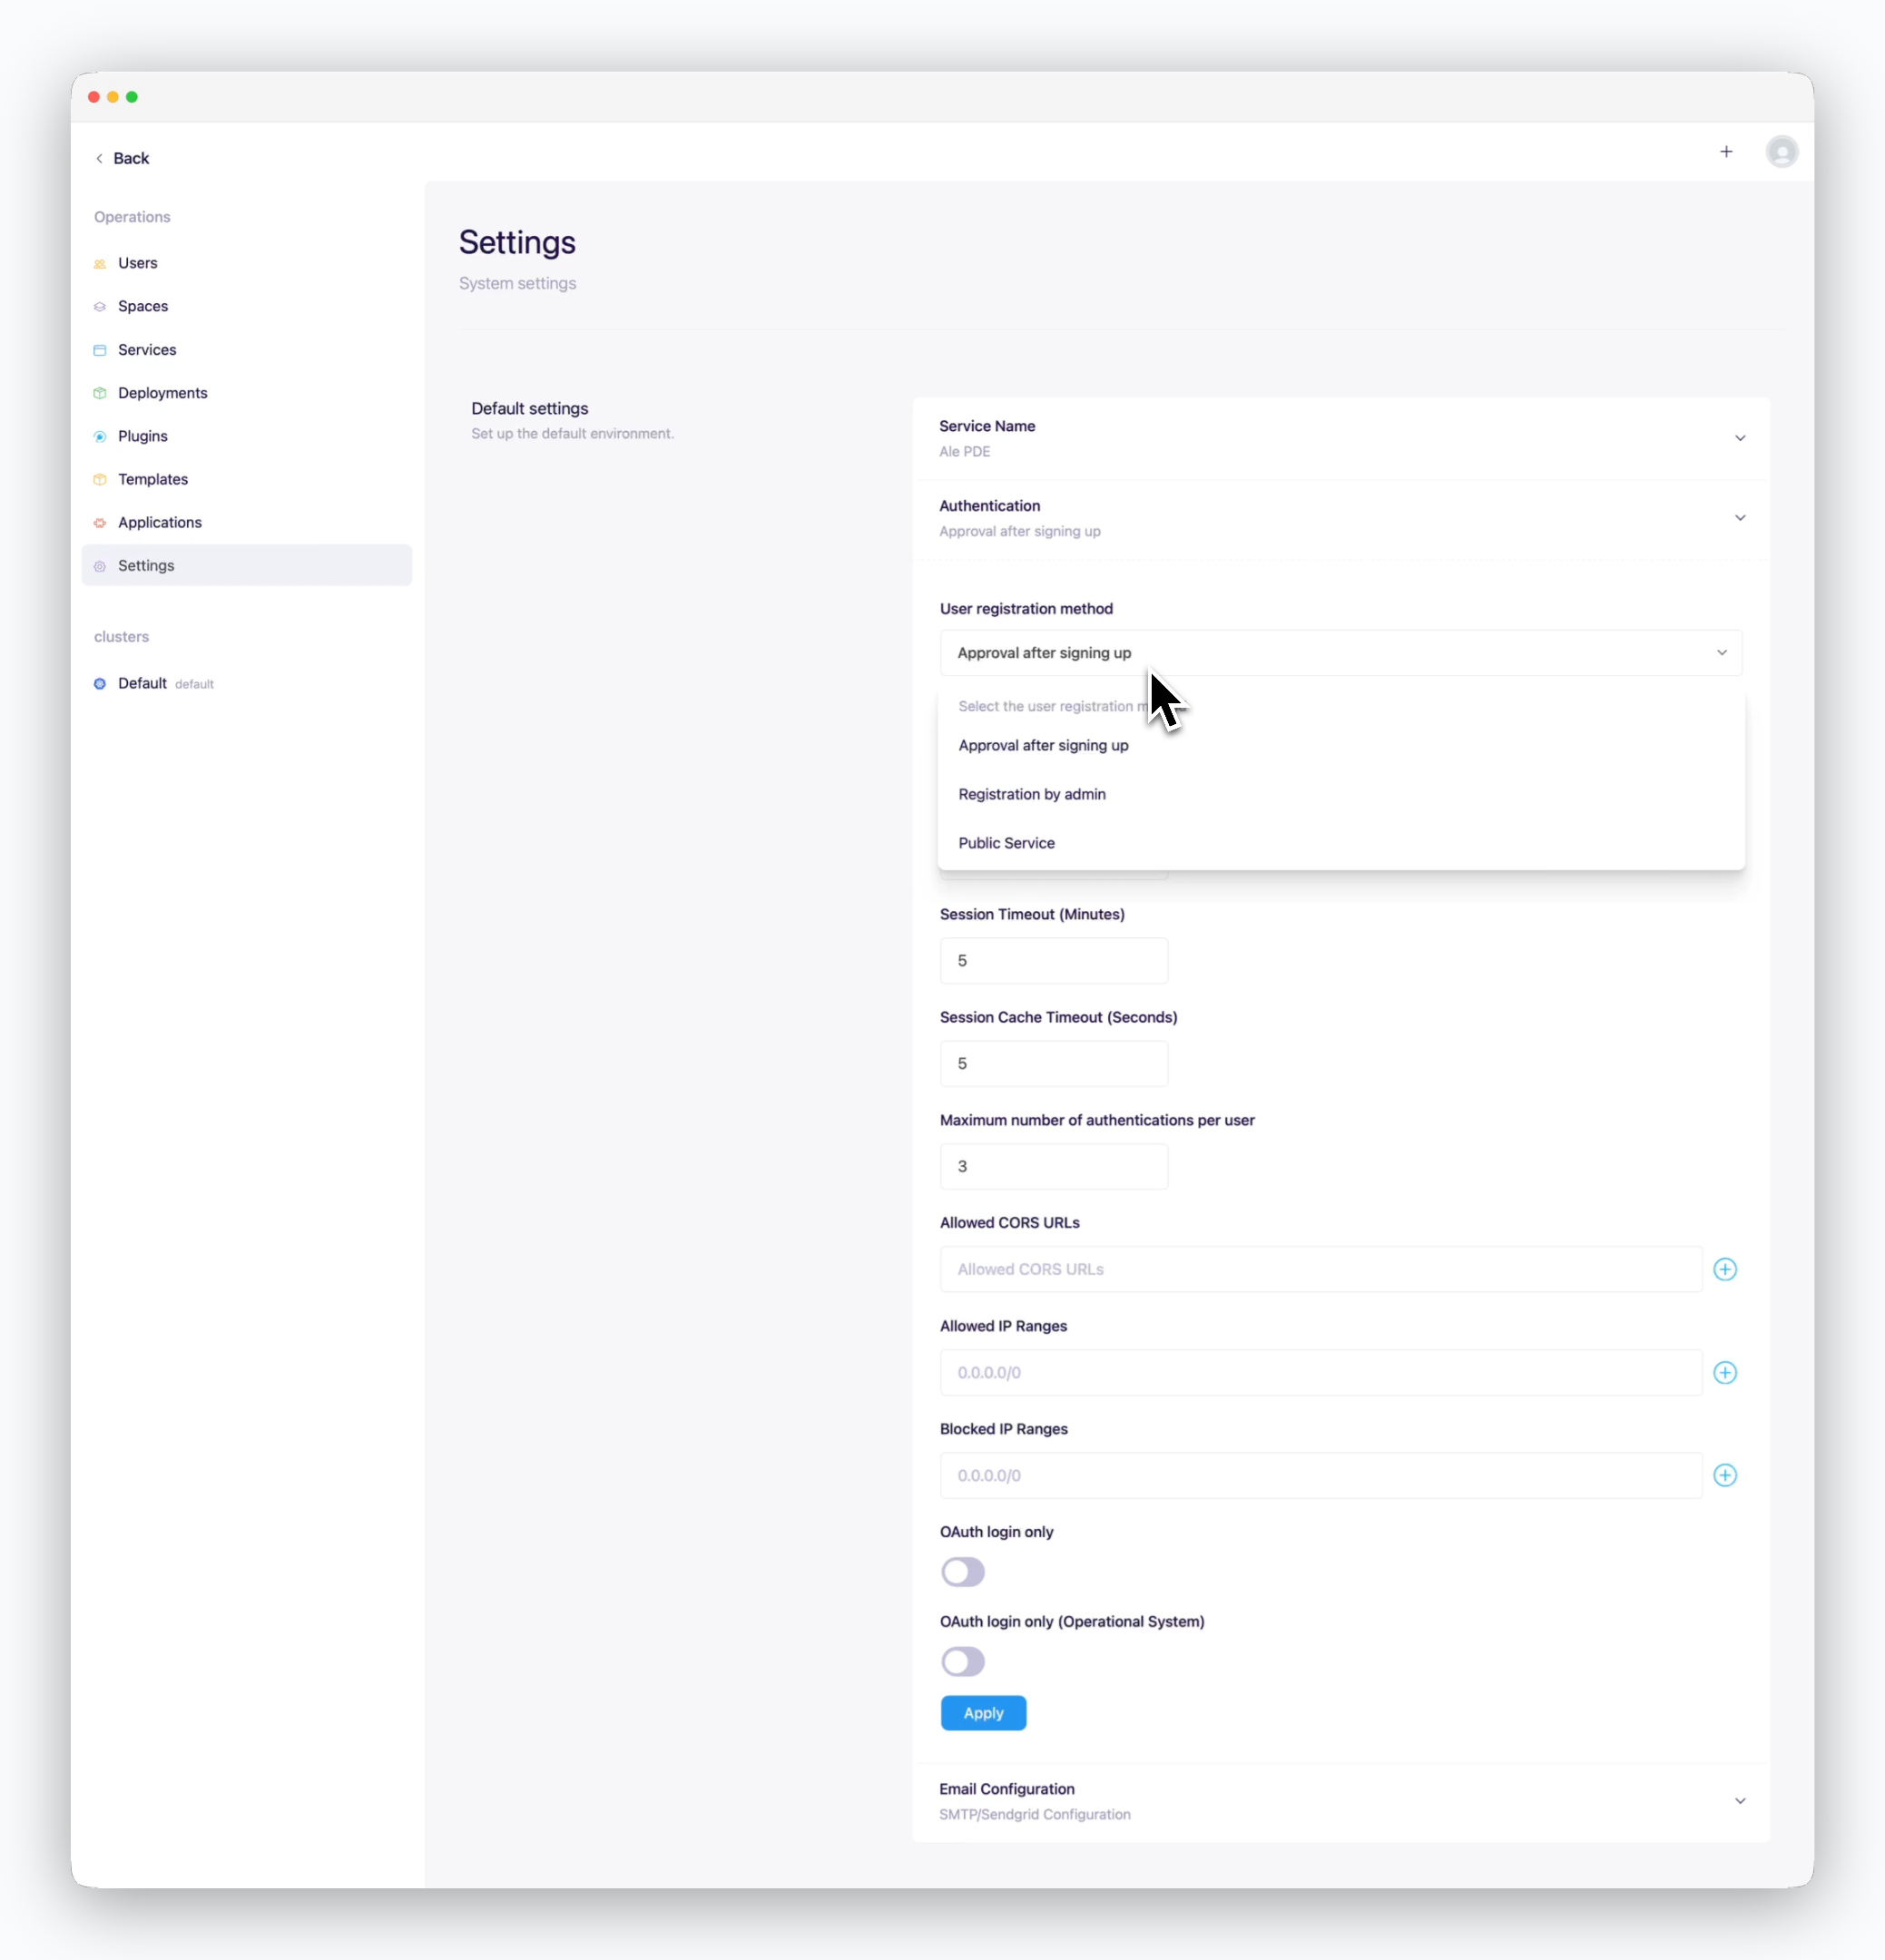 > In the **Authentication / Access Control** section of the basic settings, you can configure various authentication and access-related settings, such as user onboarding options, session timeout duration, and allowed IP ranges for system access.
| User Onboarding Options | Sign-up and Approval Process |
| ---------------------------------------------------------- | ----------------------------------------------------------------------------------------------------------------------------------------------------------- |
| Approval after signing up | Users can sign up via the dashboard and [need to be approved (activated) before gaining access.](/en/operations/user-management#activation) |
| Registration by admin | Sign-up via the dashboard is disabled. Only users [registered in the operations system](/en/operations/user-management#registration) can access the system. |
| Public service | Users who sign up via the dashboard can access the system without approval. |
### Mailer Setup
> In the **Authentication / Access Control** section of the basic settings, you can configure various authentication and access-related settings, such as user onboarding options, session timeout duration, and allowed IP ranges for system access.
| User Onboarding Options | Sign-up and Approval Process |
| ---------------------------------------------------------- | ----------------------------------------------------------------------------------------------------------------------------------------------------------- |
| Approval after signing up | Users can sign up via the dashboard and [need to be approved (activated) before gaining access.](/en/operations/user-management#activation) |
| Registration by admin | Sign-up via the dashboard is disabled. Only users [registered in the operations system](/en/operations/user-management#registration) can access the system. |
| Public service | Users who sign up via the dashboard can access the system without approval. |
### Mailer Setup
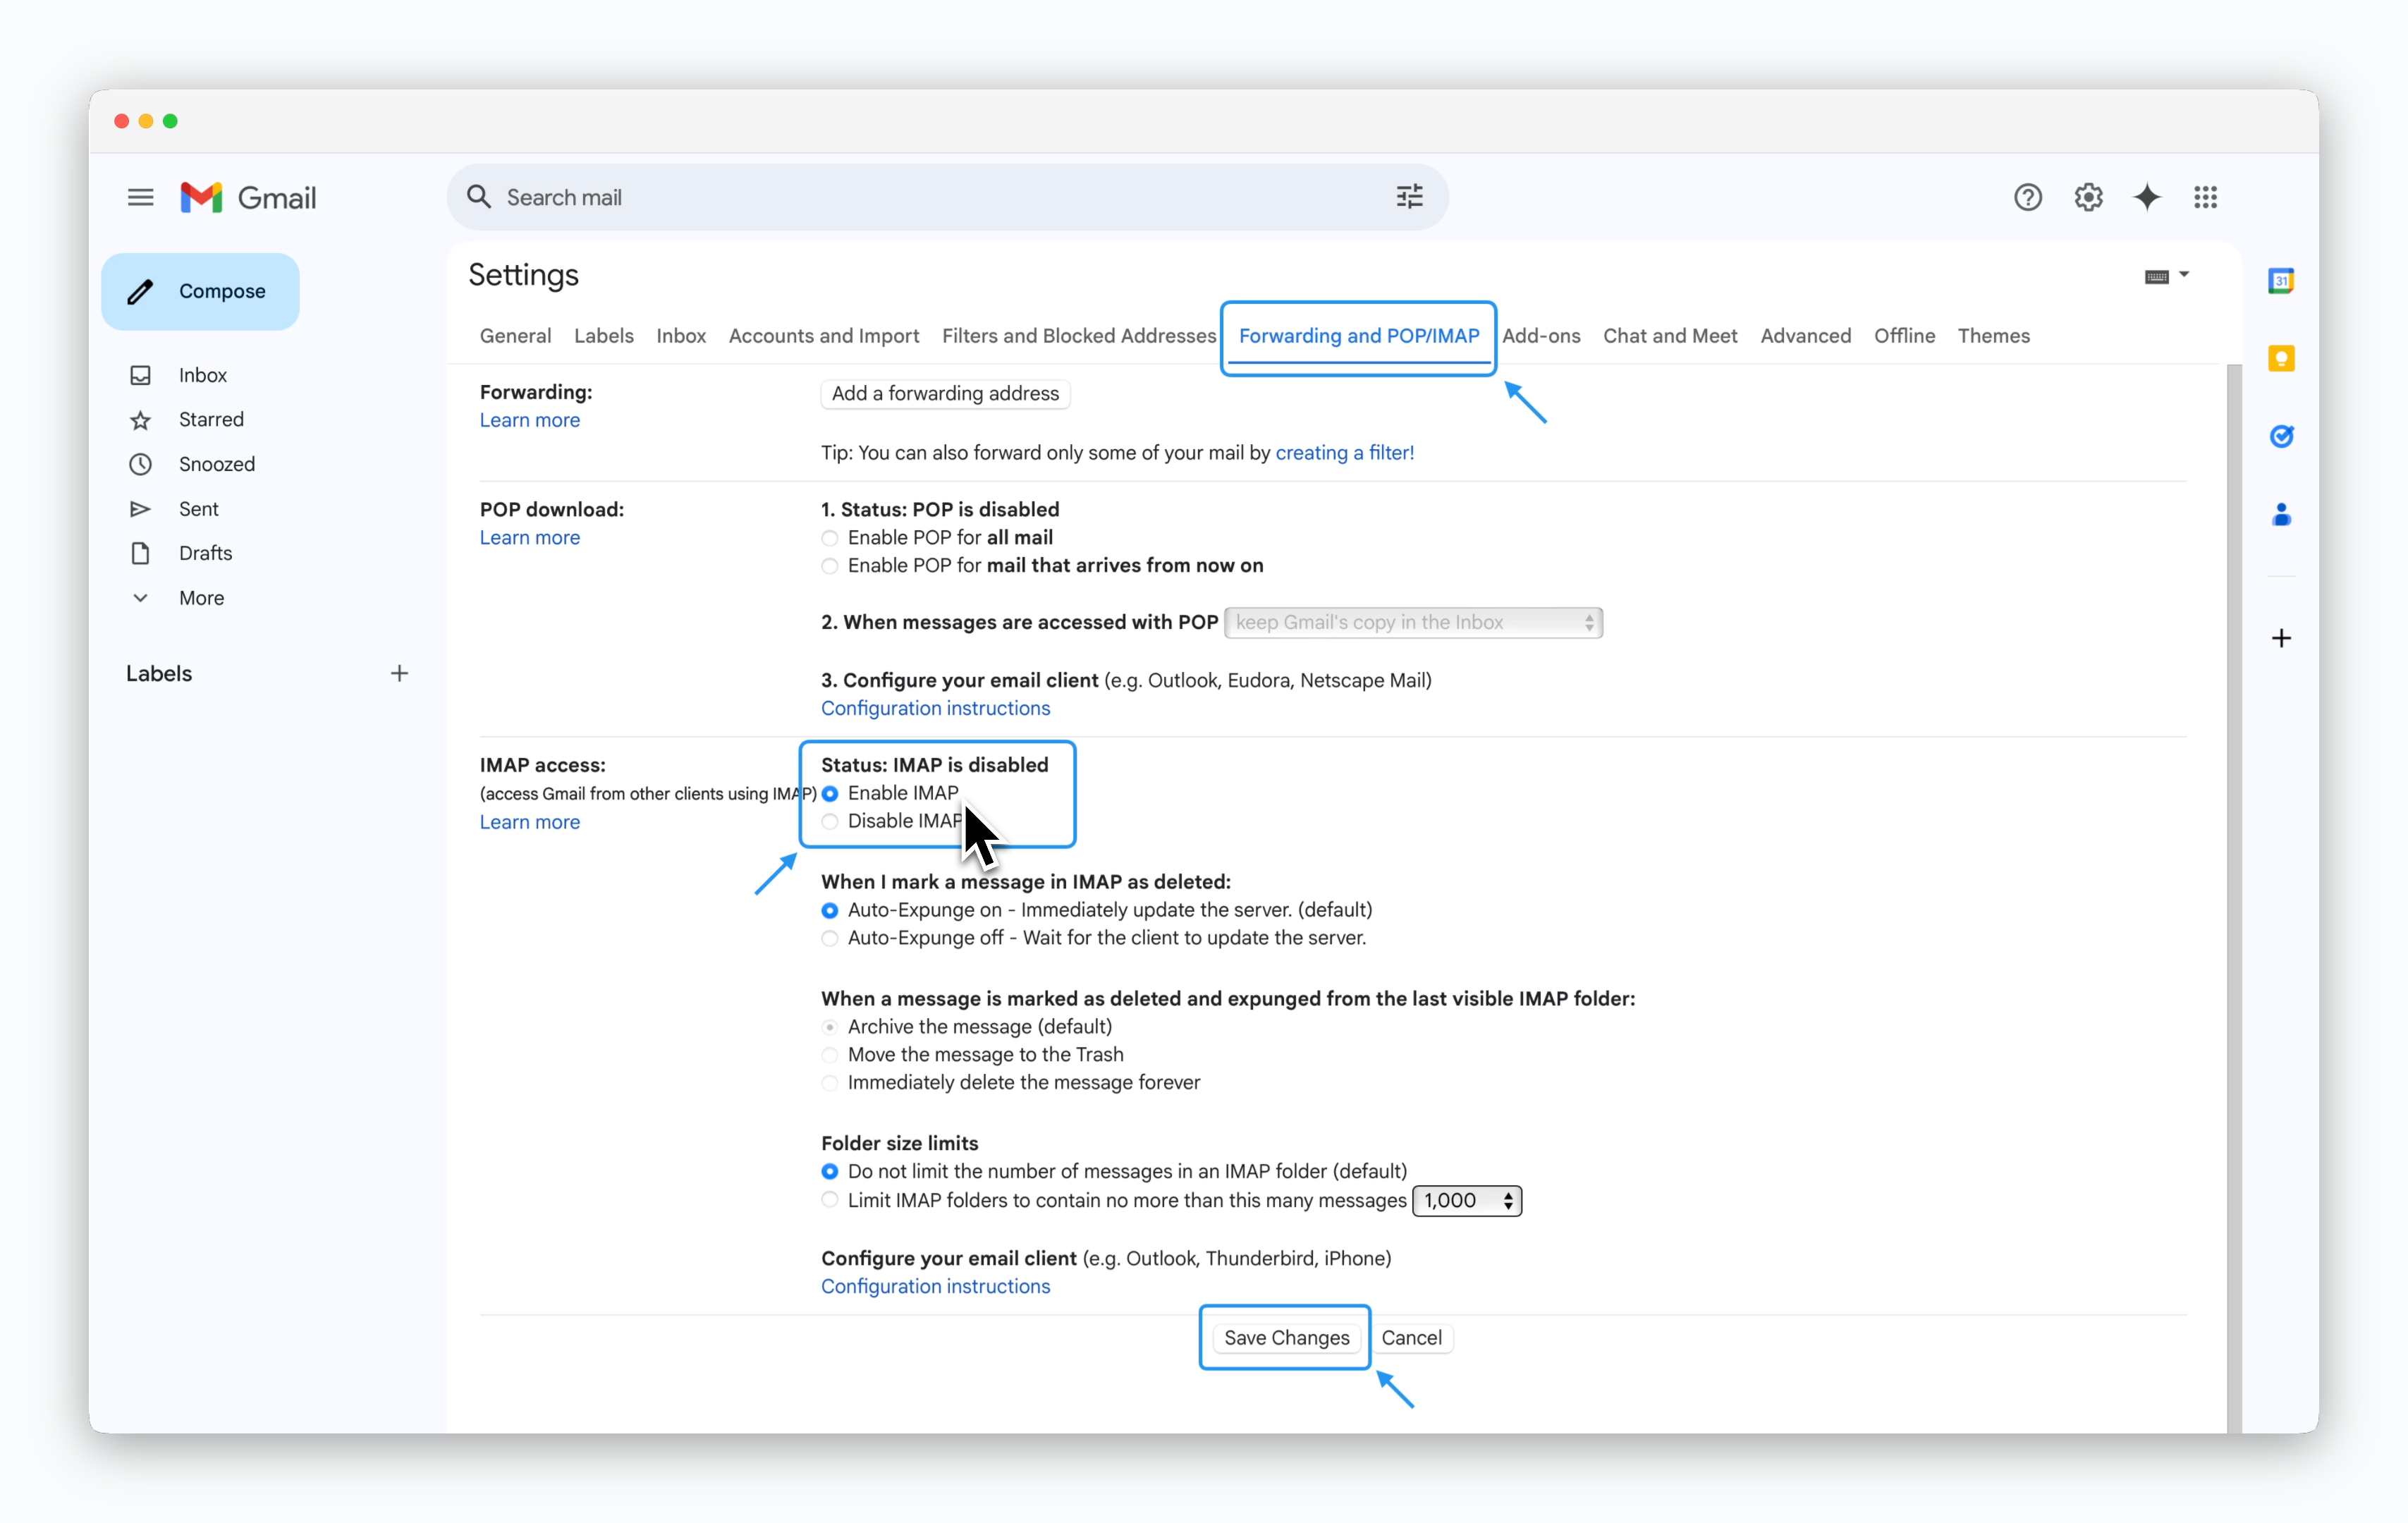
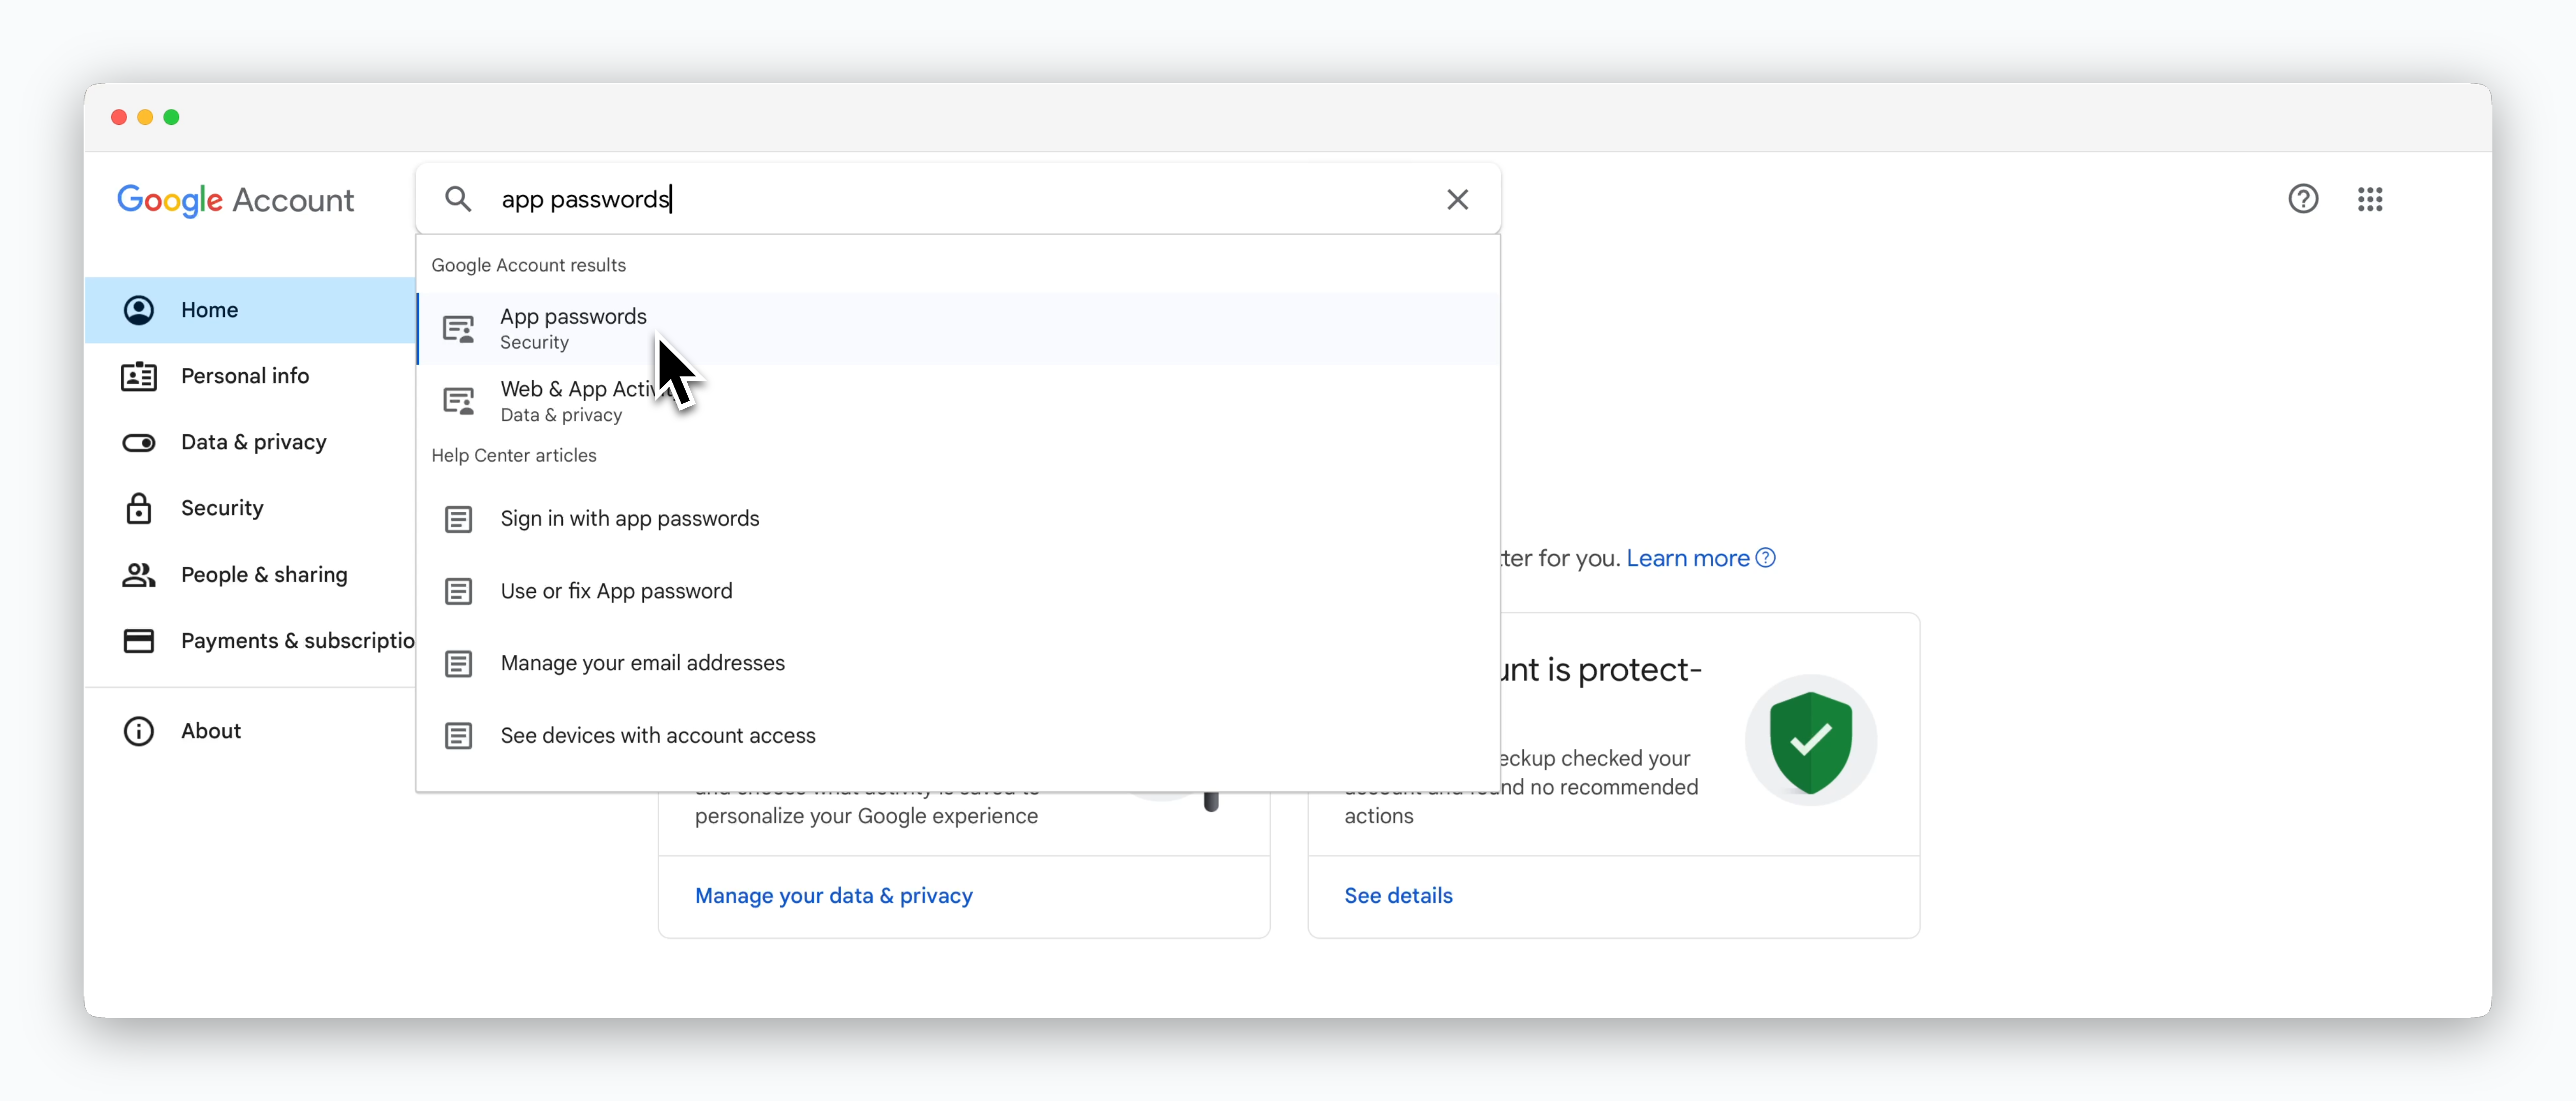
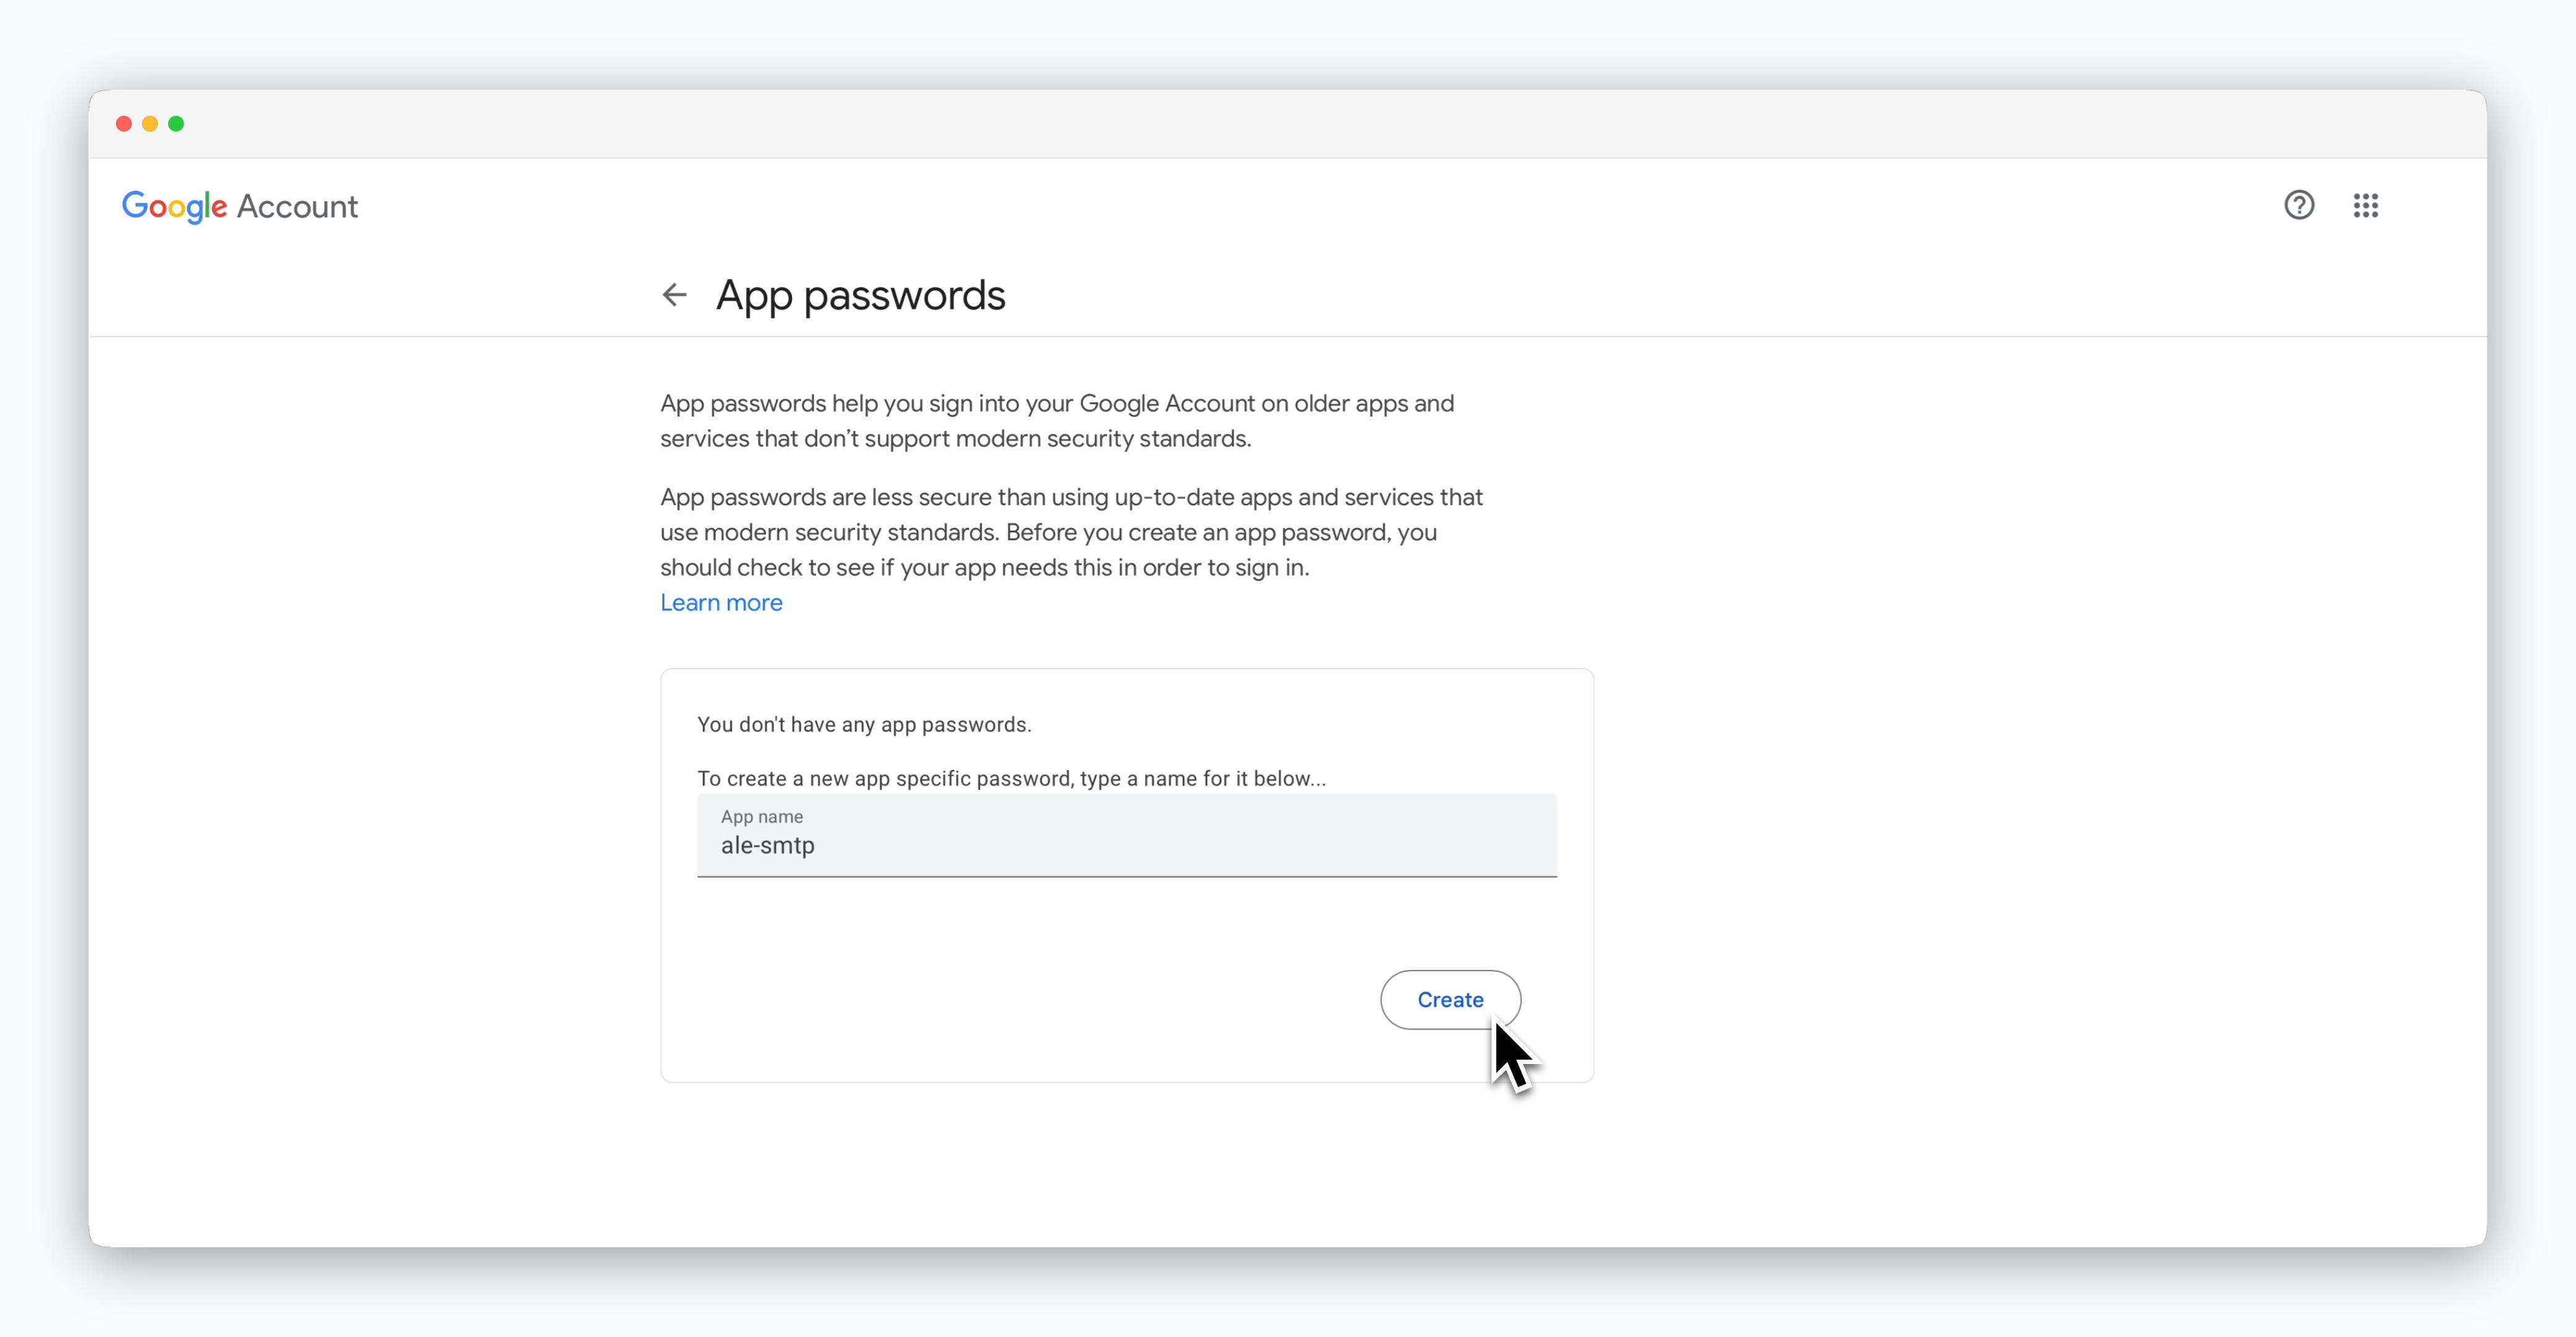
 > You can choose between SMTP and Sendgrid as the mailer type. If you want to use a Gmail account as the SMTP server, follow the steps below.
To use a Gmail account as an SMTP server, ensure the following settings are applied:
* Enable 2-Step Verification
* If the administrator of an organizational account has disabled the App Passwords feature due to security policies, request the administrator to enable it
> You can choose between SMTP and Sendgrid as the mailer type. If you want to use a Gmail account as the SMTP server, follow the steps below.
To use a Gmail account as an SMTP server, ensure the following settings are applied:
* Enable 2-Step Verification
* If the administrator of an organizational account has disabled the App Passwords feature due to security policies, request the administrator to enable it
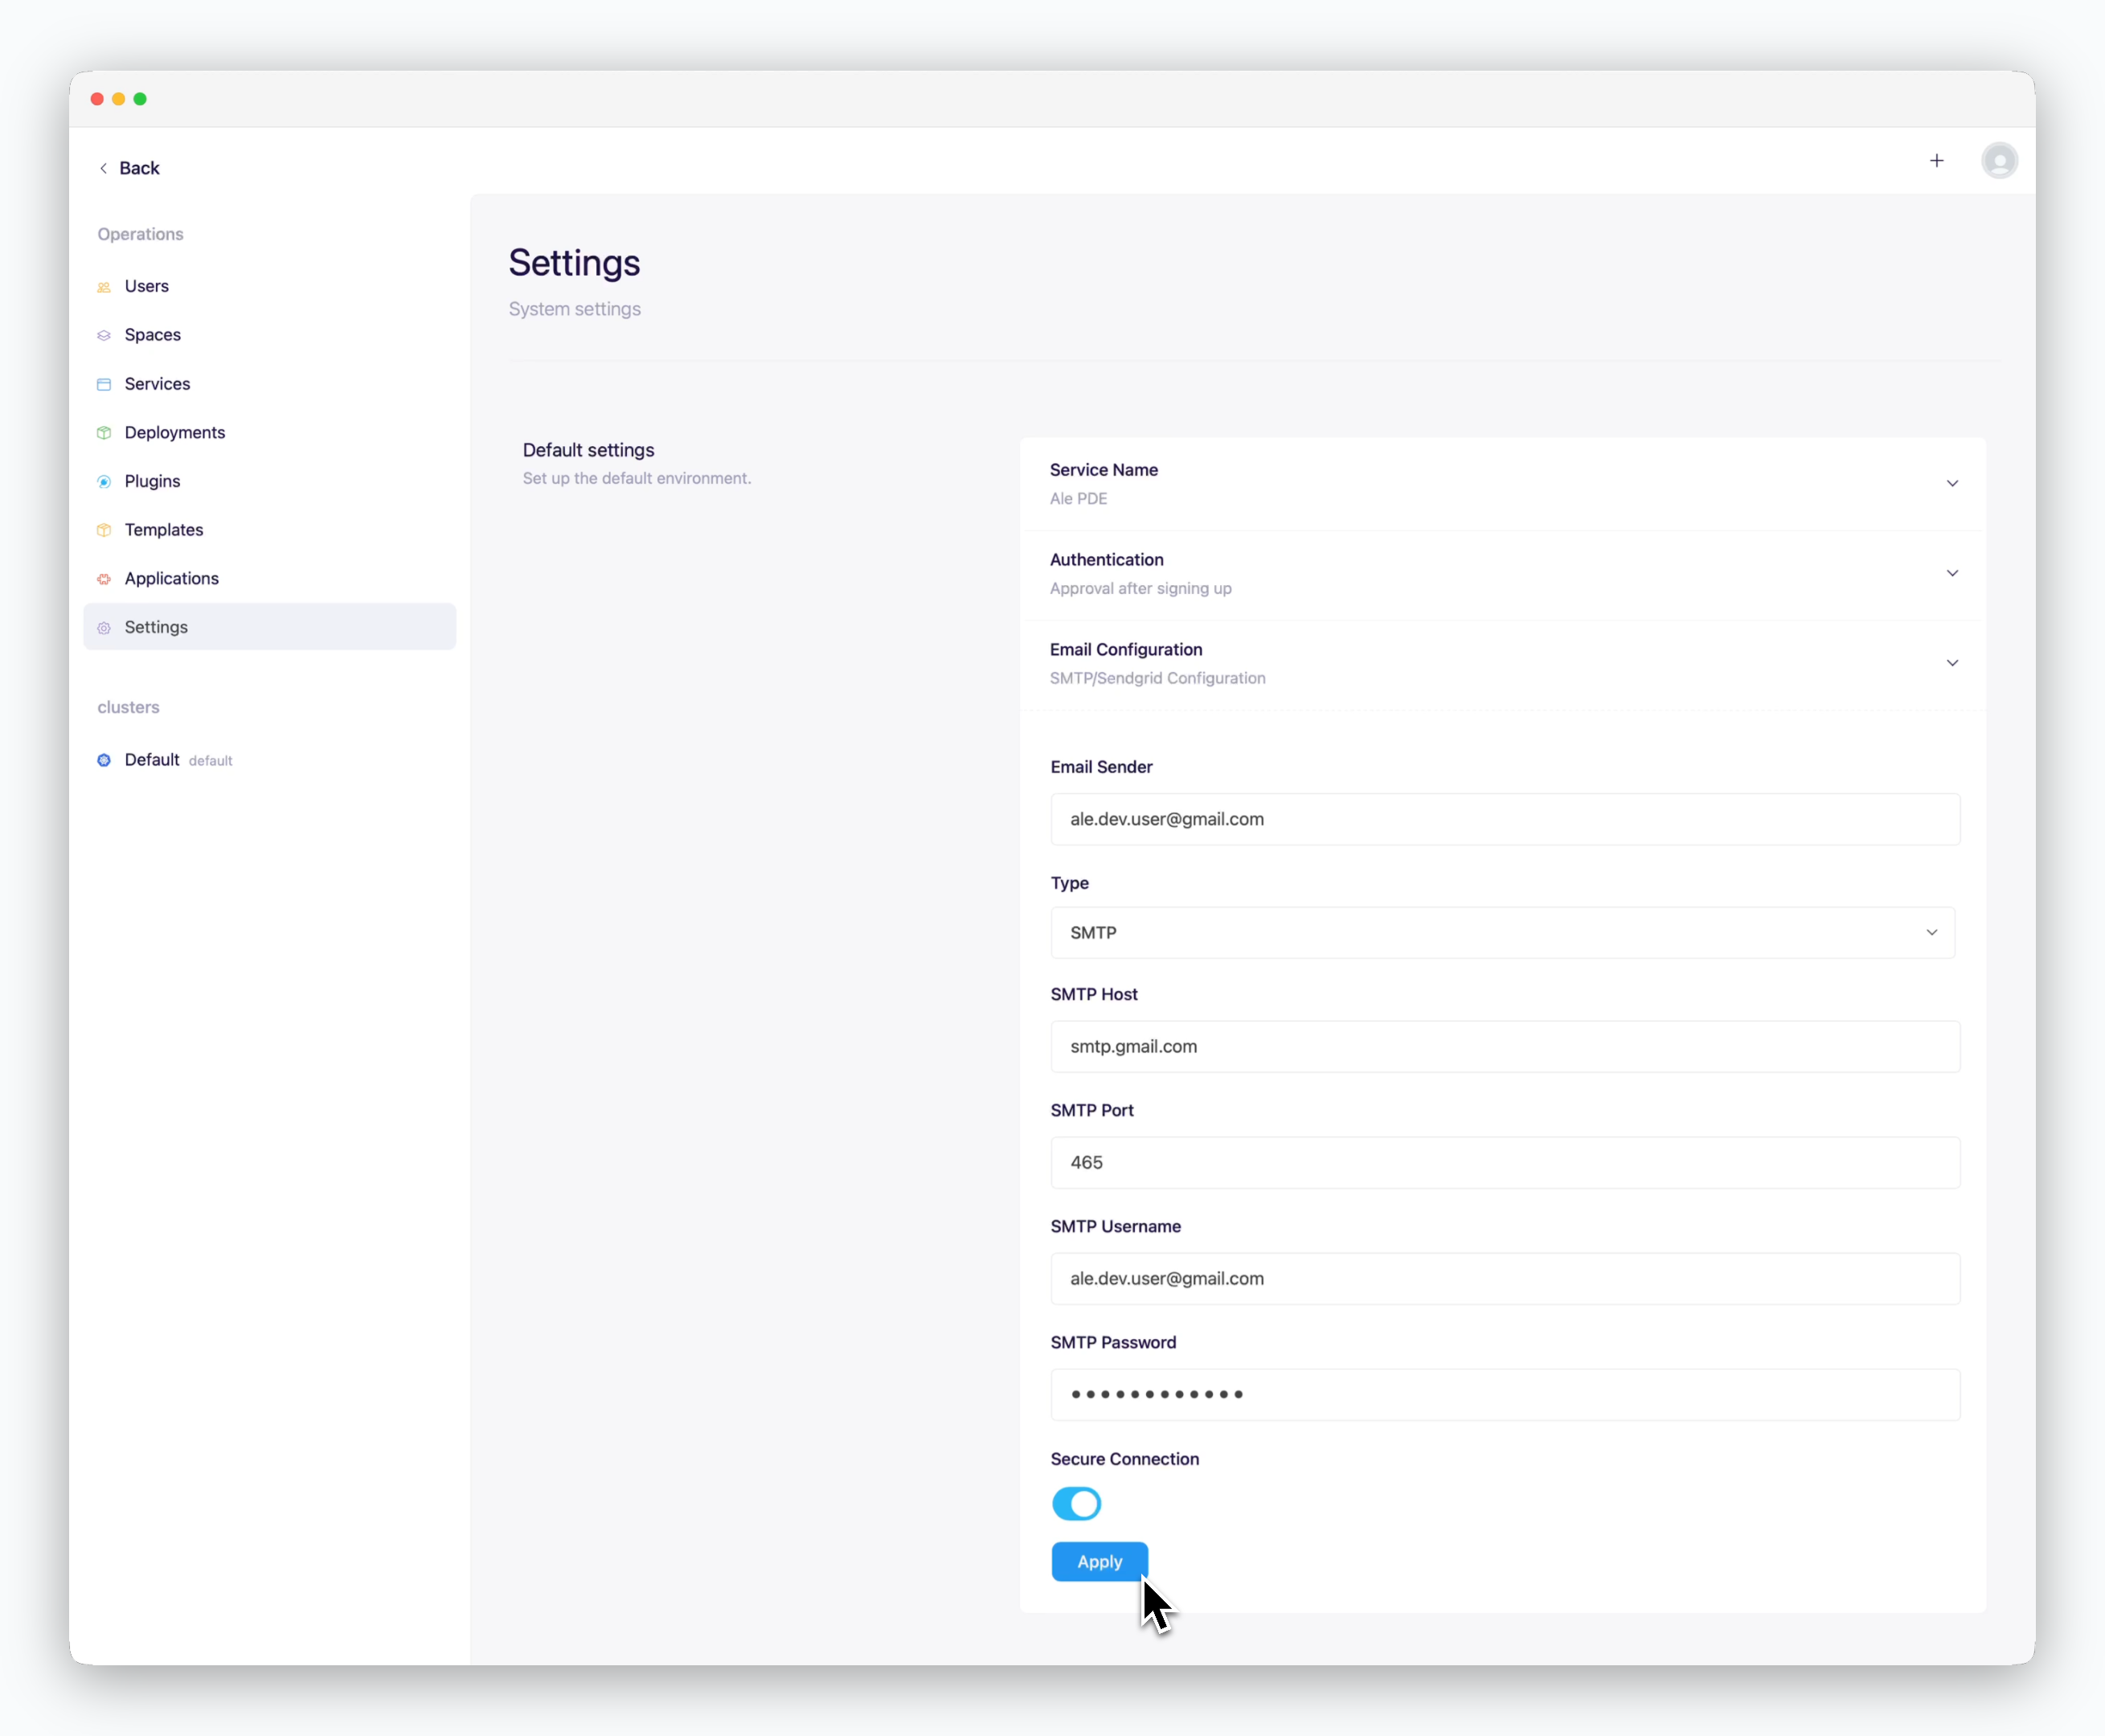 * **Email sender**: The sender's email address
* **Type**: SMTP
* **SMTP Host**: smtp.gmail.com
* **SMTP Port**: 465
* **SMTP Username**: The Gmail address used for SMTP setup
* **SMTP Password**: App password
* **Secure Connection**: Enabled
## OAuth Setup
* **Email sender**: The sender's email address
* **Type**: SMTP
* **SMTP Host**: smtp.gmail.com
* **SMTP Port**: 465
* **SMTP Username**: The Gmail address used for SMTP setup
* **SMTP Password**: App password
* **Secure Connection**: Enabled
## OAuth Setup
 ## Resource Profile Management
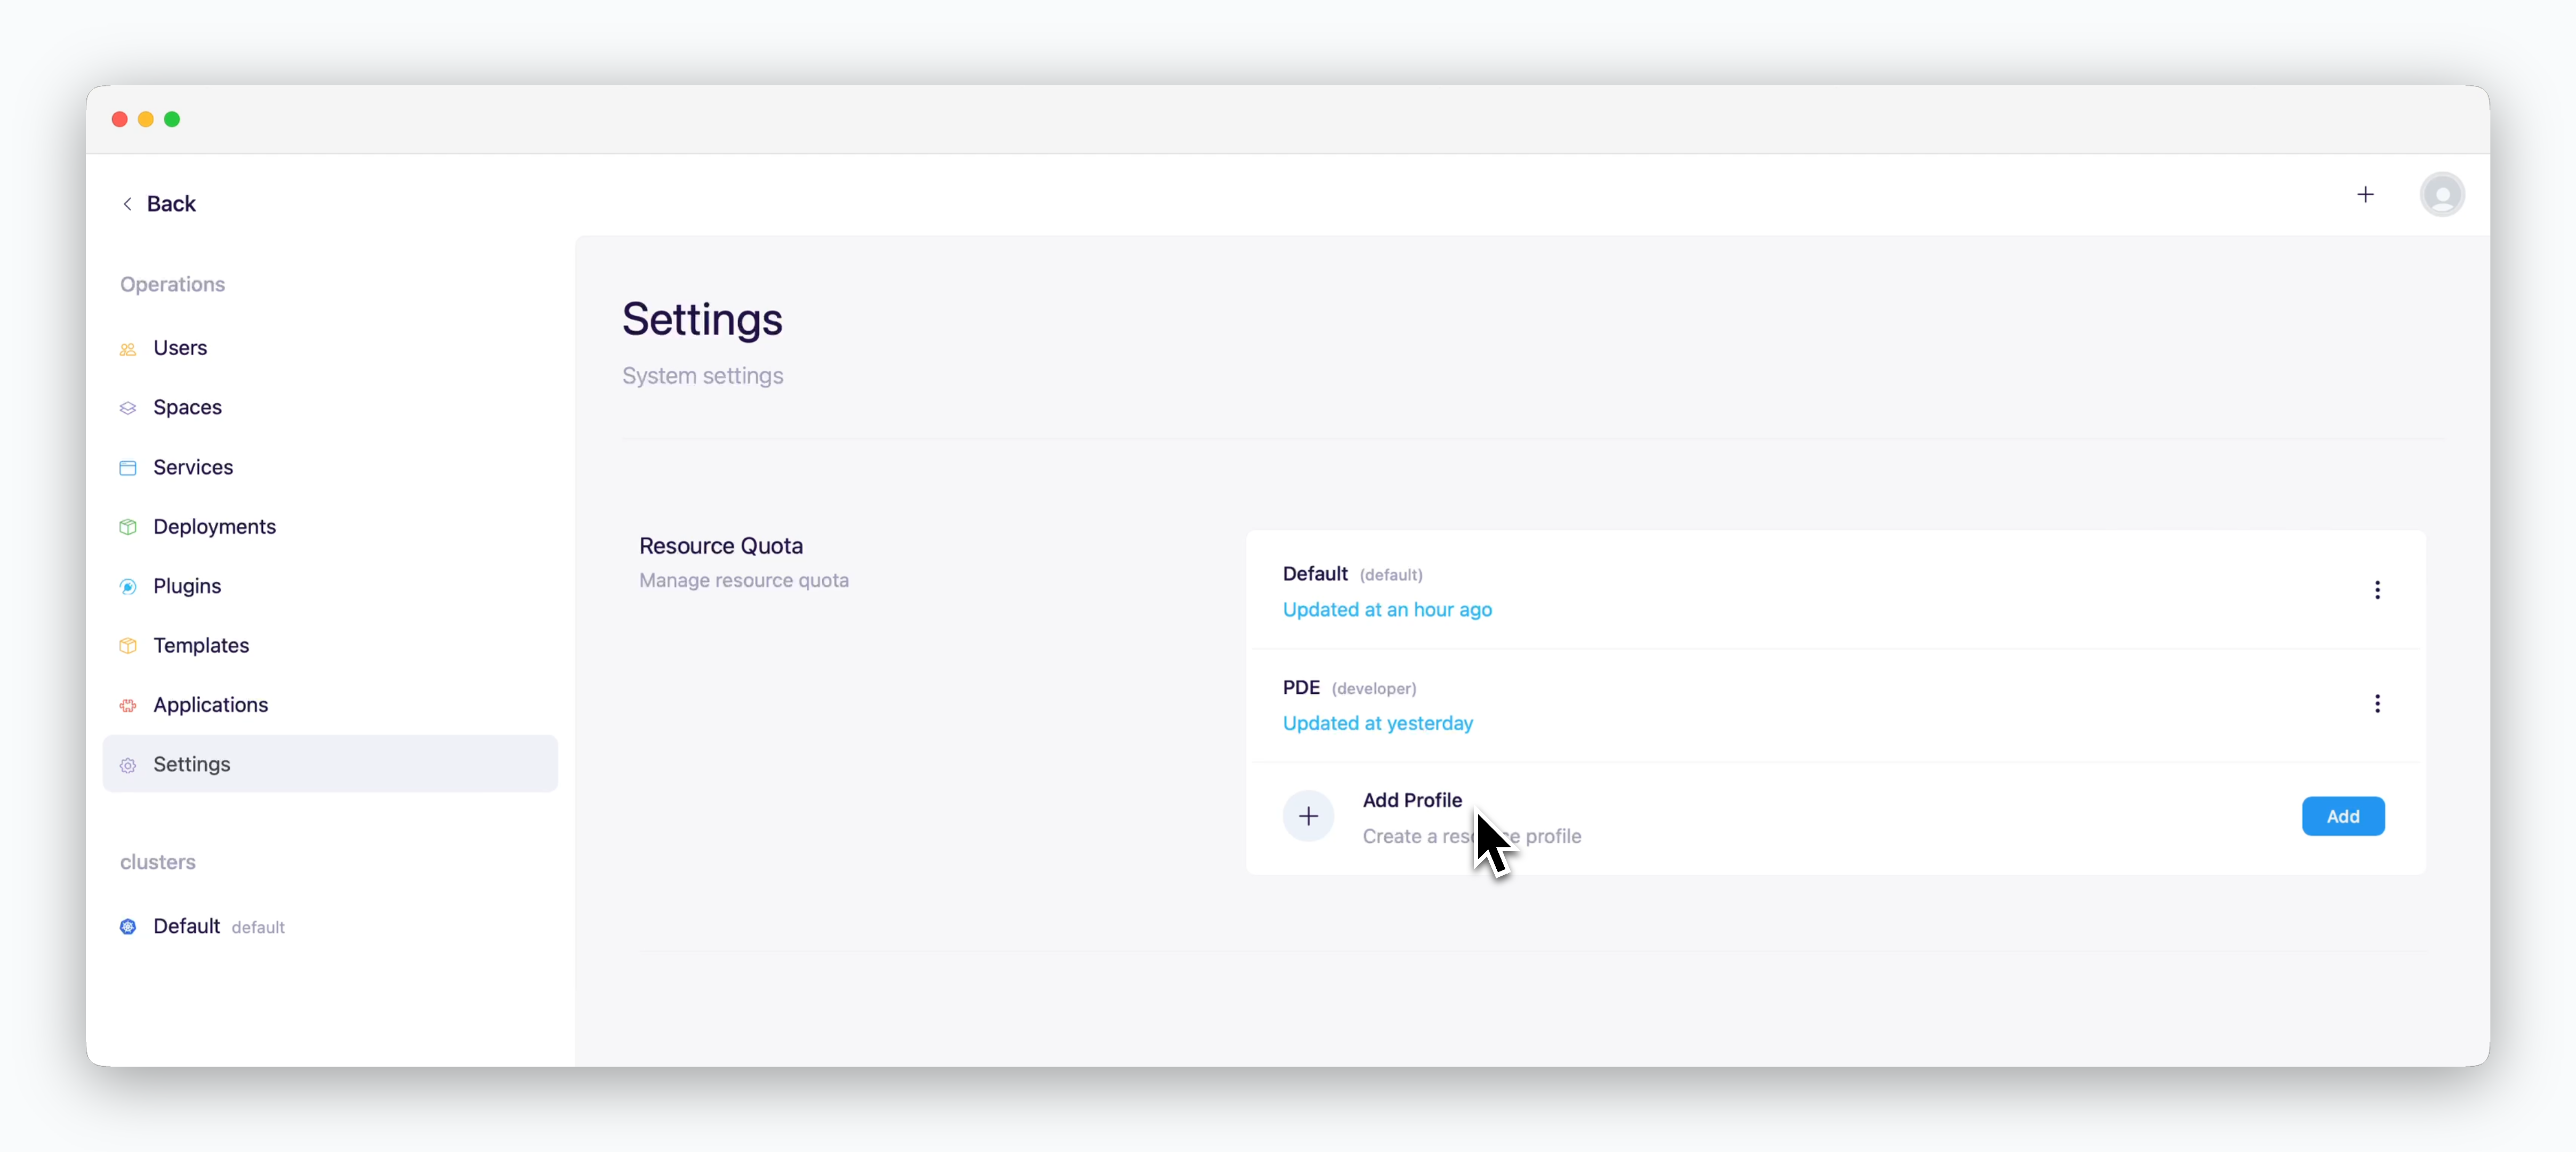 > You can allocate predefined resource sets to spaces. Configure resource profiles as described below and [easily assign resources by applying resource profiles to spaces.](/en/operations/spaces#apply-a-resource-profile)
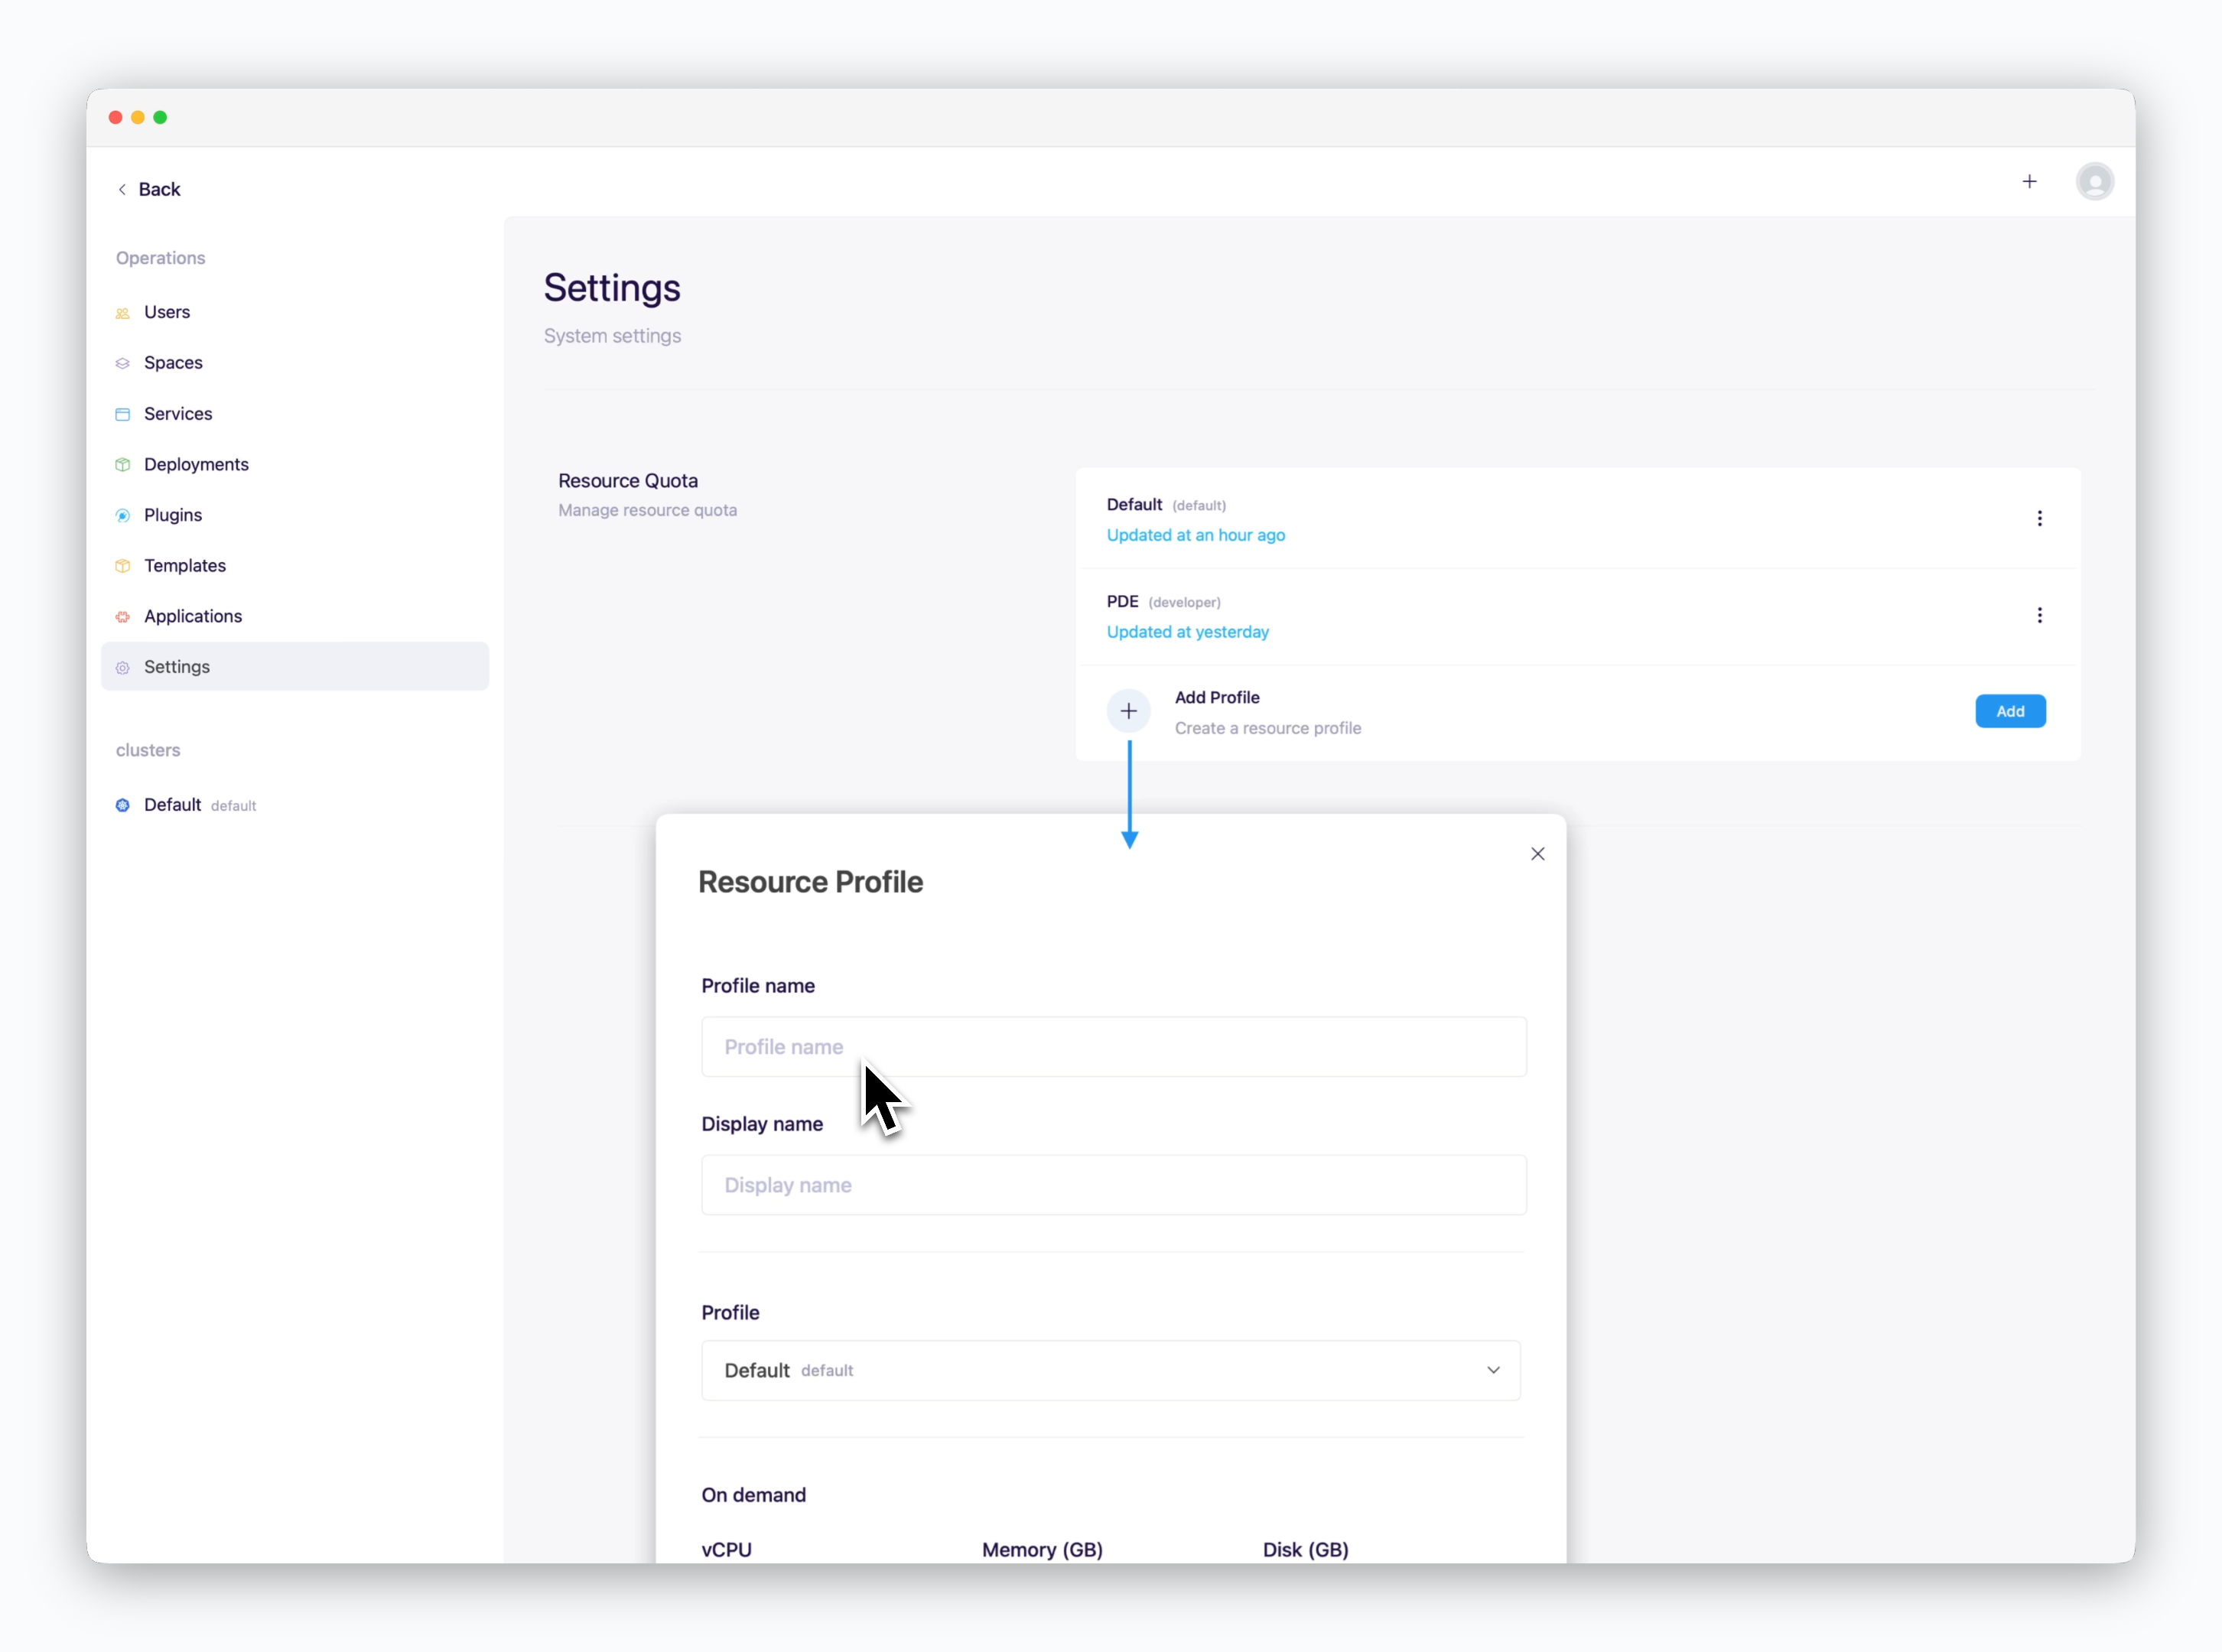 Click `Add` in the **Resource Quota** section and enter the profile name and the display name.
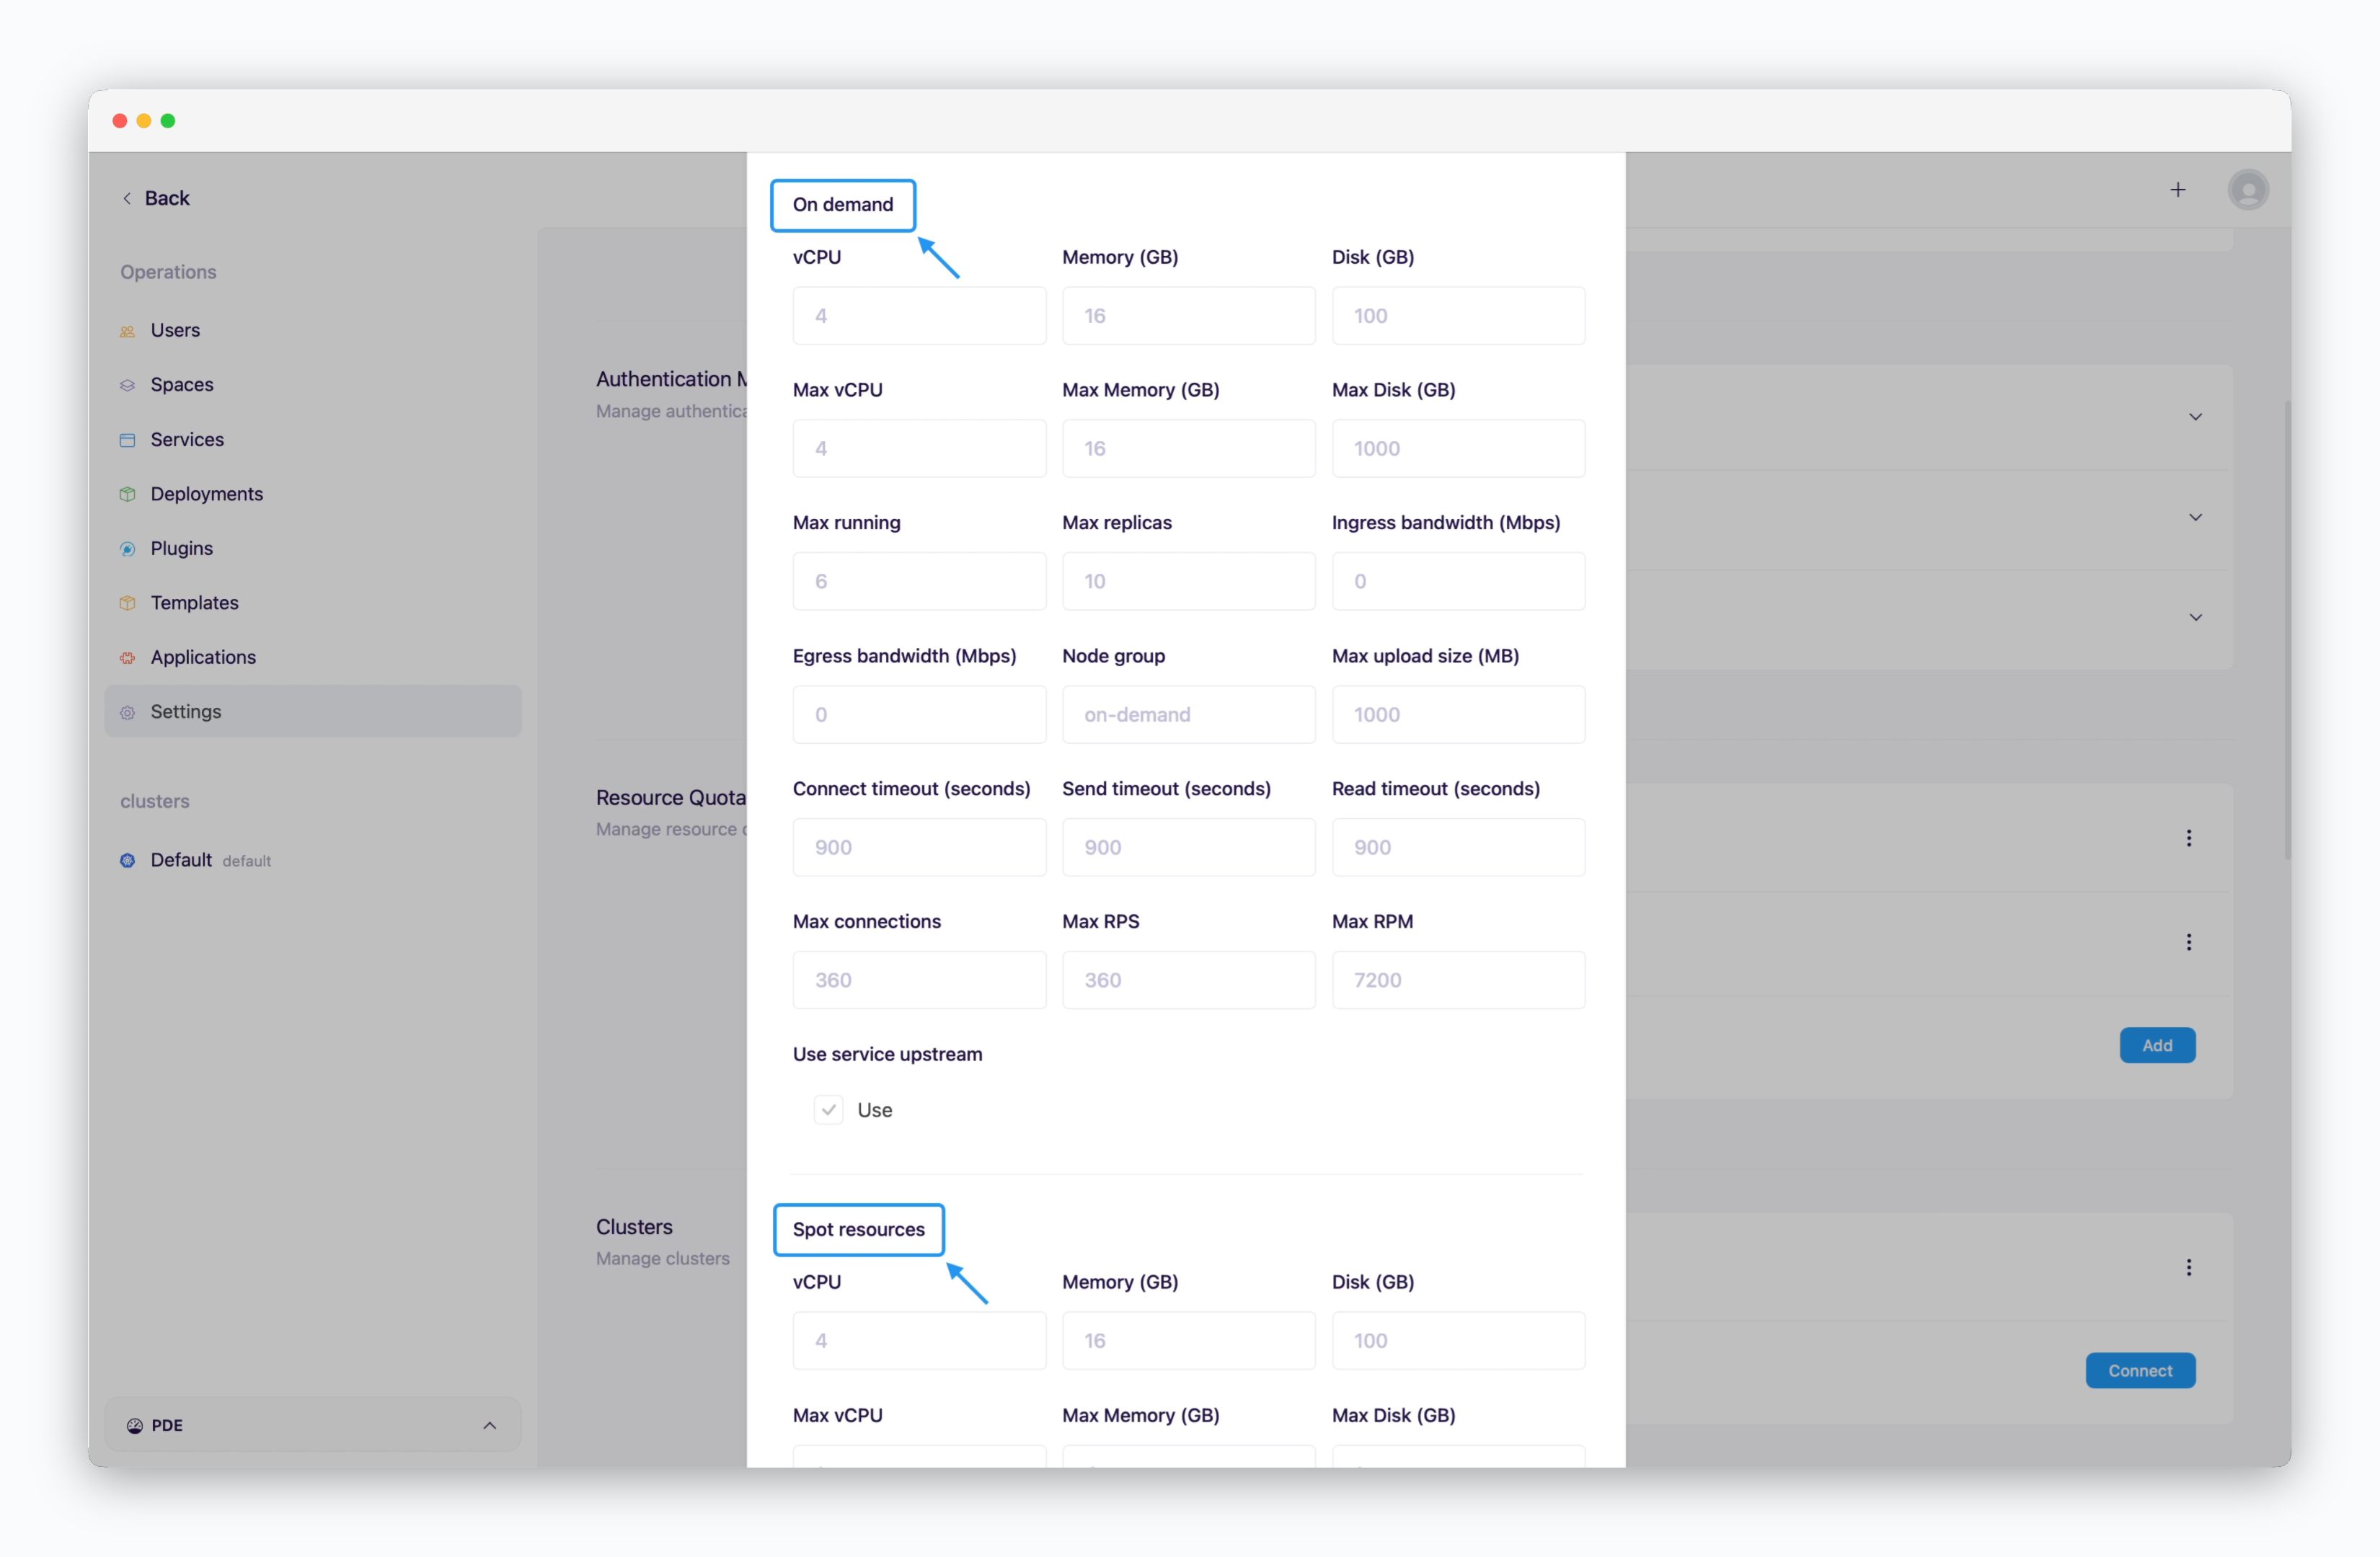 Configure resource values for each type. You can use only one type or mix both. **If no value is entered, the placeholder value will be applied.** Key fields include:
* **vCPU / Memory / Disk**: Total resources allocated to the space
* **Max vCPU / Memory / Disk**: Maximum resources per service
* **Max Running**: Maximum number of services that can be deployed
* **Max Replica**: Maximum number of replicas per service
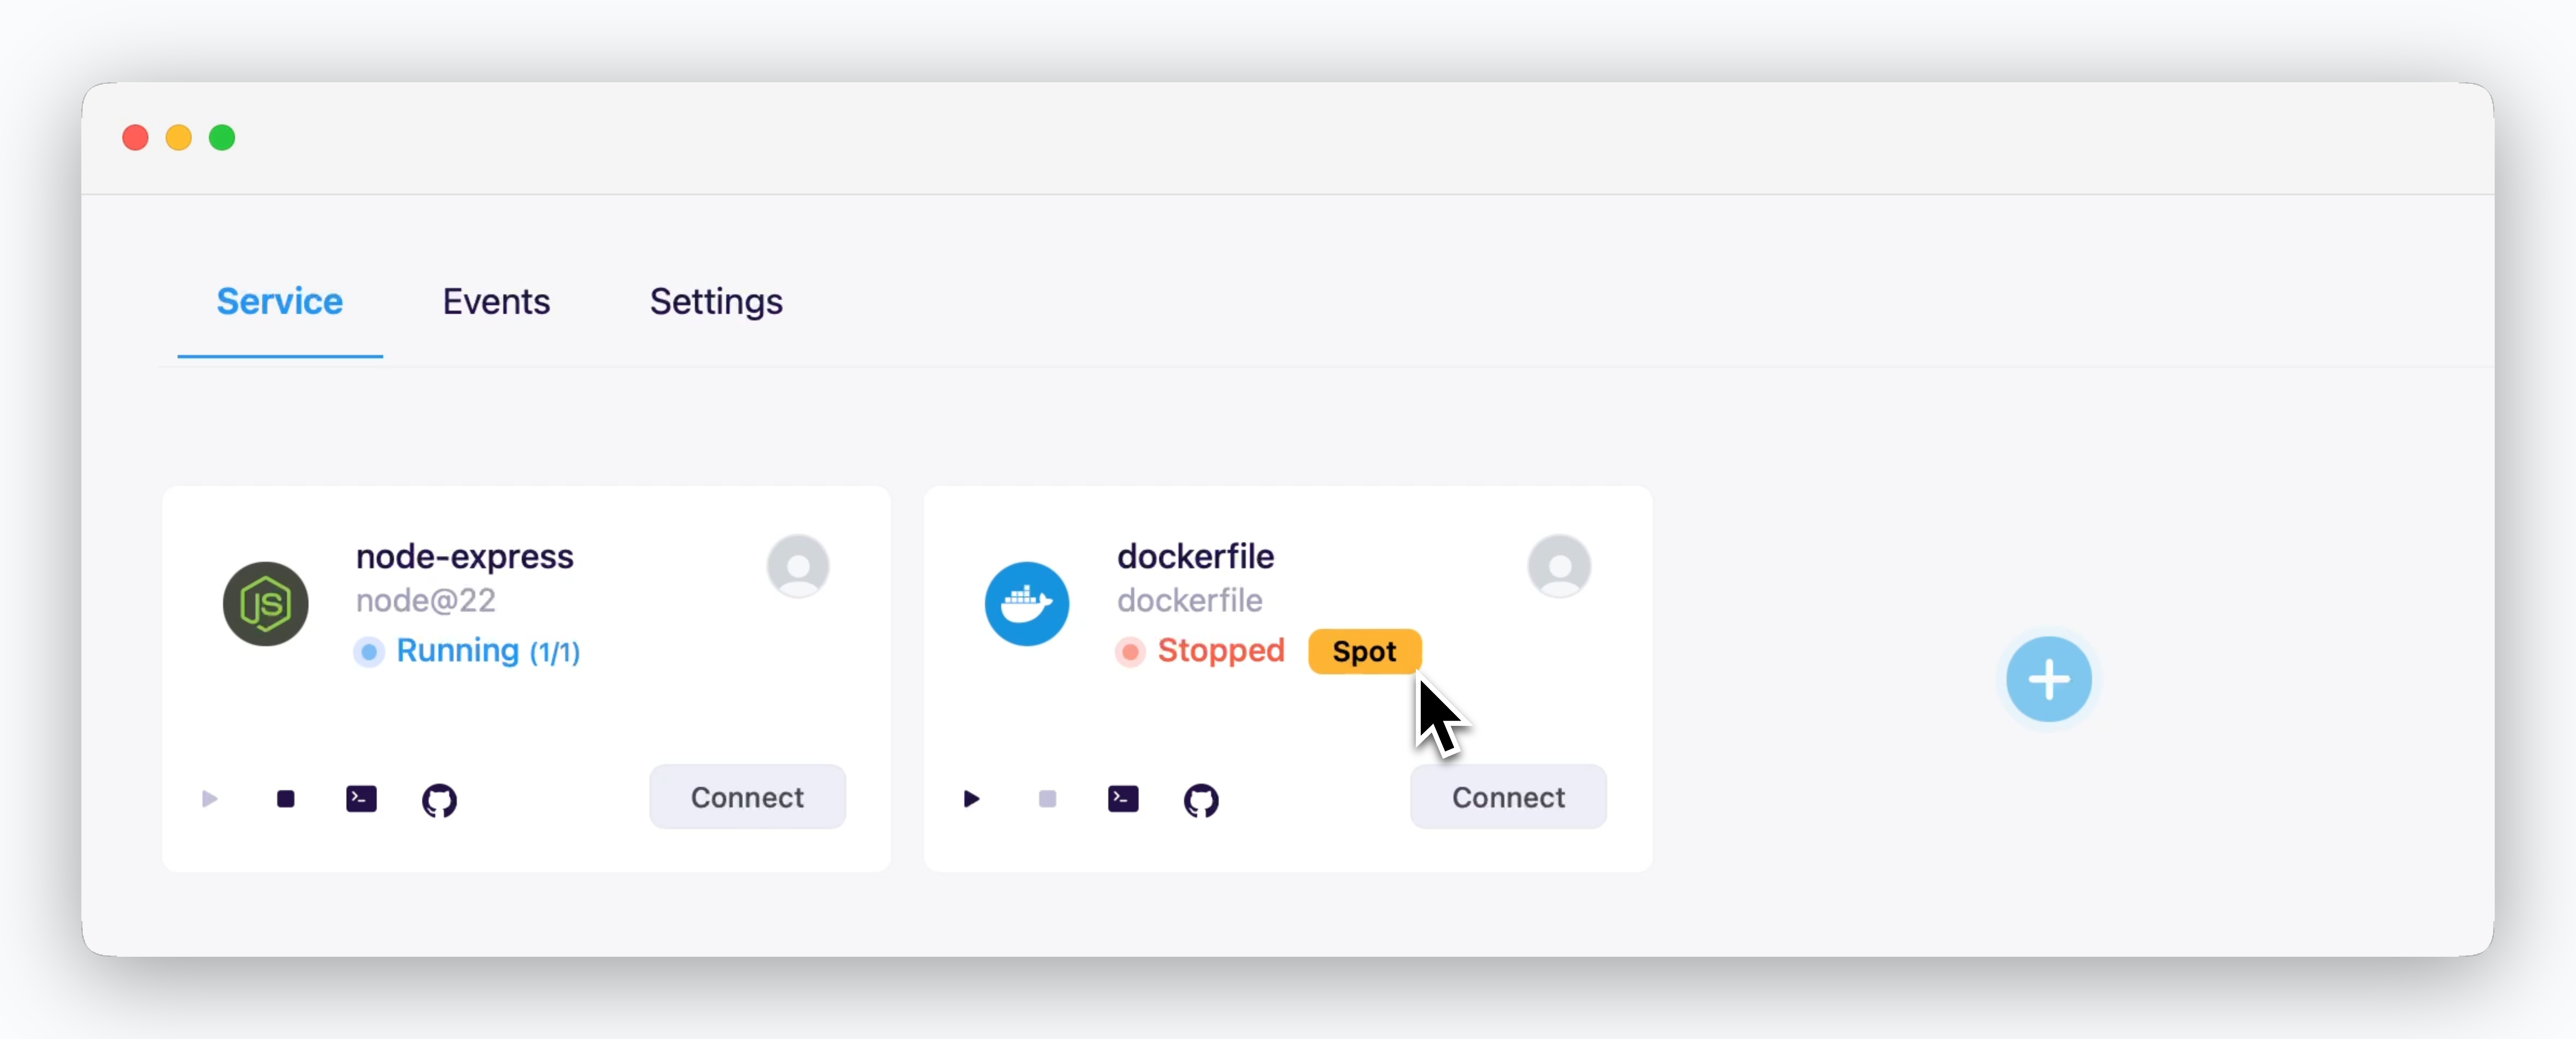
* **Node Group**: Specify `on-demand` or `spot`. See details below.
> `ale` supports resource allocation based on instance types for efficient resource management. Specify `on-demand` or `spot` in the Node Group field to allocate resources accordingly.
Even if the cluster's worker nodes consist only of on-demand instances or if spot resources are unavailable, `ale` can still deploy services labeled as spot. These services will run on on-demand instances but will retain the spot label.
Services deployed with spot resources can be removed at once using the [Bulk Remove Spot Resources](/en/operations/spaces#bulk-remove-spot-resources) feature. For temporary services, deploying with spot resources can help manage cloud costs efficiently by using this feature.
Configure resource values for each type. You can use only one type or mix both. **If no value is entered, the placeholder value will be applied.** Key fields include:
* **vCPU / Memory / Disk**: Total resources allocated to the space
* **Max vCPU / Memory / Disk**: Maximum resources per service
* **Max Running**: Maximum number of services that can be deployed
* **Max Replica**: Maximum number of replicas per service
* **Node Group**: Specify `on-demand` or `spot`. See details below.
> `ale` supports resource allocation based on instance types for efficient resource management. Specify `on-demand` or `spot` in the Node Group field to allocate resources accordingly.
Even if the cluster's worker nodes consist only of on-demand instances or if spot resources are unavailable, `ale` can still deploy services labeled as spot. These services will run on on-demand instances but will retain the spot label.
Services deployed with spot resources can be removed at once using the [Bulk Remove Spot Resources](/en/operations/spaces#bulk-remove-spot-resources) feature. For temporary services, deploying with spot resources can help manage cloud costs efficiently by using this feature.
 The availability and pricing policies for on-demand and spot instances differ by CSP. Refer to the following links for more information:
* [Amazon EC2 Spot](https://aws.amazon.com/ec2/spot/details/)
* [GCP Spot VM](https://cloud.google.com/compute/docs/instances/spot)
* [Azure Spot VM](https://learn.microsoft.com/azure/virtual-machines/spot-vms)
The availability and pricing policies for on-demand and spot instances differ by CSP. Refer to the following links for more information:
* [Amazon EC2 Spot](https://aws.amazon.com/ec2/spot/details/)
* [GCP Spot VM](https://cloud.google.com/compute/docs/instances/spot)
* [Azure Spot VM](https://learn.microsoft.com/azure/virtual-machines/spot-vms)
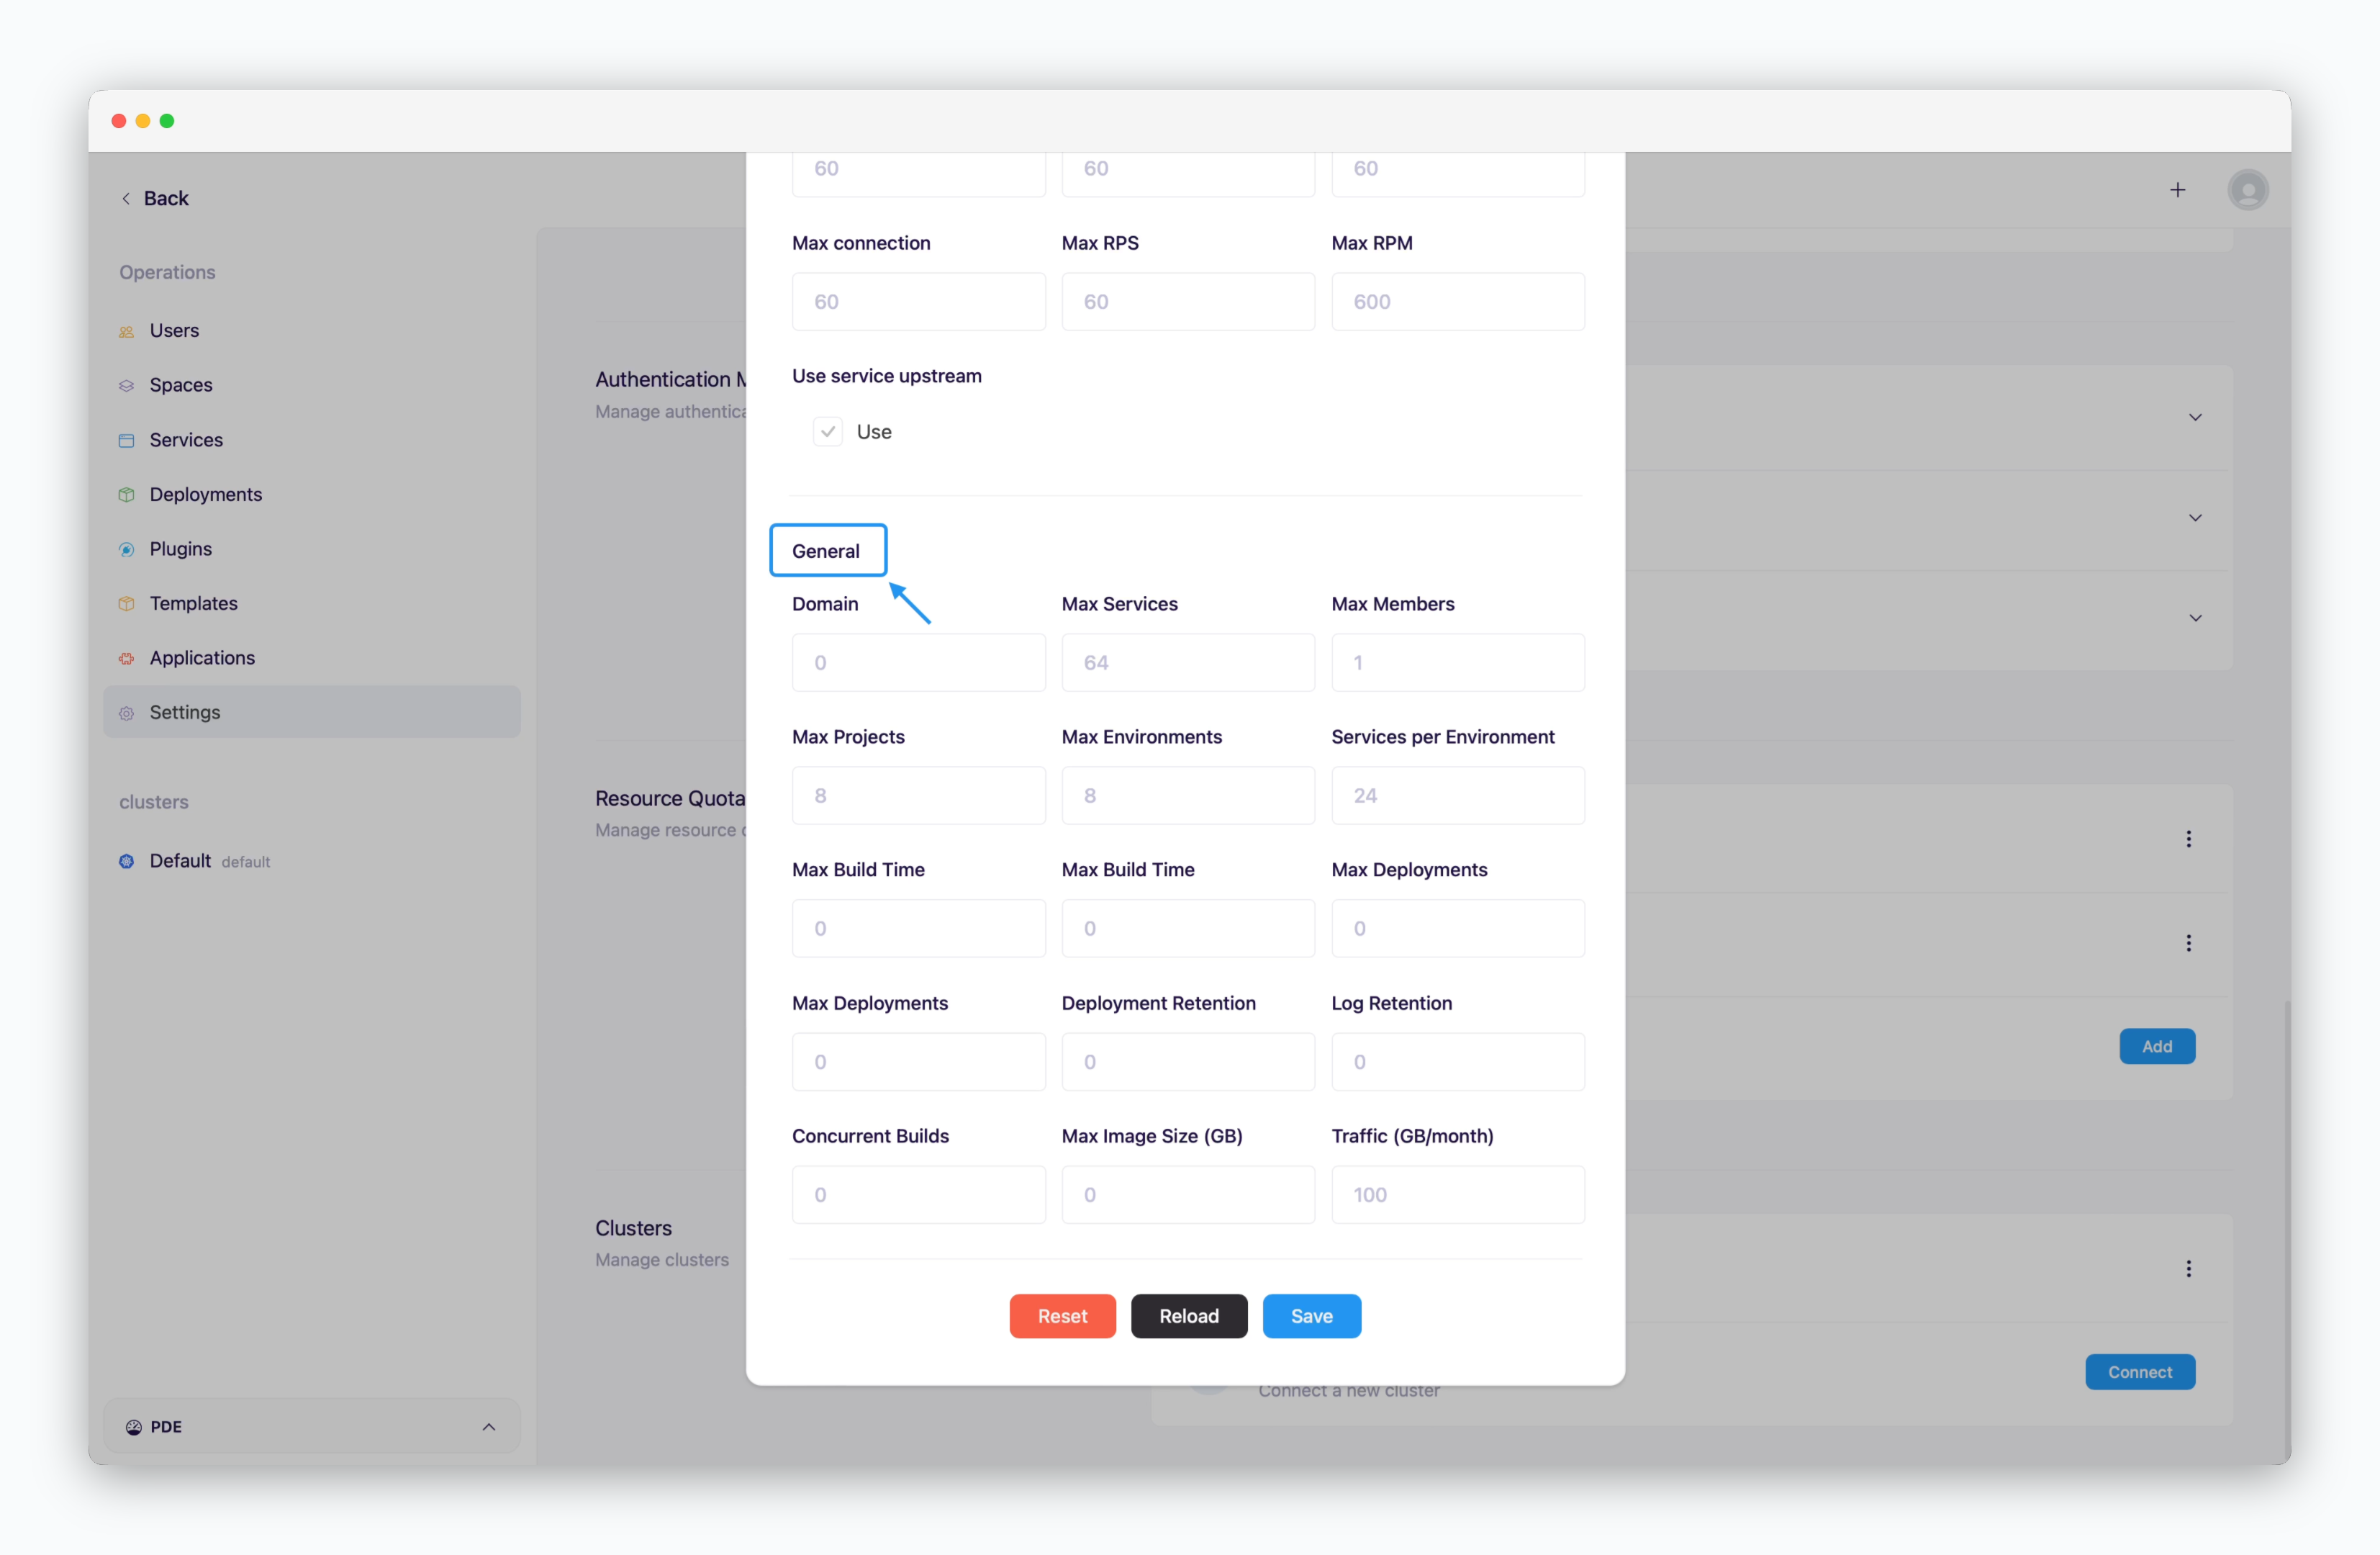 * **Domain**: Number of allowed custom domains (set to 0 to disable)
* **Max Services**: Maximum number of deployable services (including on-demand and spot)
* **Max Members**: Maximum number of team members allowed in the space
* **Max Projects**: Maximum number of projects in the space
* **Services per Environment**: Maximum services per environment(namespace)
* **Others**: If the placeholder value is 0, it will be applied as unlimited.
When a space is created, the `Default` profile is applied by default.
## Add Cluster
* **Domain**: Number of allowed custom domains (set to 0 to disable)
* **Max Services**: Maximum number of deployable services (including on-demand and spot)
* **Max Members**: Maximum number of team members allowed in the space
* **Max Projects**: Maximum number of projects in the space
* **Services per Environment**: Maximum services per environment(namespace)
* **Others**: If the placeholder value is 0, it will be applied as unlimited.
When a space is created, the `Default` profile is applied by default.
## Add Cluster
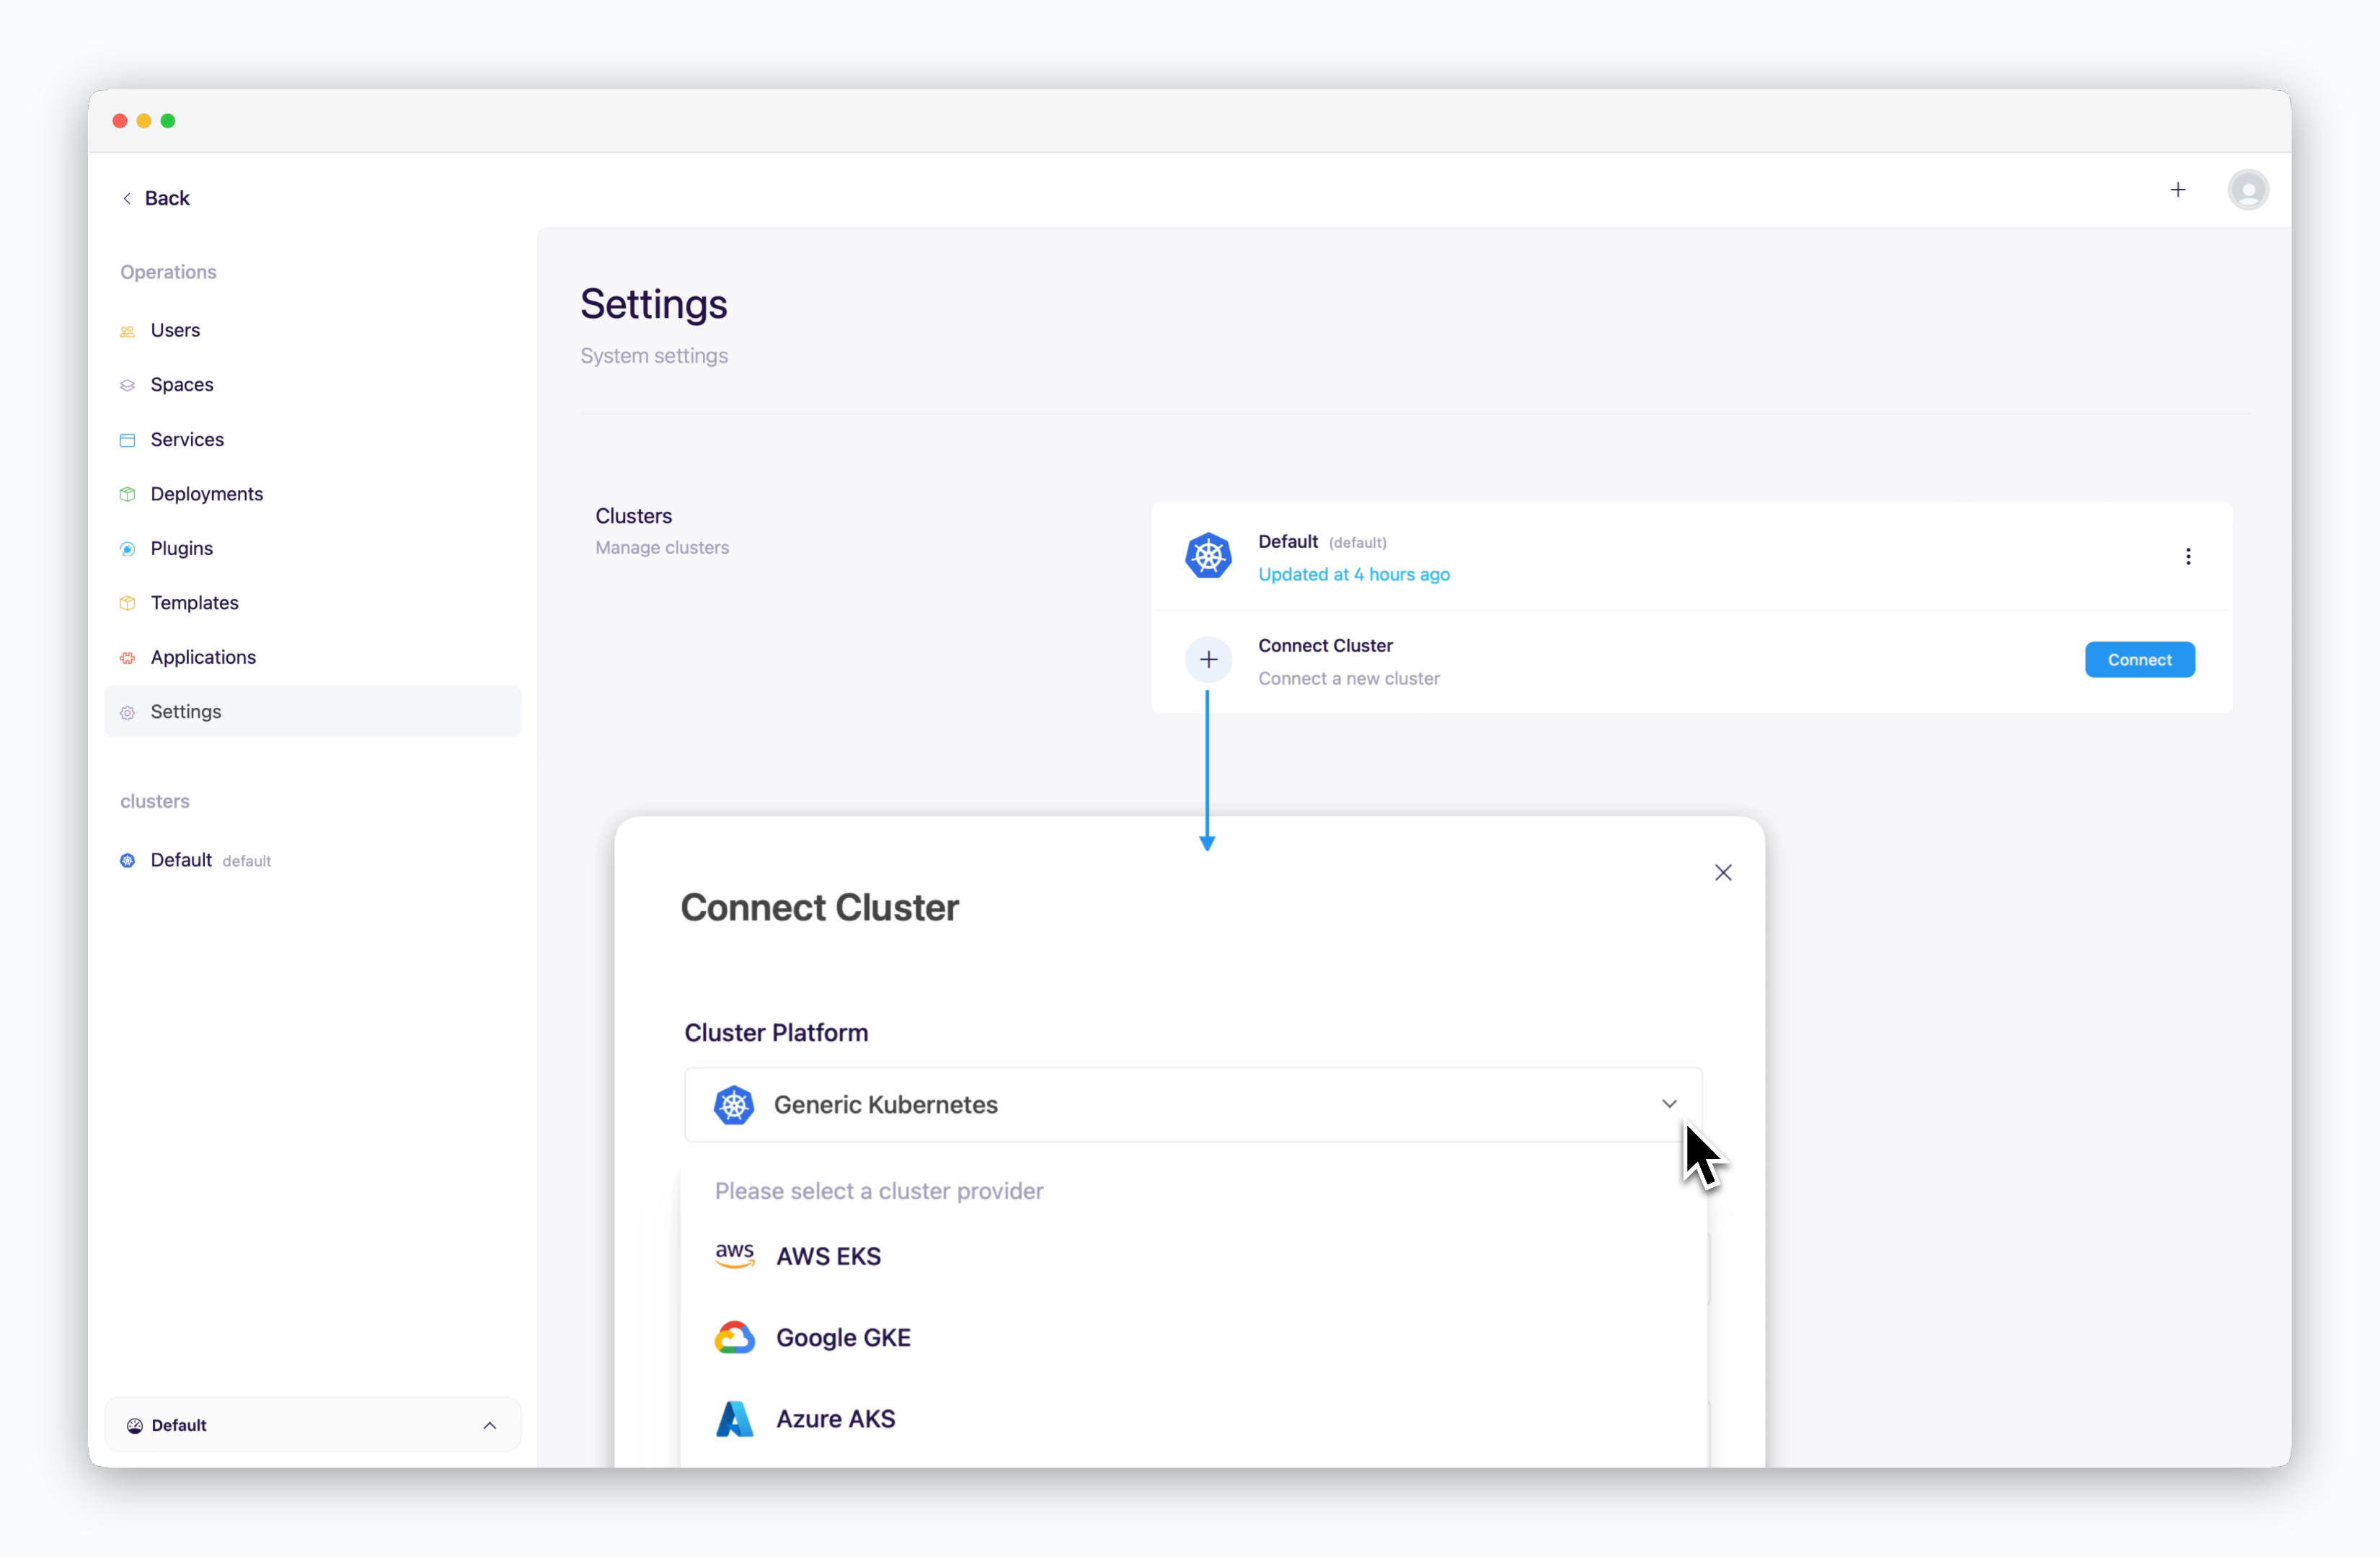 > `ale` supports connecting to Kubernetes clusters from major CSPs as well as generic clusters. For more details on adding clusters, refer to the [Multi-Cluster page](/en/advanced/multi-cluster).