> ## Documentation Index
> Fetch the complete documentation index at: https://docs.ale.run/llms.txt
> Use this file to discover all available pages before exploring further.
# AWS ECR
> You can configure AWS **Elastic Container Registry** as the repository for storing images built in `ale` and for use during deployment.
***
## Create AWS IAM User
### Create User
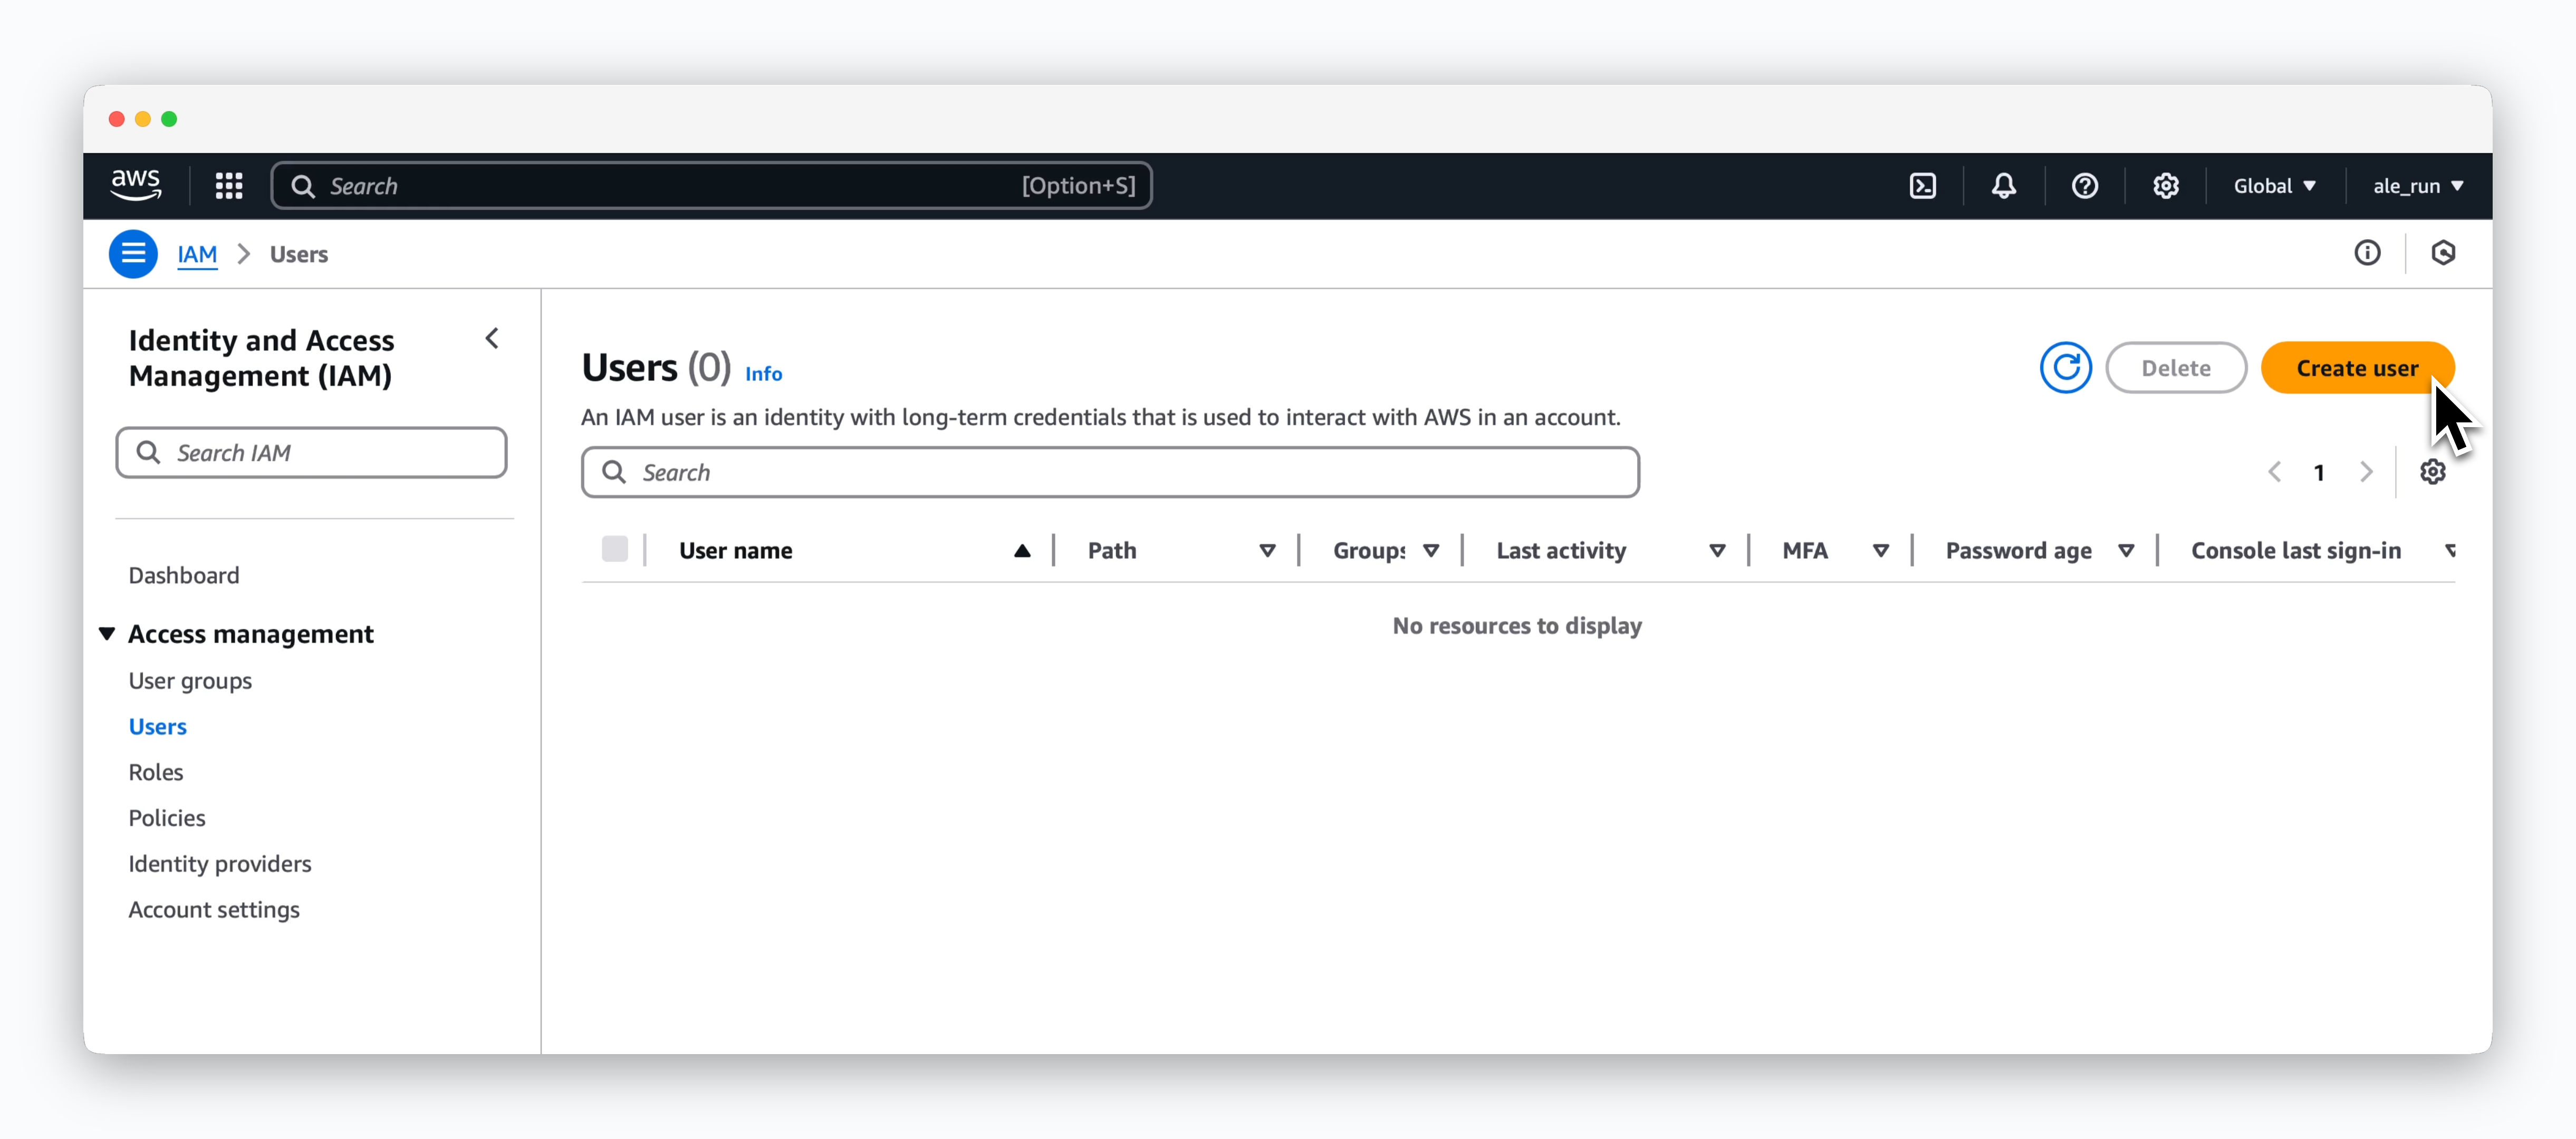 > Access the `IAM > Access management > Users` page and click `Create user`.
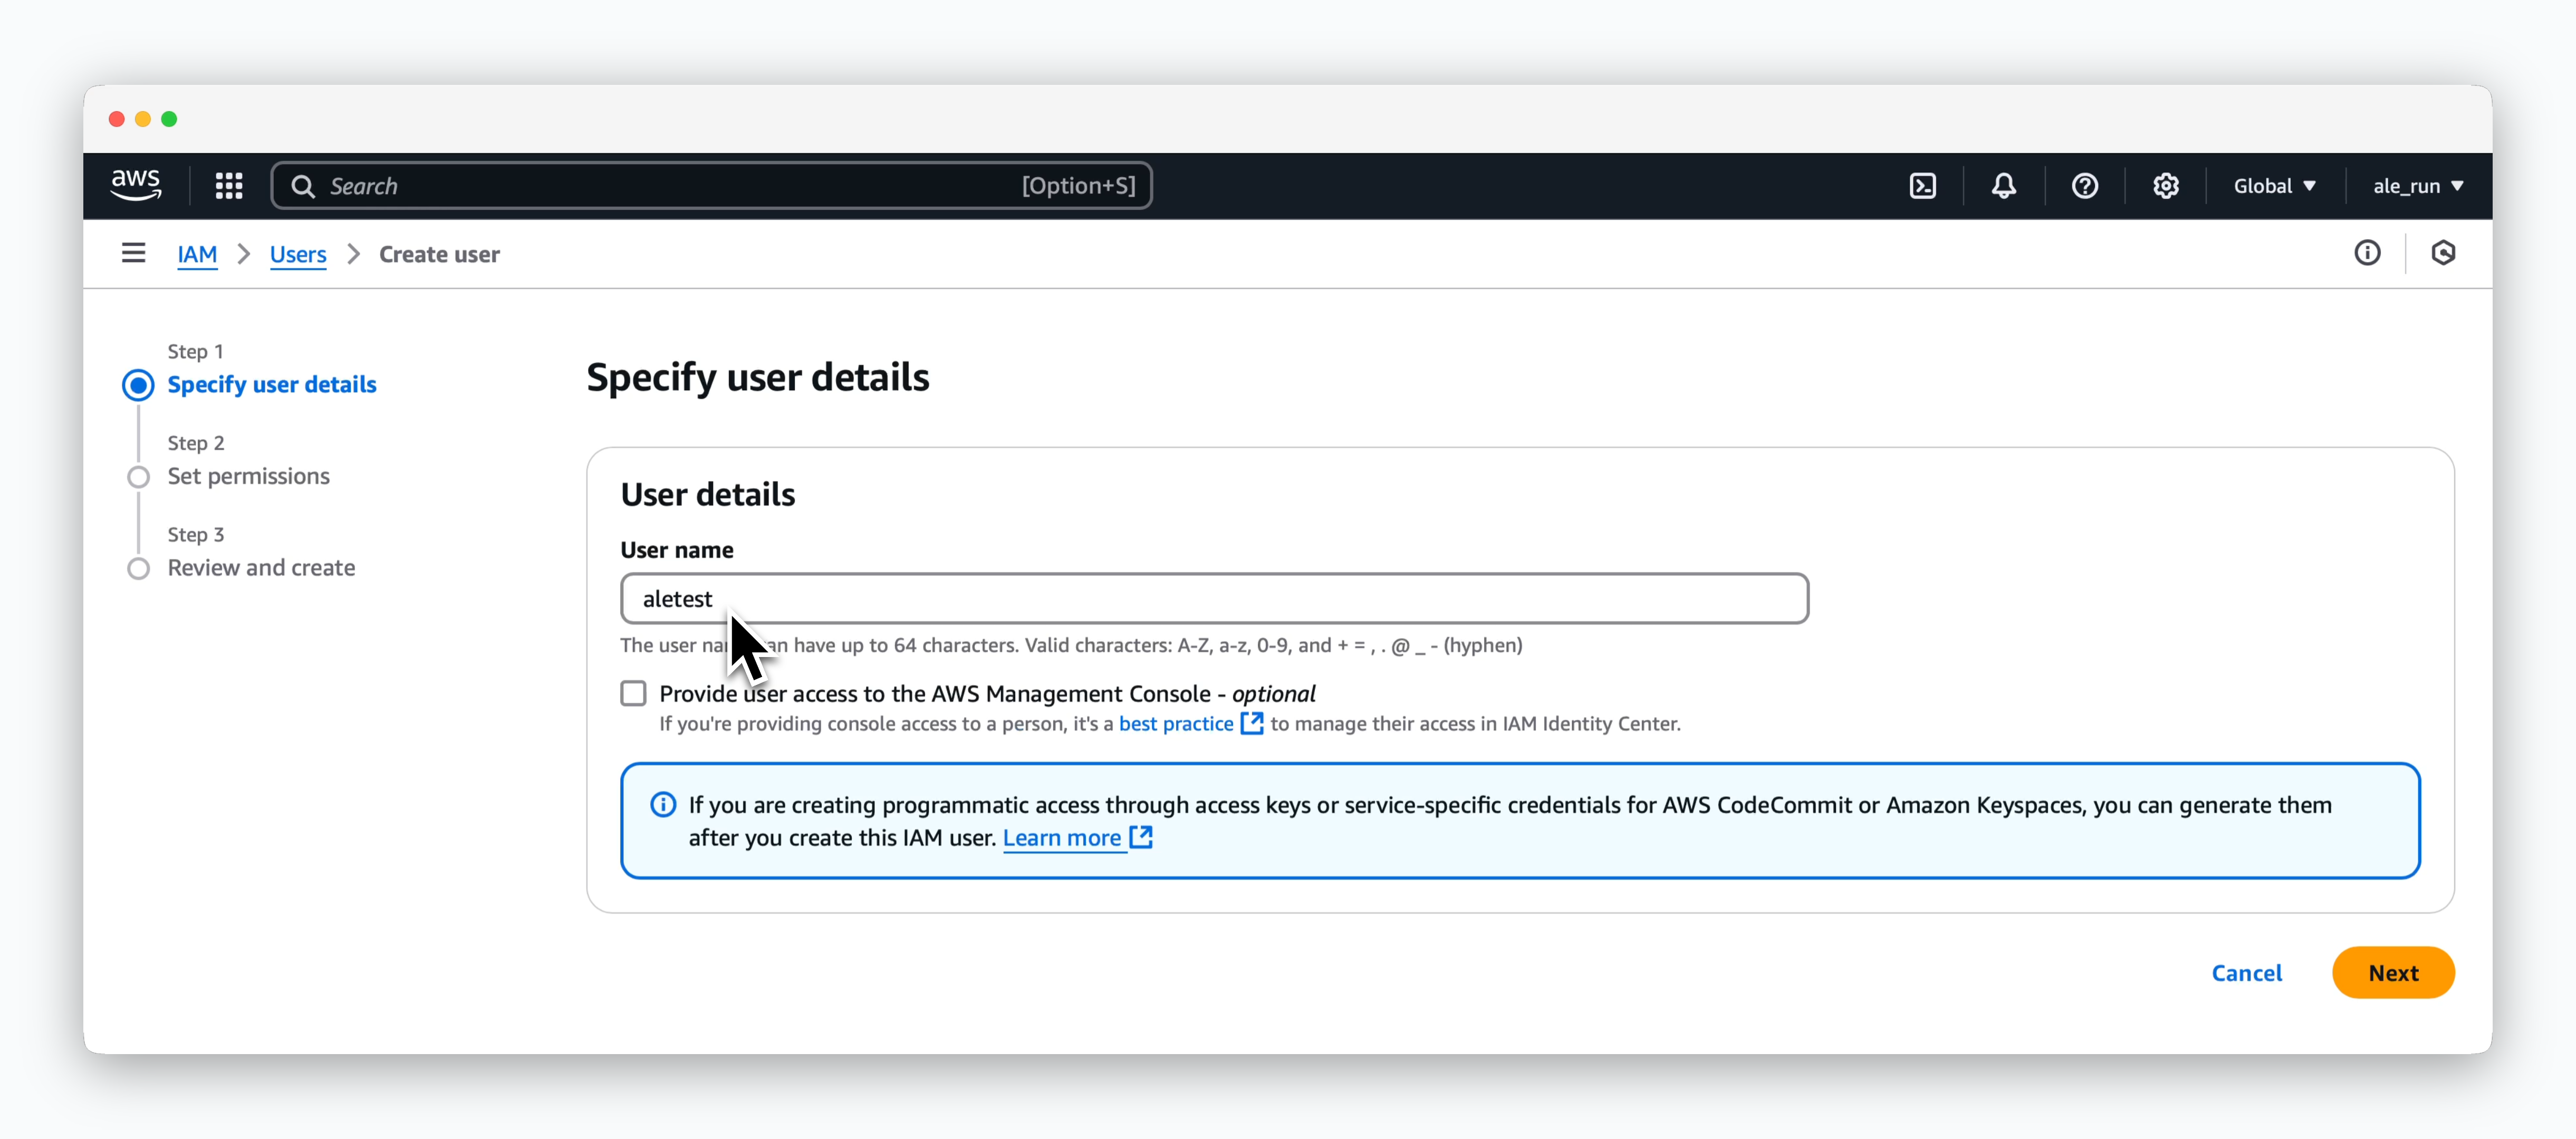 > Enter your desired **User name** and proceed to the next step.
### Grant Permissions
> Enter your desired **User name** and proceed to the next step.
### Grant Permissions
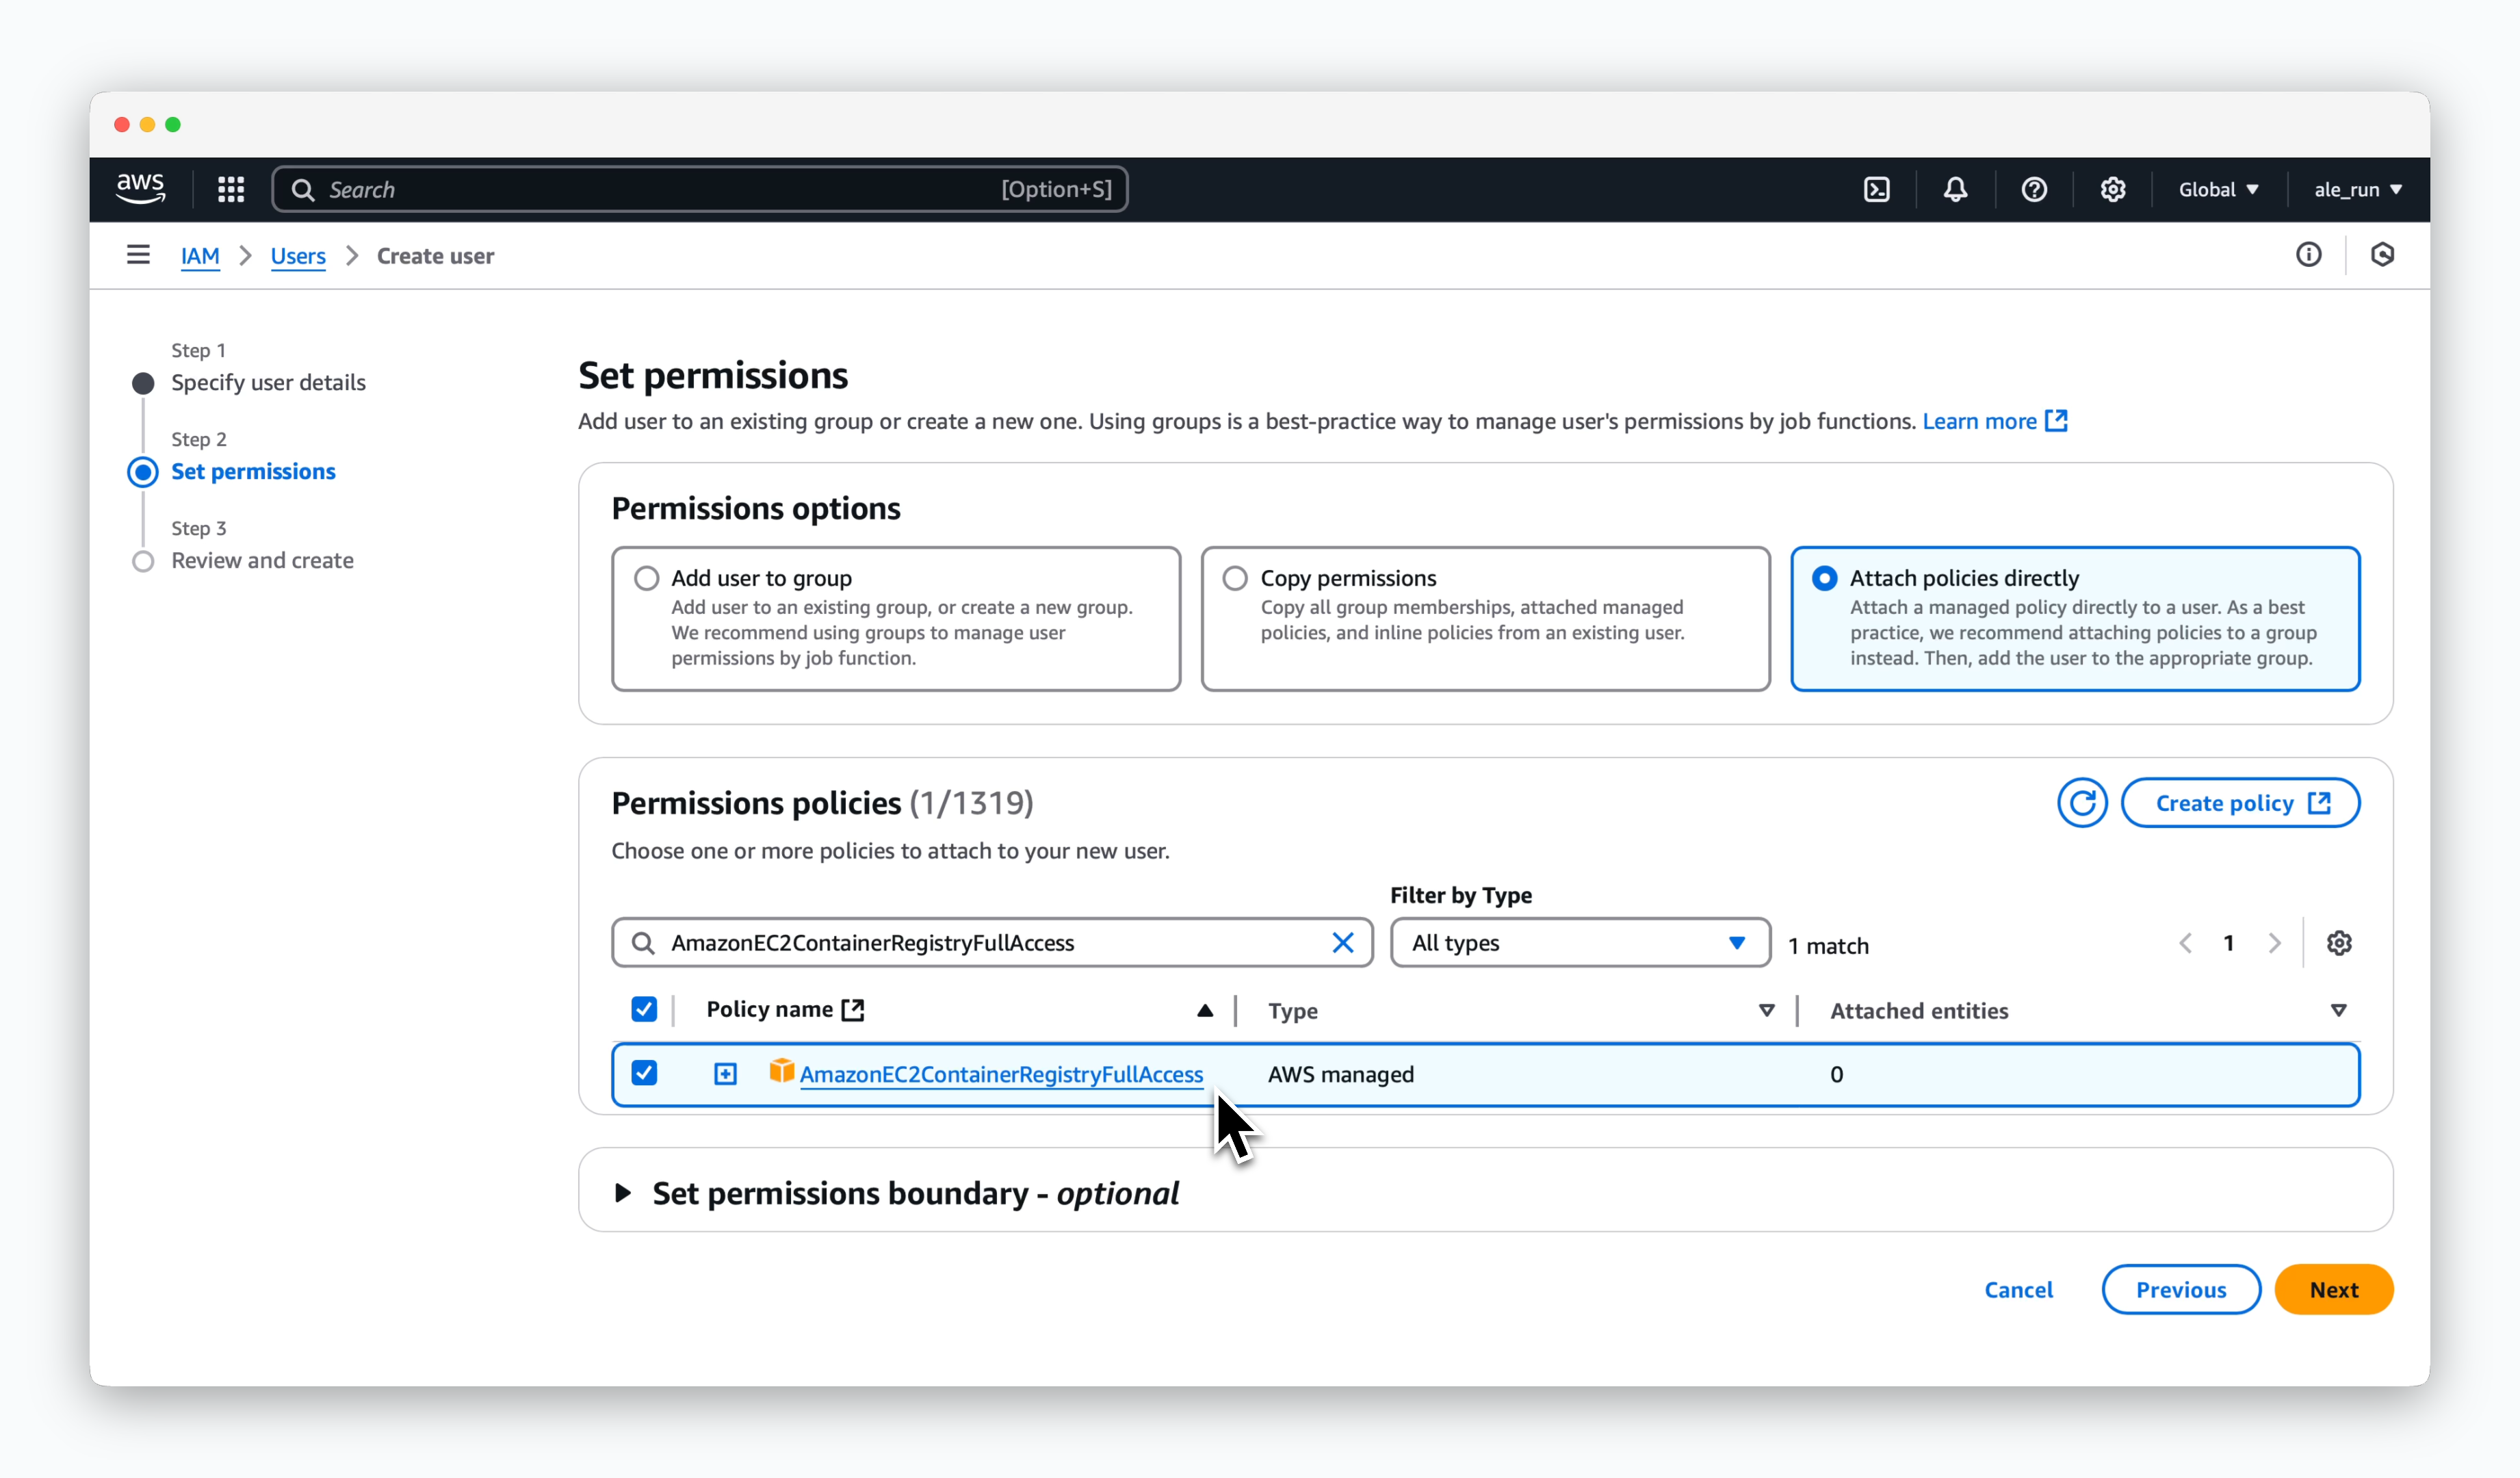 > Under permission options, select **Attach policies directly**, search for **AmazonEC2ContainerRegistryFullAccess**, check the checkbox, and proceed to the next step.
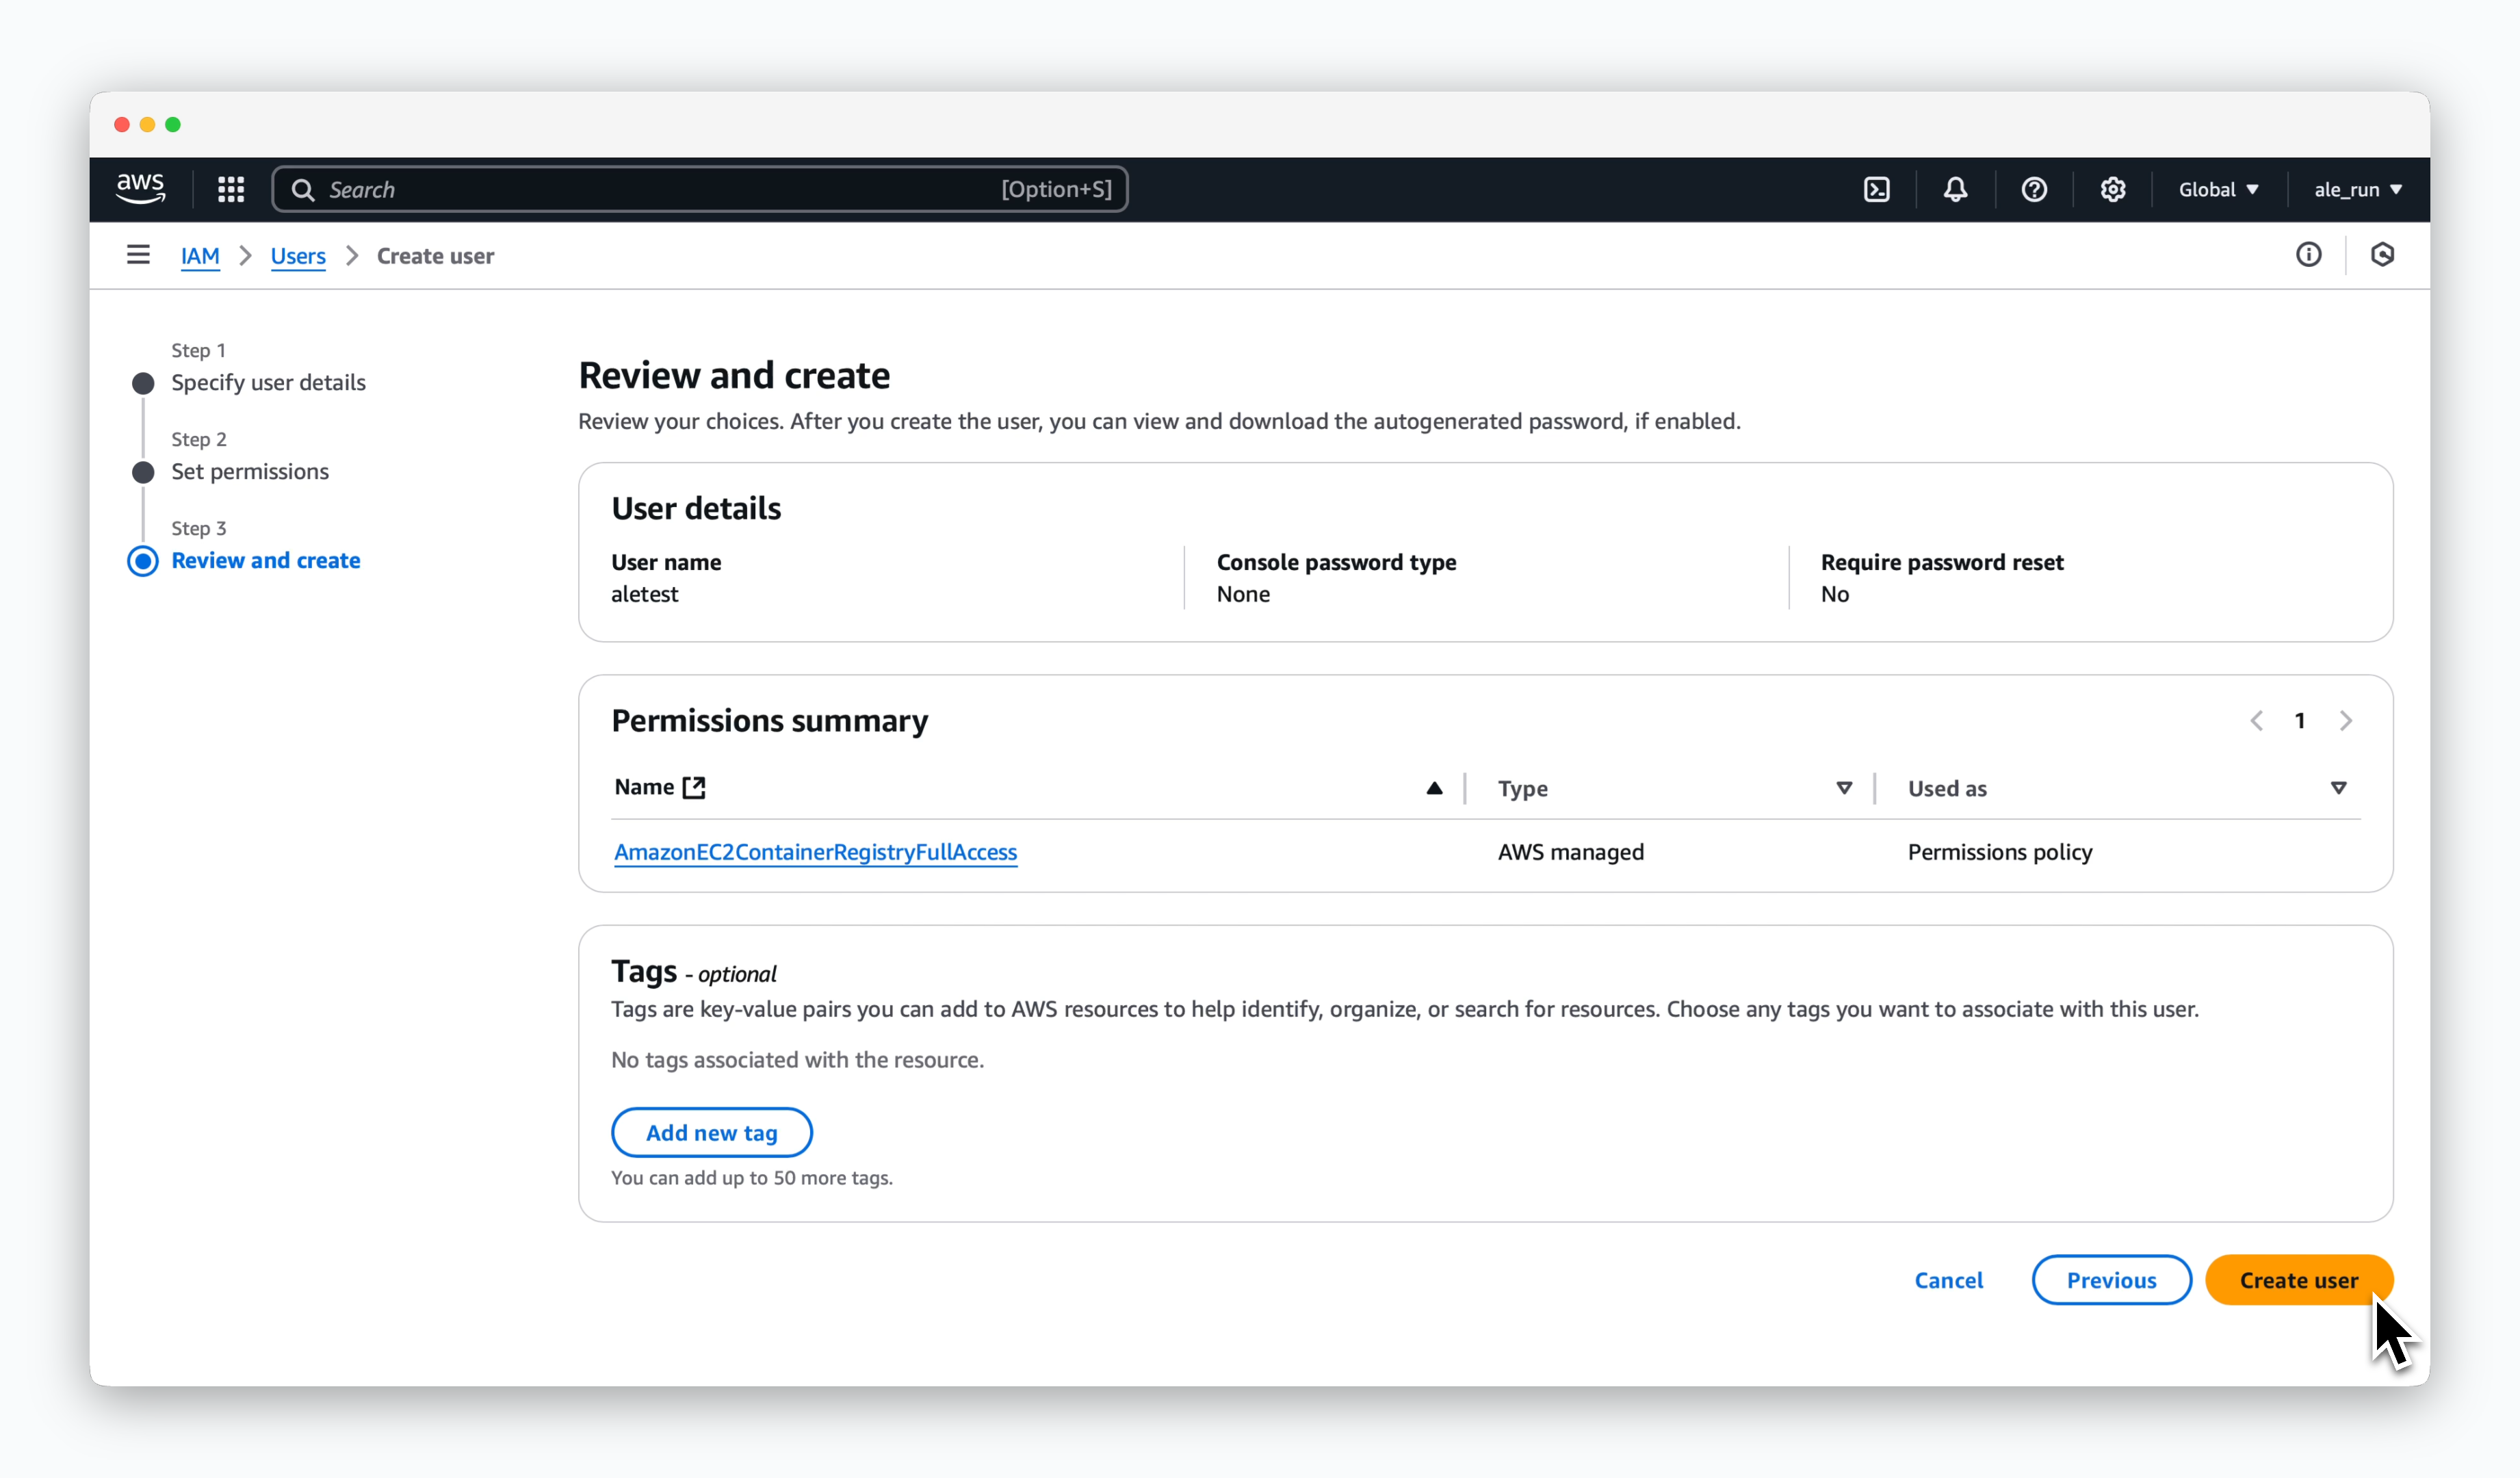 > Click `Create user` without any additional settings.
## Generate Access Key
> Click `Create user` without any additional settings.
## Generate Access Key
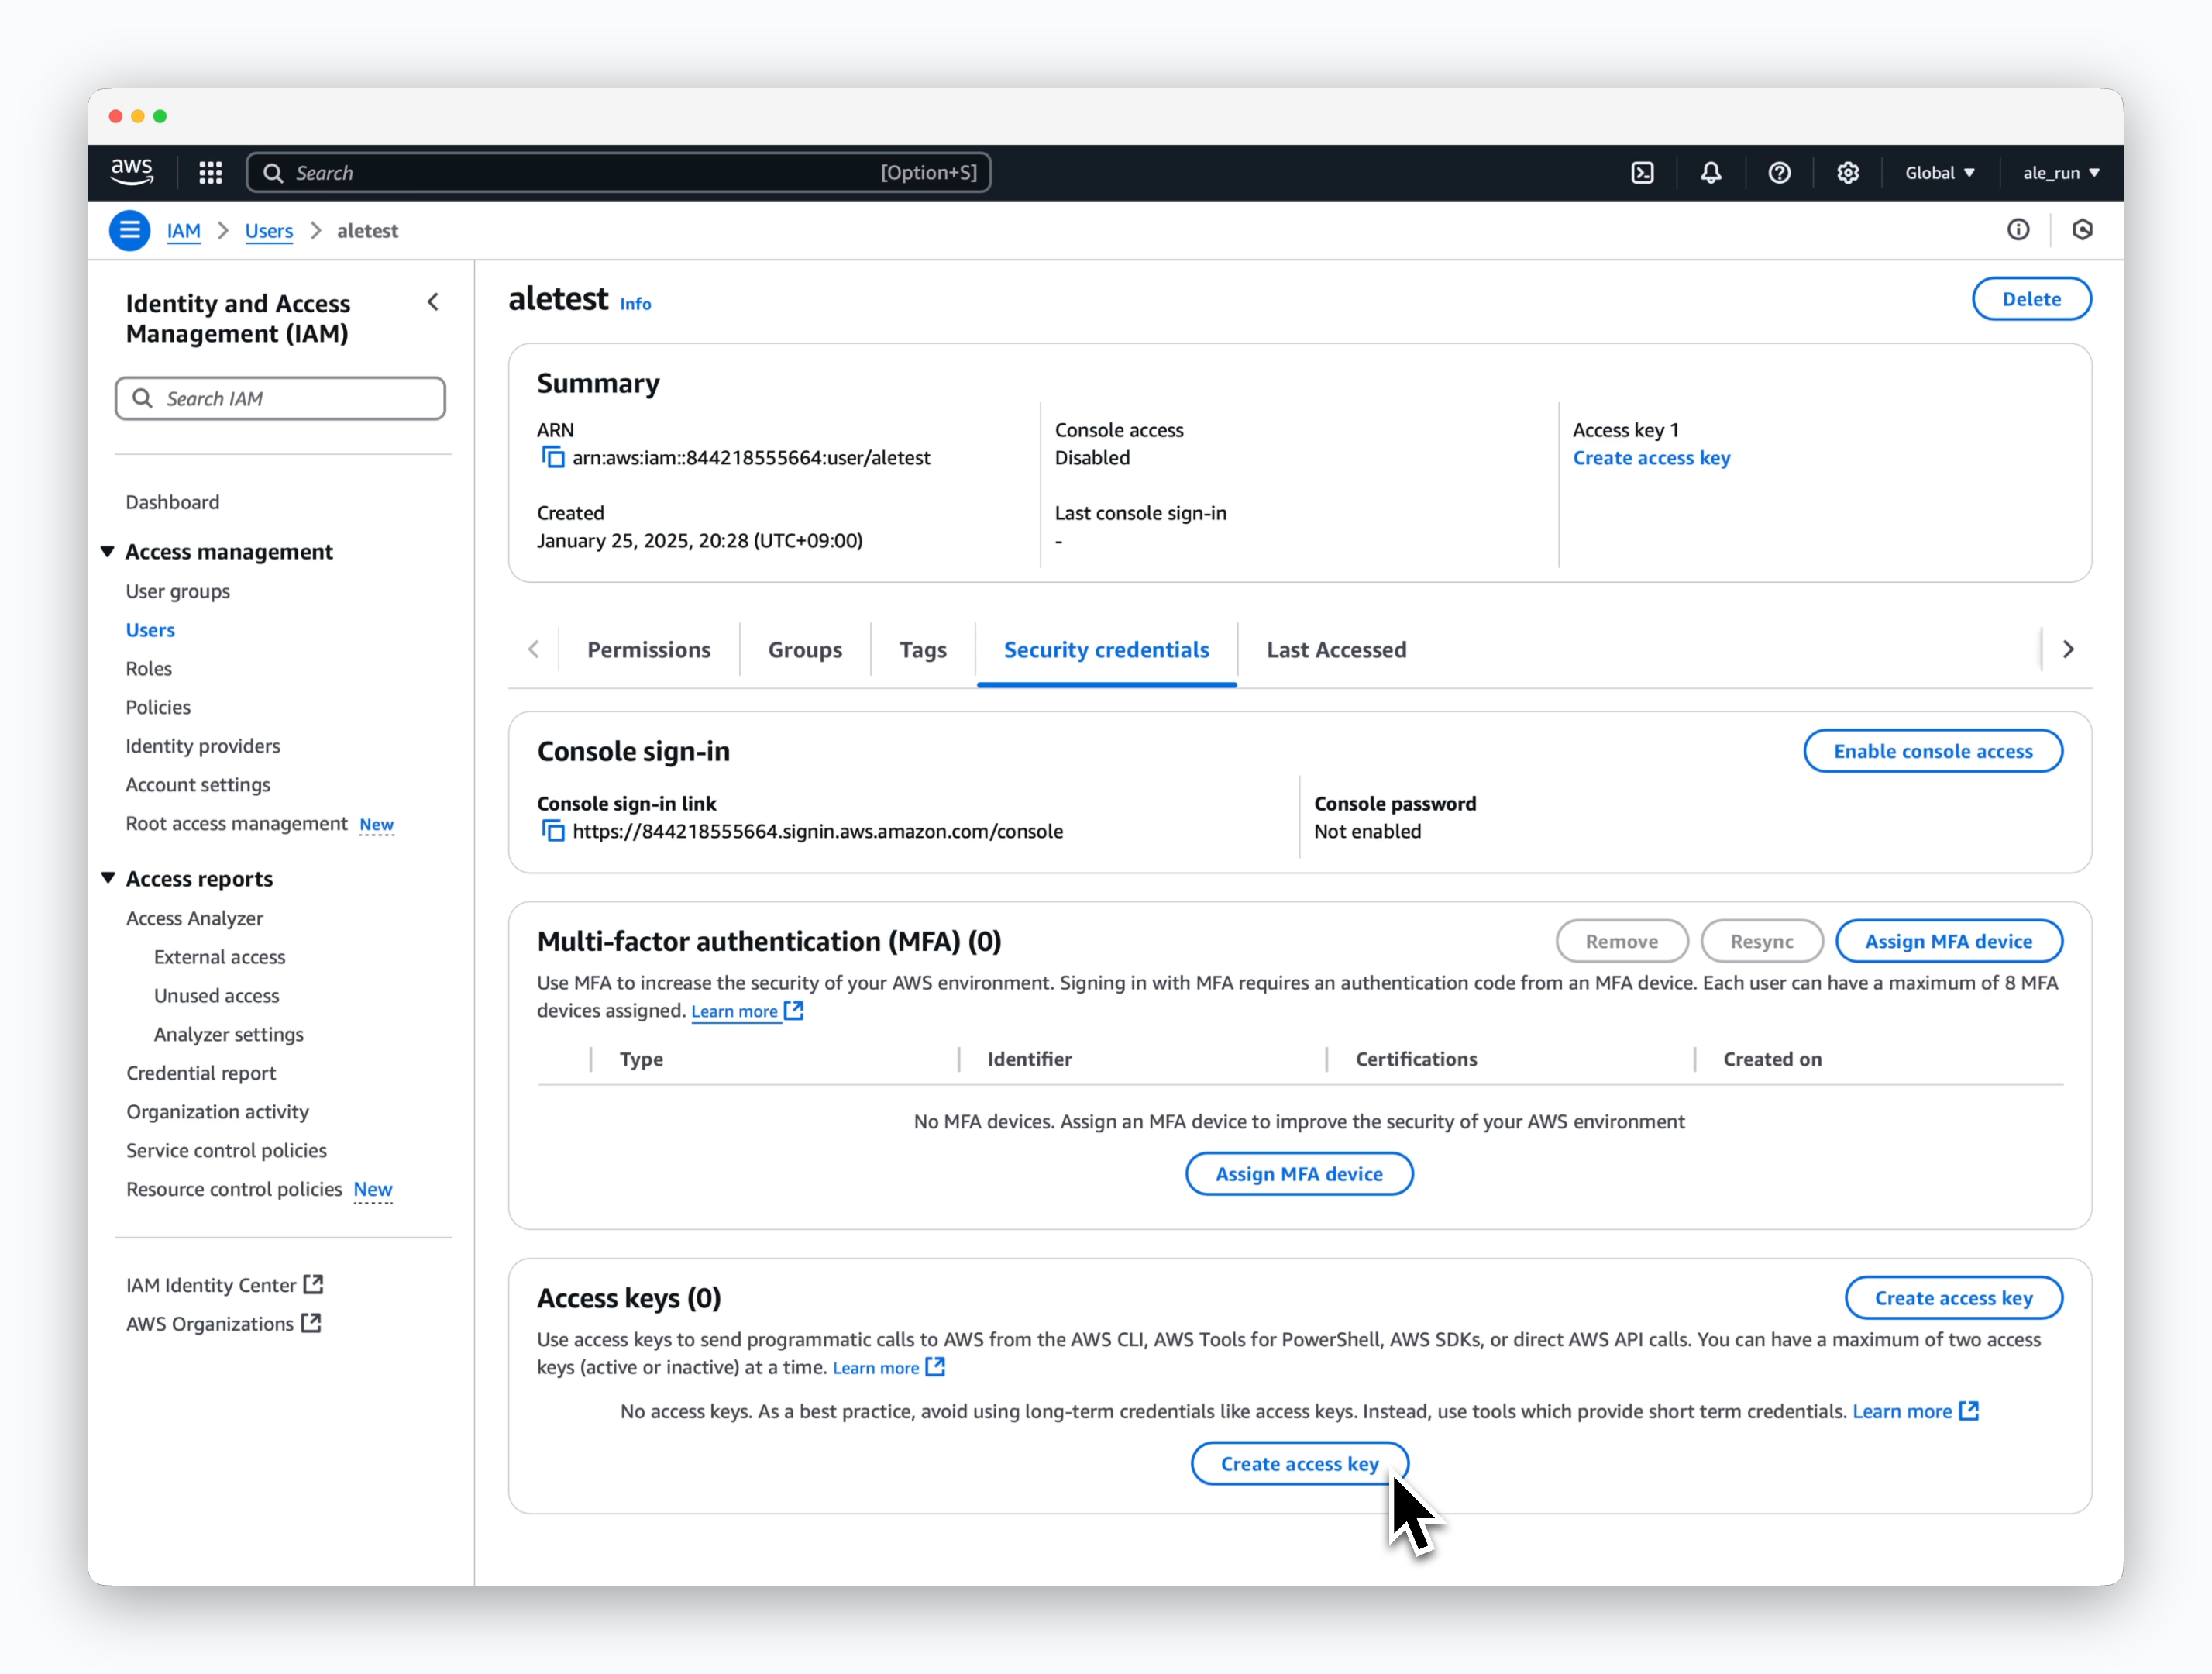 > On the user’s page, click `Create access key` in the Access keys section of the **Security credentials** tab.
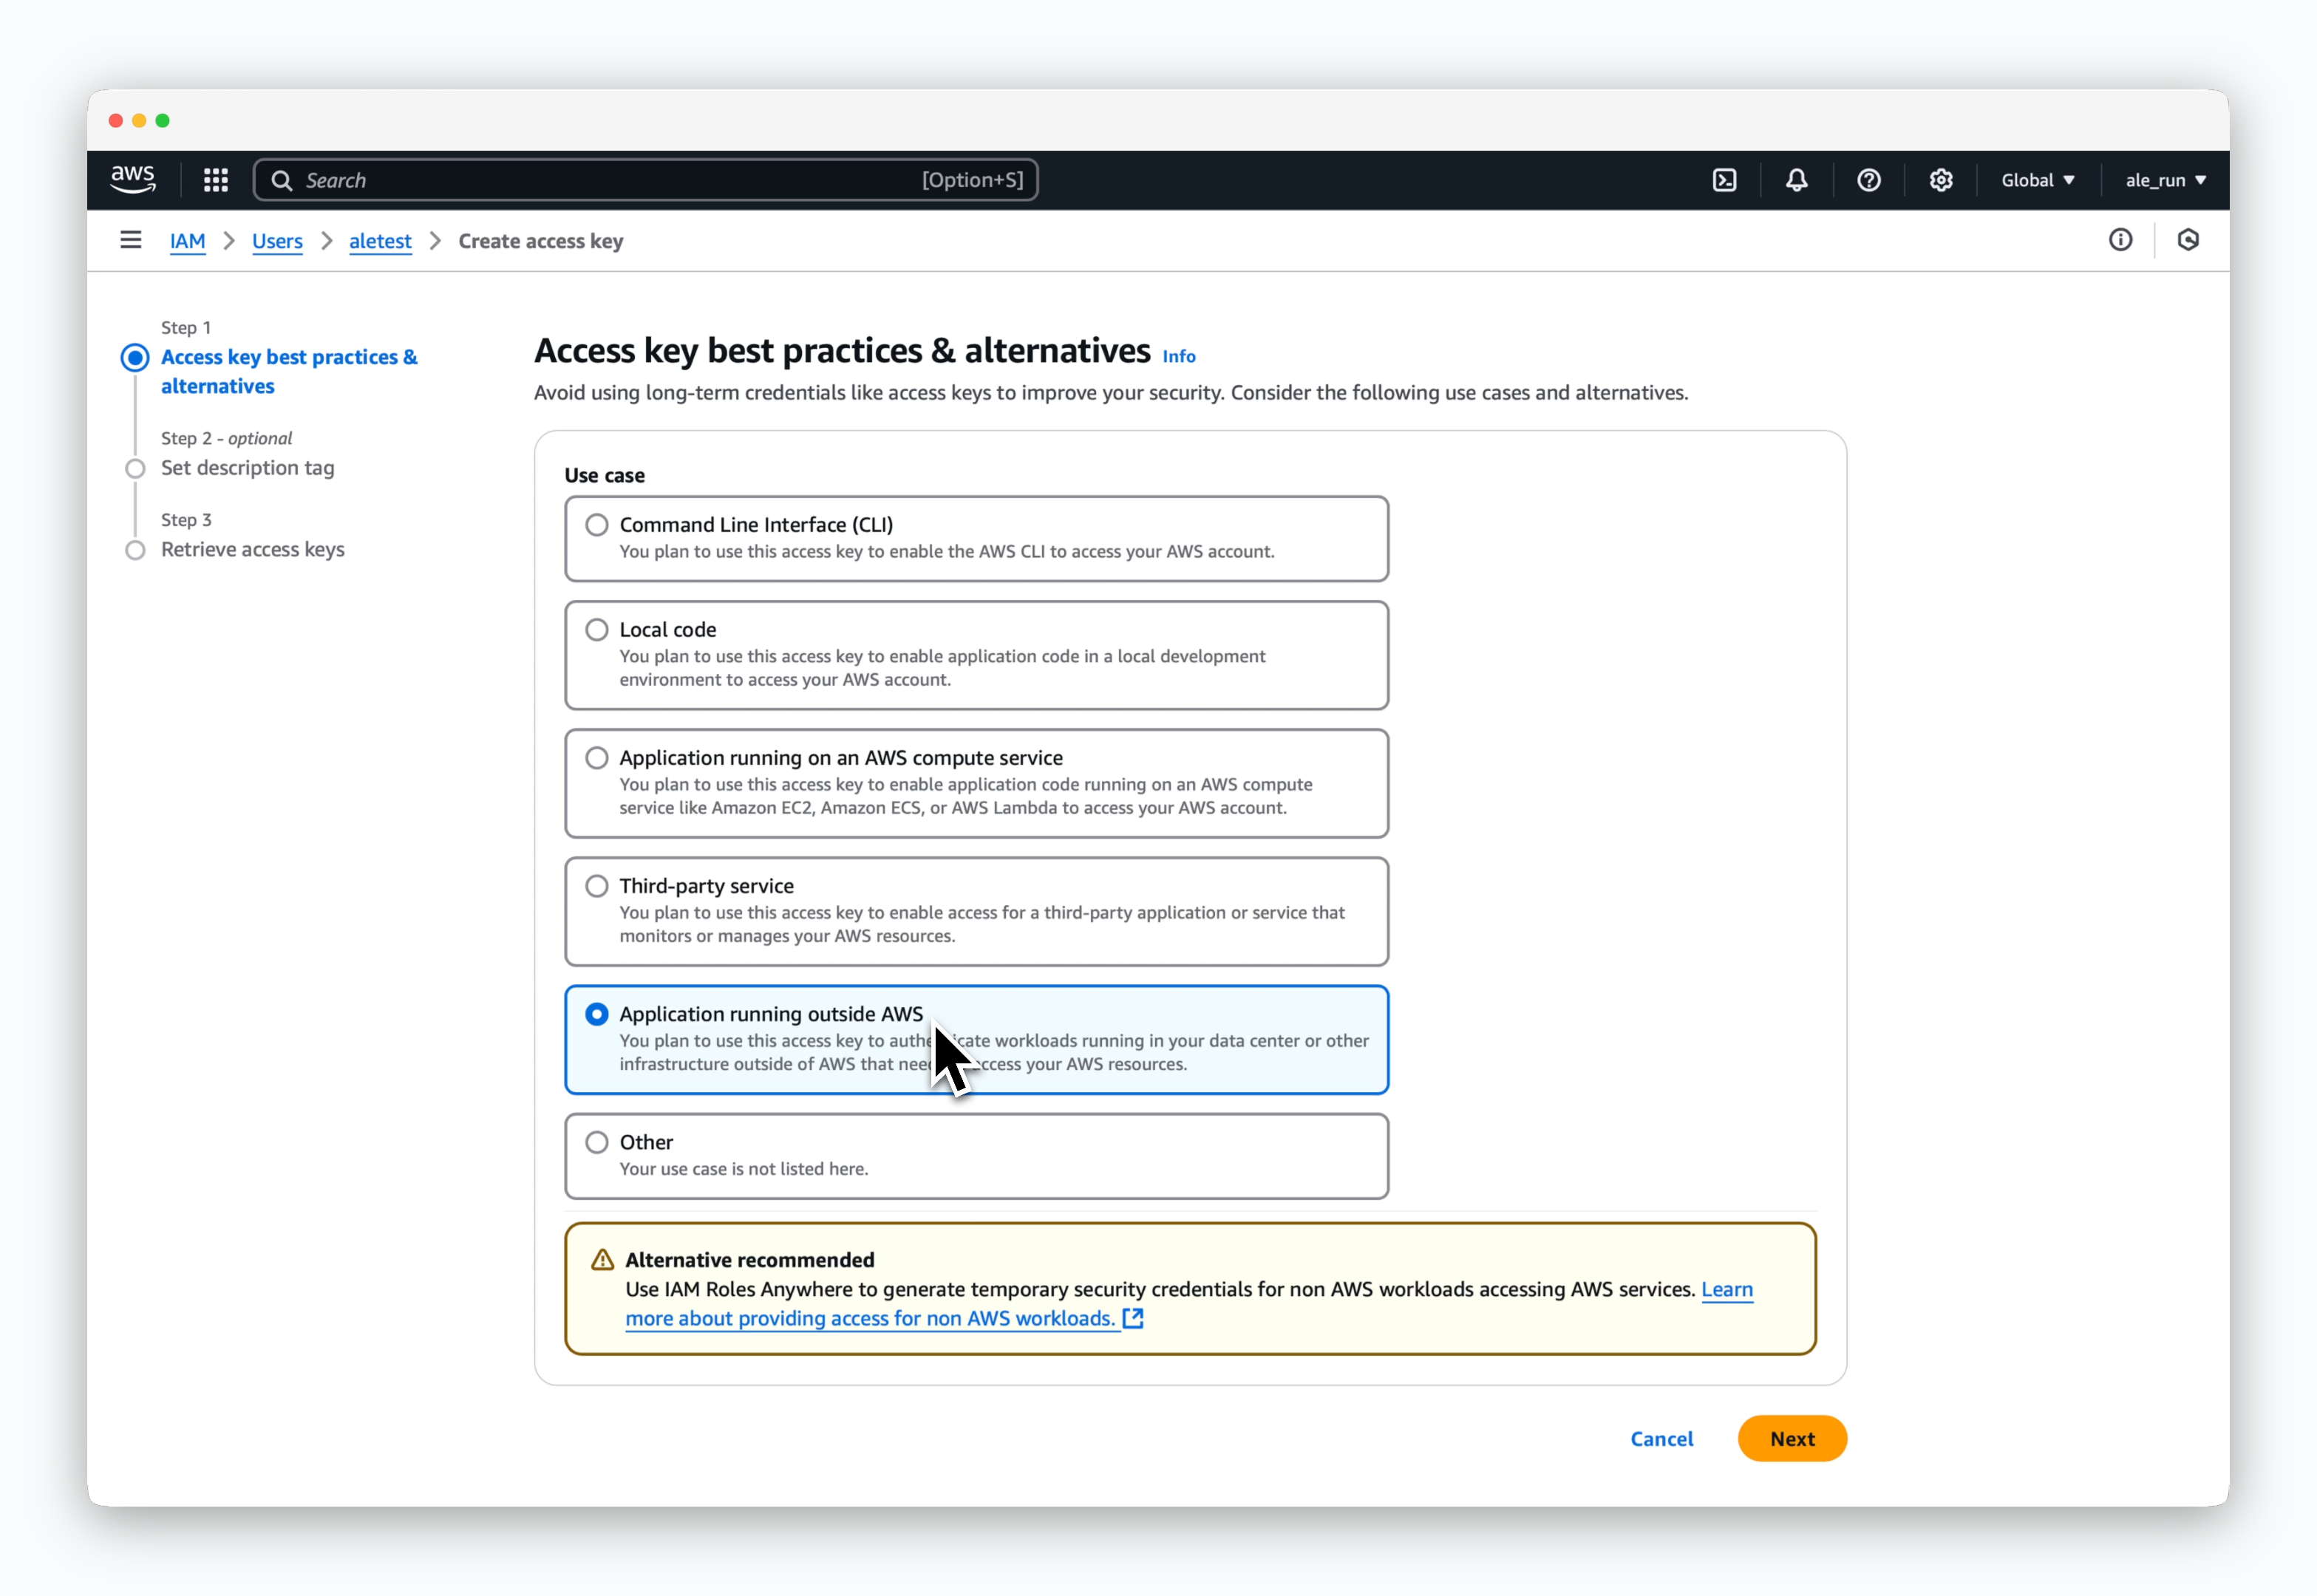 > On the following screen, select **Application running outside AWS**.
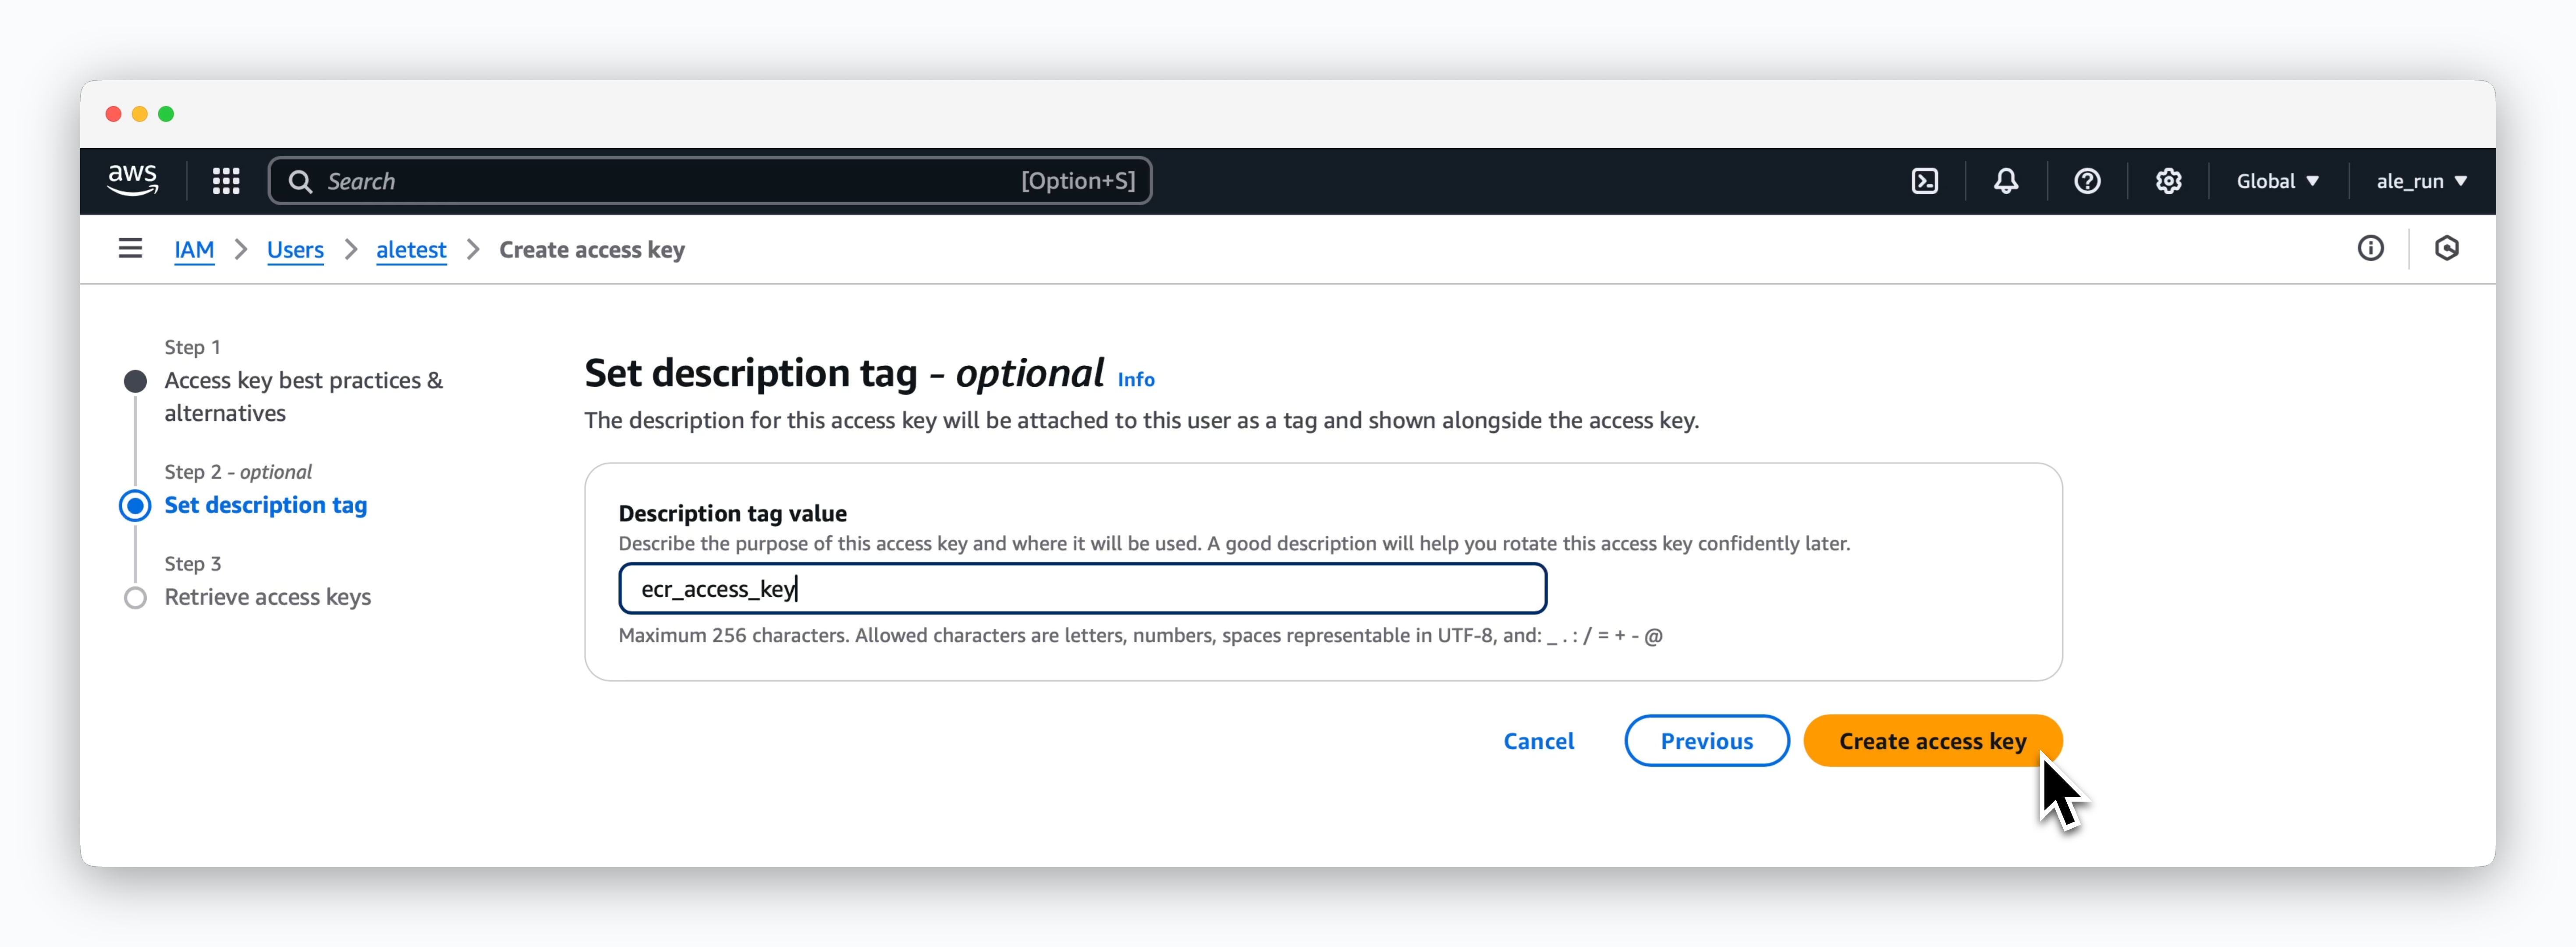 > Enter an appropriate description tag and click `Create access key`.
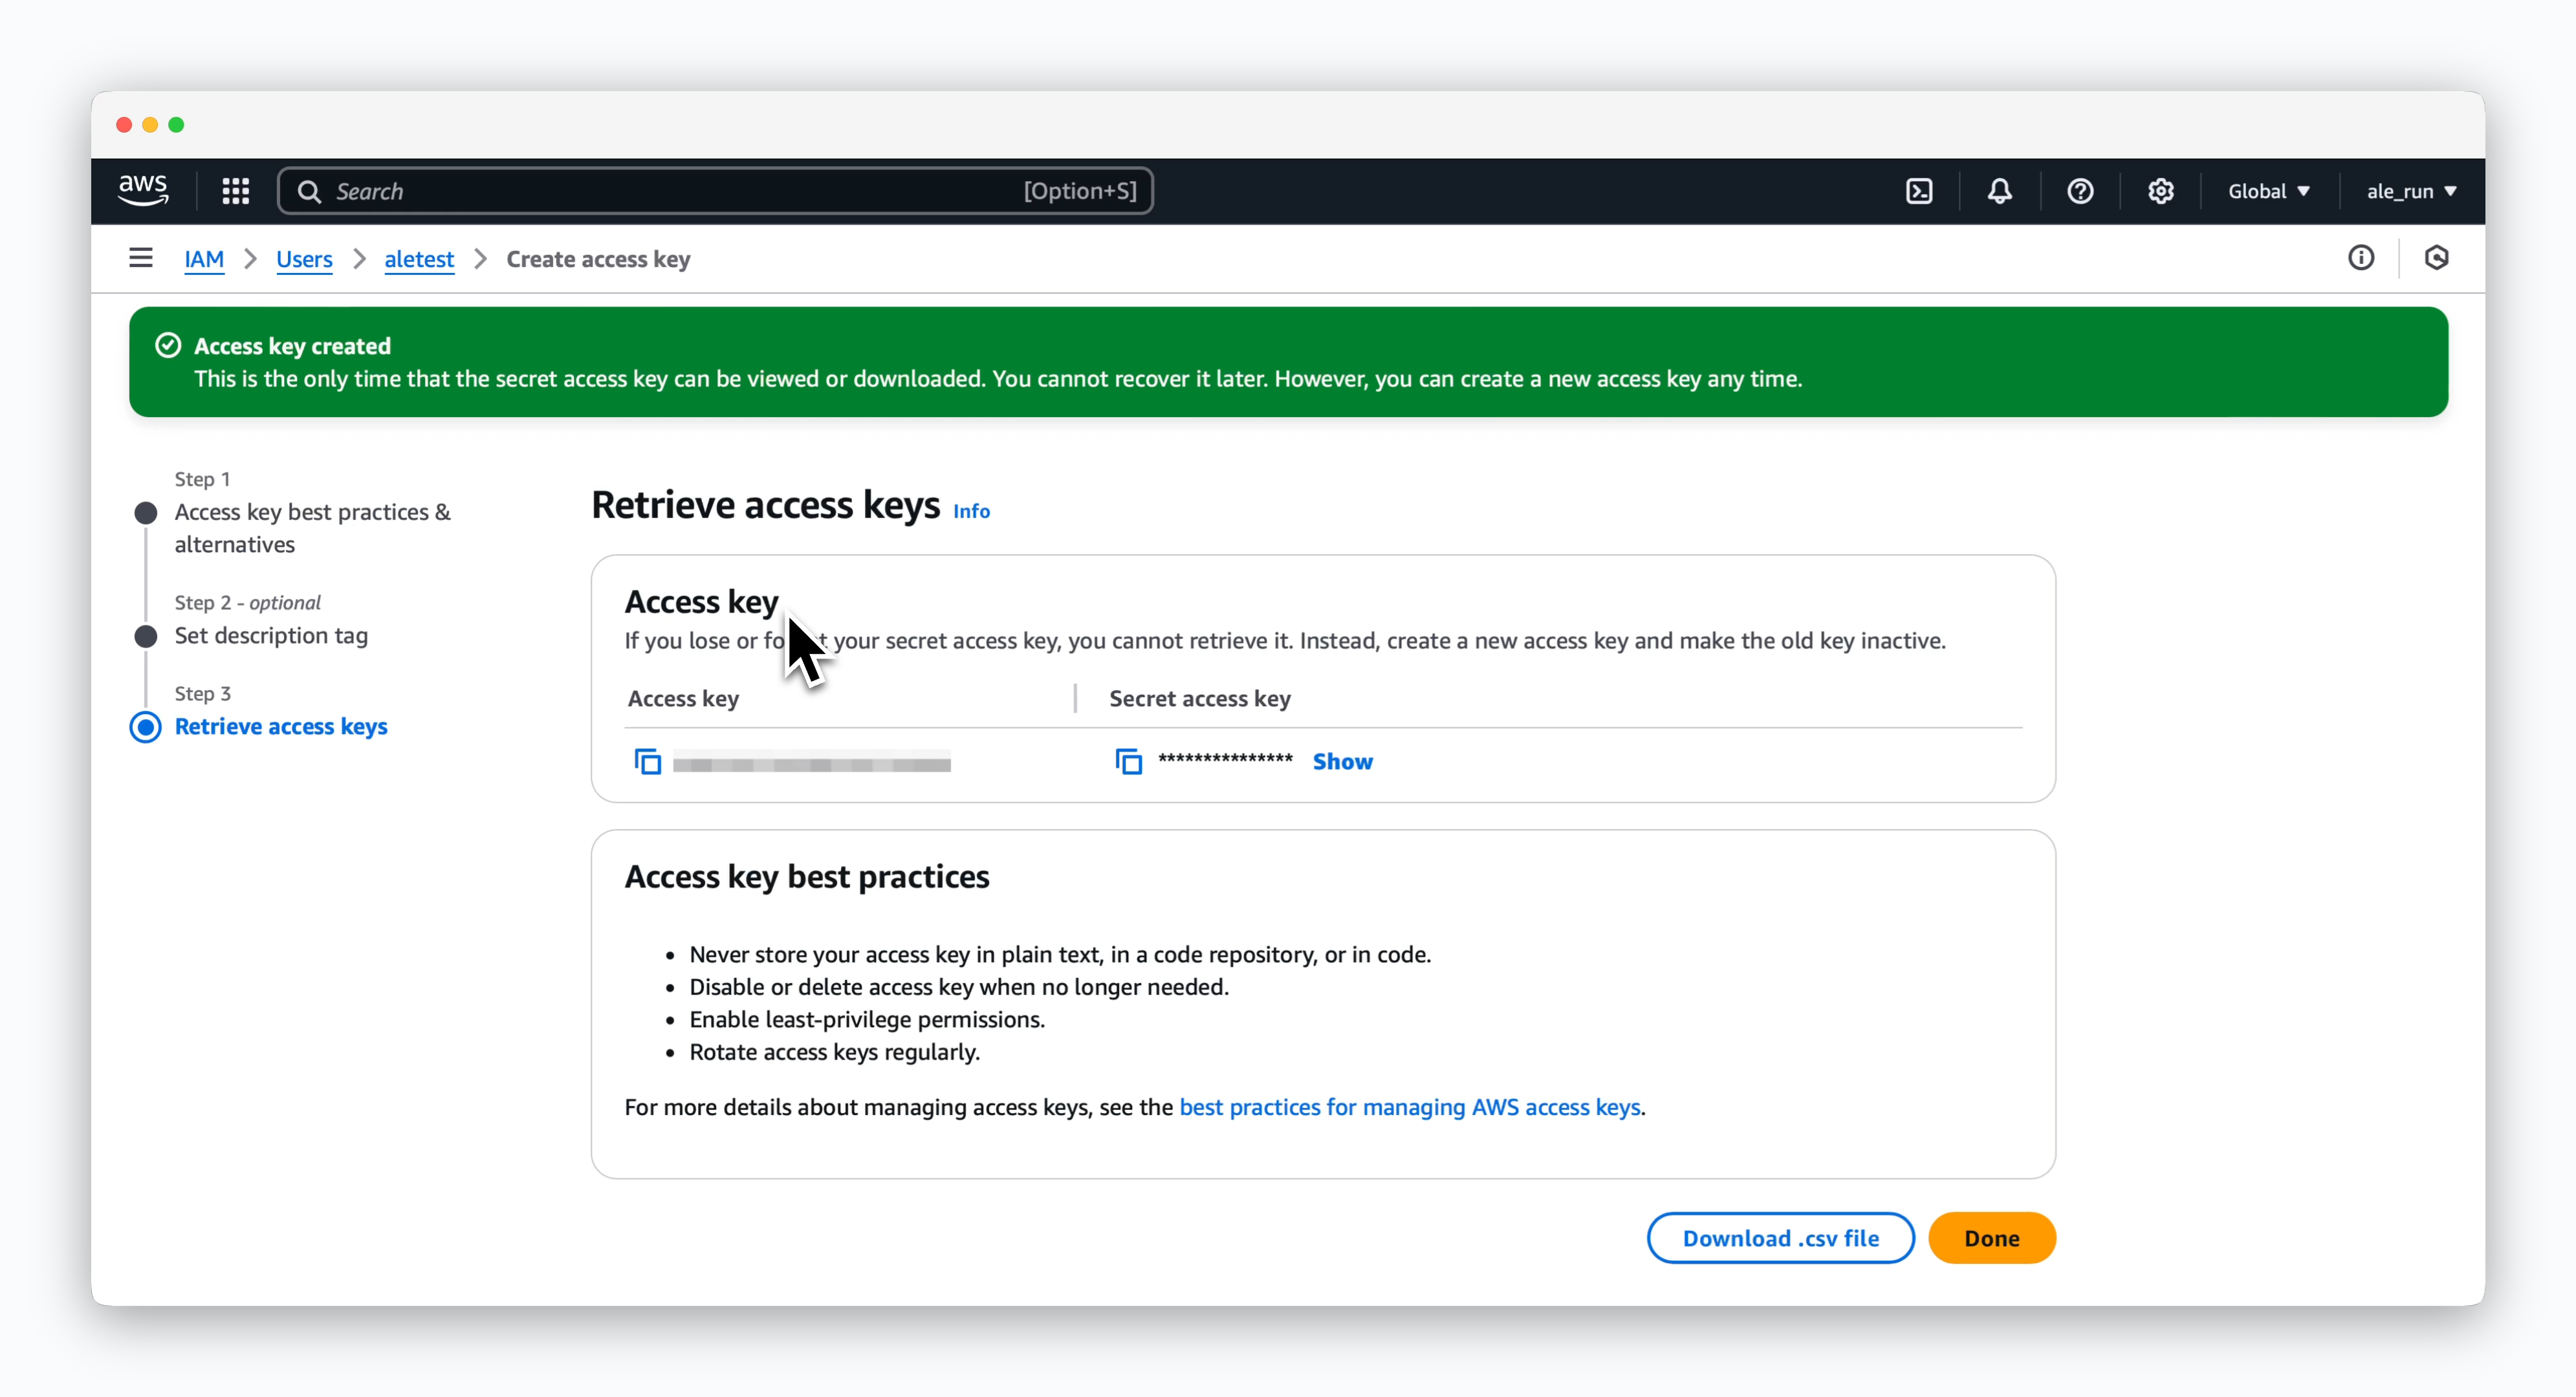 > On the next screen, you can retrieve the generated **Access key** and **Secret access key**.
## Create Console Login URL
> On the next screen, you can retrieve the generated **Access key** and **Secret access key**.
## Create Console Login URL
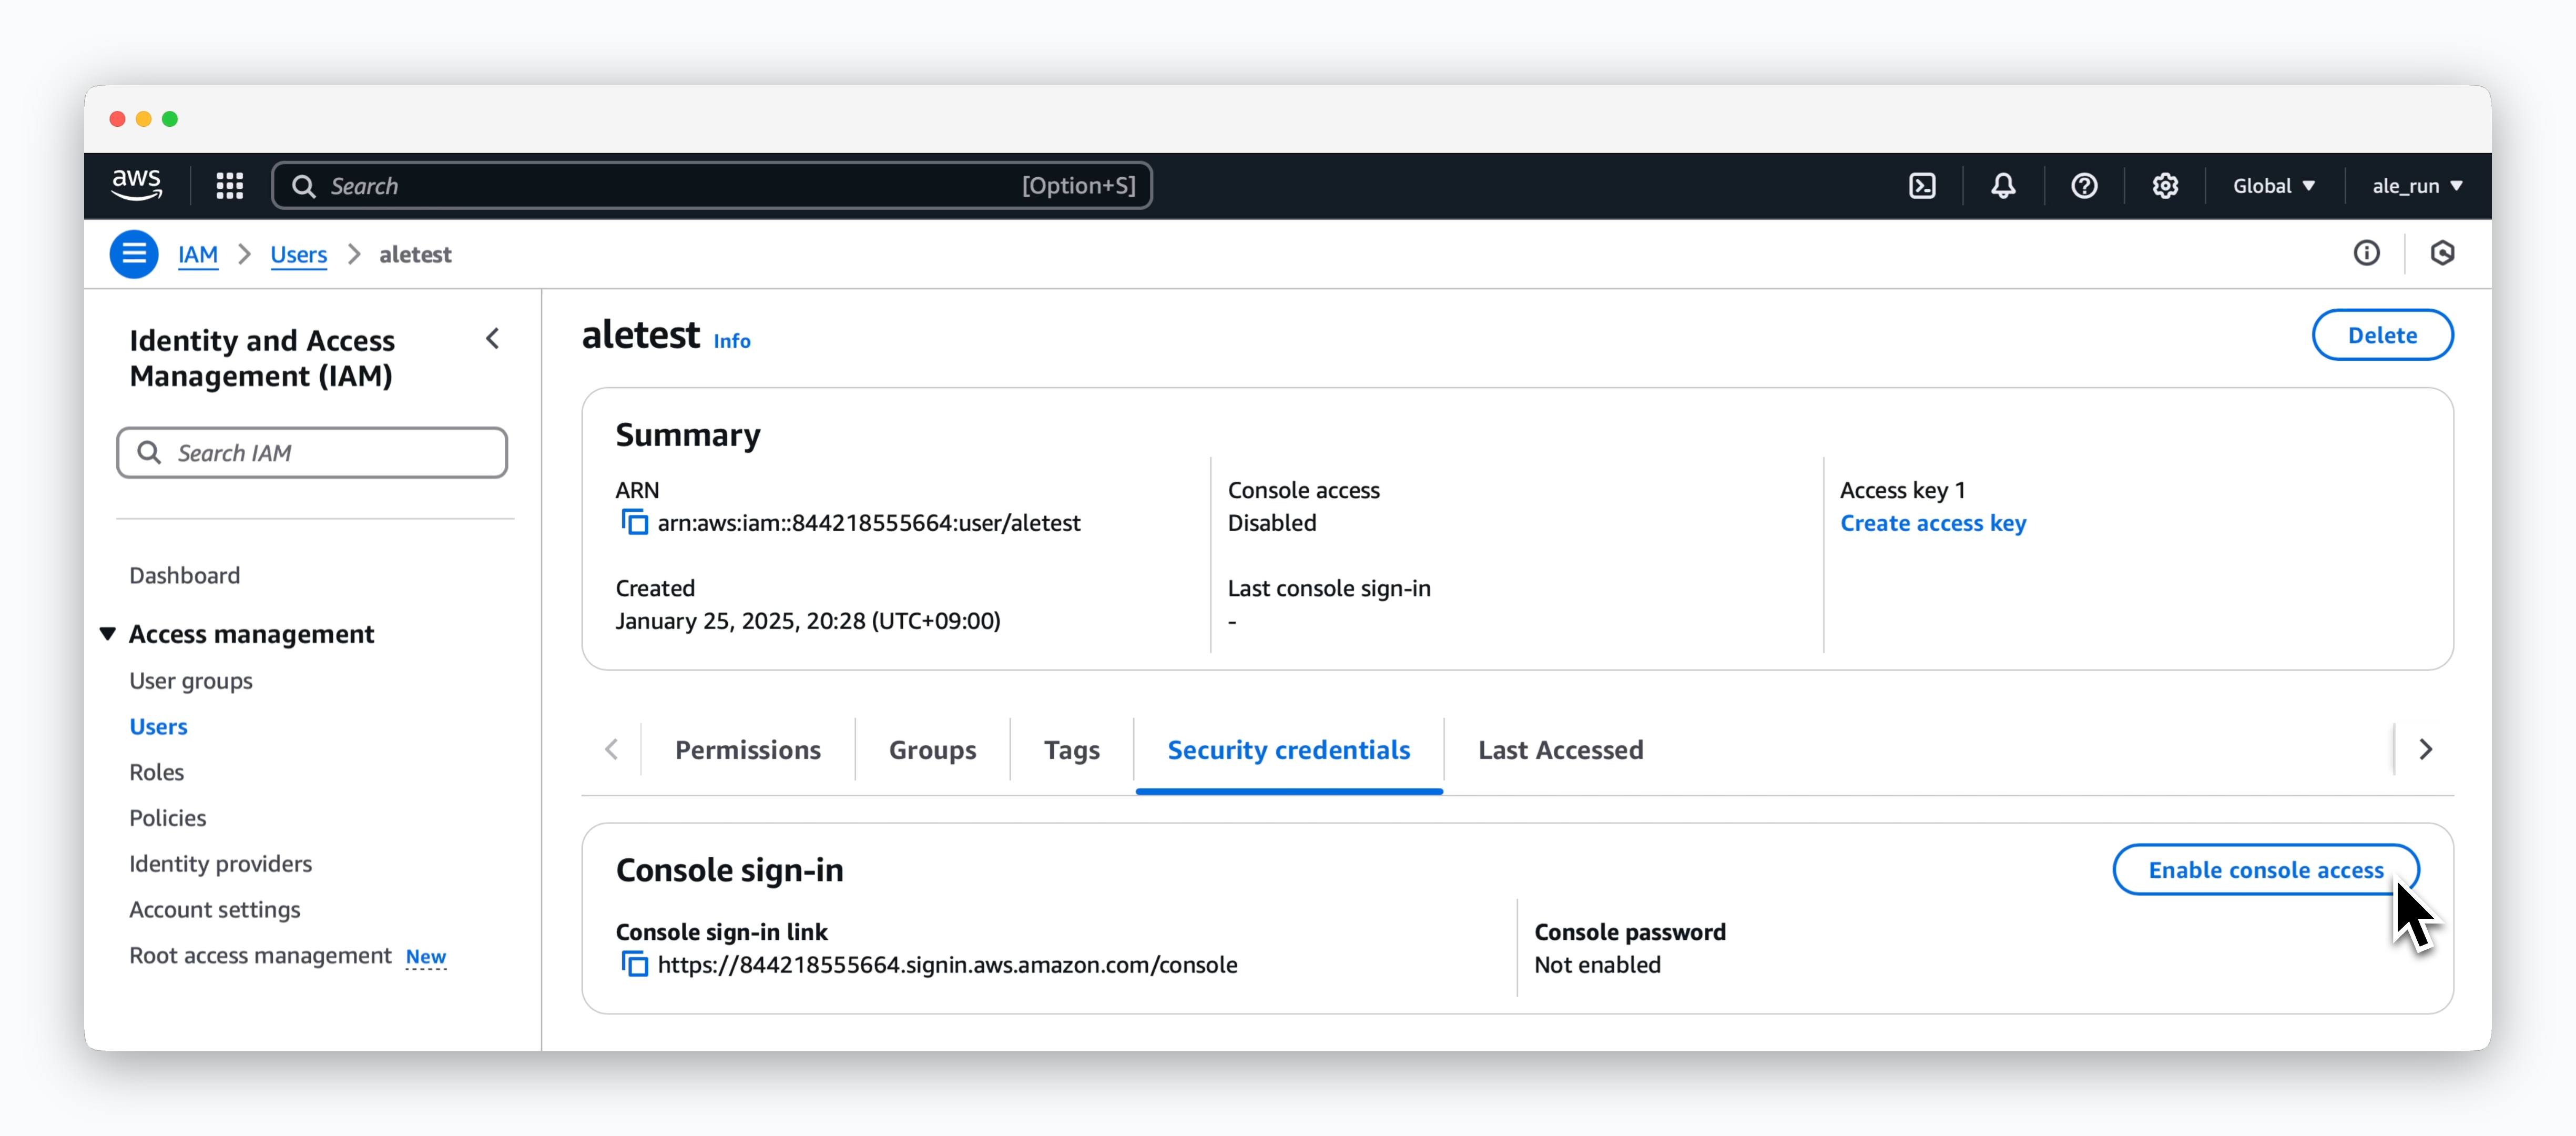 > Click `Enable console access` in the Console sign-in section of the **Security credentials** tab on the user's page.
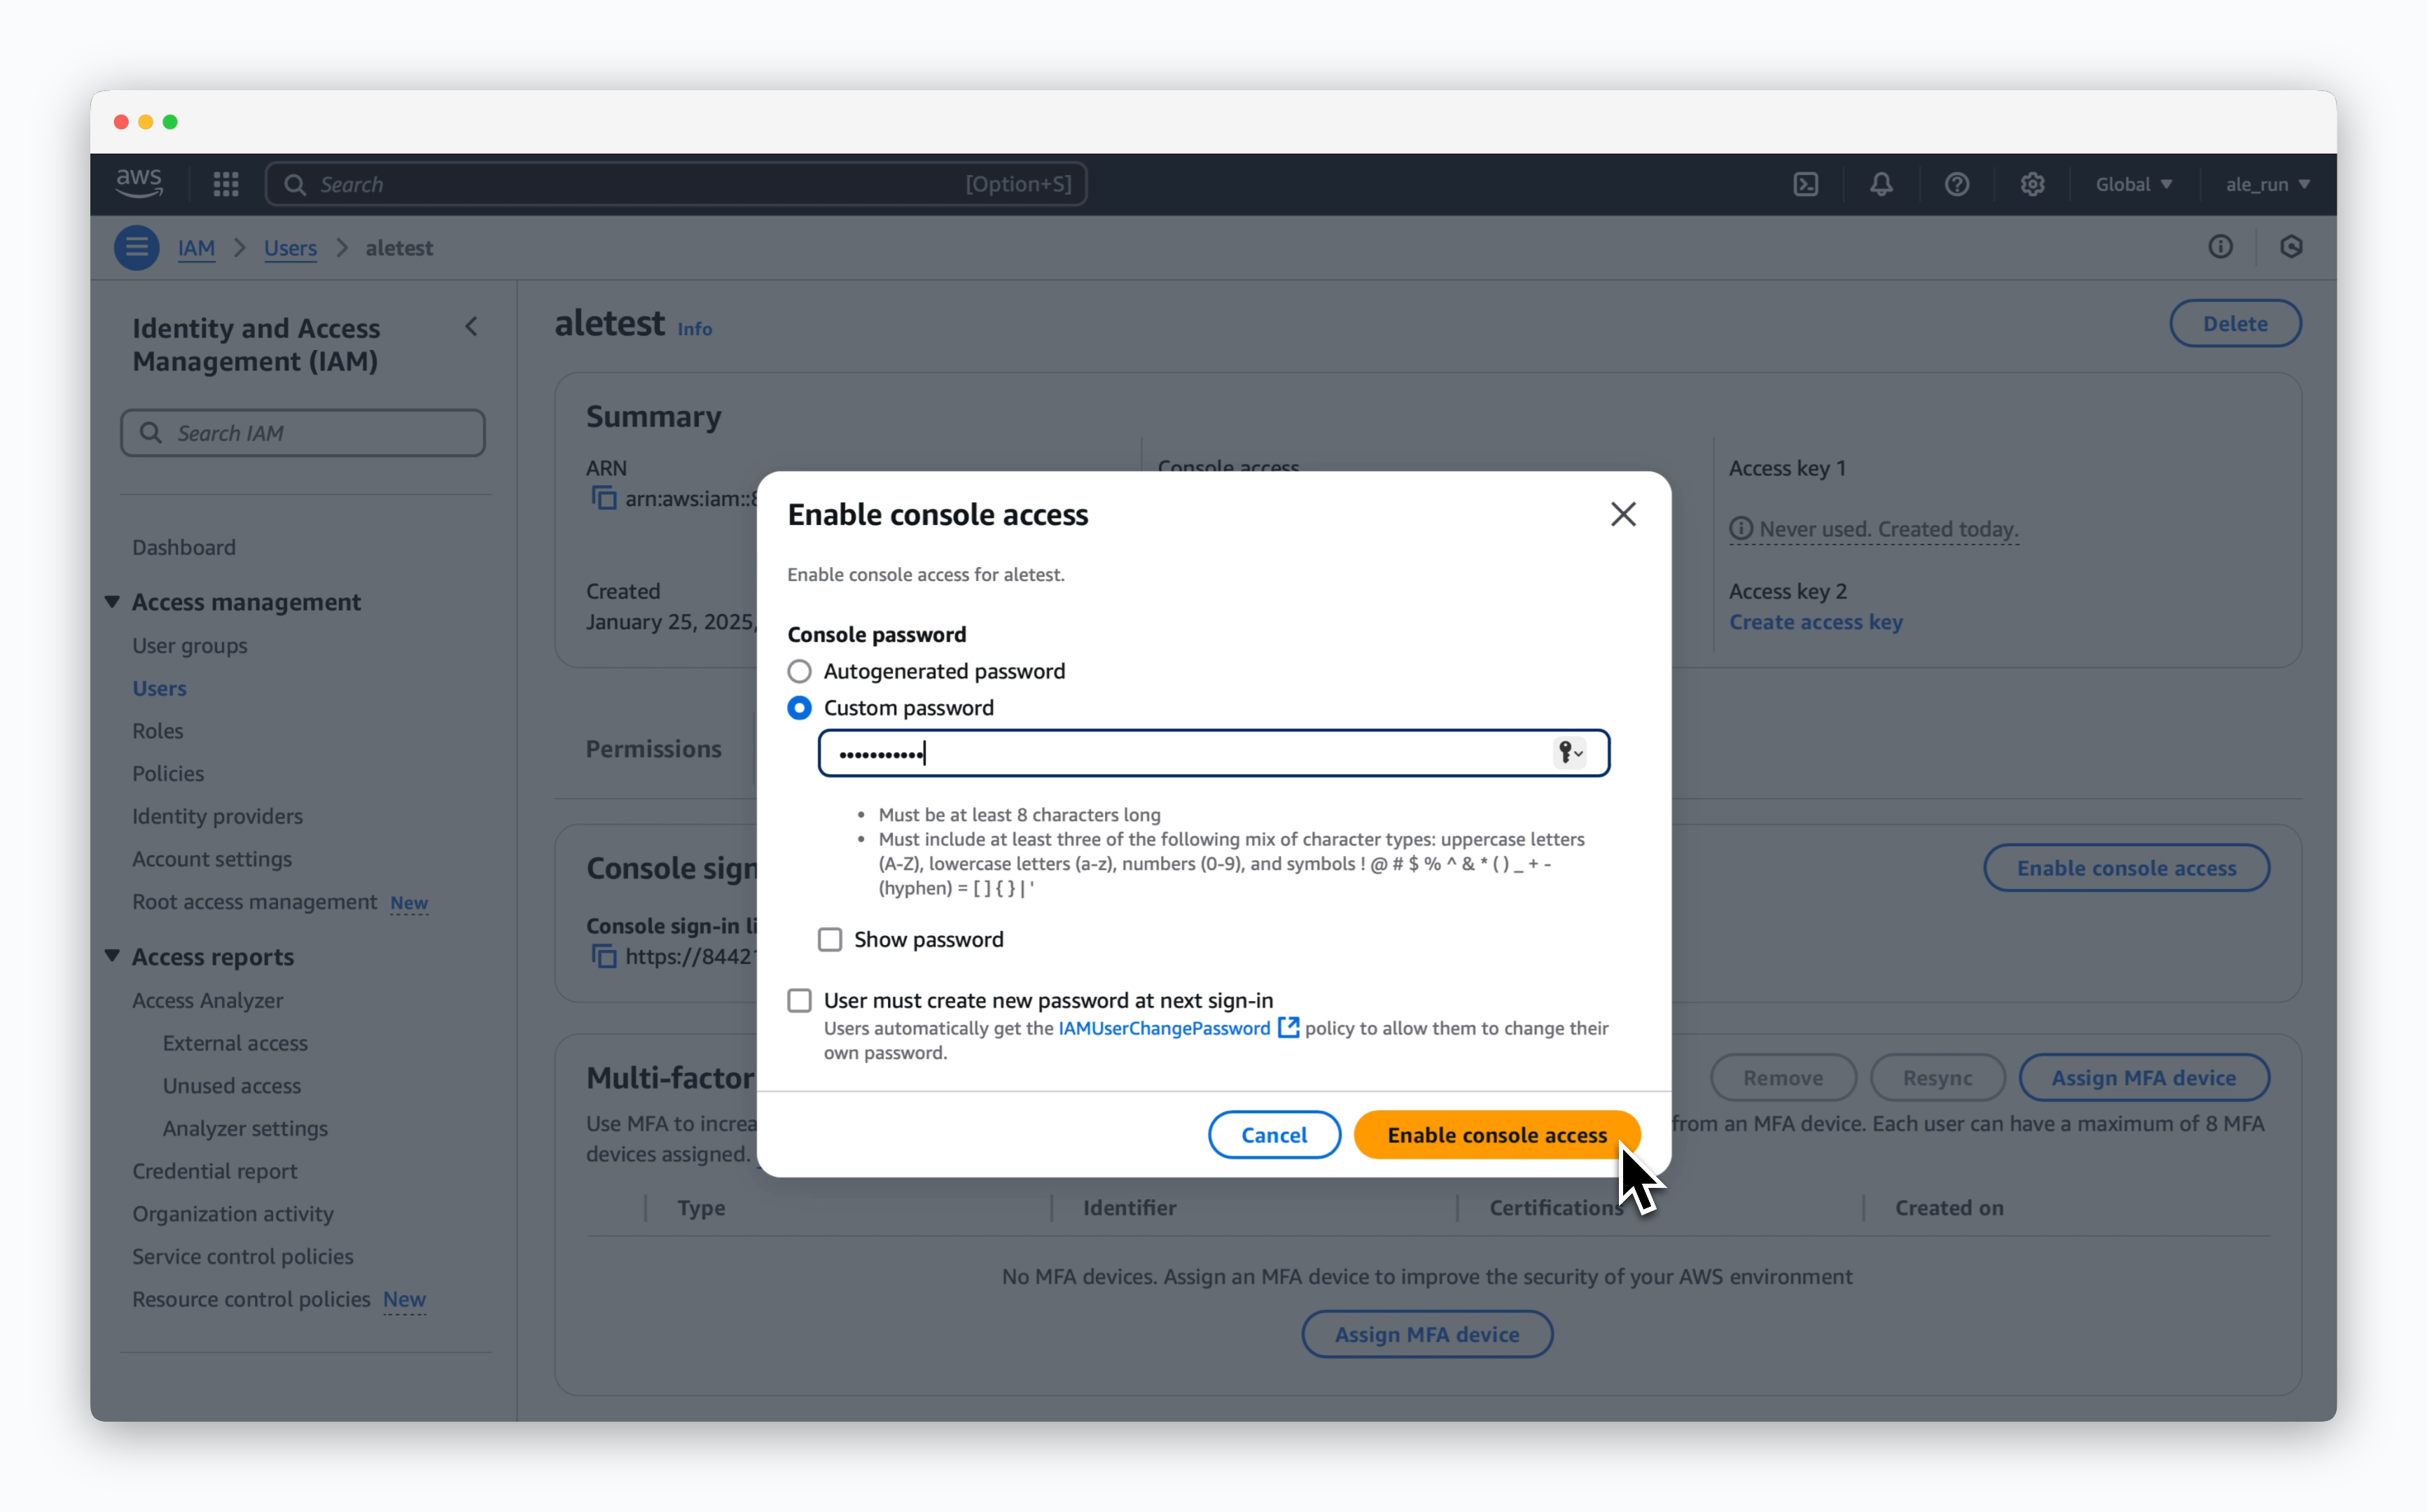 > Select **Enable** for console access, choose **Custom password** for password settings, enter your desired password, and click `Enable console access`.
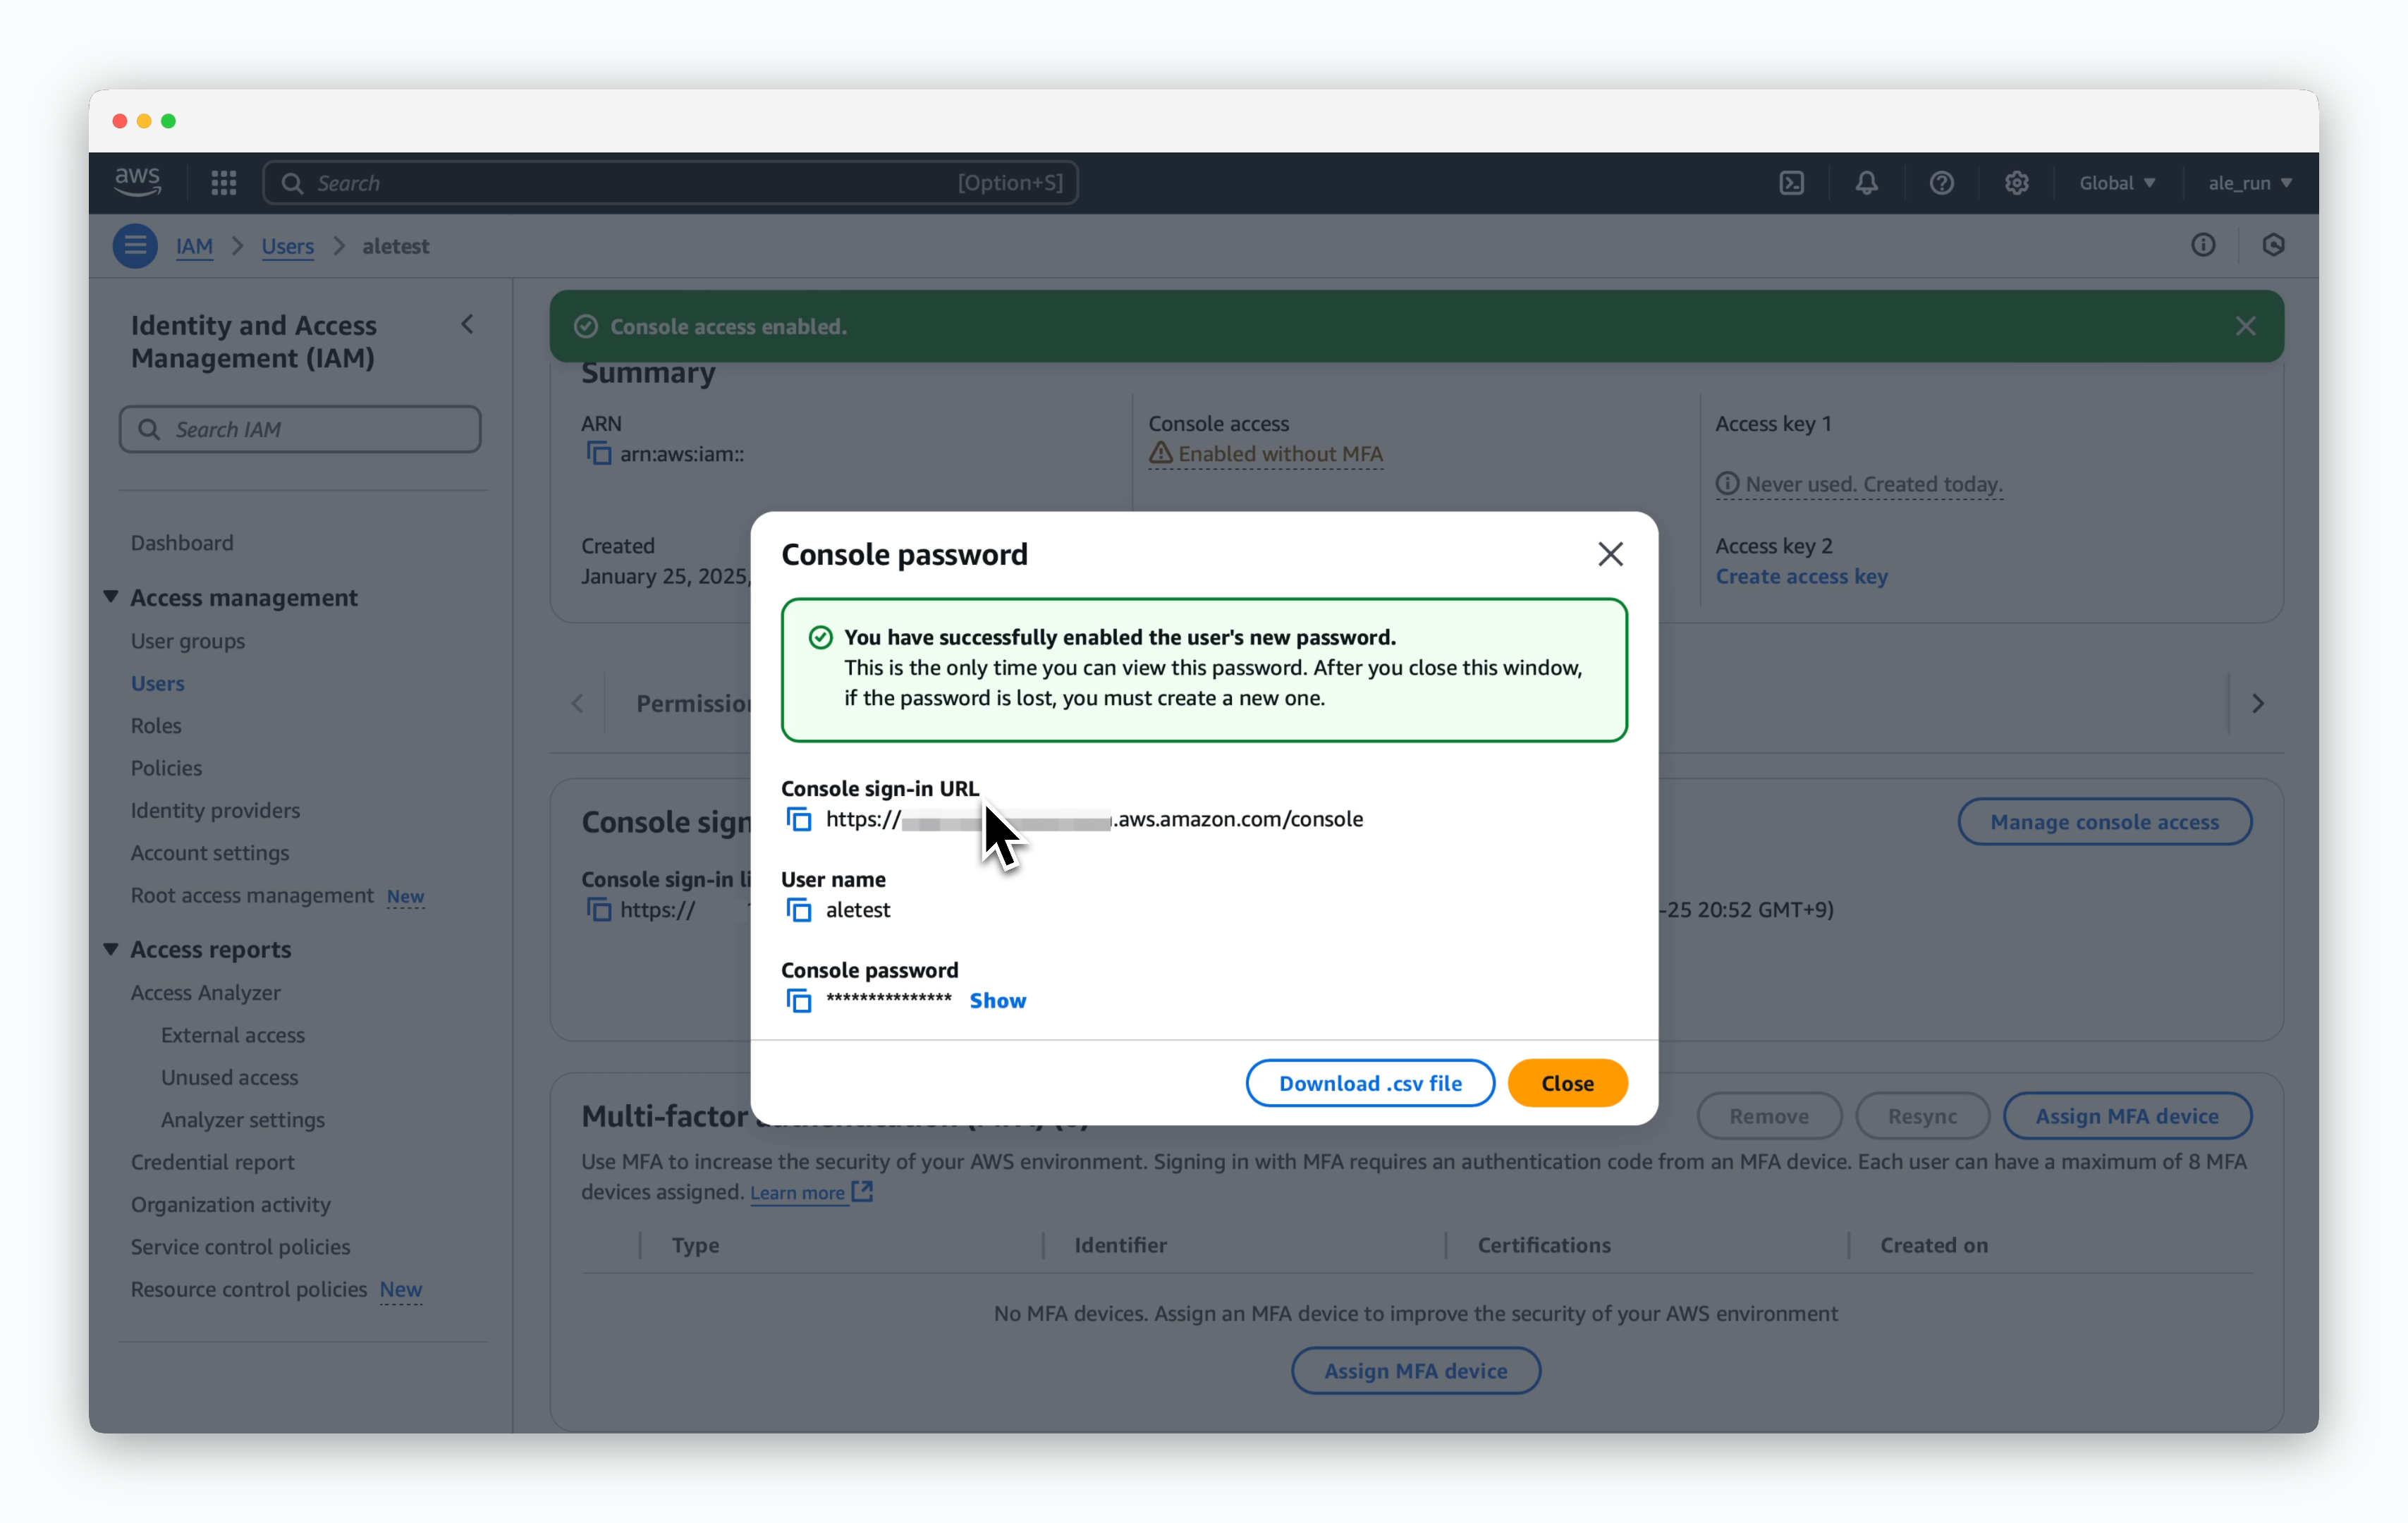 > Using the generated Console login URL, you can access the container registry by entering your username and console password.
## Create AWS ECR
> Using the generated Console login URL, you can access the container registry by entering your username and console password.
## Create AWS ECR
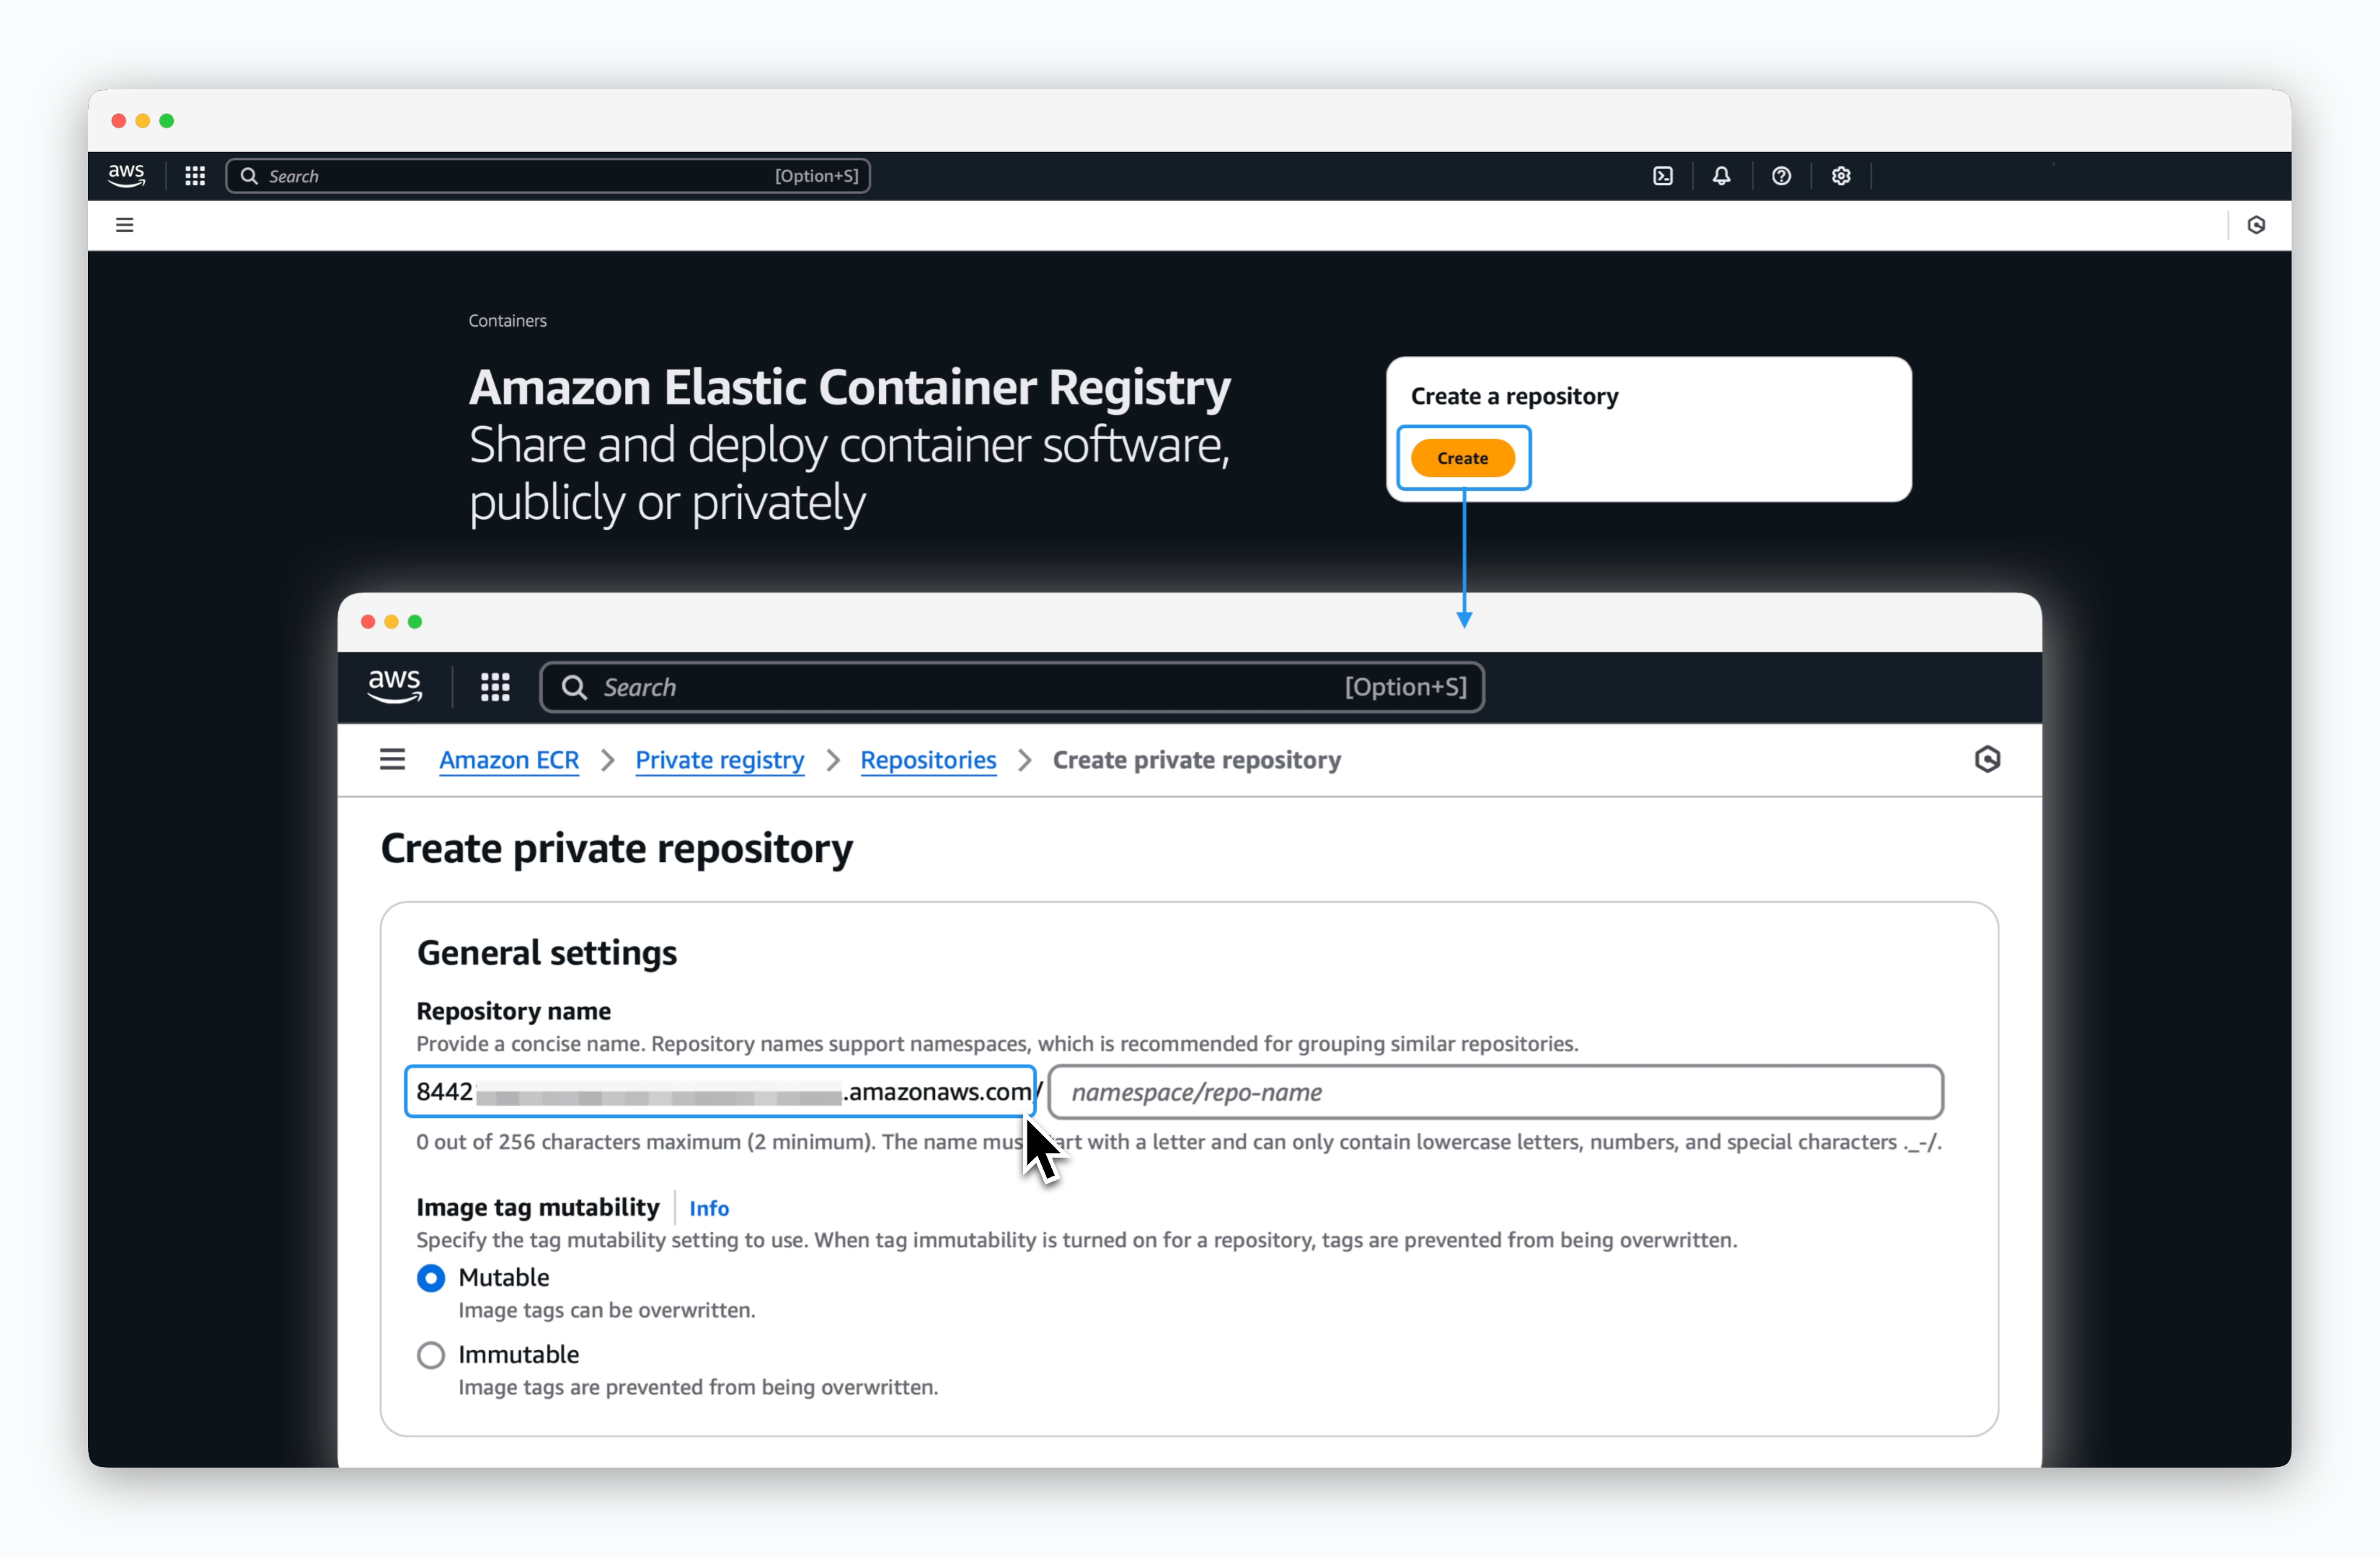 > On the Elastic Container Registry page, click `Create` to create a repository. On the next screen, the`[ID].dkr.ecr.[region].amazonaws.com` portion of the Repository name field will be used as the Access URL to connect ECR to `ale`.
## Connect to ale
> On the Elastic Container Registry page, click `Create` to create a repository. On the next screen, the`[ID].dkr.ecr.[region].amazonaws.com` portion of the Repository name field will be used as the Access URL to connect ECR to `ale`.
## Connect to ale
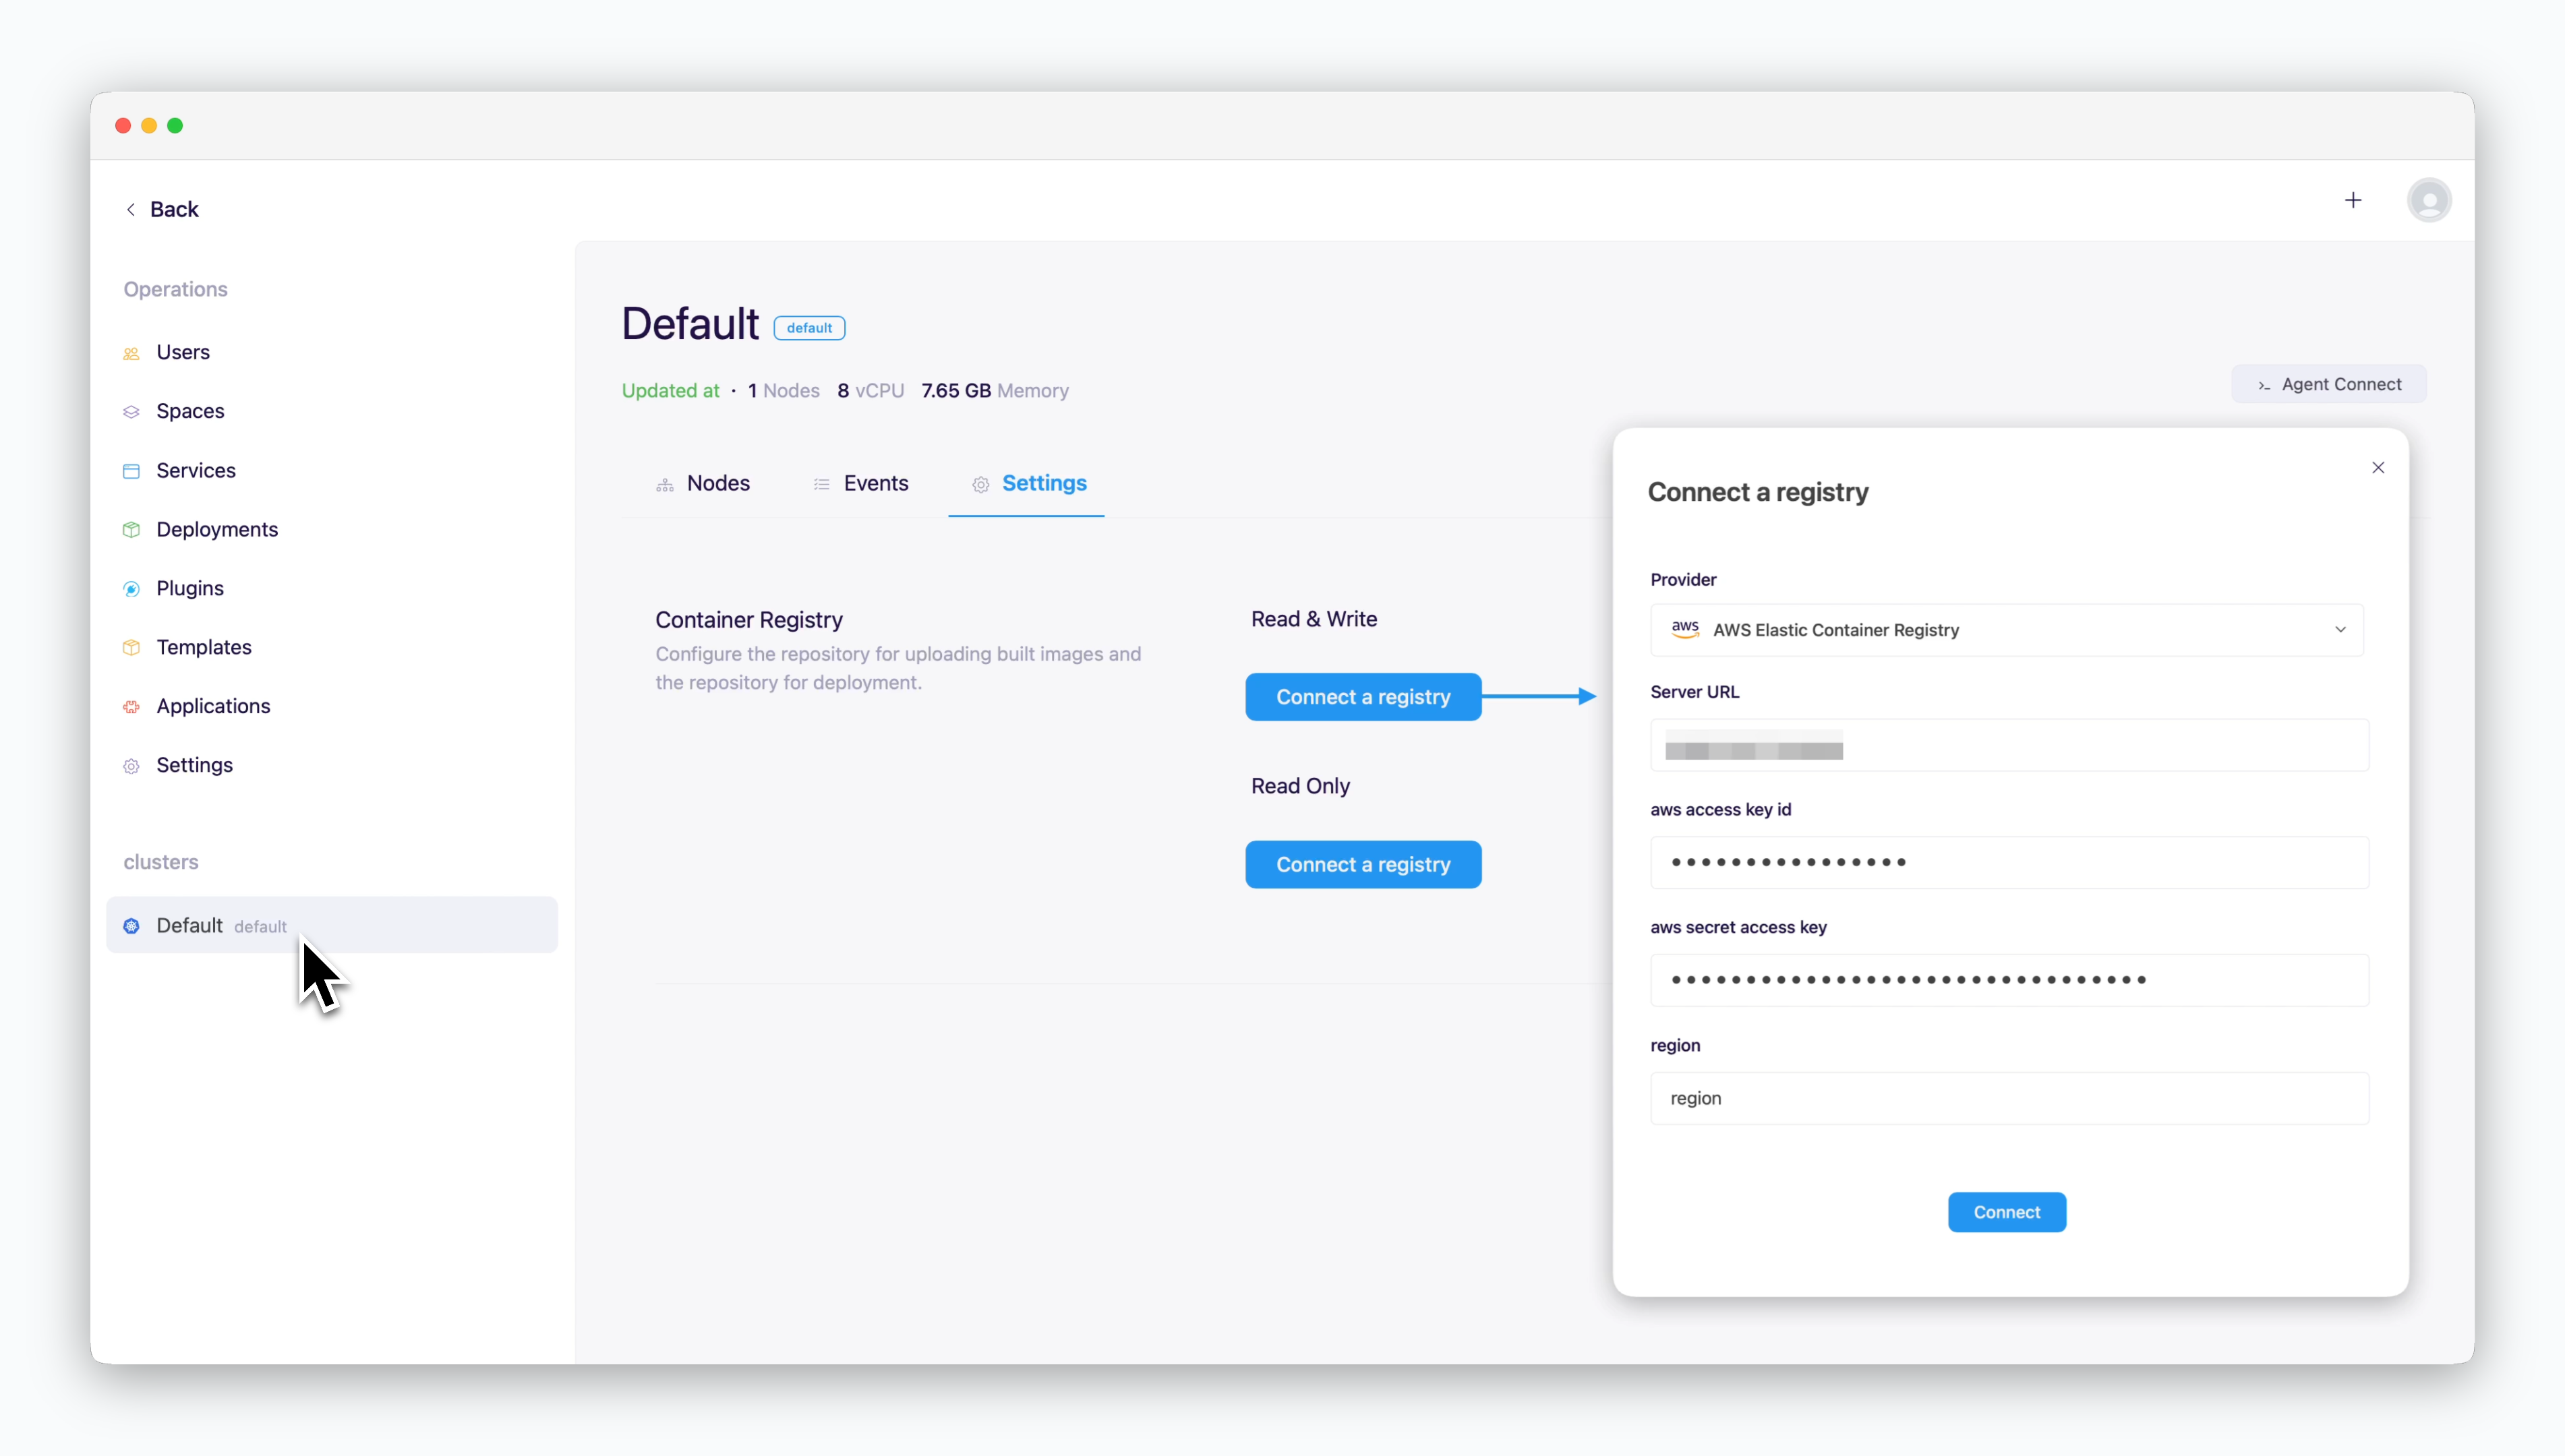 > In the operations system, go to the Settings tab on the cluster page and click `Connect Container Repository`. In the modal that appears, enter the following values and click `Connect`.
* **Repository Provider**: AWS Elastic Container Registry
* [Access URL](/en/registry/aws-ecr#create-aws-ecr): `[ID].dkr.ecr.[region].amazonaws.com`
* **aws access key ID**: Access key
* **aws secret access key**: Secret access key
* **region**: Region identifier where ECR is located **(e.g., us-east-1)**
> In the operations system, go to the Settings tab on the cluster page and click `Connect Container Repository`. In the modal that appears, enter the following values and click `Connect`.
* **Repository Provider**: AWS Elastic Container Registry
* [Access URL](/en/registry/aws-ecr#create-aws-ecr): `[ID].dkr.ecr.[region].amazonaws.com`
* **aws access key ID**: Access key
* **aws secret access key**: Secret access key
* **region**: Region identifier where ECR is located **(e.g., us-east-1)**