> ## Documentation Index
> Fetch the complete documentation index at: https://docs.ale.run/llms.txt
> Use this file to discover all available pages before exploring further.
# AWS ALB Setup
## Create Target Group
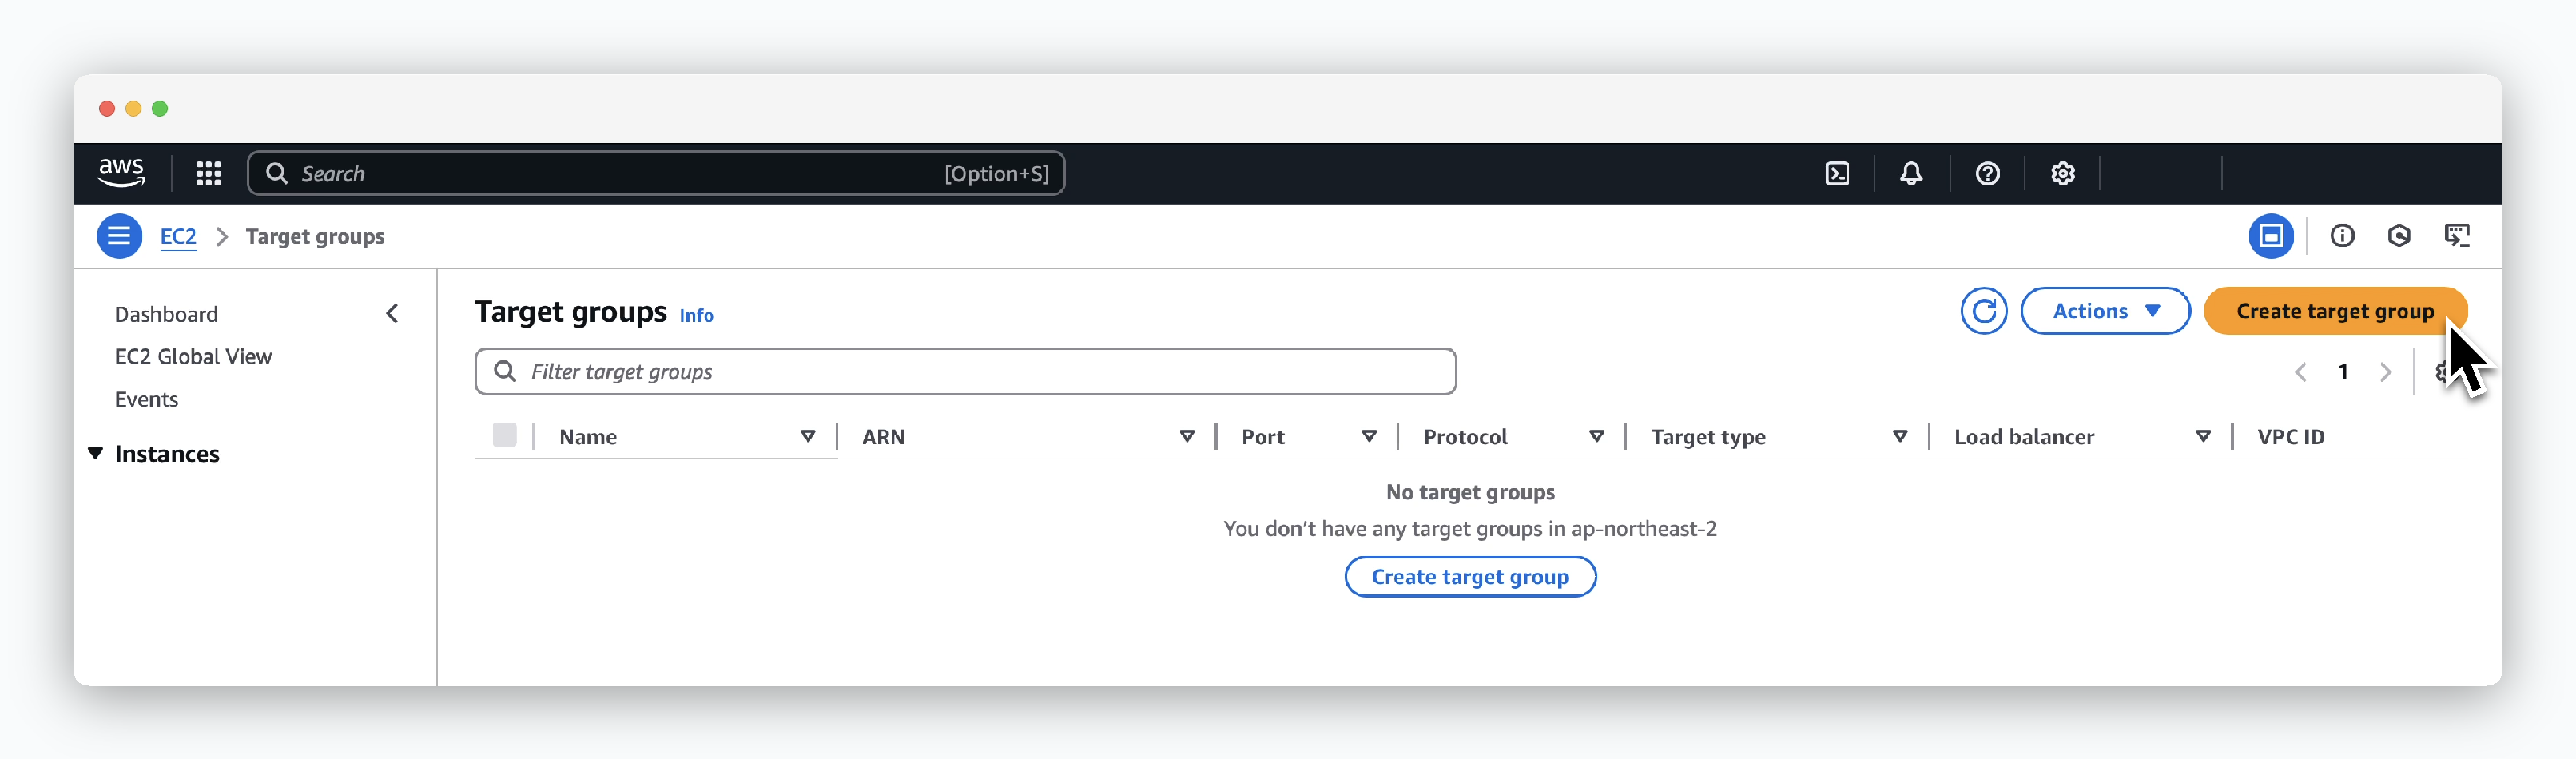 > Click `Create target group` in `EC2 > Load Balancing > Target groups`.
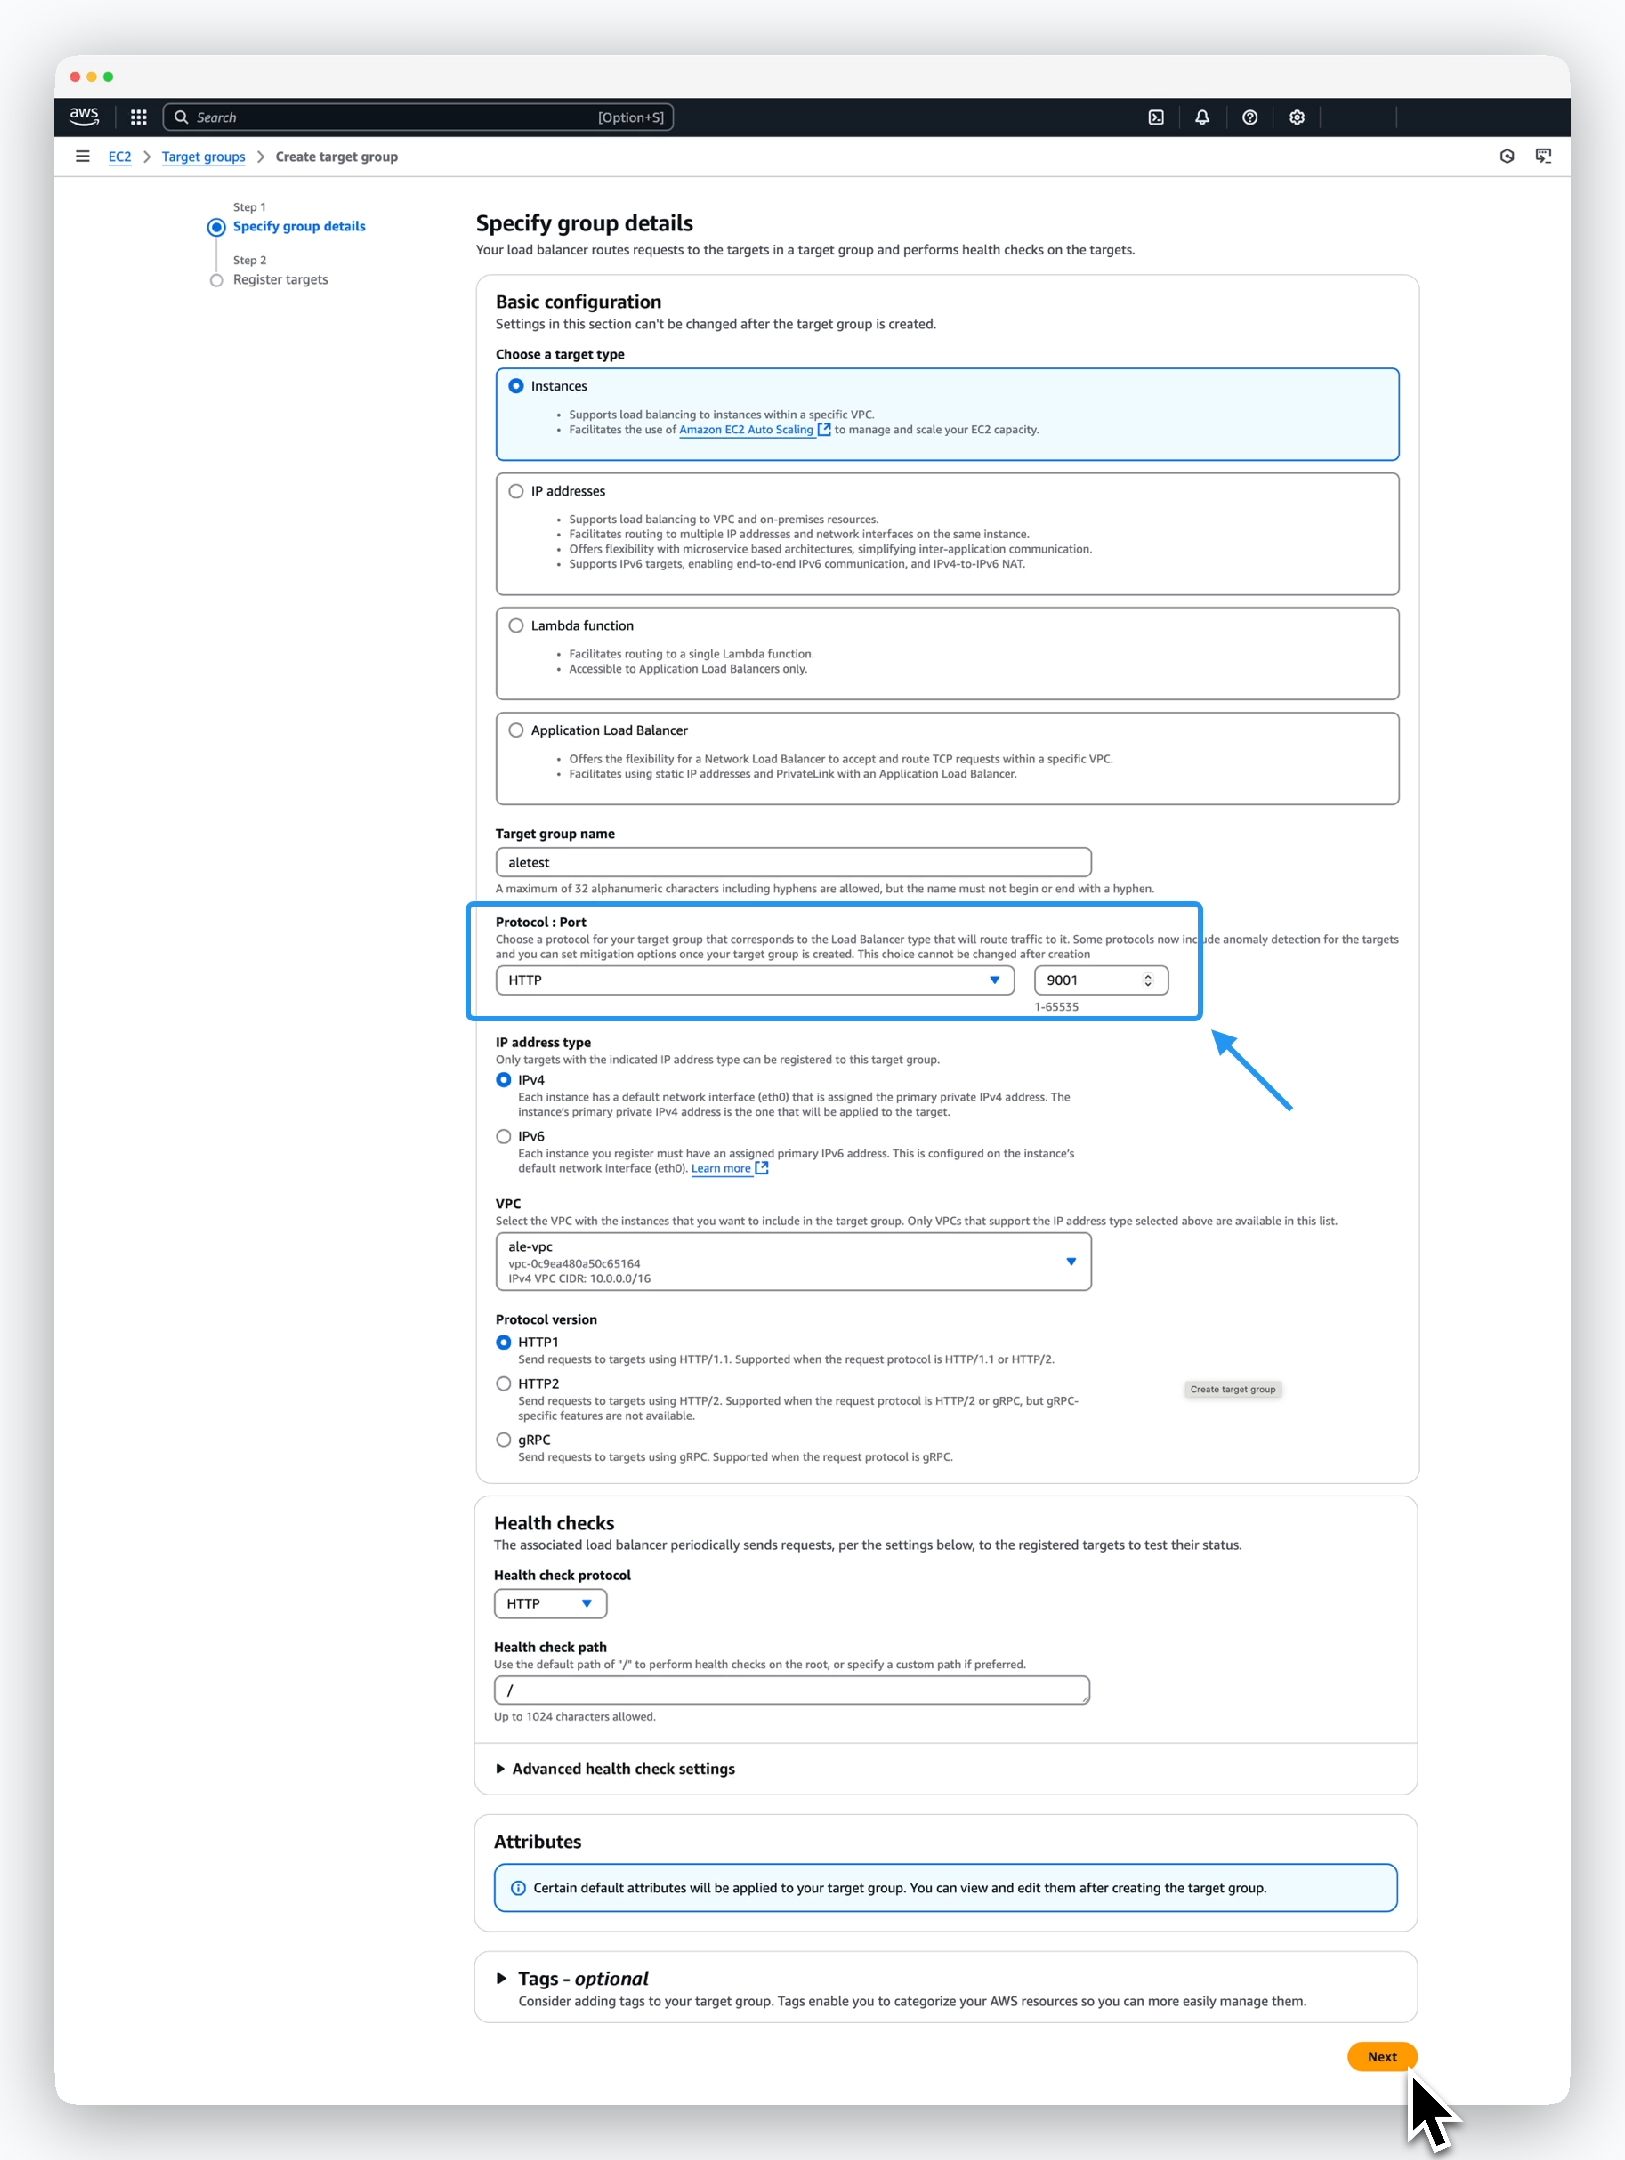 > In the Specify group details menu, enter or select the target group information as follows and click `Next`.
* Basic configuration
* Choose a target type: Instances
* Target group name: Enter target group name
* Protocol-Port: HTTP, 9001
* IP address type: IPv4
* VPC: Select VPC containing the instance
* Protocol version: HTTP1
> In the Specify group details menu, enter or select the target group information as follows and click `Next`.
* Basic configuration
* Choose a target type: Instances
* Target group name: Enter target group name
* Protocol-Port: HTTP, 9001
* IP address type: IPv4
* VPC: Select VPC containing the instance
* Protocol version: HTTP1
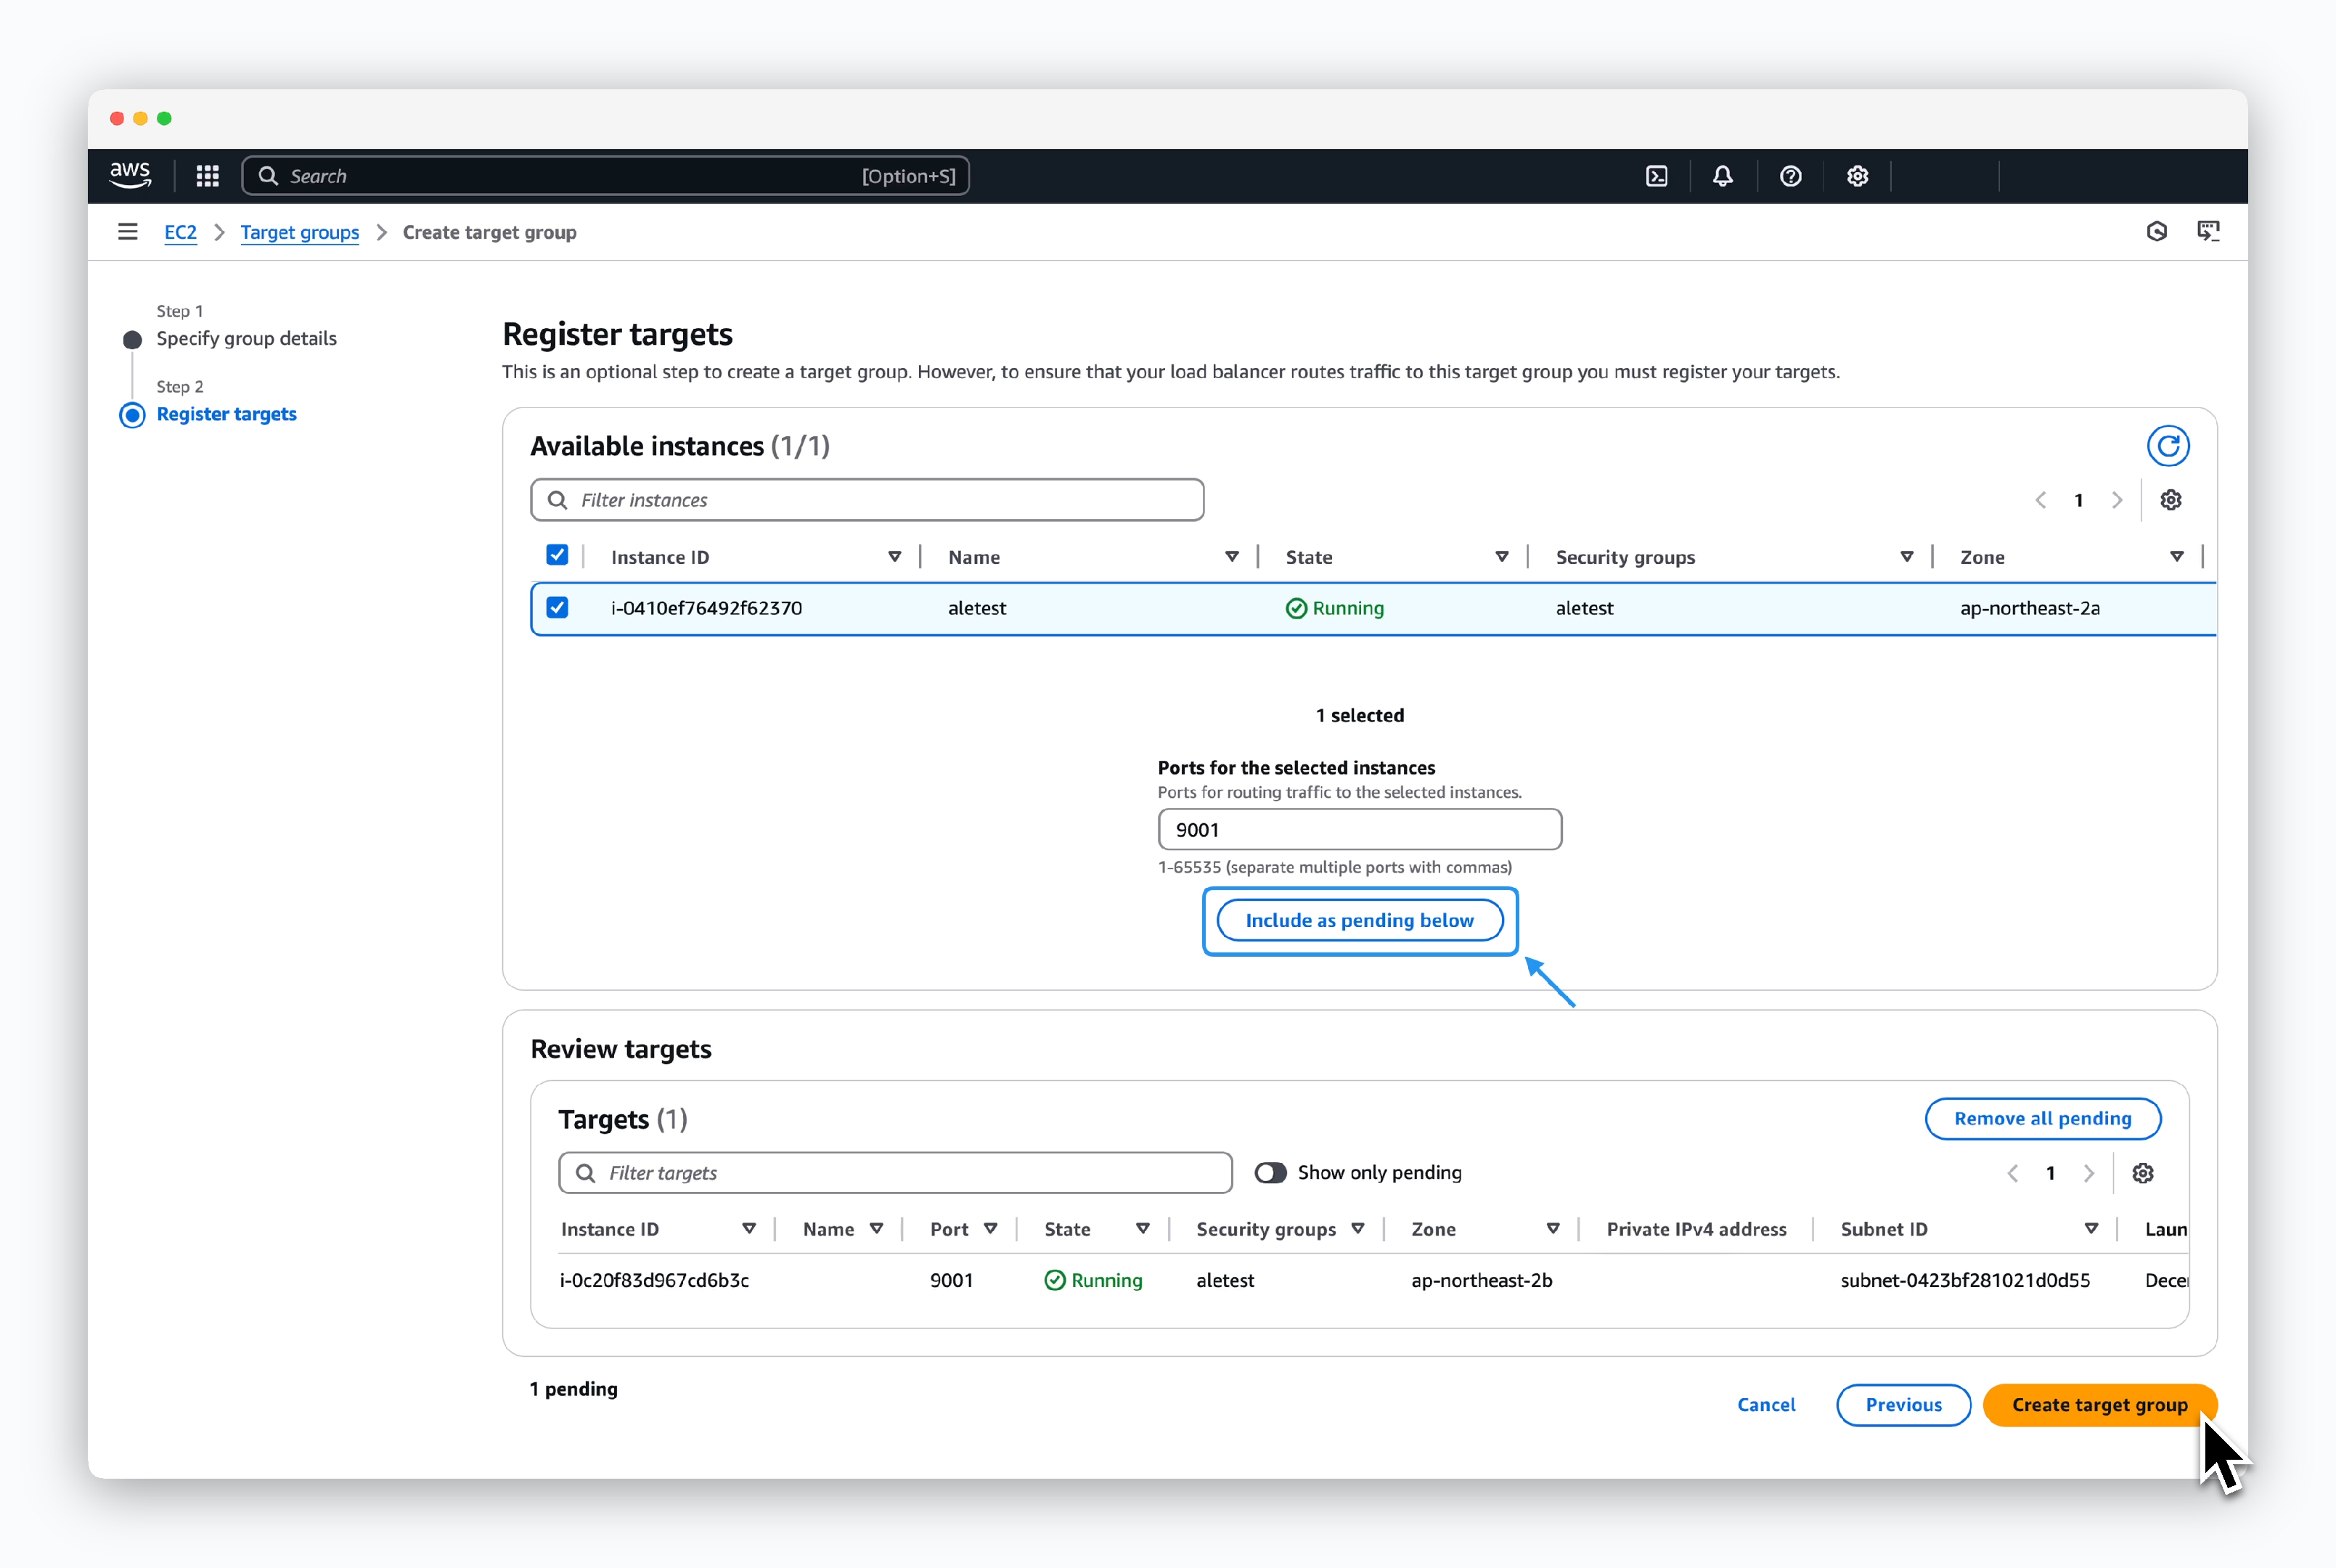 > Select the instance where `ale` is installed, enter 9001 in Ports for the selected instances, and click Include as pending below.
> Then click `Create target group`.
## Create ALB
> Select the instance where `ale` is installed, enter 9001 in Ports for the selected instances, and click Include as pending below.
> Then click `Create target group`.
## Create ALB
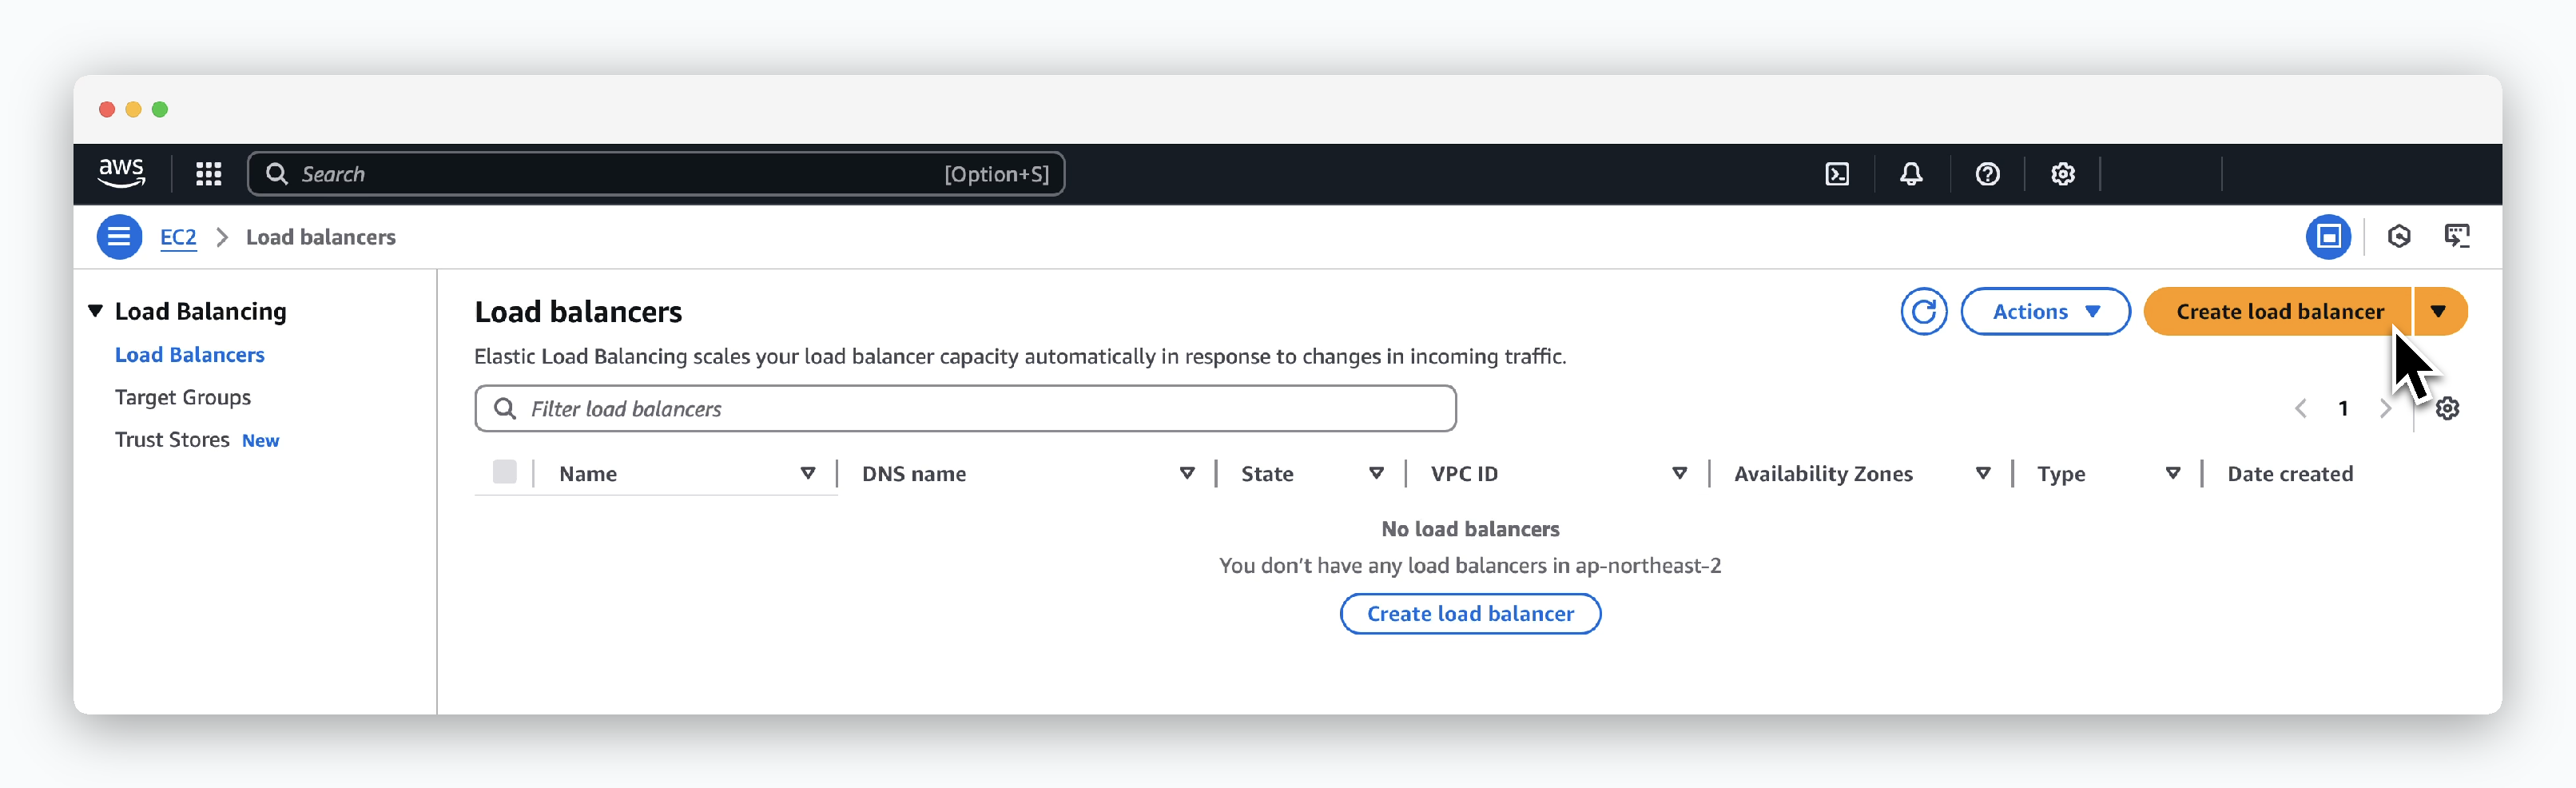 > Click `Create Load Balancer` in `EC2 > Load Balancing > Load balancers`.
> Then select **Application Load Balancer**.
> Click `Create Load Balancer` in `EC2 > Load Balancing > Load balancers`.
> Then select **Application Load Balancer**.
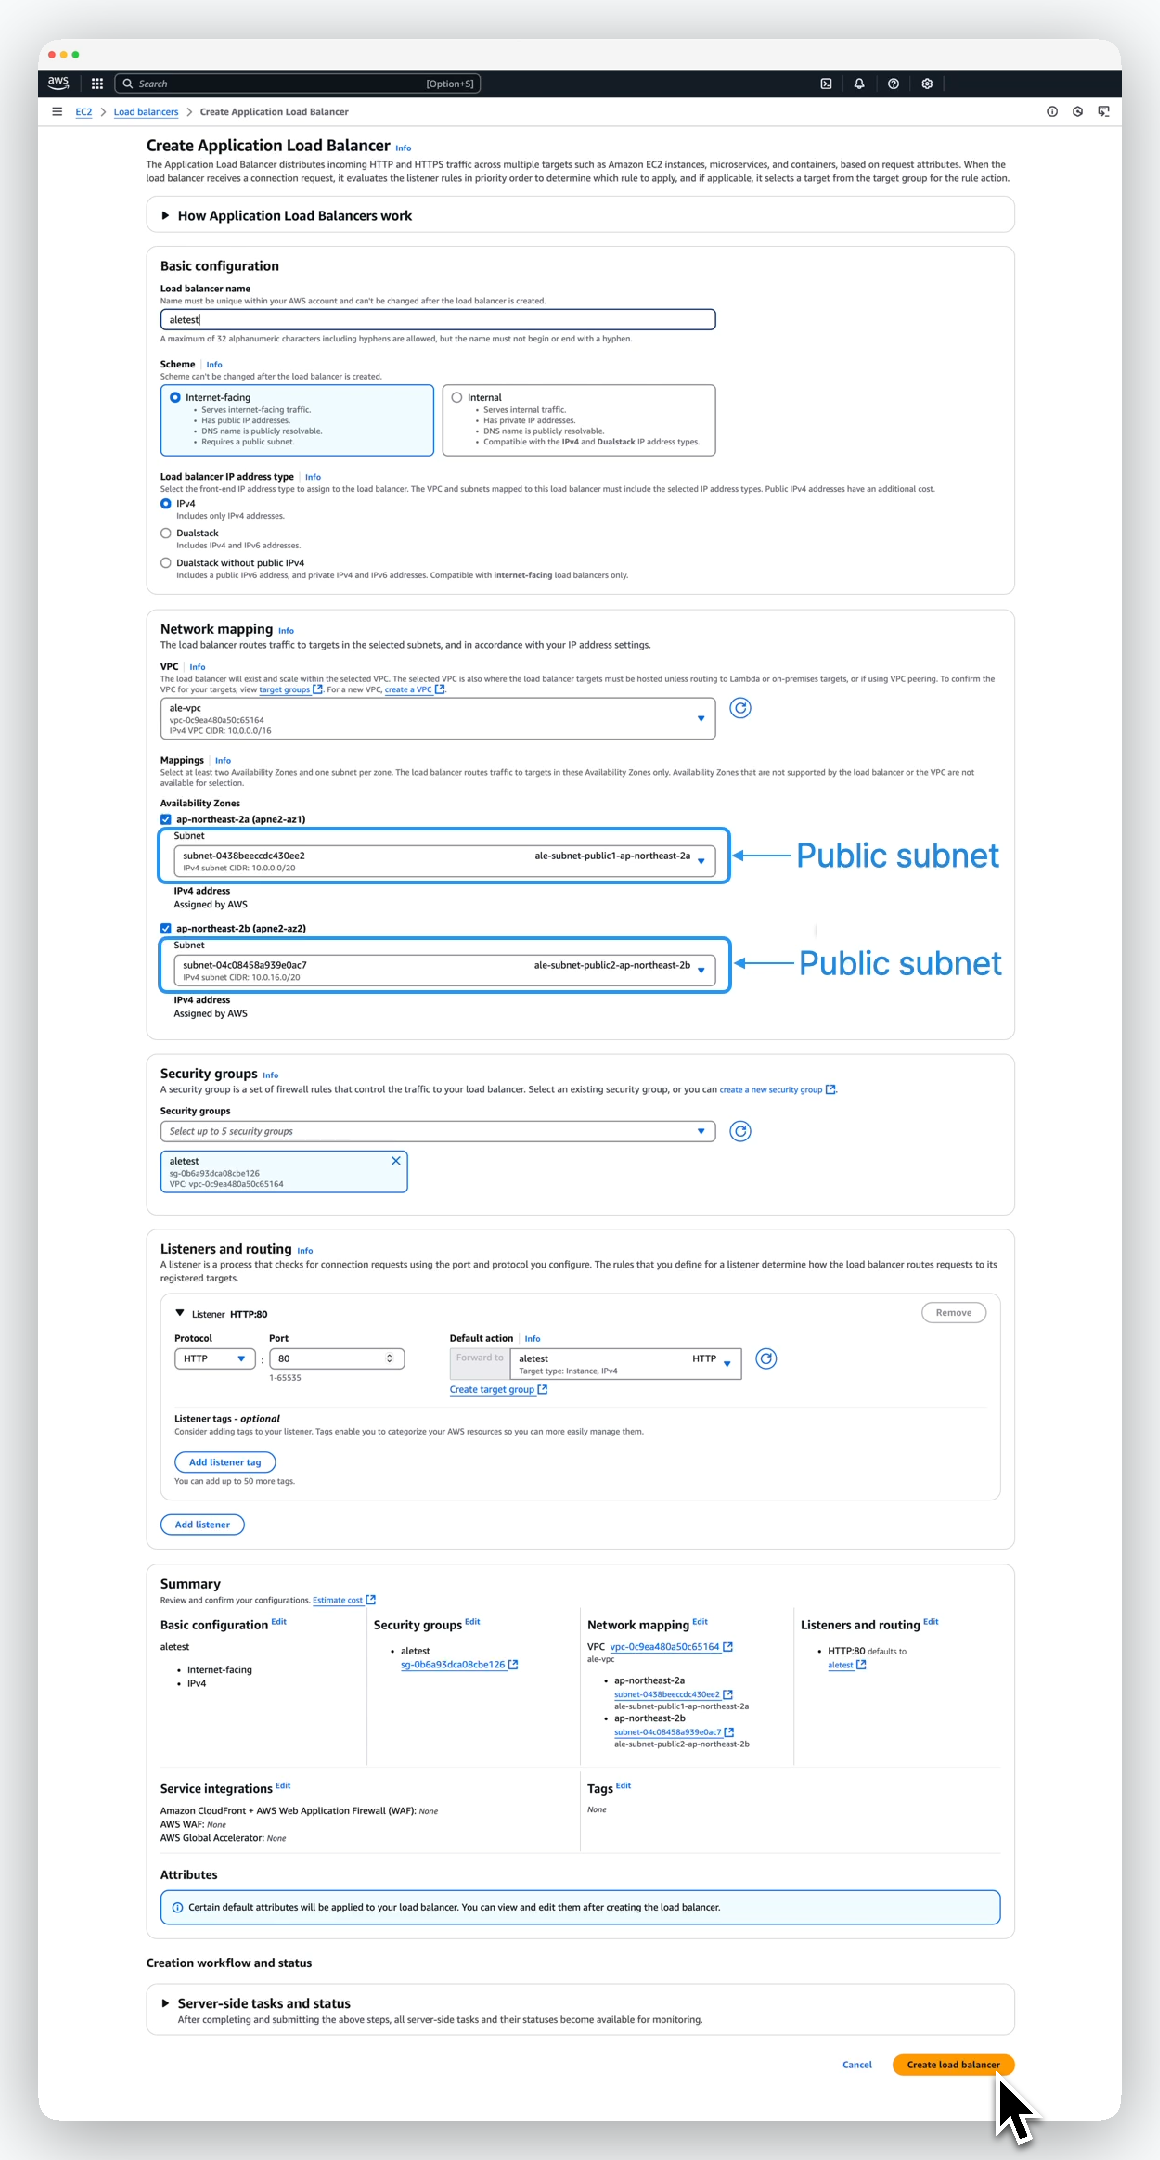 > Enter or select the load balancer information as follows and click `Create load balancer`:
* Basic configuration
* Name: ALB name
* Scheme: internet-facing
* IP address type: ipv4
* Network mapping
* VPC: Select VPC containing the instance
* Availability Zones: Select all available subnets
* Security groups
* Security groups: Select security group applied to EC2 instance
* Listeners and routing
* Listener port: 80
* Target group: Select previously created target group
> Enter or select the load balancer information as follows and click `Create load balancer`:
* Basic configuration
* Name: ALB name
* Scheme: internet-facing
* IP address type: ipv4
* Network mapping
* VPC: Select VPC containing the instance
* Availability Zones: Select all available subnets
* Security groups
* Security groups: Select security group applied to EC2 instance
* Listeners and routing
* Listener port: 80
* Target group: Select previously created target group
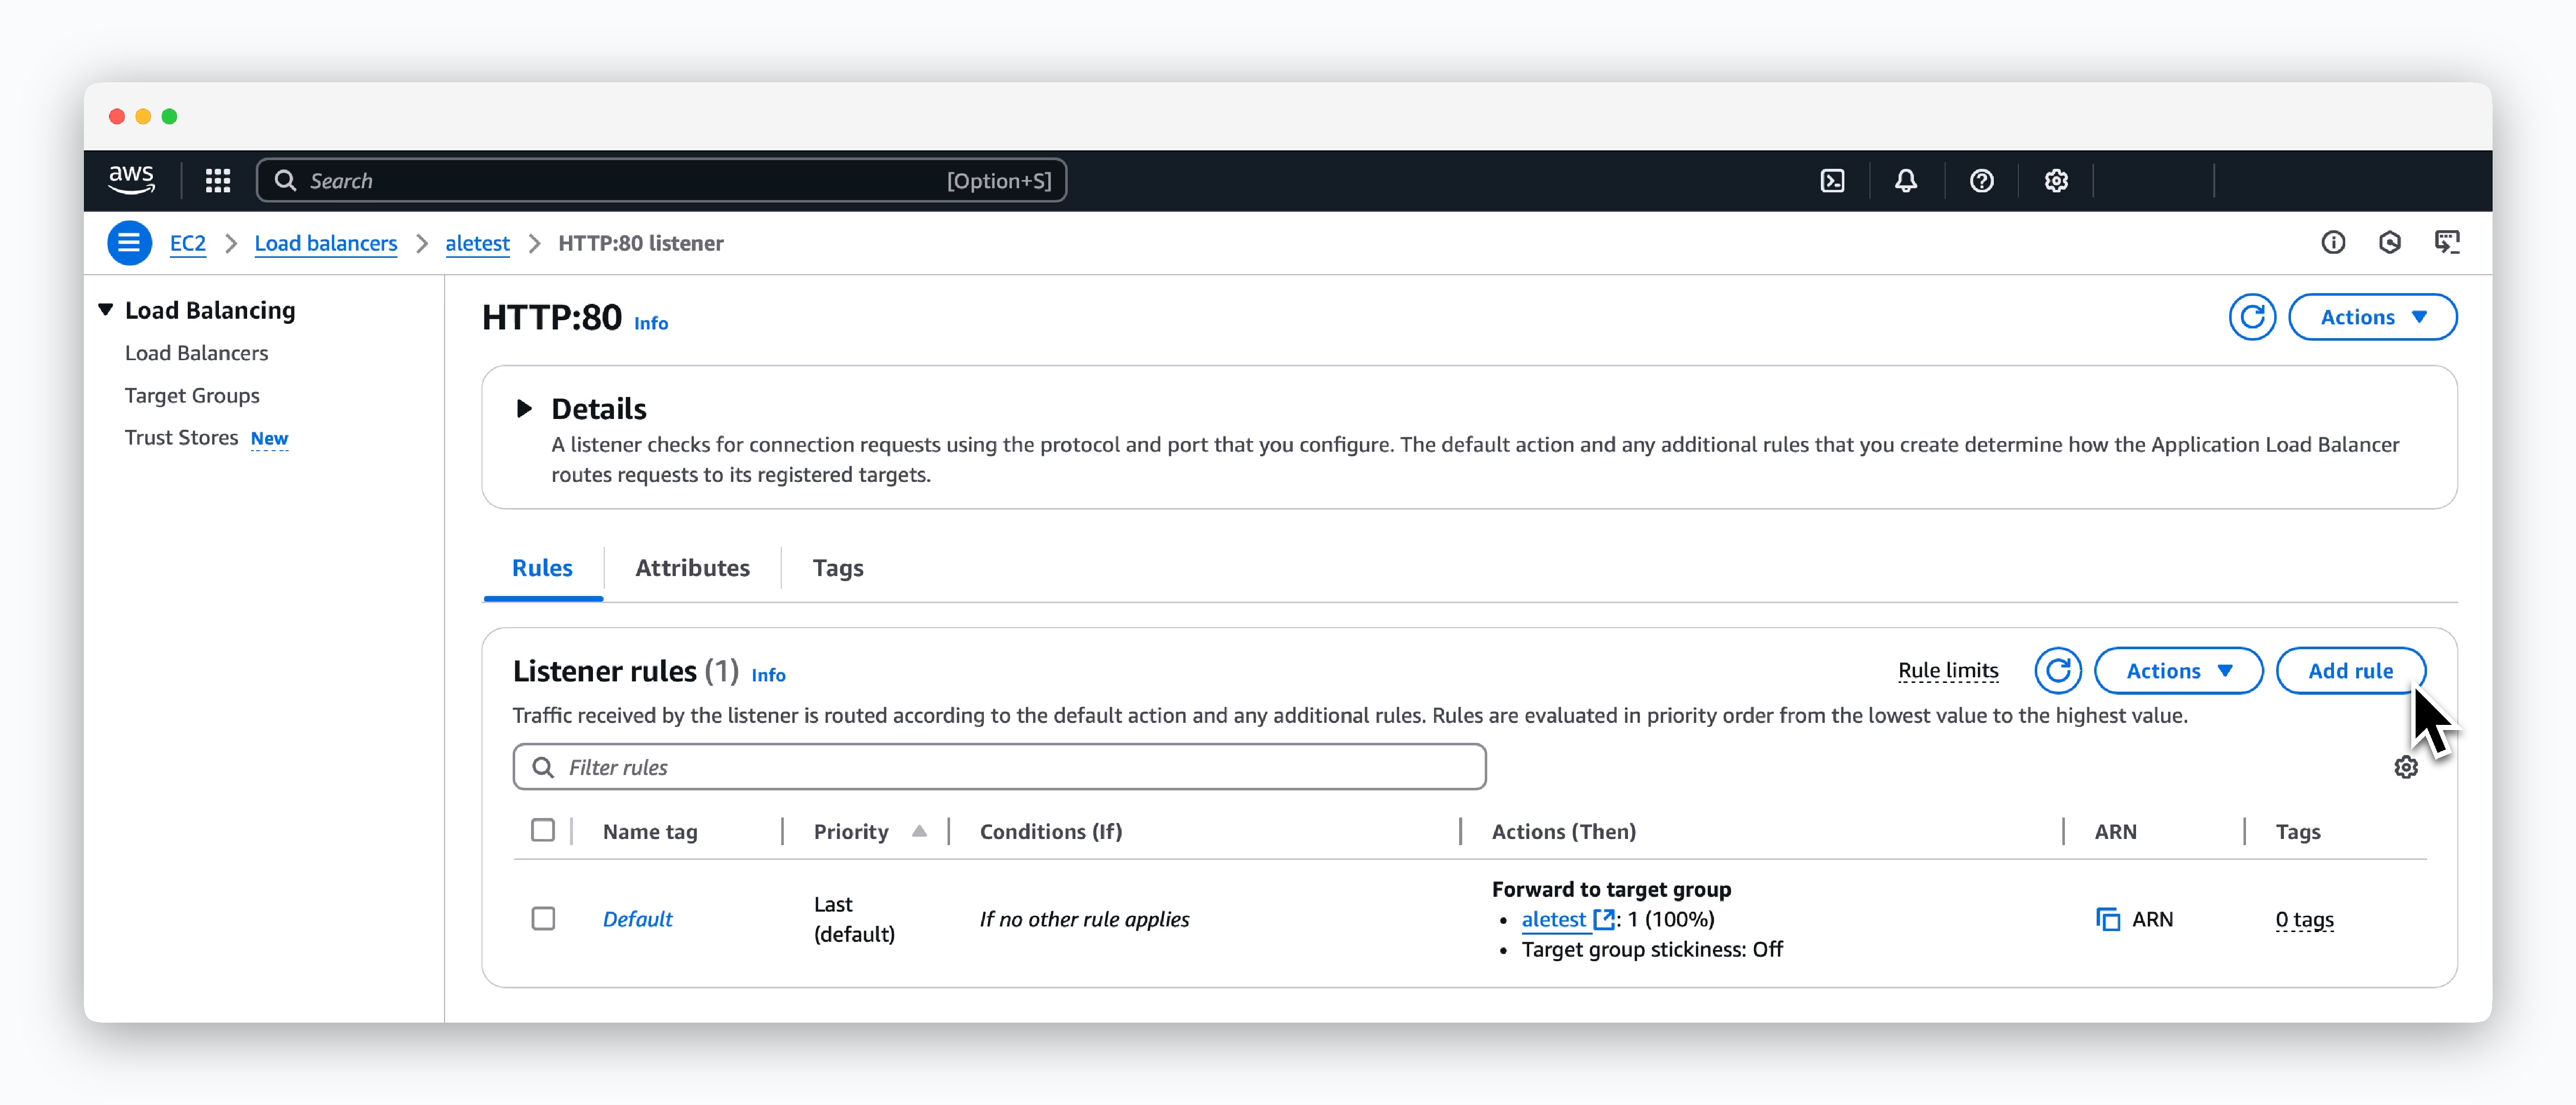 > Click `Add rule` in the created Load balancer page, and create a rule following these 5 steps:
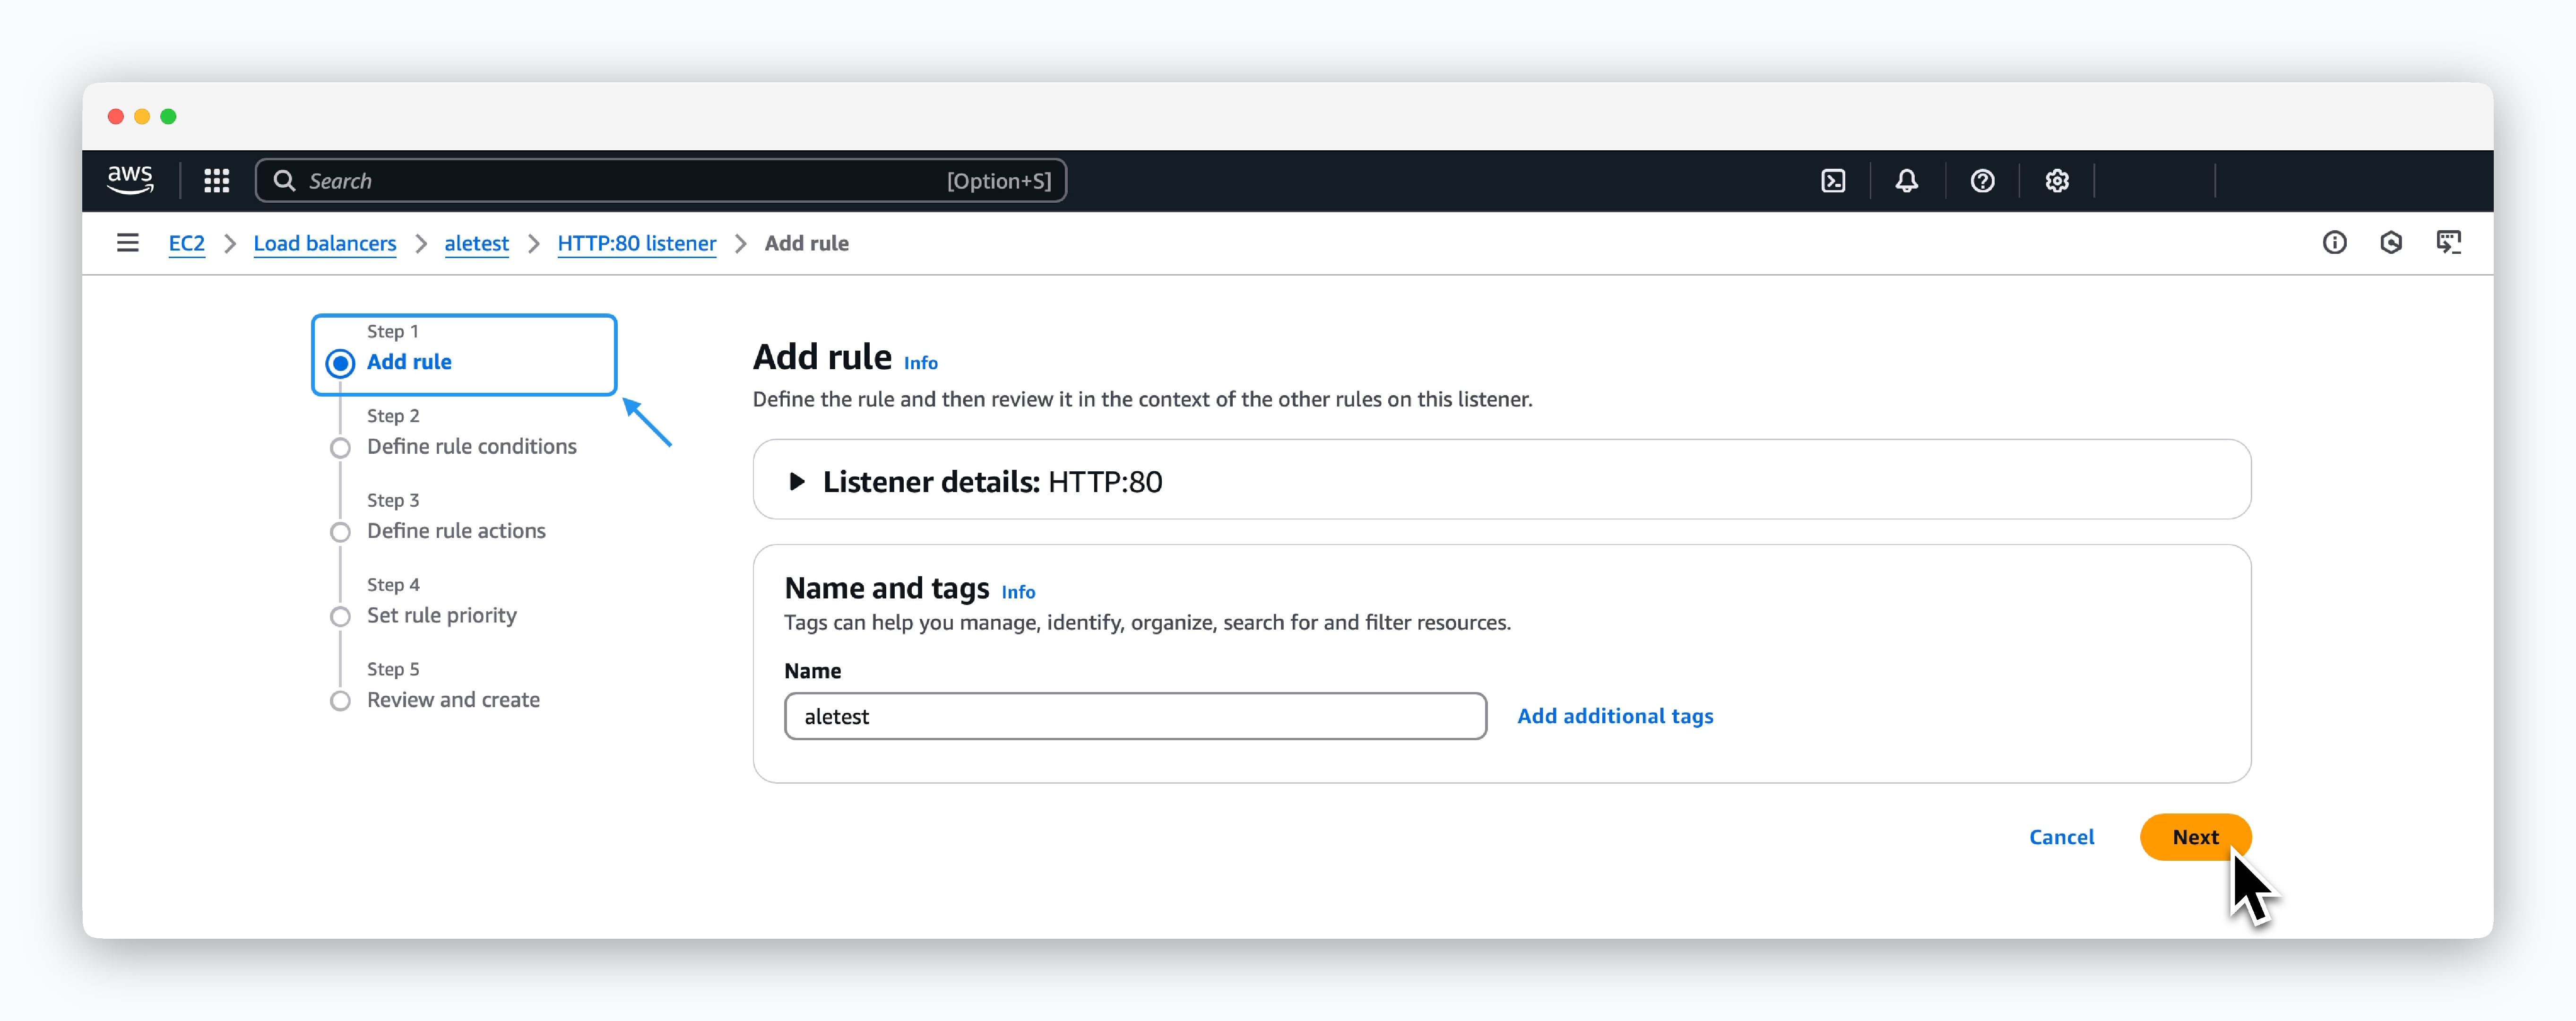 > Enter the Rule name in the Name field.
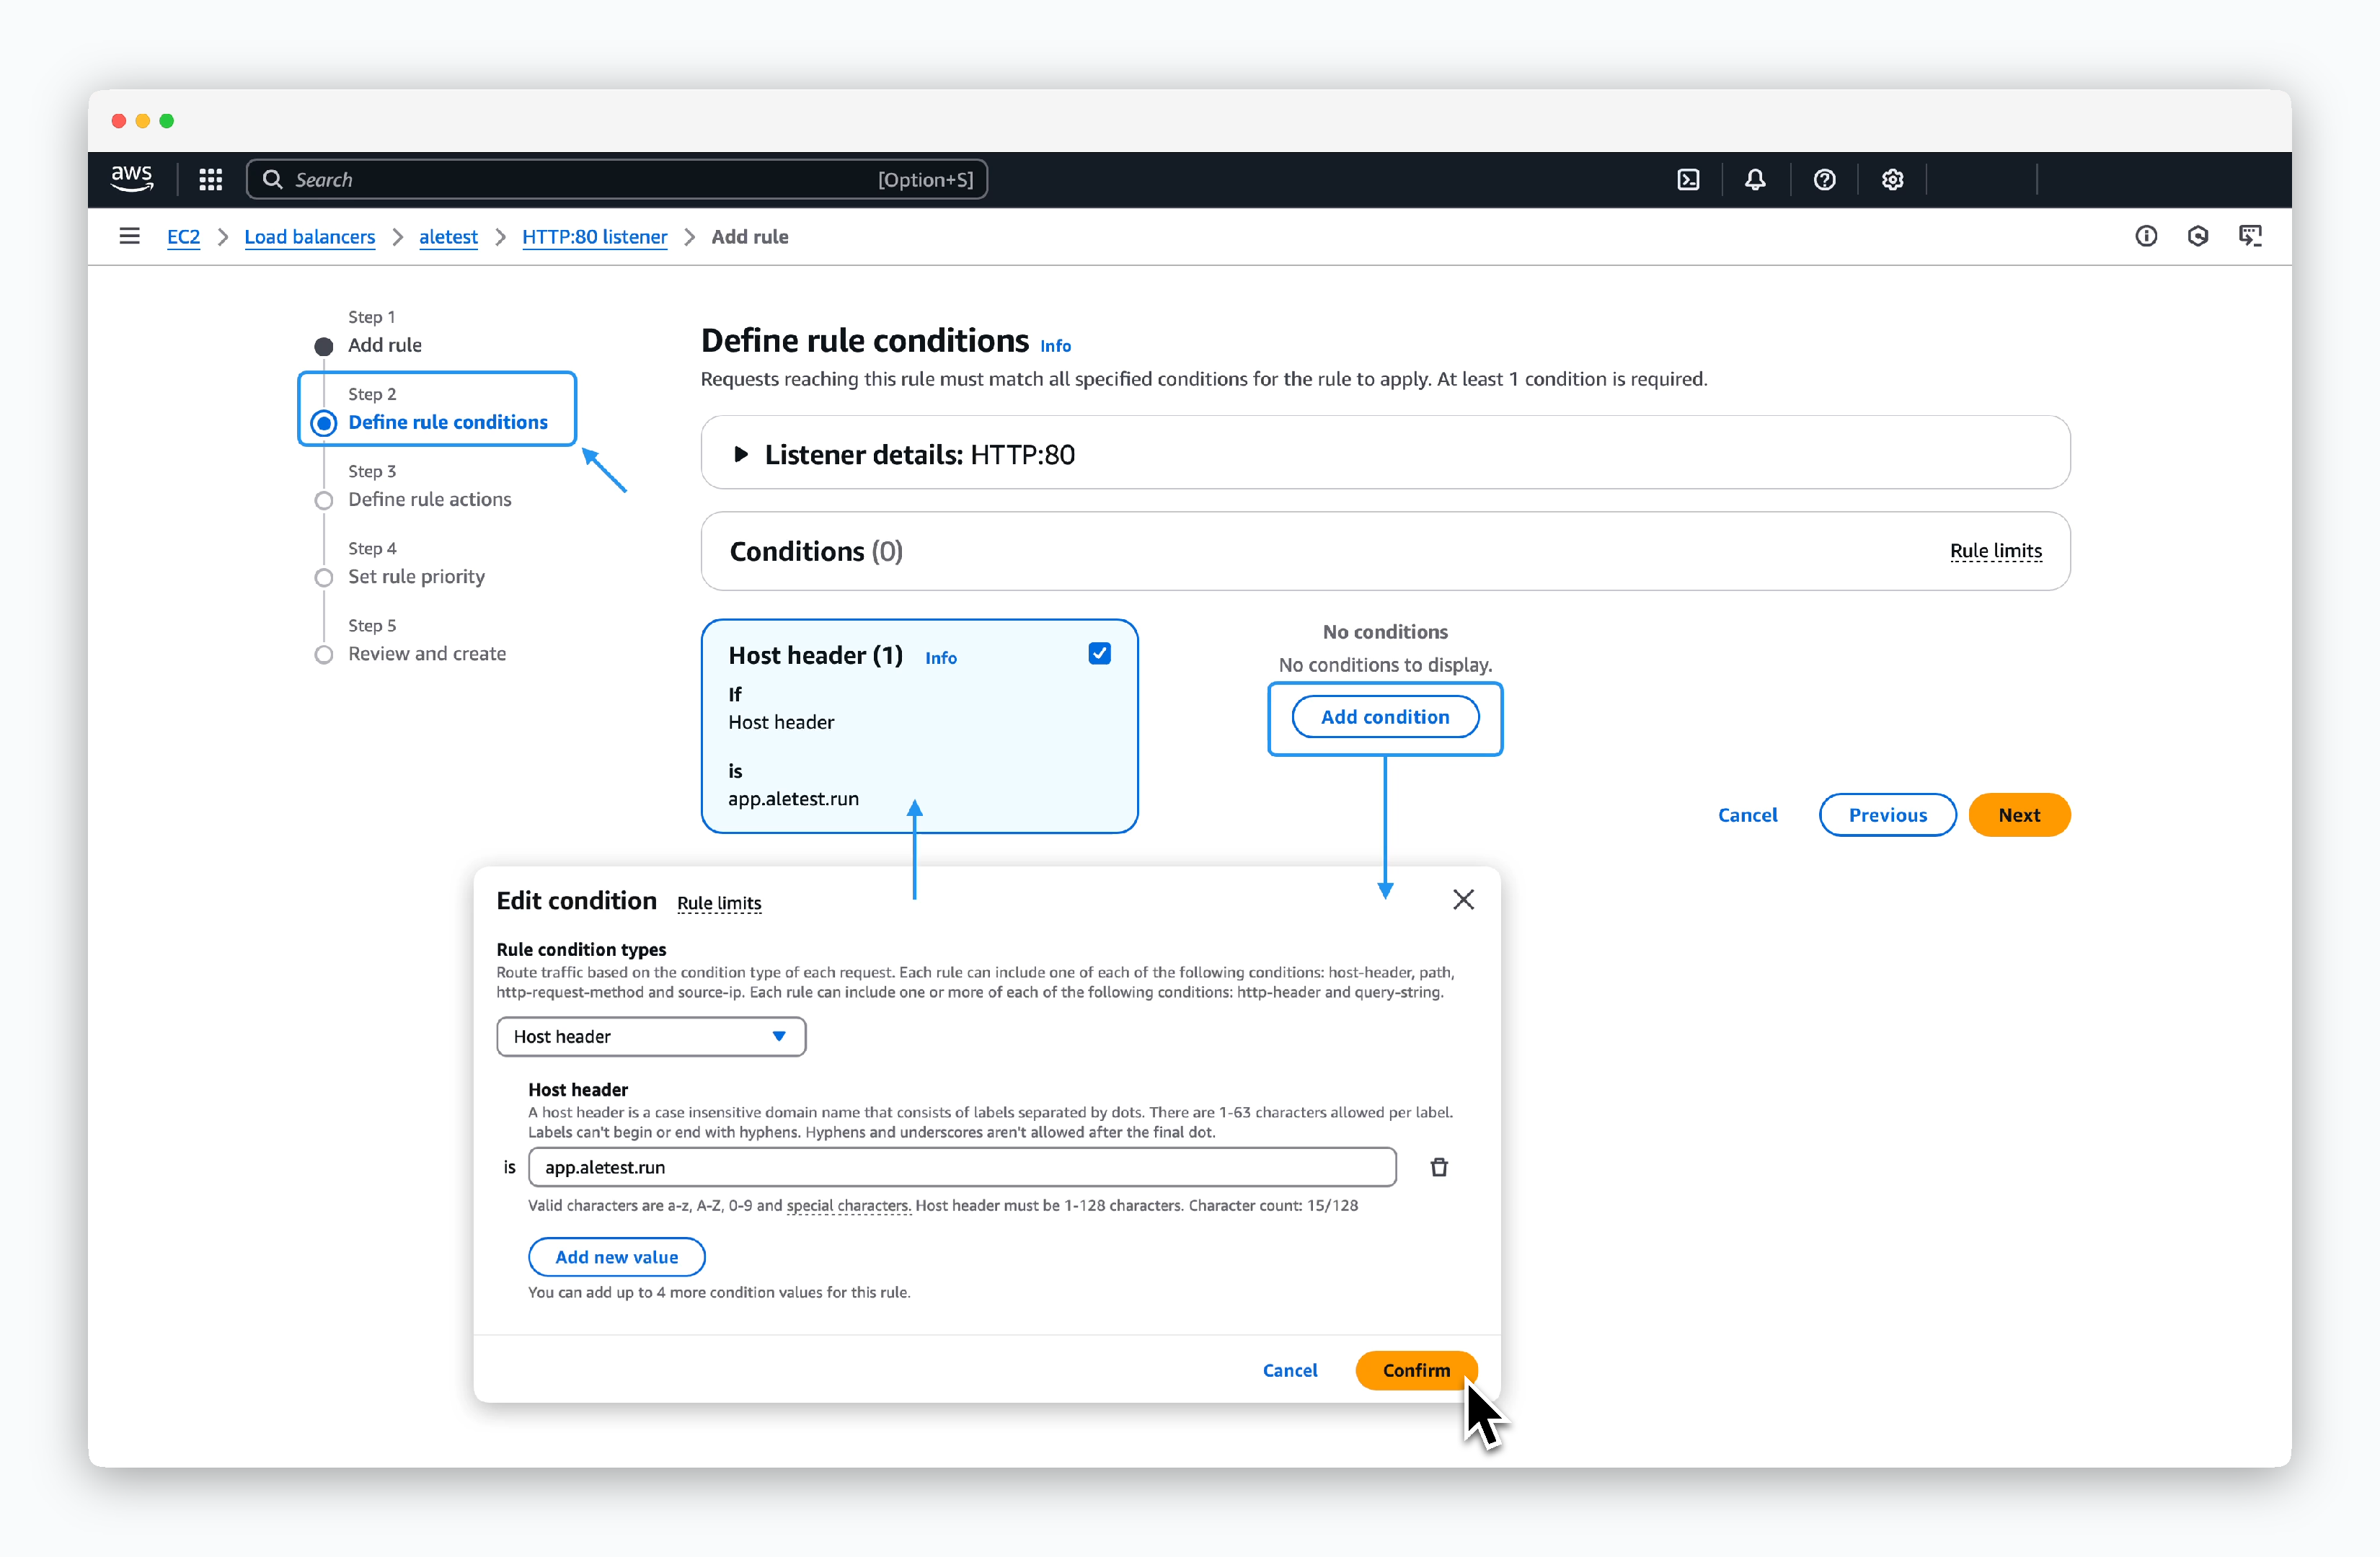 > Click `Add condition`, select Host header in the modal, enter `app.[domain]`, and click `confirm` to create a Condition card. Then click `Next`.
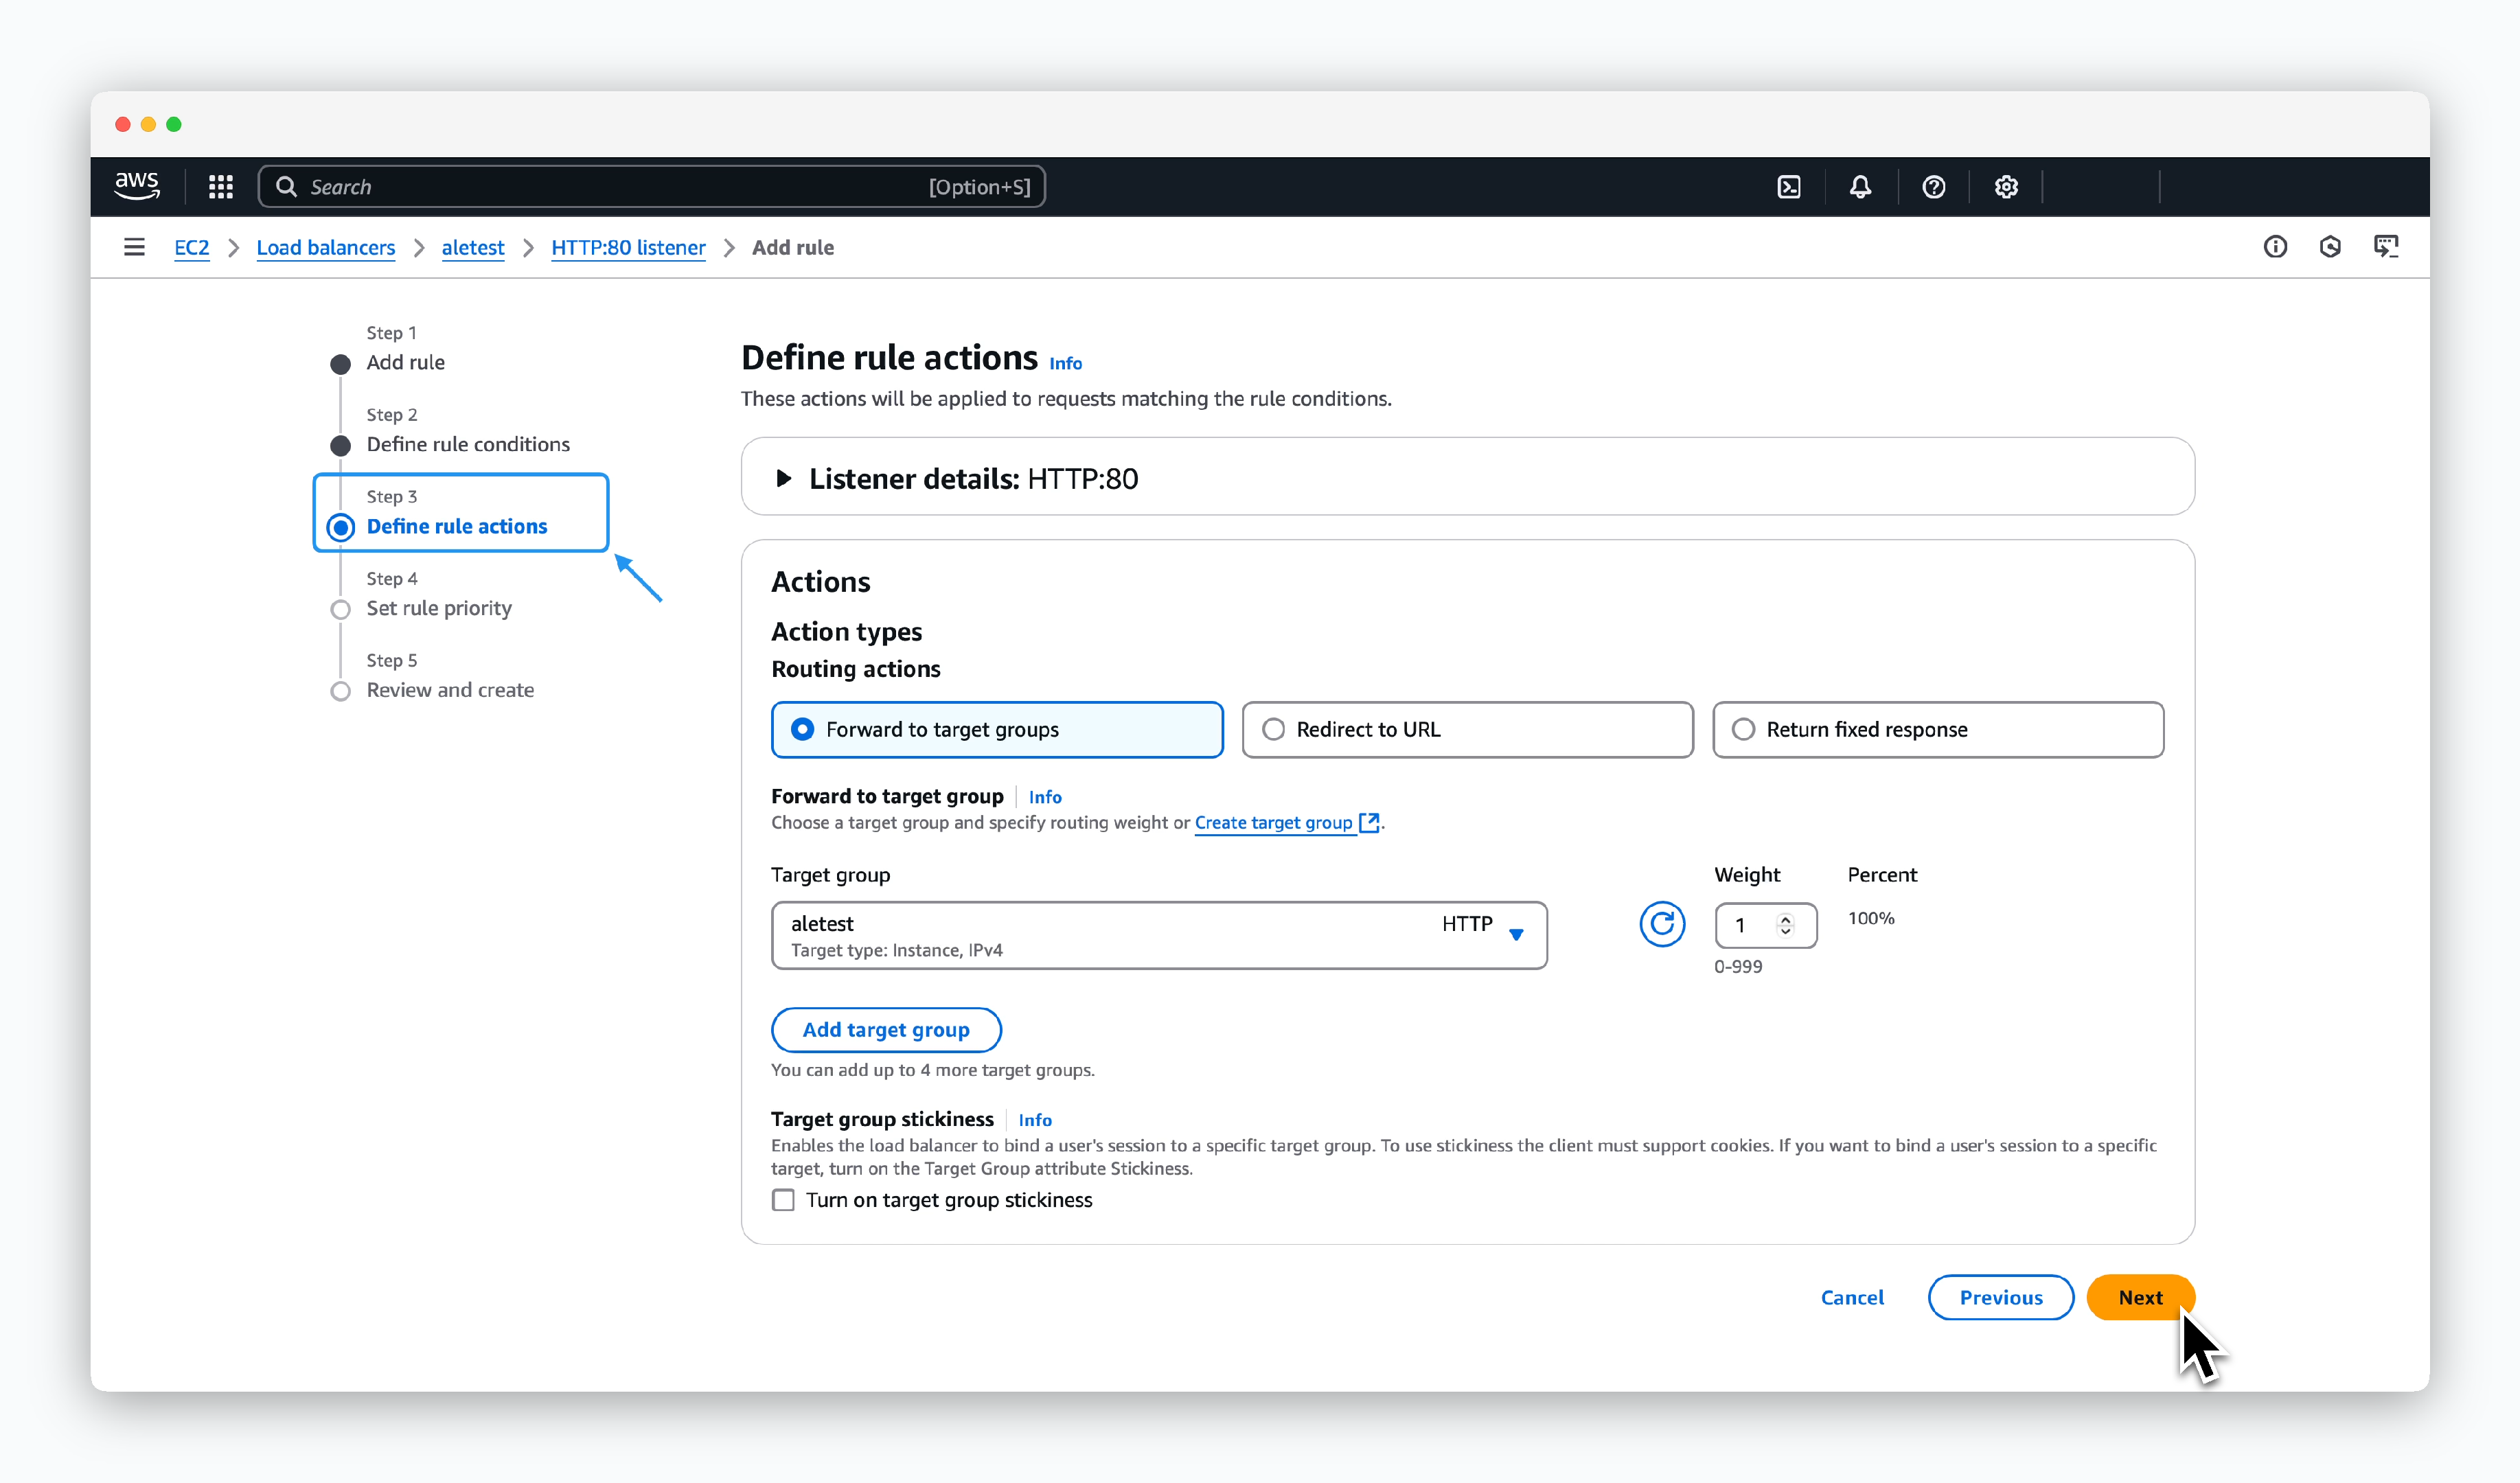 > Select Forward to target groups for Action types, choose the previously created target group, and click `Next`.
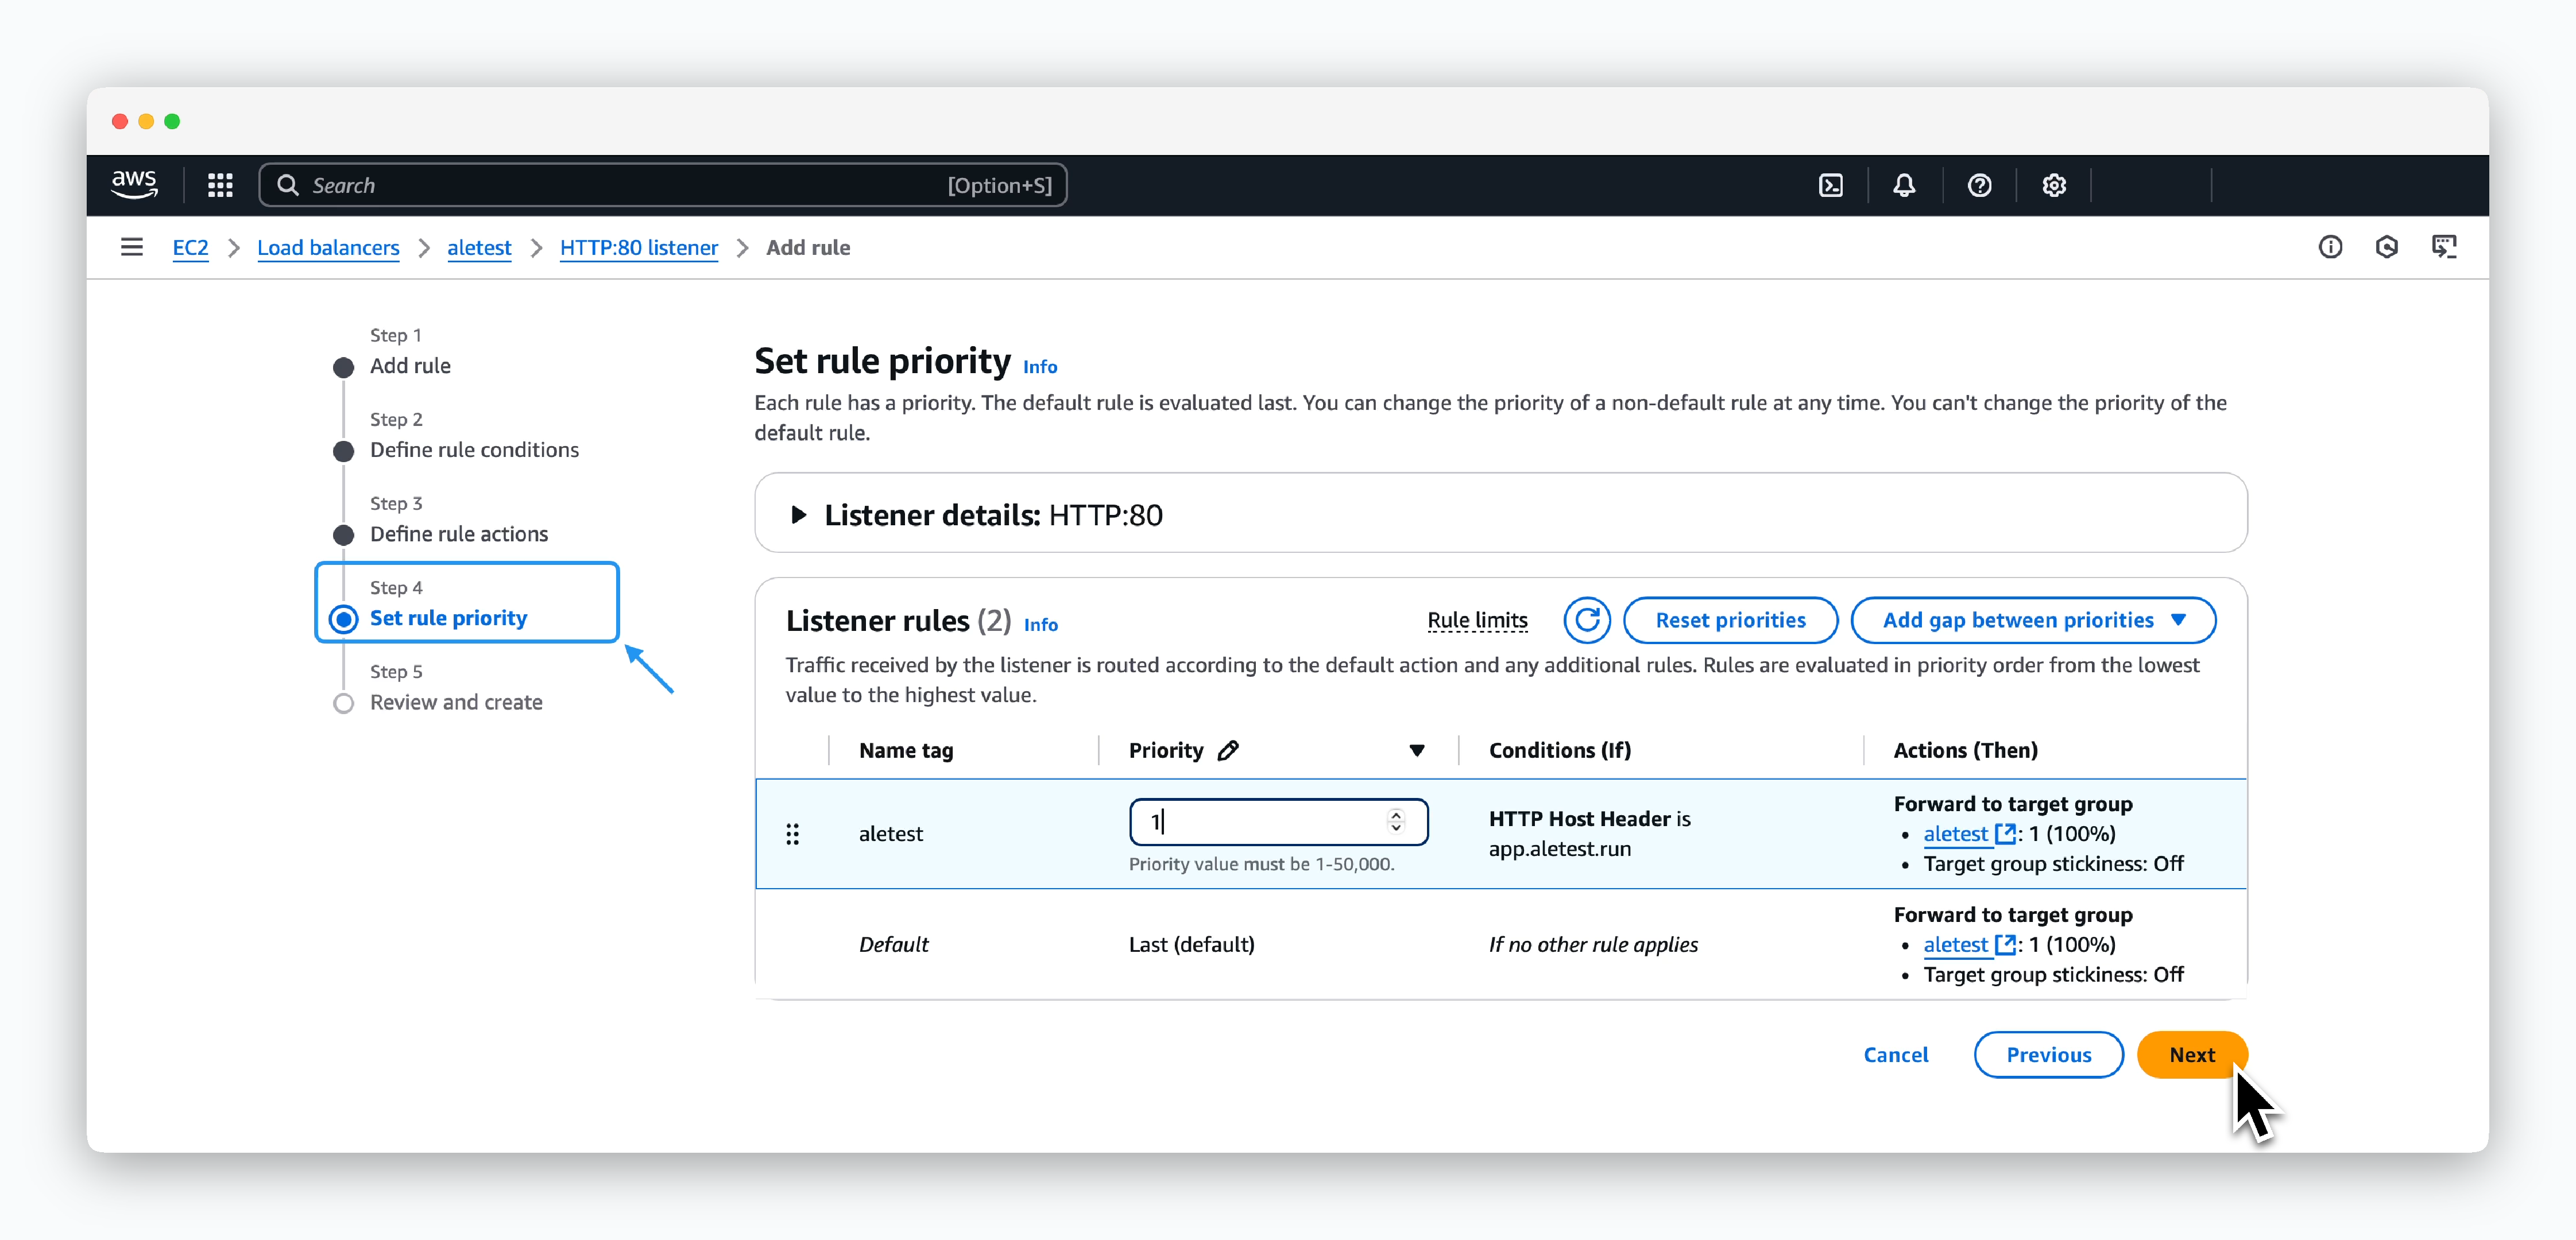 > Set Priority to 1 and click `Next`.
 > Finally, click `Create` to create the rule.
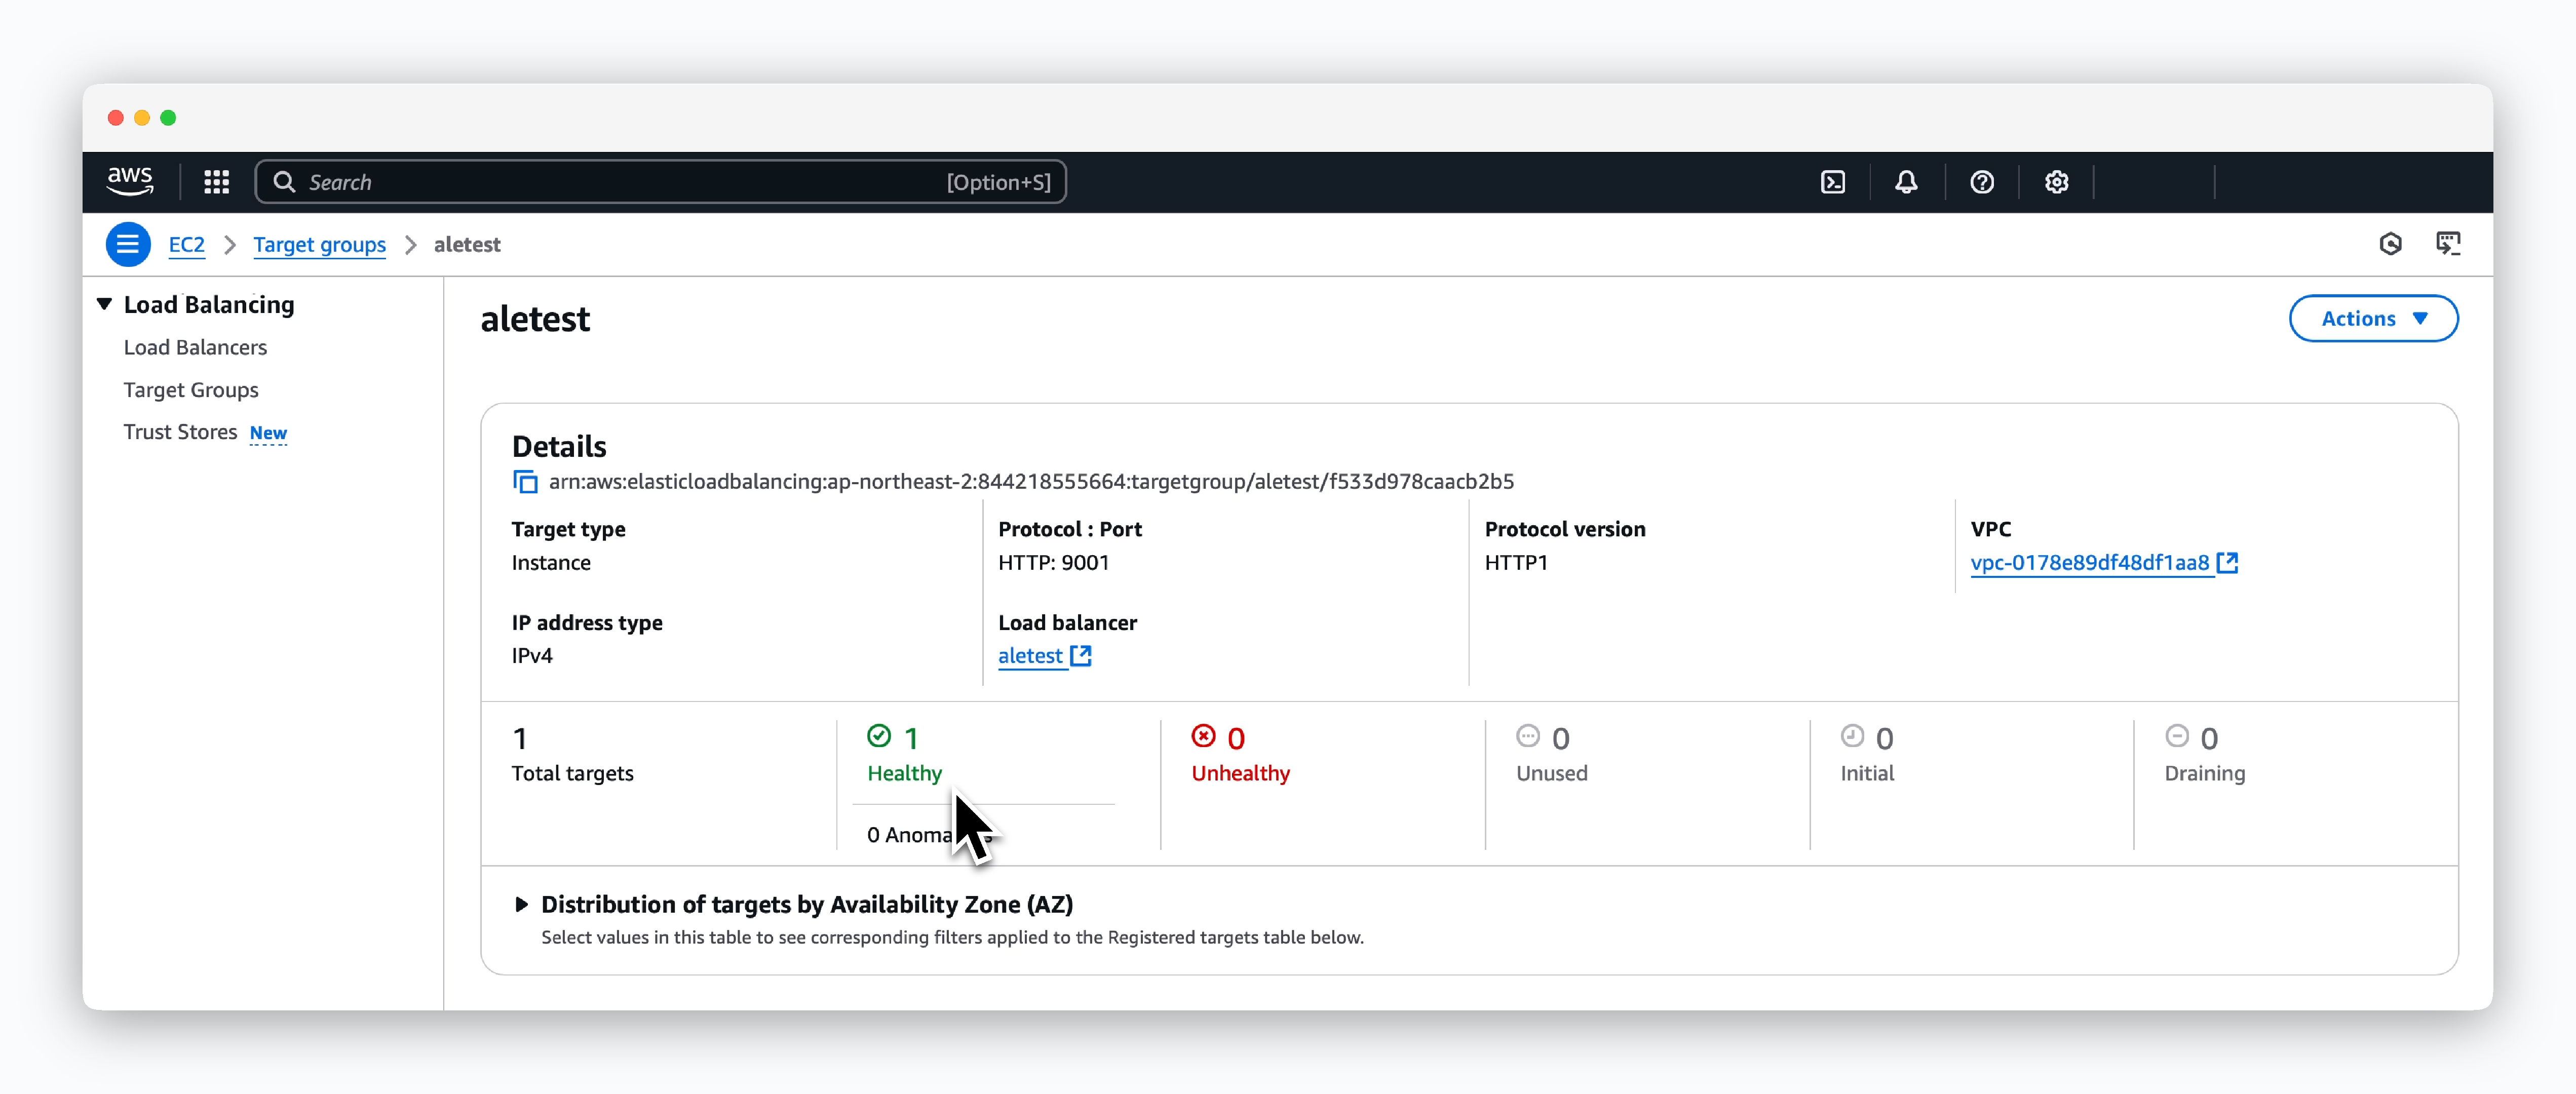
After creating the rule, wait a moment. If `ale` is running properly on the instance, the status of the target group routed by ALB will show as Healthy as in the image below.
> Finally, click `Create` to create the rule.
After creating the rule, wait a moment. If `ale` is running properly on the instance, the status of the target group routed by ALB will show as Healthy as in the image below.
 ## Create DNS Record for ale dashboard
 > Click `Create record` in Route53 > Hosted zones > Target domain page.
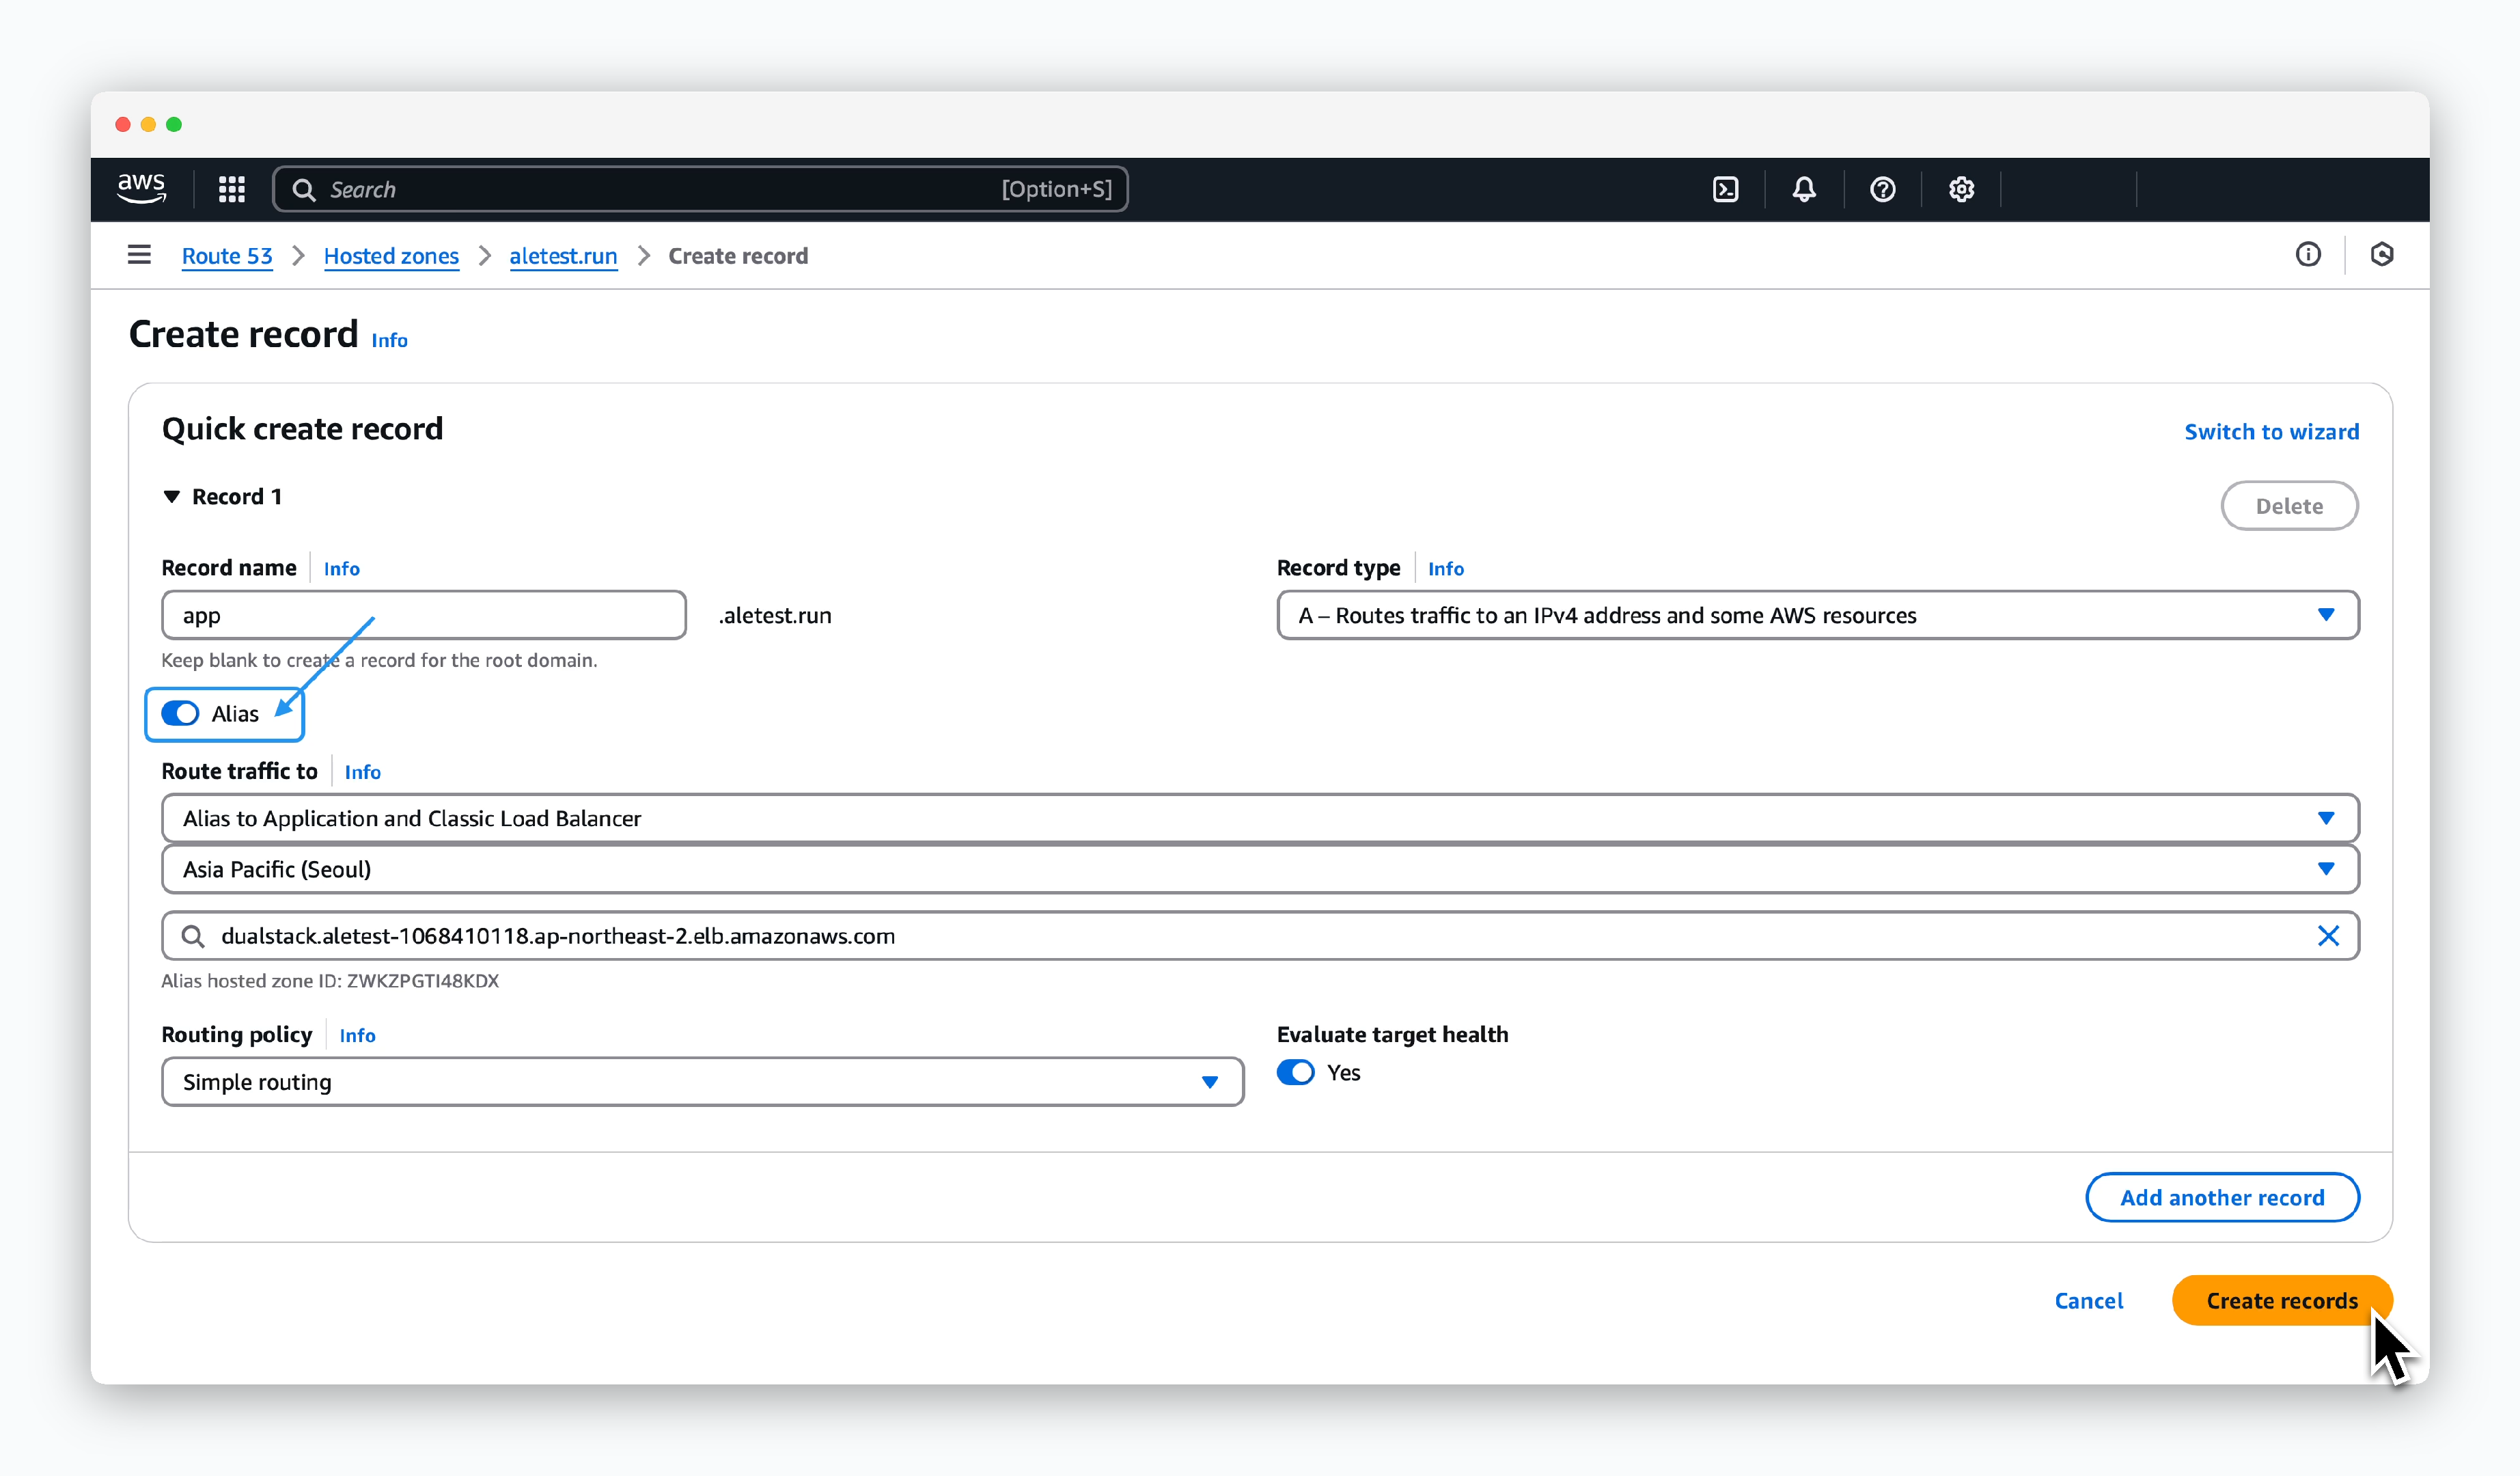 > Enter the values as follows in the create record page and click `Create record`:
* **Record name**: app
* **Record type**: A
* **Alias**: Enable
* **Route traffic to**
* **Alias to Application and Classic Load Balancer**
* **Region**: VPC region
* **ALB**: Select previously created ALB
The domain with the configured record name (e.g., app.aletest.run) will be used as the access domain for `ale`.
## Request ACM Certificate
> Enter the values as follows in the create record page and click `Create record`:
* **Record name**: app
* **Record type**: A
* **Alias**: Enable
* **Route traffic to**
* **Alias to Application and Classic Load Balancer**
* **Region**: VPC region
* **ALB**: Select previously created ALB
The domain with the configured record name (e.g., app.aletest.run) will be used as the access domain for `ale`.
## Request ACM Certificate
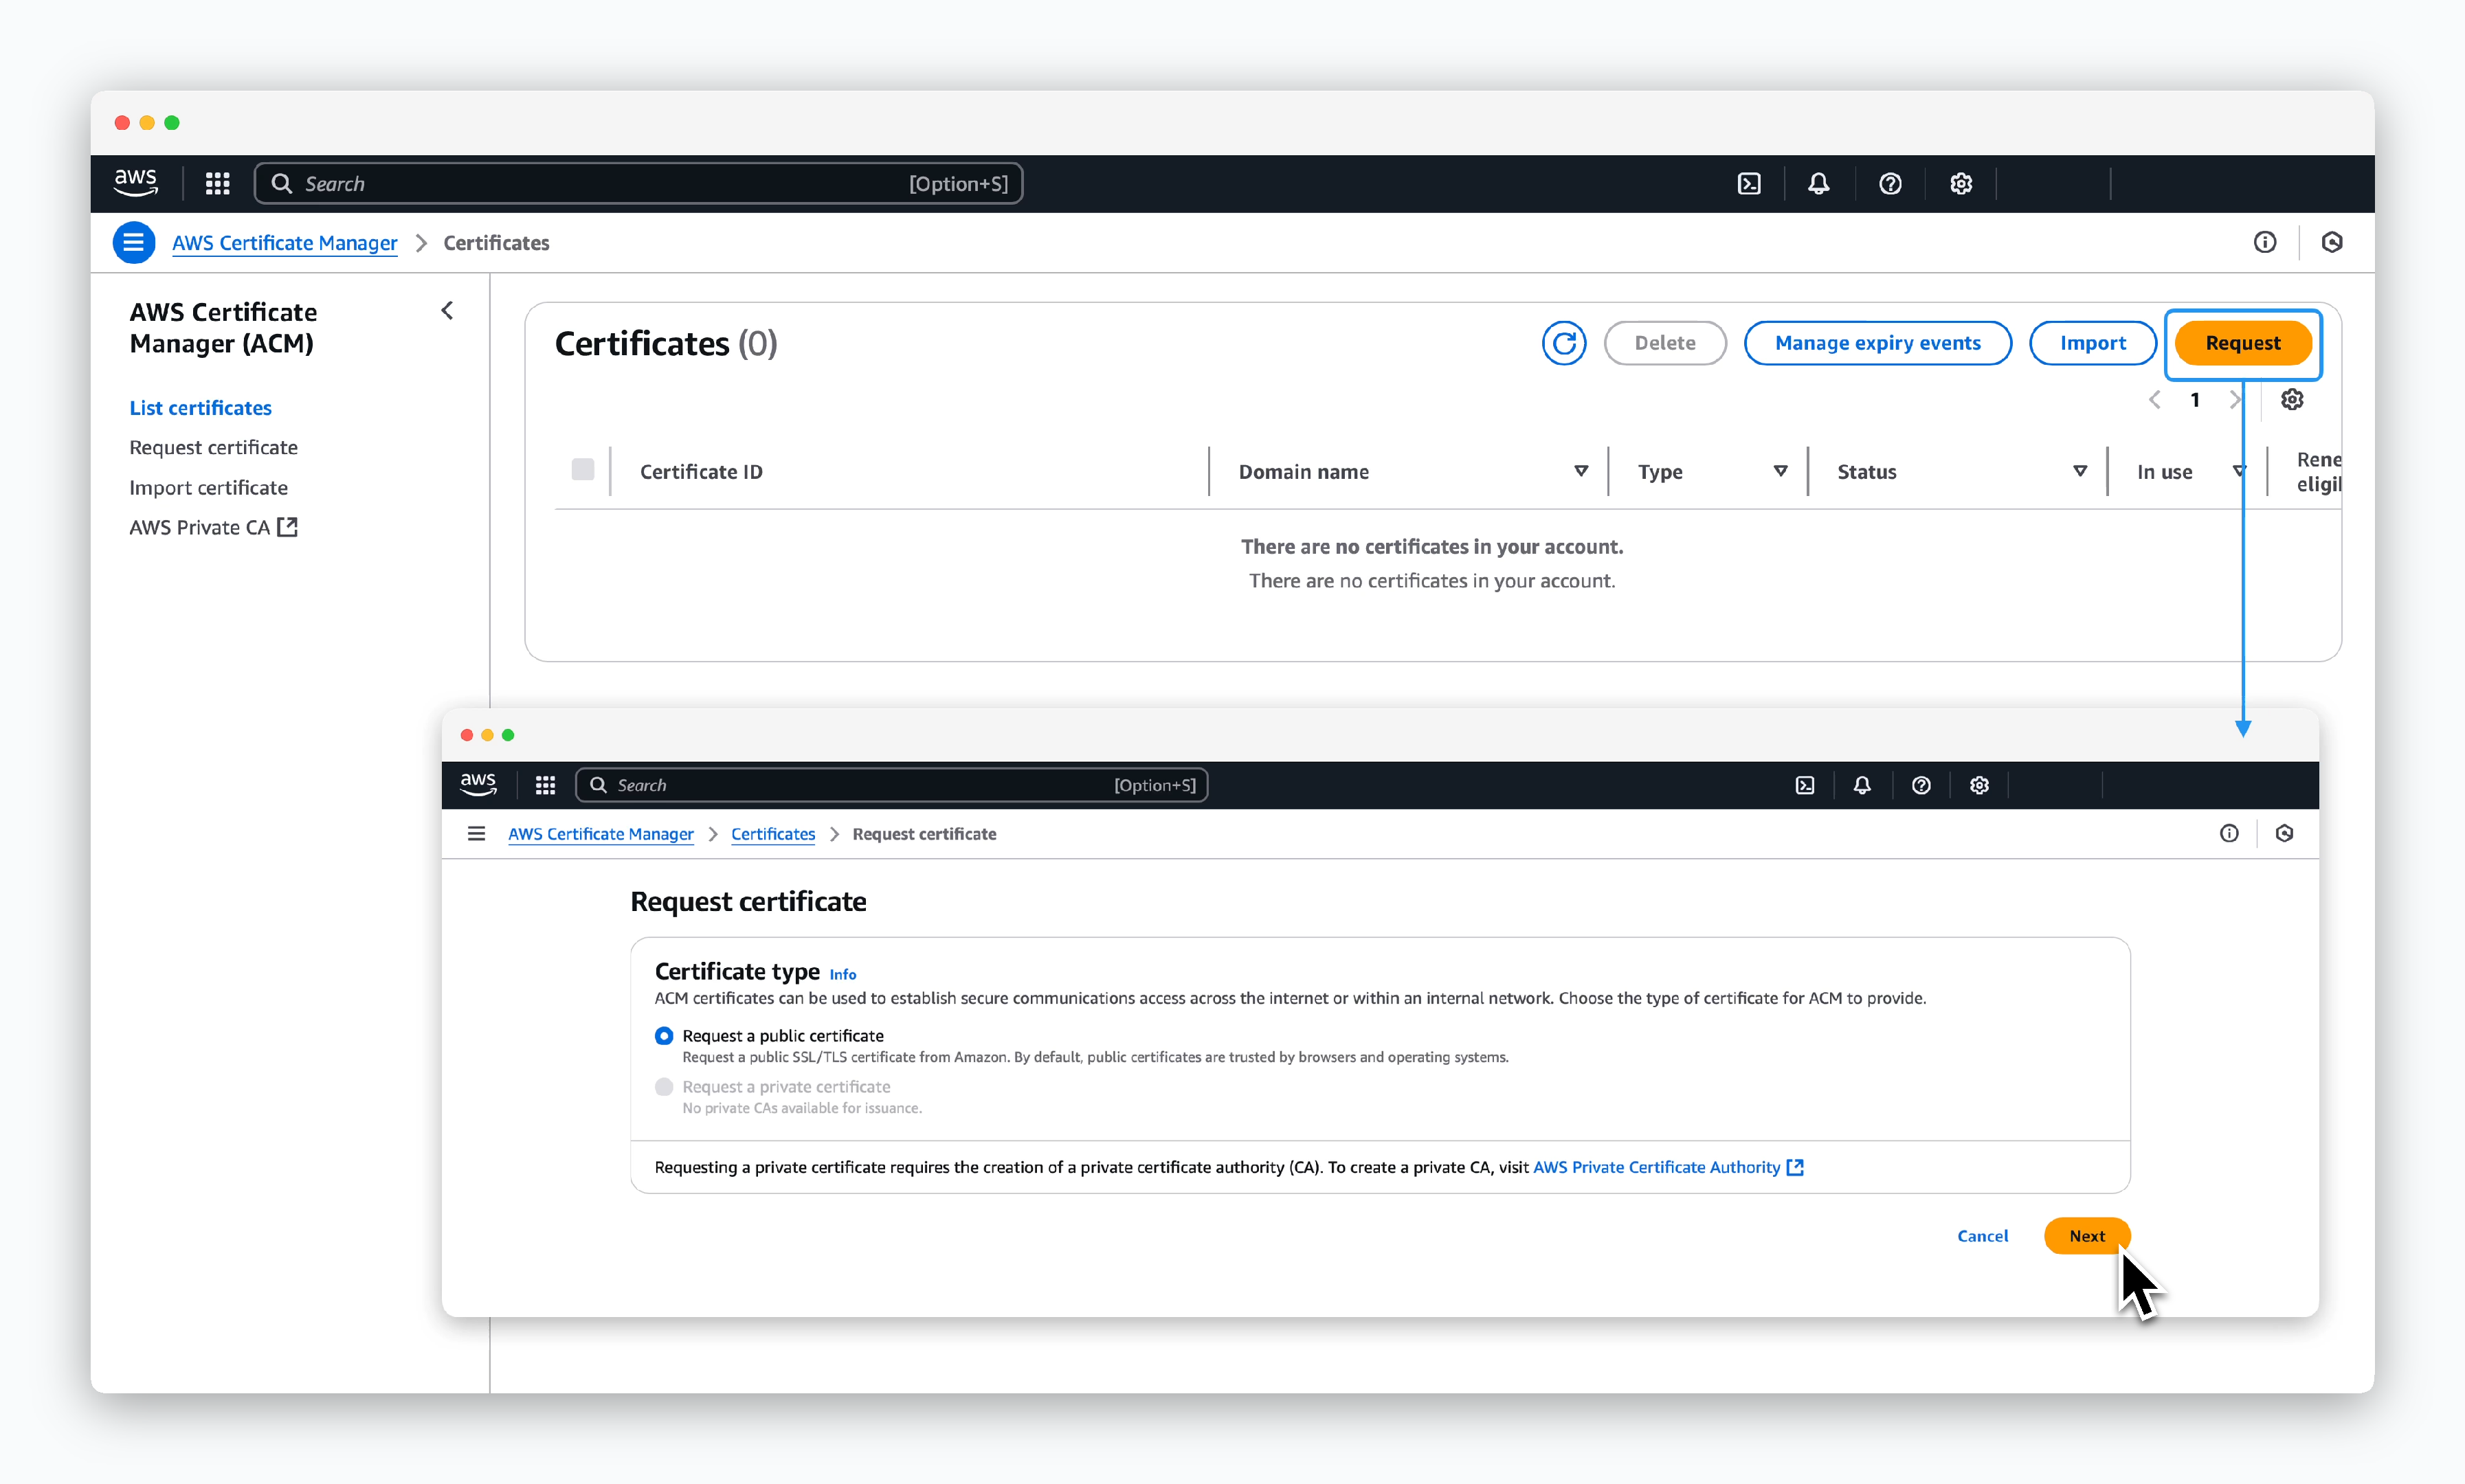 > Click `Request` in the AWS Certificate Manager dashboard, select Request a public certificate on the following screen, and click `Next`.
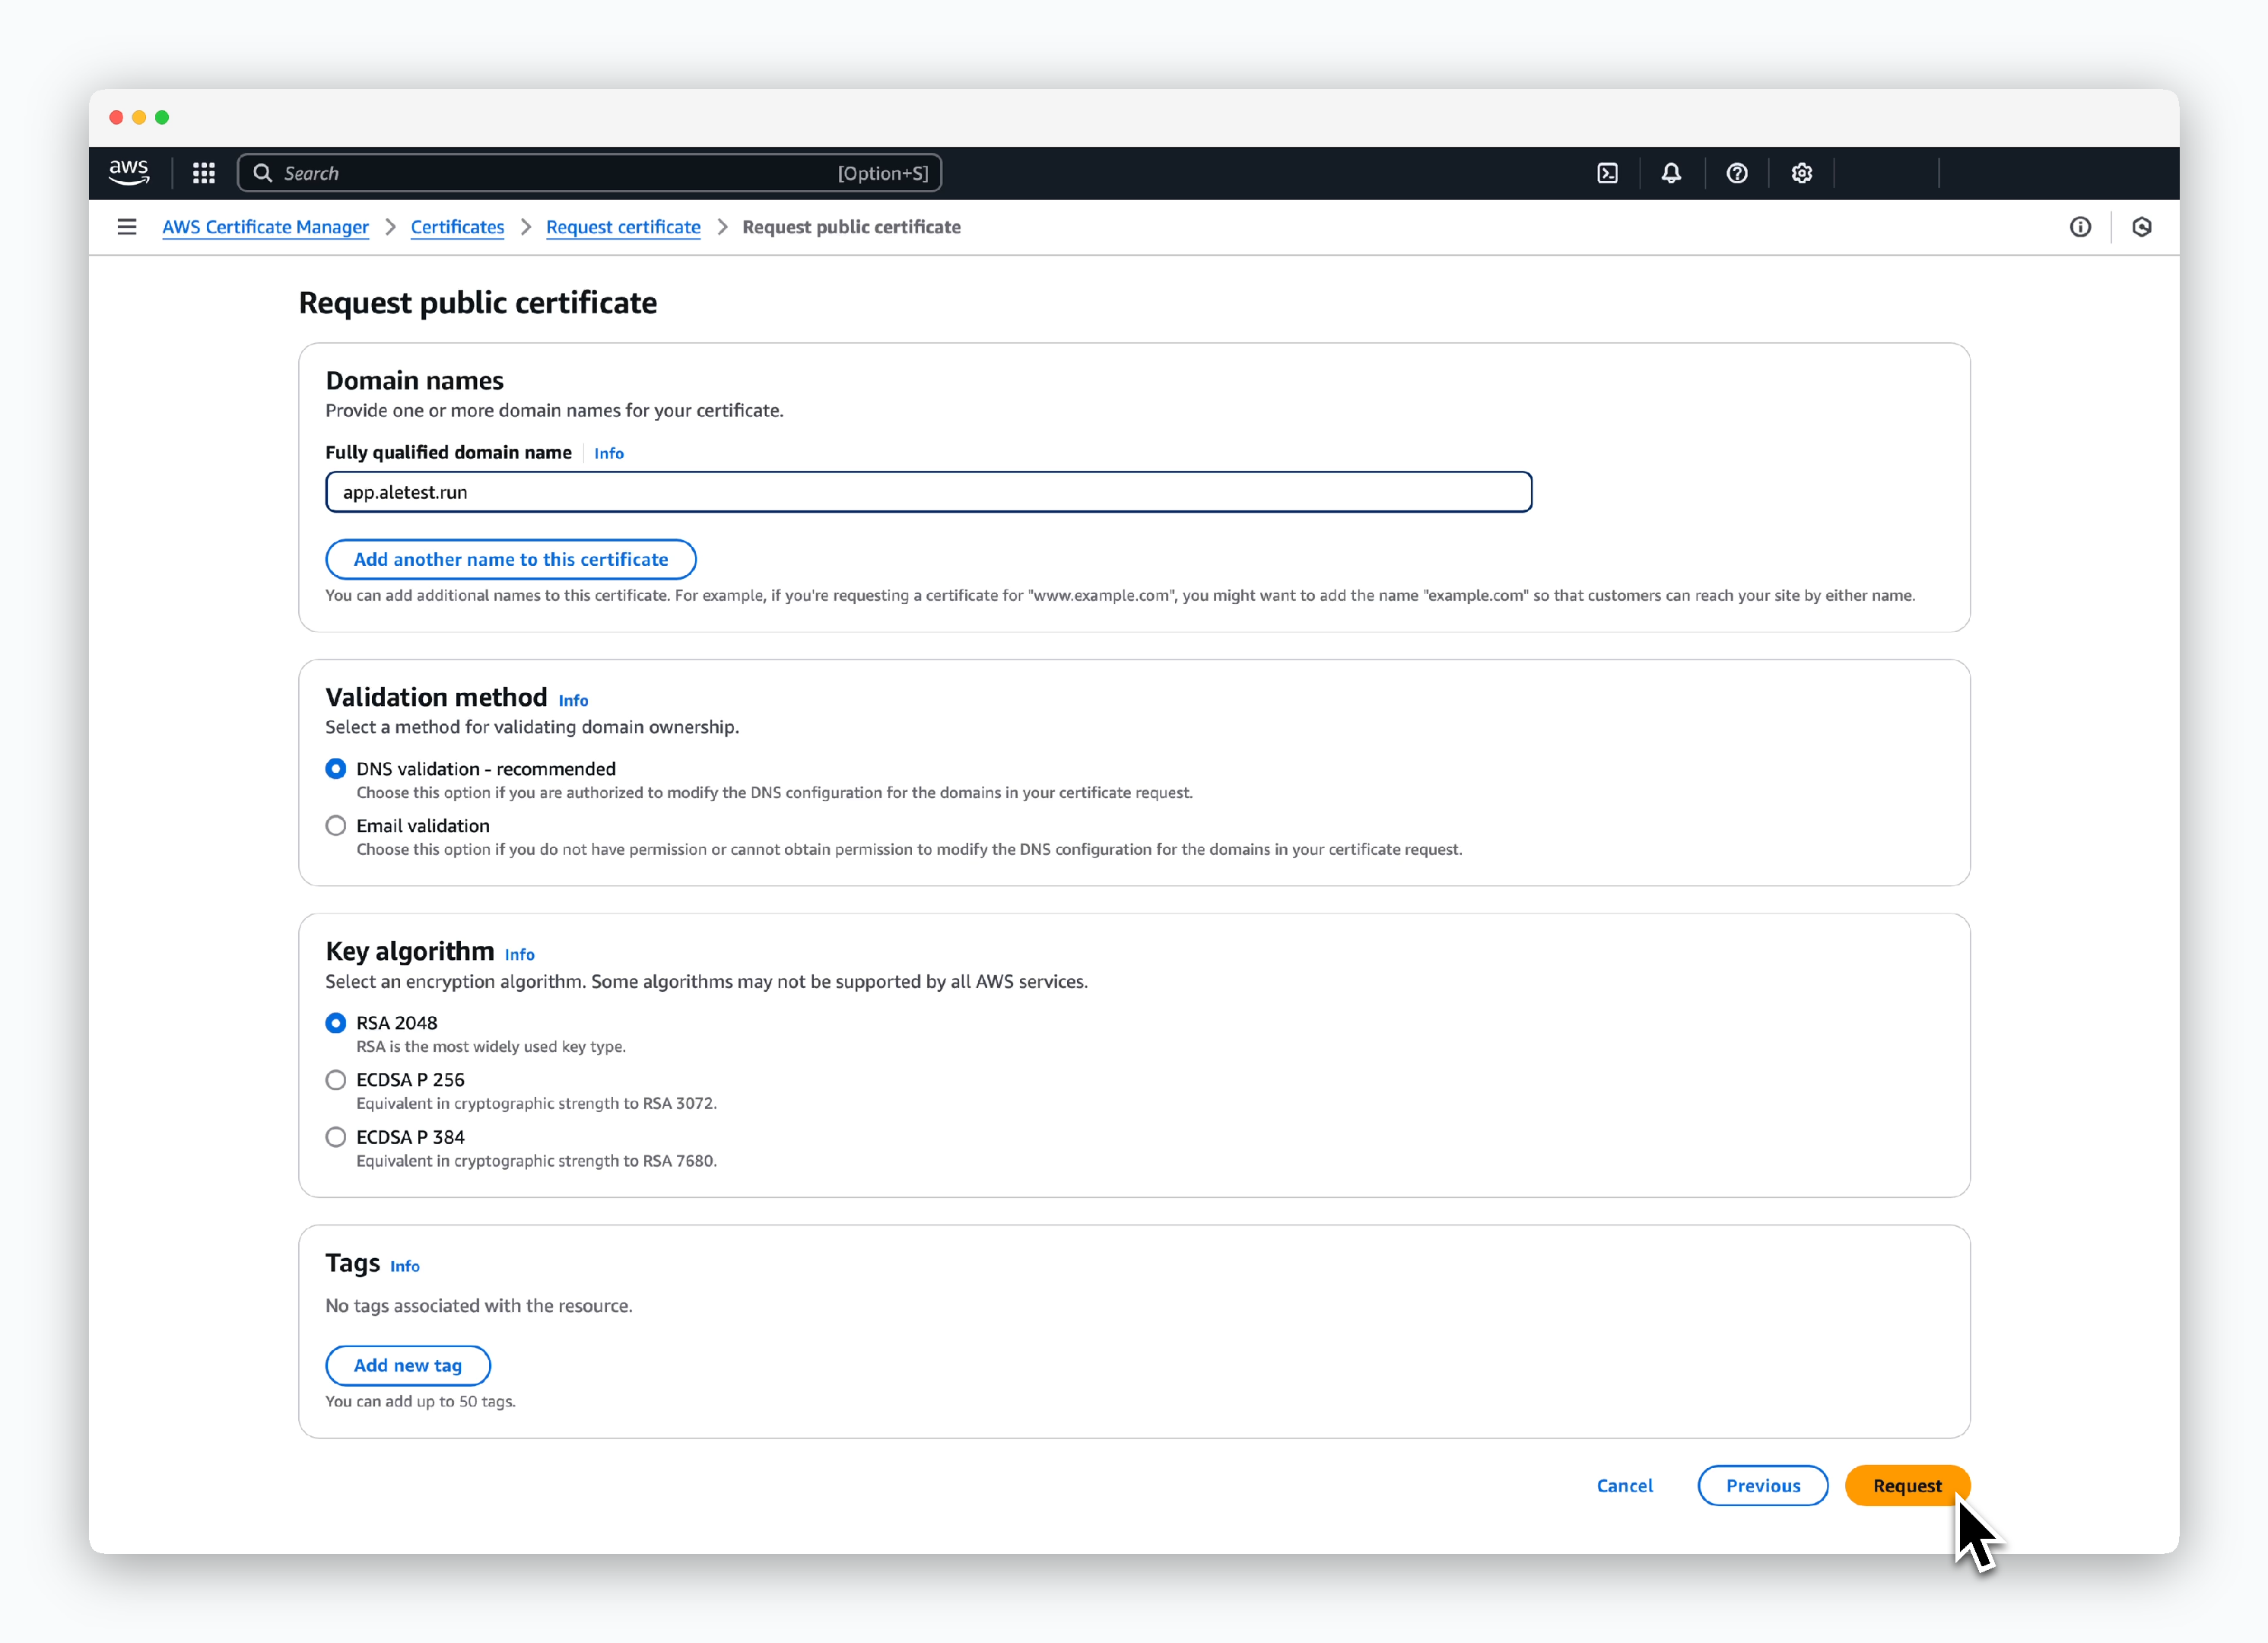 > Enter the certificate information as follows and click `Request`:
* Domain names
* Fully qualified domain name: app.\[domain]
* Validation method
* DNS validation
* Key configuration
* RSA 2048
> Enter the certificate information as follows and click `Request`:
* Domain names
* Fully qualified domain name: app.\[domain]
* Validation method
* DNS validation
* Key configuration
* RSA 2048
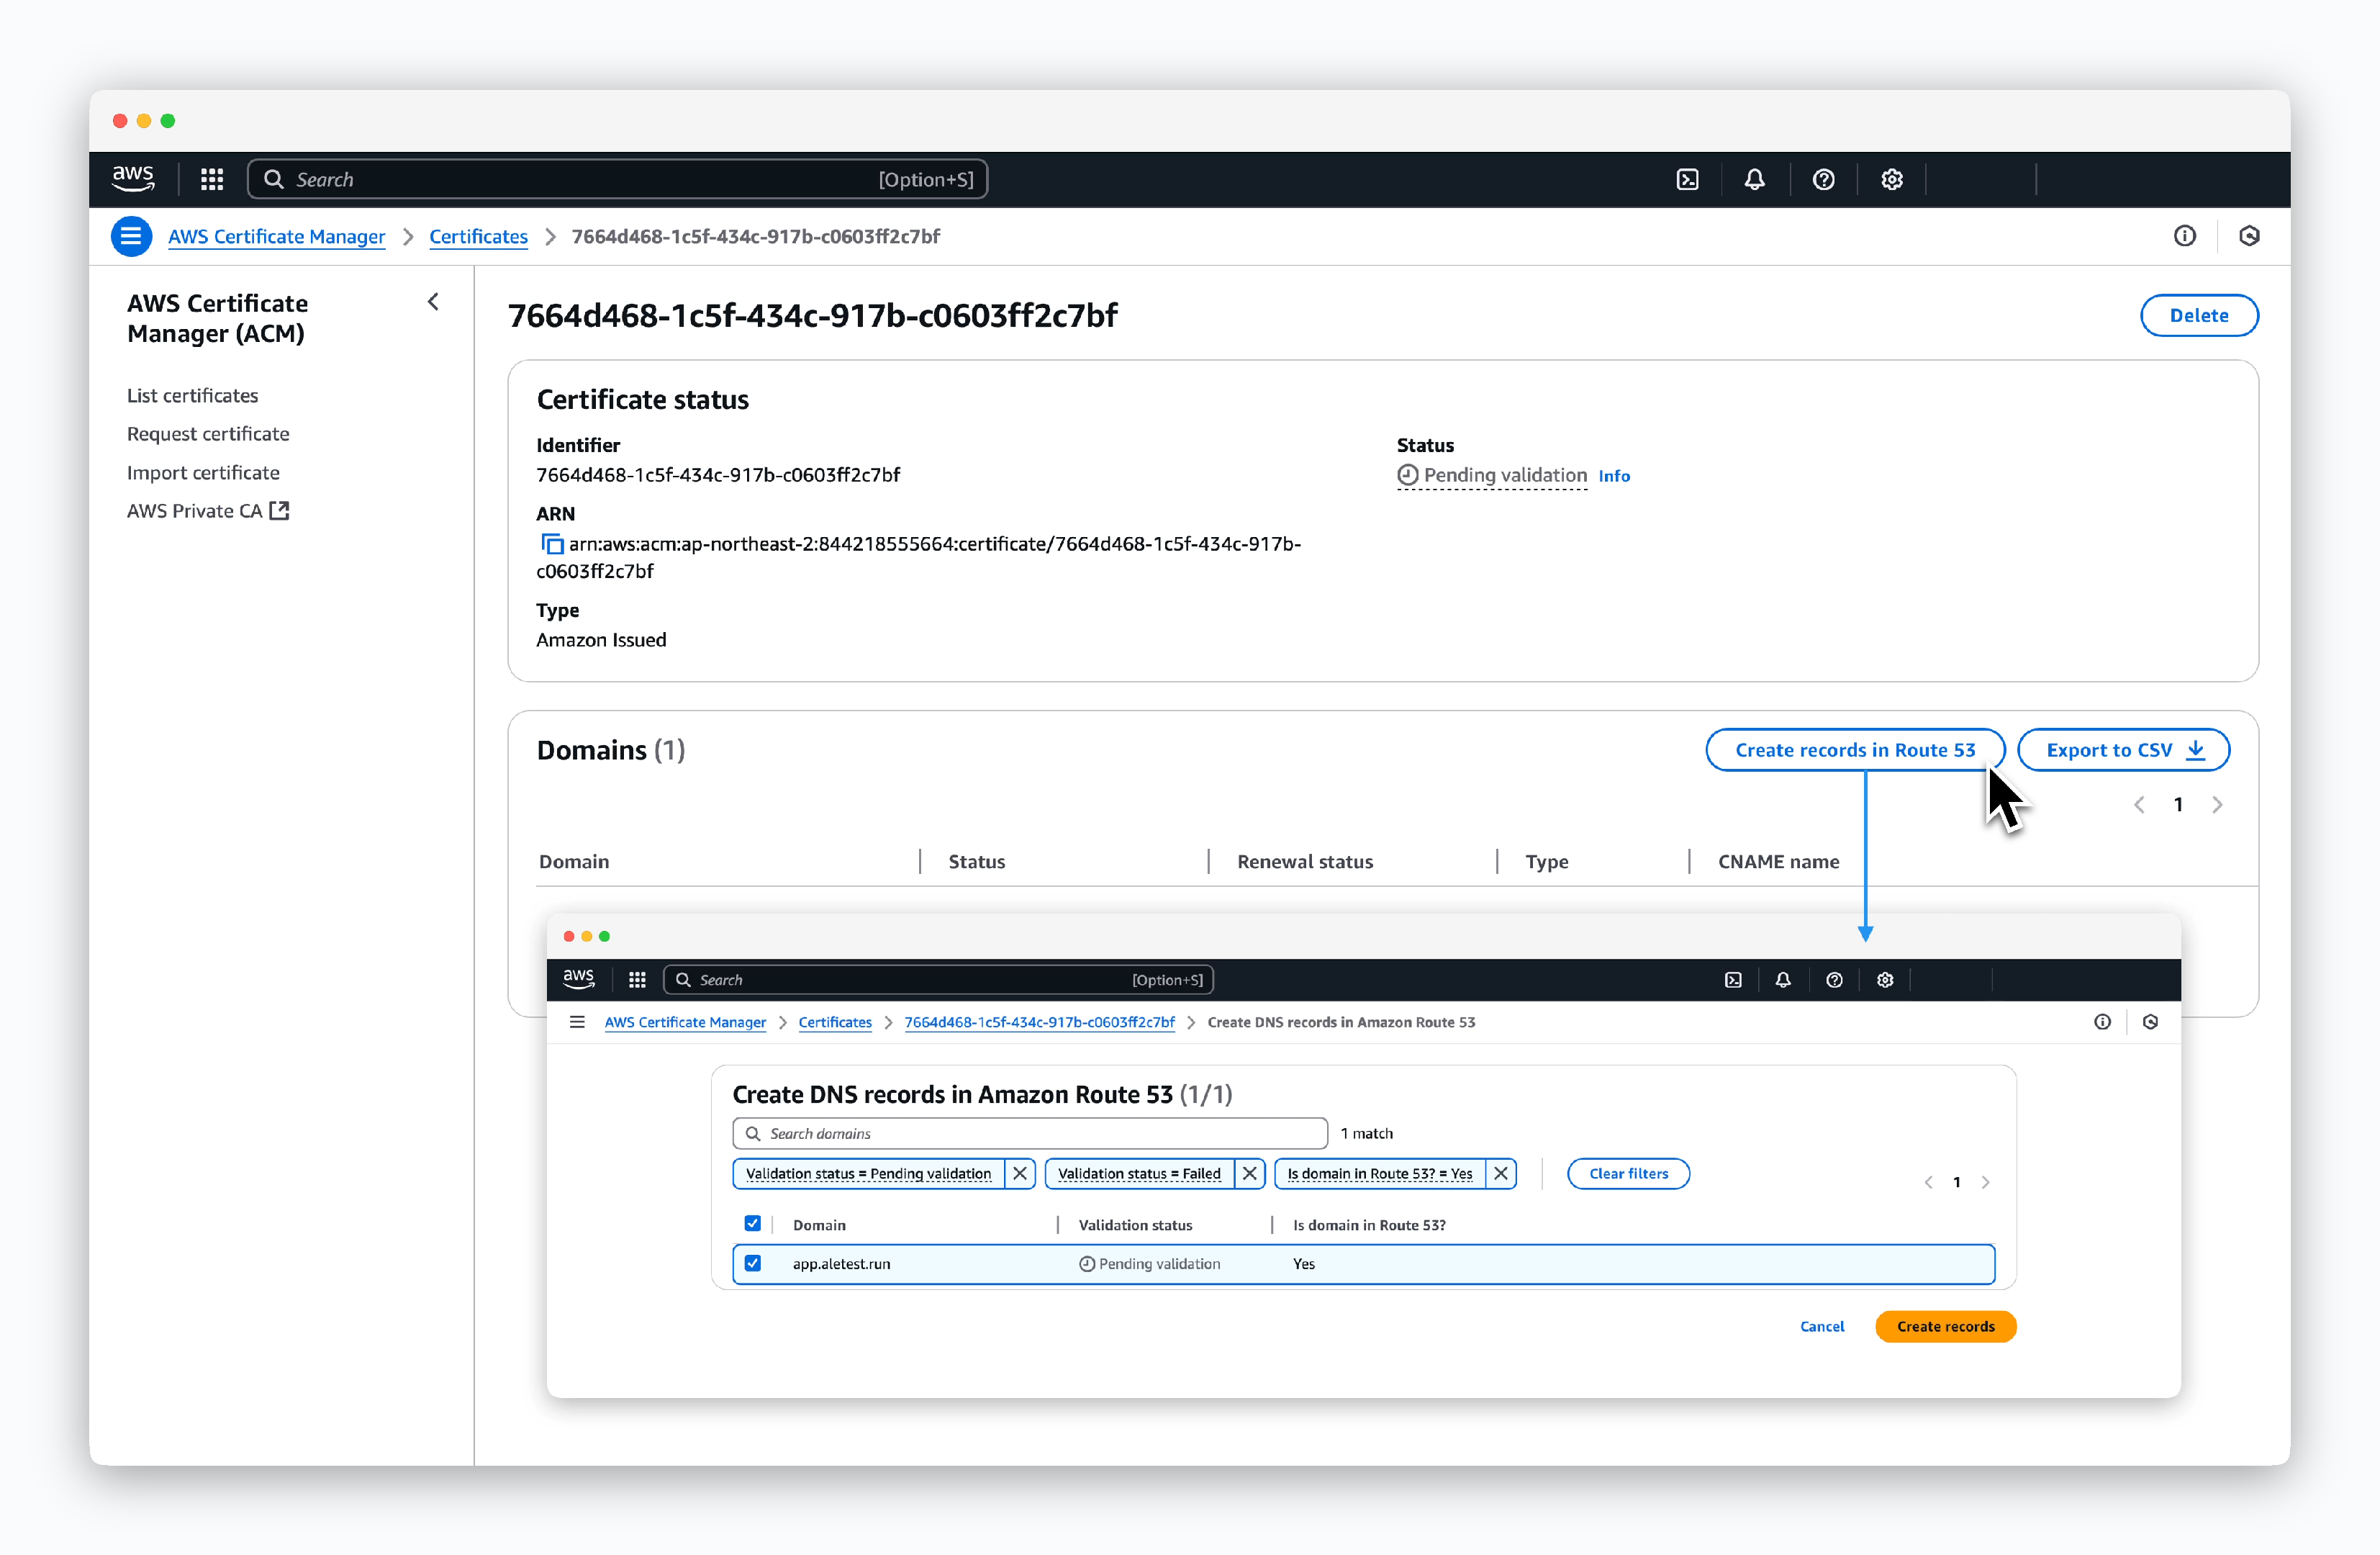 > For DNS validation, click `Create record in Route 53` on the created certificate page, then click `Create records`.
## Add HTTPS Listener to ALB
> For DNS validation, click `Create record in Route 53` on the created certificate page, then click `Create records`.
## Add HTTPS Listener to ALB
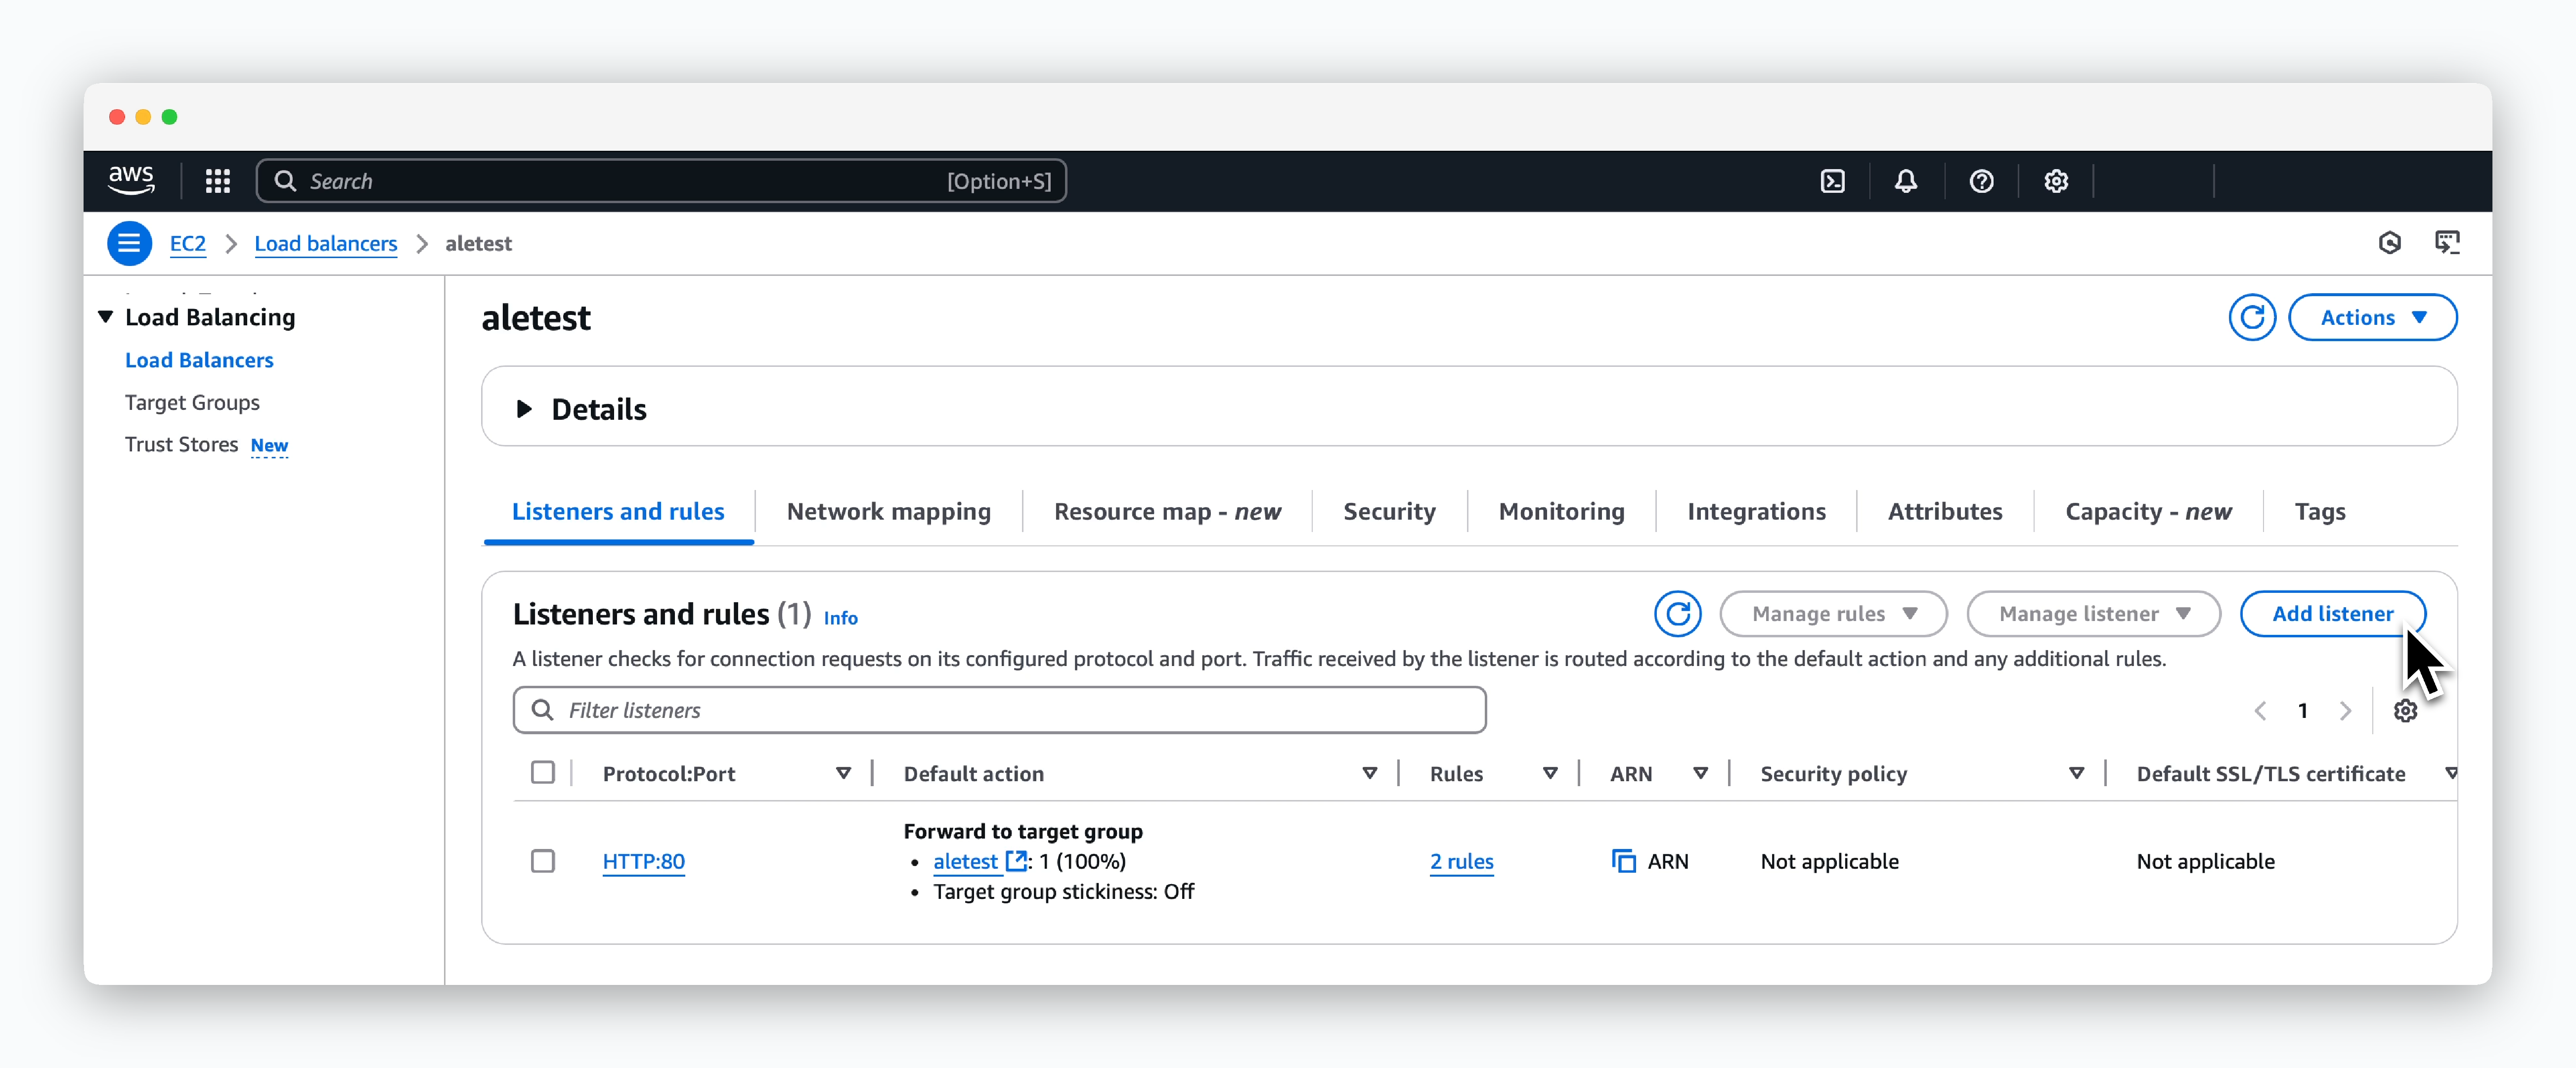 > Click `Add listener` on the created Load balancer page in `EC2 > Load Balancing > Load Balancers`.
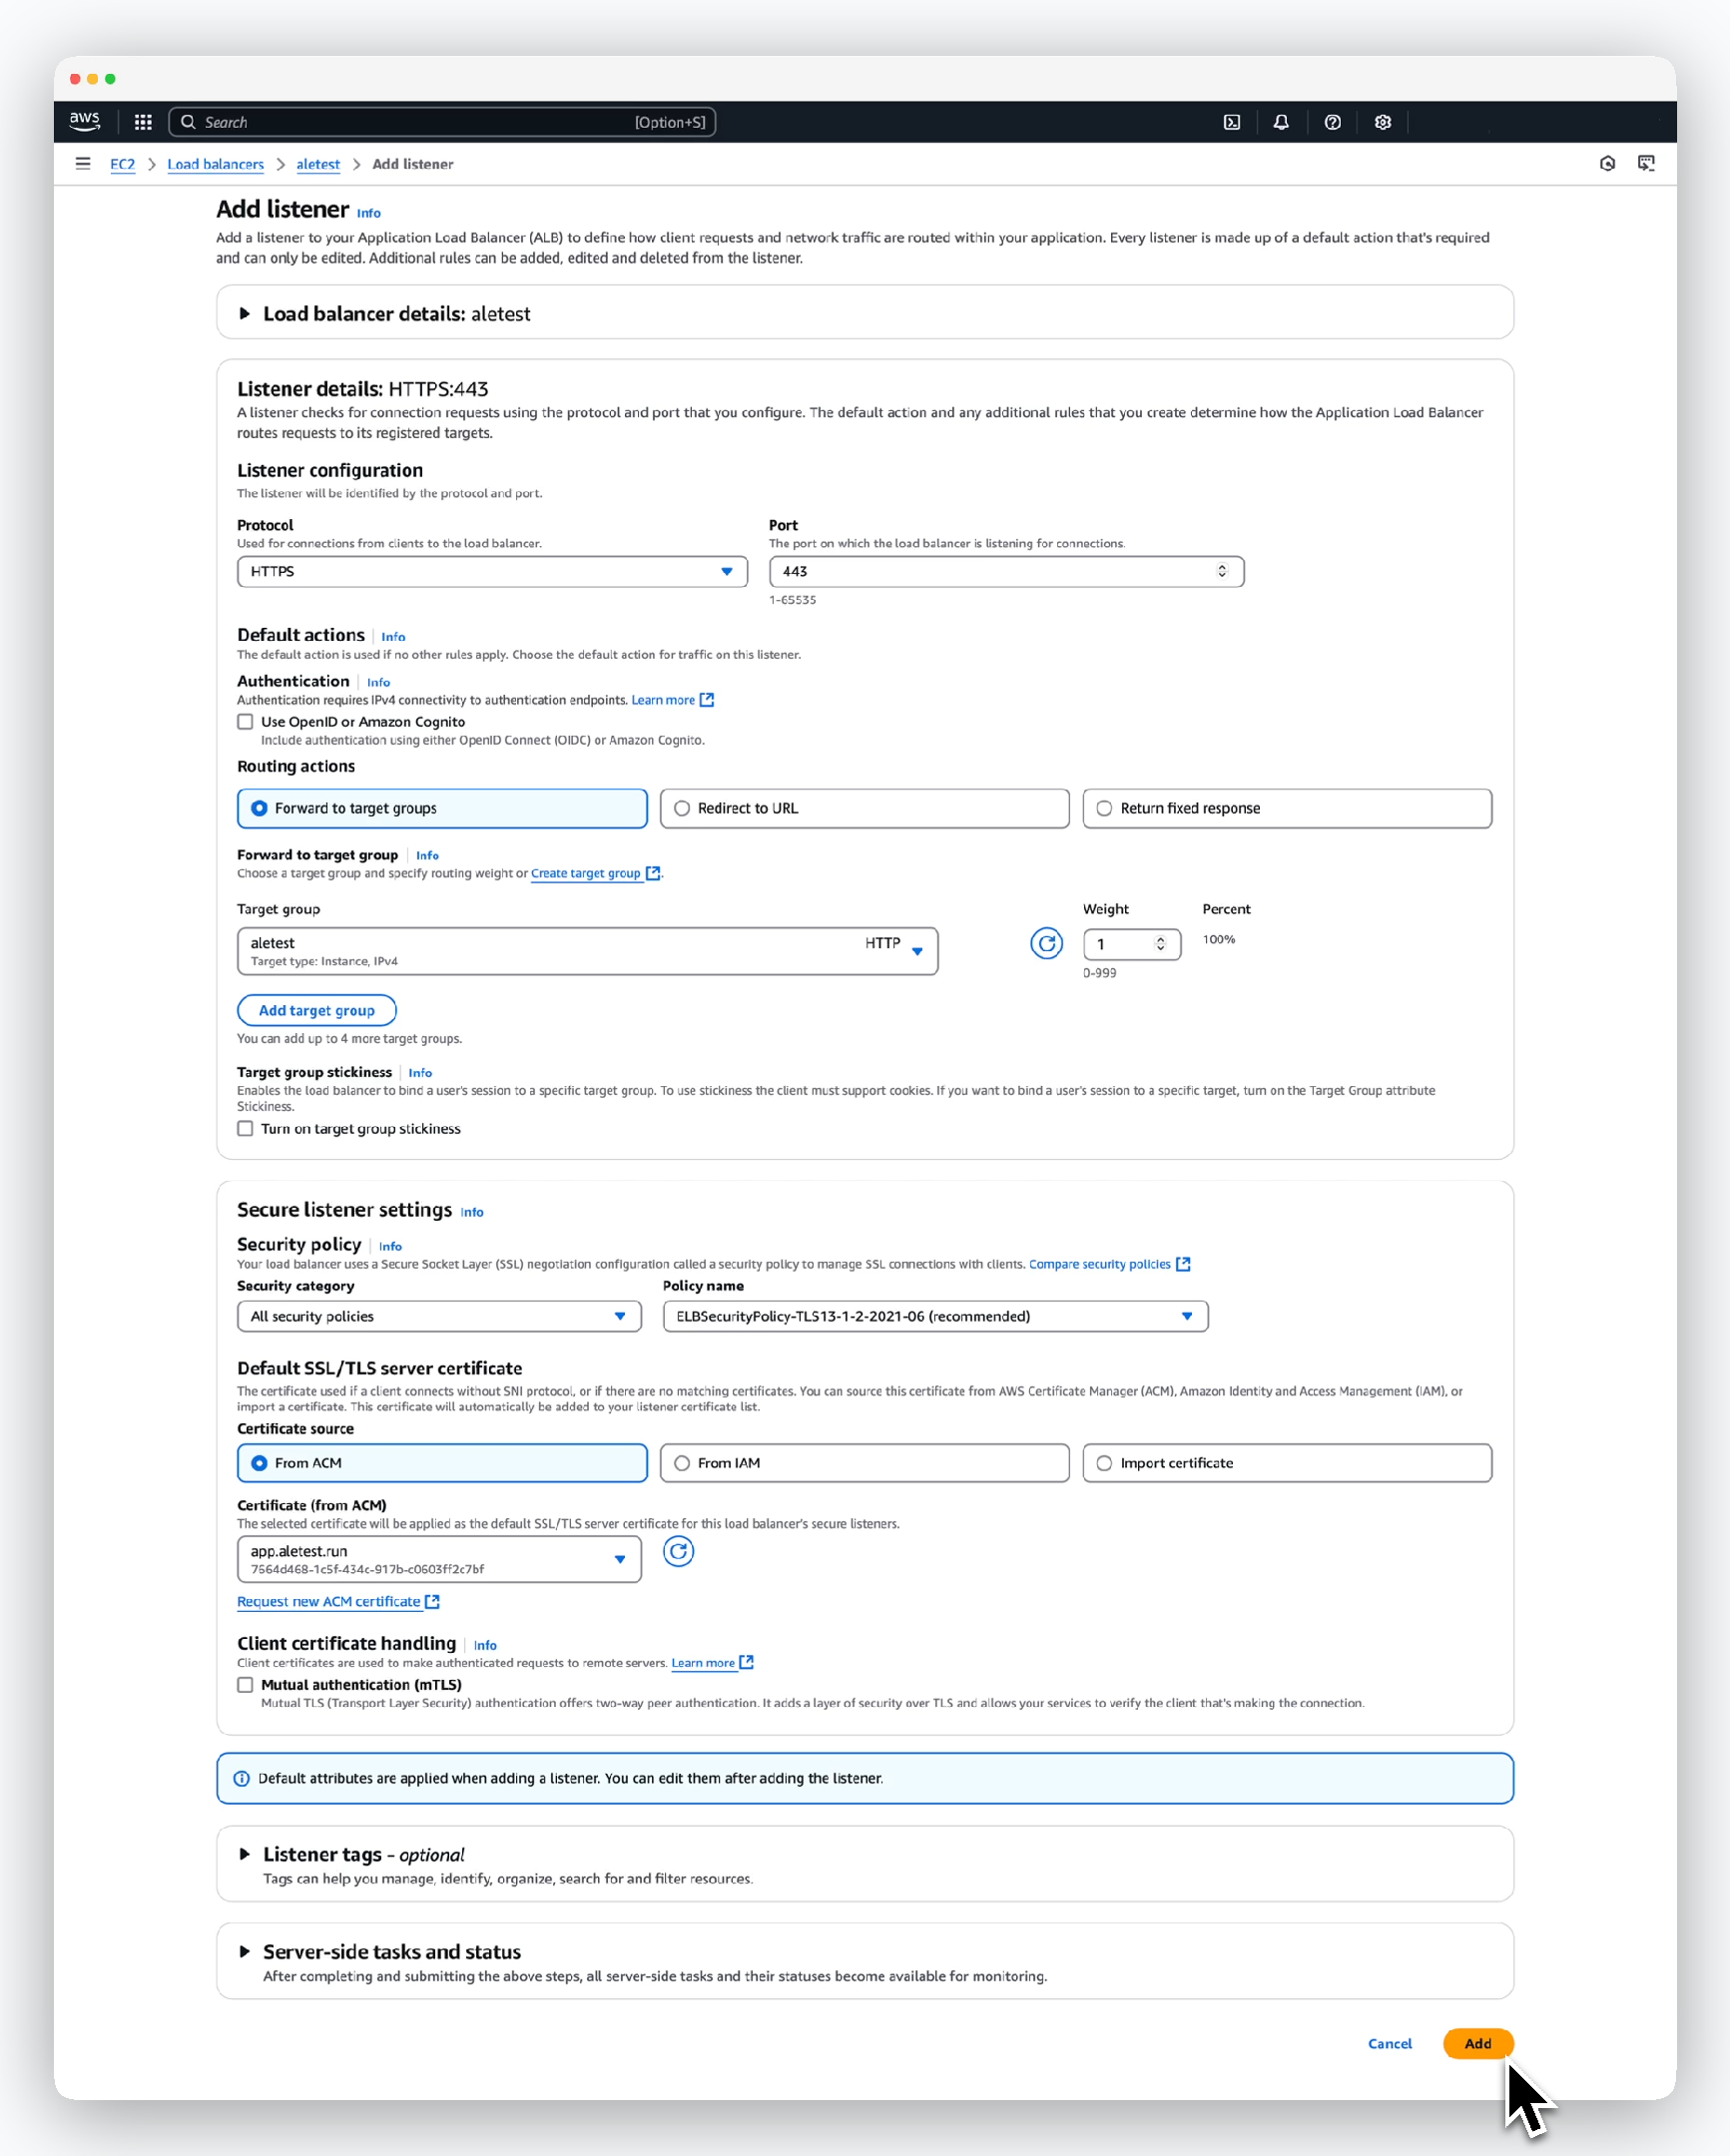 > Enter the values as follows on the next screen and click `Add`:
* Listener configuration
* Protocol: HTTPS
* Port: 443
* Default actions
* Routing actions: Forward to target groups
* Target group: Select previously created target group
* Security Policy
* Security category: All security policies
* Policy name: Apply policy marked as `recommended`
* Default SSL/TLS server certificate
* Certificate source: From ACM
* Certificate: Select previously created ACM certificate
Test that you can access `ale` by visiting `https://app.[domain]`.
> Enter the values as follows on the next screen and click `Add`:
* Listener configuration
* Protocol: HTTPS
* Port: 443
* Default actions
* Routing actions: Forward to target groups
* Target group: Select previously created target group
* Security Policy
* Security category: All security policies
* Policy name: Apply policy marked as `recommended`
* Default SSL/TLS server certificate
* Certificate source: From ACM
* Certificate: Select previously created ACM certificate
Test that you can access `ale` by visiting `https://app.[domain]`.
 Ingress configuration is required for operation.