> ## Documentation Index
> Fetch the complete documentation index at: https://docs.ale.run/llms.txt
> Use this file to discover all available pages before exploring further.

# TLS & Ingress Configuration

> Guide for applying SSL/TLS certificates using Cert Manager.

<Note>
  TLS certificates are automatically applied to the preview URLs and custom domains of services deployed with `ale`.
</Note>

***

## Cert Generator Install & Issue

<Steps>
  <Step title="Set the values used in the certificate generation script as environment variables.">
    ```bash theme={null}
    export CLOUDFLARE_DOMAIN=<Cloudflare domain>
    export CLOUDFLARE_EMAIL=<Cloudflare account email>
    export CLOUDFLARE_API_TOKEN=<Cloudflare API token>
    export ACME_EMAIL=<Certificate issuance email>
    ```

    <Info>
      The Cloudflare API token must have DNS Edit permissions.
    </Info>
  </Step>

  <Step title="Install the cluster certificate generator using the following command.">
    ```bash theme={null}
    cat <<EOF | kubectl apply -f -
    apiVersion: v1
    kind: Secret
    metadata:
      name: cloudflare-api-token-secret
      namespace: cert-manager
    type: Opaque
    stringData:
      api-token: $CLOUDFLARE_API_TOKEN
    ---
    apiVersion: cert-manager.io/v1
    kind: ClusterIssuer
    metadata:
      name: ale-issuer
      namespace: cert-manager
    spec:
      acme:
        email: $ACME_EMAIL
        server: https://acme-v02.api.letsencrypt.org/directory
        privateKeySecretRef:
          name: ale-issuer
        solvers:
          - http01:
              ingress:
                class: nginx
          - dns01:
              cloudflare:
                email: $CLOUDFLARE_EMAIL
                apiTokenSecretRef:
                  name: cloudflare-api-token-secret
                  key: api-token
            selector:
              dnsZones:
                - $CLOUDFLARE_DOMAIN
    EOF
    ```
  </Step>

  <Step title="Run the following command to issue a certificate.">
    ```bash theme={null}
    cat <<EOF | kubectl apply -f -
    apiVersion: cert-manager.io/v1
    kind: Certificate
    metadata:
      name: ale-app-tls
      namespace: cert-manager
    spec:
      dnsNames:
        - "*.$CLOUDFLARE_DOMAIN"
      issuerRef:
        kind: ClusterIssuer
        name: ale-issuer
      secretName: ale-app-tls
    EOF
    ```
  </Step>
</Steps>

## Ingress Setup

<Steps>
  <Step title="Use the following command to install the Cluster Certificate Generator and Ingress.">
    ```bash theme={null}
    cat <<EOF | kubectl apply -f -
    apiVersion: networking.k8s.io/v1
    kind: Ingress
    metadata:
      name: ale
      namespace: ale
      annotations:
        nginx.ingress.kubernetes.io/whitelist-source-range: 0.0.0.0/0
        cert-manager.io/cluster-issuer: ale-issuer
    spec:
      ingressClassName: nginx
      tls:
        - hosts:
            - app.$CLOUDFLARE_DOMAIN
          secretName: ale-controller-tls
      rules:
        - host: app.$CLOUDFLARE_DOMAIN
          http:
            paths:
              - path: /
                pathType: Prefix
                backend:
                  service:
                    name: ale-controller
                    port:
                      number: 9001
    EOF
    ```
  </Step>

  <Step title="Use the following command to verify that the certificates have been created and applied. If created successfully, the STATE field should show as valid.">
    ```bash theme={null}
    kubectl get order -n ale \
      | awk '/ale-/{print $1}' \
      | xargs kubectl get order -n ale
    ```

    ```bash theme={null}
    NAME                              STATE   AGE
    ale-controller-tls-1-1997619857   valid   103s
    ```
  </Step>

  <Step title="If you can access the following URLs, the certificate has been applied successfully. If access fails, check the status of the Cert Manager pod or the Cluster Issuer.">
    ```bash theme={null}
    https://app.[Cloudflare_Domain]
    ```
  </Step>

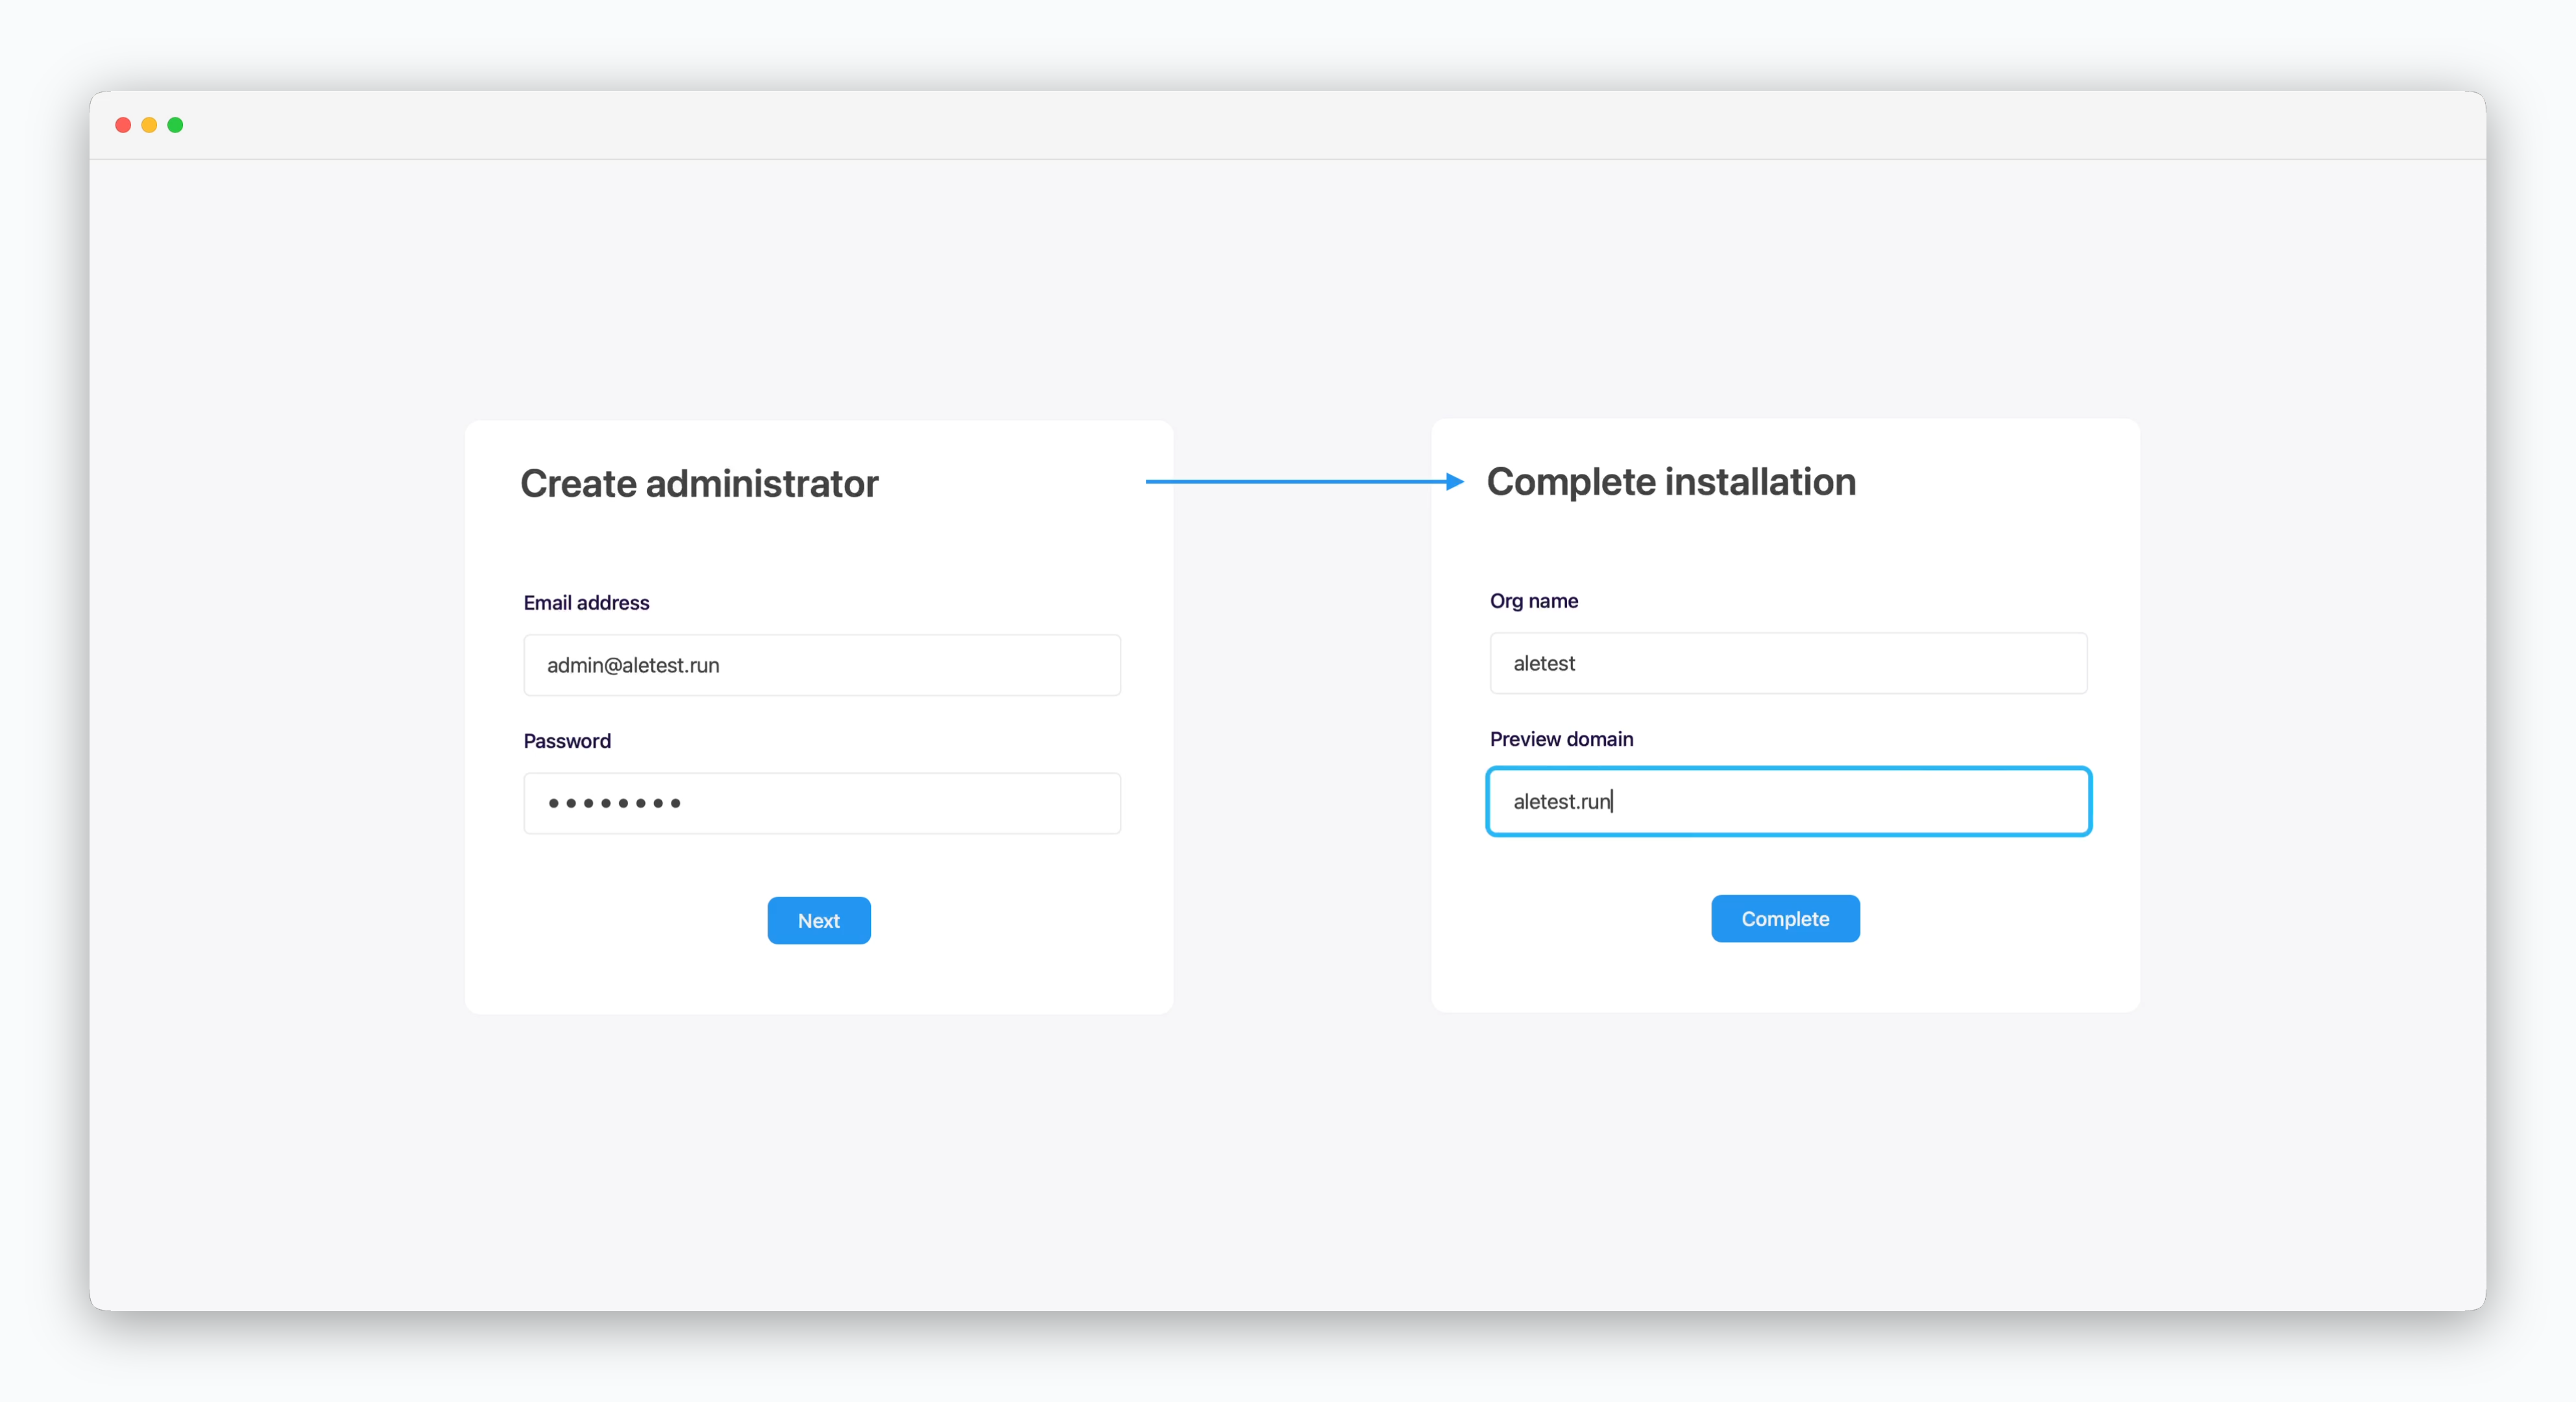
  <Step title="Create an administrator account and complete the installation.">
    <Frame>
      <img className="block rounded-md" src="https://files.cloudtype.io/ale-docs/setup/ec2/images/en/04_22.png" />
    </Frame>

    <Note>
      Enter the root domain in the preview domain field.
    </Note>
  </Step>
</Steps>

## Cluster Network Configuration

<Frame>
  <img className="block rounded-md" src="https://files.cloudtype.io/ale-docs/setup/ec2/images/en/04_23.png" />
</Frame>

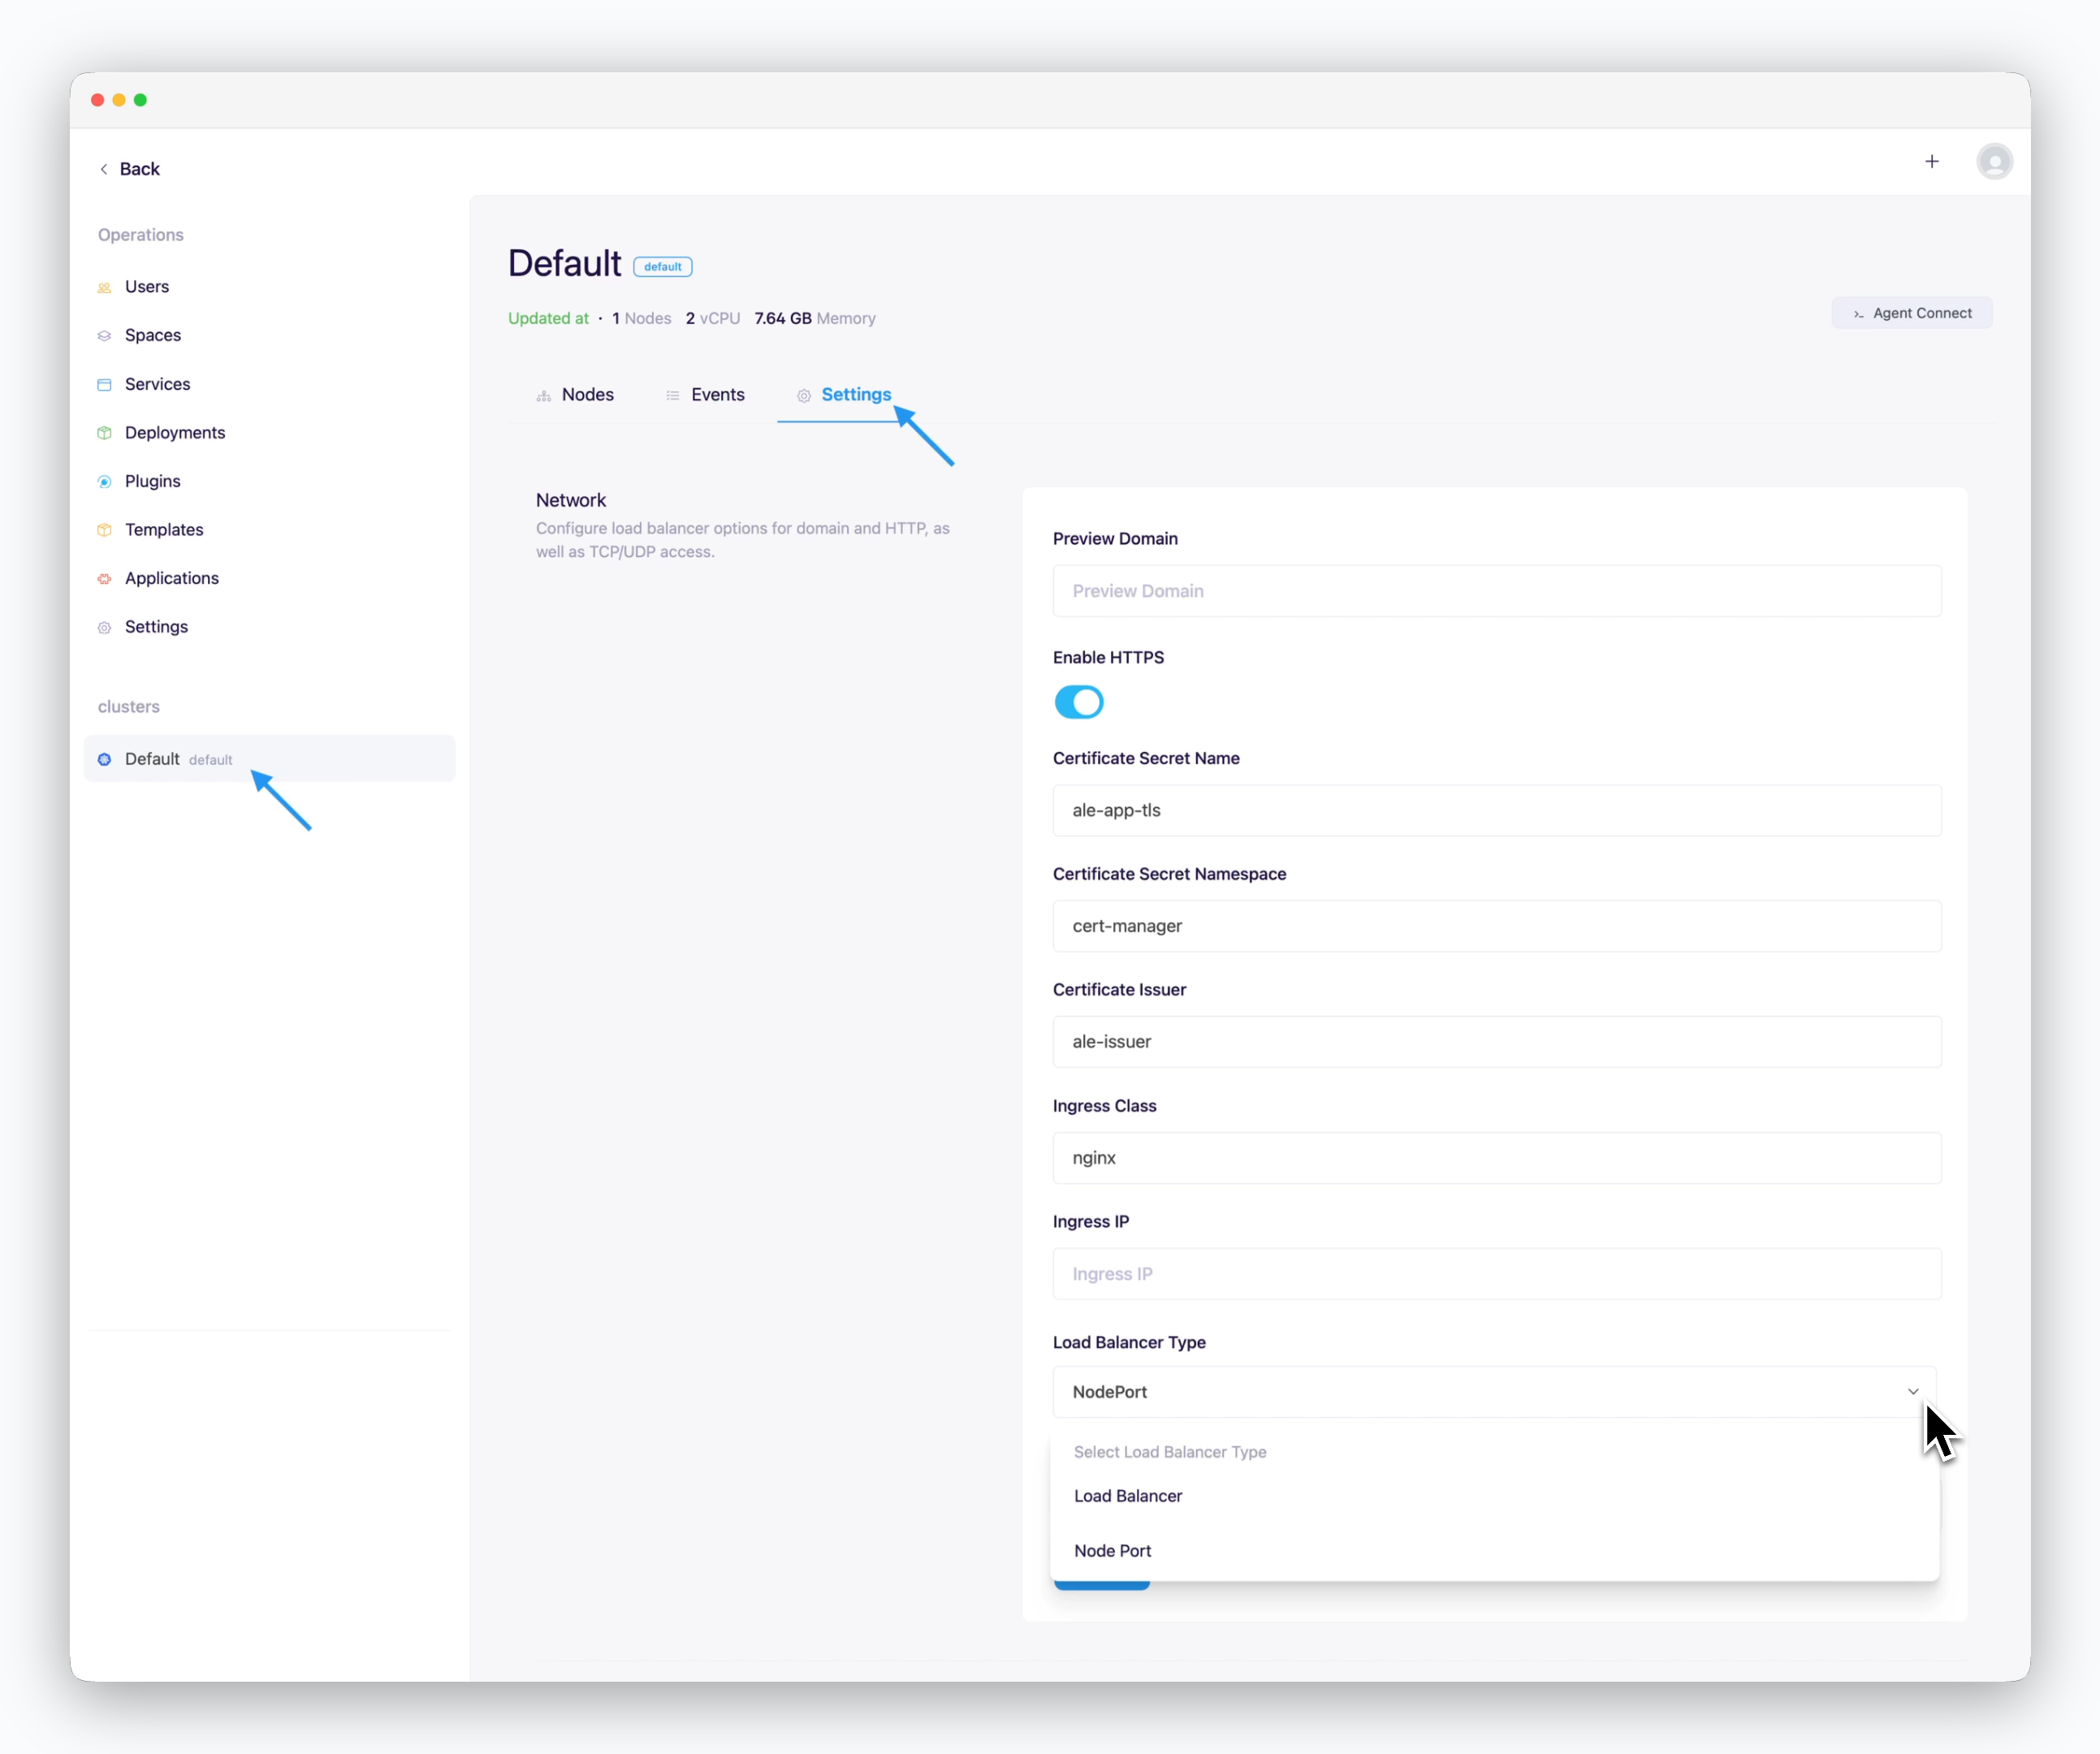
> On the cluster page in the Operations System, navigate to the **Settings** tab and enter the following values in the **Network** section.

* **Preview Domain**: Root domain
* **Use HTTPS**
  * **Checked**: Internet environment
  * **Unchecked**: Intranet/closed network environment
* **Certificate Secret Name**: ale-app-tls
* **Certificate Secret Namespace**: cert-manager
* **Certificate Issuer**: ale-issuer
* **Ingress Class**: nginx
* **Ingress IP**: Blank (Auto-detected)
* **Load Balancer Type**
  * Load Balancer
  * NodePort
* **Ingress/Egress Bandwidth**: Enter in Mbps

<Info>
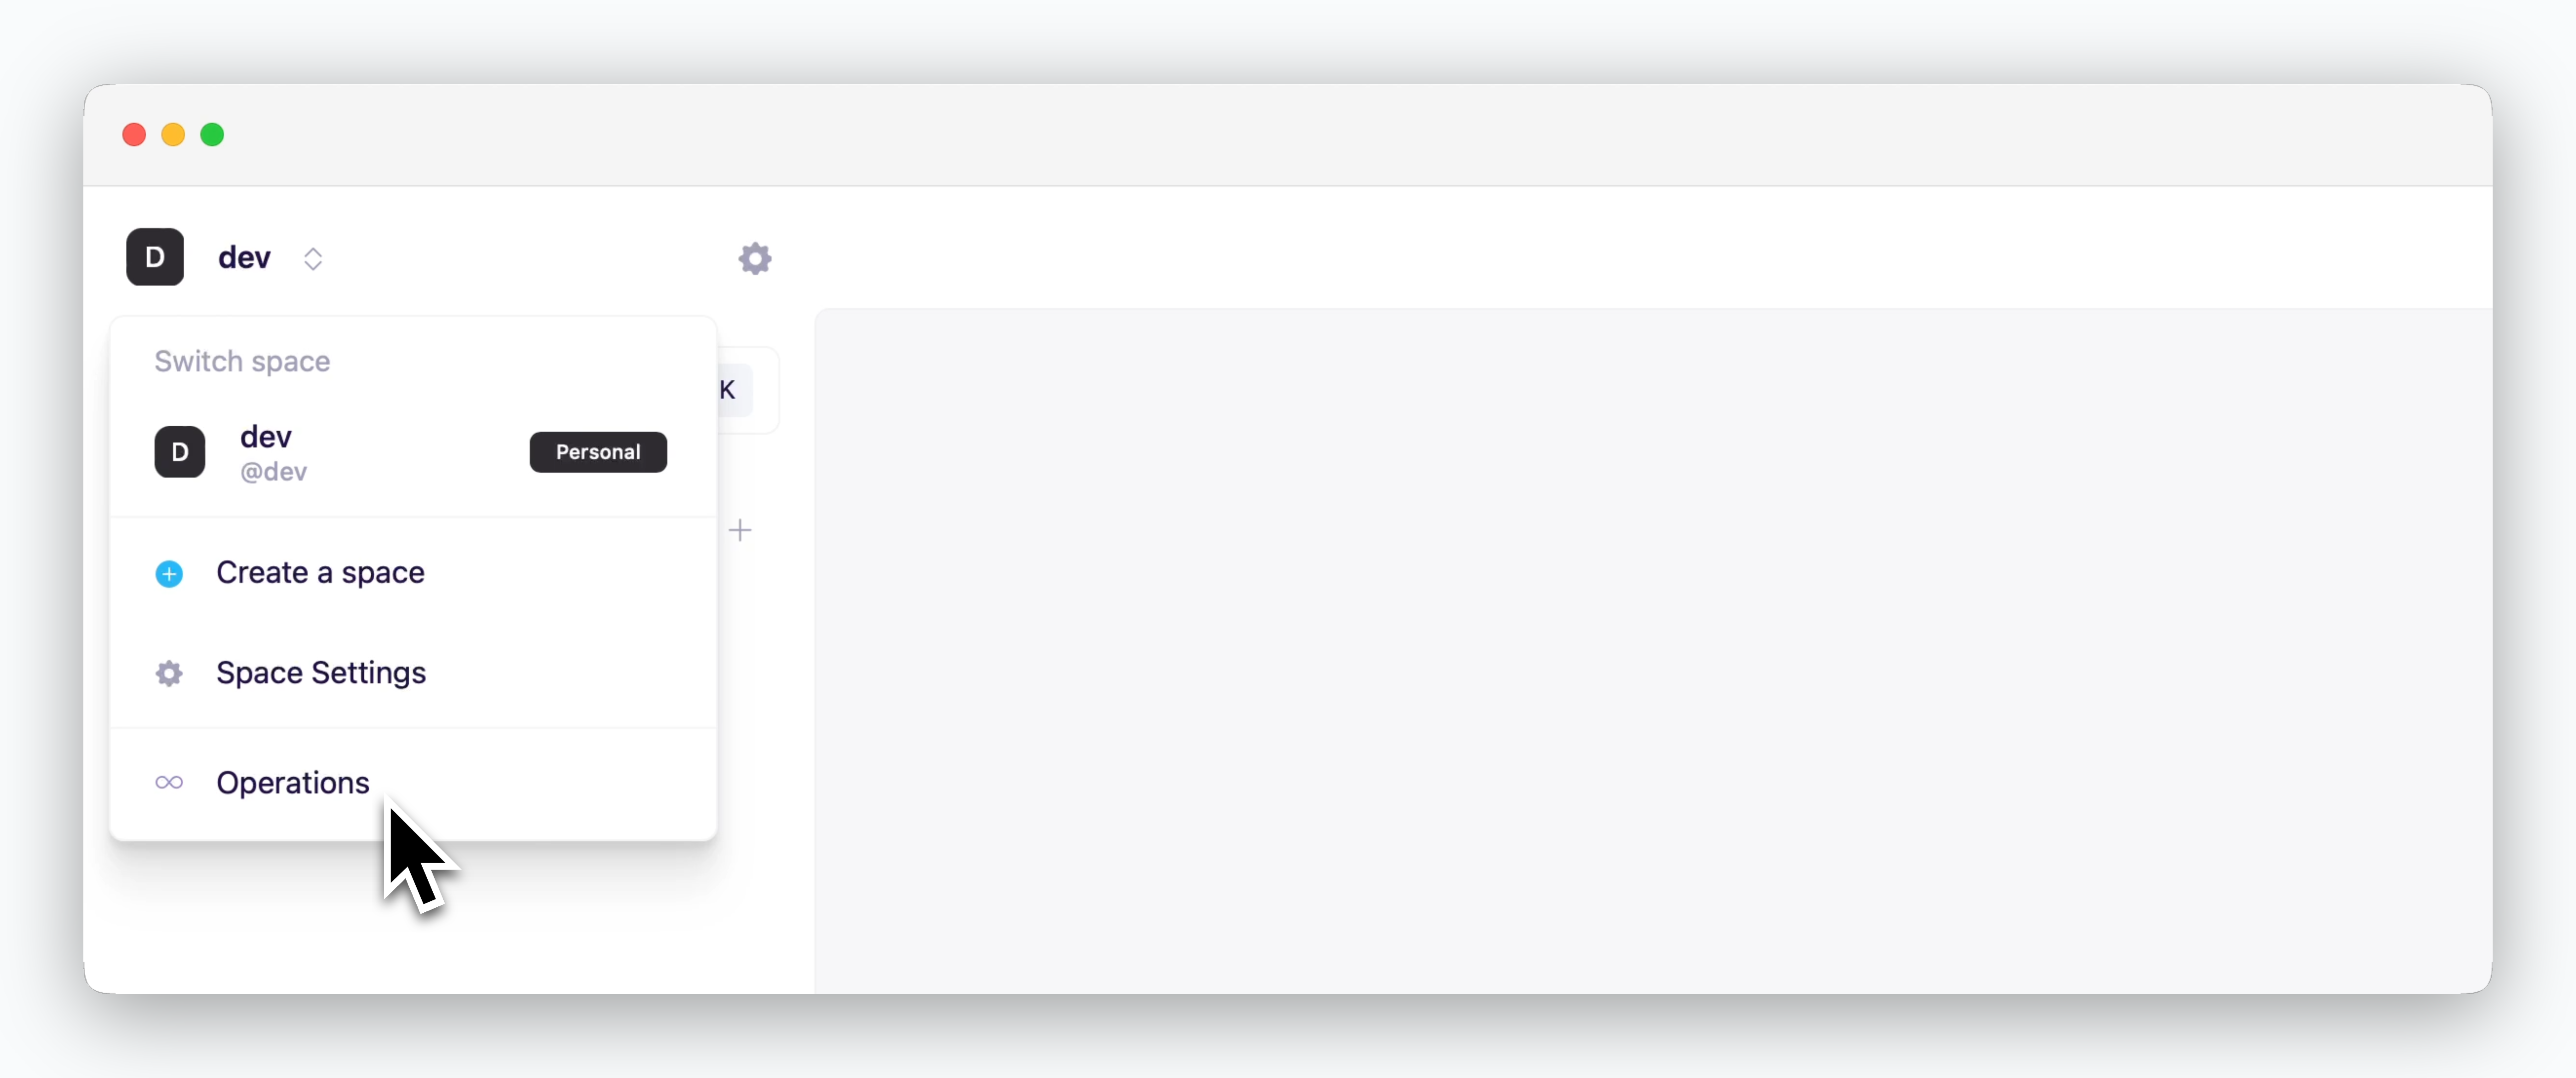
  You can access the operations system by clicking the space name in the dashboard.
  <Frame>
    <img className="block rounded-md" src="https://files.cloudtype.io/ale-docs/setup/ec2/images/en/04_24.png" />
  </Frame>
</Info>

<Note>
  The operations system menu is only displayed for accounts with access permissions to the operations system.
</Note>