> ## Documentation Index
> Fetch the complete documentation index at: https://docs.ale.run/llms.txt
> Use this file to discover all available pages before exploring further.
# GitHub
> GitHub OAuthをエールに追加するガイドです。
> **GitHub OAuth**を追加すると、GitHubログインが有効になり、ダッシュボードユーザーは連携したGitHubアカウントのリポジトリを選択してサービスをデプロイできるようになります。
***
## GitHub Appsの作成
 > GitHubにログインした後、**Settings > Developer Settings > GitHub Apps**ページで[New GitHub App](https://github.com/settings/apps/new)をクリックすると、GitHub App作成プロセスが開始されます。
### 基本情報の入力
> GitHubにログインした後、**Settings > Developer Settings > GitHub Apps**ページで[New GitHub App](https://github.com/settings/apps/new)をクリックすると、GitHub App作成プロセスが開始されます。
### 基本情報の入力
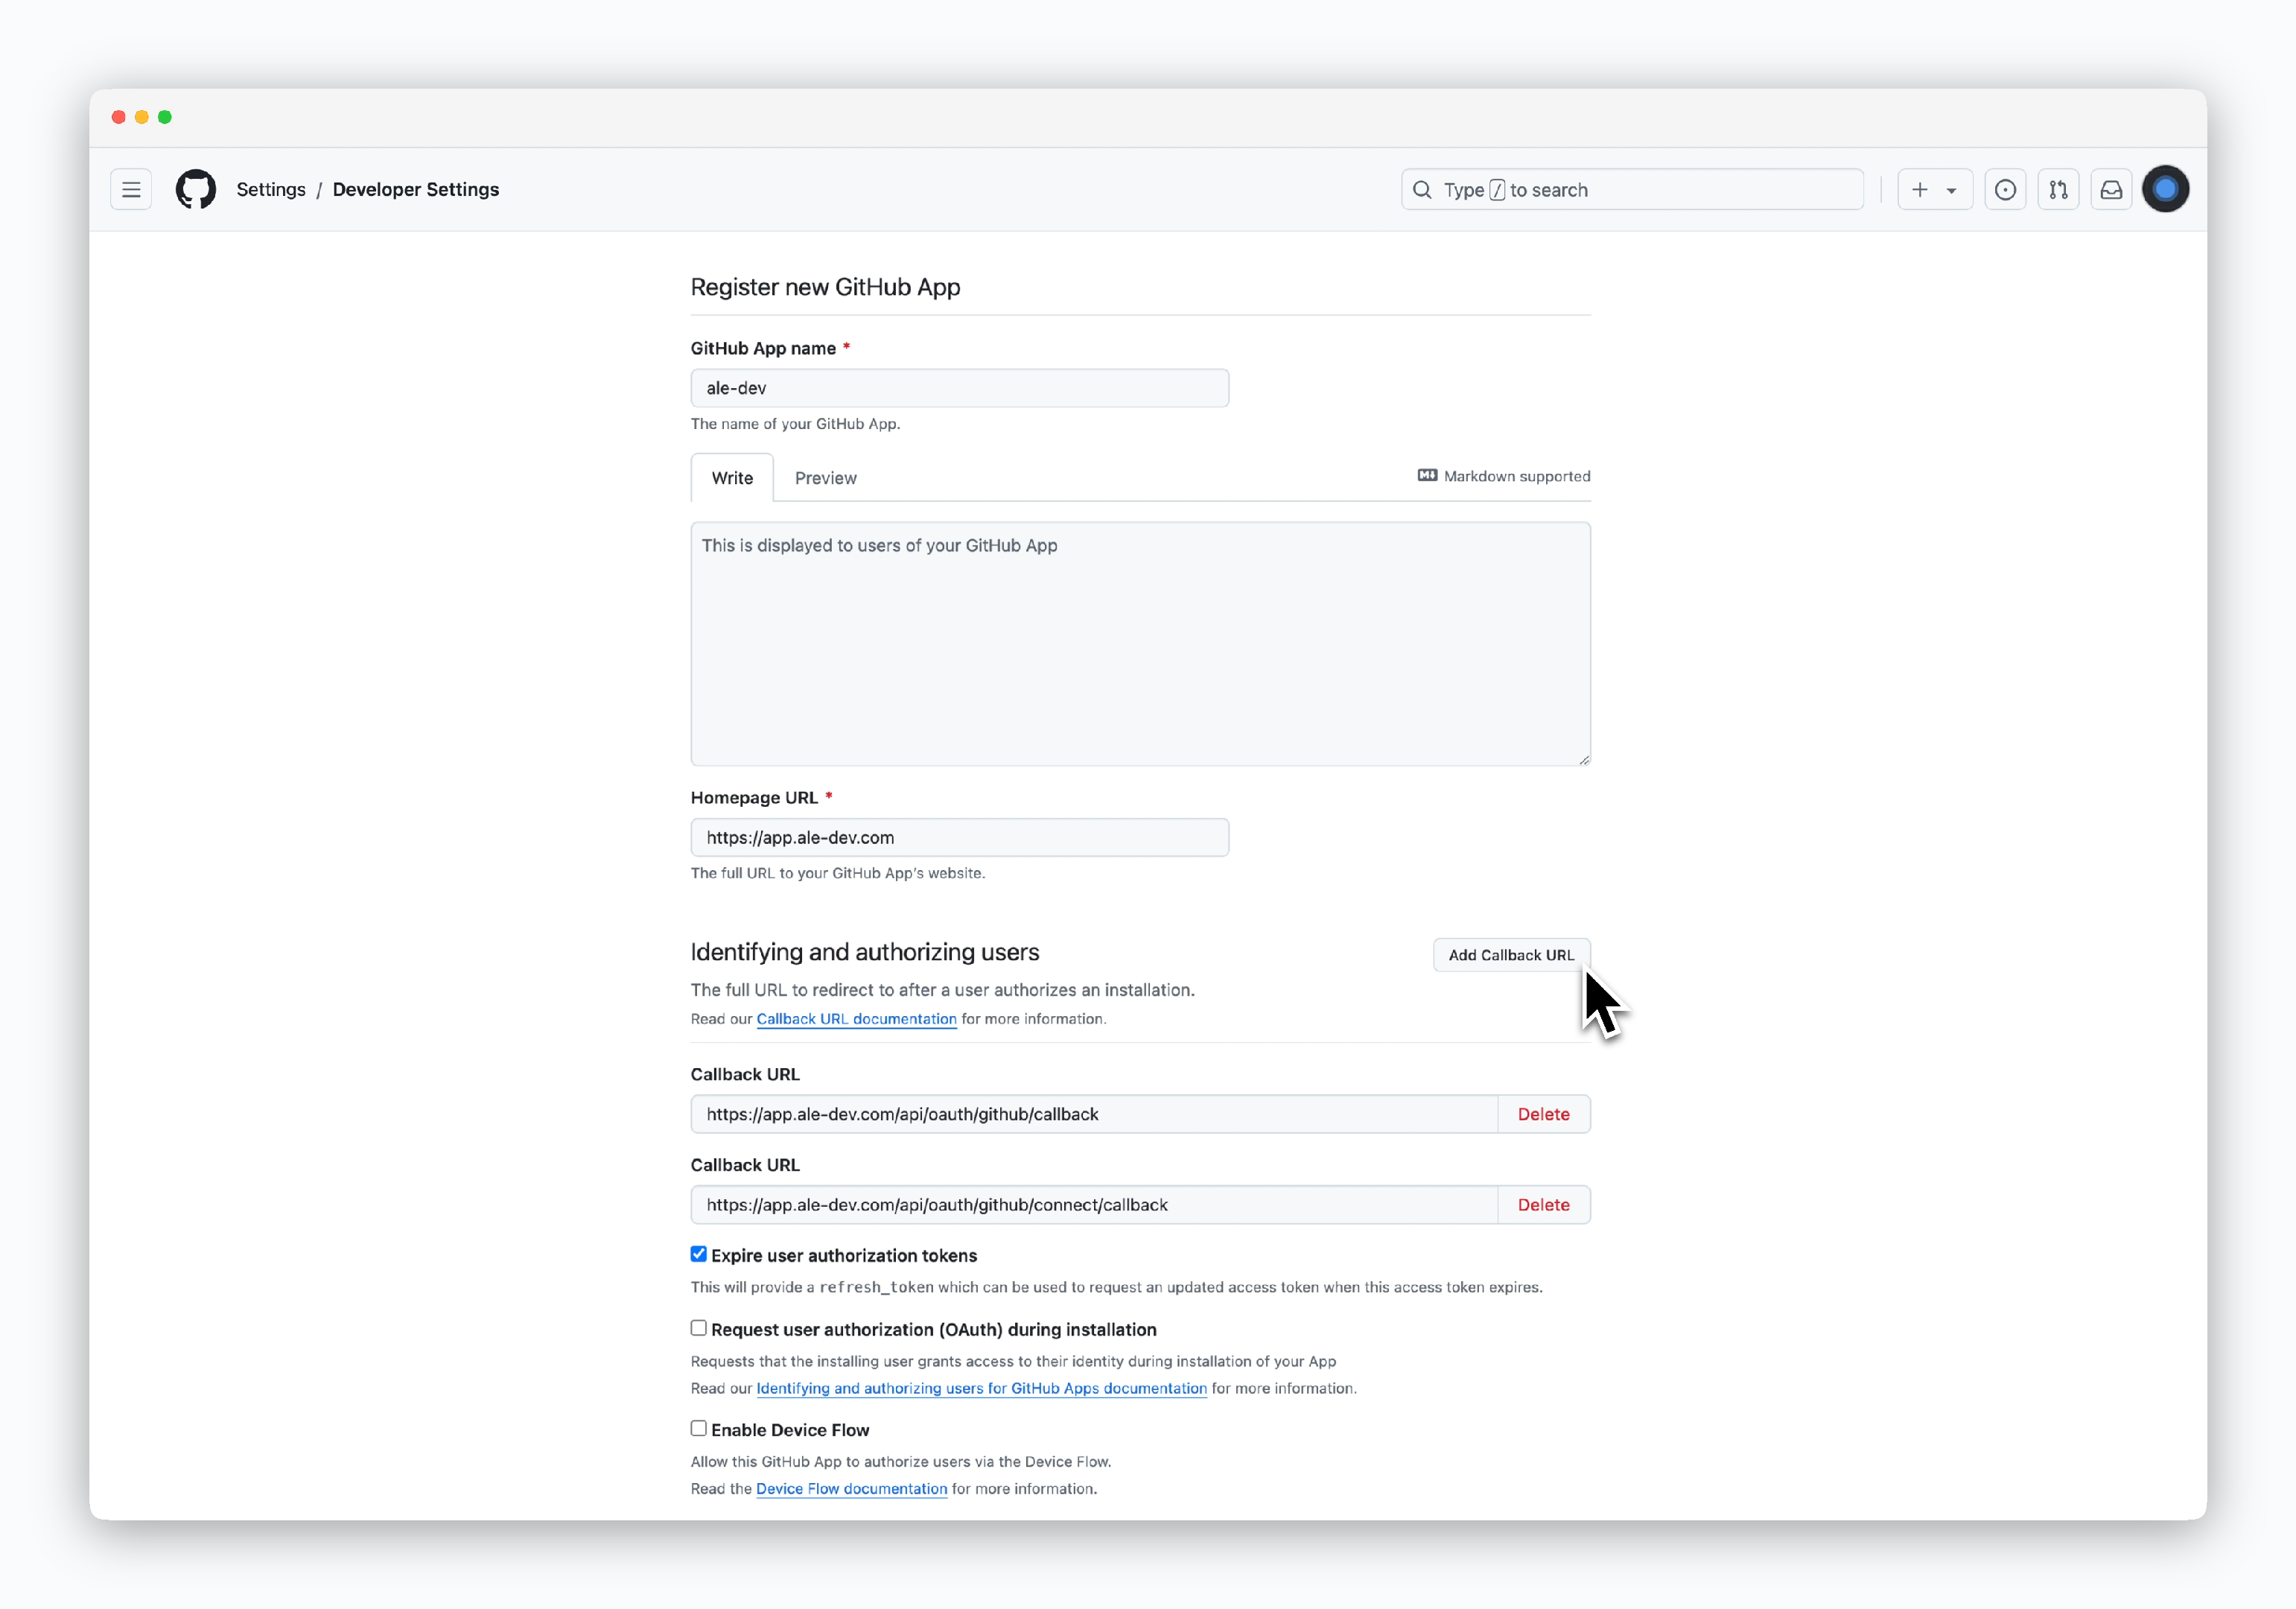 > GitHub Appを作成するための情報を以下のように入力してください。
* **GitHub App name** : GitHub Appの名前
* **Homepage URL**
* GitHub OAuthを適用するホームページURL
* IngressでデプロイされたURLである`https://app.[ドメイン]`
* **Callback URL(`Add Callbak URL`で項目追加)**
* `https://app.[ドメイン]/api/oauth/github/callback`
* `https://app.[ドメイン]/api/oauth/github/connect/callback`
この画面で入力した**GitHub App name**はエールにGitHub OAuth登録時に使用されます。
`https://app.[ドメイン]/api/`はエールのAPIエンドポイントアドレスです。
### Webhookの無効化
> GitHub Appを作成するための情報を以下のように入力してください。
* **GitHub App name** : GitHub Appの名前
* **Homepage URL**
* GitHub OAuthを適用するホームページURL
* IngressでデプロイされたURLである`https://app.[ドメイン]`
* **Callback URL(`Add Callbak URL`で項目追加)**
* `https://app.[ドメイン]/api/oauth/github/callback`
* `https://app.[ドメイン]/api/oauth/github/connect/callback`
この画面で入力した**GitHub App name**はエールにGitHub OAuth登録時に使用されます。
`https://app.[ドメイン]/api/`はエールのAPIエンドポイントアドレスです。
### Webhookの無効化
 > Webhook項目のActiveチェックを解除して無効化してください。
### 権限の付与とAPPの作成
> Webhook項目のActiveチェックを解除して無効化してください。
### 権限の付与とAPPの作成
 > Permission項目で以下の権限を付与し、`Create GitHub App`でAPPを作成します。
* **Read and Write**
* Actions
* Administration
* Commit statuses
* Contents
* Deployments
* Issues
* Pull requests
* Workflows
* **Read-only**
* Metadata
* **Read and Write**
* Administration
* **Read-only**
* Members
* **Read-only**
* Email addresses
## GitHub App情報の確認
> エールにGitHub OAuthを追加するにはGitHub App Nameと**4つのID・Key**が必要です。
* **App ID**
* **Client ID**
* **Cleint Secret**
* **Private Key**
### App ID、Client IDの確認
> Permission項目で以下の権限を付与し、`Create GitHub App`でAPPを作成します。
* **Read and Write**
* Actions
* Administration
* Commit statuses
* Contents
* Deployments
* Issues
* Pull requests
* Workflows
* **Read-only**
* Metadata
* **Read and Write**
* Administration
* **Read-only**
* Members
* **Read-only**
* Email addresses
## GitHub App情報の確認
> エールにGitHub OAuthを追加するにはGitHub App Nameと**4つのID・Key**が必要です。
* **App ID**
* **Client ID**
* **Cleint Secret**
* **Private Key**
### App ID、Client IDの確認
 > 権限付与後にAppが作成されると、**App IDとClient ID**を確認できます。
### Client Secretの確認
> 権限付与後にAppが作成されると、**App IDとClient ID**を確認できます。
### Client Secretの確認
 > 同じ画面で`Generate a new client secret`をクリックして**Client Secret**を確認します。
### Private Keyの確認
> 同じ画面で`Generate a new client secret`をクリックして**Client Secret**を確認します。
### Private Keyの確認
 > 画面下部の`Generate a private key`をクリックしてpemファイルをダウンロードします。
## GitHub Appの公開設定
> 作成されたGitHub Appの公開設定のデフォルト値は**非公開**であり、Appを作成したアカウントが所属する組織のユーザーのみがGitHub Appを使用できるようになります。GitHub組織に関係なくGitHub Appを使用できるようにするには、以下をご参照ください。
> 画面下部の`Generate a private key`をクリックしてpemファイルをダウンロードします。
## GitHub Appの公開設定
> 作成されたGitHub Appの公開設定のデフォルト値は**非公開**であり、Appを作成したアカウントが所属する組織のユーザーのみがGitHub Appを使用できるようになります。GitHub組織に関係なくGitHub Appを使用できるようにするには、以下をご参照ください。
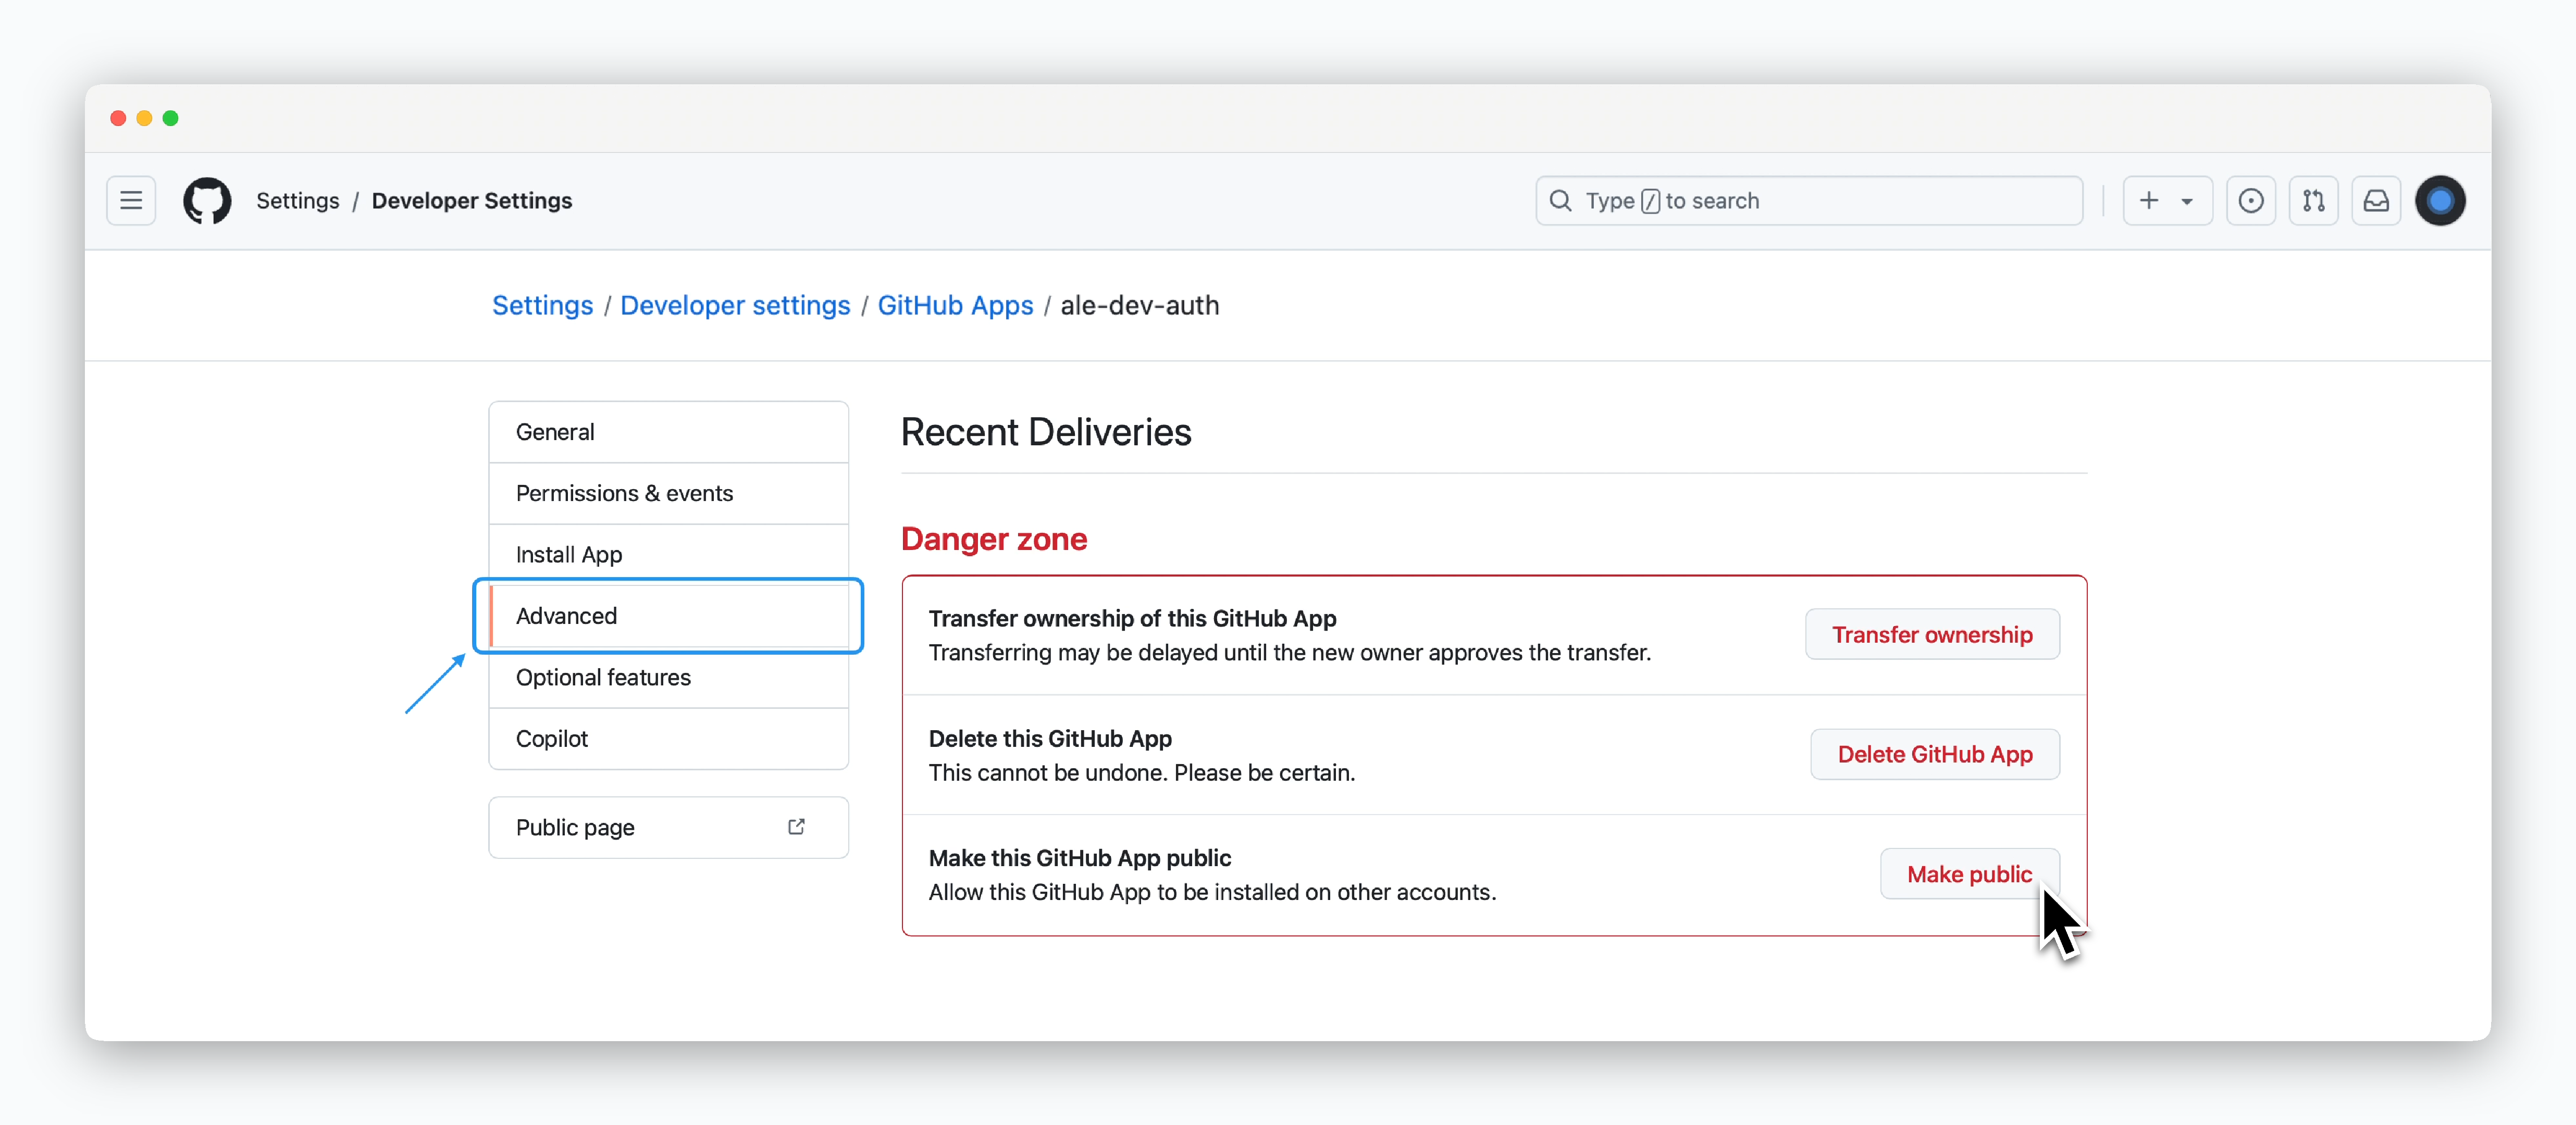 > **Advanced**メニューから**Danger Zone**セクションの`Make public`をクリックします。
## エール運用システムへの登録
> **Advanced**メニューから**Danger Zone**セクションの`Make public`をクリックします。
## エール運用システムへの登録
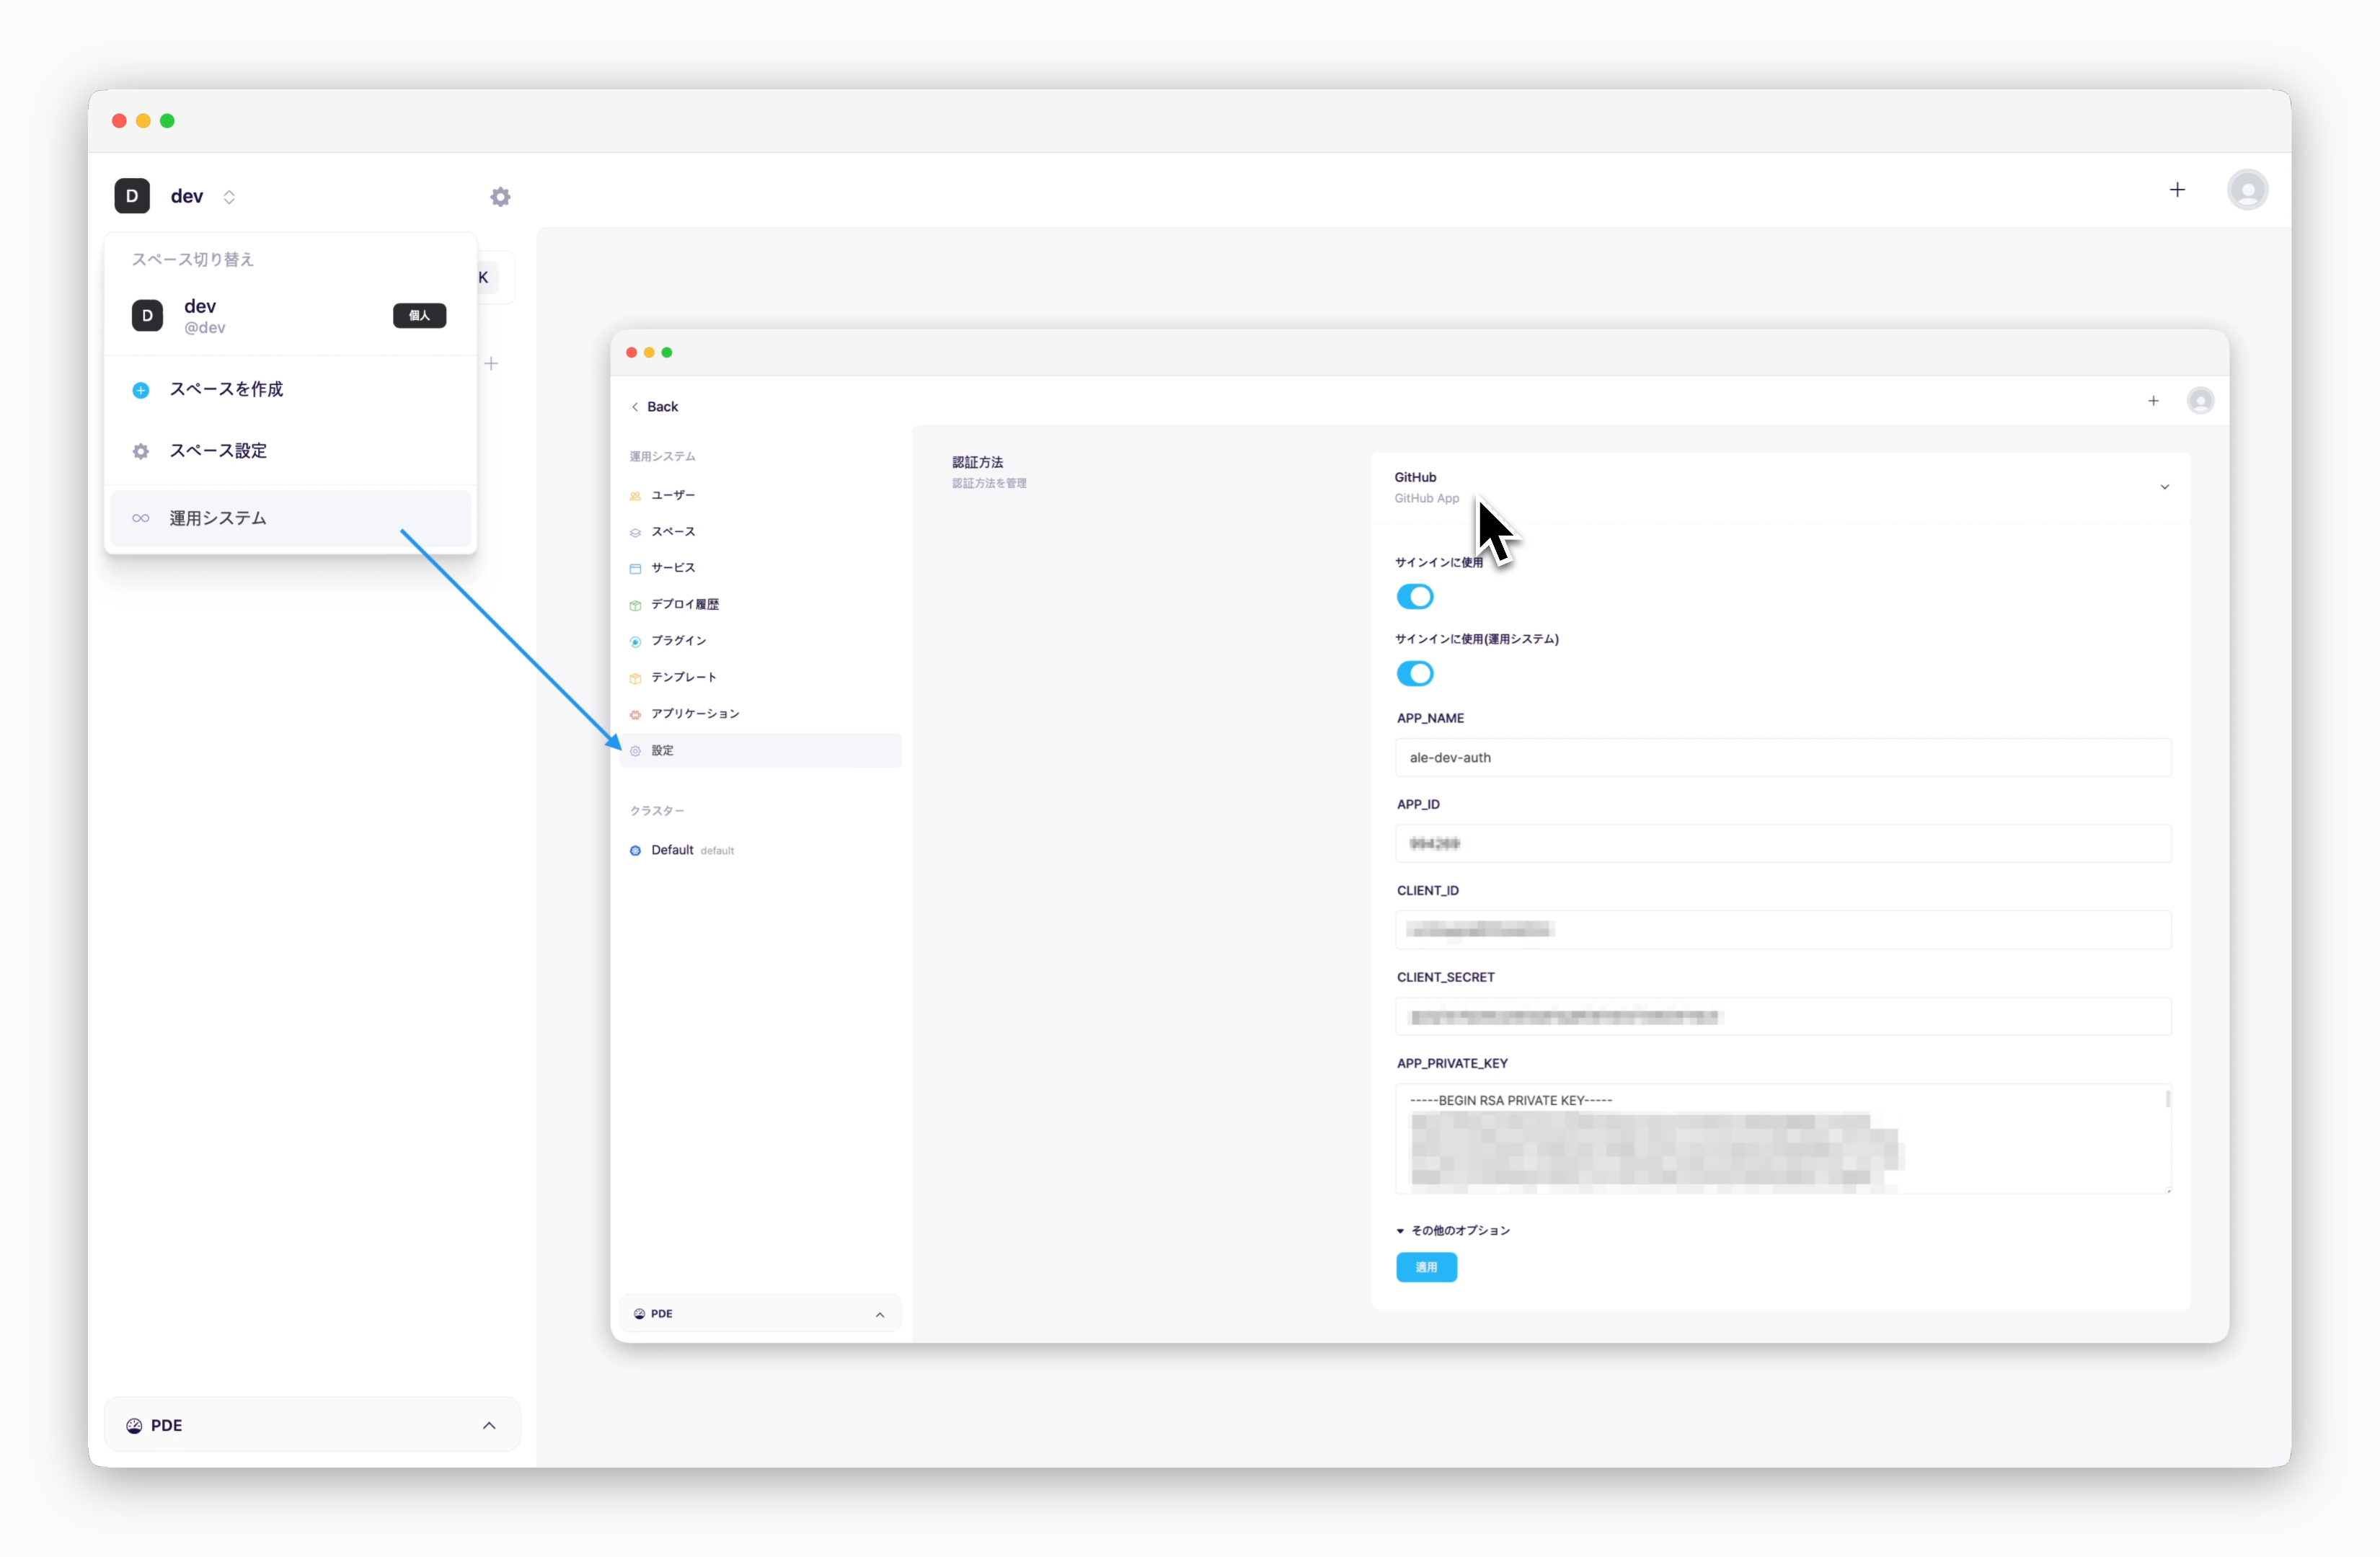 > 運用システムにアクセスし、**設定 > 認証手段 > GitHub**ドロップダウンをクリックした後、前段階で確認した値を各フィールドに入力して`適用`をクリックしてください。
* **ログイン使用** : OAuthログインの使用可否
* **APP\_NAME** : GitHub App名
* **APP\_ID** : App ID
* **CLIENT\_ID** : Client ID
* **CLIENT\_SECRET** : Client secret
* **APP\_PRIVATE\_KEY**: Private key pemファイルの値
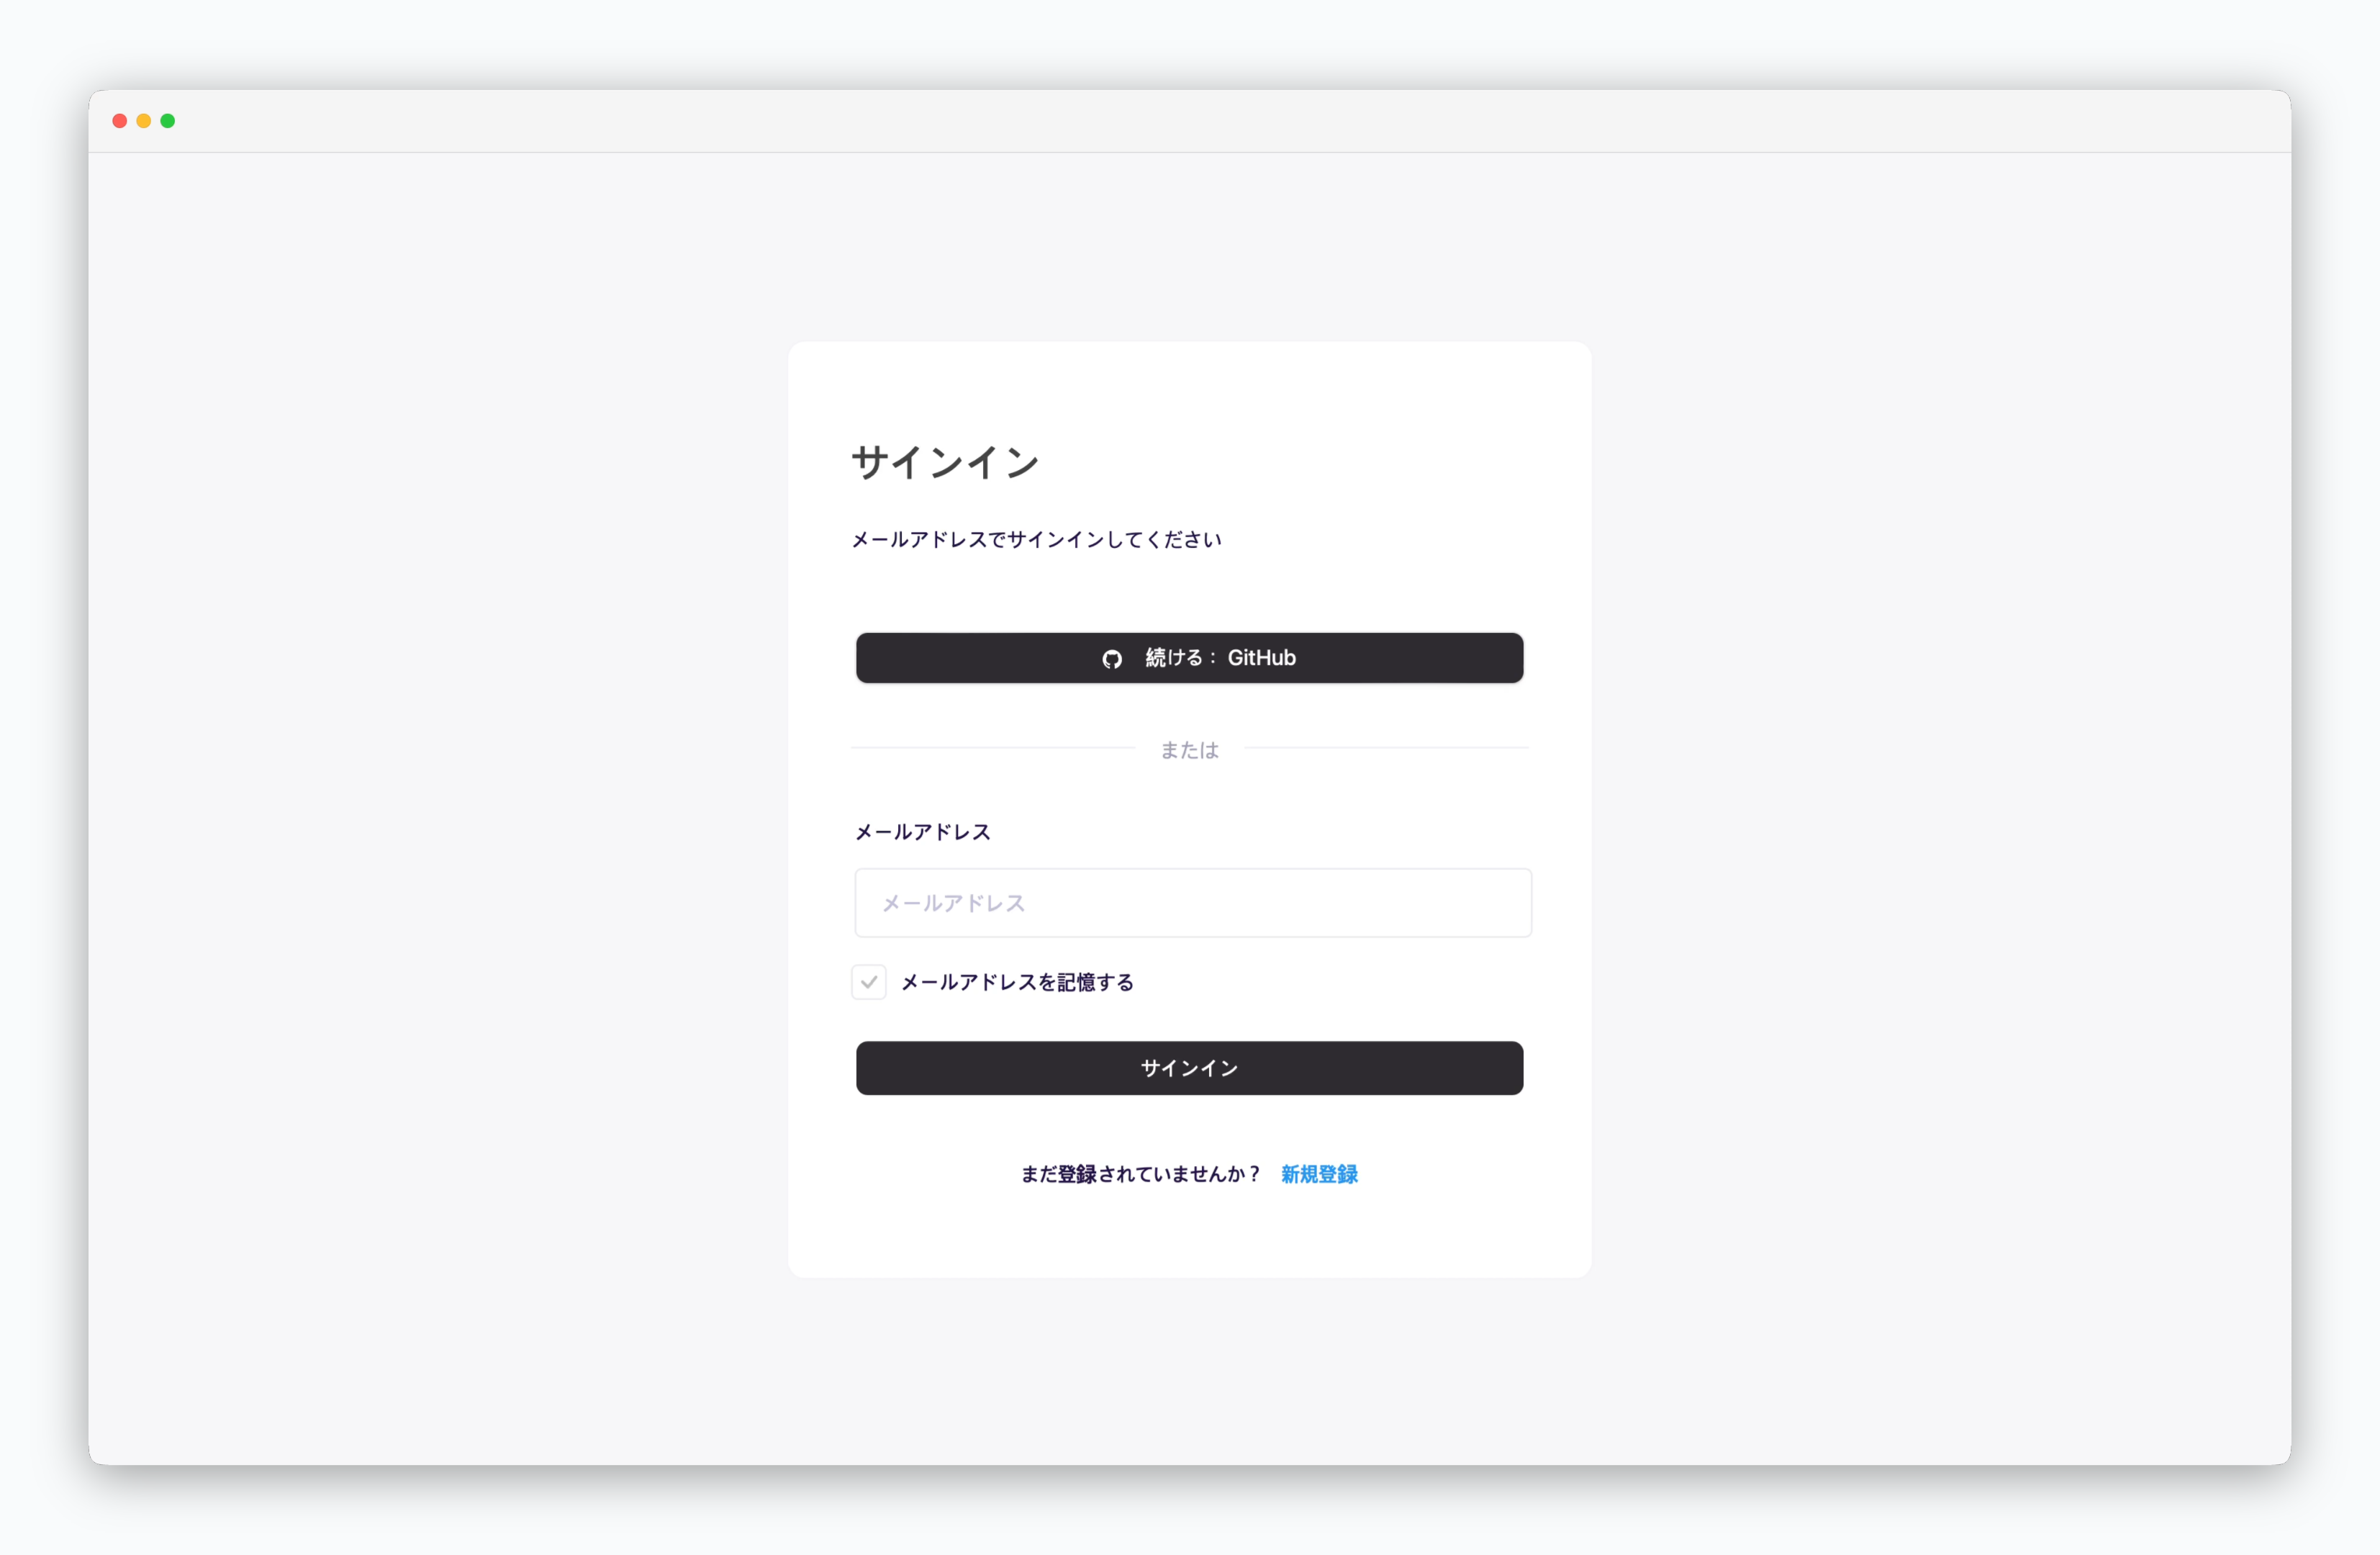
適用完了後、ダッシュボードにアクセスすると**GitHubアカウントでログイン**ボタンが表示されます。
> 運用システムにアクセスし、**設定 > 認証手段 > GitHub**ドロップダウンをクリックした後、前段階で確認した値を各フィールドに入力して`適用`をクリックしてください。
* **ログイン使用** : OAuthログインの使用可否
* **APP\_NAME** : GitHub App名
* **APP\_ID** : App ID
* **CLIENT\_ID** : Client ID
* **CLIENT\_SECRET** : Client secret
* **APP\_PRIVATE\_KEY**: Private key pemファイルの値
適用完了後、ダッシュボードにアクセスすると**GitHubアカウントでログイン**ボタンが表示されます。
 ## GitHubアカウントでログイン
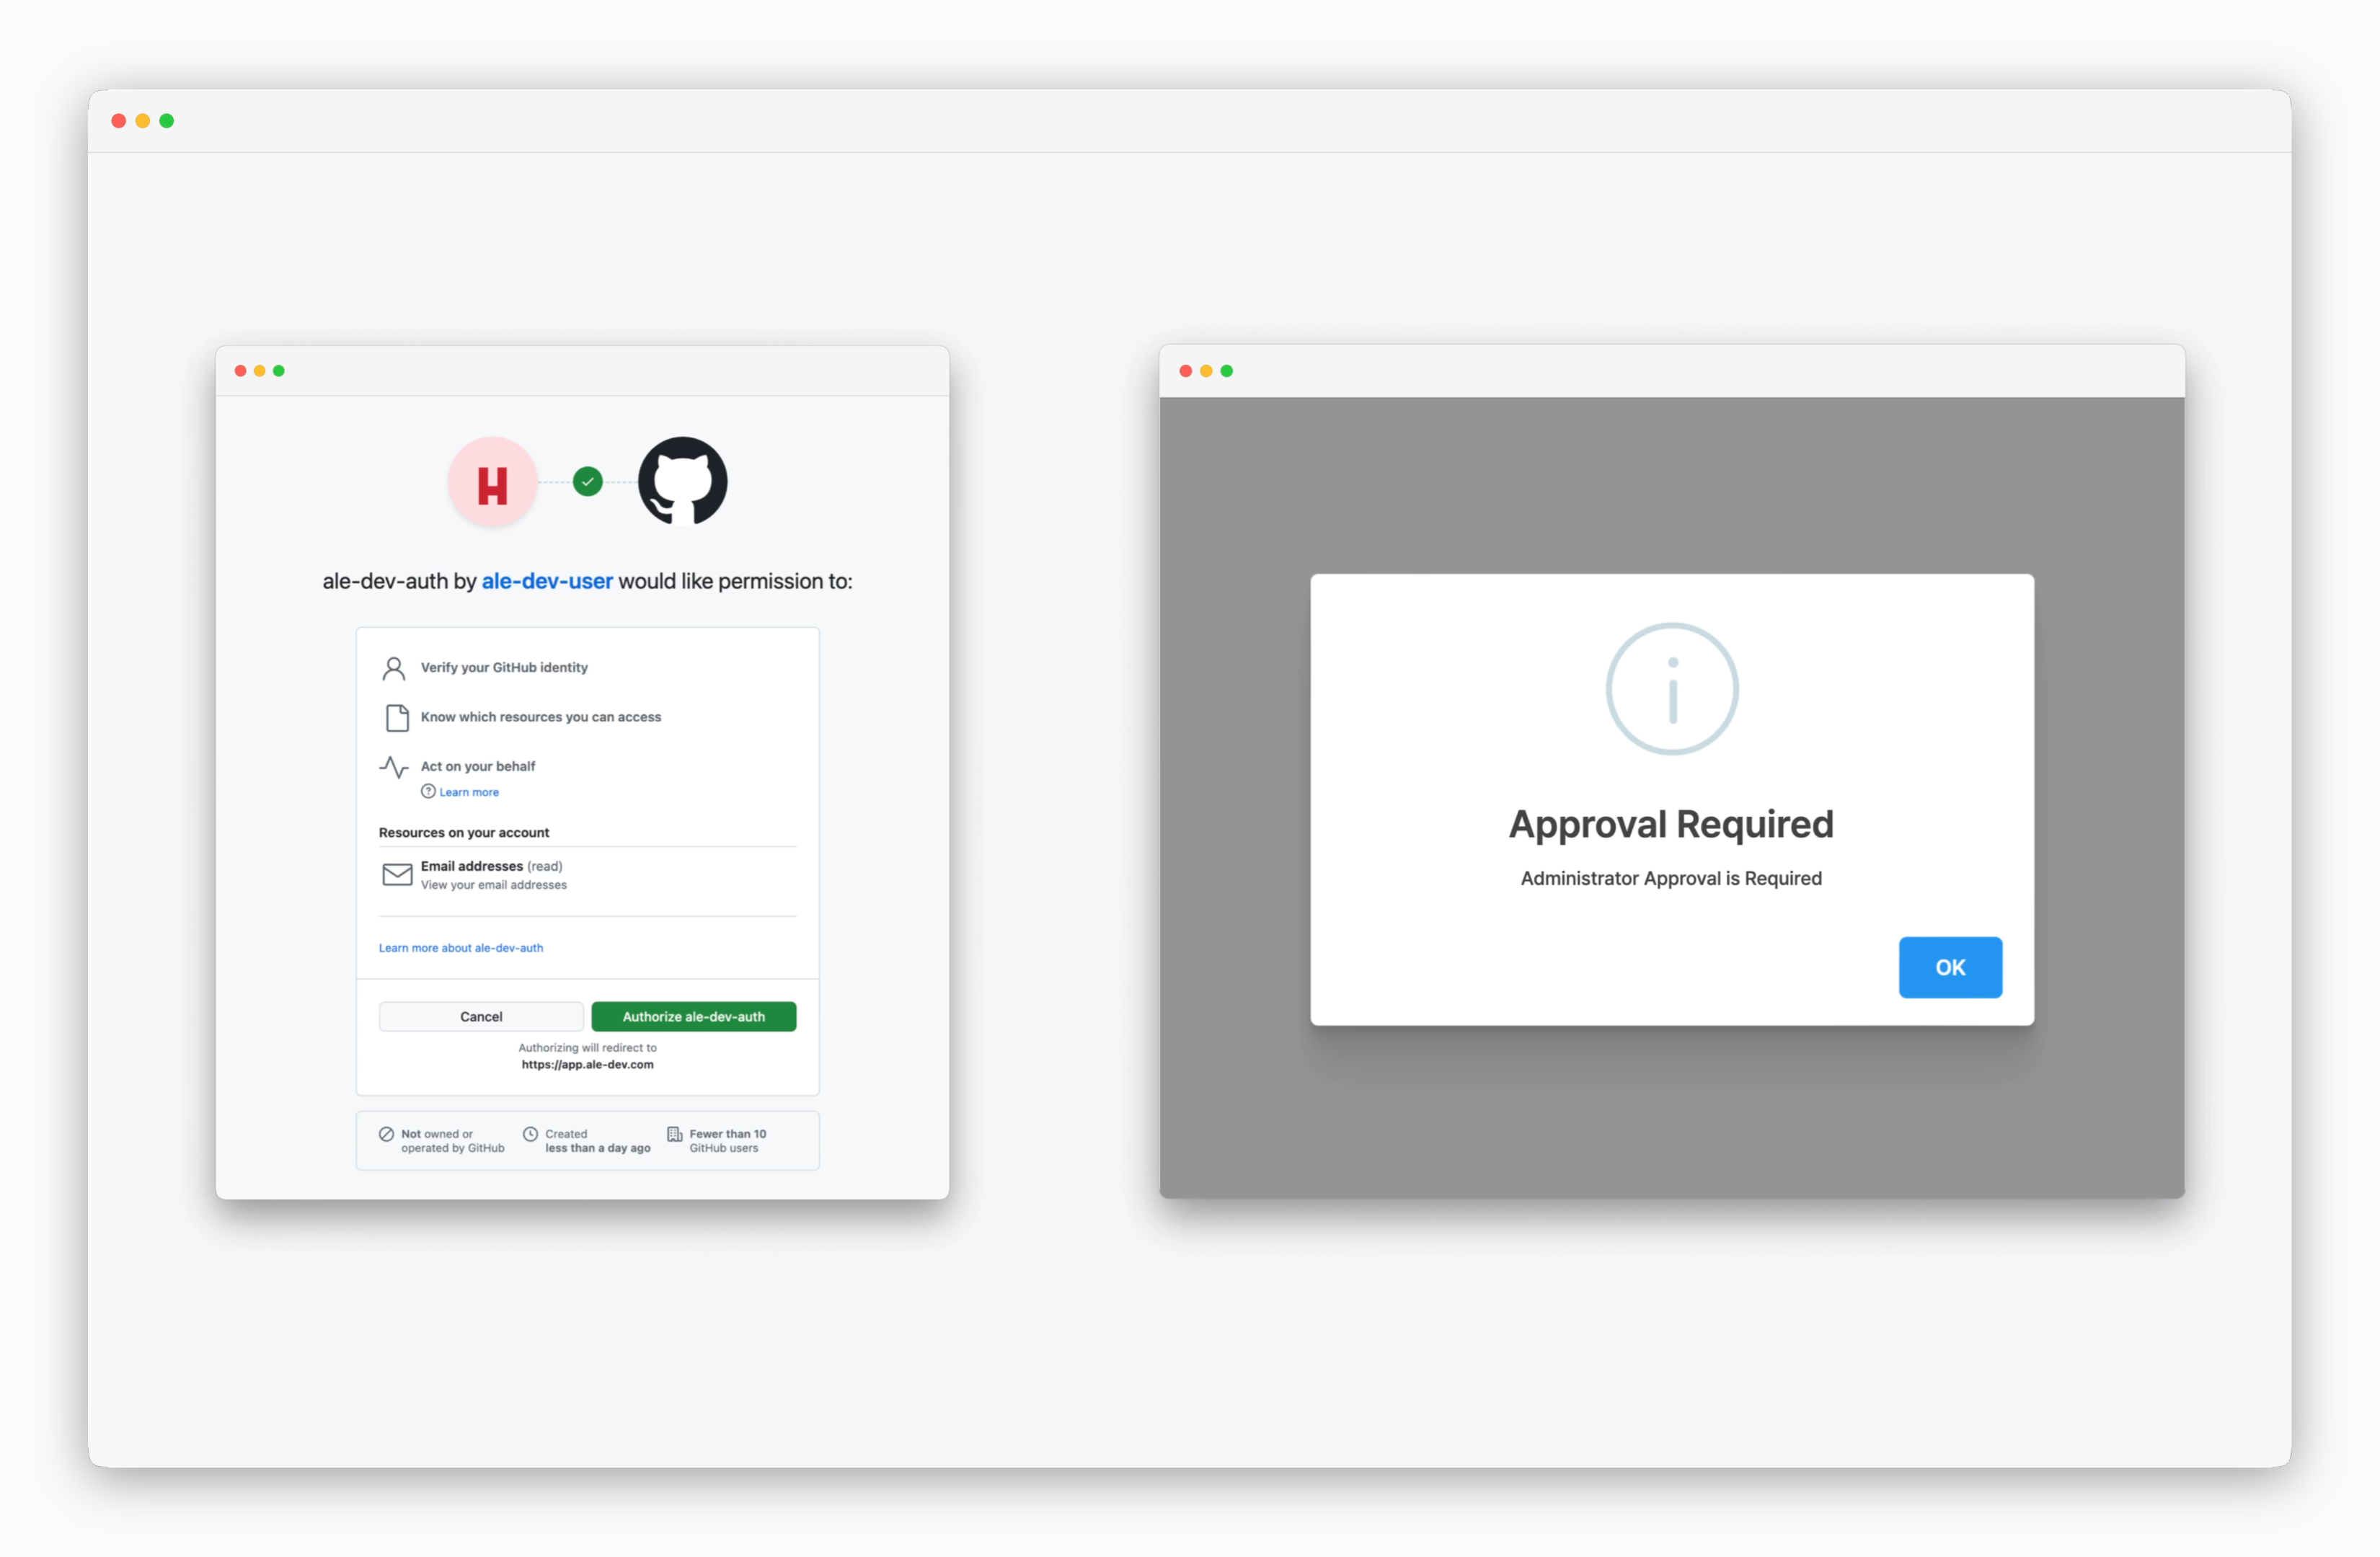 > ユーザーの最初のGitHubログイン時、`Authorize [GitHub App名]`をクリックすると登録申請が進められ、管理者承認に関するメッセージが表示されます。
登録申請したユーザーの承認(有効化)については、[ユーザー管理ページ](/ja/operations/user-management#%E3%83%A6%E3%83%BC%E3%82%B6%E3%83%BC%E3%81%AE%E6%9C%89%E5%8A%B9%E5%8C%96)をご参照ください。
ブラウザにログインされているGitHubアカウントがGitHub Appを作成したアカウントと同じ場合、上記のようなウィンドウは表示されません。
新しいブラウザセッションで、GitHub Appを作成したアカウントとは異なるGitHubアカウントで認証を進めてください。
[GitHub Appを非公開に設定](/ja/authentication/github#github-app)した場合、ログインしようとする他のアカウントがGitHub Appを作成したアカウントの組織に所属している必要があります。
> ユーザーの最初のGitHubログイン時、`Authorize [GitHub App名]`をクリックすると登録申請が進められ、管理者承認に関するメッセージが表示されます。
登録申請したユーザーの承認(有効化)については、[ユーザー管理ページ](/ja/operations/user-management#%E3%83%A6%E3%83%BC%E3%82%B6%E3%83%BC%E3%81%AE%E6%9C%89%E5%8A%B9%E5%8C%96)をご参照ください。
ブラウザにログインされているGitHubアカウントがGitHub Appを作成したアカウントと同じ場合、上記のようなウィンドウは表示されません。
新しいブラウザセッションで、GitHub Appを作成したアカウントとは異なるGitHubアカウントで認証を進めてください。
[GitHub Appを非公開に設定](/ja/authentication/github#github-app)した場合、ログインしようとする他のアカウントがGitHub Appを作成したアカウントの組織に所属している必要があります。
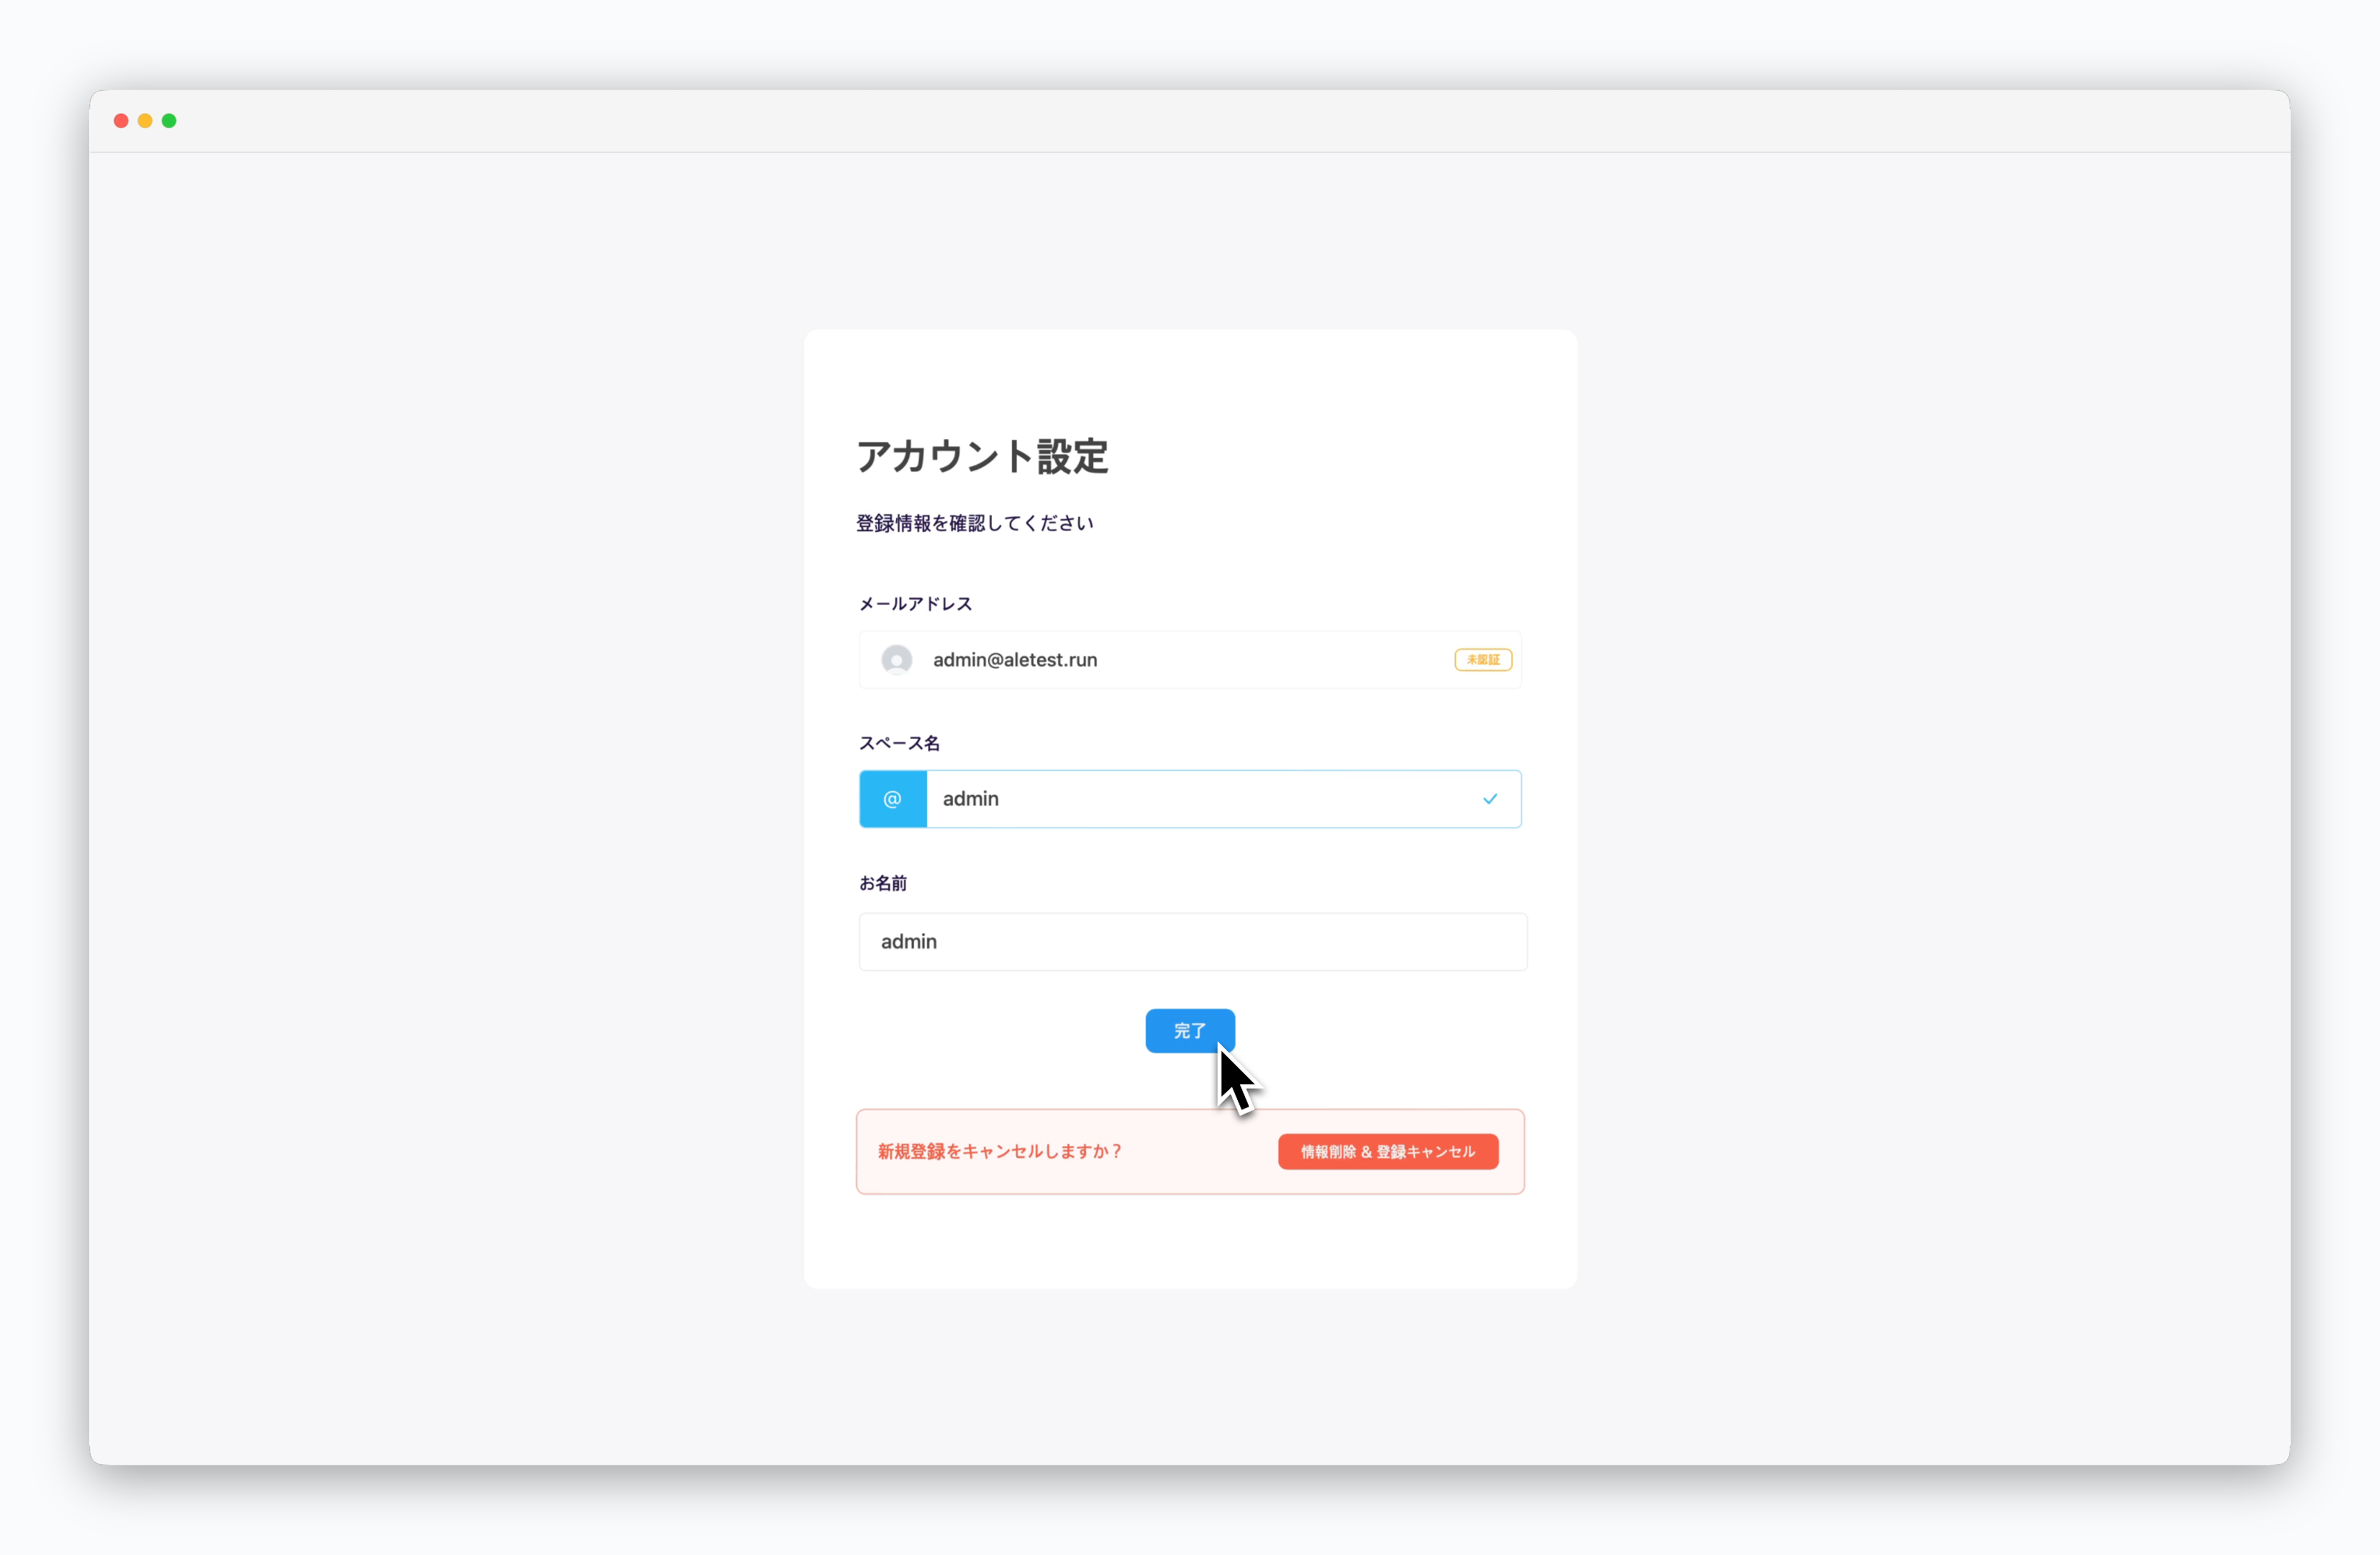 > 管理者承認後にGitHubログインを試みると、**登録完了**ページが表示されます。
> スペースと名前を適切に作成し、`完了`をクリックしてください。
ダッシュボードアクセスと共に指定した名前のスペースが作成され、[運用システムで予め定めたデフォルト値のリソース](/ja/operations/settings#%E3%83%AA%E3%82%BD%E3%83%BC%E3%82%B9%E3%83%97%E3%83%AD%E3%83%95%E3%82%A1%E3%82%A4%E3%83%AB%E7%AE%A1%E7%90%86)が付与されます。
ユーザー登録および管理に関する内容は[ユーザー管理ページ](/ja/operations/user-management)をご参照ください。
> 管理者承認後にGitHubログインを試みると、**登録完了**ページが表示されます。
> スペースと名前を適切に作成し、`完了`をクリックしてください。
ダッシュボードアクセスと共に指定した名前のスペースが作成され、[運用システムで予め定めたデフォルト値のリソース](/ja/operations/settings#%E3%83%AA%E3%82%BD%E3%83%BC%E3%82%B9%E3%83%97%E3%83%AD%E3%83%95%E3%82%A1%E3%82%A4%E3%83%AB%E7%AE%A1%E7%90%86)が付与されます。
ユーザー登録および管理に関する内容は[ユーザー管理ページ](/ja/operations/user-management)をご参照ください。