> ## Documentation Index
> Fetch the complete documentation index at: https://docs.ale.run/llms.txt
> Use this file to discover all available pages before exploring further.
# クイックスタート
> **Node.jsのデプロイ**
***
## 事前準備
* エール[**アカウントの作成**](/ja/operations/user-management#%E3%83%A6%E3%83%BC%E3%82%B6%E3%83%BC%E7%99%BB%E9%8C%B2)
* **GitHubアカウントの連携**
## テンプレートの選択
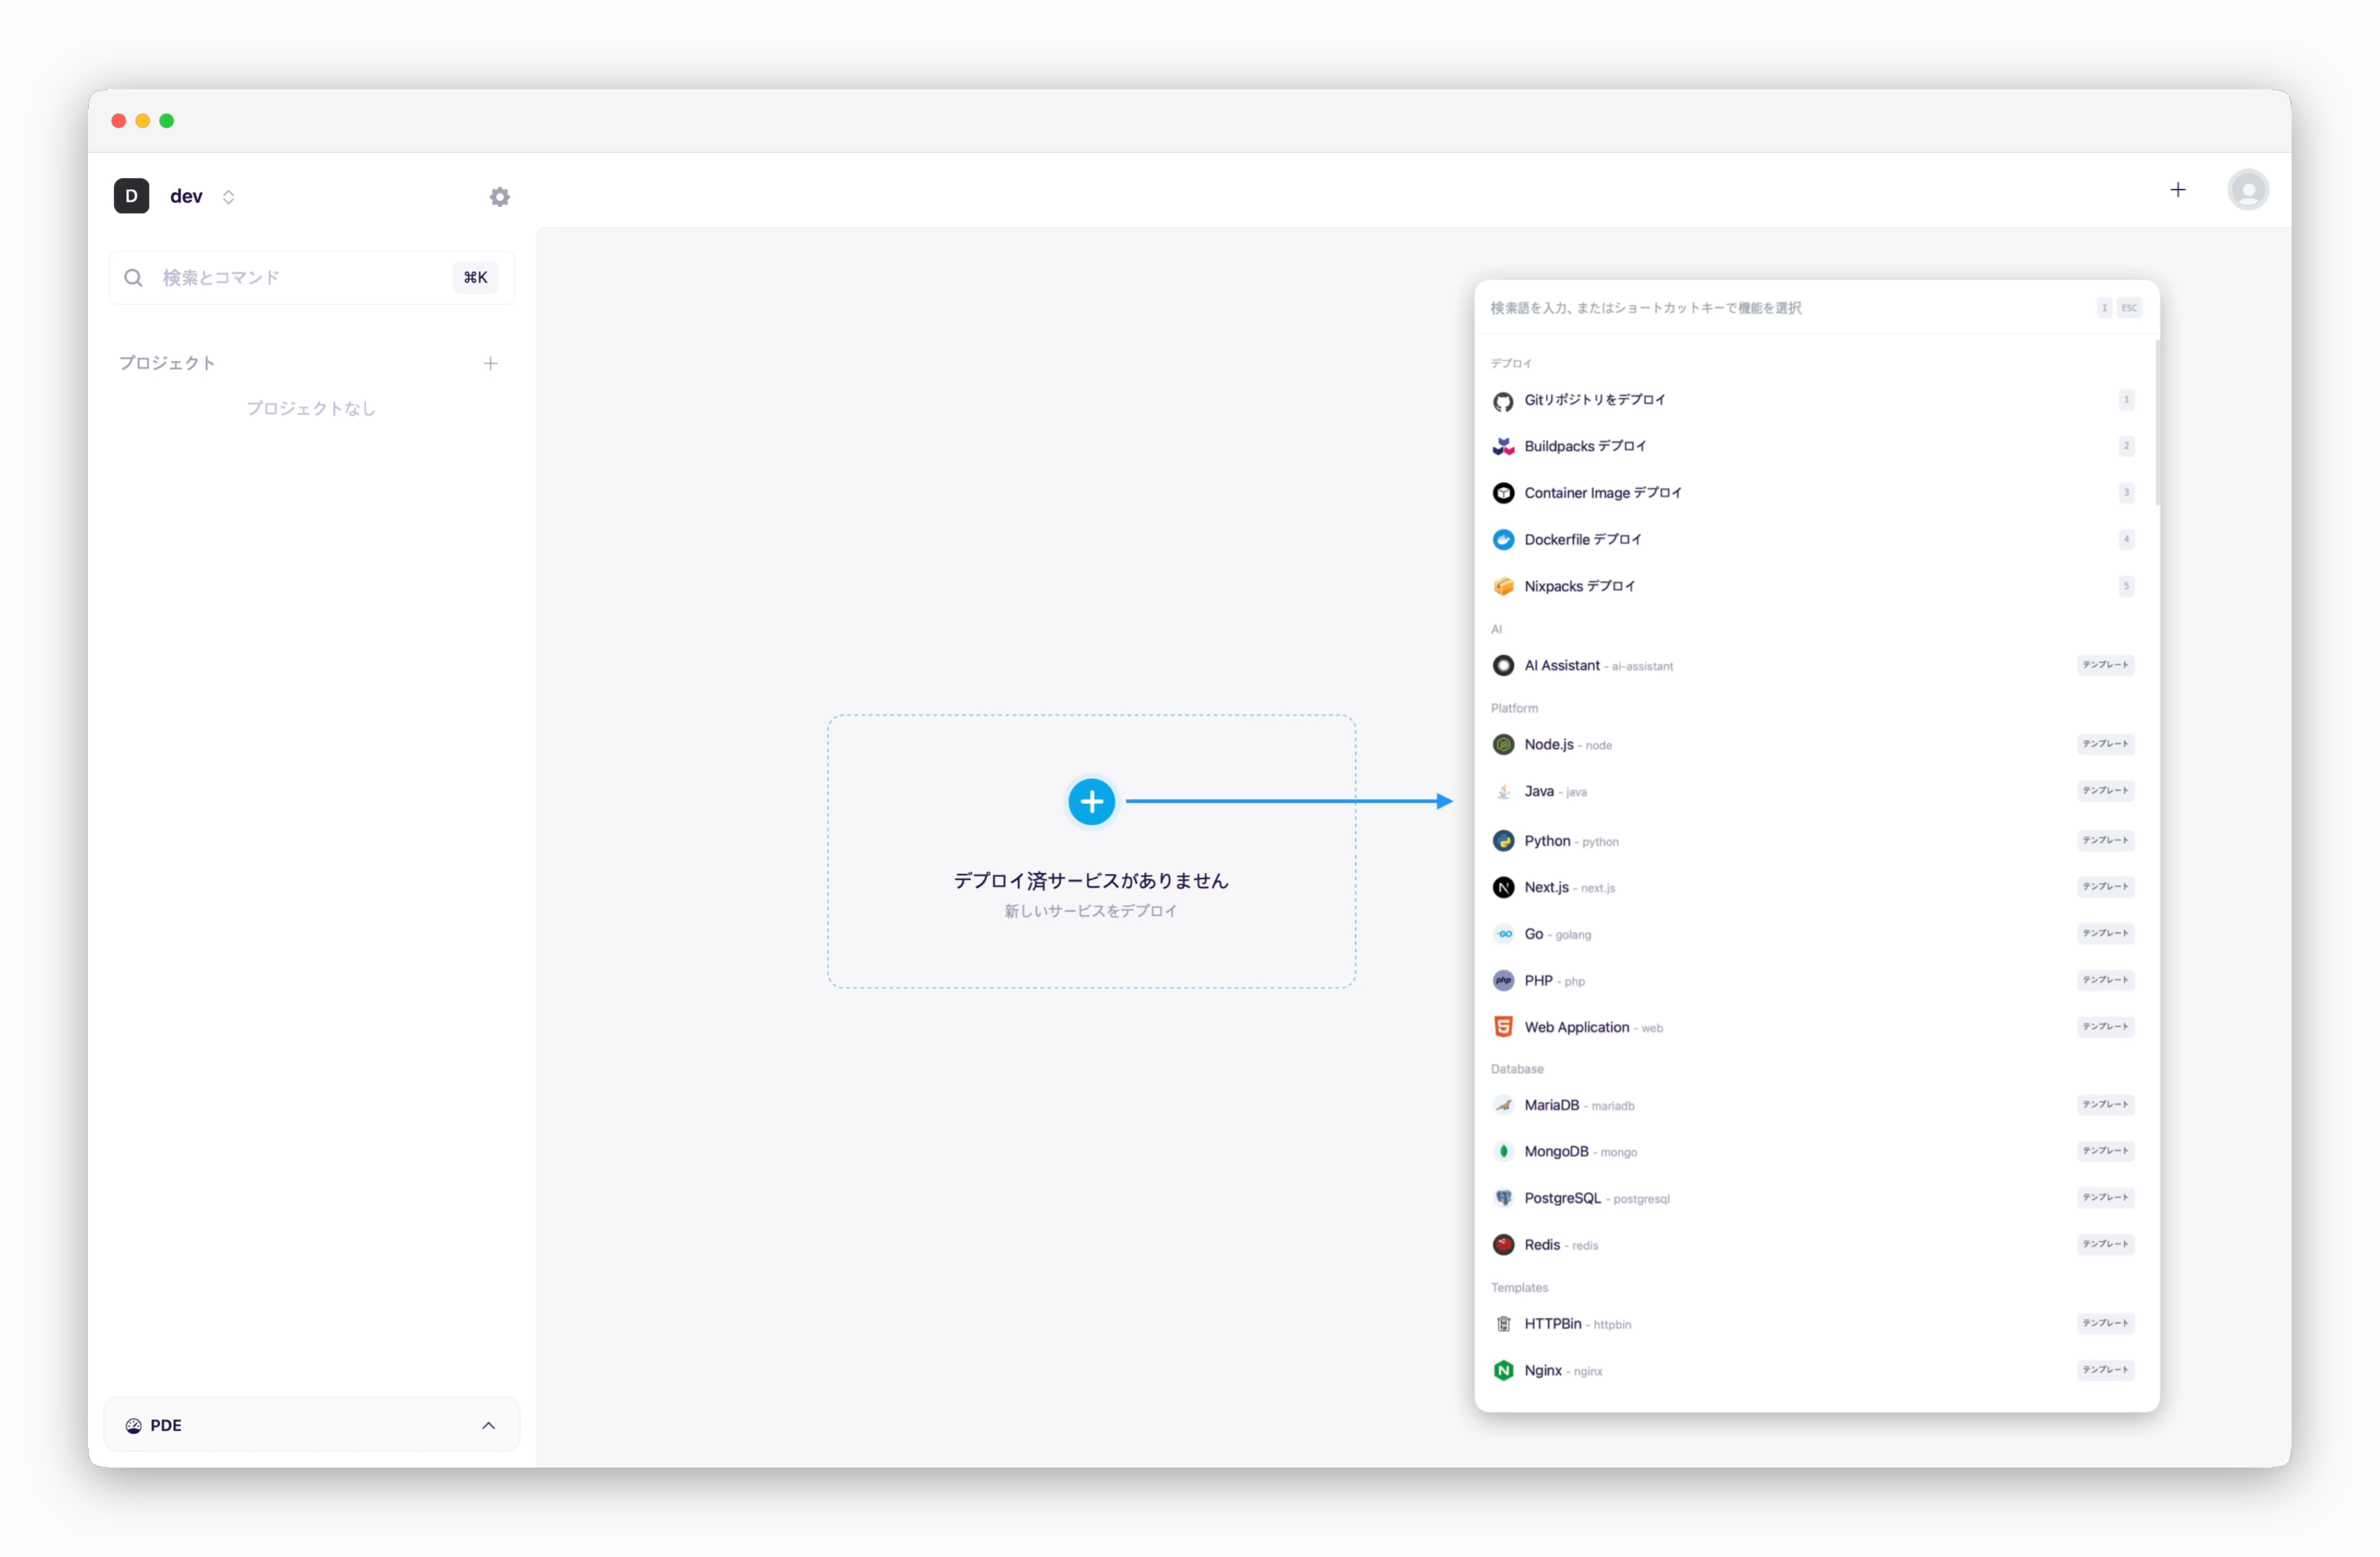 > ダッシュボードの ボタンまたは `⌘ + K` で表示されるデプロイモーダルから**Node.js**テンプレートを選択してください。
## リポジトリの選択
> ダッシュボードの ボタンまたは `⌘ + K` で表示されるデプロイモーダルから**Node.js**テンプレートを選択してください。
## リポジトリの選択
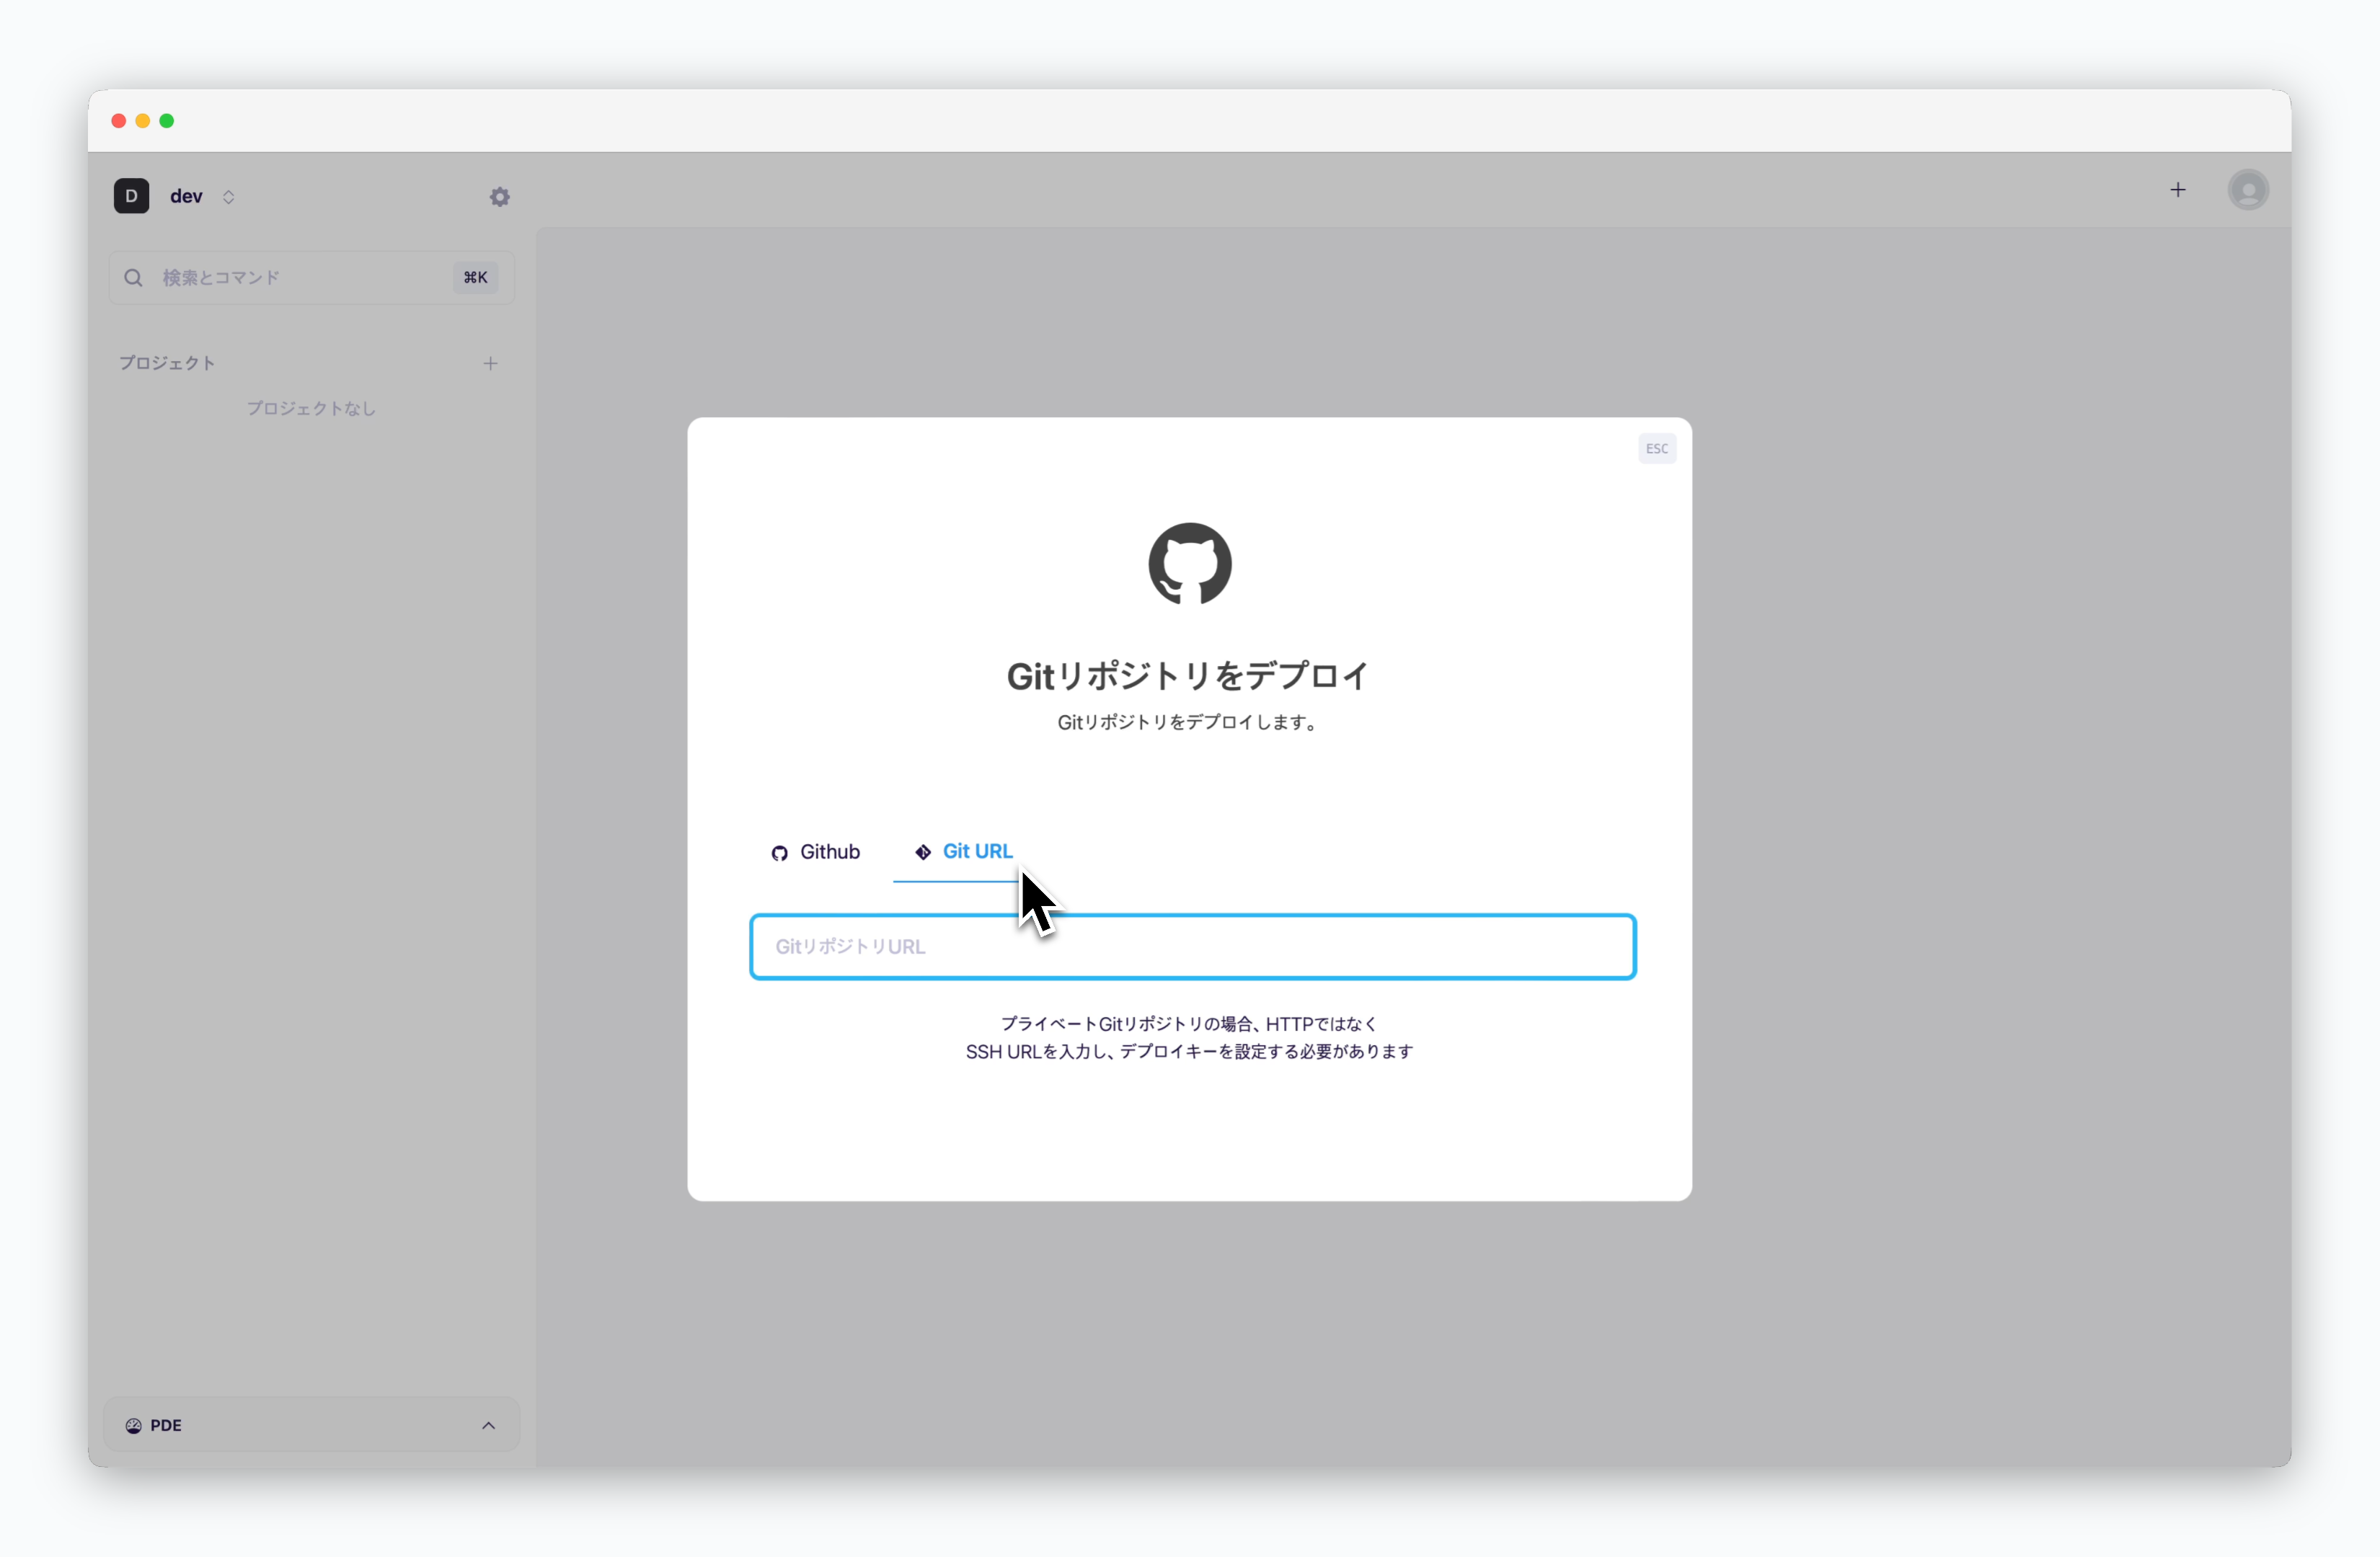 > 以下のパブリックリポジトリのURLを入力するか、連携済みのGitHubアカウントからリポジトリを選択してください。
```bash theme={null}
https://github.com/cloudtype-examples/node-express.git
```
## 設定とデプロイ
> 以下のパブリックリポジトリのURLを入力するか、連携済みのGitHubアカウントからリポジトリを選択してください。
```bash theme={null}
https://github.com/cloudtype-examples/node-express.git
```
## 設定とデプロイ
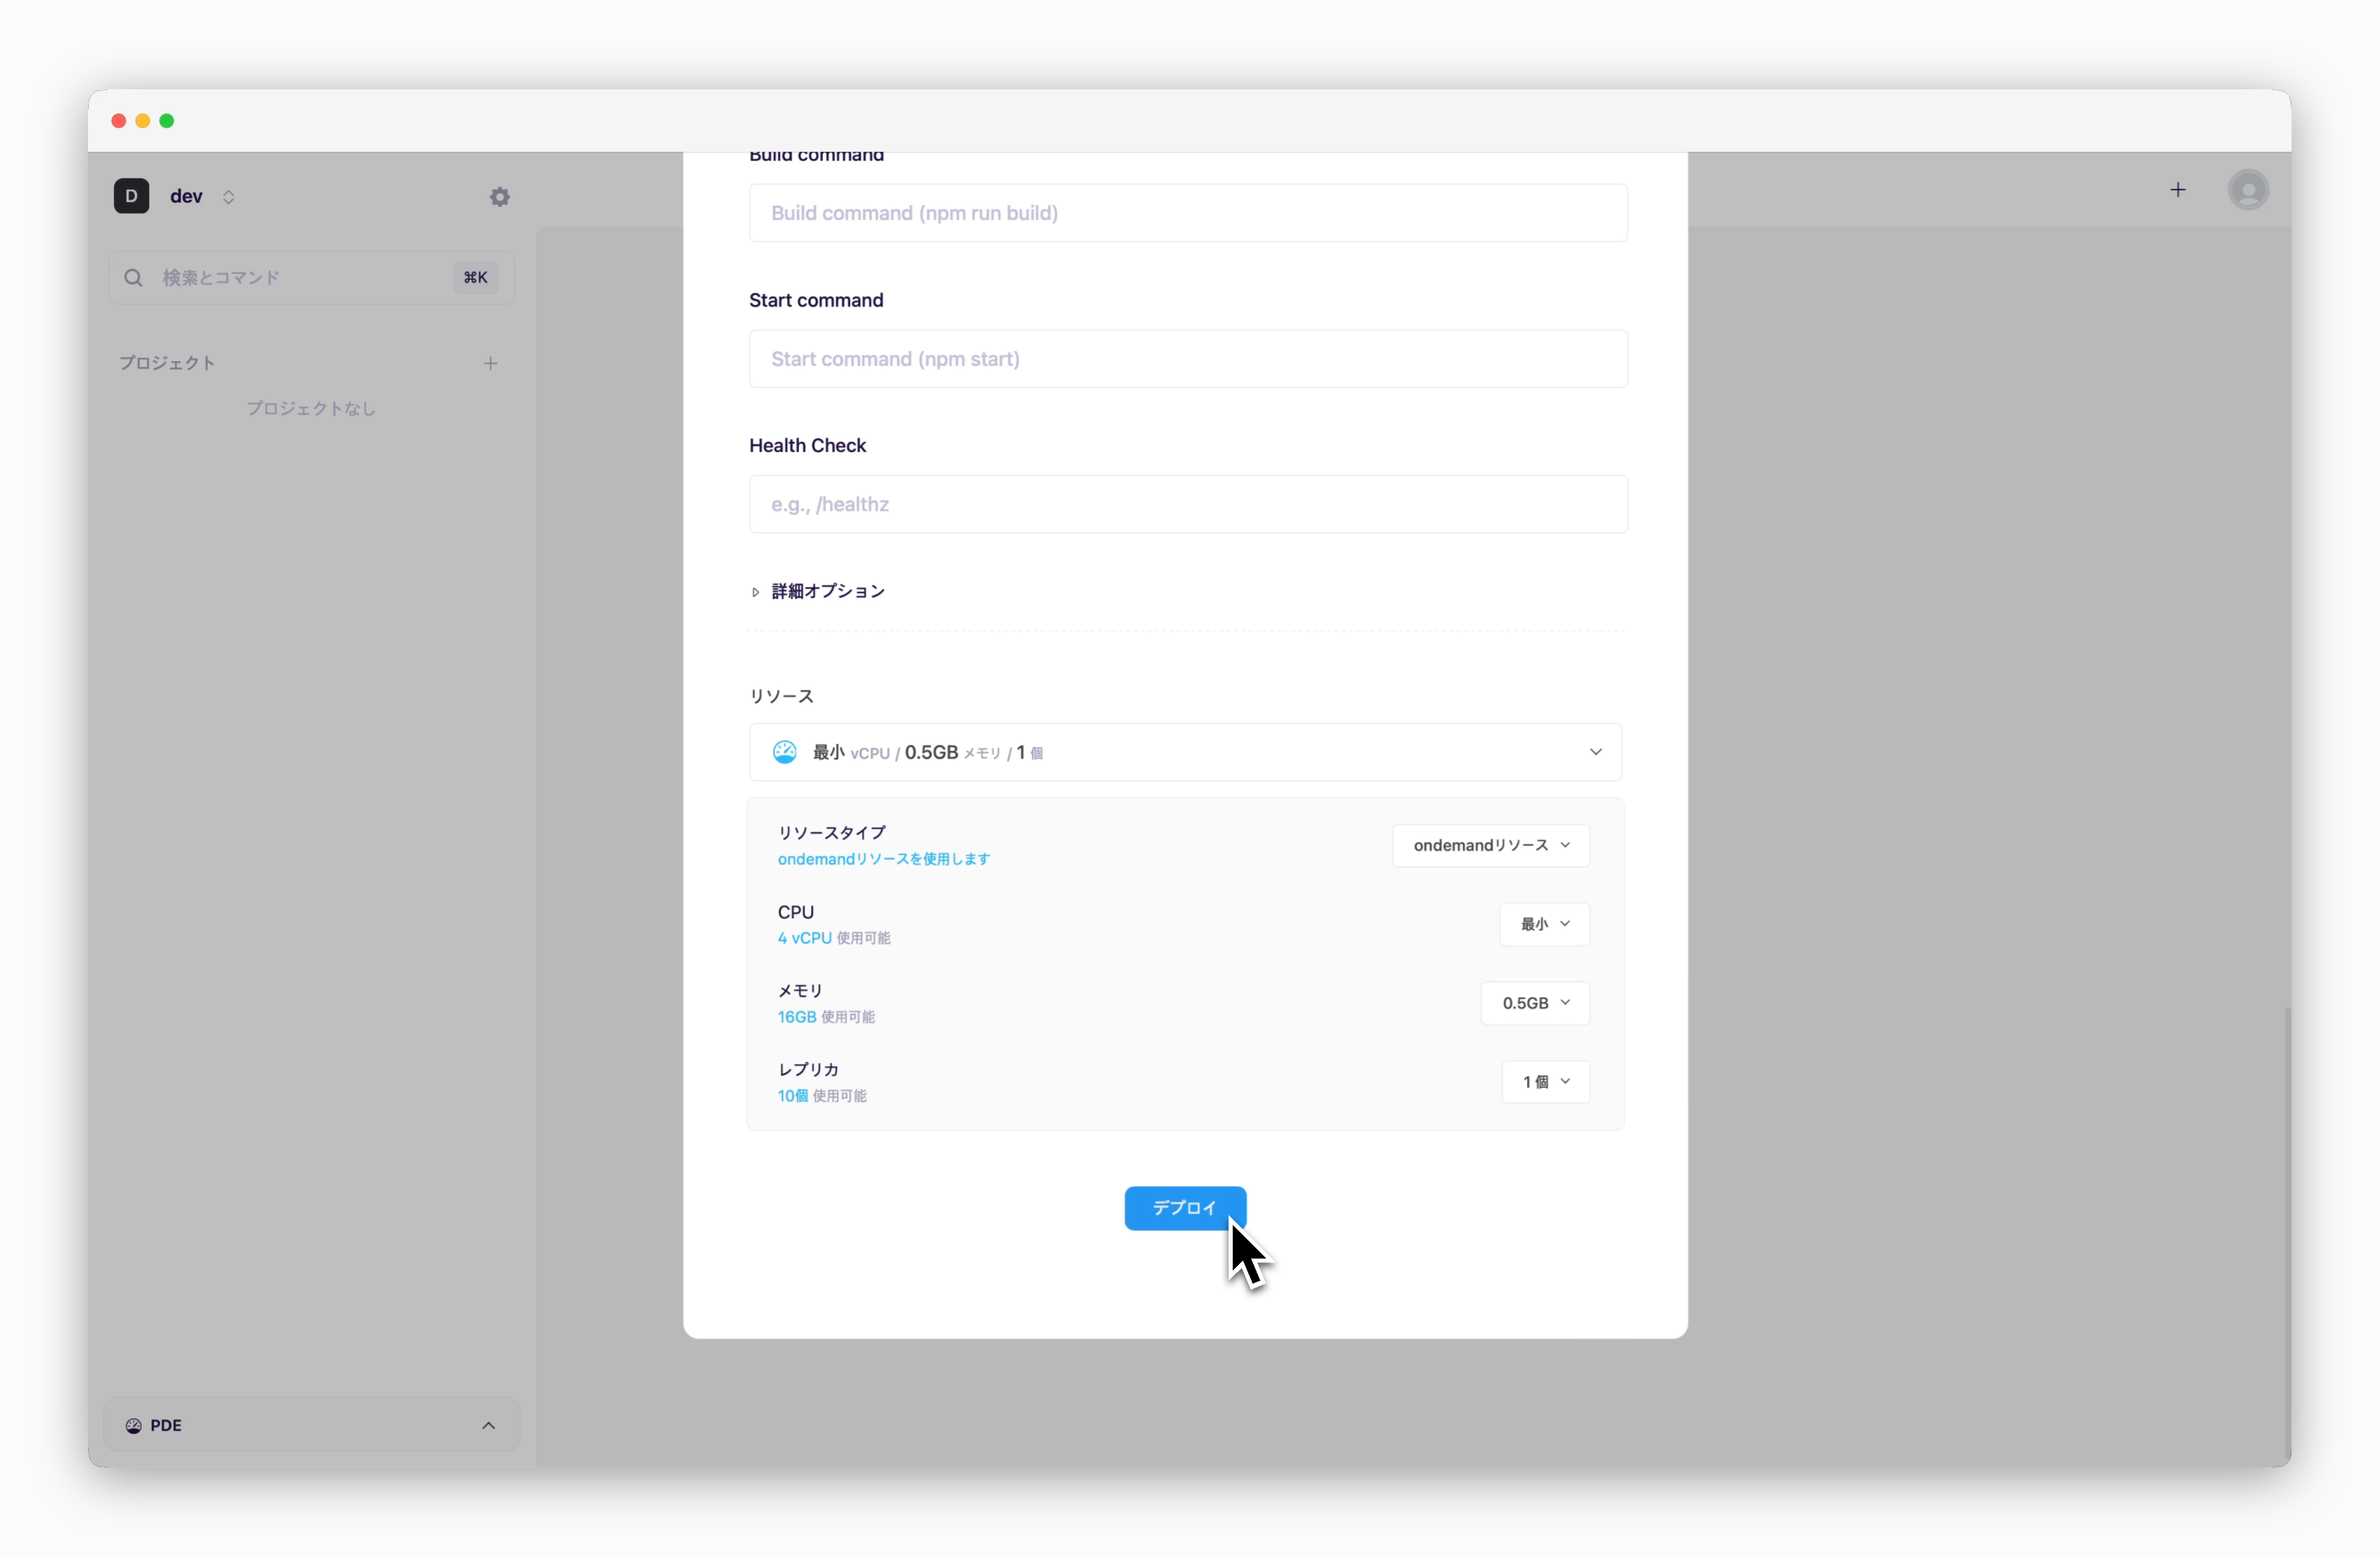 > パブリックリポジトリのURLを入力した場合は、デフォルト設定のまま画面下部の`デプロイ`をクリックしてください。
GitHubアカウントのリポジトリを選択した場合は、設定値の入力が必要です。デプロイ設定の詳細については[エールでデプロイ](/ja/developers/deploy#2)ページをご参照ください。
## アクセス
> パブリックリポジトリのURLを入力した場合は、デフォルト設定のまま画面下部の`デプロイ`をクリックしてください。
GitHubアカウントのリポジトリを選択した場合は、設定値の入力が必要です。デプロイ設定の詳細については[エールでデプロイ](/ja/developers/deploy#2)ページをご参照ください。
## アクセス
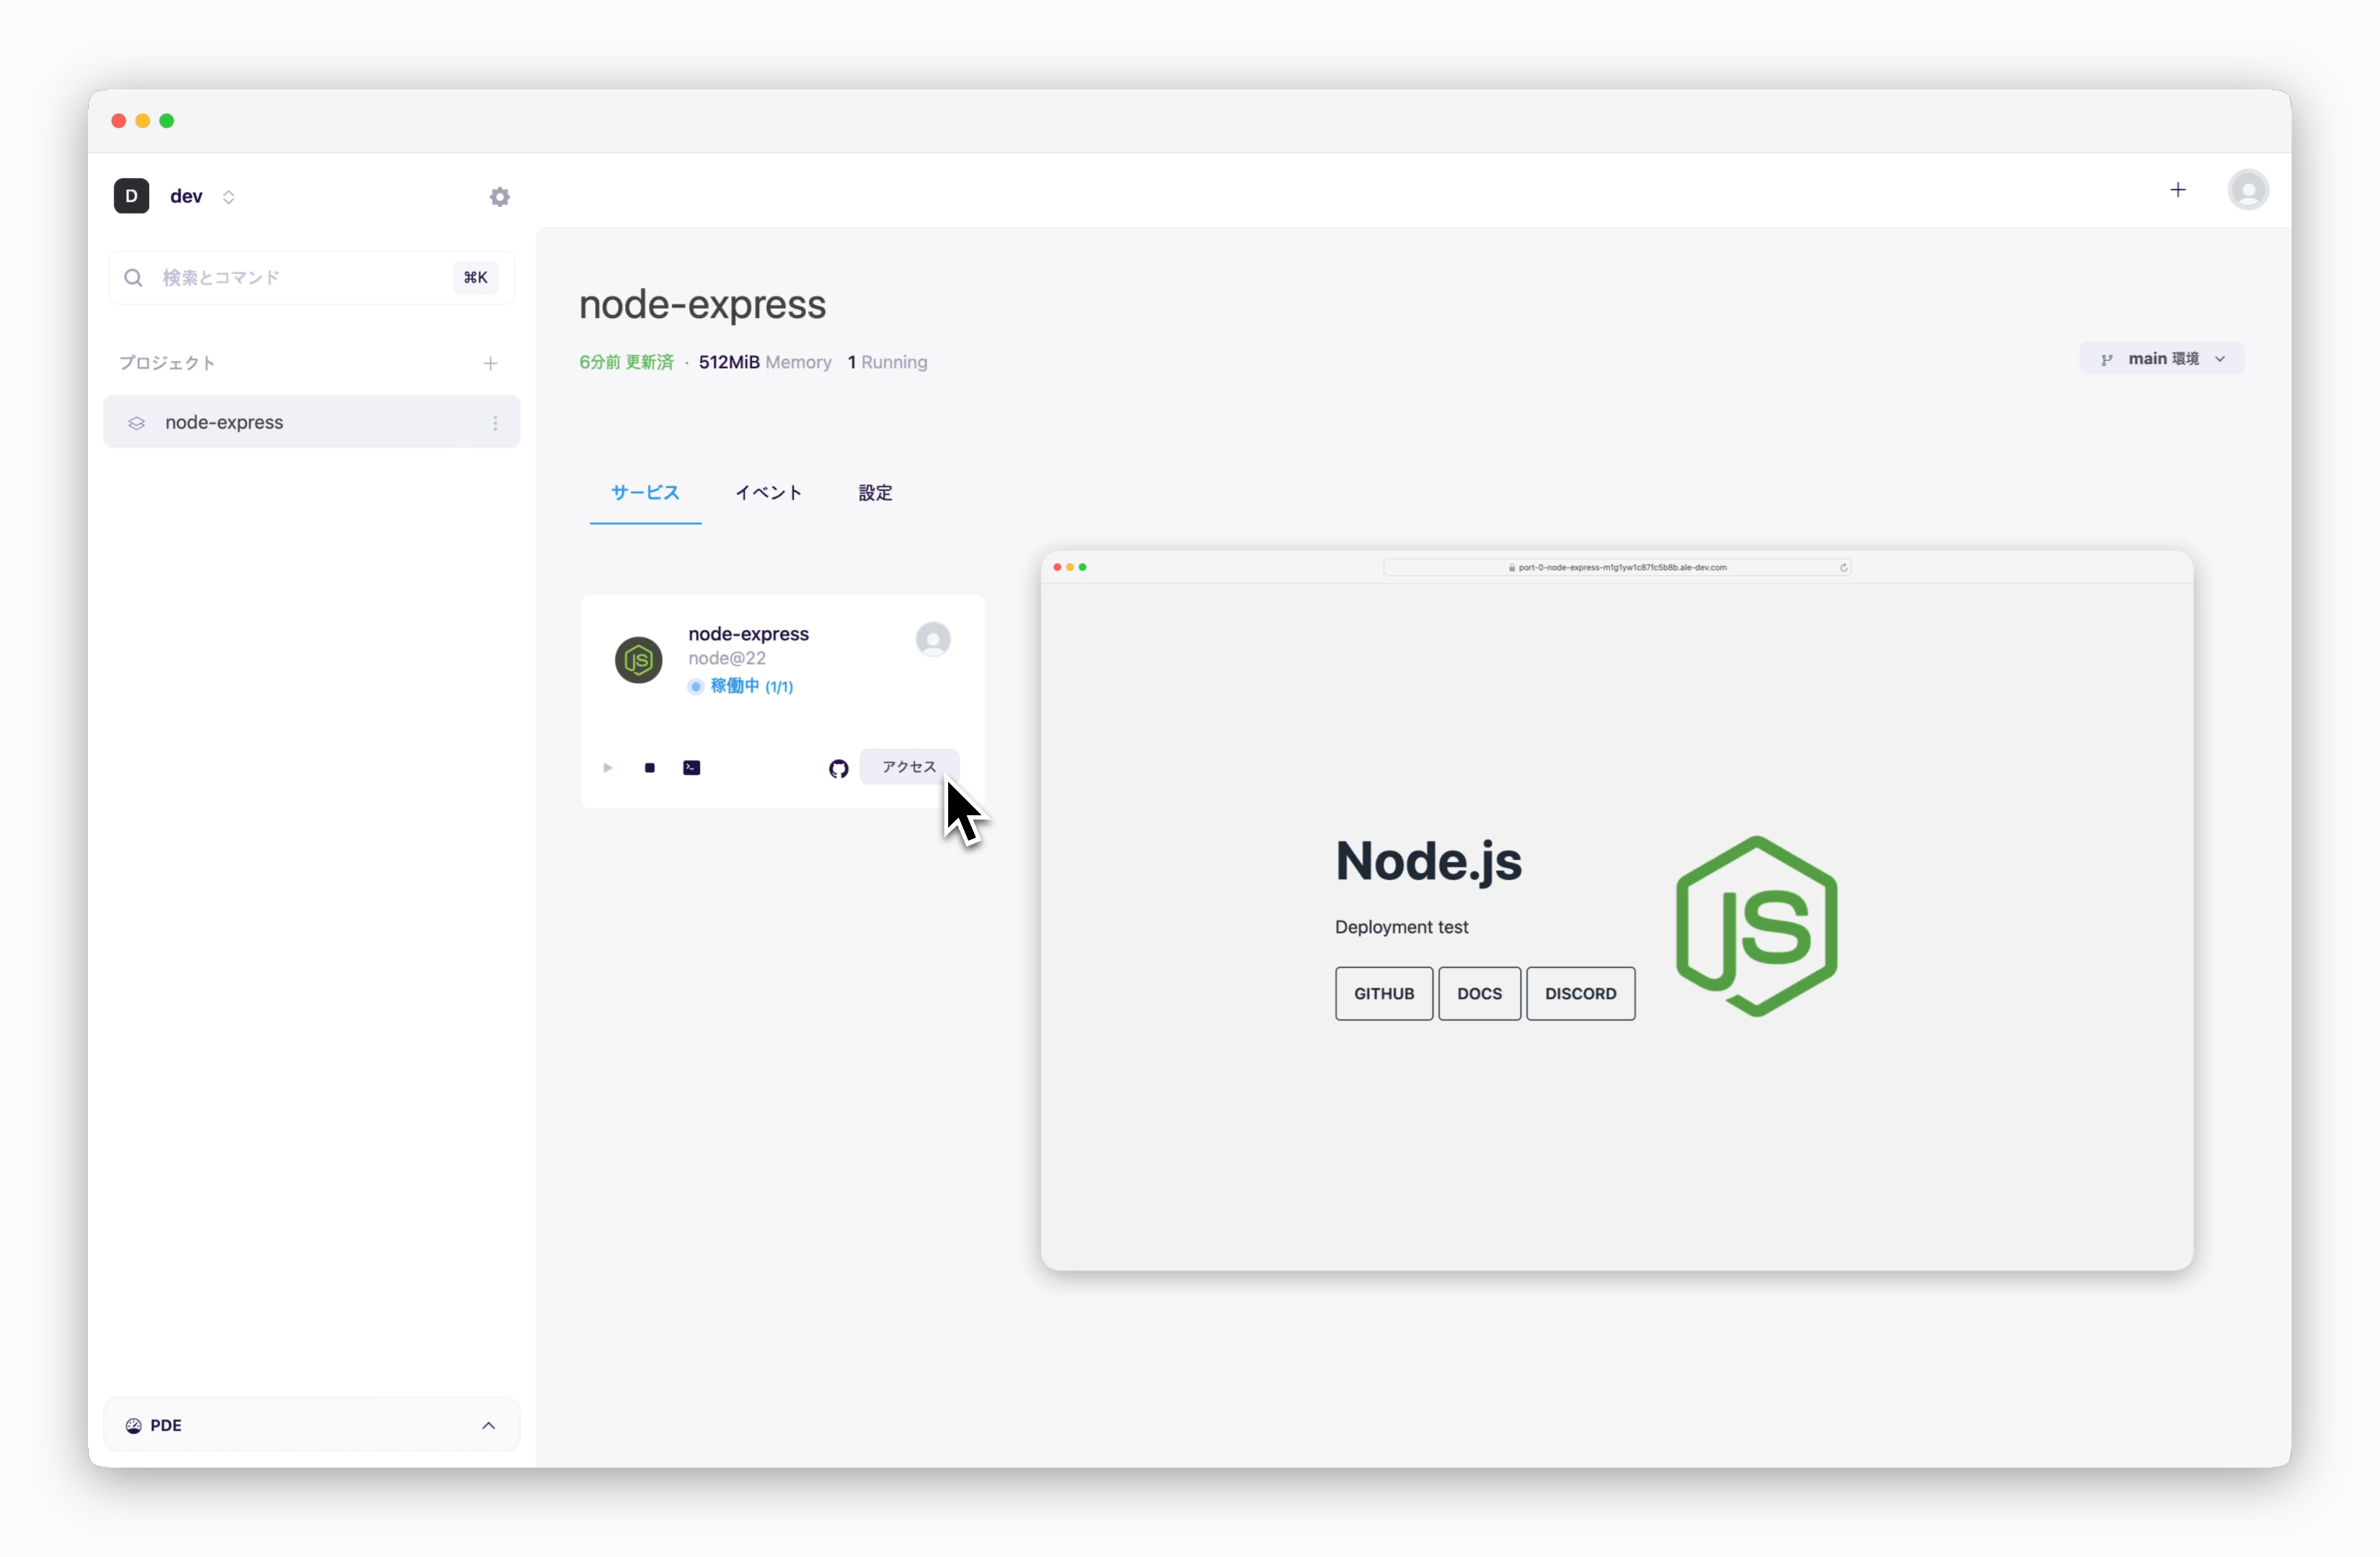 > デプロイが完了したら、右側の`アクセス`ボタンをクリックすると、割り当てられたプレビュードメインからサービスにアクセスできます。