> ## Documentation Index
> Fetch the complete documentation index at: https://docs.ale.run/llms.txt
> Use this file to discover all available pages before exploring further.
# AWS ECR
> AWS **Elastic Container Registry** を `ale` でビルドされたイメージの保存とデプロイ時に使用するリポジトリとして設定できます。
***
## AWS IAM ユーザーの作成
### ユーザーの作成
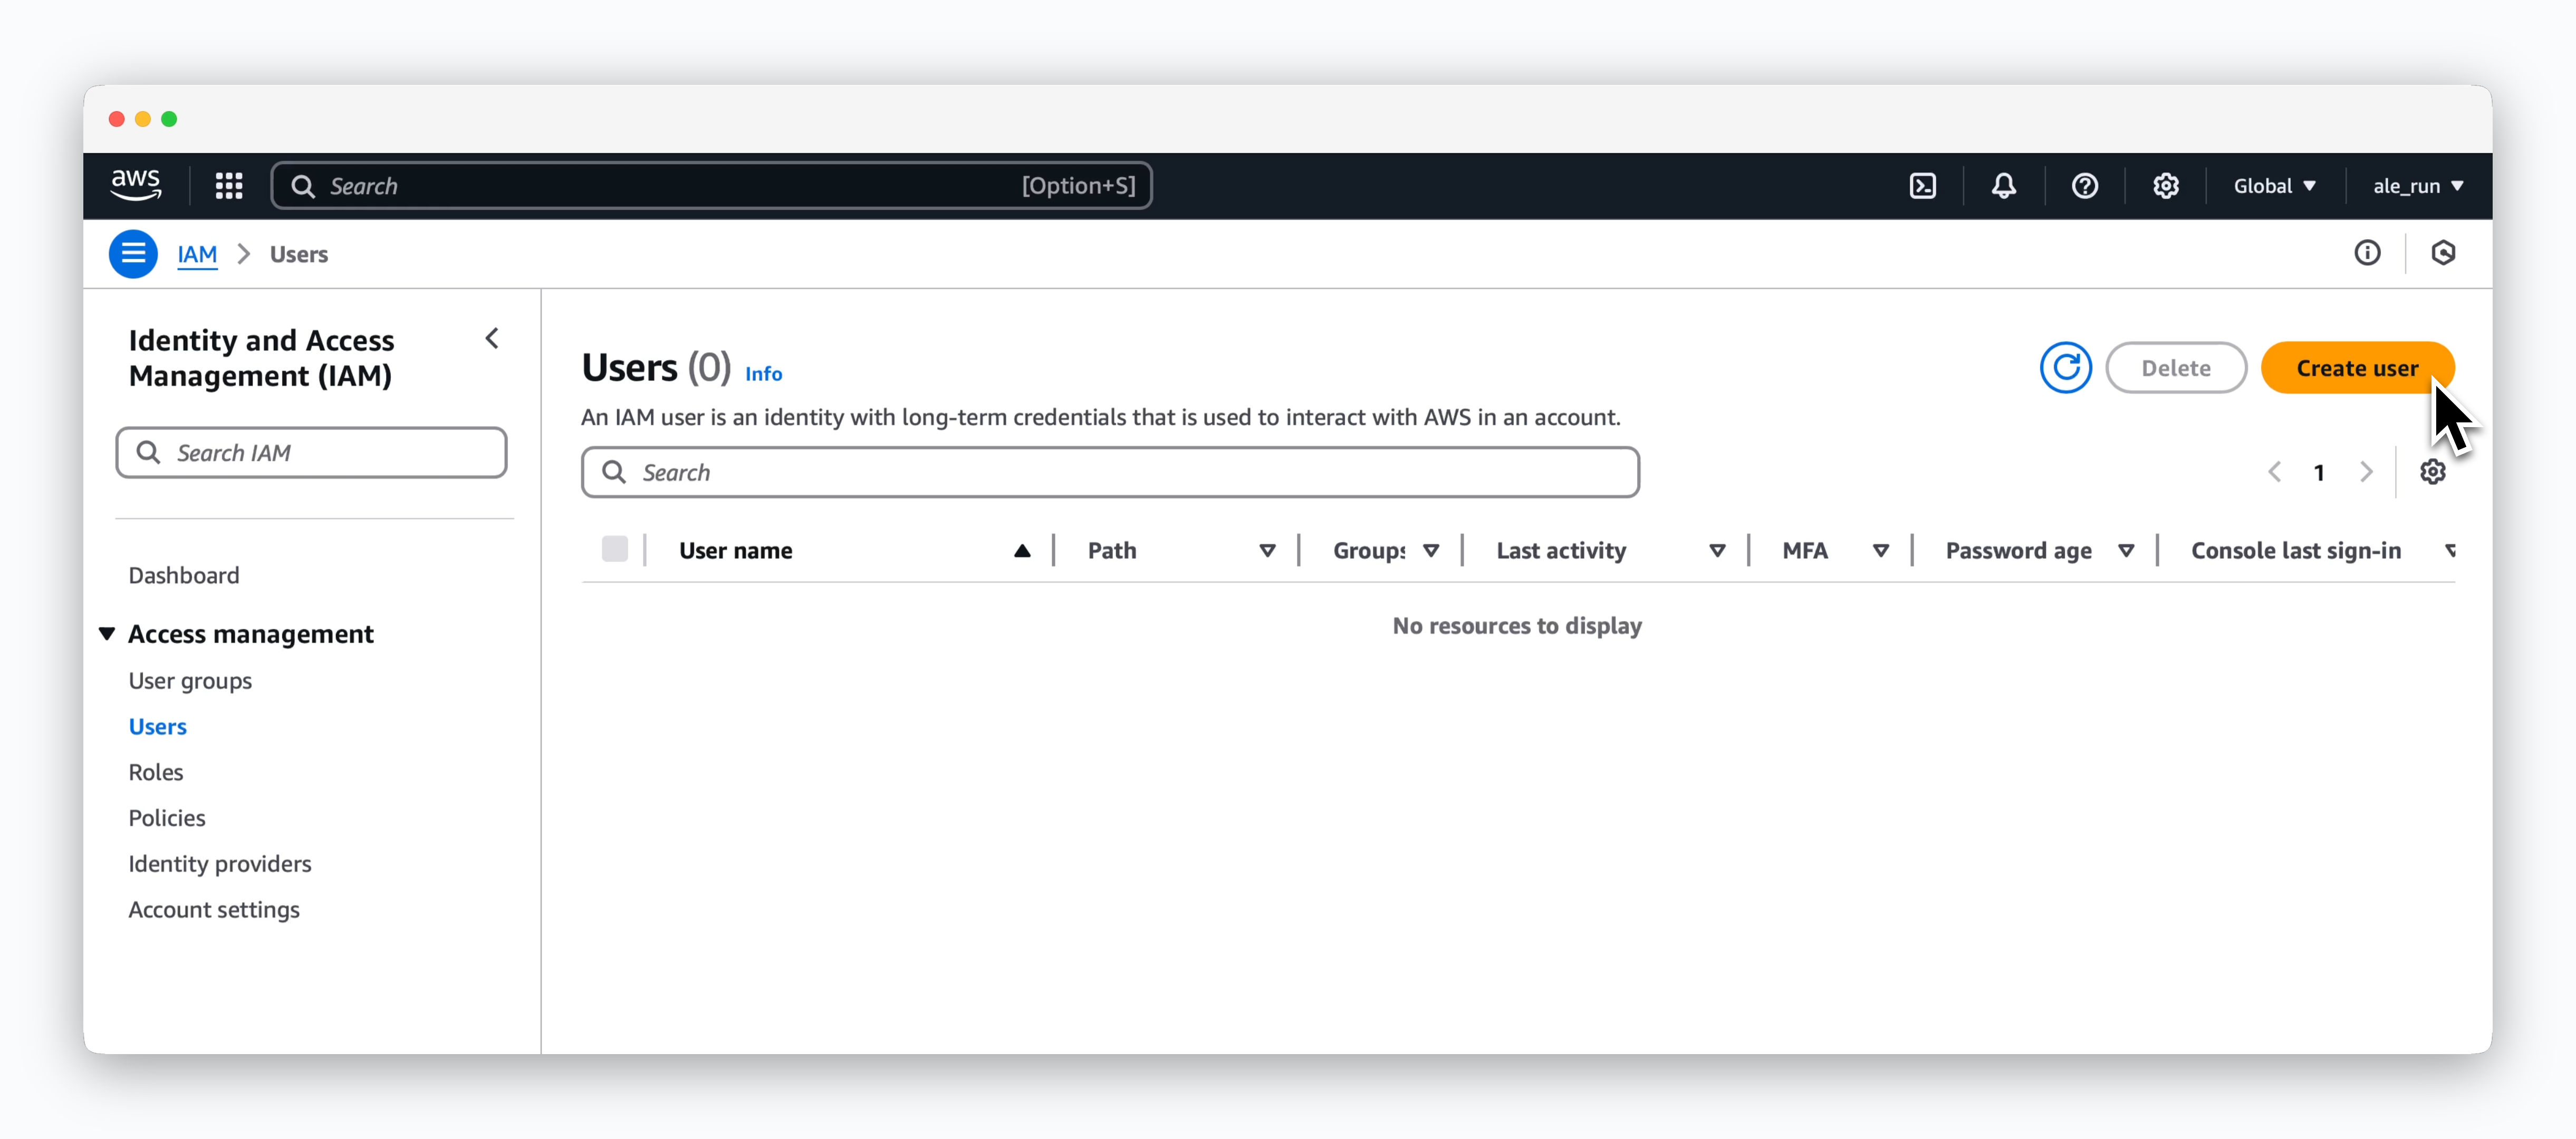 > `IAM > Access management > Users` ページにアクセスし、`Create user` をクリックします。
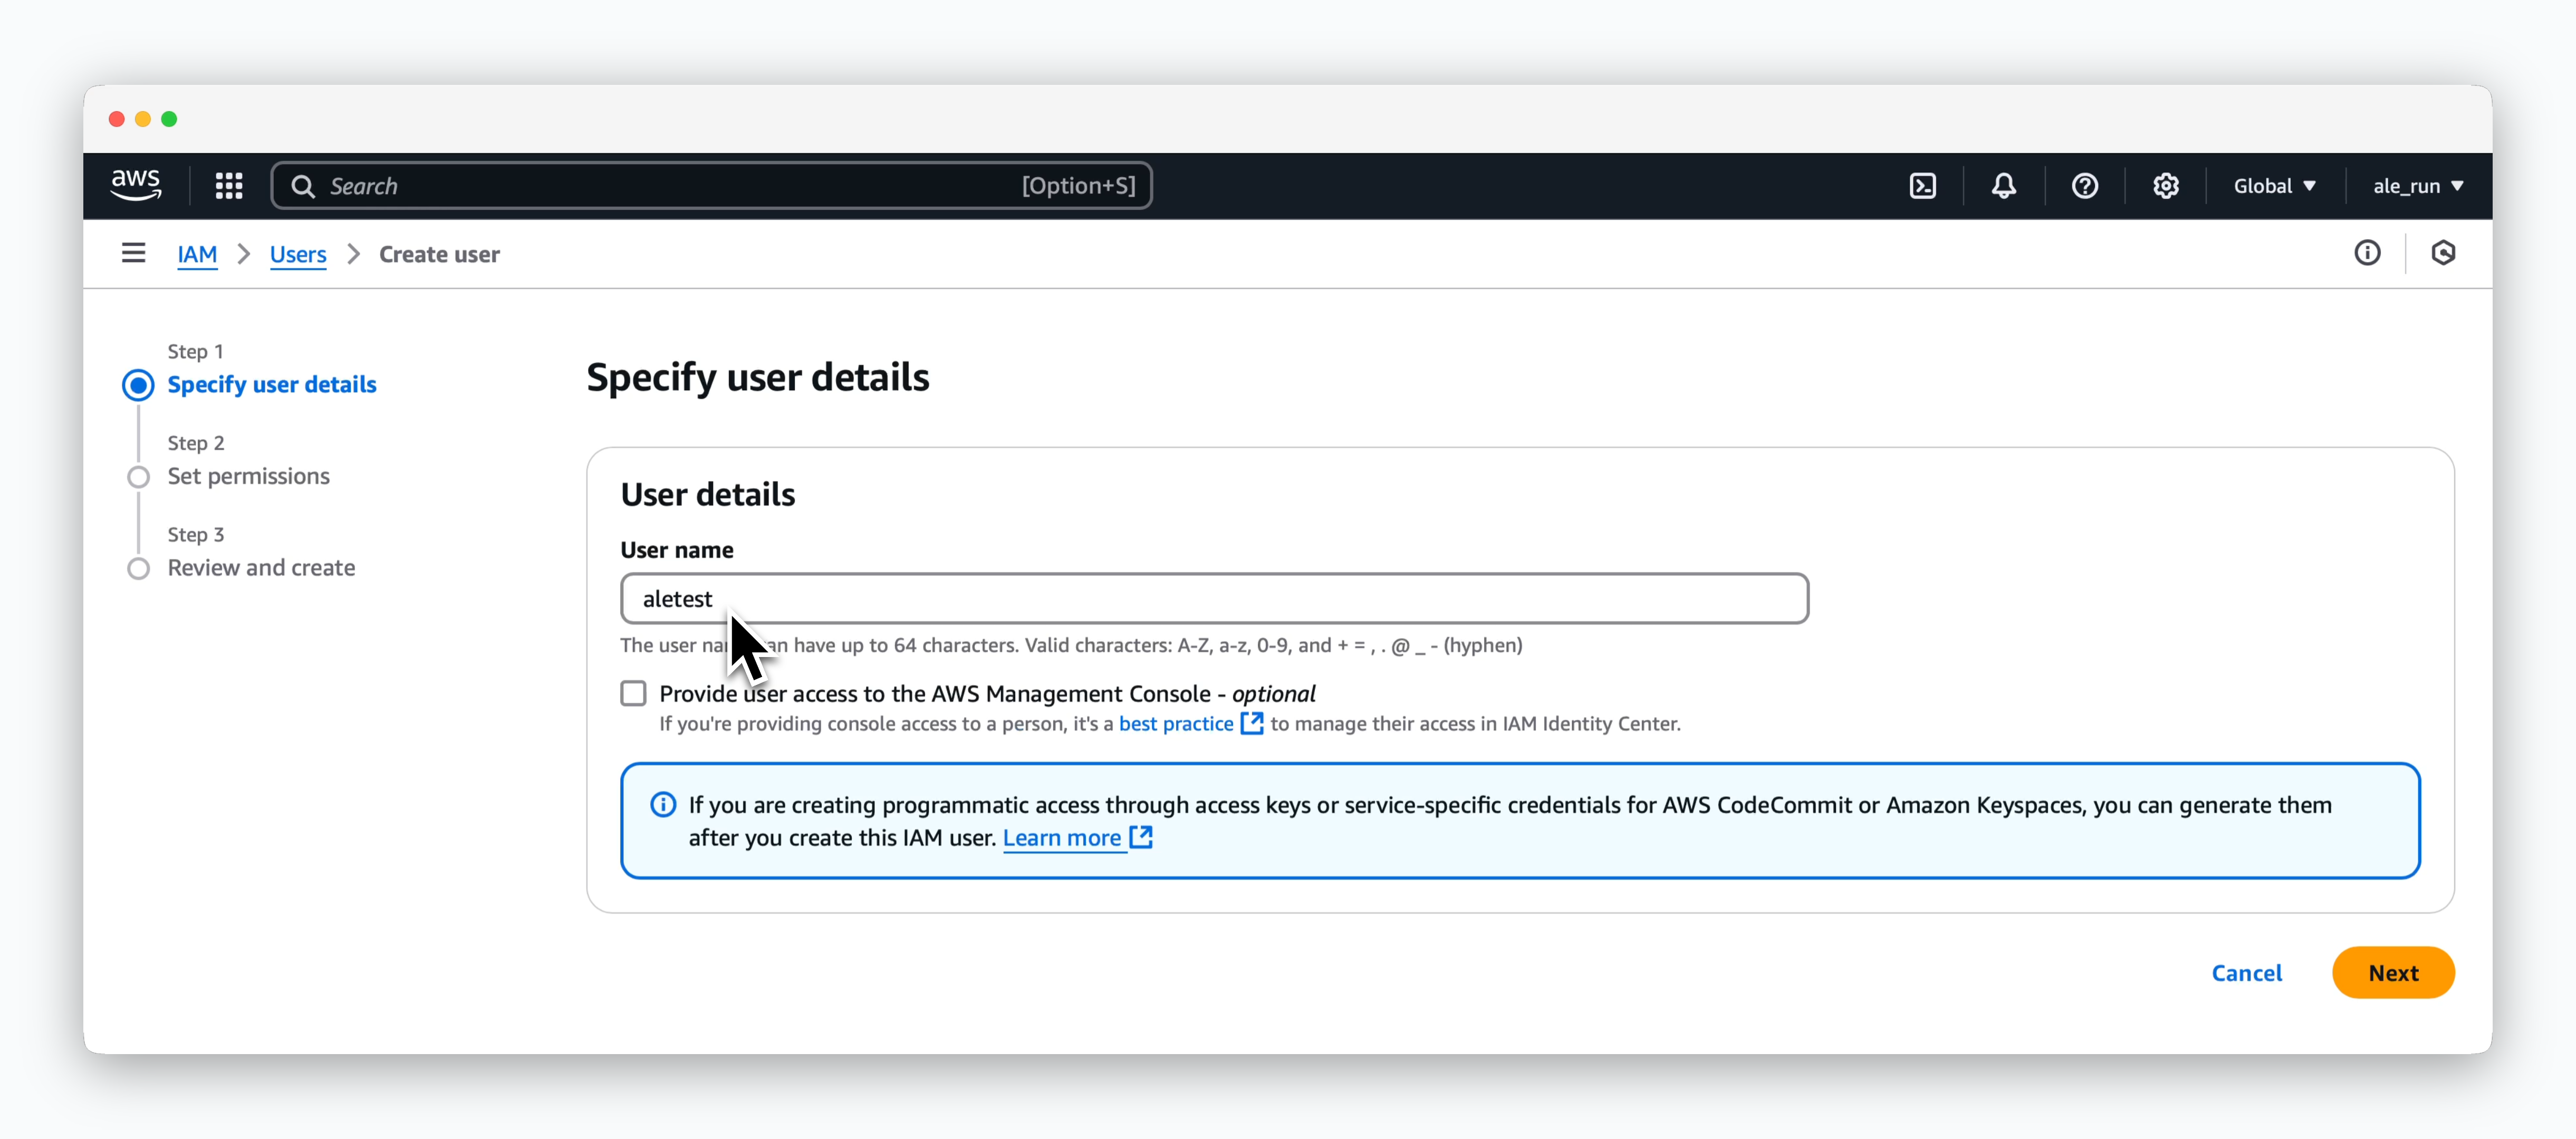 > 任意の **ユーザー名** を入力し、次のステップに進みます。
### 権限の付与
> 任意の **ユーザー名** を入力し、次のステップに進みます。
### 権限の付与
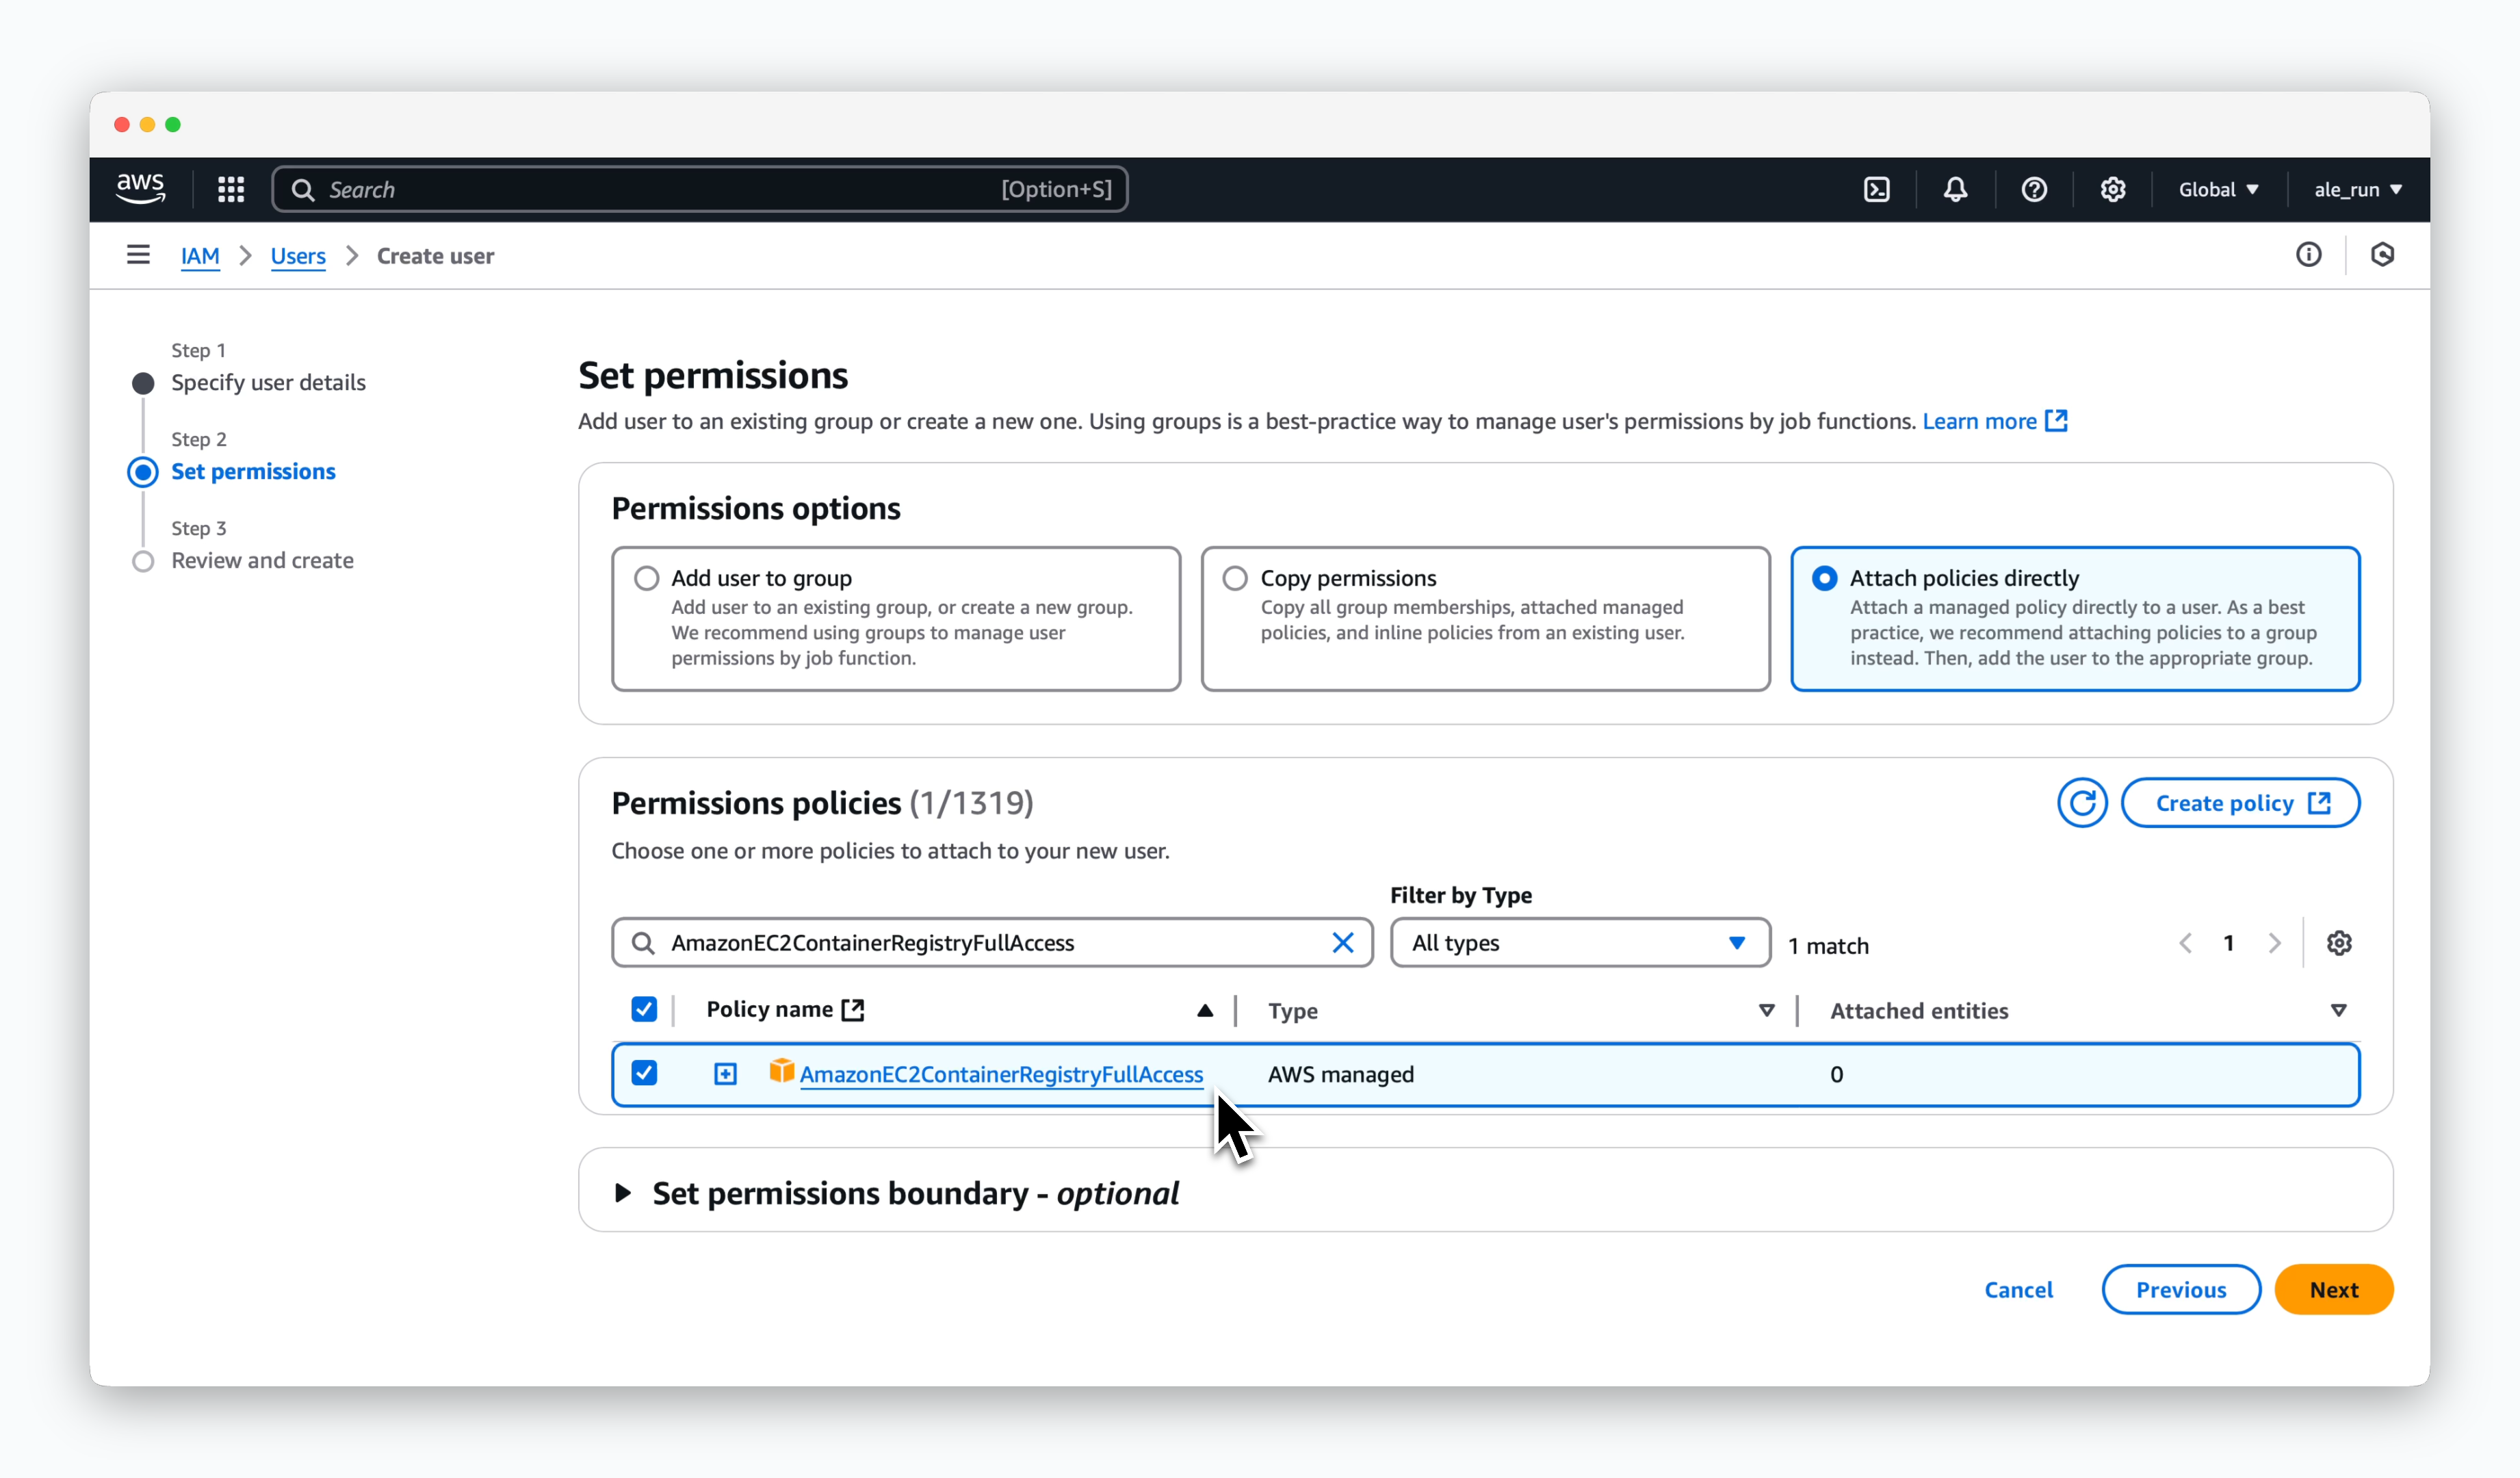 > 権限オプションで`Attatch policy directly`を選択し、**AmazonEC2ContainerRegistryFullAccess** を検索してチェックボックスを選択し、次のステップに進みます。
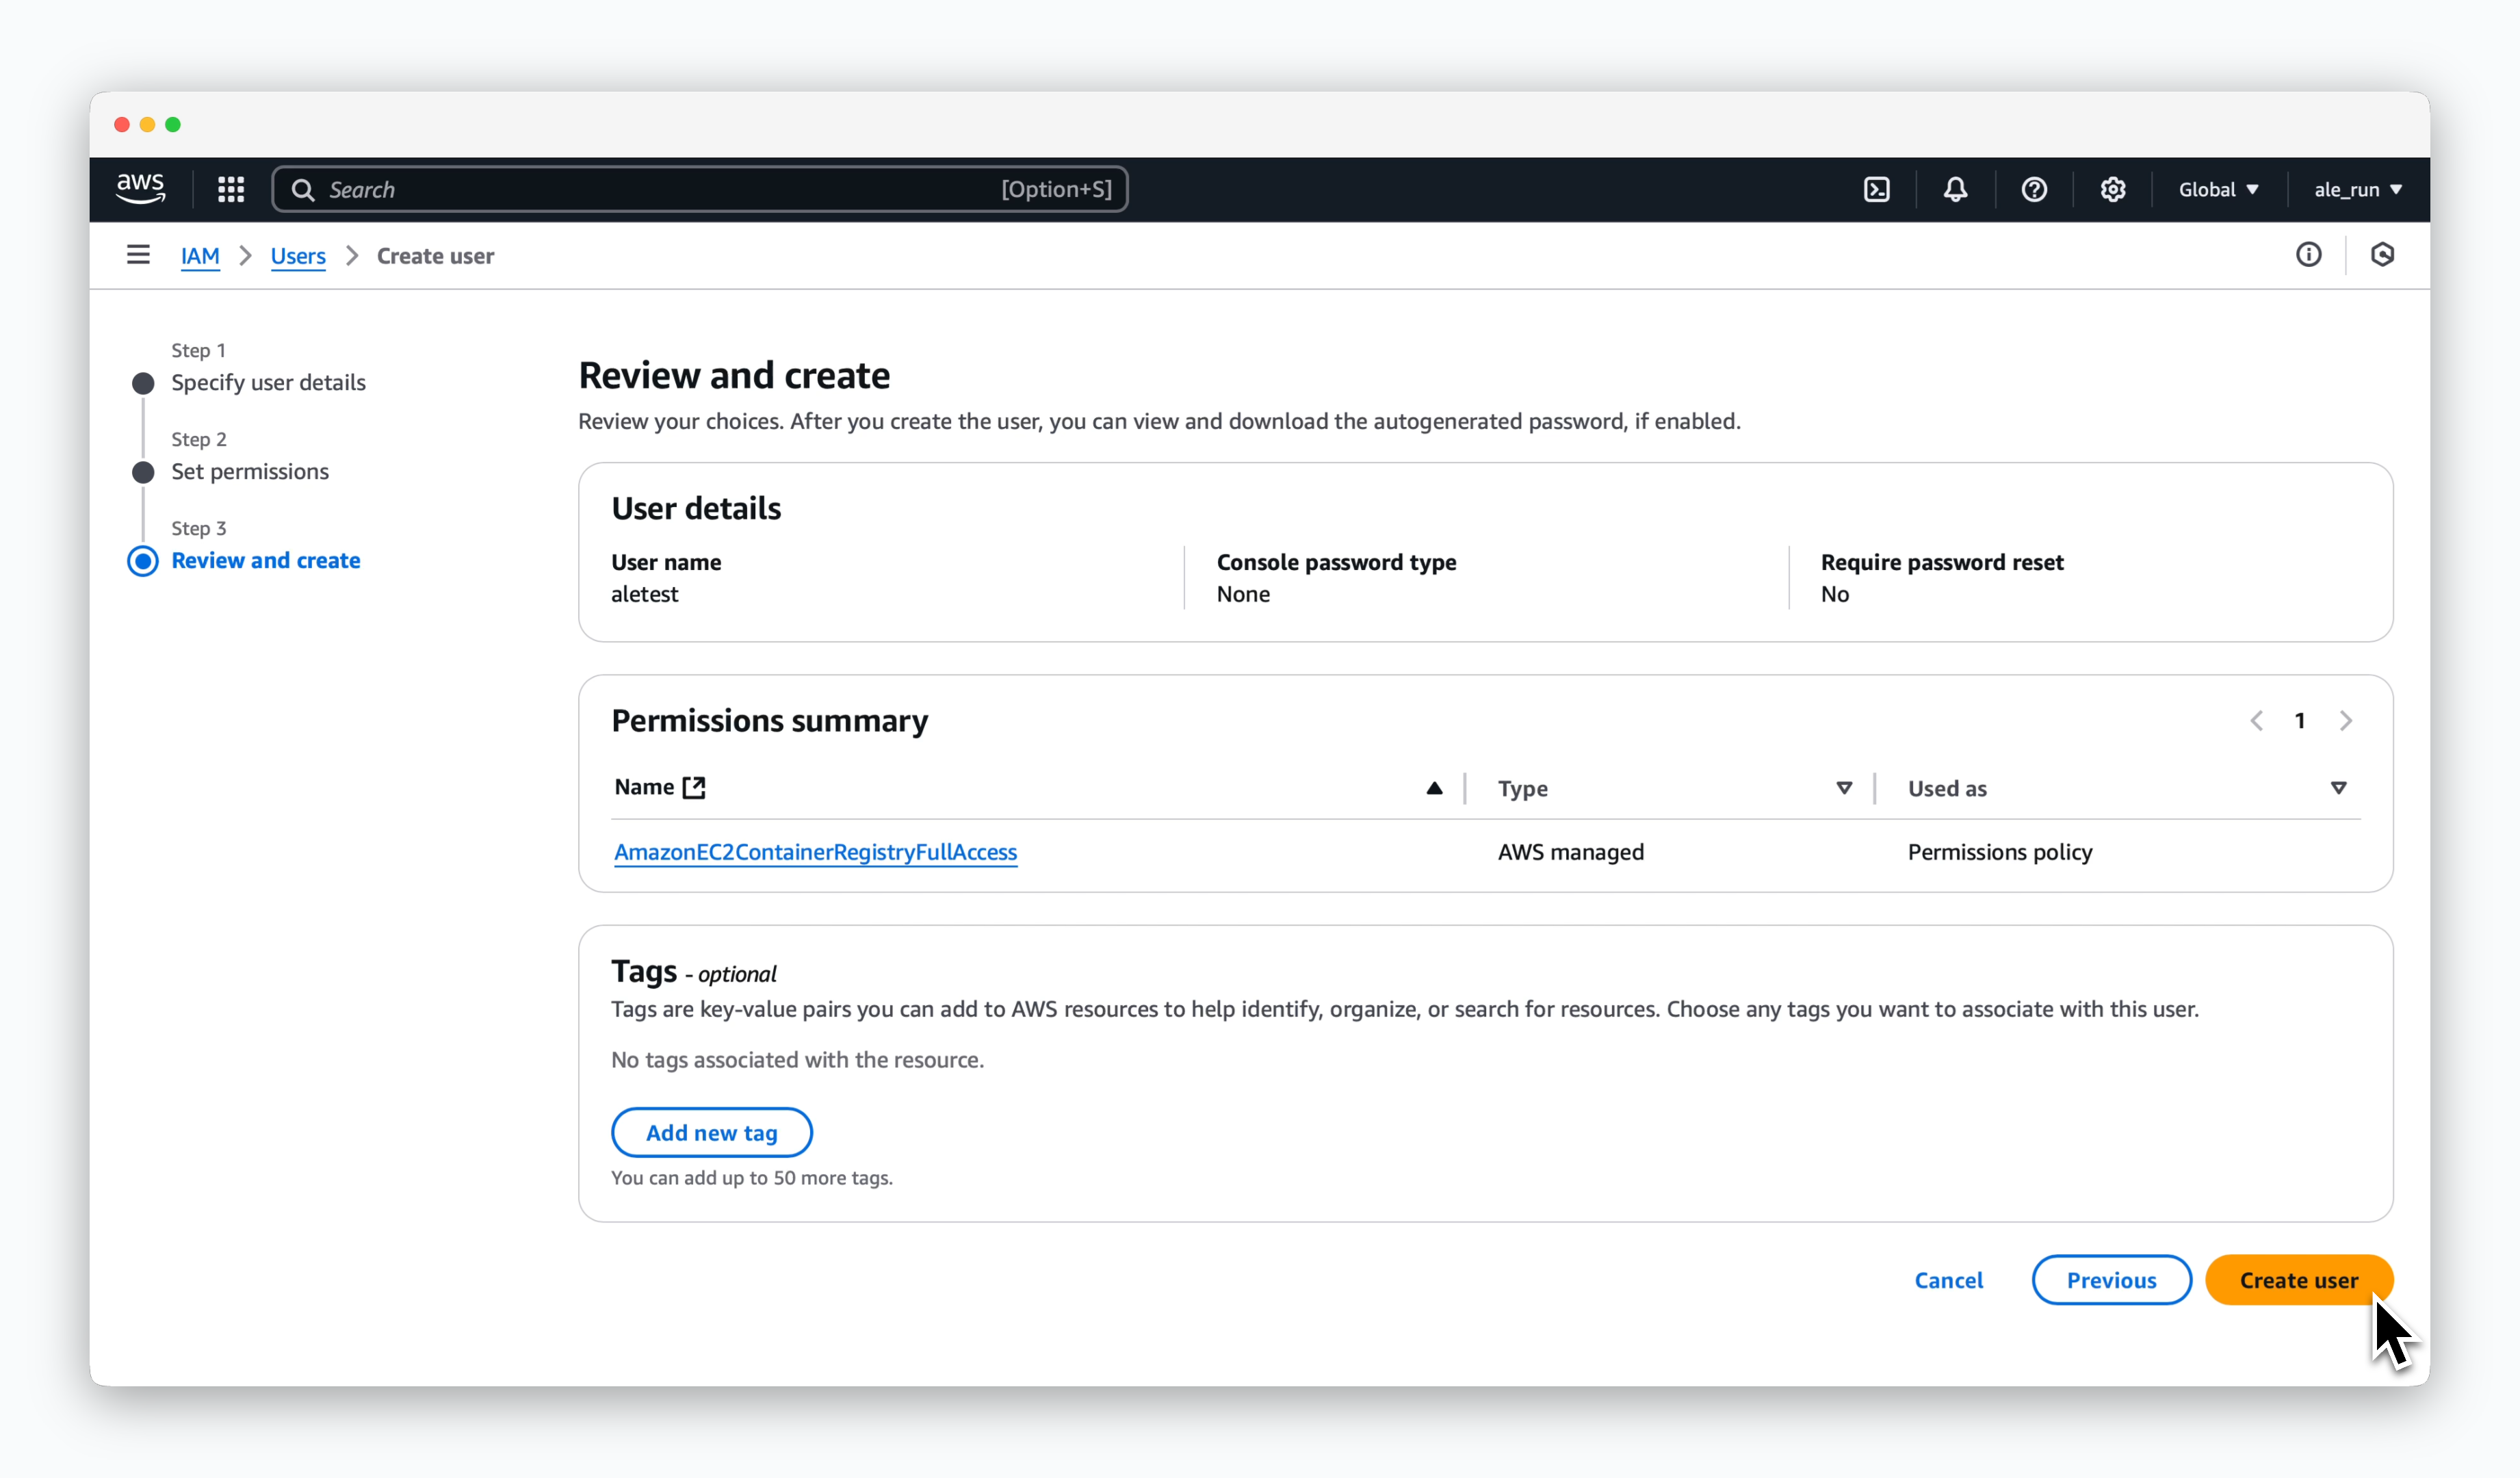 > 追加設定なしで `Create user` をクリックします。
## アクセスキーの生成
> 追加設定なしで `Create user` をクリックします。
## アクセスキーの生成
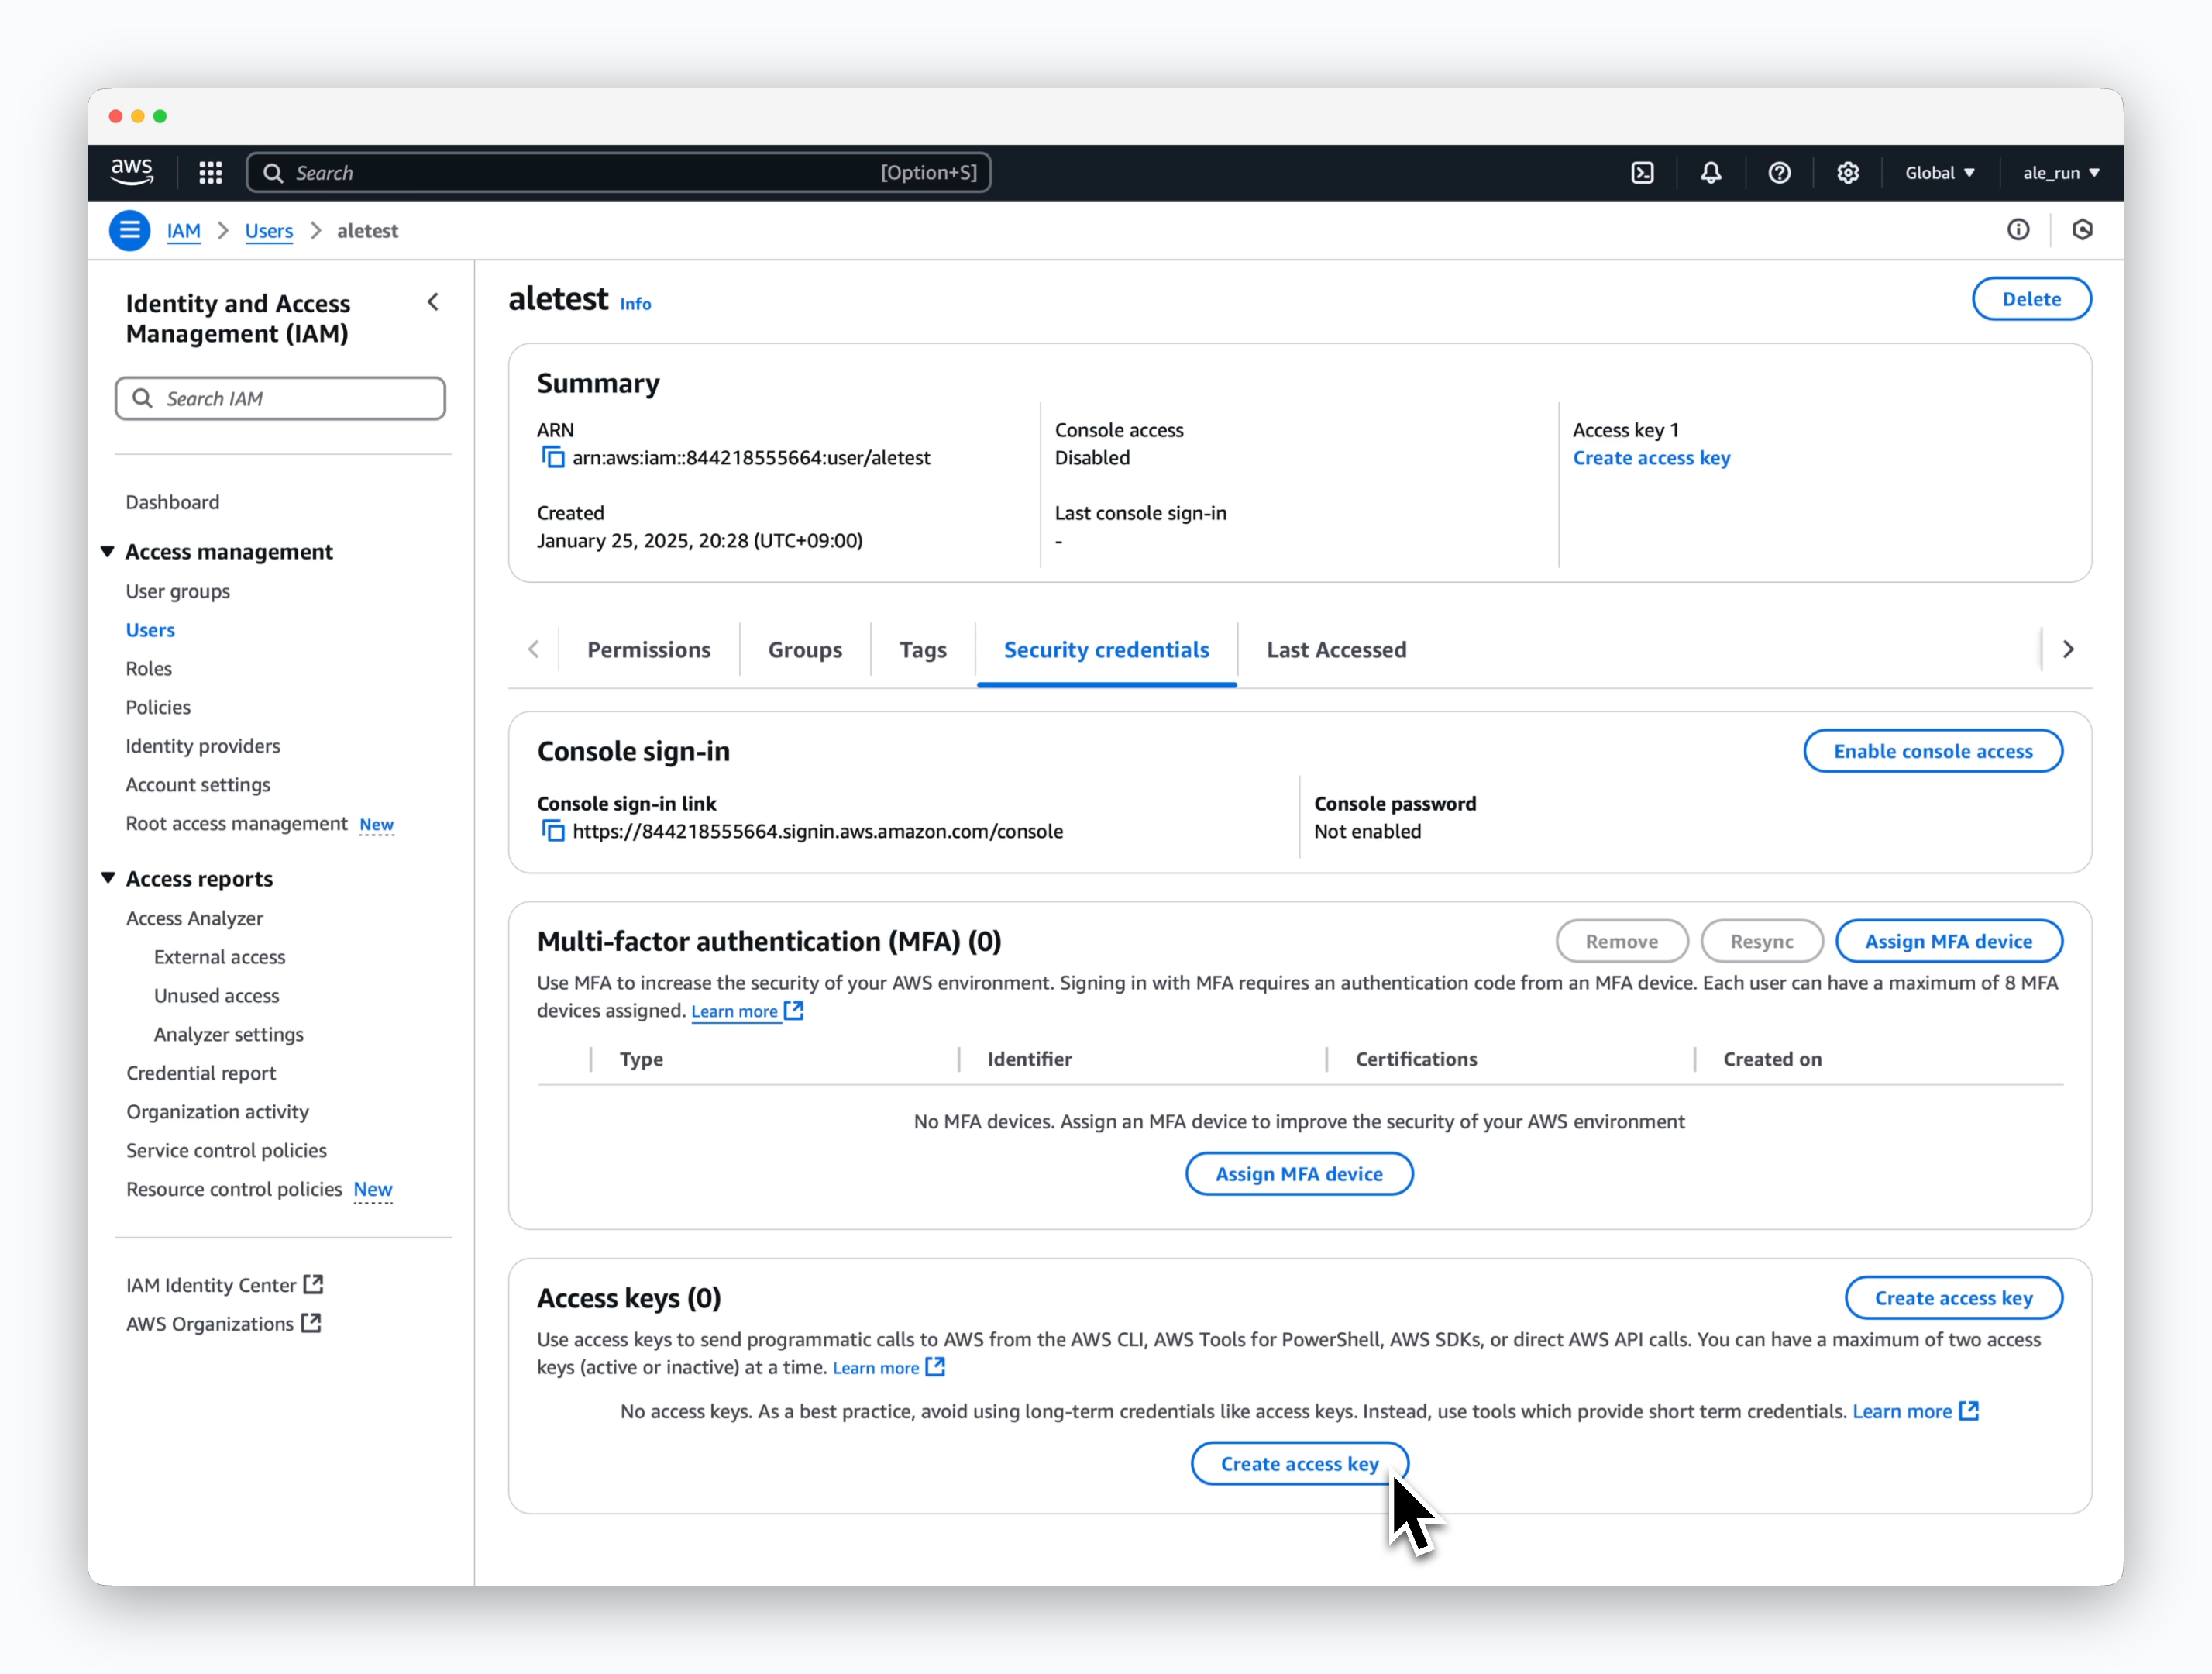 > ユーザーページで、**Security credentials** タブの **Access keys** セクションにある `Create access key` をクリックします。
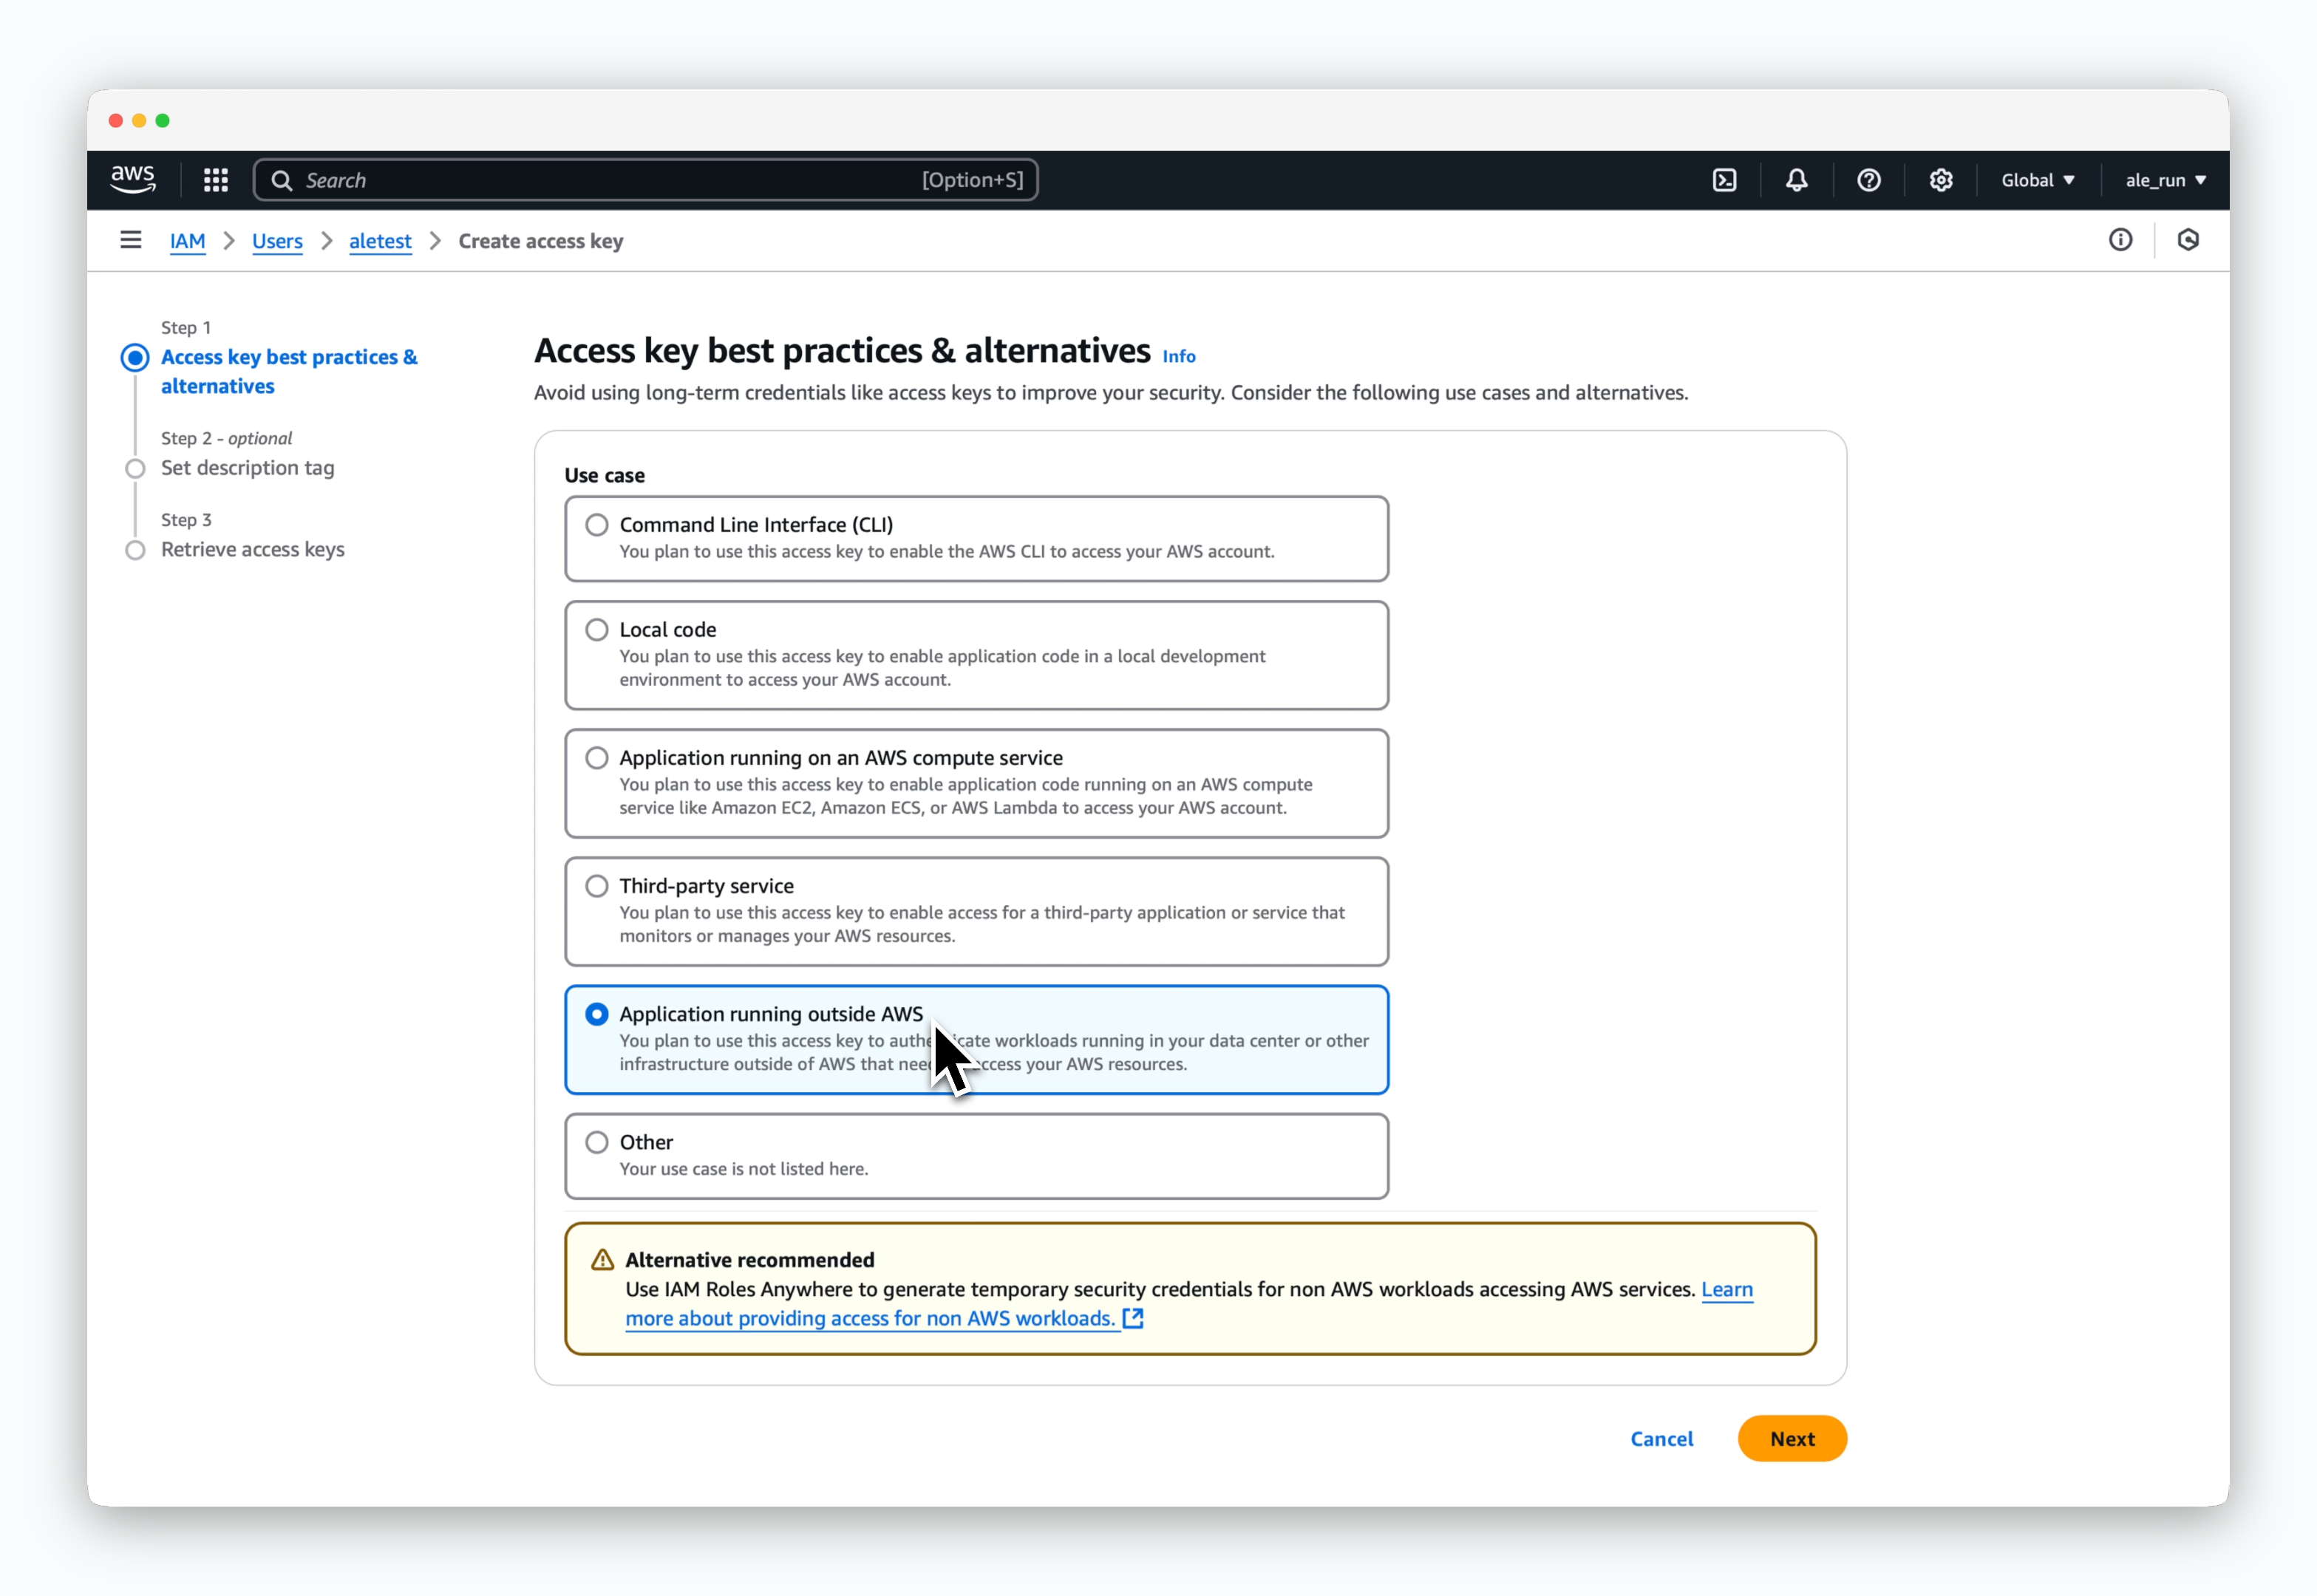 > 次の画面で、**Application running outside AWS** を選択します。
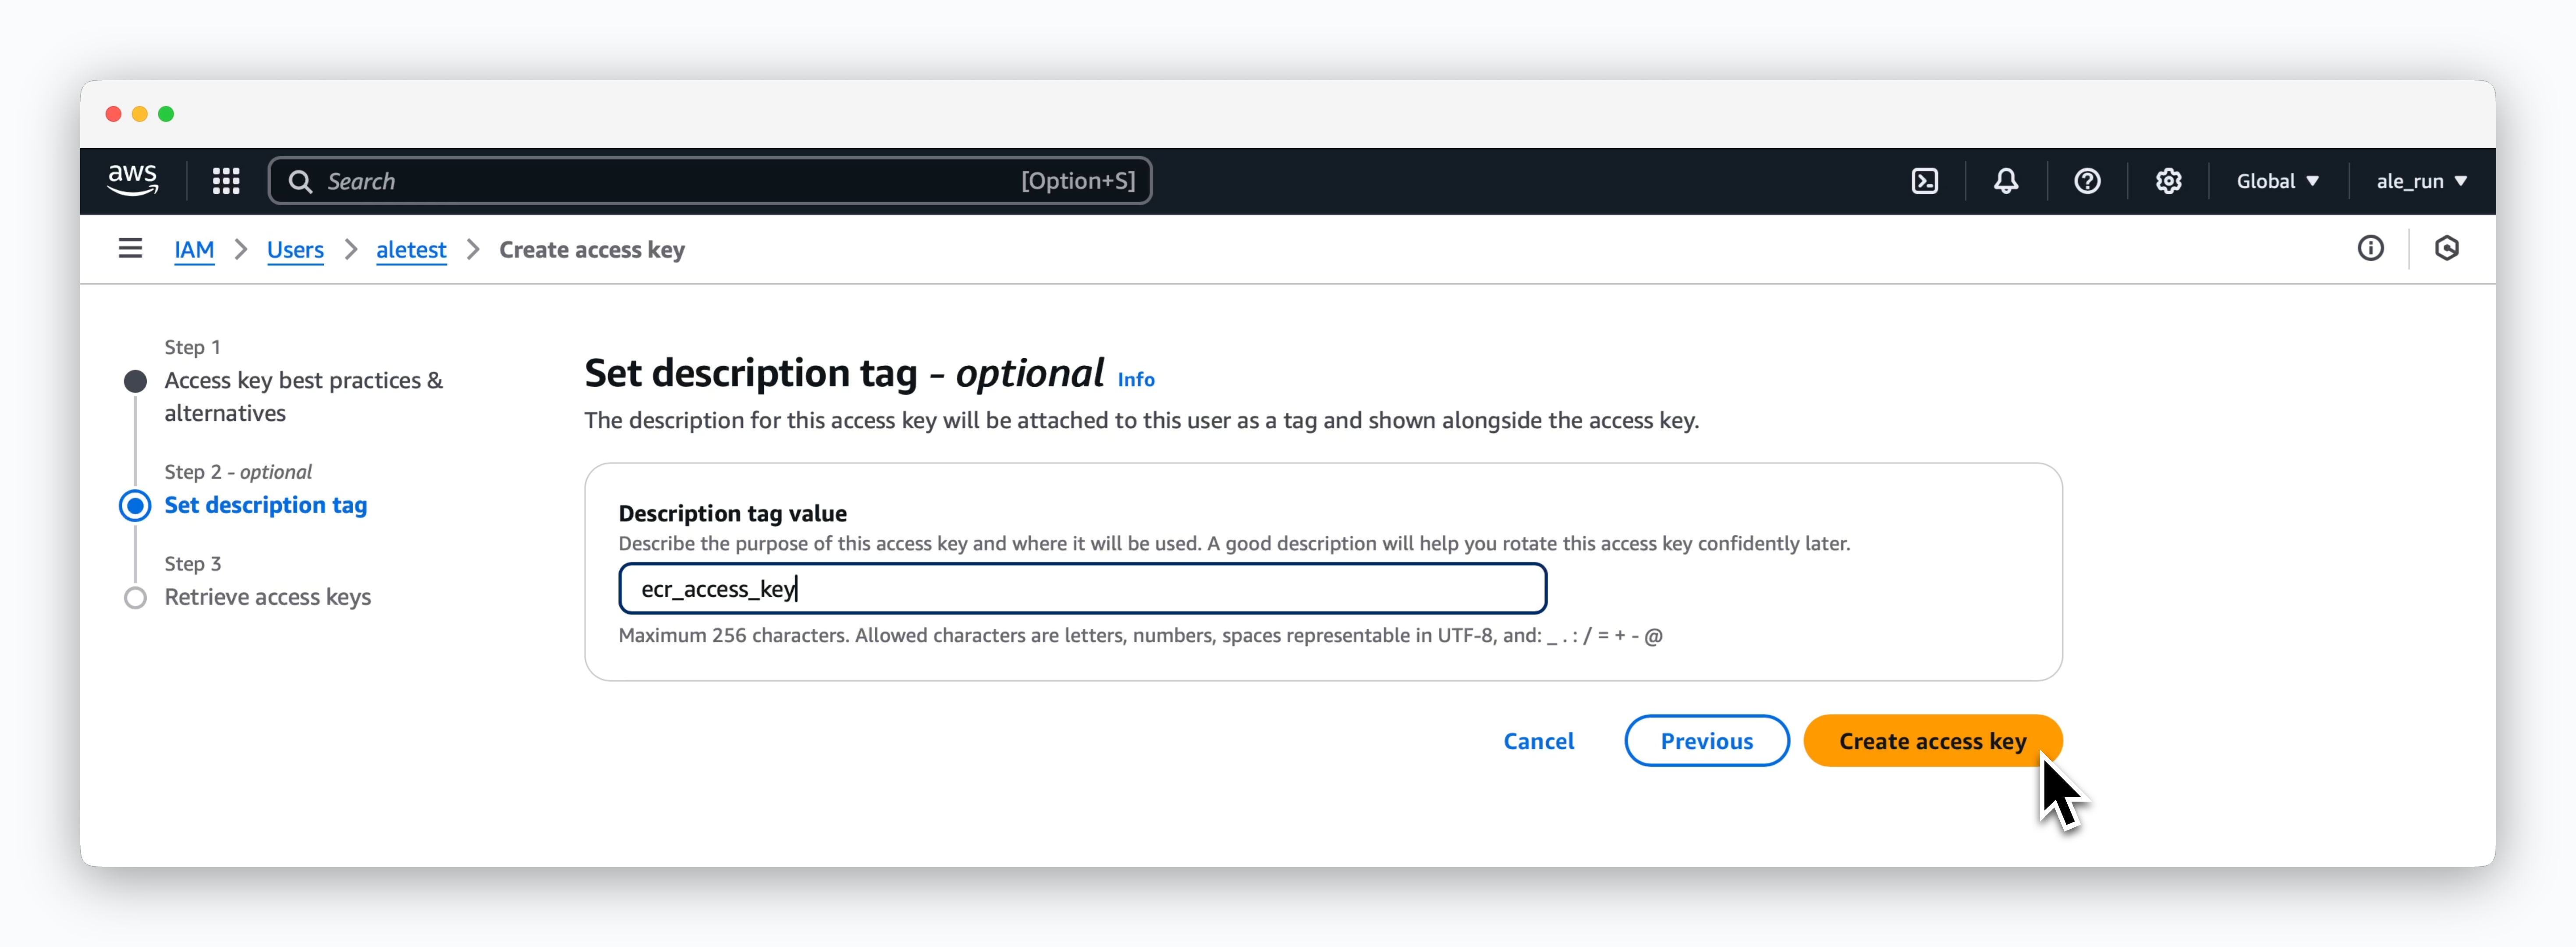 > 適切な説明タグを入力し、`Create access key` をクリックします。
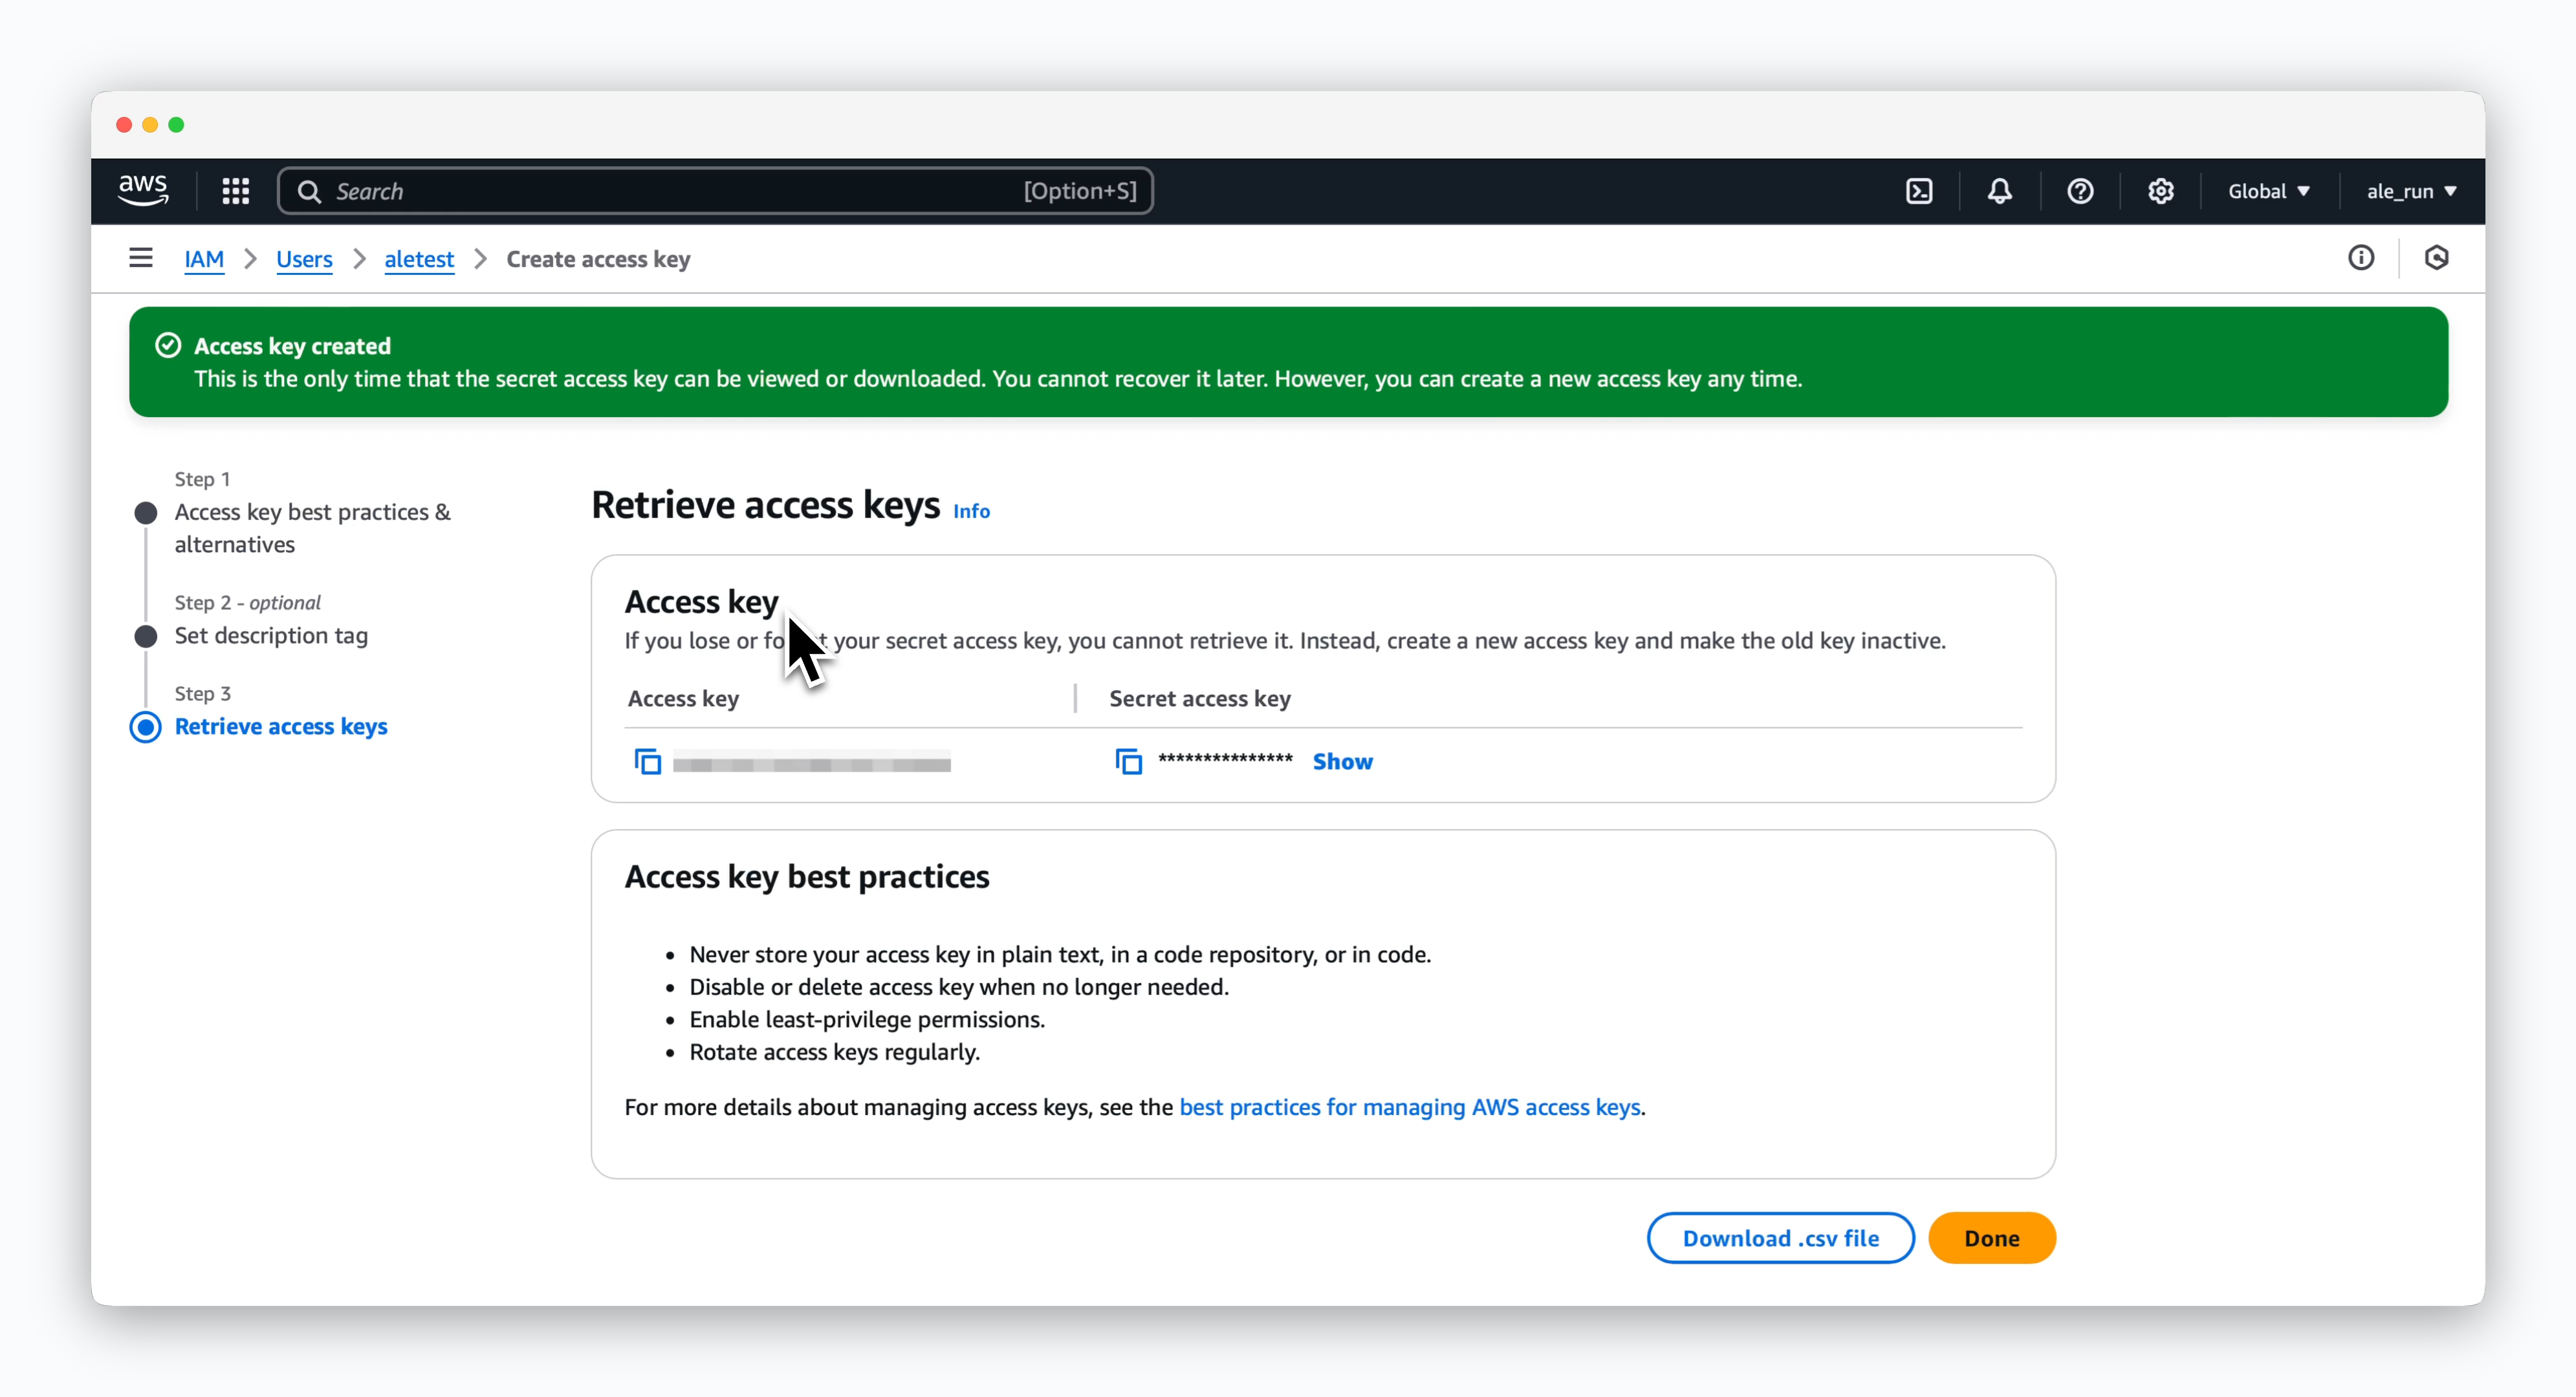 > 次の画面で、生成された **アクセスキー** と **シークレットアクセスキー** を確認できます。
## コンソールログインURLの作成
> 次の画面で、生成された **アクセスキー** と **シークレットアクセスキー** を確認できます。
## コンソールログインURLの作成
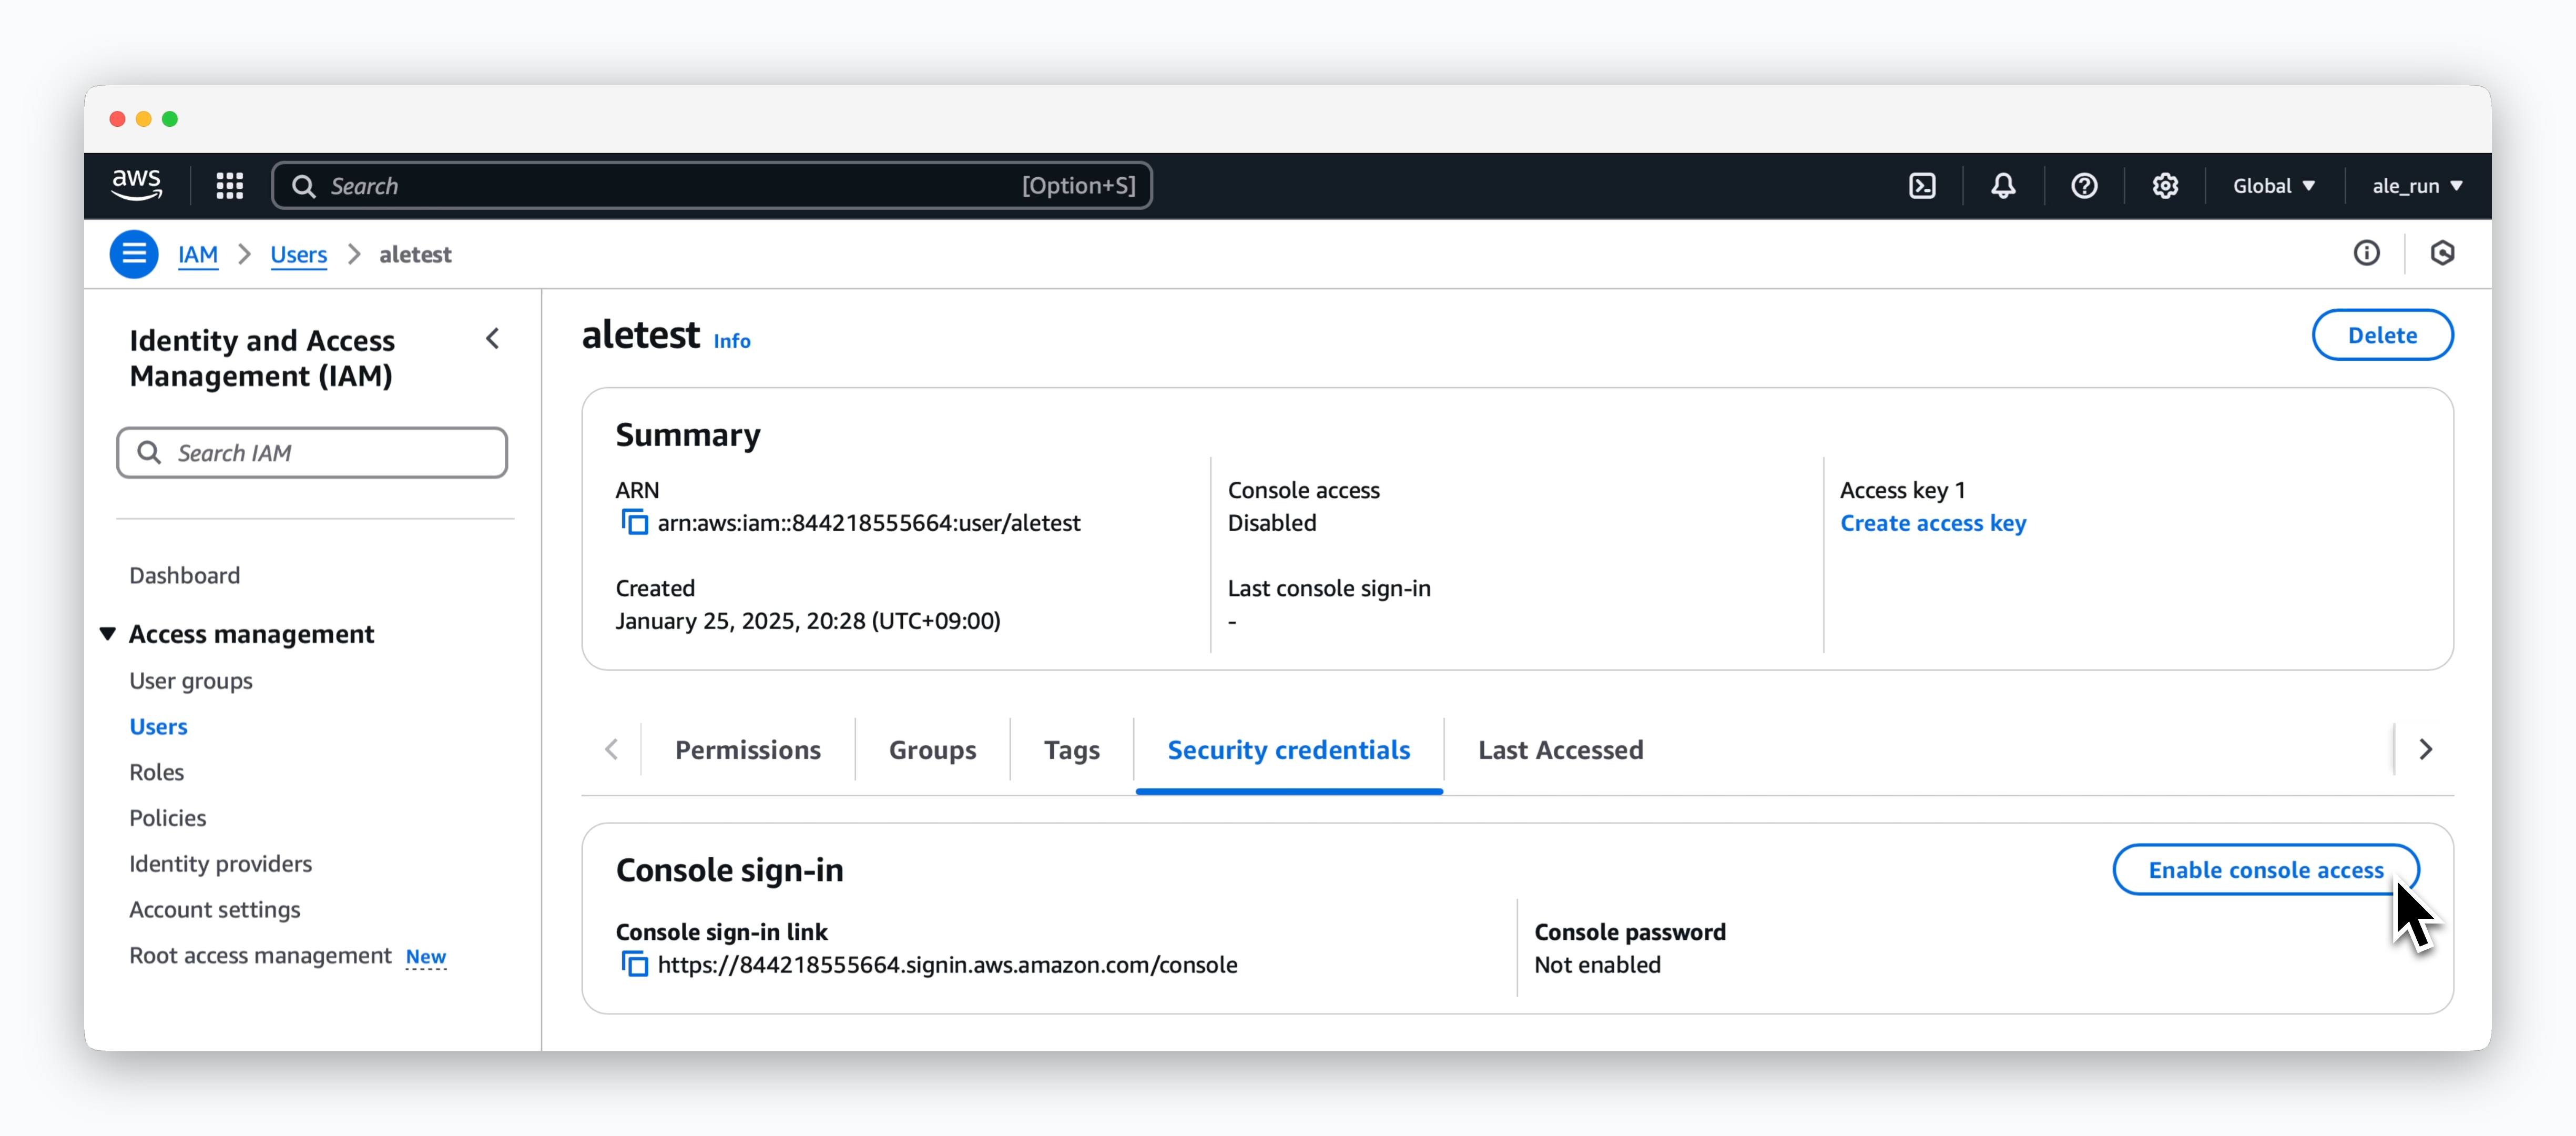 > ユーザーページの **Security credentials** タブにある **Console sign-in** セクションで、`Enable console access` をクリックします。
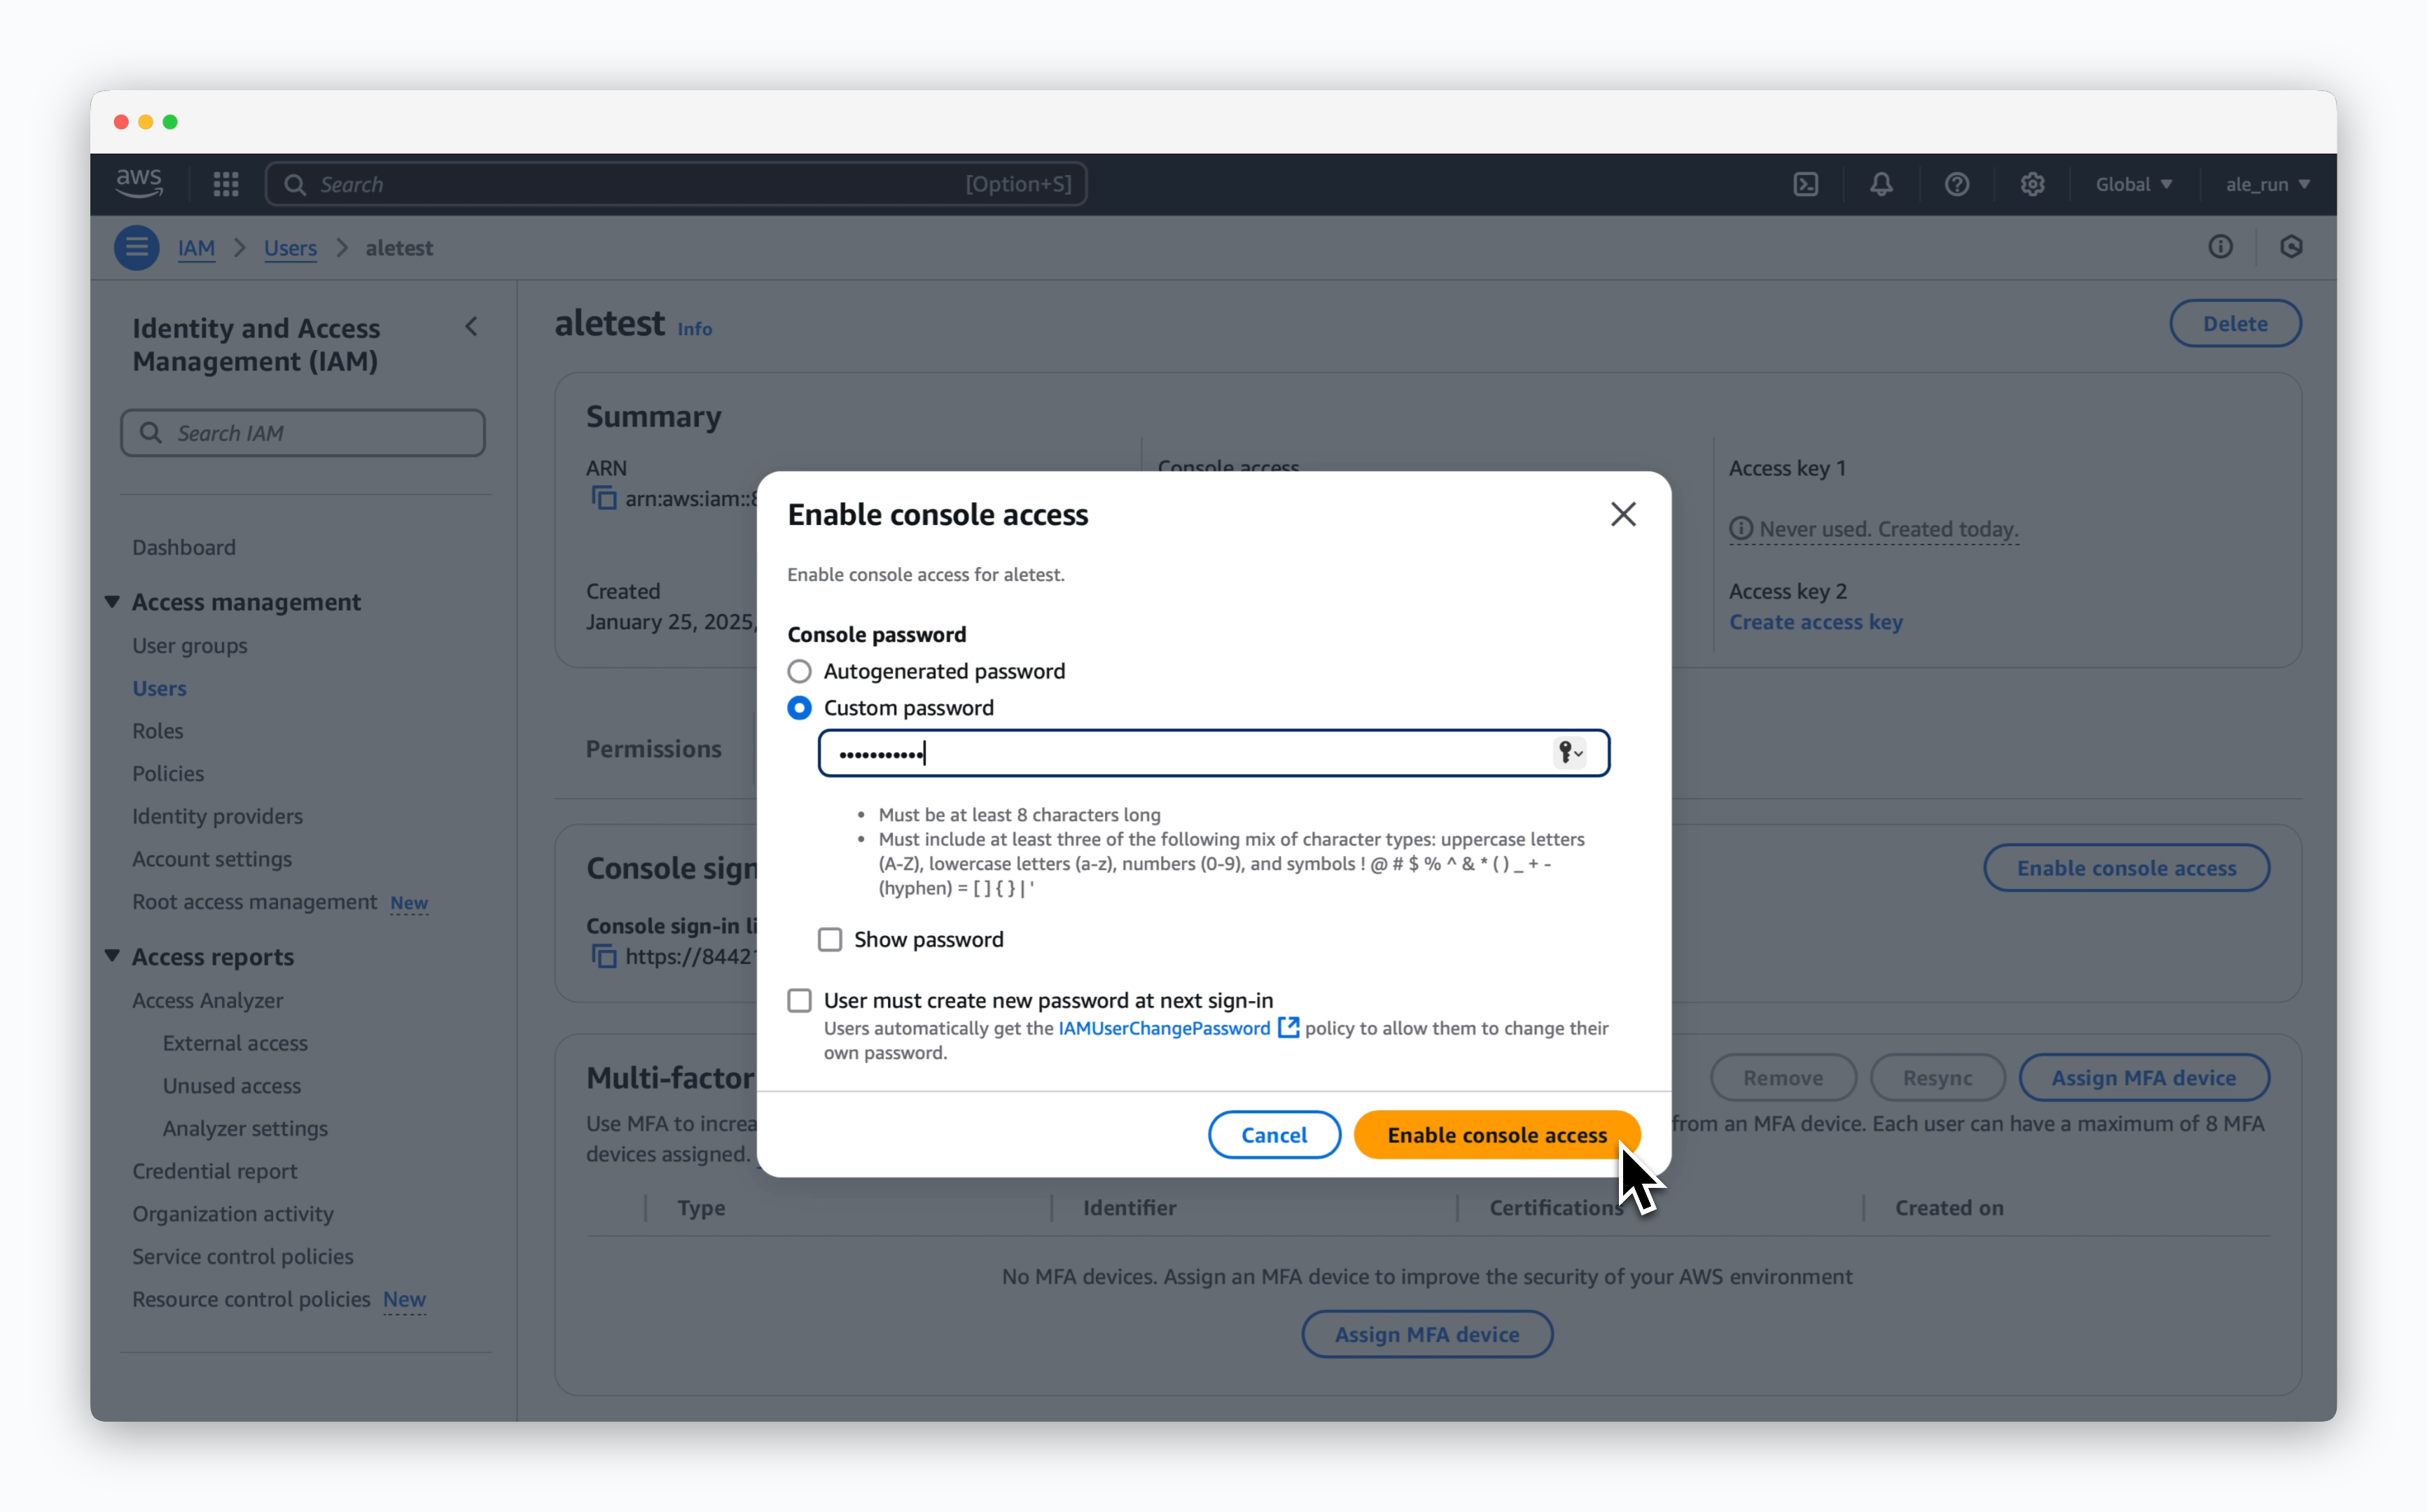 > コンソールアクセスで **有効化** を選択し、パスワード設定で **カスタムパスワード** を選択し、任意のパスワードを入力して `Enable console access` をクリックします。
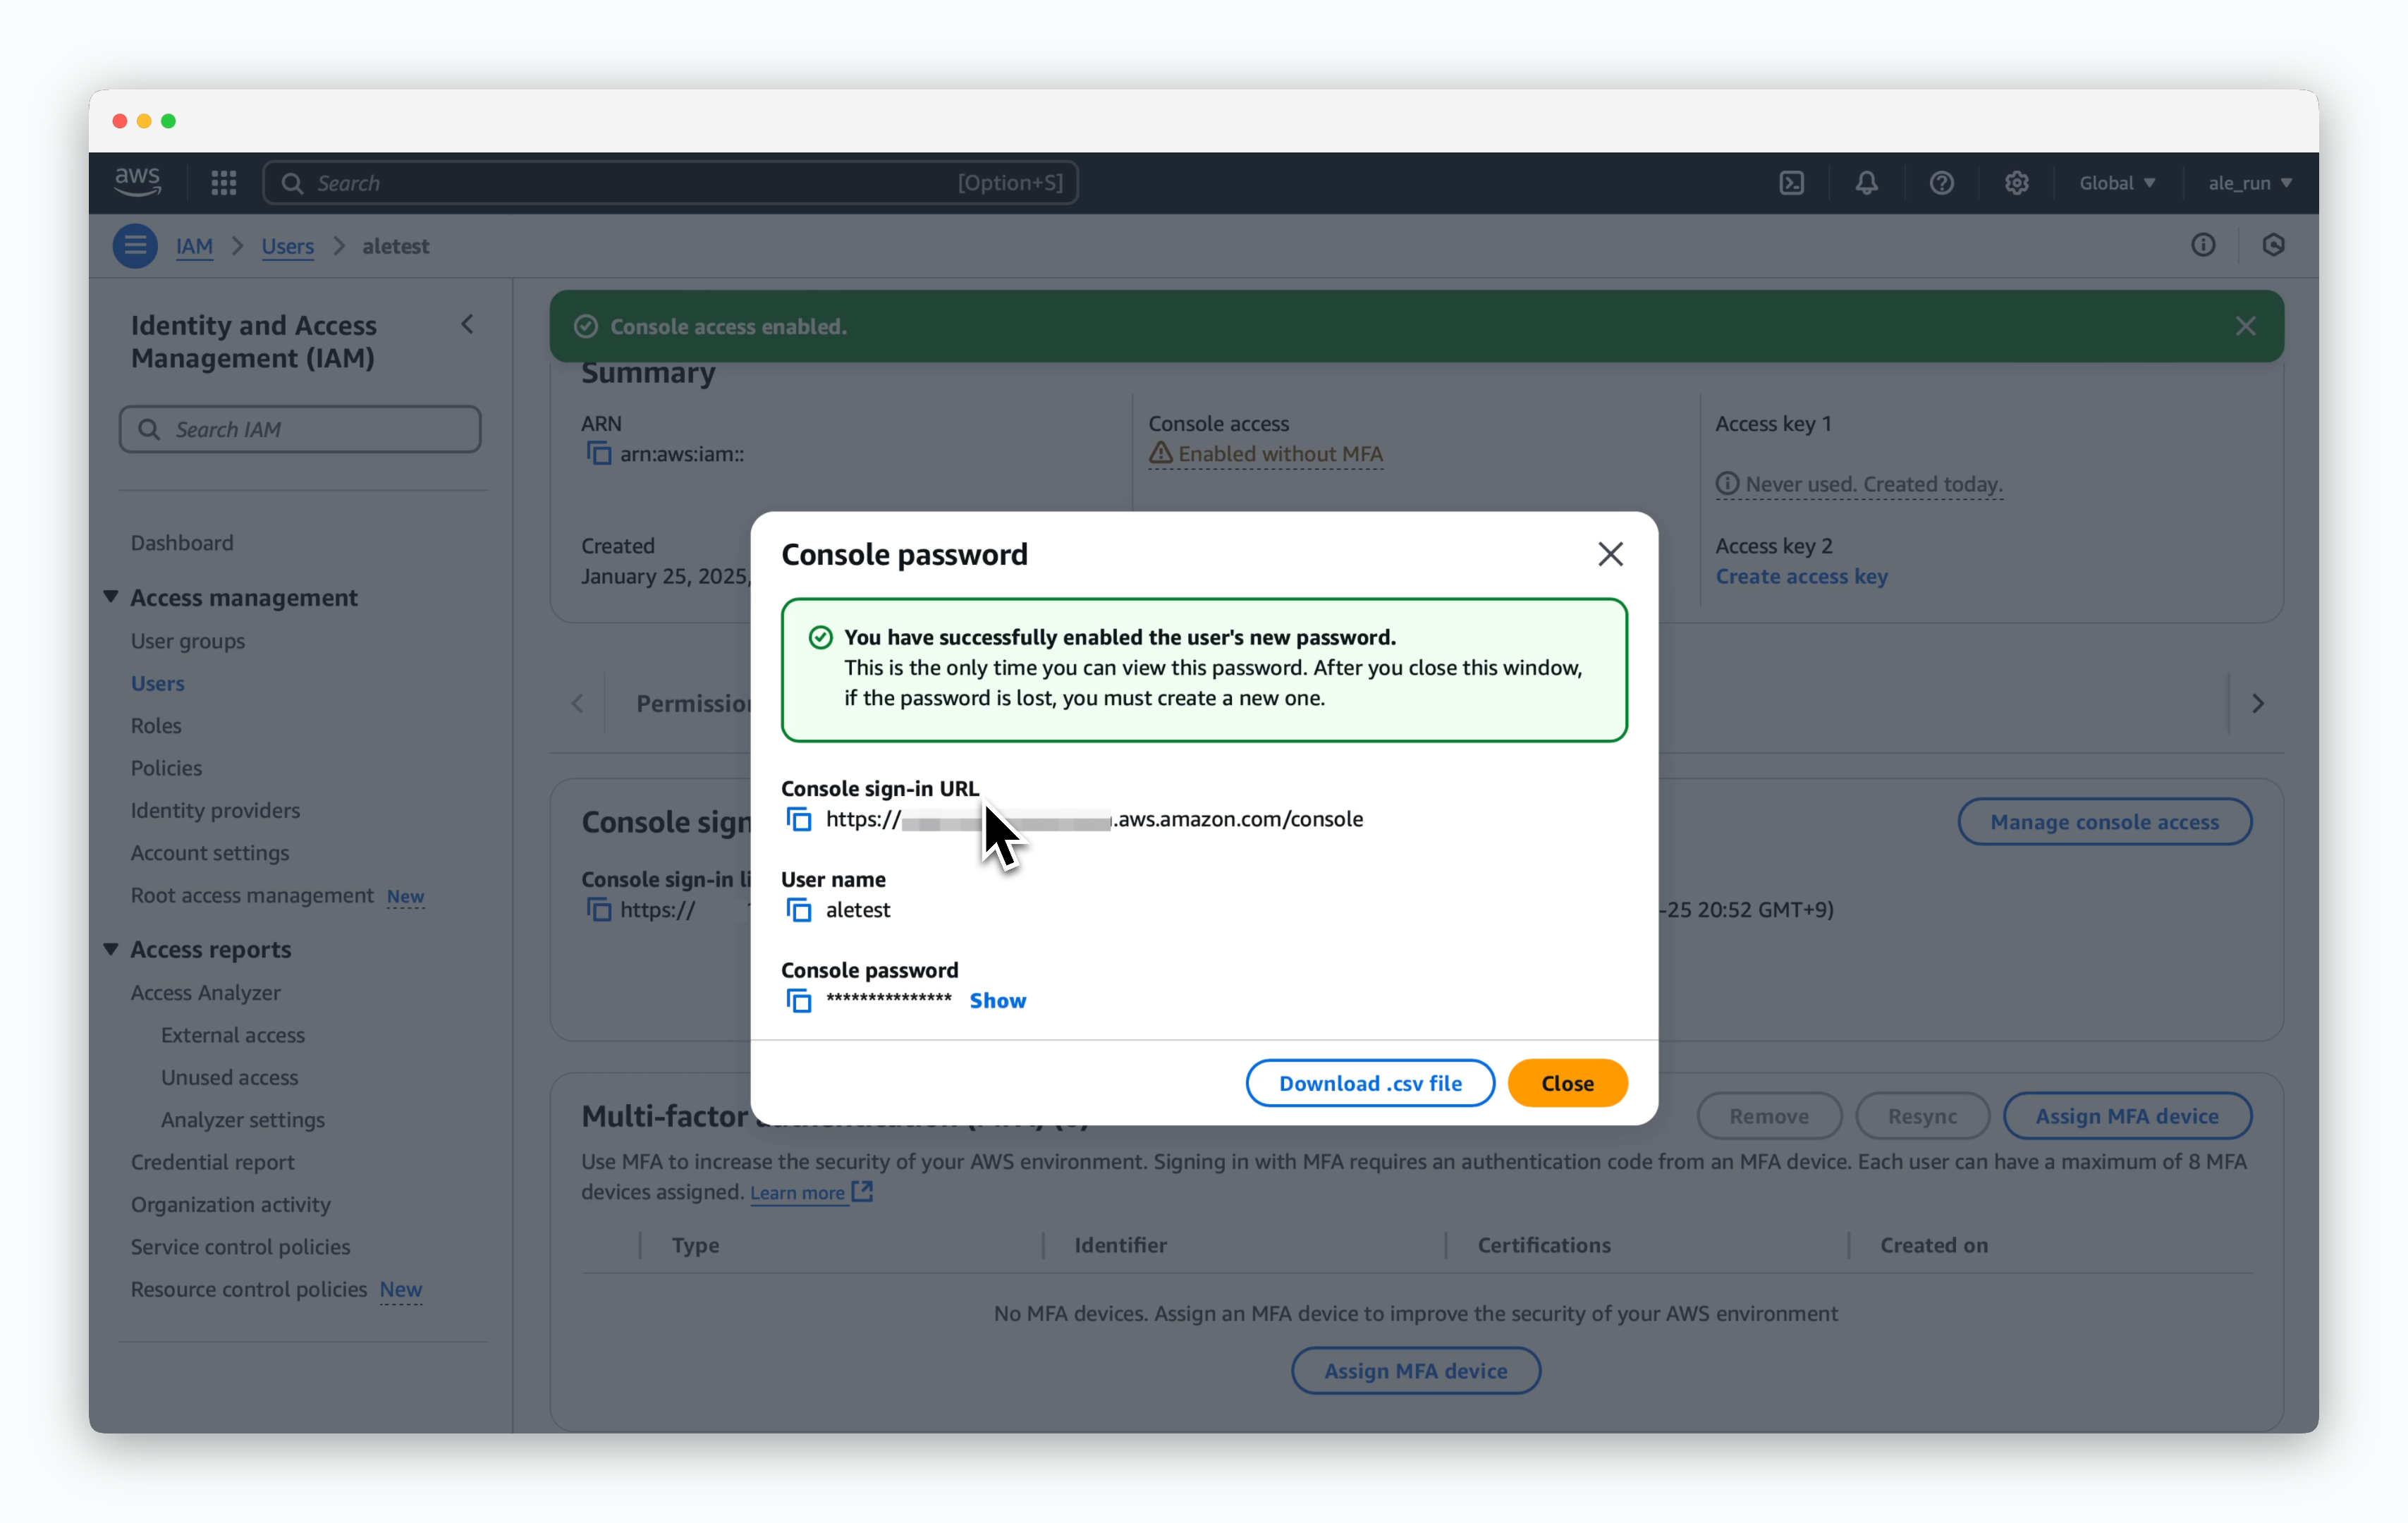 > 生成されたコンソールログインURLを使用して、ユーザー名とコンソールパスワードを入力し、コンテナレジストリにアクセスできます。
## AWS ECRの作成
> 生成されたコンソールログインURLを使用して、ユーザー名とコンソールパスワードを入力し、コンテナレジストリにアクセスできます。
## AWS ECRの作成
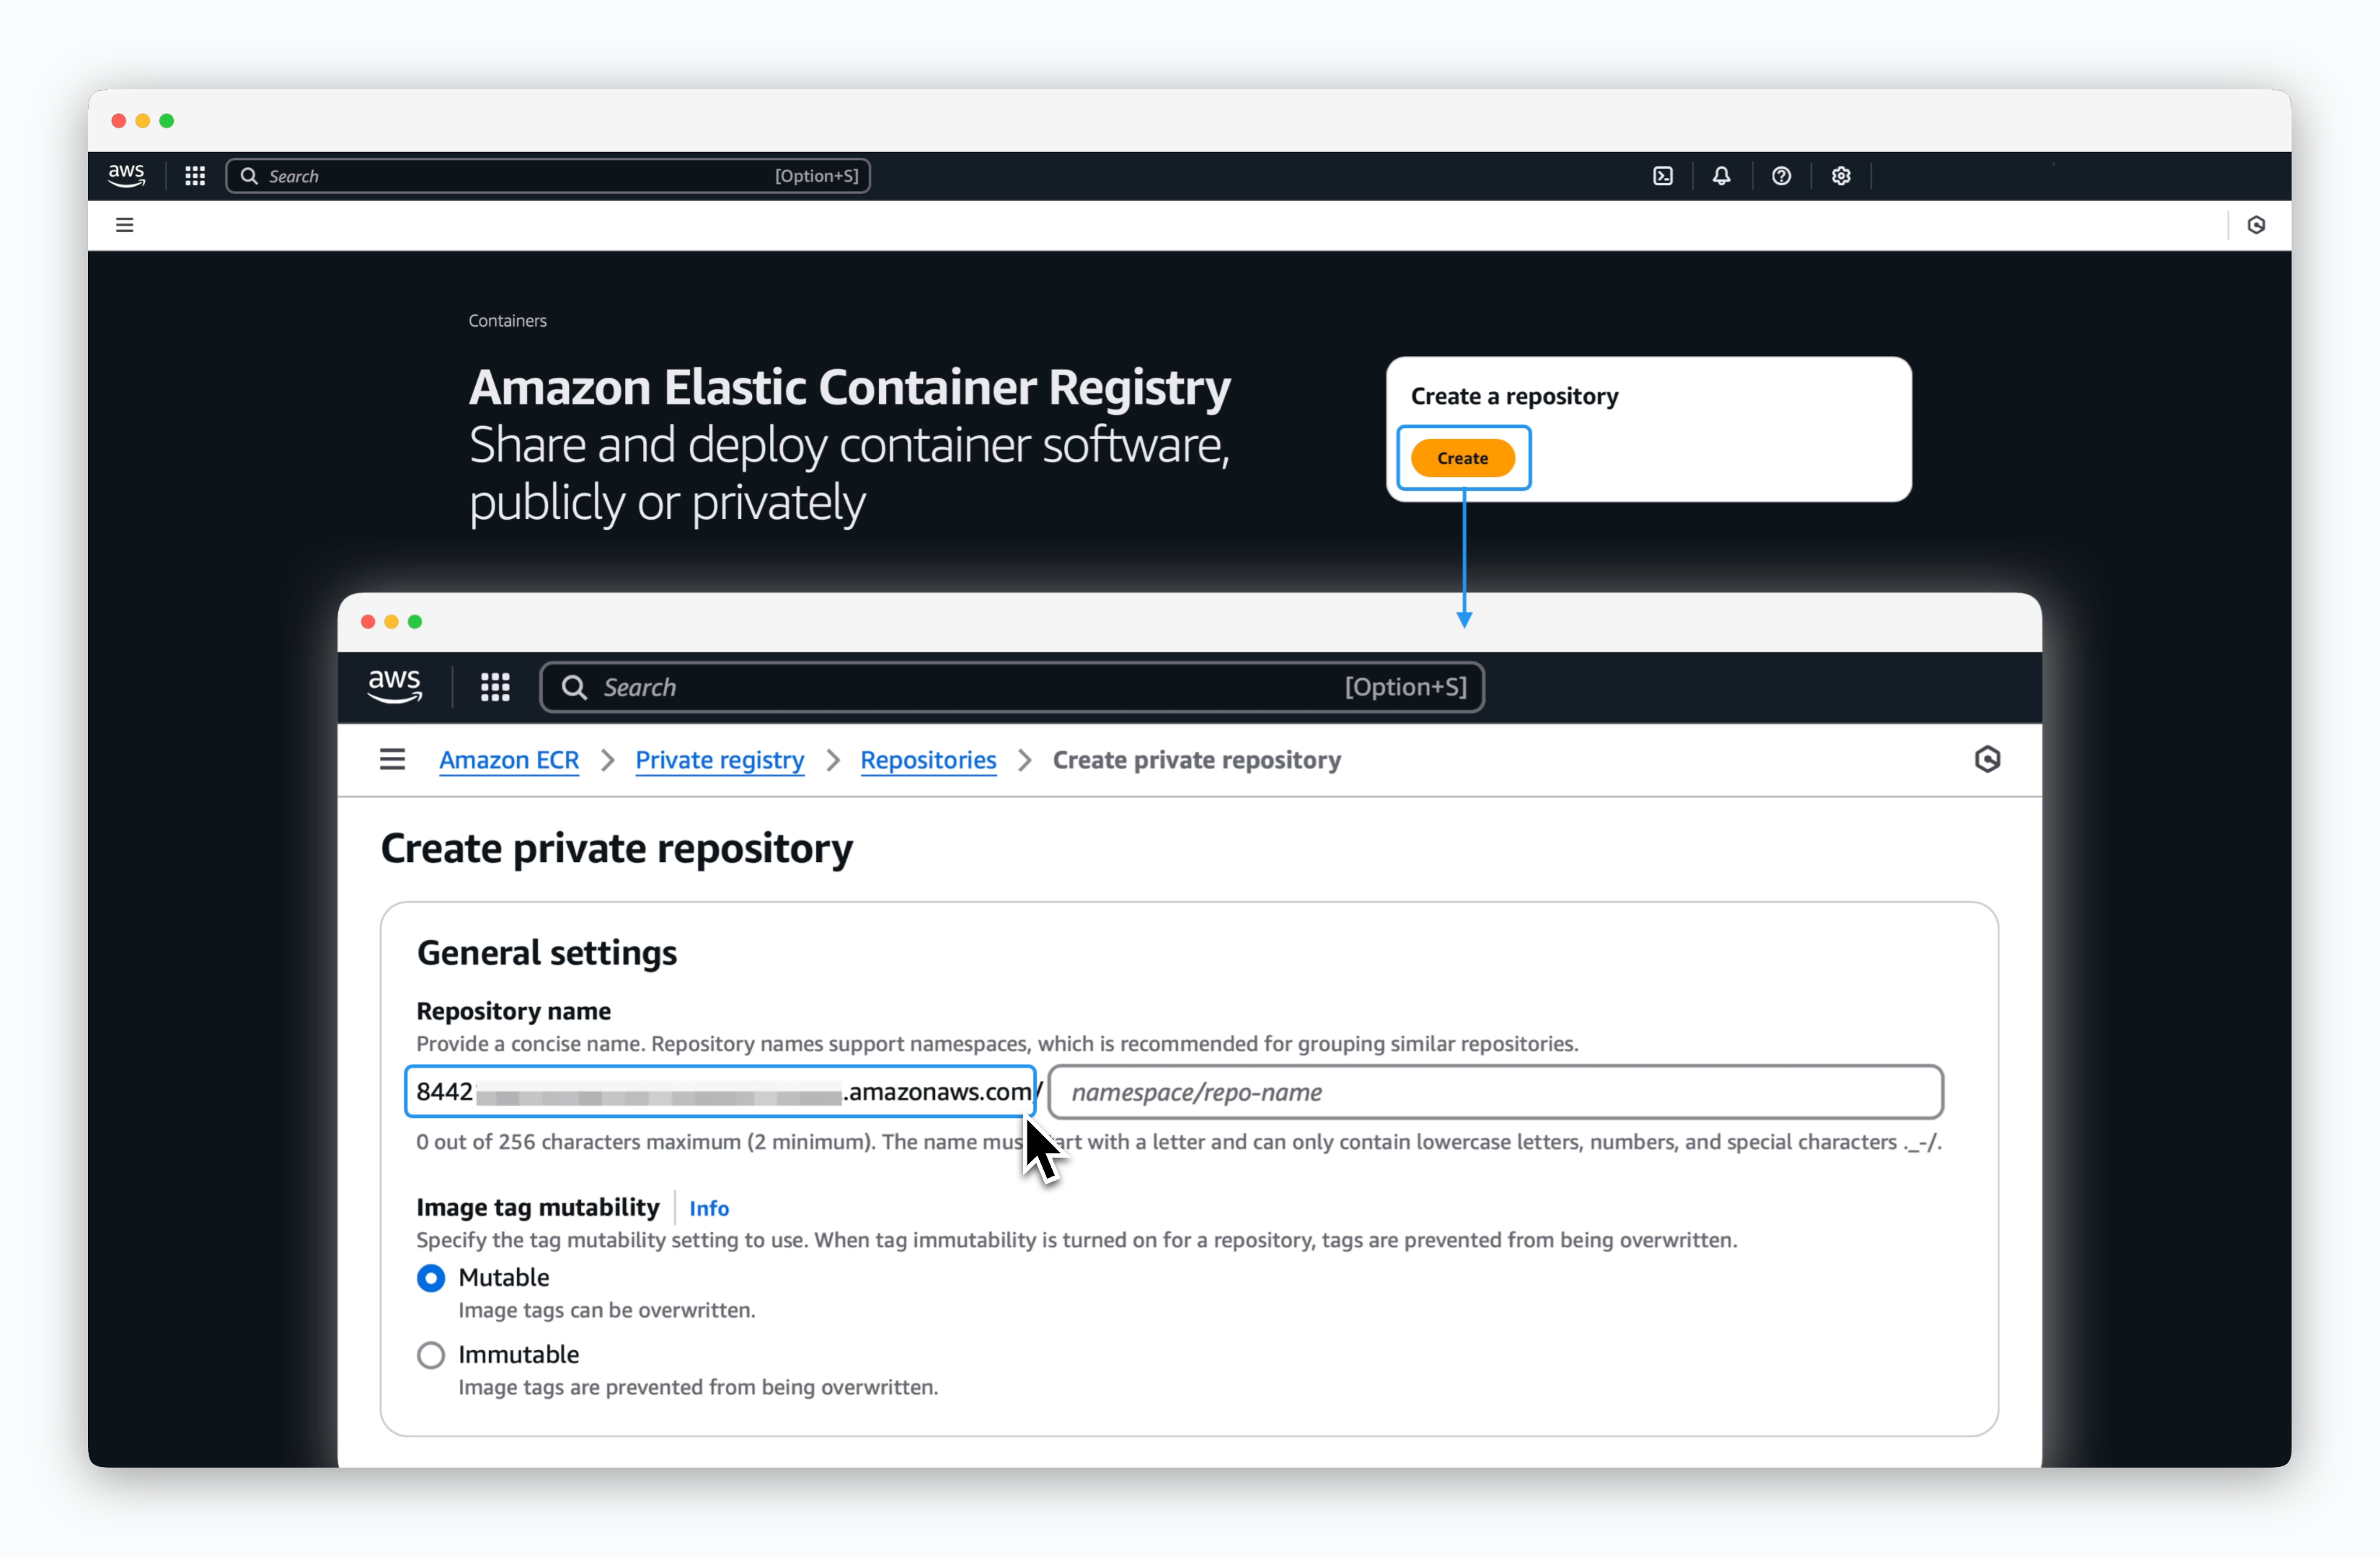 > Elastic Container Registry ページで `Create` をクリックし、リポジトリを作成します。次の画面で、リポジトリ名フィールドの `[ID].dkr.ecr.[region].amazonaws.com` 部分が、ECR を `ale` に接続するためのアクセスURLとして使用されます。
## aleへの接続
> Elastic Container Registry ページで `Create` をクリックし、リポジトリを作成します。次の画面で、リポジトリ名フィールドの `[ID].dkr.ecr.[region].amazonaws.com` 部分が、ECR を `ale` に接続するためのアクセスURLとして使用されます。
## aleへの接続
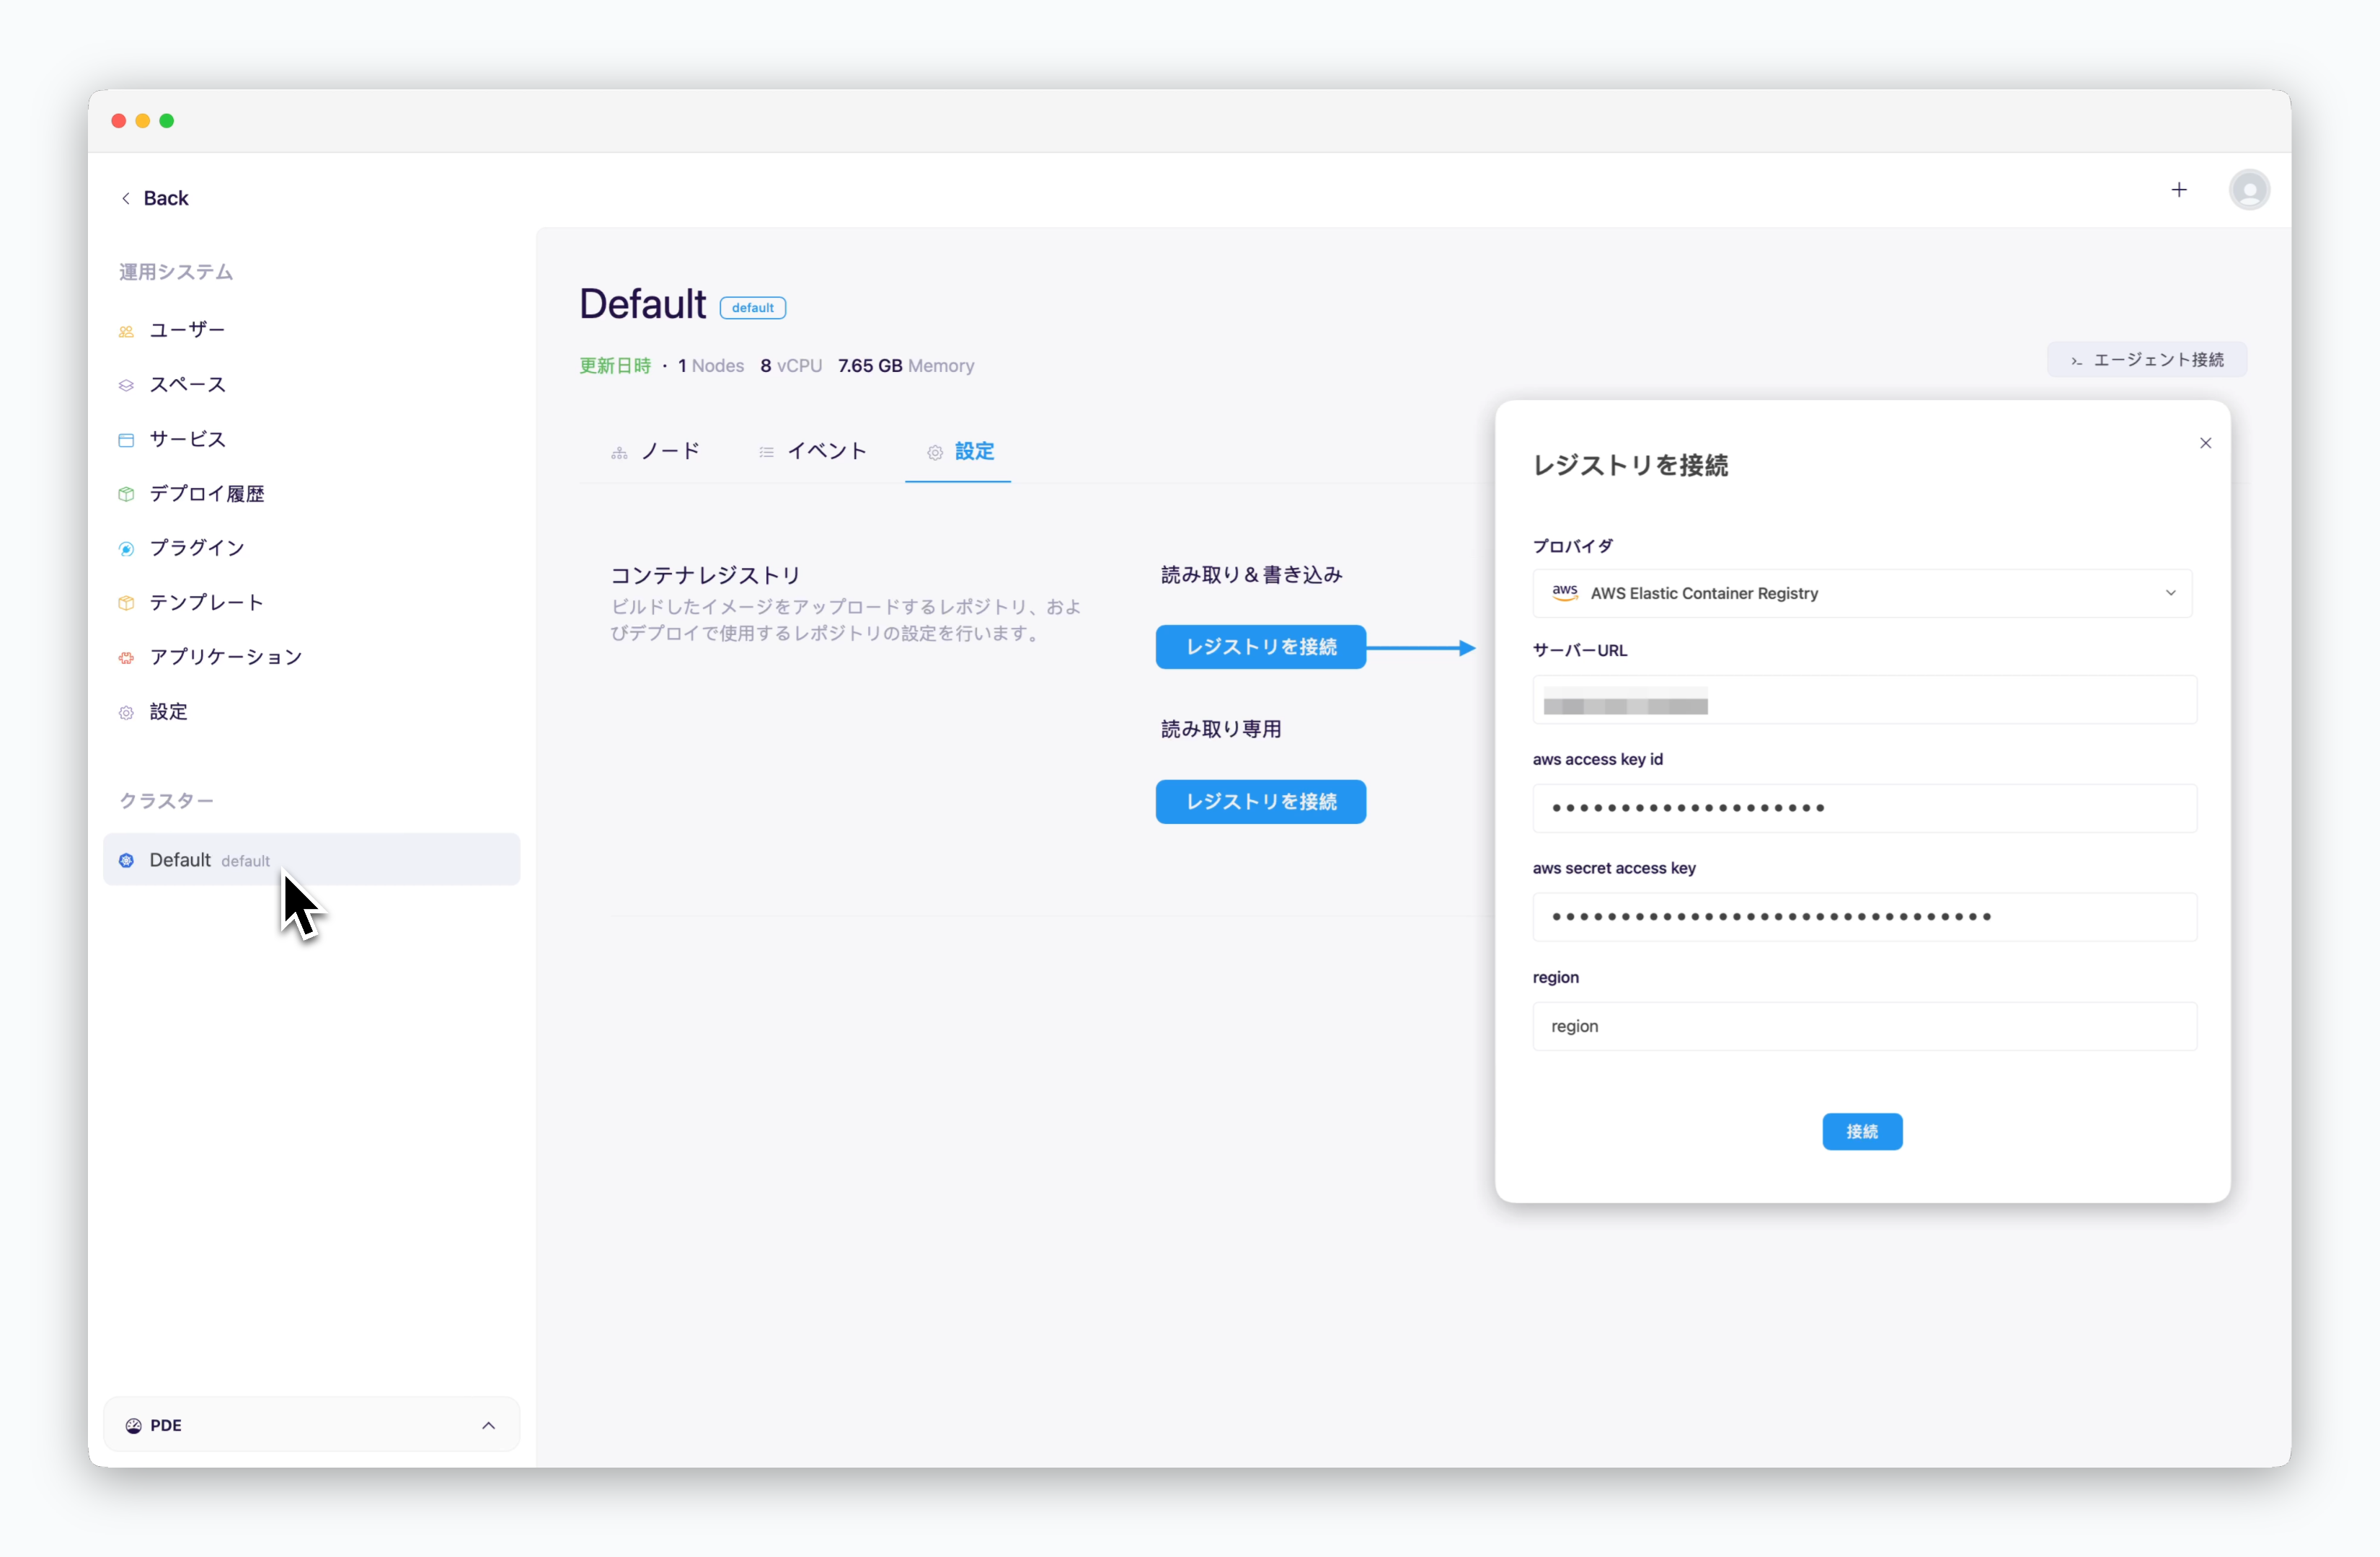 > 運用システムで、クラスターページの **設定** タブに移動し、`コンテナリポジトリを接続` をクリックします。表示されるモーダルで、以下の値を入力し、`接続` をクリックします。
* **リポジトリプロバイダー**: AWS Elastic Container Registry
* [アクセスURL](/en/registry/aws-ecr#create-aws-ecr): `[ID].dkr.ecr.[region].amazonaws.com`
* **AWS アクセスキーID**: アクセスキー
* **AWS シークレットアクセスキー**: シークレットアクセスキー
* **リージョン**: ECR が配置されているリージョン識別子 **(例: ap-northeast-1)**
> 運用システムで、クラスターページの **設定** タブに移動し、`コンテナリポジトリを接続` をクリックします。表示されるモーダルで、以下の値を入力し、`接続` をクリックします。
* **リポジトリプロバイダー**: AWS Elastic Container Registry
* [アクセスURL](/en/registry/aws-ecr#create-aws-ecr): `[ID].dkr.ecr.[region].amazonaws.com`
* **AWS アクセスキーID**: アクセスキー
* **AWS シークレットアクセスキー**: シークレットアクセスキー
* **リージョン**: ECR が配置されているリージョン識別子 **(例: ap-northeast-1)**