> ## Documentation Index
> Fetch the complete documentation index at: https://docs.ale.run/llms.txt
> Use this file to discover all available pages before exploring further.
# イングレス構成とログイン
## DNSレコード登録
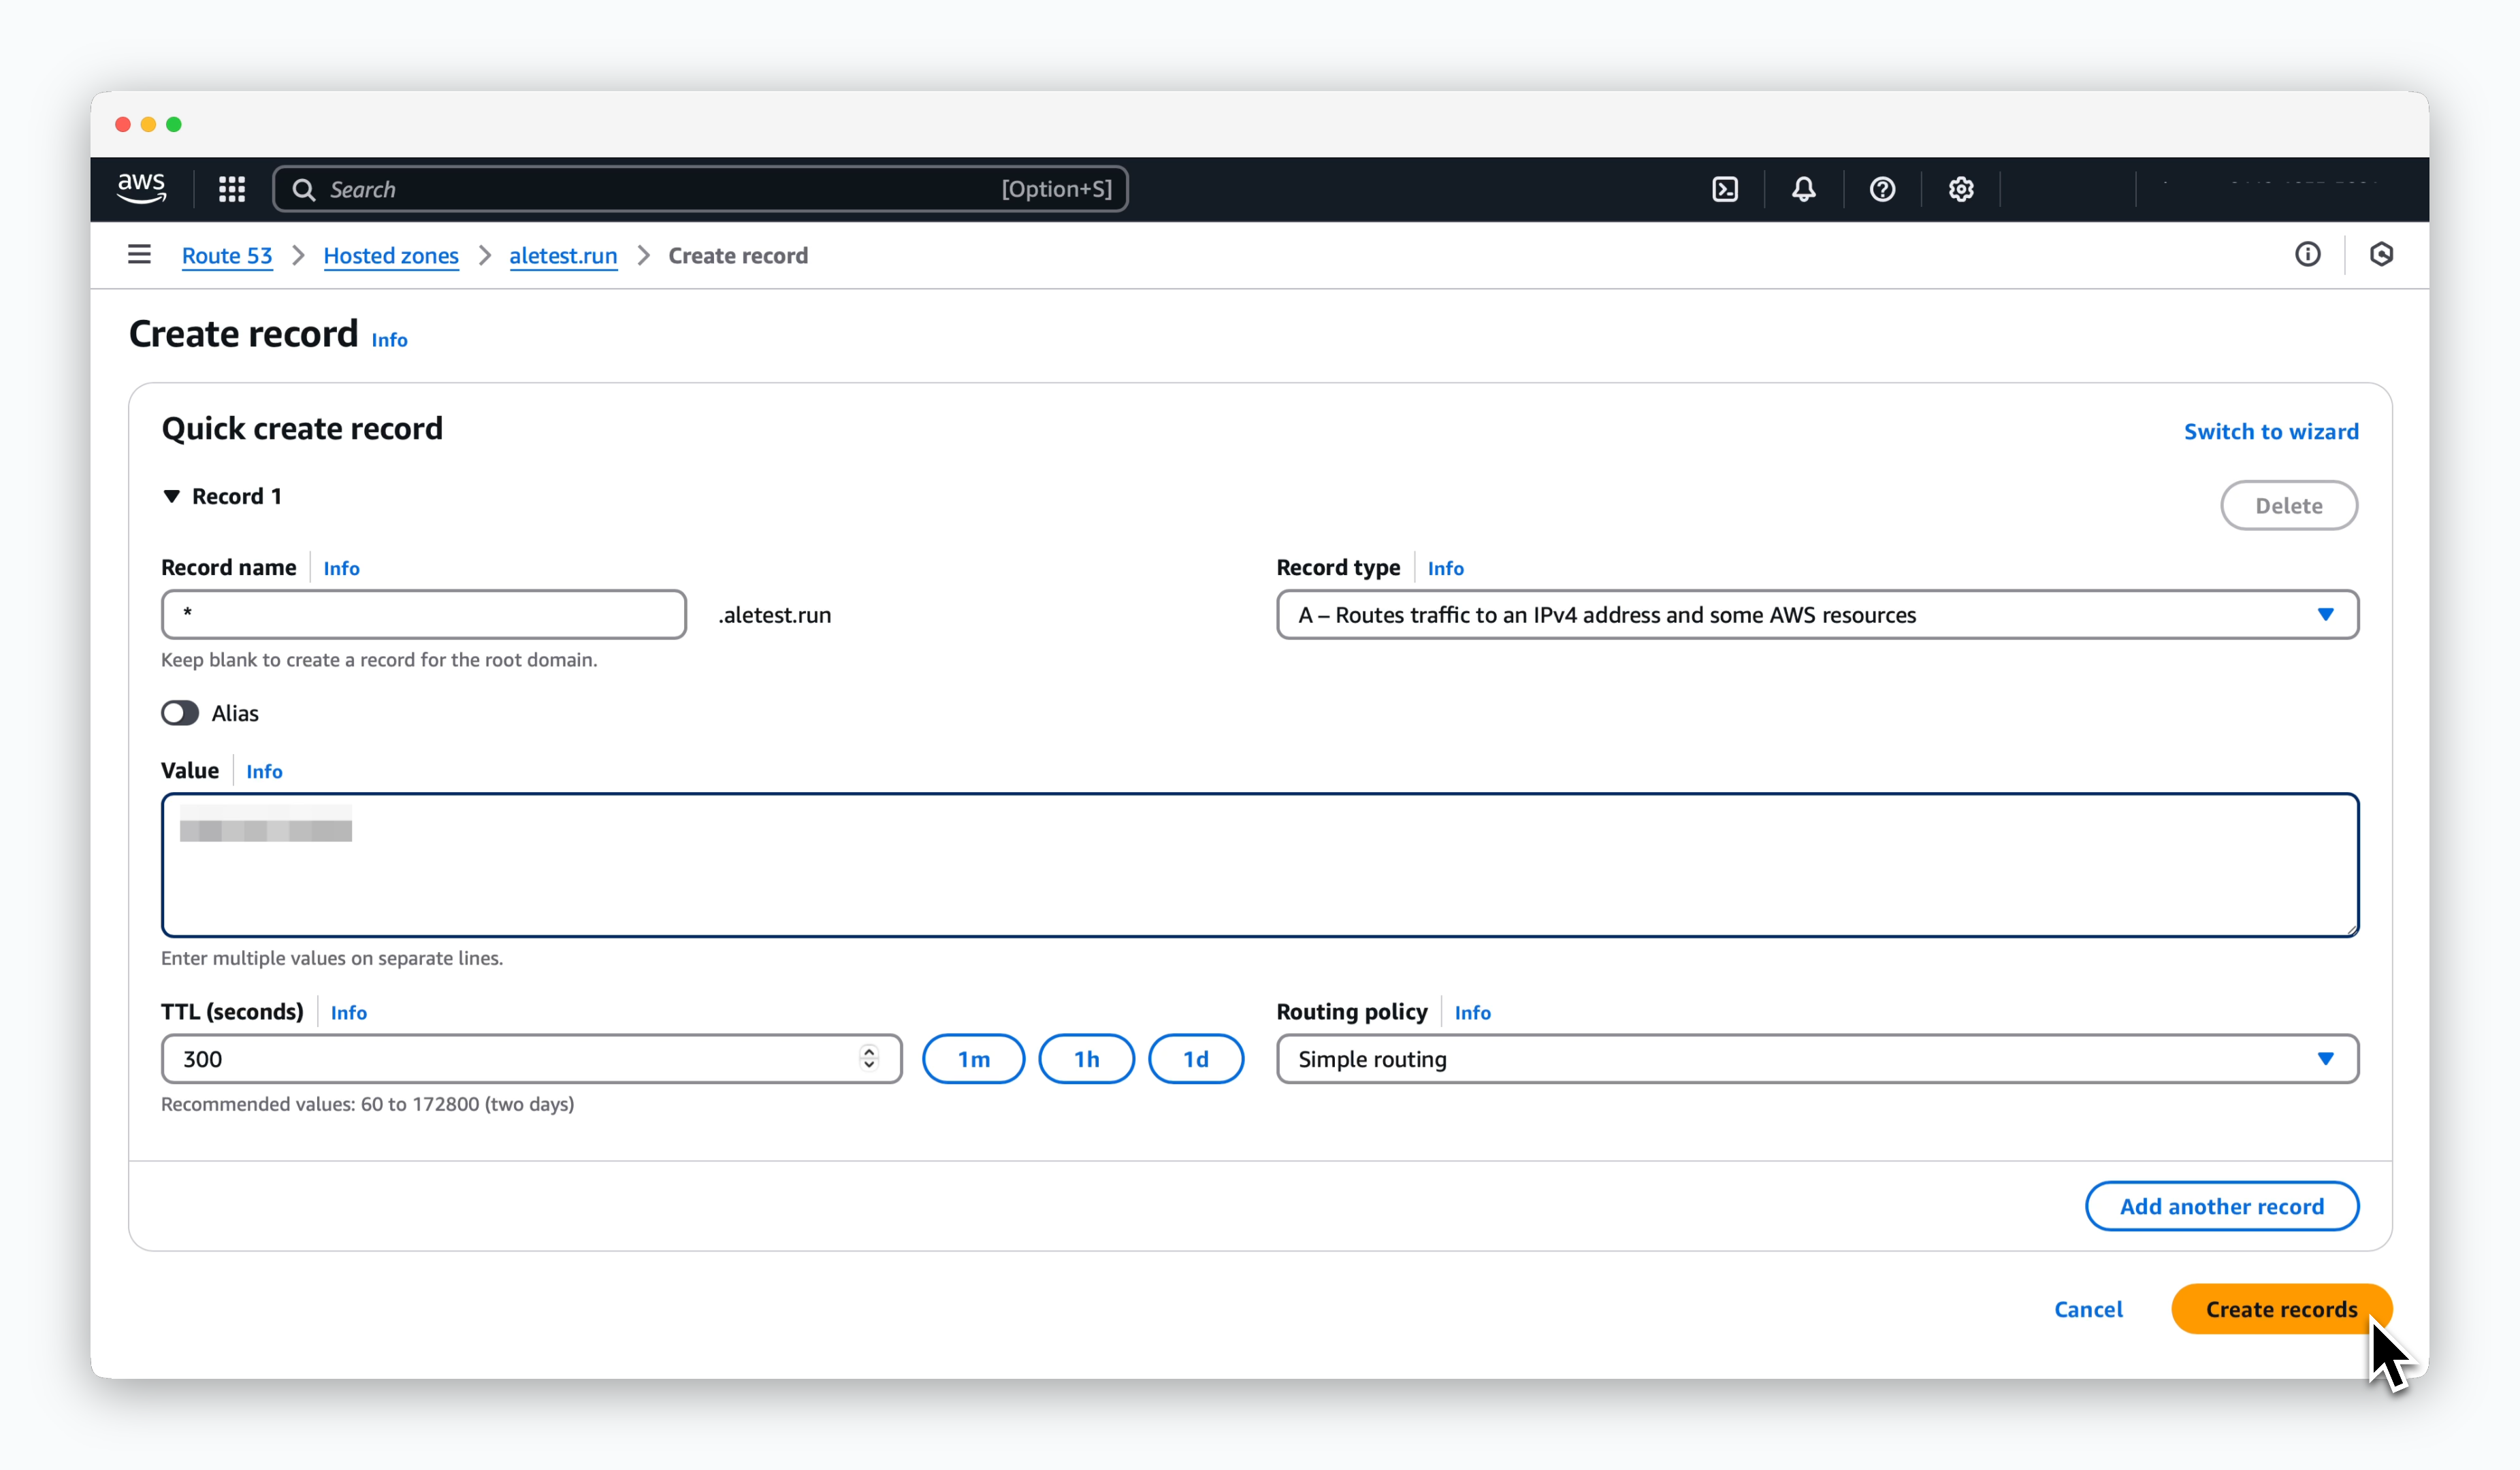 > Route53ダッシュボードの設定対象ドメインページで`Create record`をクリックし、次の値のレコードを生成してください。
* **Record name**: \*
* **Record type**: A
* **value**: EC2インスタンスのPublic IPアドレス
この手順で、エールでデプロイしたサービスに登録されたルートドメインがプレビューURLとして付与されます。
次のコマンドでネームサーバにレコードが反映されたか確認できます。
```bash theme={null}
dig "<レコードに登録したドメイン>"
```
## Cert Managerのインストール
> 次のコマンドを実行し、**Cert Manager**をインストールしてください。
```bash theme={null}
helm repo add jetstack https://charts.jetstack.io
helm repo update
```
```bash theme={null}
helm install \
cert-manager jetstack/cert-manager \
--namespace cert-manager \
--create-namespace \
--version v1.15.3 \
--set crds.enabled=true
```
## ClusterIssuer設定とTLS証明書発行
> 次のコマンドでClusterIssuerとTLS証明書を作成してください。
```bash theme={null}
cat <
> Route53ダッシュボードの設定対象ドメインページで`Create record`をクリックし、次の値のレコードを生成してください。
* **Record name**: \*
* **Record type**: A
* **value**: EC2インスタンスのPublic IPアドレス
この手順で、エールでデプロイしたサービスに登録されたルートドメインがプレビューURLとして付与されます。
次のコマンドでネームサーバにレコードが反映されたか確認できます。
```bash theme={null}
dig "<レコードに登録したドメイン>"
```
## Cert Managerのインストール
> 次のコマンドを実行し、**Cert Manager**をインストールしてください。
```bash theme={null}
helm repo add jetstack https://charts.jetstack.io
helm repo update
```
```bash theme={null}
helm install \
cert-manager jetstack/cert-manager \
--namespace cert-manager \
--create-namespace \
--version v1.15.3 \
--set crds.enabled=true
```
## ClusterIssuer設定とTLS証明書発行
> 次のコマンドでClusterIssuerとTLS証明書を作成してください。
```bash theme={null}
cat <
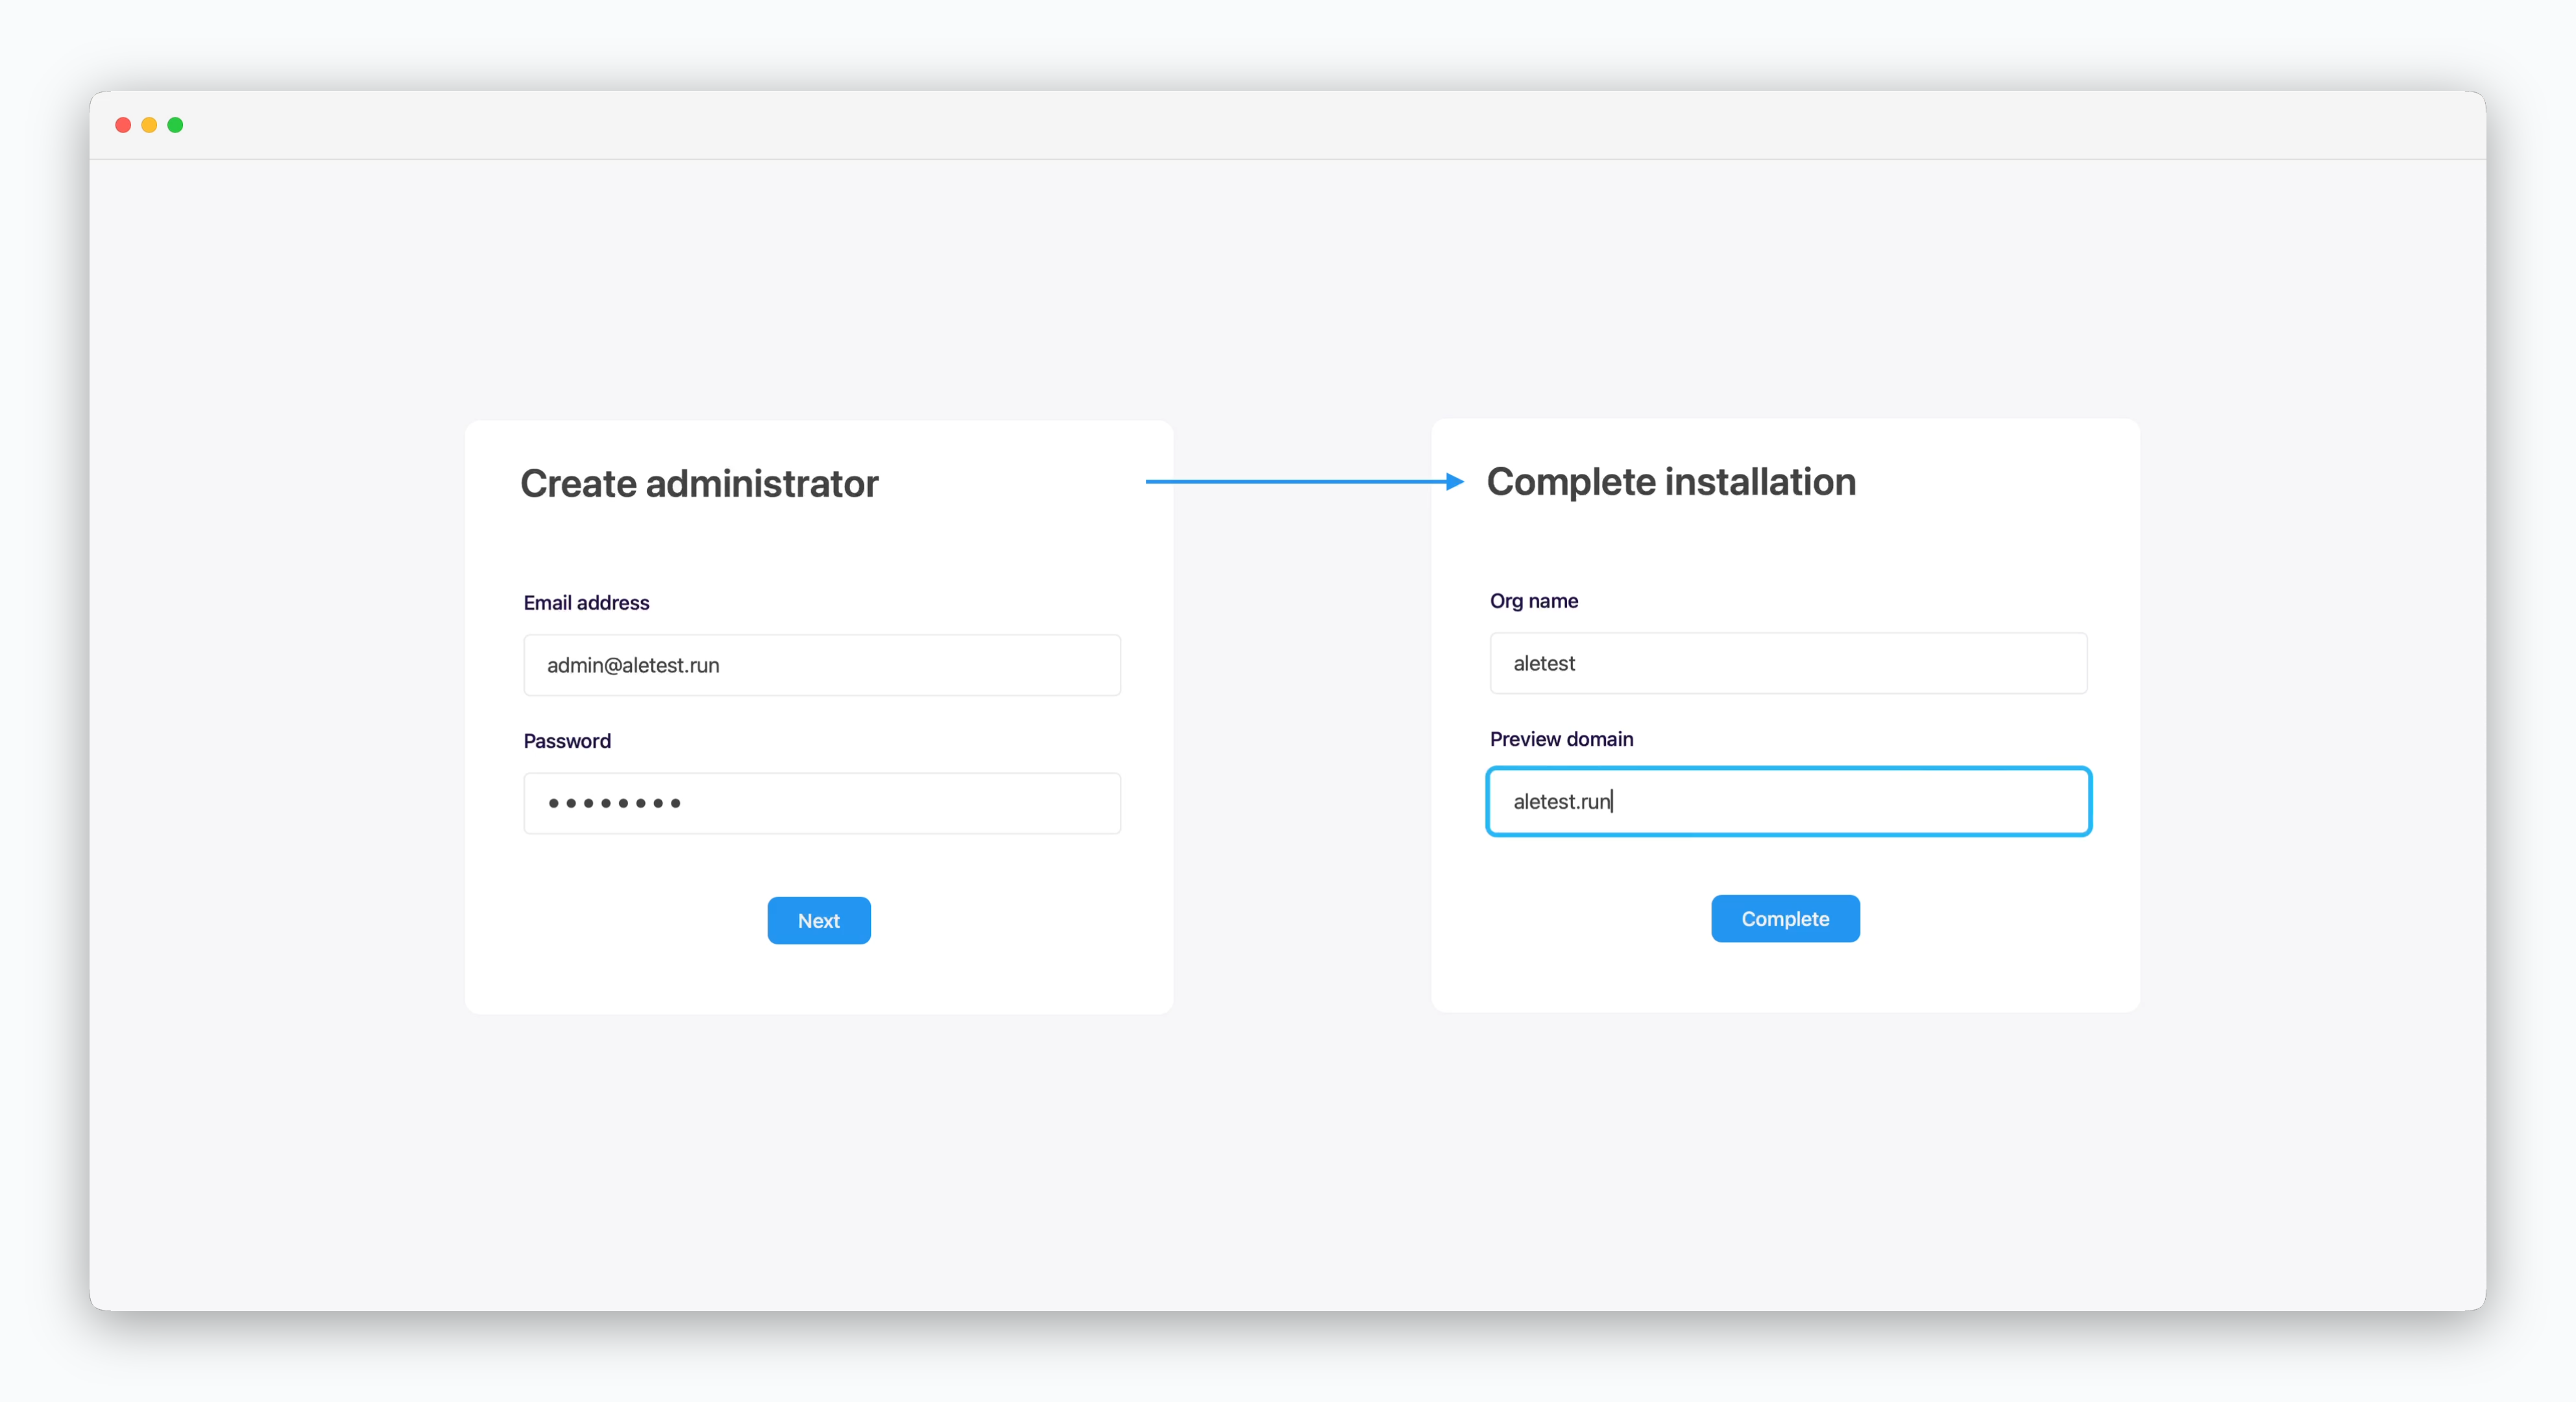 > `https://app.[ドメイン]`にアクセスして、エールで管理者を生成し、インストールを完了してください。
プレビュードメインフィールドには接続したルートドメインを入力します。
> `https://app.[ドメイン]`にアクセスして、エールで管理者を生成し、インストールを完了してください。
プレビュードメインフィールドには接続したルートドメインを入力します。
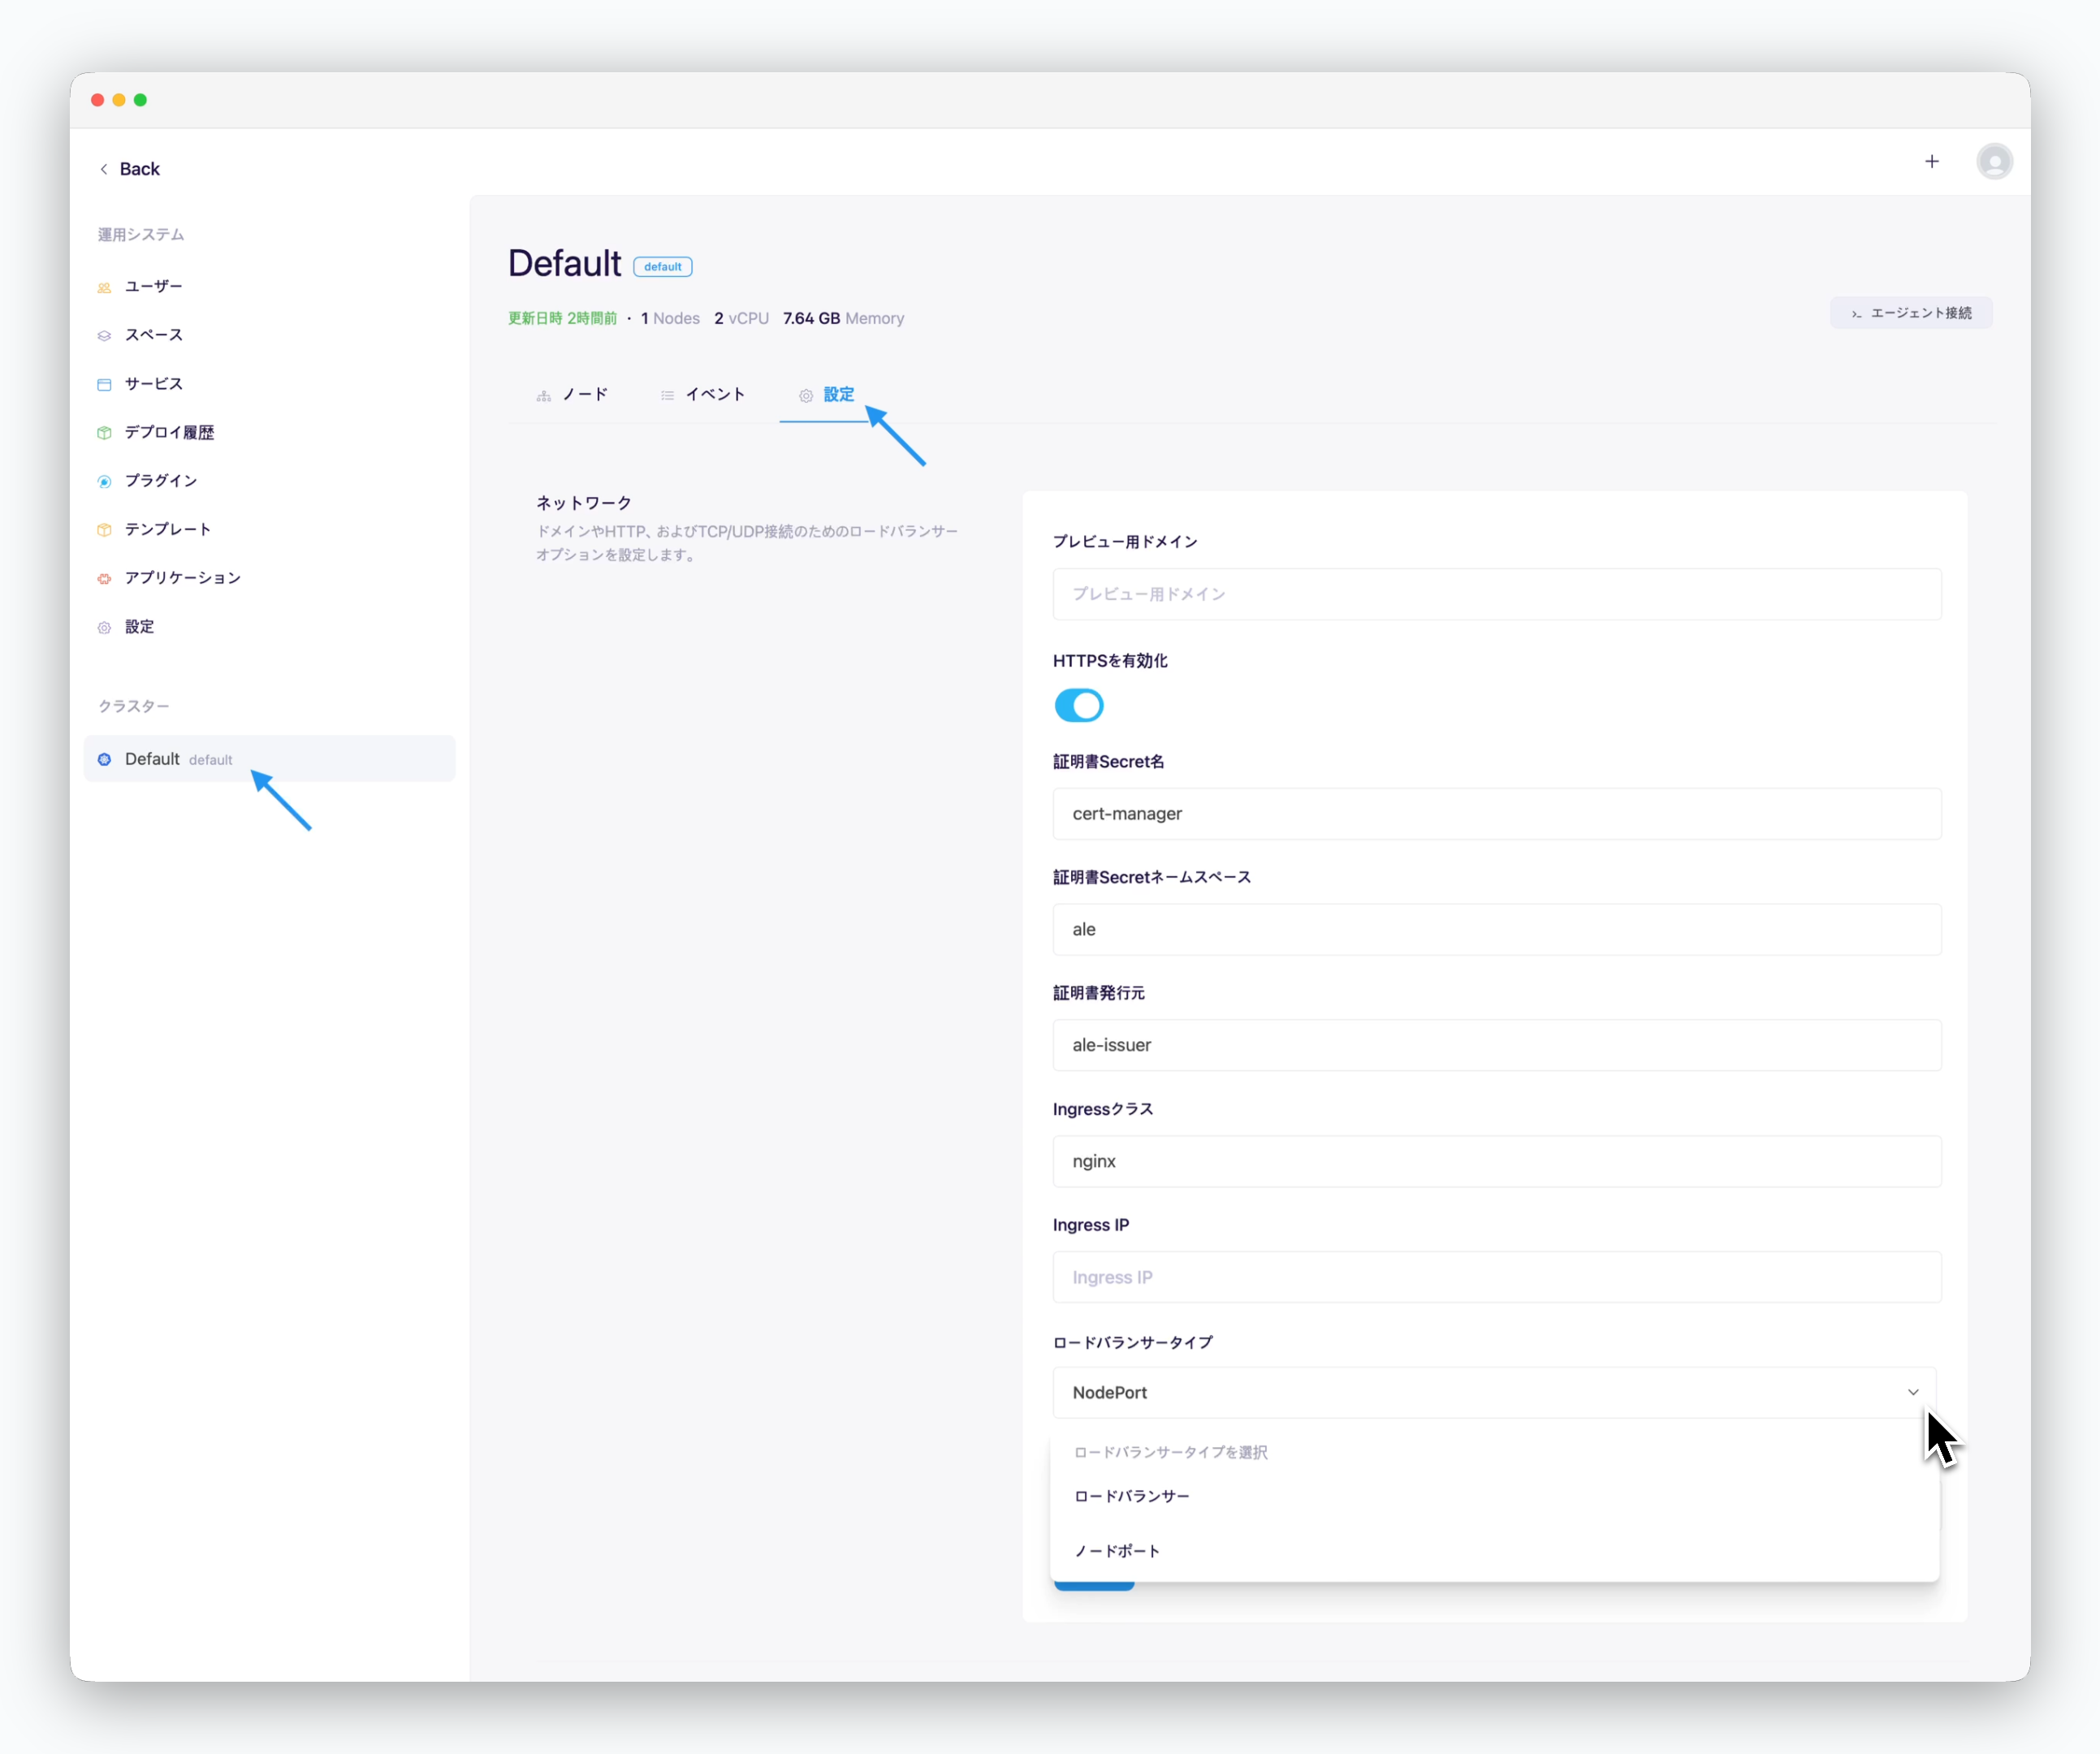 > 左サイドバーのクラスターページ設定タブで、ネットワークセクションに以下の値を入力し、`適用`をクリックします。
* **プレビュードメイン**: 接続したルートドメイン
* **HTTPS使用**
* **チェック**: インターネット環境
* **チェック解除**: イントラネット/閉鎖網環境
* **証明書シークレット名**: ale-app-tls
* **証明書シークレットネームスペース**: cert-manager
* **証明書発行者**: ale-issuer
* **イングレスクラス**: nginx
* **ロードバランサータイプ**: NodePort
ダッシュボードの左上にあるスペース名をクリックすると、運用システムにアクセスできます。
> 左サイドバーのクラスターページ設定タブで、ネットワークセクションに以下の値を入力し、`適用`をクリックします。
* **プレビュードメイン**: 接続したルートドメイン
* **HTTPS使用**
* **チェック**: インターネット環境
* **チェック解除**: イントラネット/閉鎖網環境
* **証明書シークレット名**: ale-app-tls
* **証明書シークレットネームスペース**: cert-manager
* **証明書発行者**: ale-issuer
* **イングレスクラス**: nginx
* **ロードバランサータイプ**: NodePort
ダッシュボードの左上にあるスペース名をクリックすると、運用システムにアクセスできます。
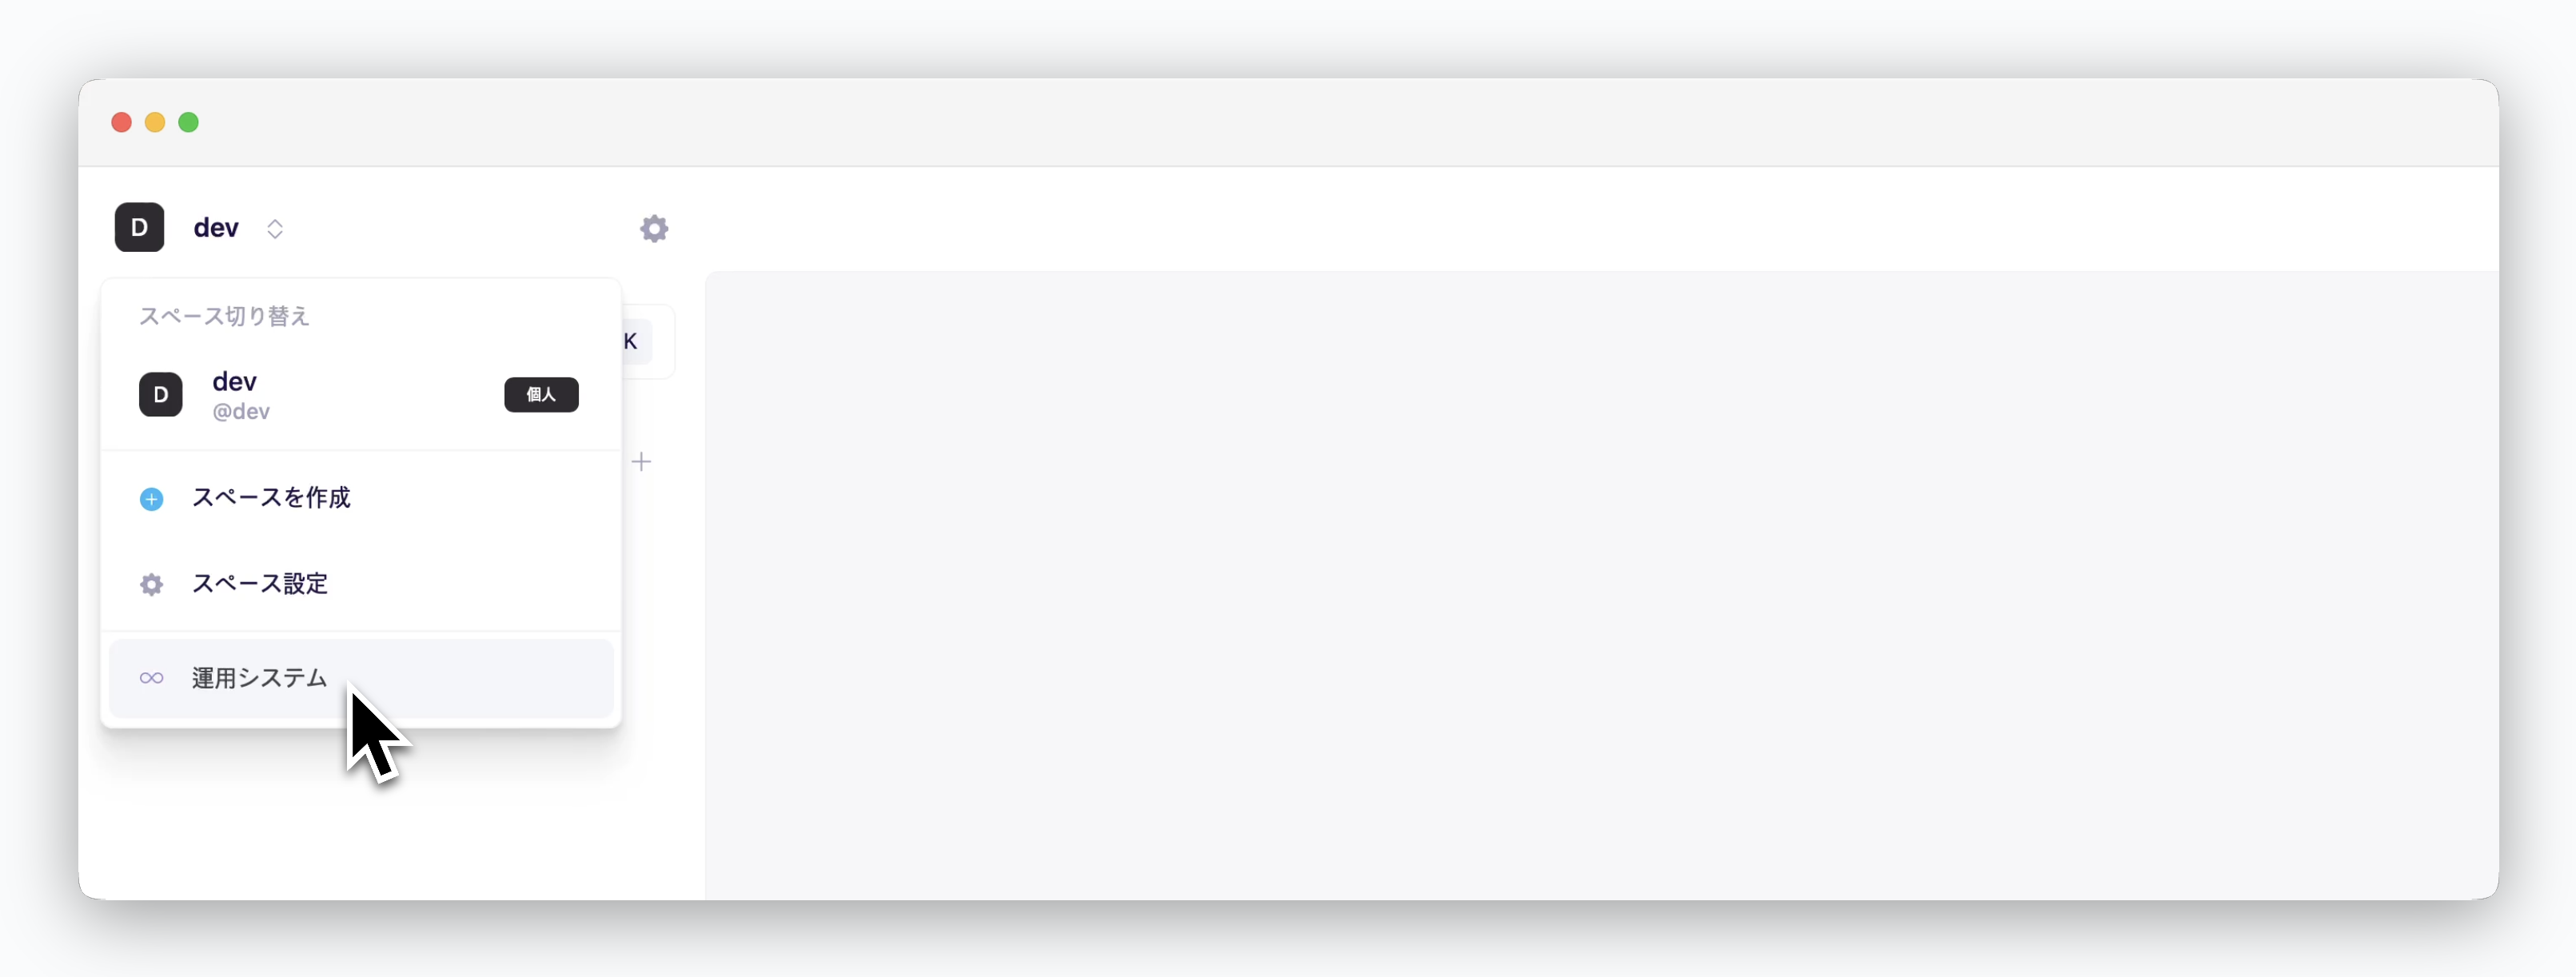 運用システムメニューは、運用システムへのアクセス権限を持つアカウントにのみ表示されます。
## エール利用開始
運用システムメニューは、運用システムへのアクセス権限を持つアカウントにのみ表示されます。
## エール利用開始
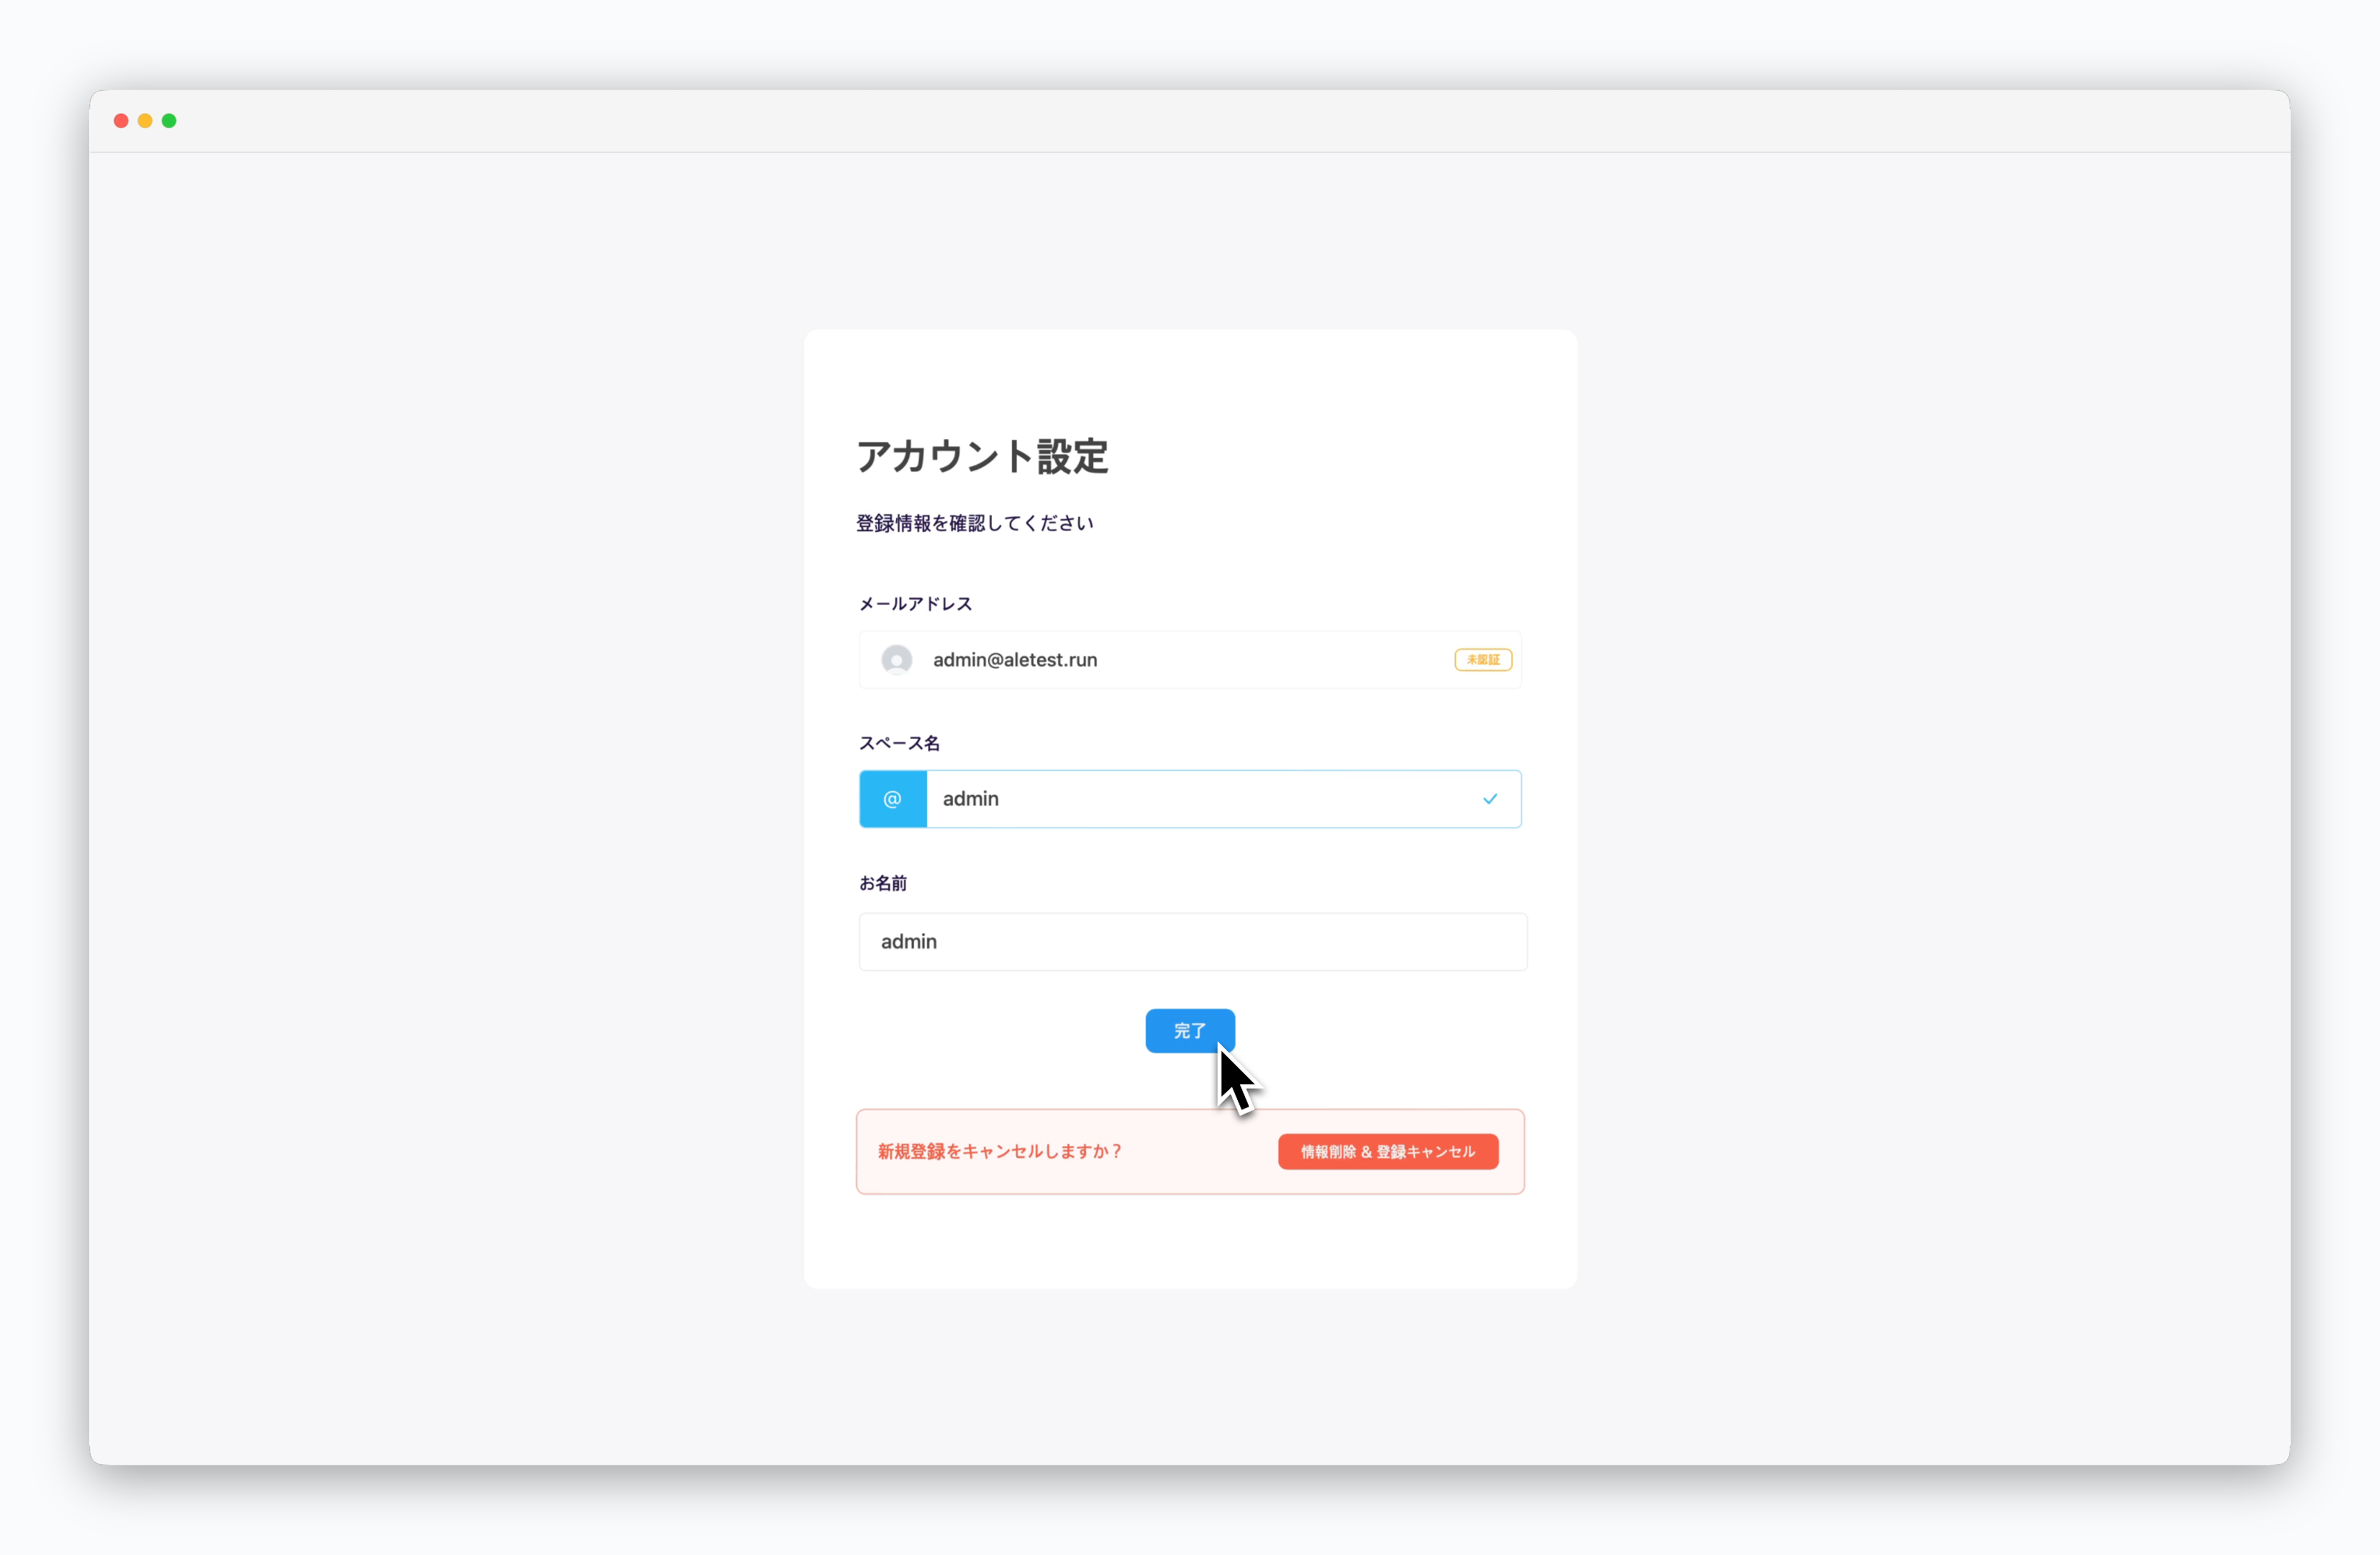 > 運用システム左上の`Back`をクリックするか、`https://app.[ドメイン]`にアクセスしてエールに接続し、登録完了プロセスを経ると開発者ダッシュボードを使用できます。
[ビルドされたイメージの保存先として、AWS ECRなどのマネージドコンテナレジストリを使用できます。](/ja/registry/aws-ecr)コンテナレジストリが接続されていない場合、ローカル環境で稼働中のDockerエンジンでイメージを管理します。
運用システムおよび開発者ダッシュボードの使用法は以下のカードをご参照ください。
> 運用システム左上の`Back`をクリックするか、`https://app.[ドメイン]`にアクセスしてエールに接続し、登録完了プロセスを経ると開発者ダッシュボードを使用できます。
[ビルドされたイメージの保存先として、AWS ECRなどのマネージドコンテナレジストリを使用できます。](/ja/registry/aws-ecr)コンテナレジストリが接続されていない場合、ローカル環境で稼働中のDockerエンジンでイメージを管理します。
運用システムおよび開発者ダッシュボードの使用法は以下のカードをご参照ください。