> ## Documentation Index
> Fetch the complete documentation index at: https://docs.ale.run/llms.txt
> Use this file to discover all available pages before exploring further.
# 빠른 시작
> **Node.js 배포하기**
***
## 사전준비
* `ale` [**계정 생성**](/ko/operations/user-management#%EC%82%AC%EC%9A%A9%EC%9E%90-%EB%93%B1%EB%A1%9D)
* **GitHub 계정 연동**
## 템플릿 선택
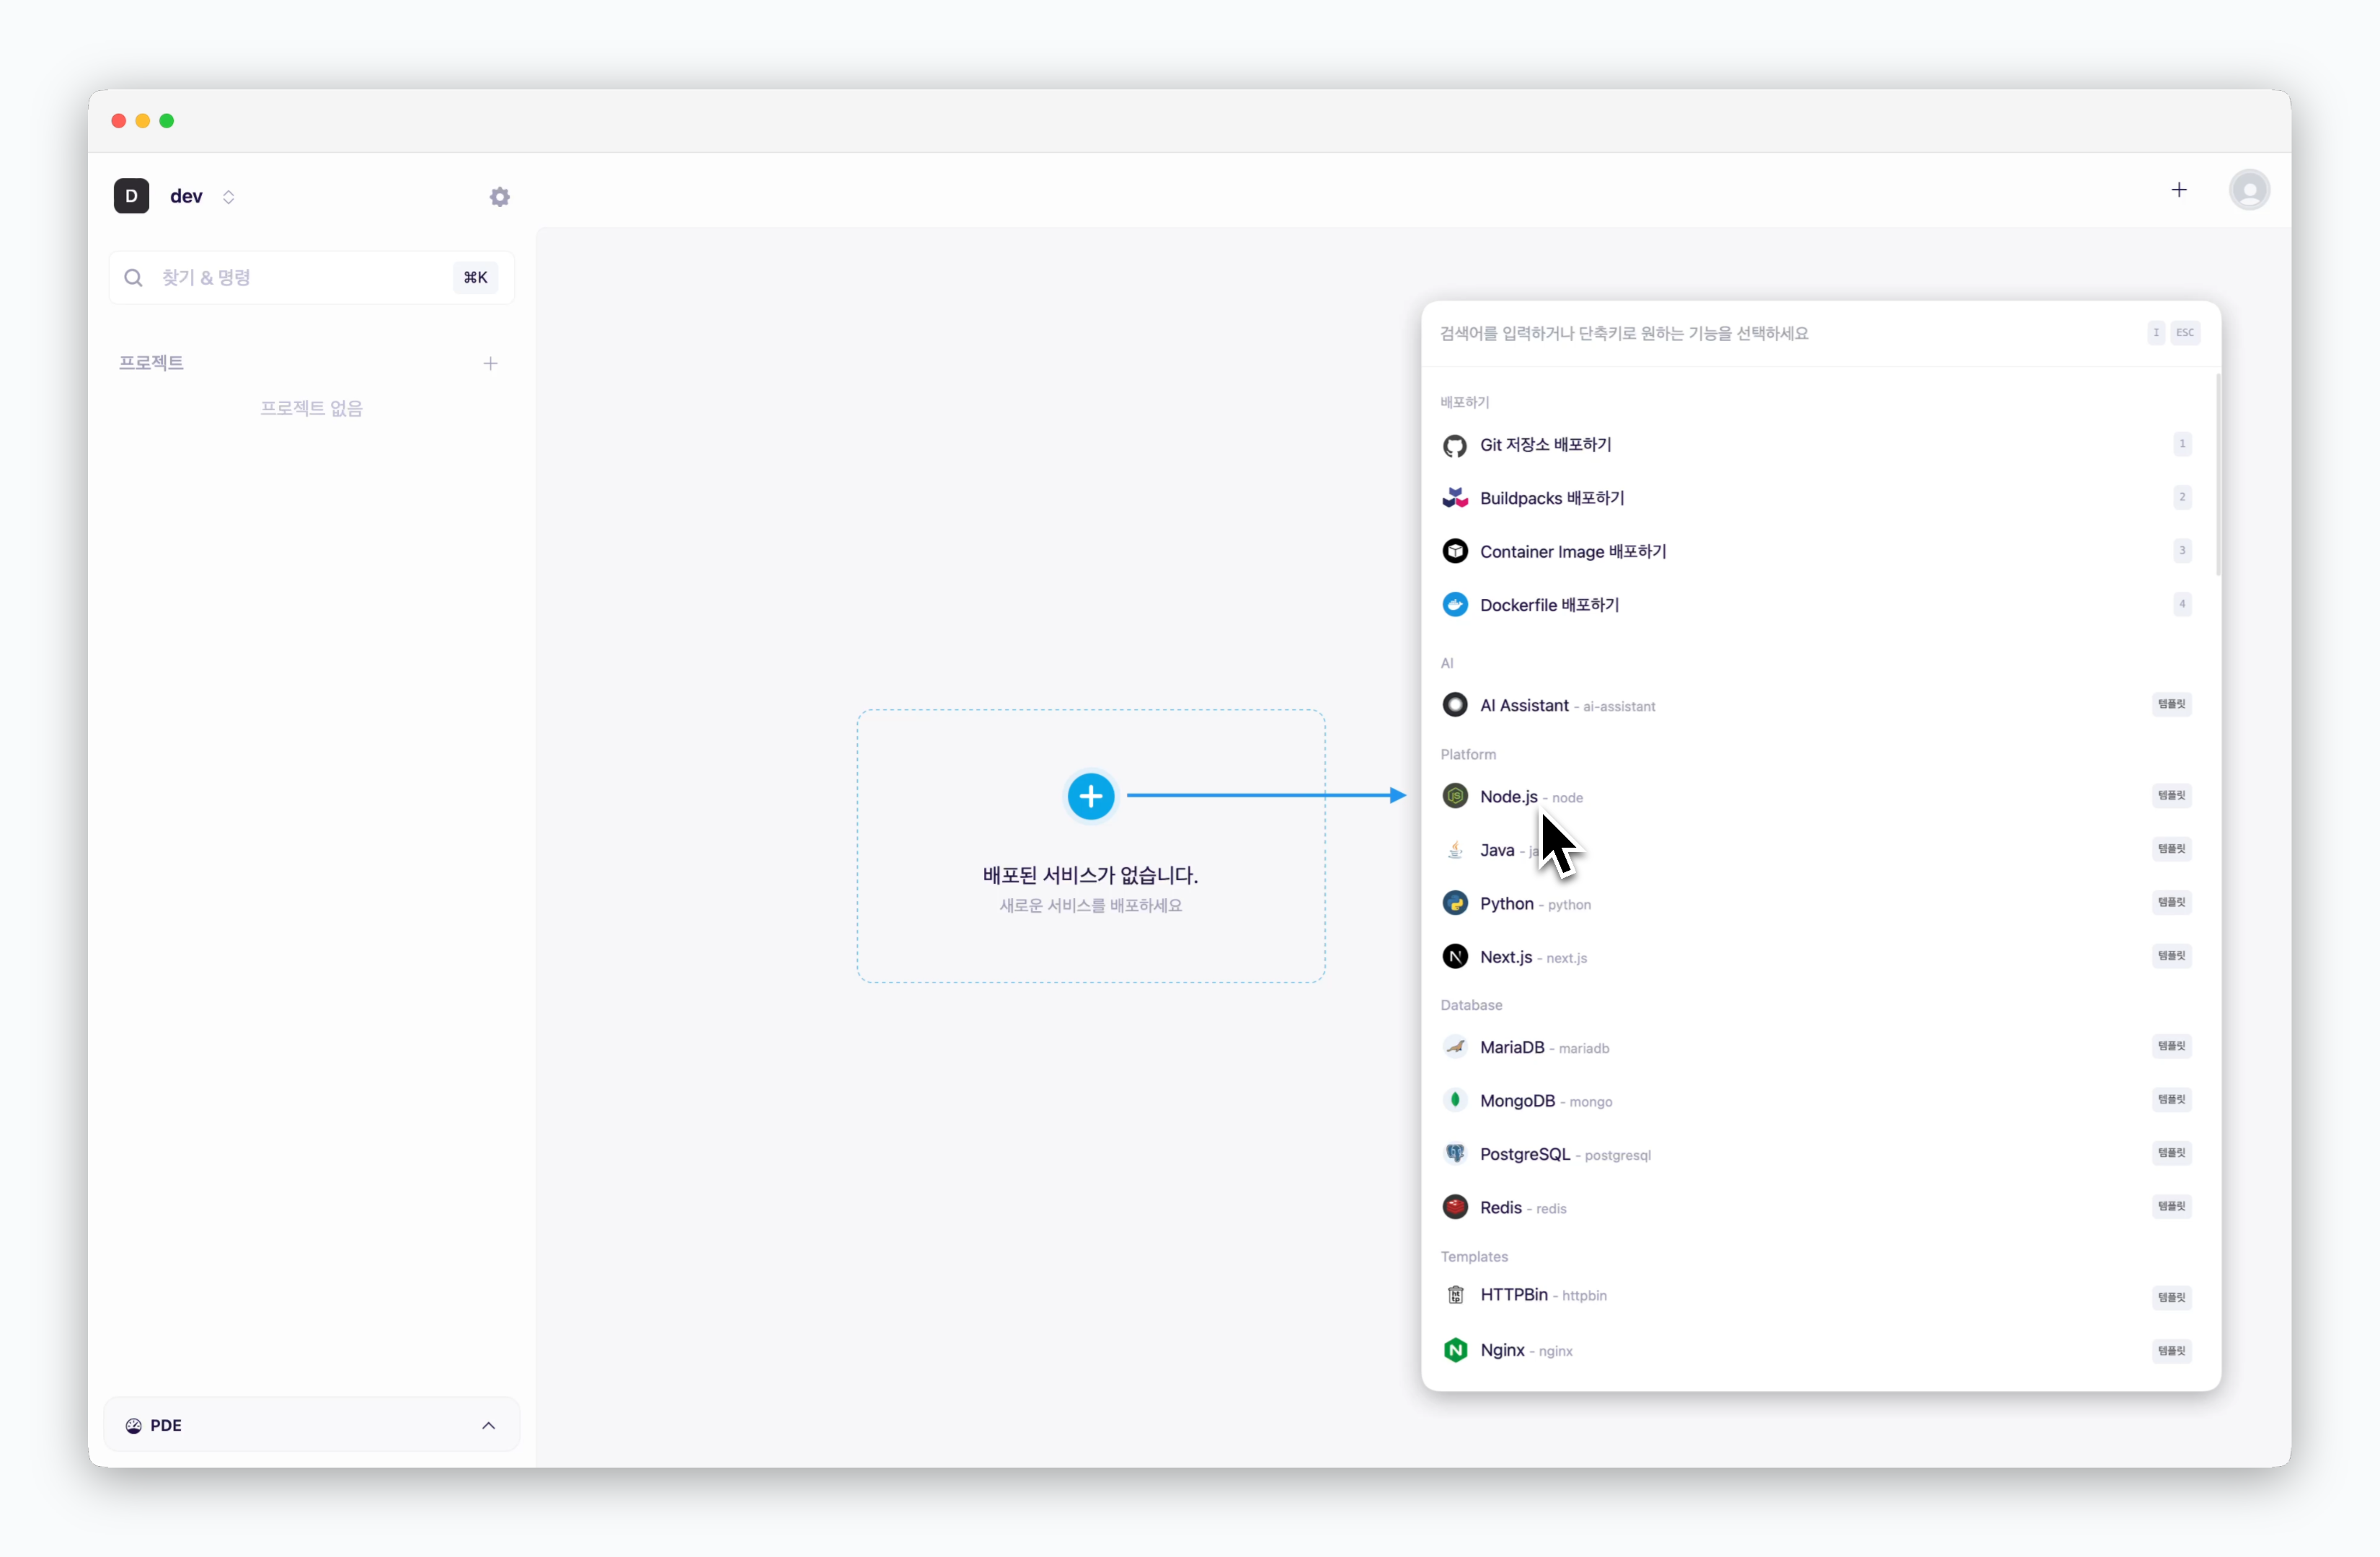 > 대시보드의 클릭 또는 `⌘ + K` 로 생성된 배포창에서 **Node.js** 템플릿을 선택하세요.
## 저장소 선택
> 대시보드의 클릭 또는 `⌘ + K` 로 생성된 배포창에서 **Node.js** 템플릿을 선택하세요.
## 저장소 선택
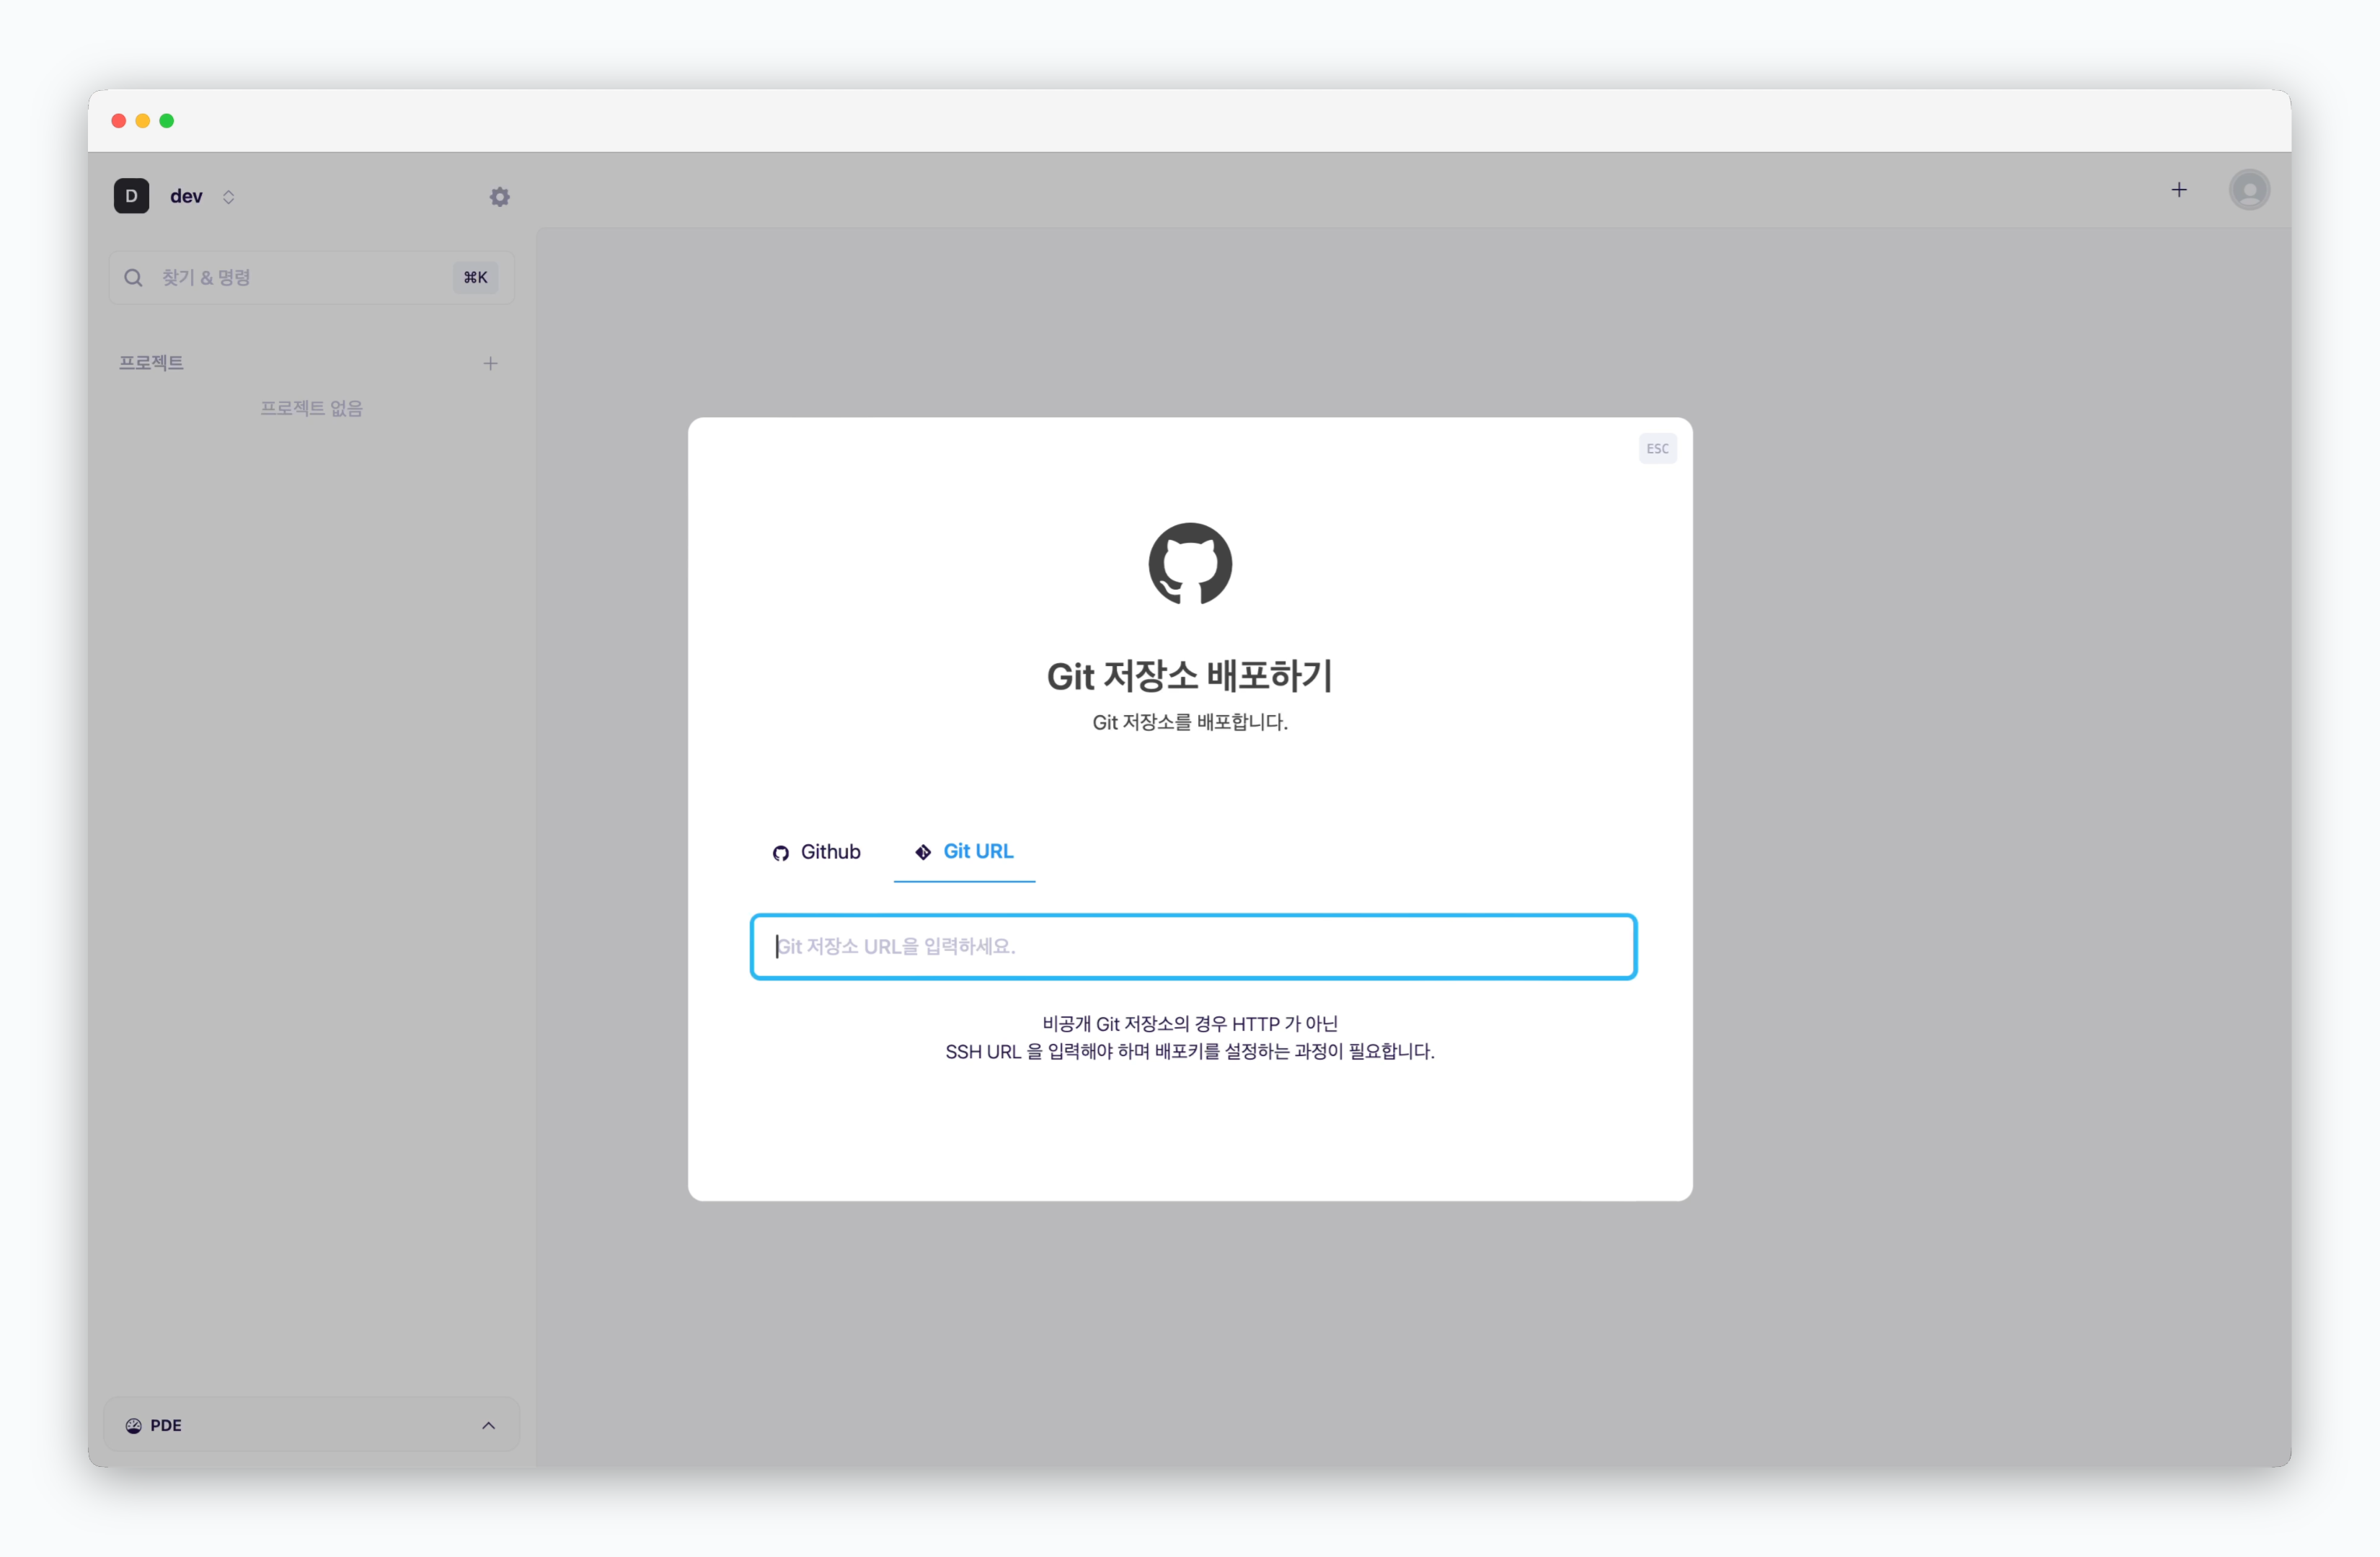 > 이어지는 화면에서 아래의 공개 저장소의 URL을 입력하거나, 연동된 GitHub 계정의 저장소를 선택하세요.
```
https://github.com/cloudtype-examples/node-express.git
```
## 설정과 배포
> 이어지는 화면에서 아래의 공개 저장소의 URL을 입력하거나, 연동된 GitHub 계정의 저장소를 선택하세요.
```
https://github.com/cloudtype-examples/node-express.git
```
## 설정과 배포
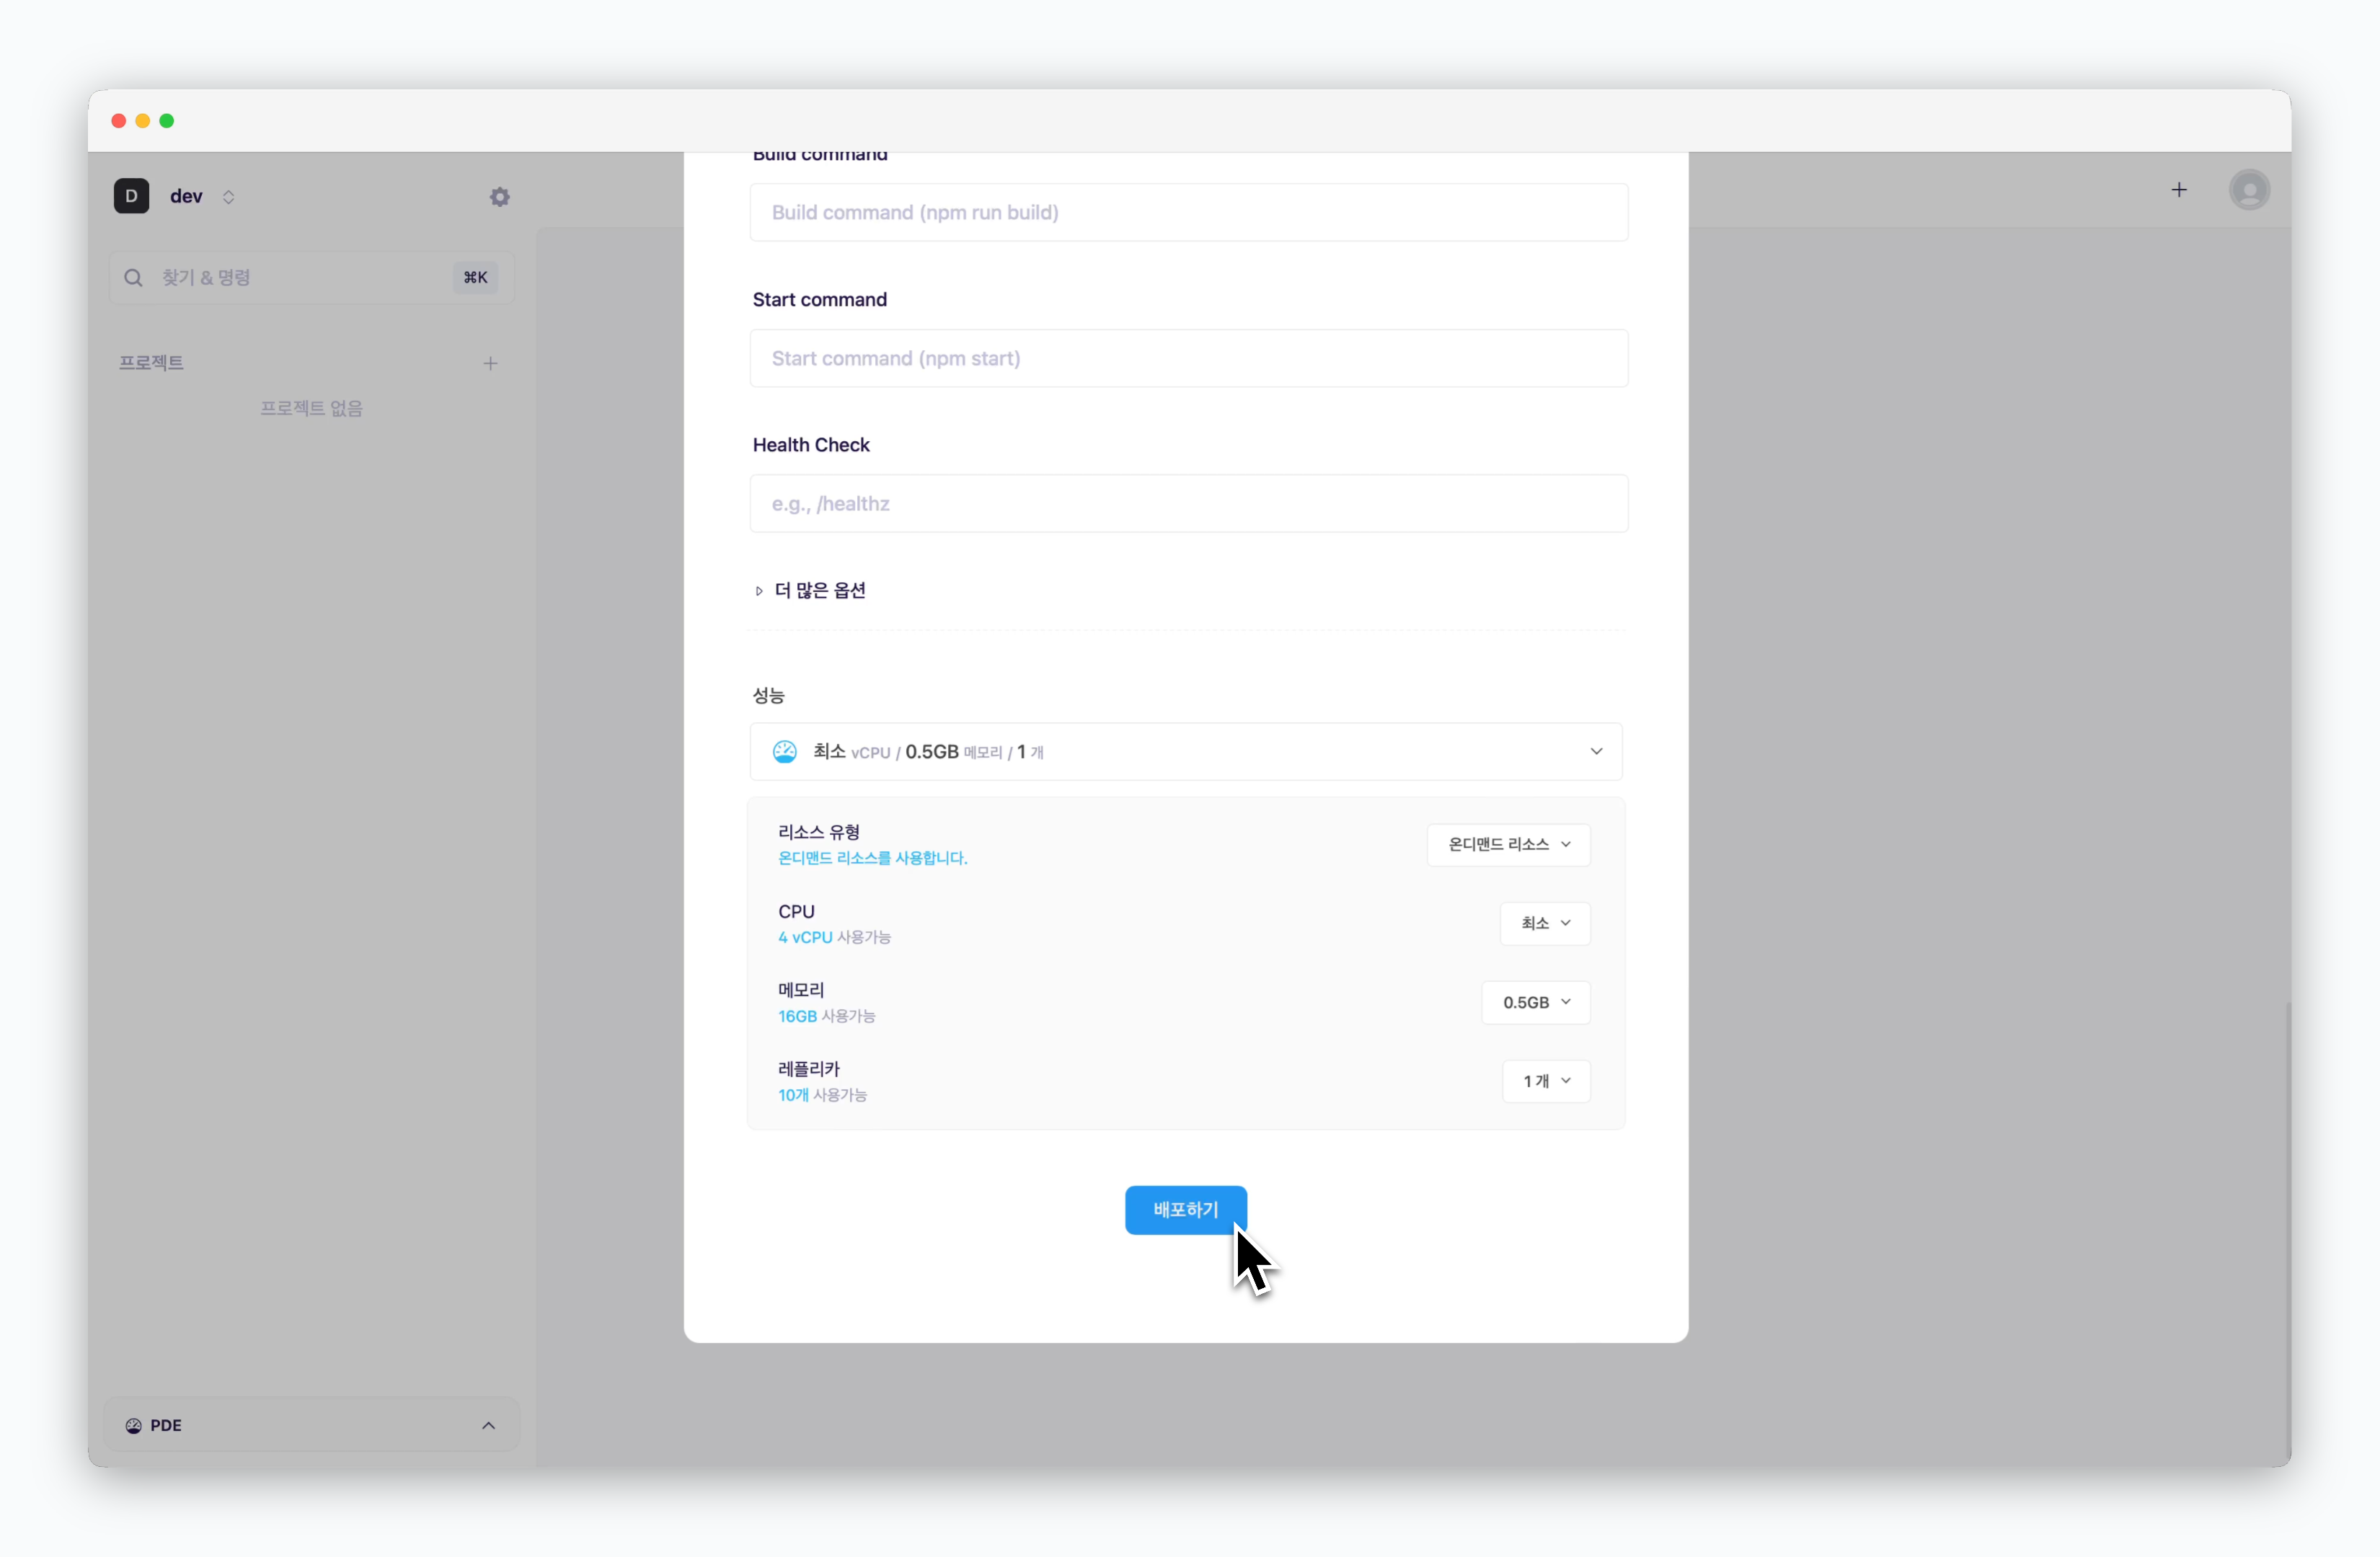 > 공개 저장소의 URL을 입력한 경우 기본 설정값을 변경하지 않고 하단부의 `배포하기`를 클릭하세요.
GitHub 계정의 저장소를 선택한 경우, 설정값 입력이 필요합니다. 배포 설정에 관한 자세한 내용은 [ale에서 배포하기 페이지](/ko/developers/deploy#2)를 참고하세요.
## 배포된 서비스에 접속
> 공개 저장소의 URL을 입력한 경우 기본 설정값을 변경하지 않고 하단부의 `배포하기`를 클릭하세요.
GitHub 계정의 저장소를 선택한 경우, 설정값 입력이 필요합니다. 배포 설정에 관한 자세한 내용은 [ale에서 배포하기 페이지](/ko/developers/deploy#2)를 참고하세요.
## 배포된 서비스에 접속
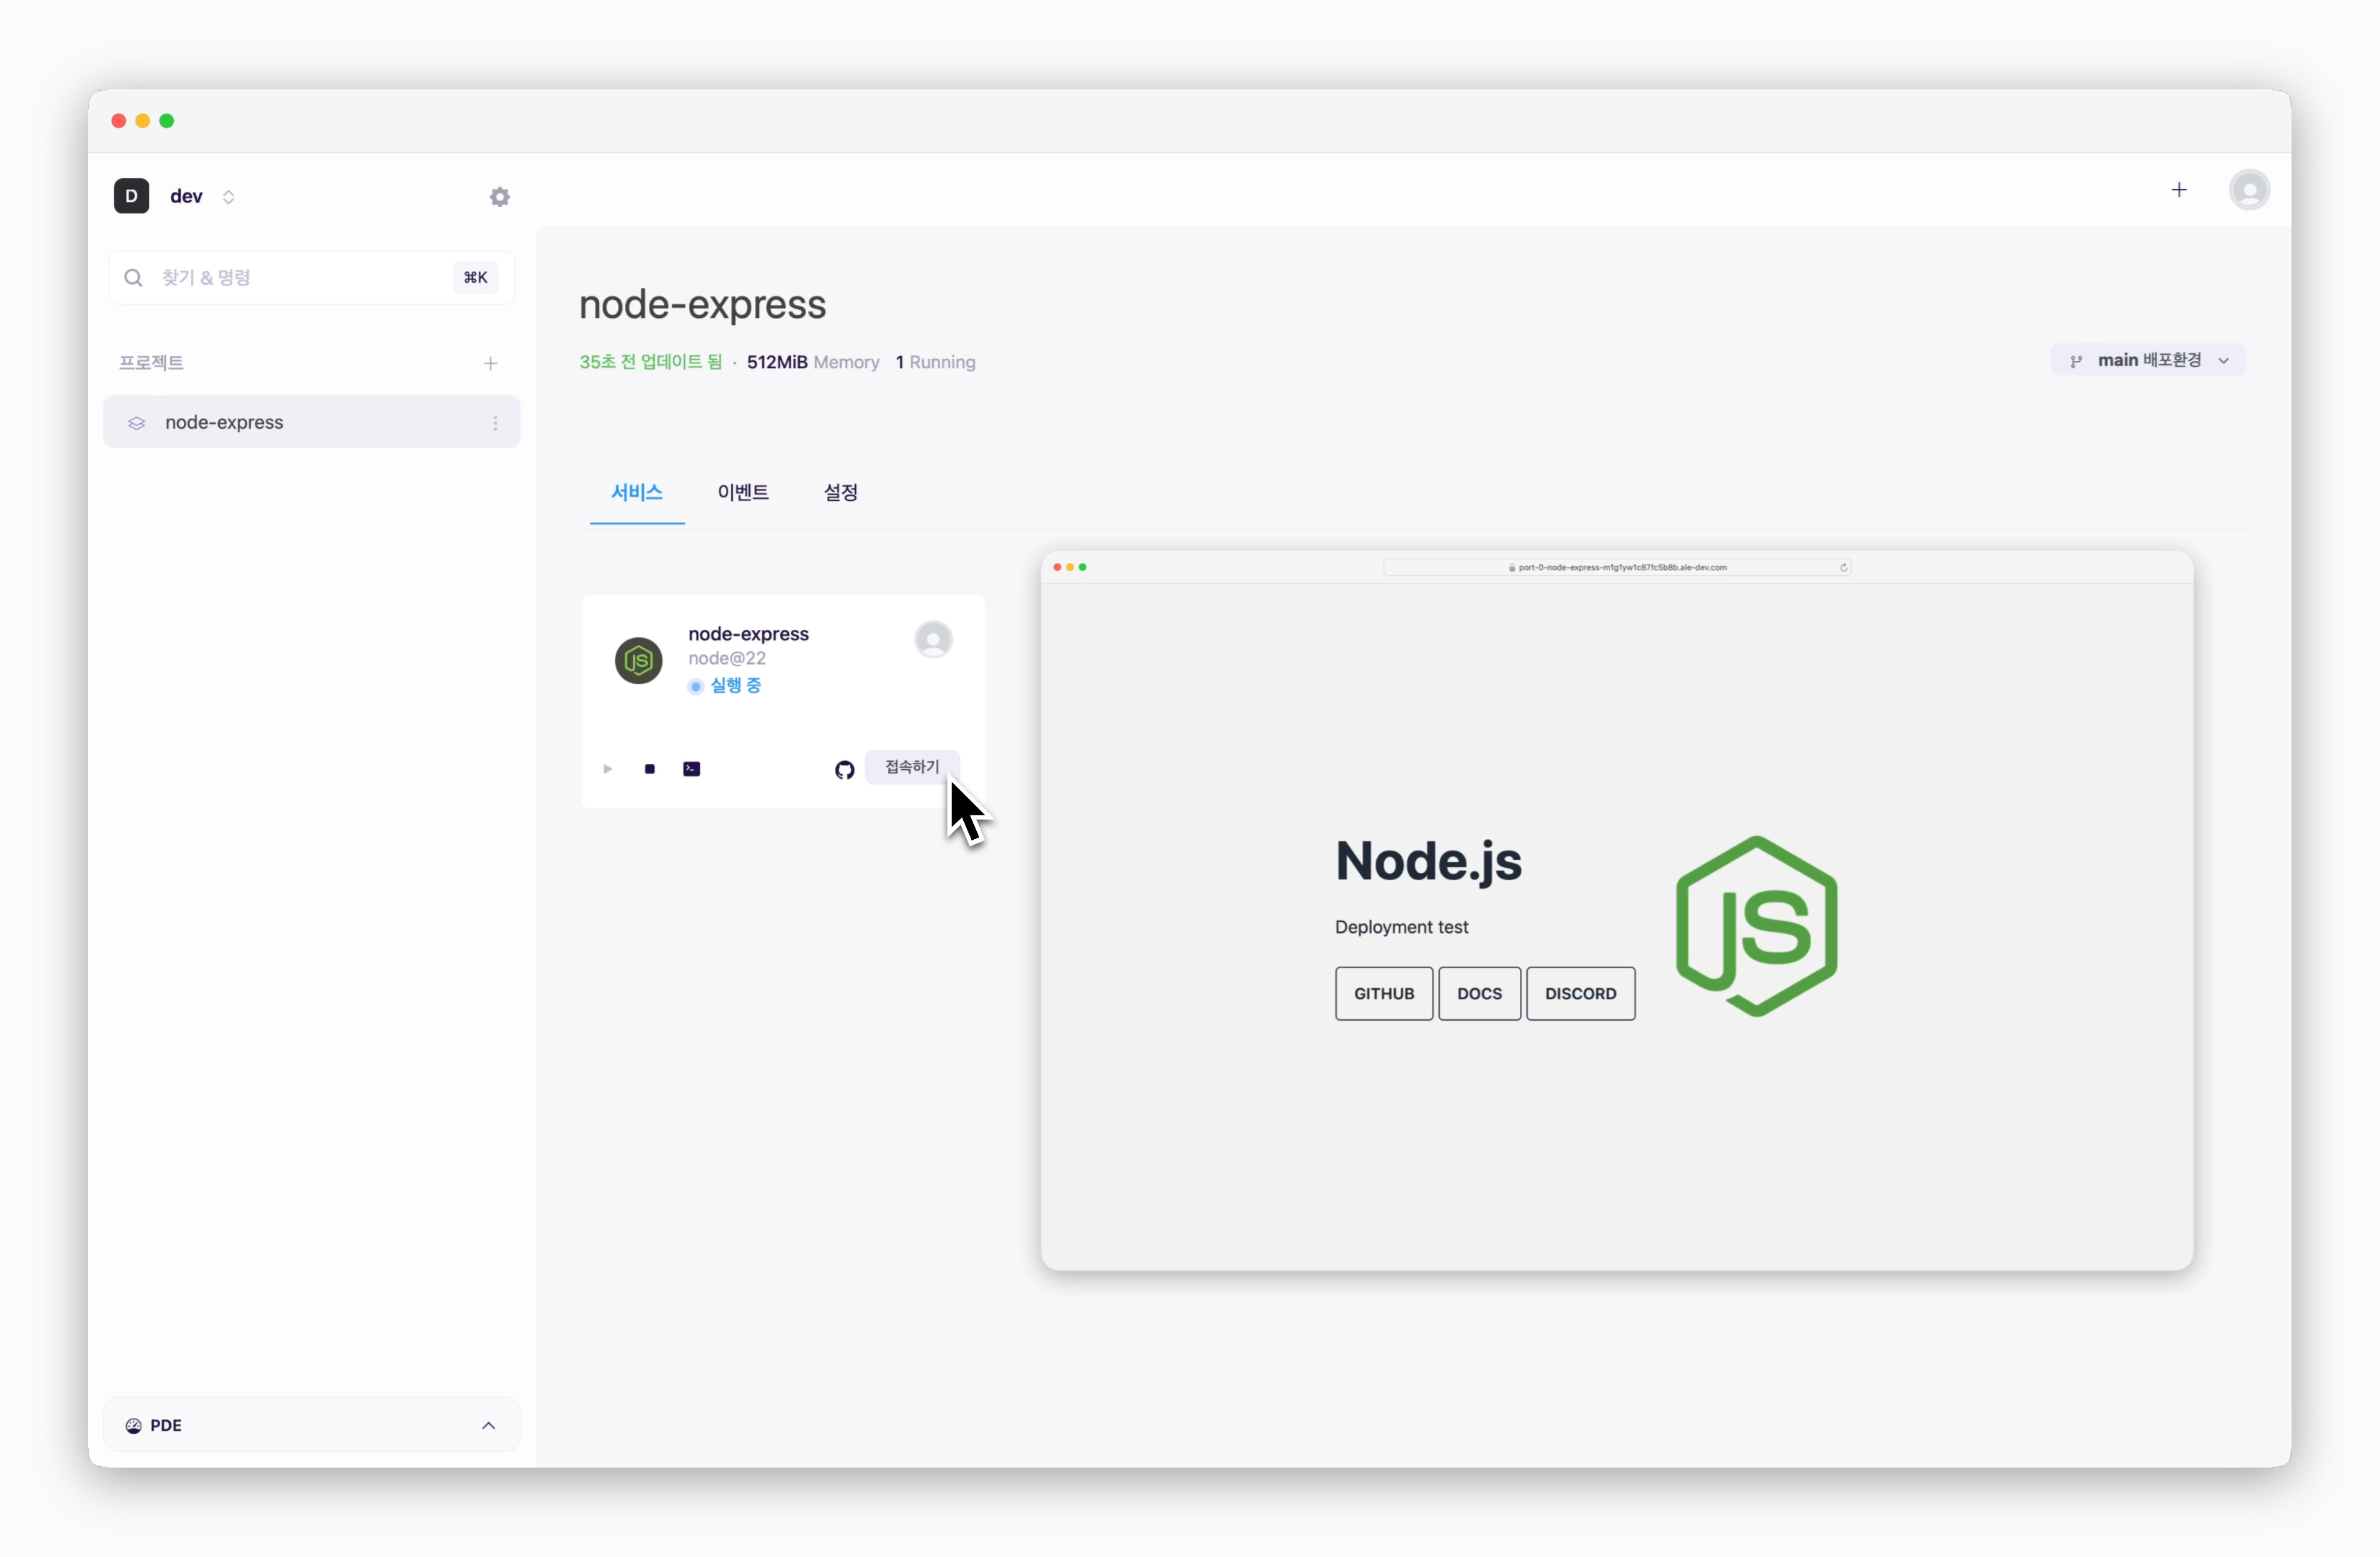 > 배포가 완료된 후 우측의 `접속하기`를 클릭하면, 연결된 프리뷰 도메인으로 서비스에 접속할 수 있습니다.