Node.js version 20 or higher is required to use
ale.Cluster Setup
Docker Desktop
Docker Desktop
- Visit the Docker Desktop website and download the installation file that matches your OS and architecture. After completing the installation, verify that Docker was installed correctly by entering the following command in your terminal:
Apply & restart at the bottom.
OrbStack
OrbStack
- Run the following command on macOS with HomeBrew installed:
Apply at the bottom.
kind
kind
kind requires go version 1.16 or higher to be installed.
Download and install the appropriate file for your operating system from this page, then run the following command to add go to your shell’s PATH:
- Run the following command in your terminal:
Install and Run ale
By integrating your local environment with GitHub, you can deploy source code from GitHub repositories.
GitHub Integration for Local Environment
GitHub Integration for Local Environment
1. Create GitHub Apps
 1-2. Disable Webhook

2. Get GitHub App Information


After logging into GitHub, go to Settings > Developer Settings > GitHub Apps and click New GitHub App.1-1. Provide Basic Information
Enter the following information to create your GitHub App:
- GitHub App name: Name for your GitHub App
- Homepage URL
- URL where GitHub OAuth will be applied
- Local access address:
http://localhost:9001
- Callback URL (Add with
Add Callback URL)http://localhost:9009/oauth/github/callbackhttp://localhost:9009/oauth/github/connect/callback
The GitHub App name entered here will be used when registering GitHub OAuth with
ale.Uncheck Active in the Webhook section to disable it.1-3. Grant Permissions and Create APP
Grant the following permissions in the Permission section and click Create GitHub App to create your APP:
Repository permissions (9)
Repository permissions (9)
- Read and Write
- Actions
- Administration
- Commit statuses
- Contents
- Deployments
- Issues
- Pull requests
- Workflows
- Read-only
- Metadata
Organization permissions (2)
Organization permissions (2)
- Read and Write
- Administration
- Read-only
- Members
Account permissions (1)
Account permissions (1)
- Read-only
- Email addresses
To add GitHub OAuth to ale, you’ll need 4 ID/Key values in addition to the GitHub App Name:
- App ID
- Client ID
- Client Secret
- Private Key
After creating the App with the granted permissions, you can view the App ID and Client ID.2-2. Client Secret
On the same screen, click Generate a new client secret to create and view the Client Secret.
2-3. Private Key
Click Generate a private key at the bottom of the screen to download the pem file.
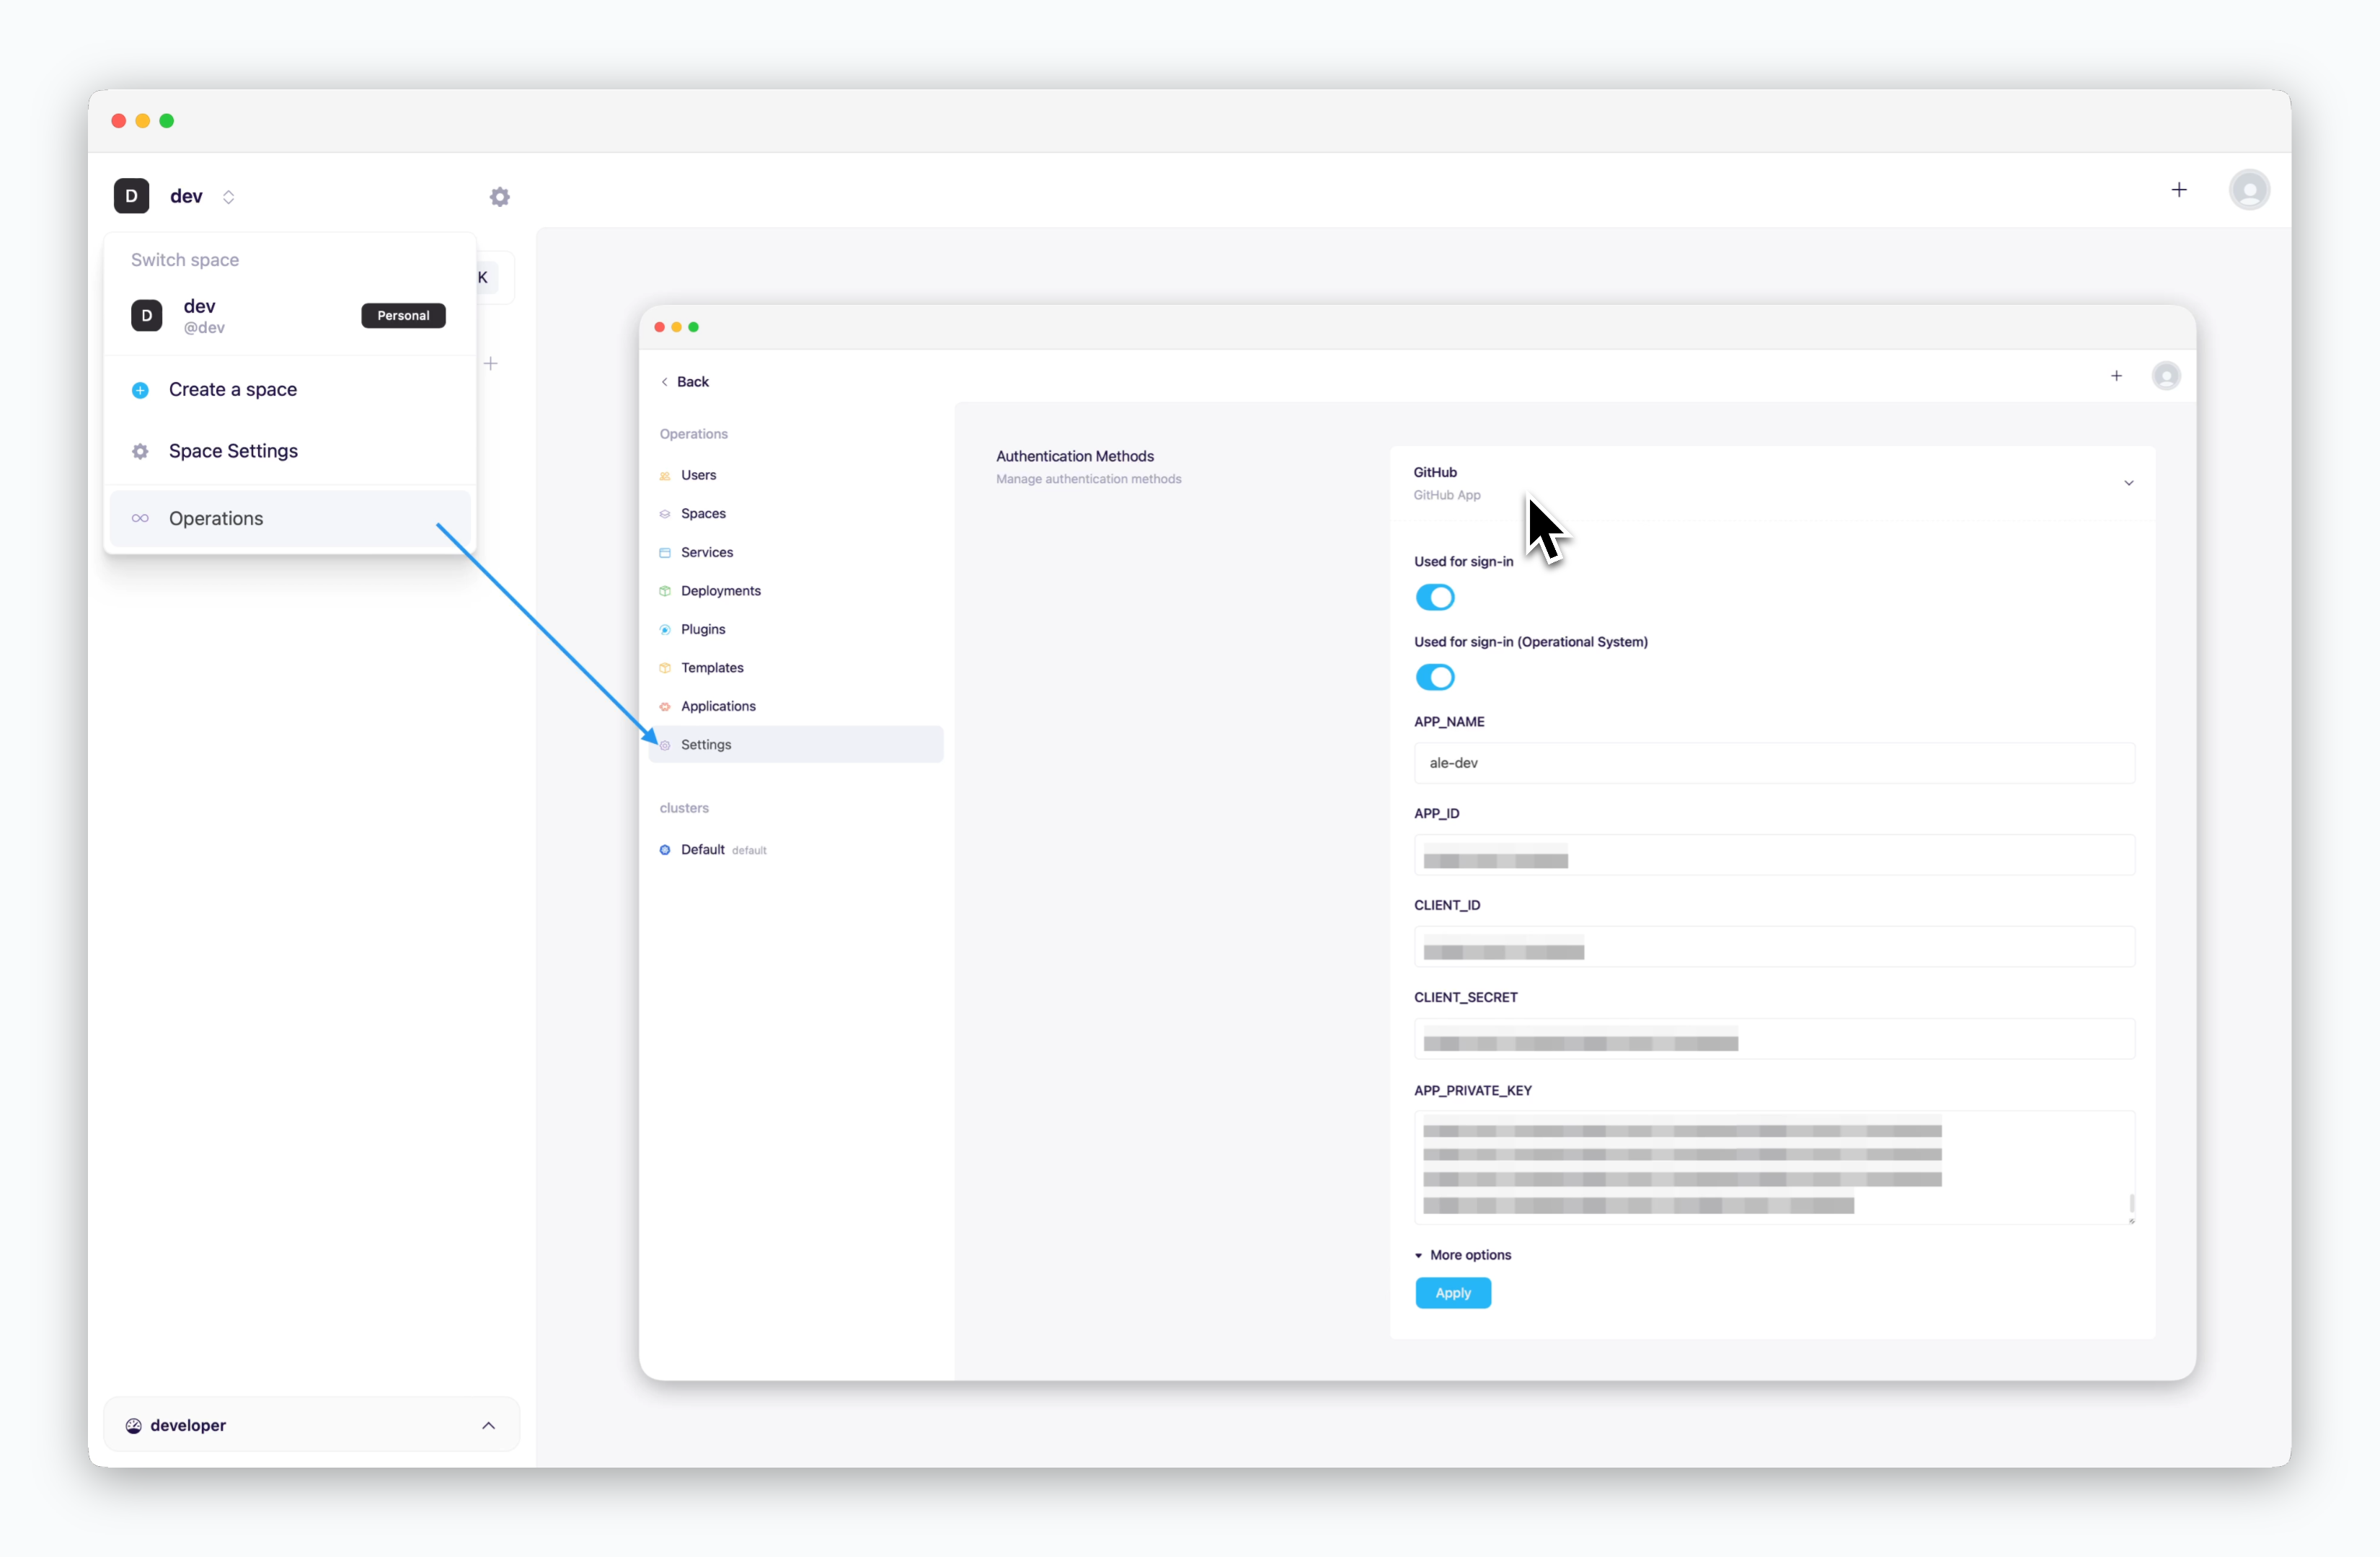
3. Integrate GitHub App in aleEnterhttp://localhost:9001in your browser’s address bar to access the operation system, then go to Settings > Authentication > GitHub dropdown. Enter the values obtained from the previous steps into each field and clickApply.
- APP_NAME: GitHub App name
- APP_ID: App ID
- CLIENT_ID: Client ID
- CLIENT_SECRET: Client secret
- APP_PRIVATE_KEY: Private key pem file value
Access Dashboard
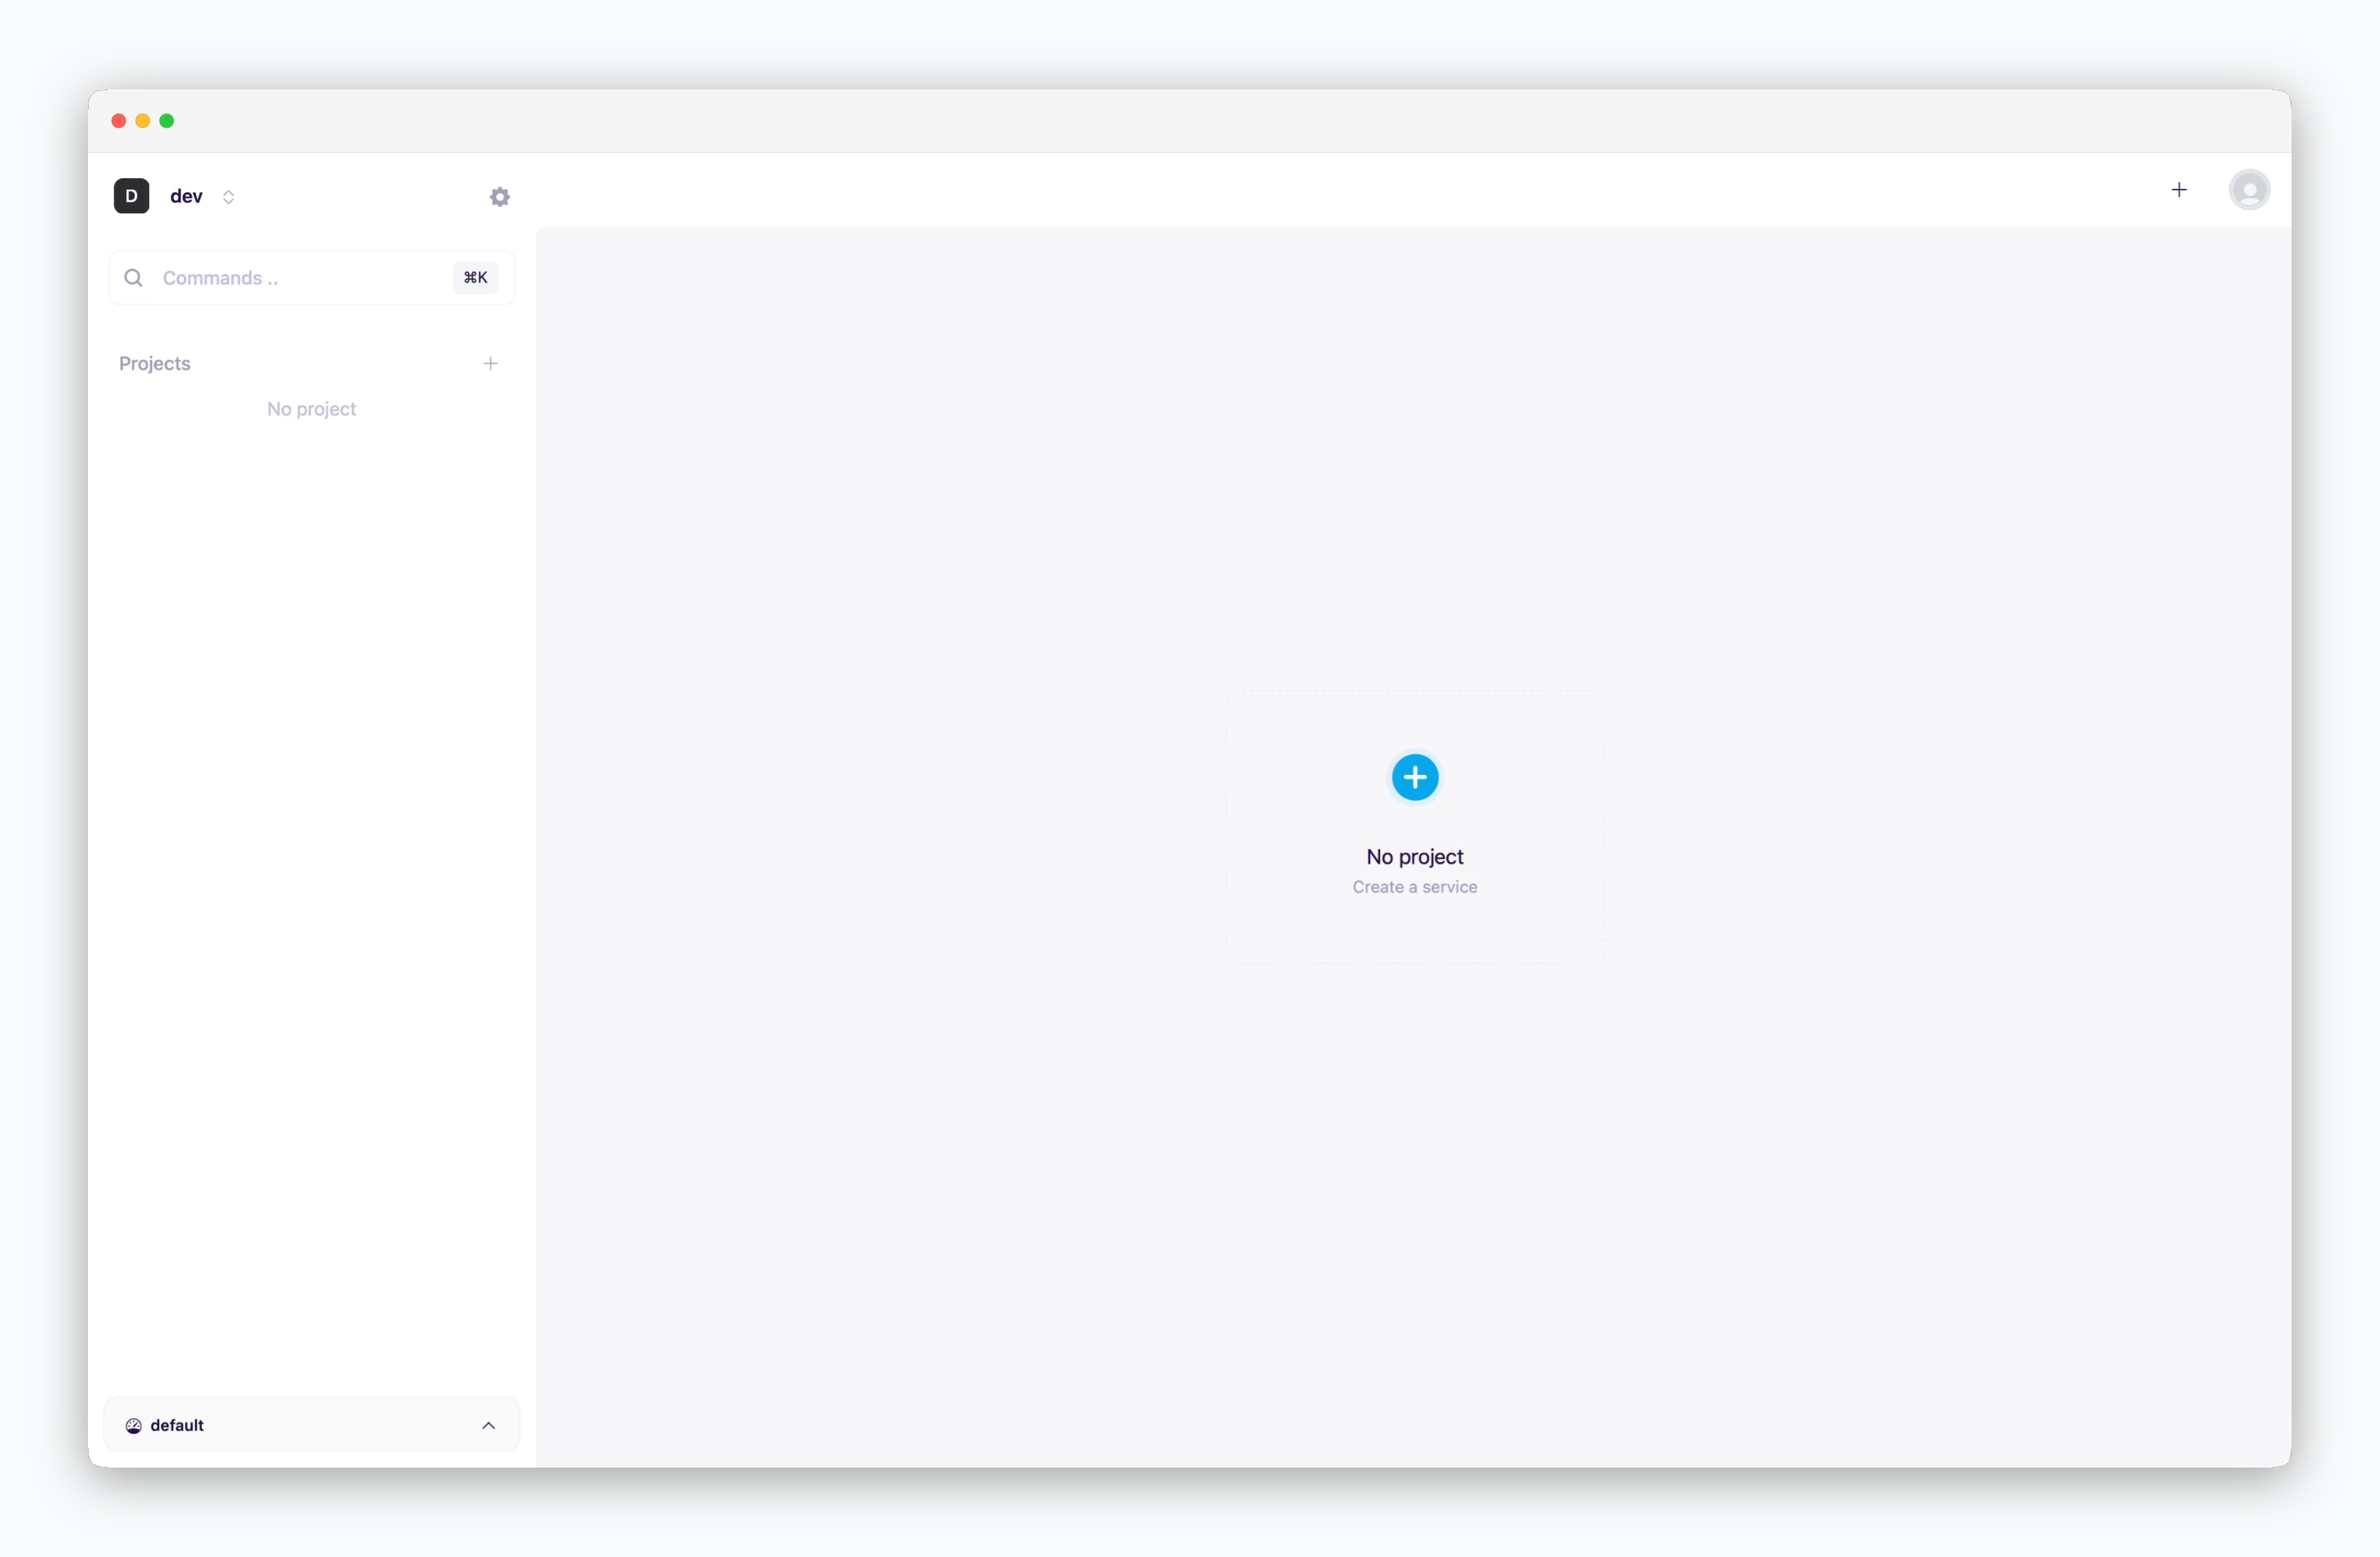
Go tohttp://localhost:9001. On first access, you’ll be connected to the default@devspace.
Accessing the operations system
Accessing the operations system
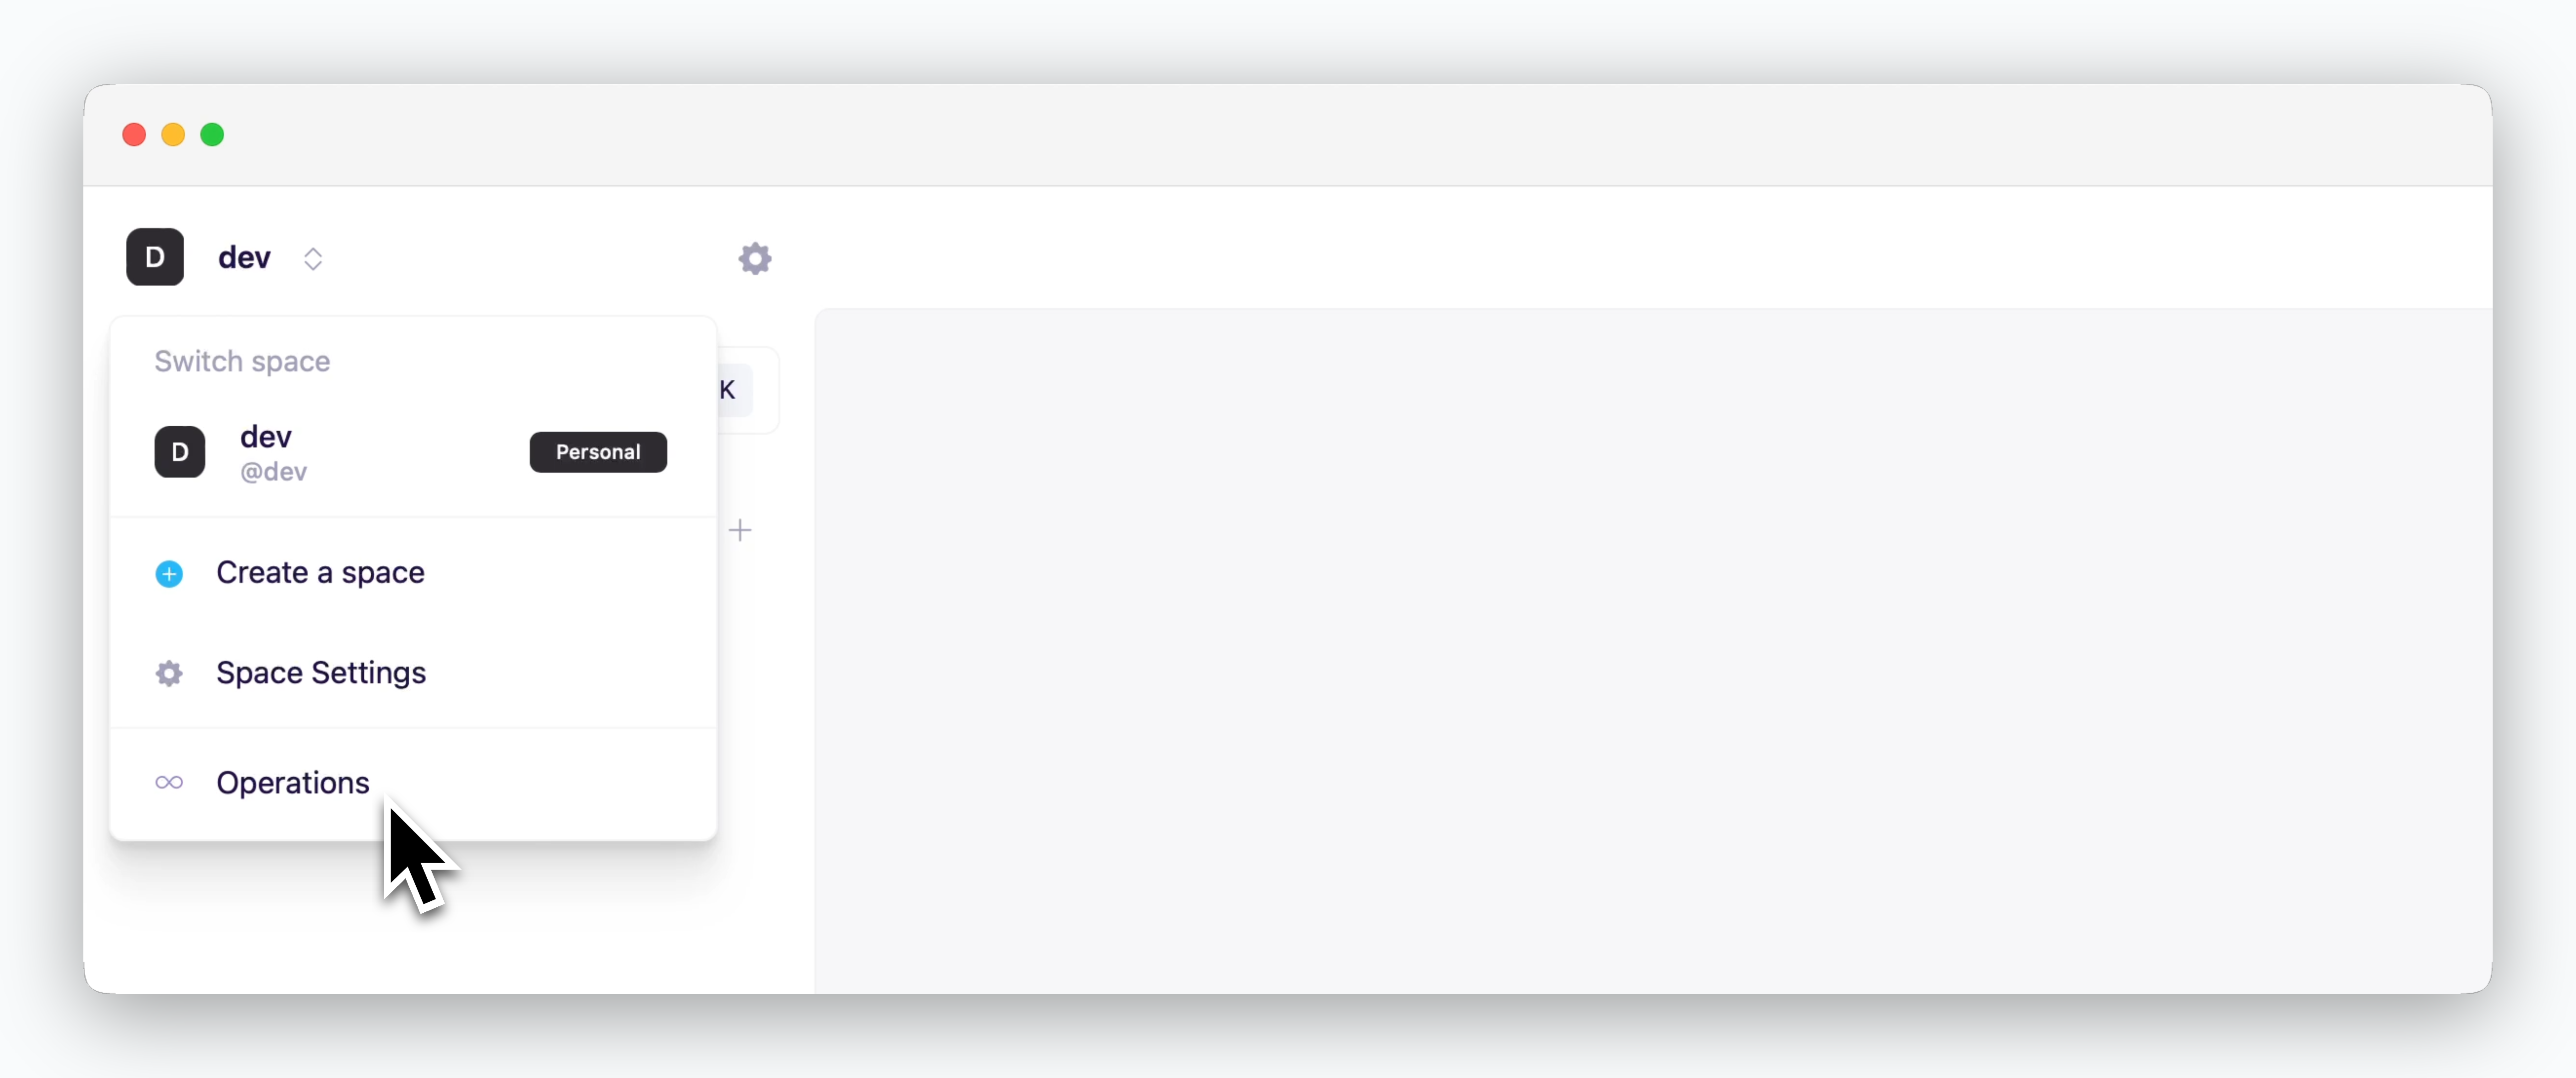
You can access the operation system by clicking the space name in the top left of the dashboard and selecting the operation system.
Deploy
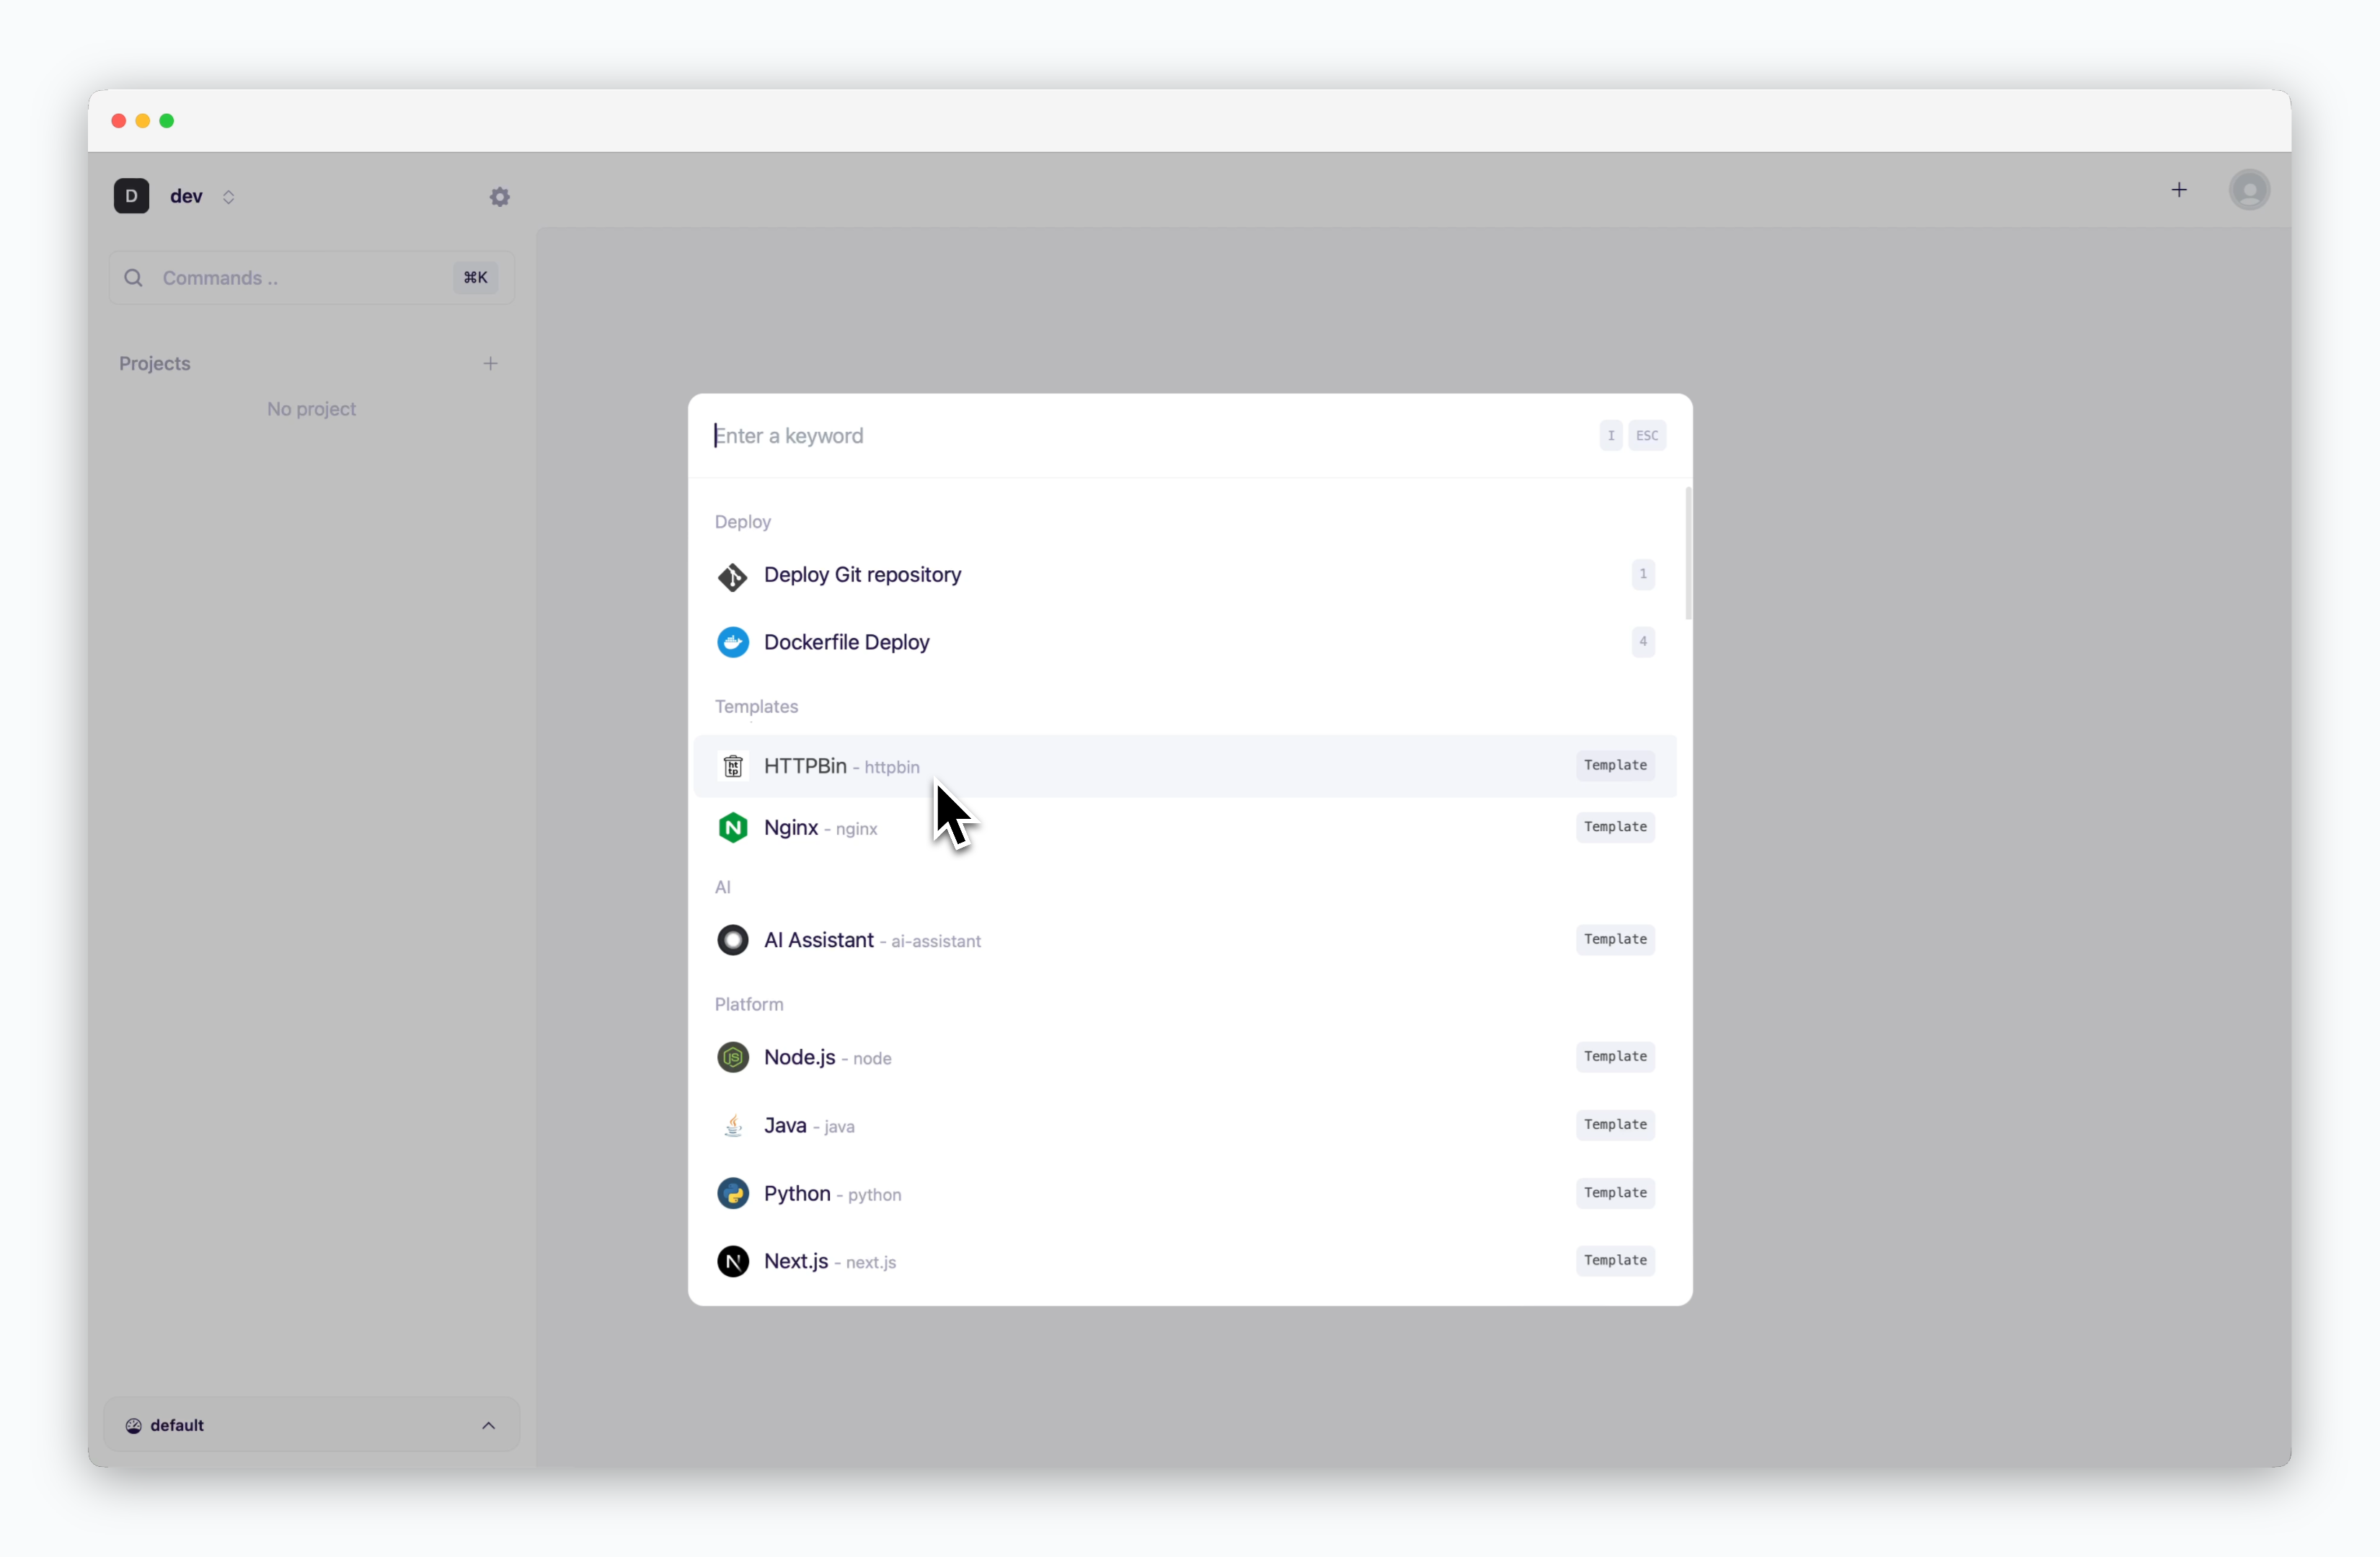
On the dashboard, click or ⌘ + K to open the deployment modal, then select the HTTPBin template.
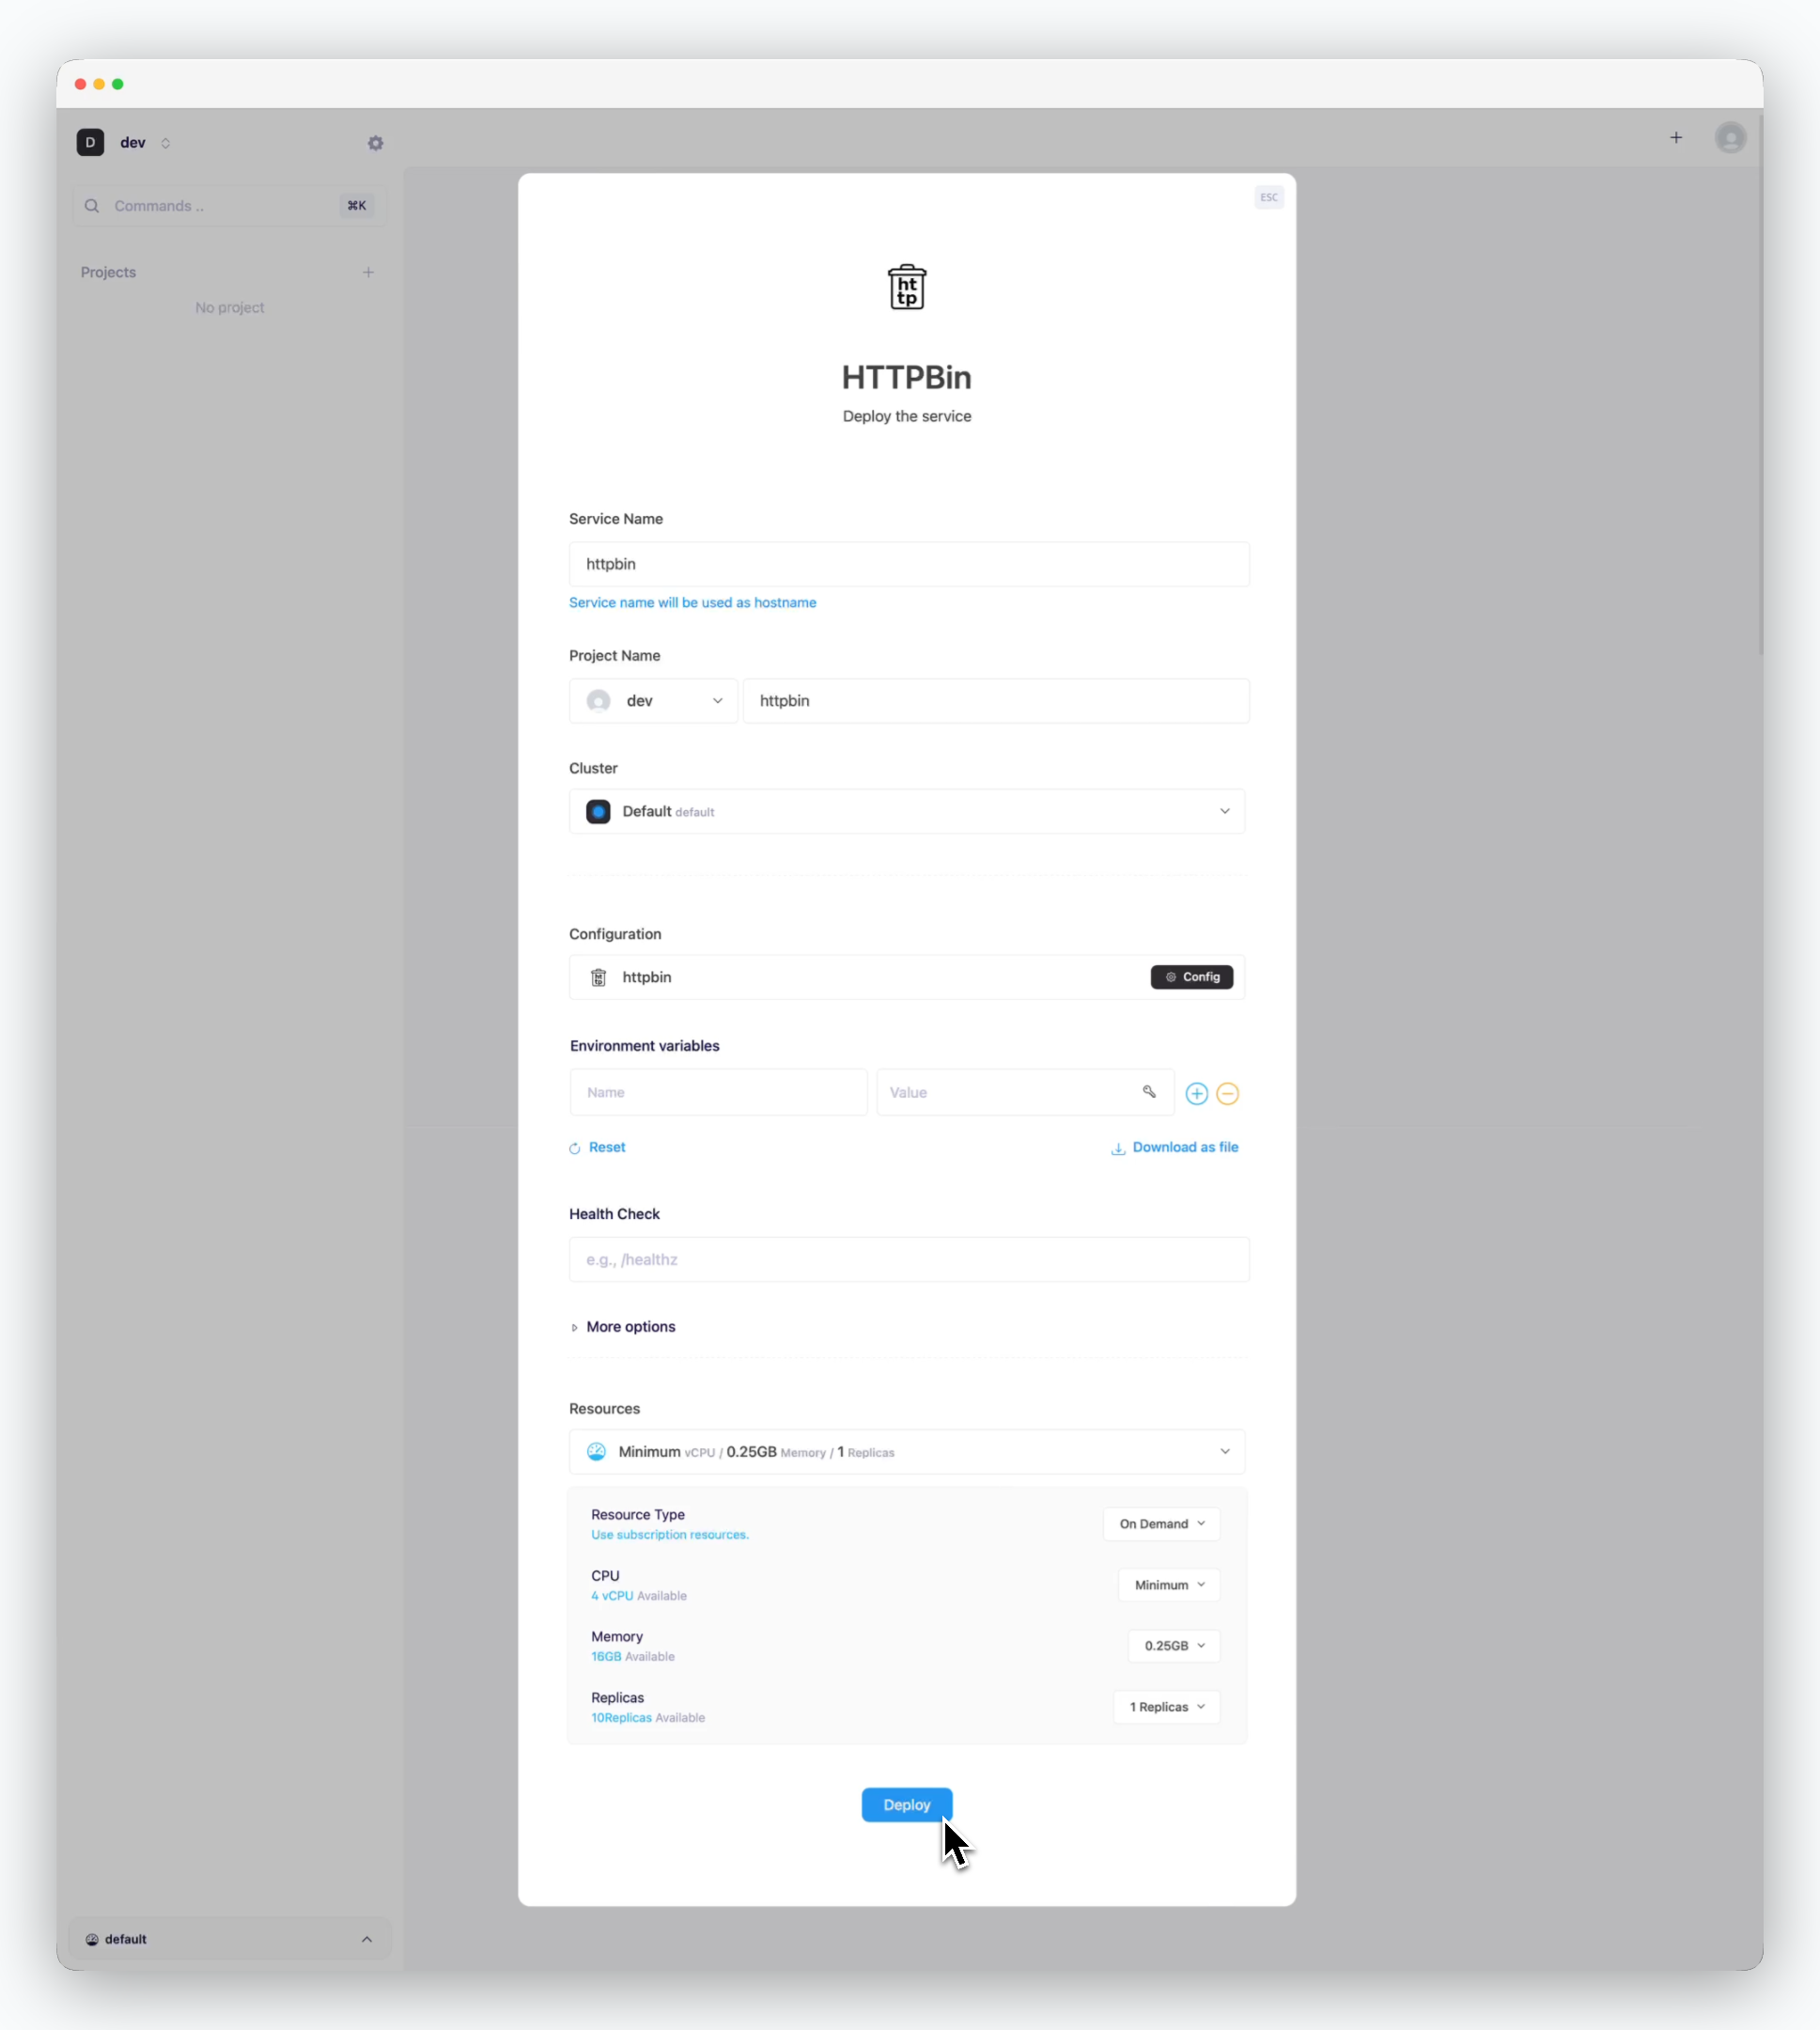
Without changing any settings, click Deploy at the bottom.
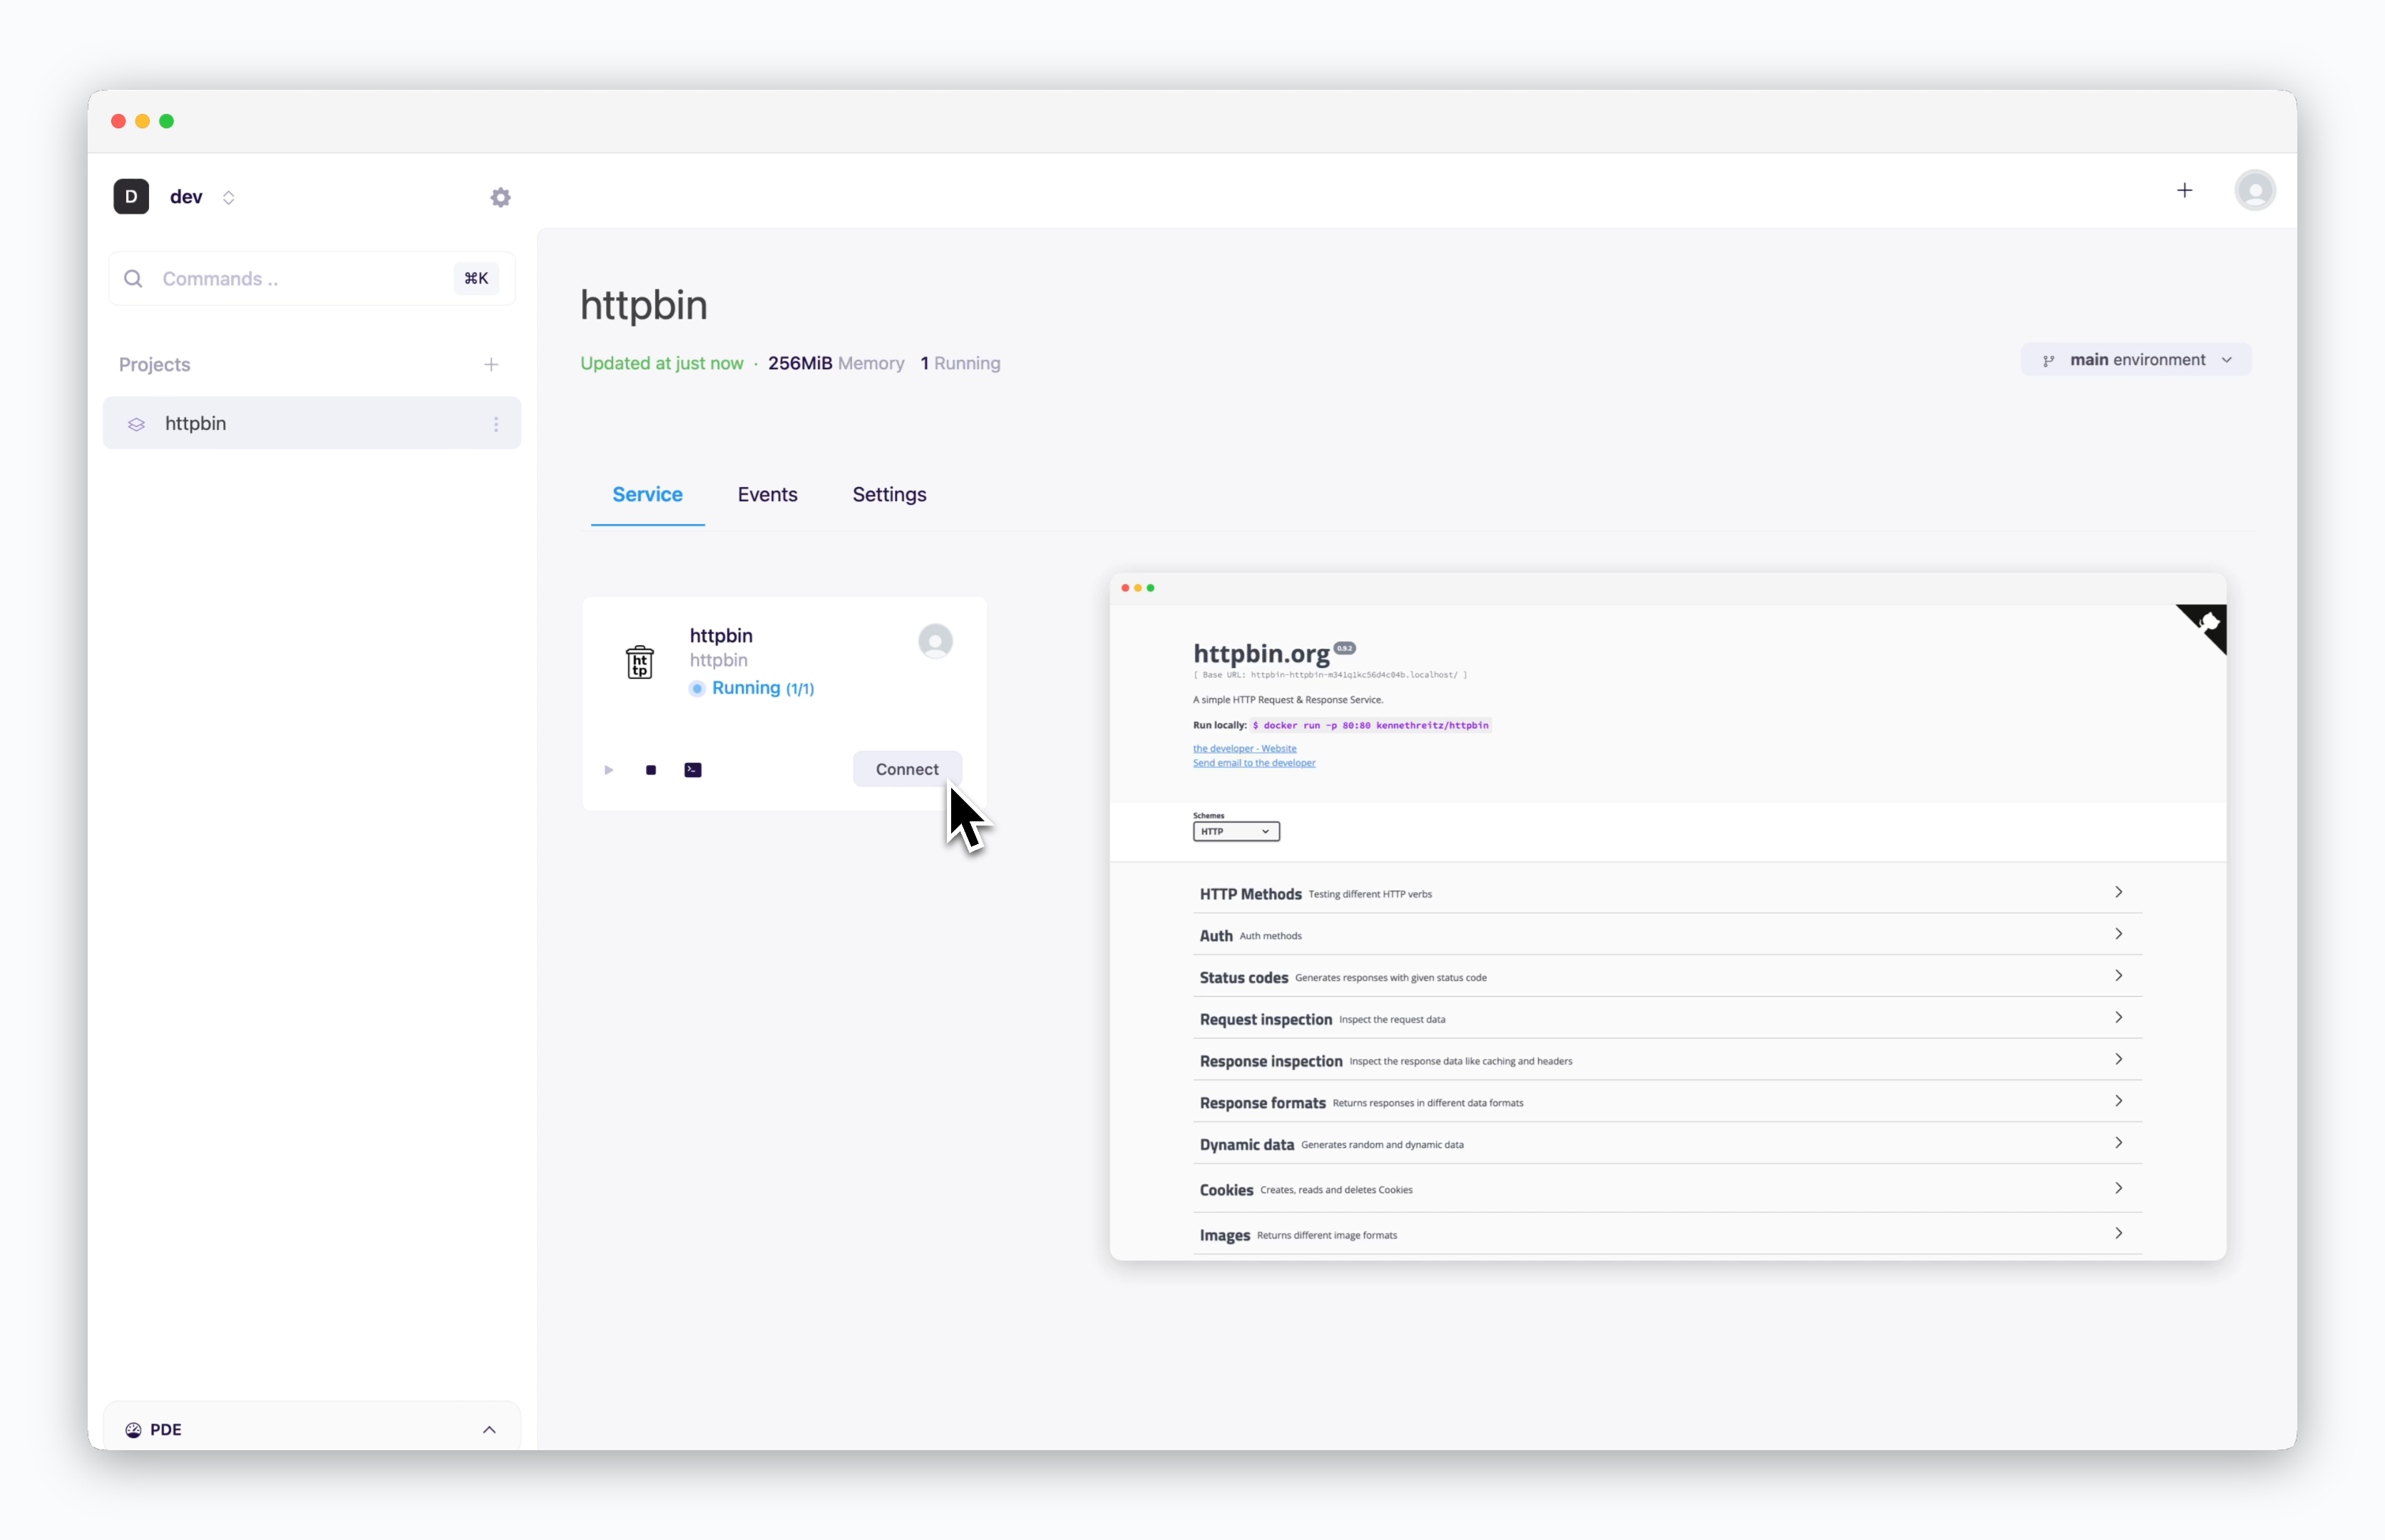
Once deployment is complete, you can access the preview page.