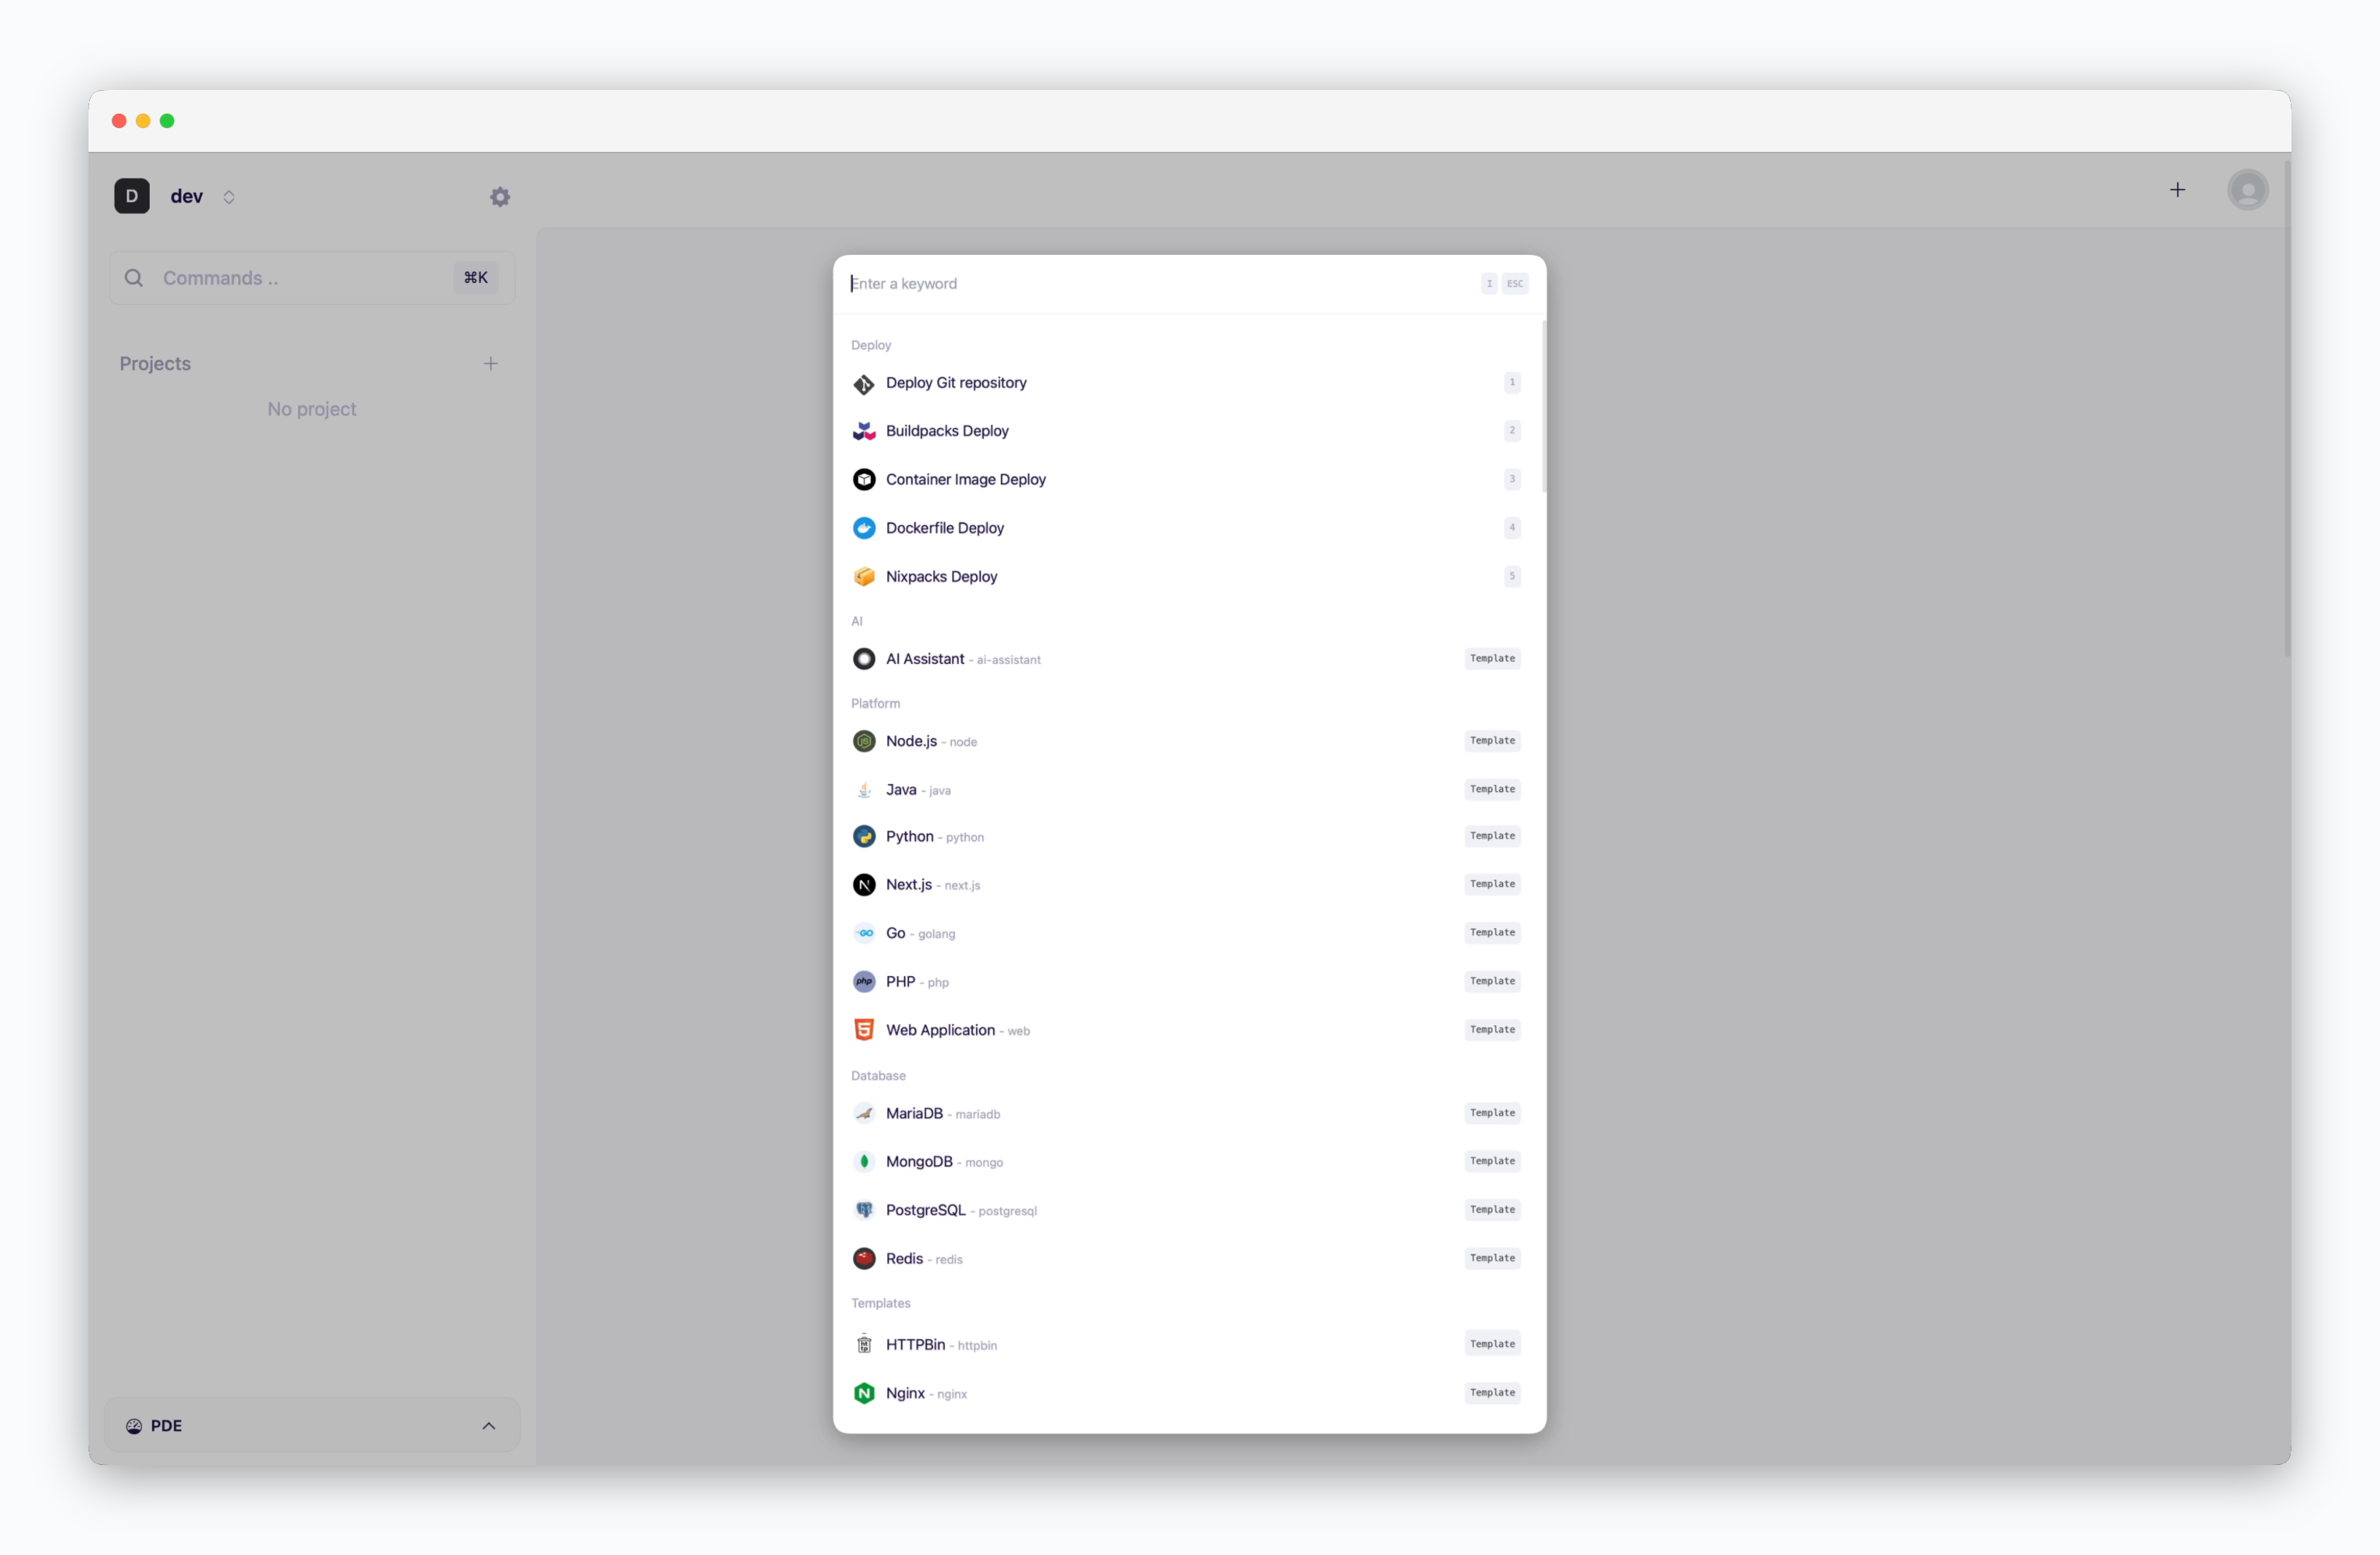
The deployment process starts through the deployment modal, which can be opened via the button in the dashboard or by ⌘ + K.
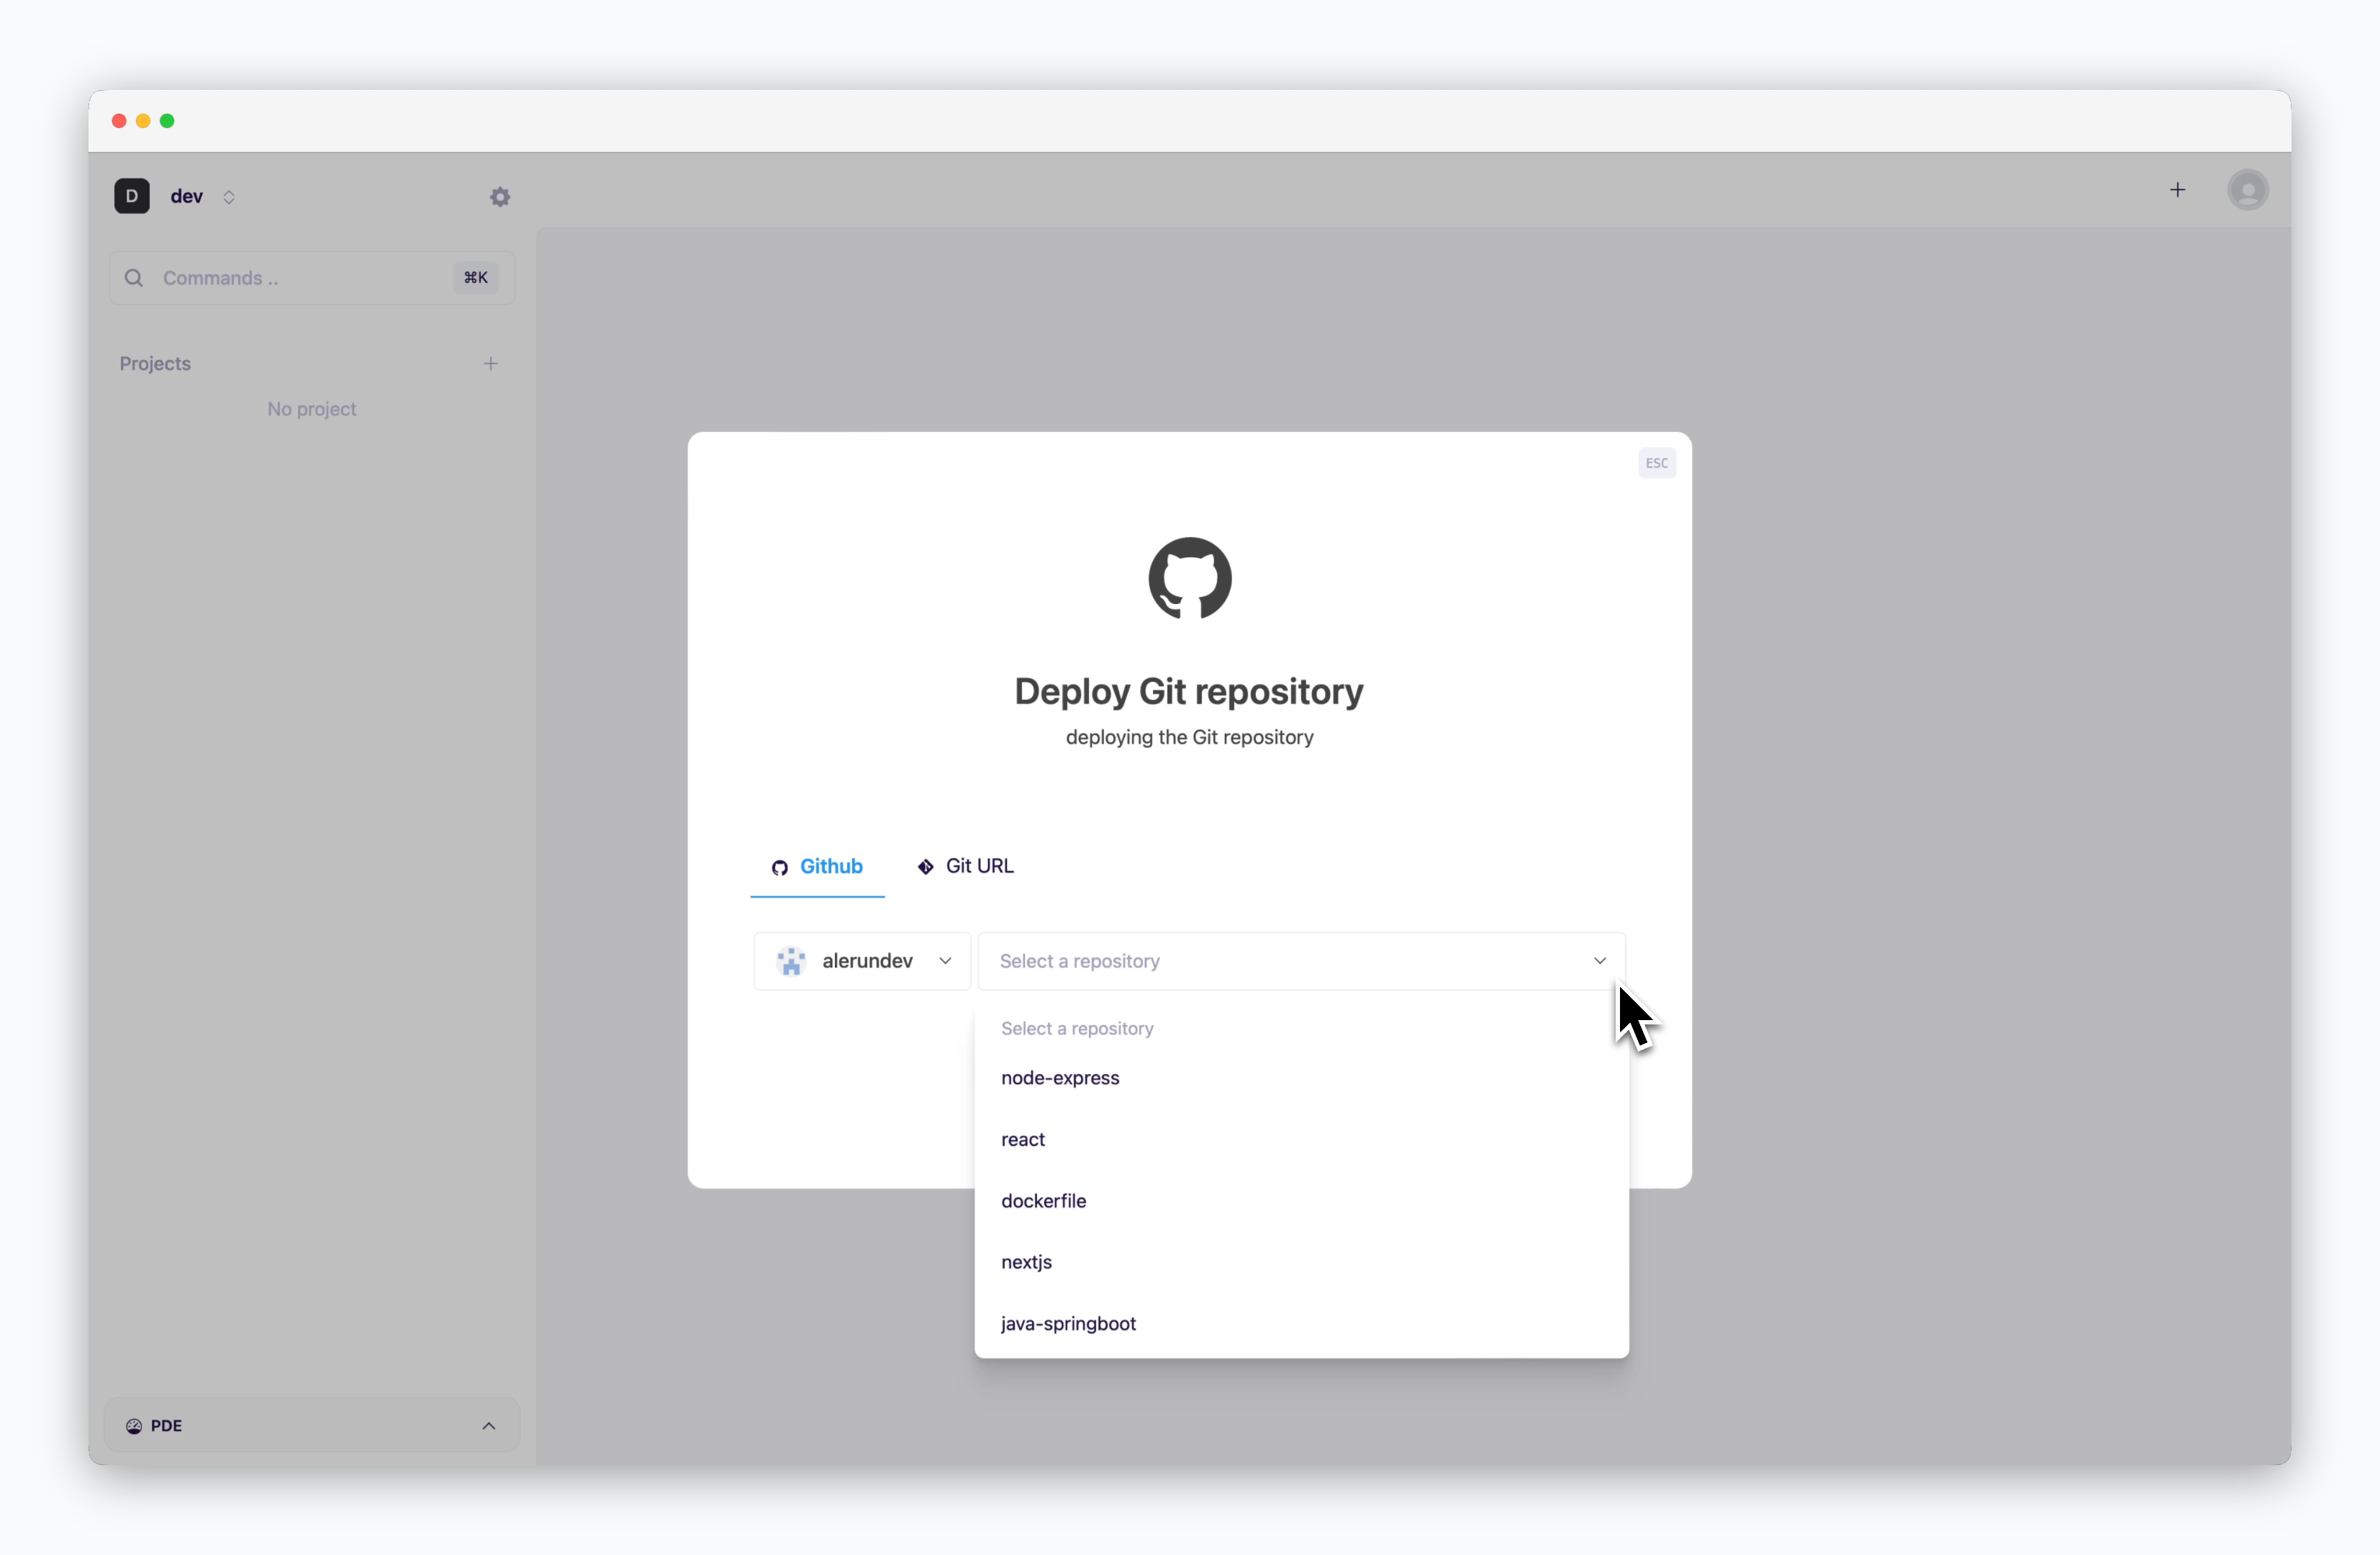
Select Deployment source
Deploy from GitHub Repository
Deploy from GitHub Repository
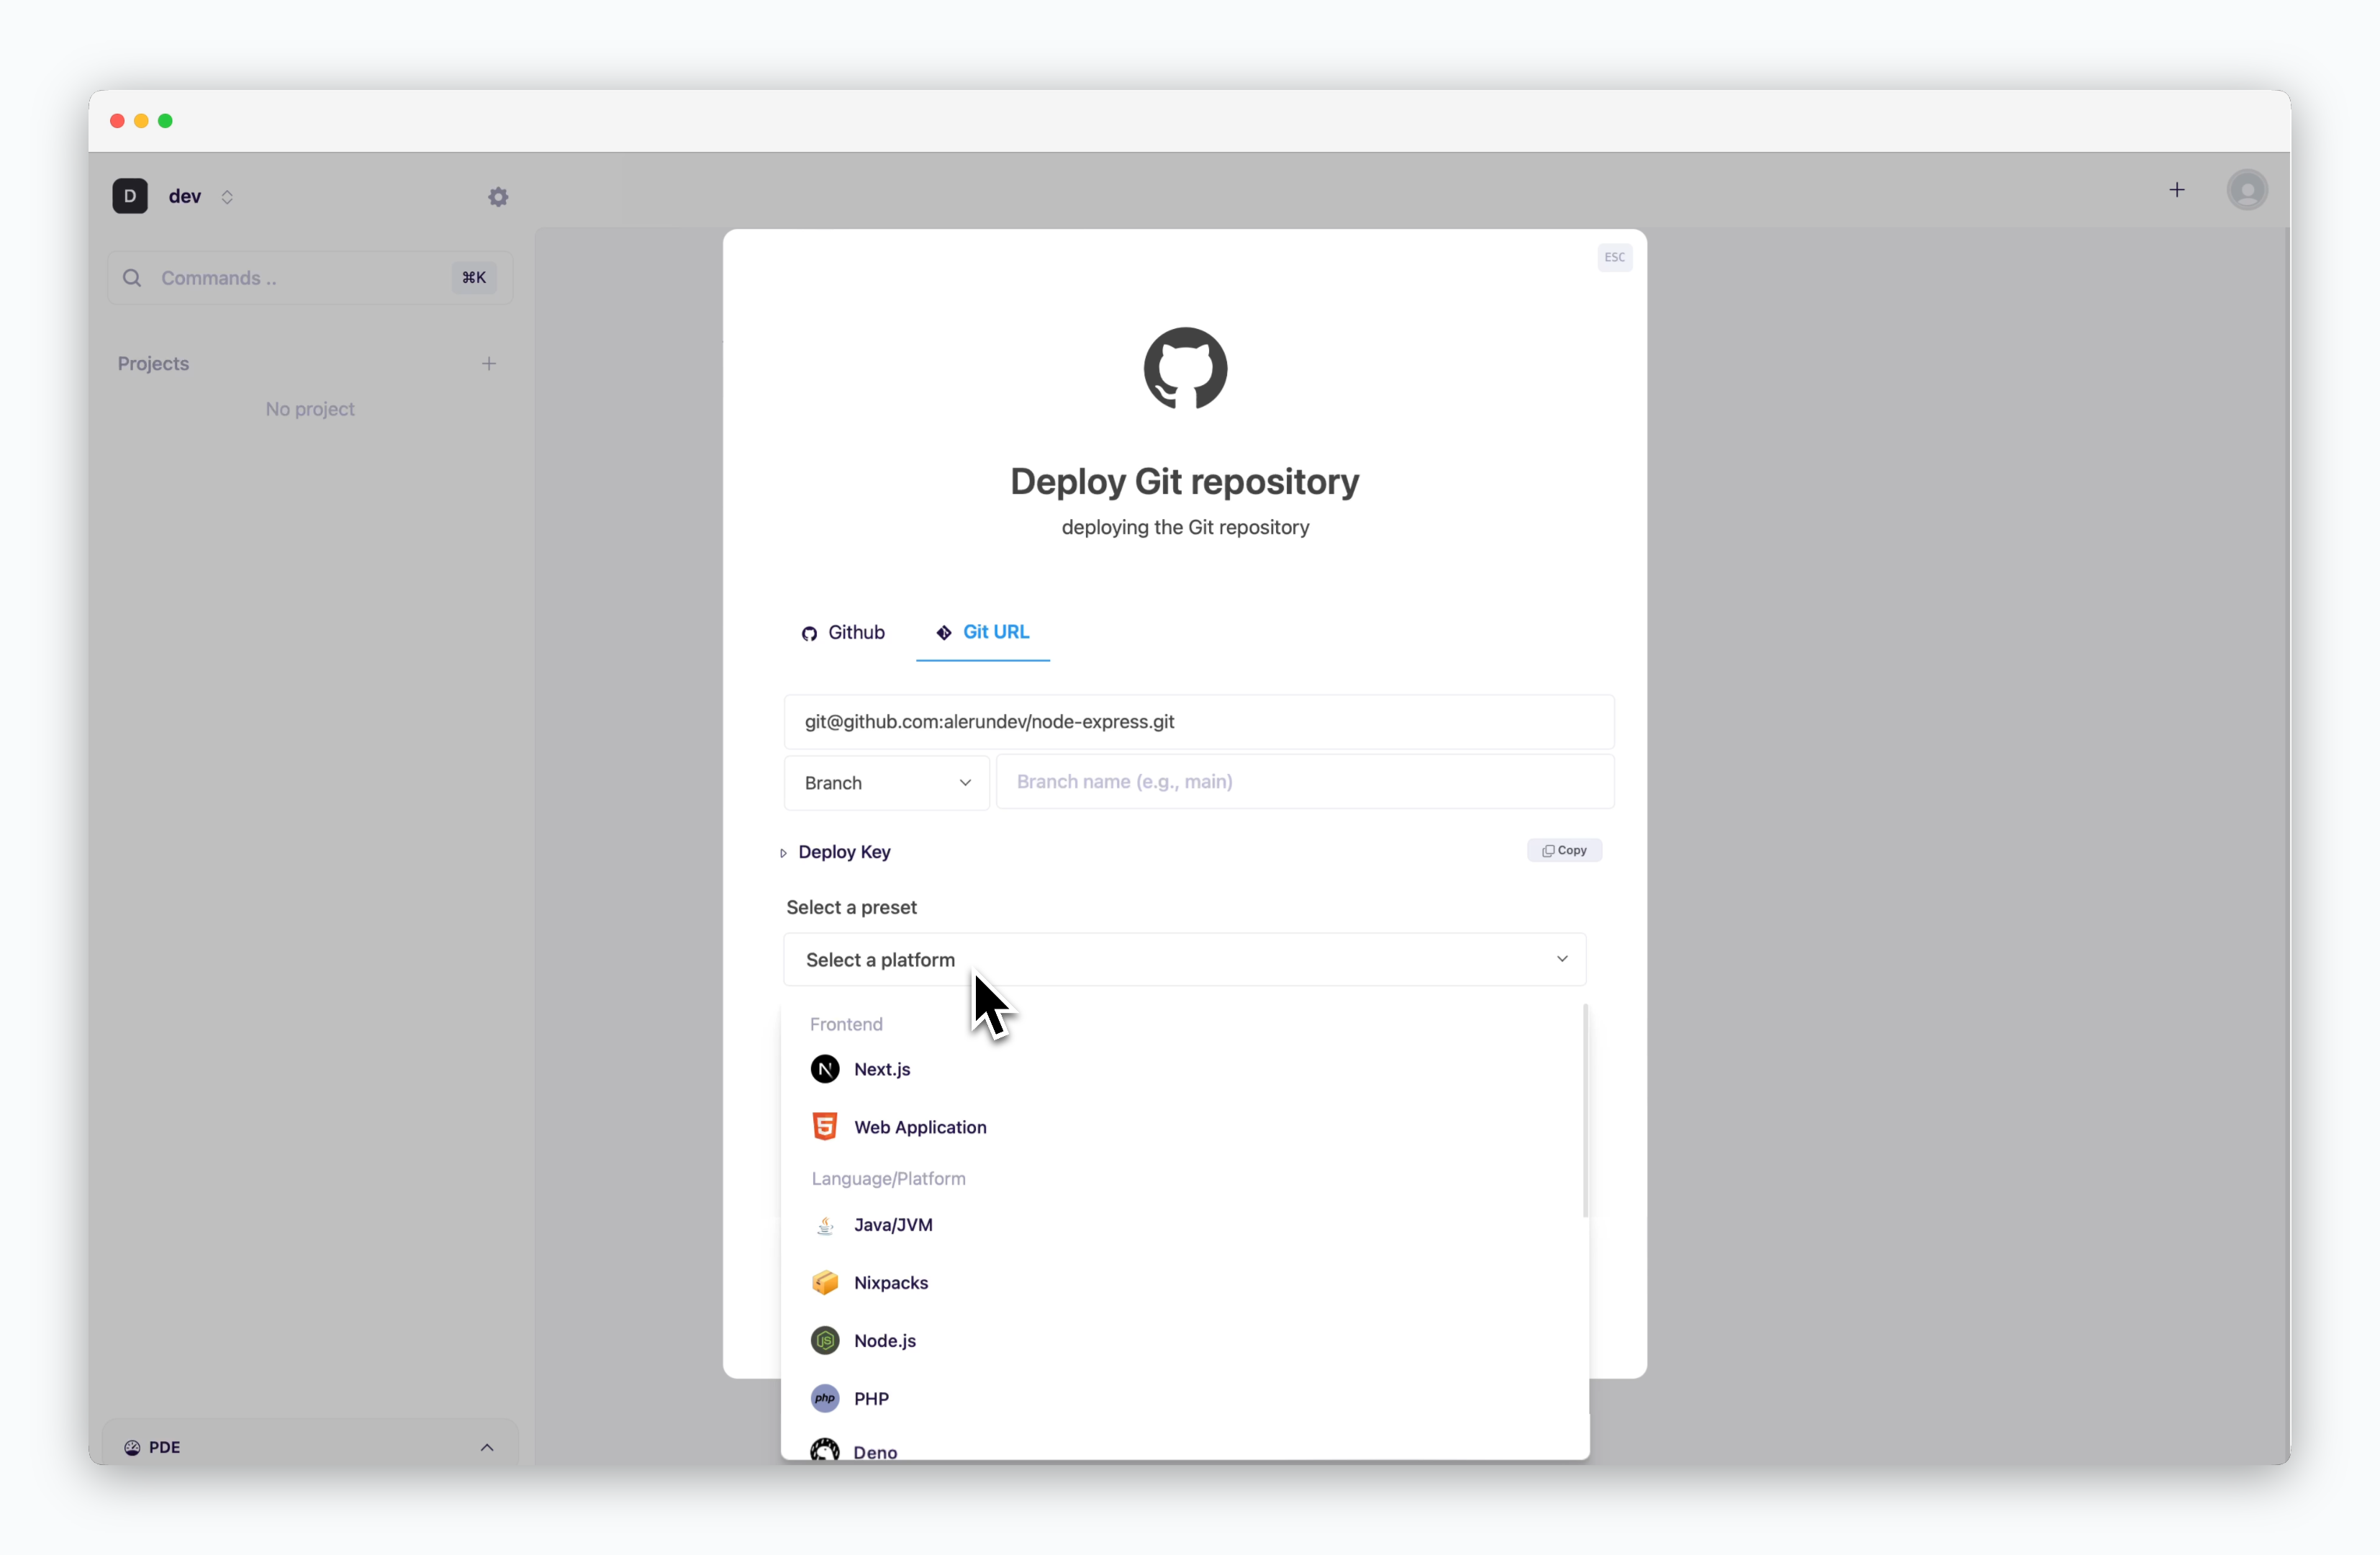
Deploy via Git URL
Deploy via Git URL
Add Deploy Key
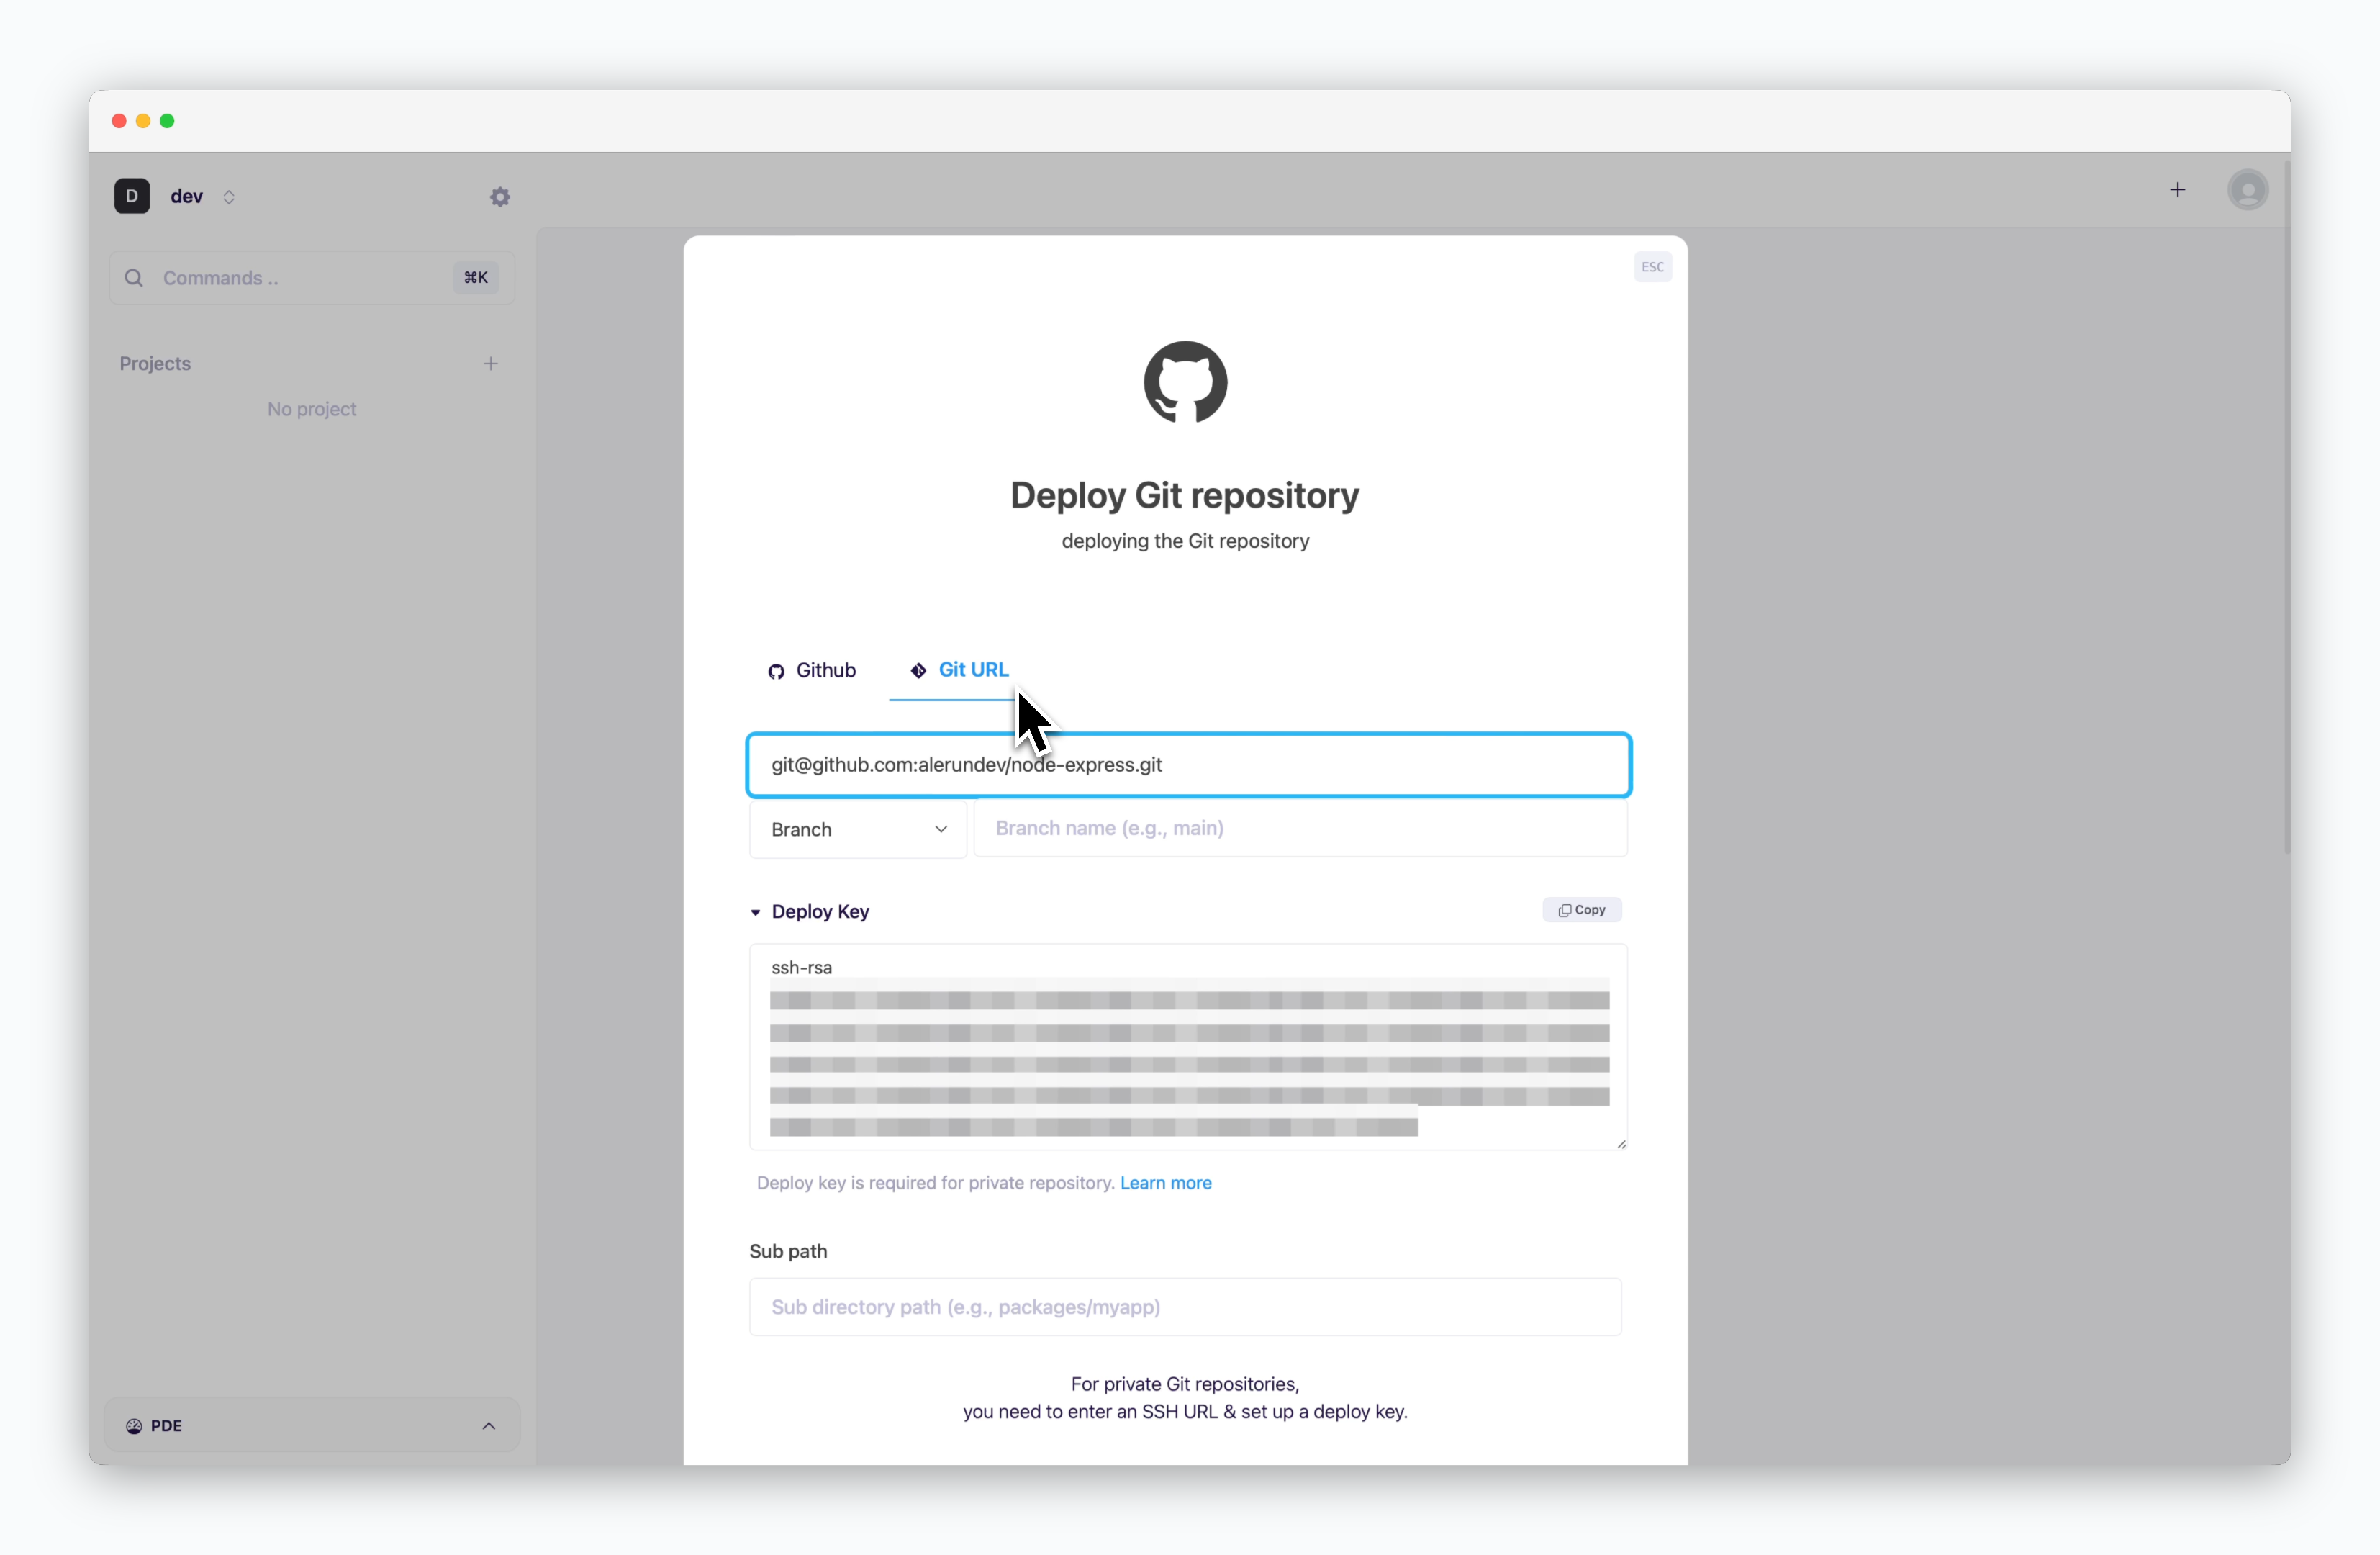
After selecting ‘Deploy Git Repository’ and navigating to the ‘Git URL’ tab, input the SSH Git URL of your repository. A Deploy Key will be generated automatically.
ale supports SSH authentication for deploying private repositories from GitHub, GitLab, Bitbucket, and other git providers. See below for platform-specific deploy key setup.GitHub
GitHub
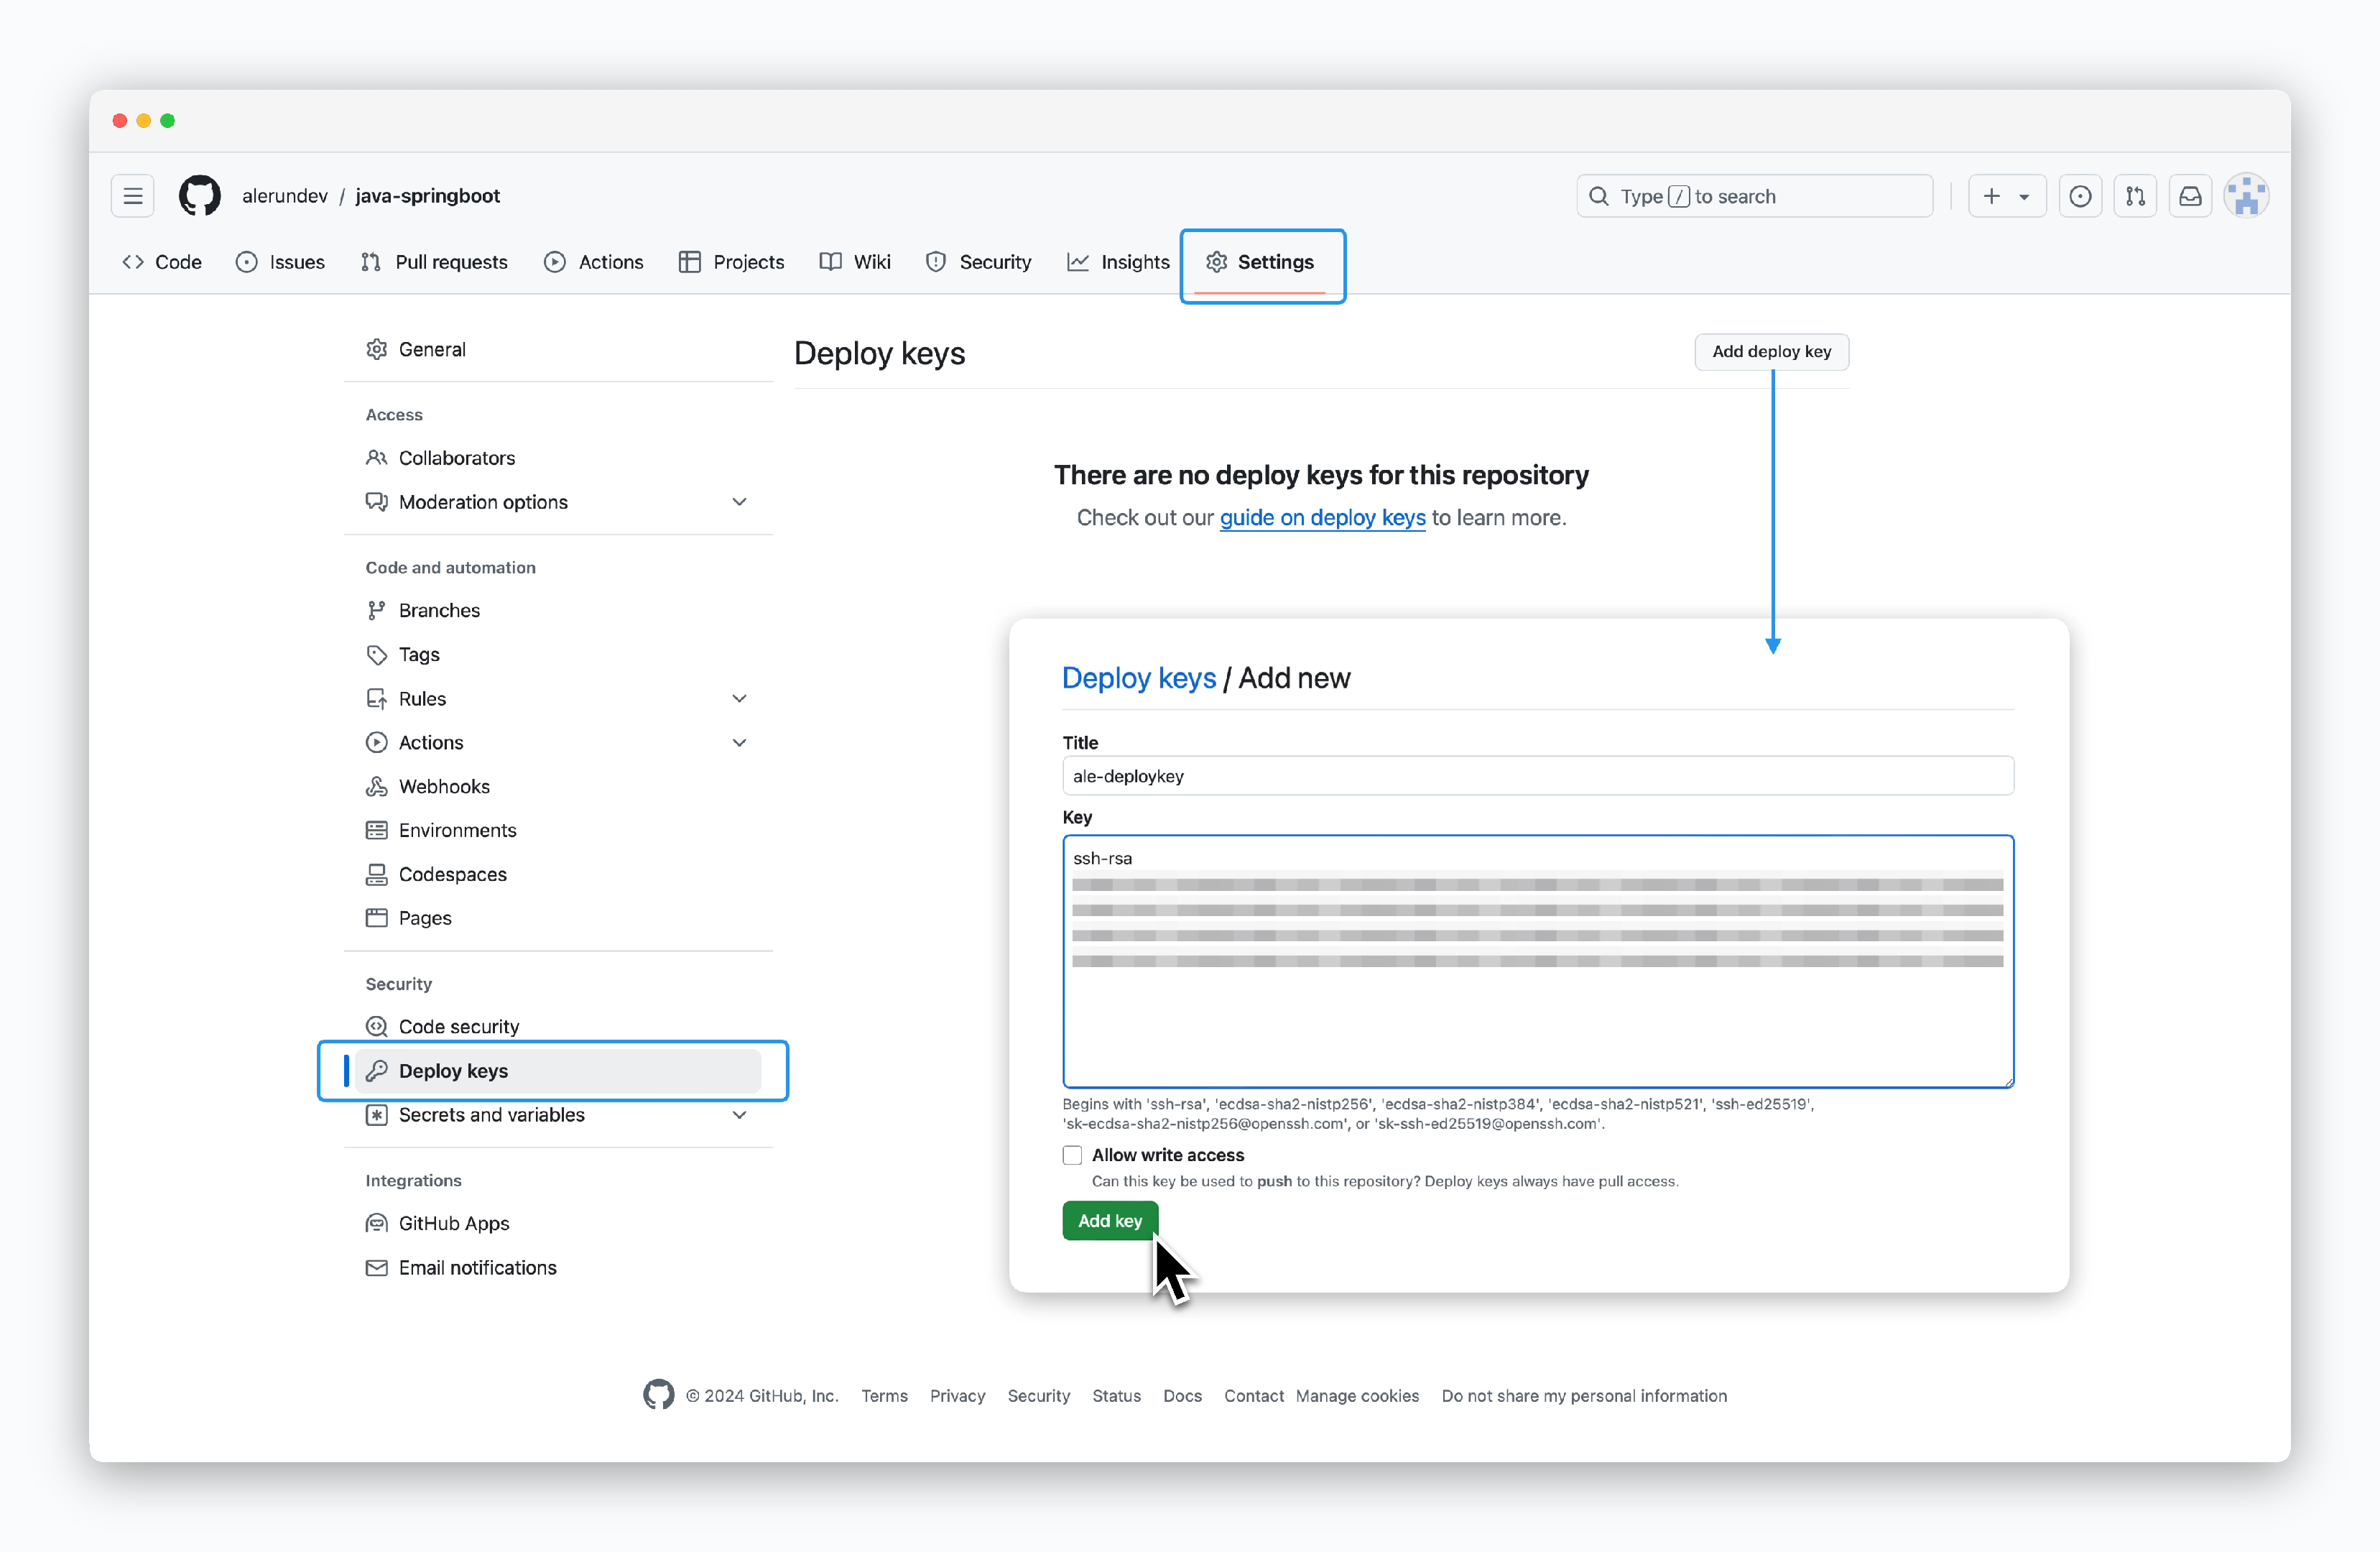
Go to Settings > Deploy keys in your repository. Then clickAdd deploy keyin the top right corner and paste the deploy key fromale.
GitLab
GitLab
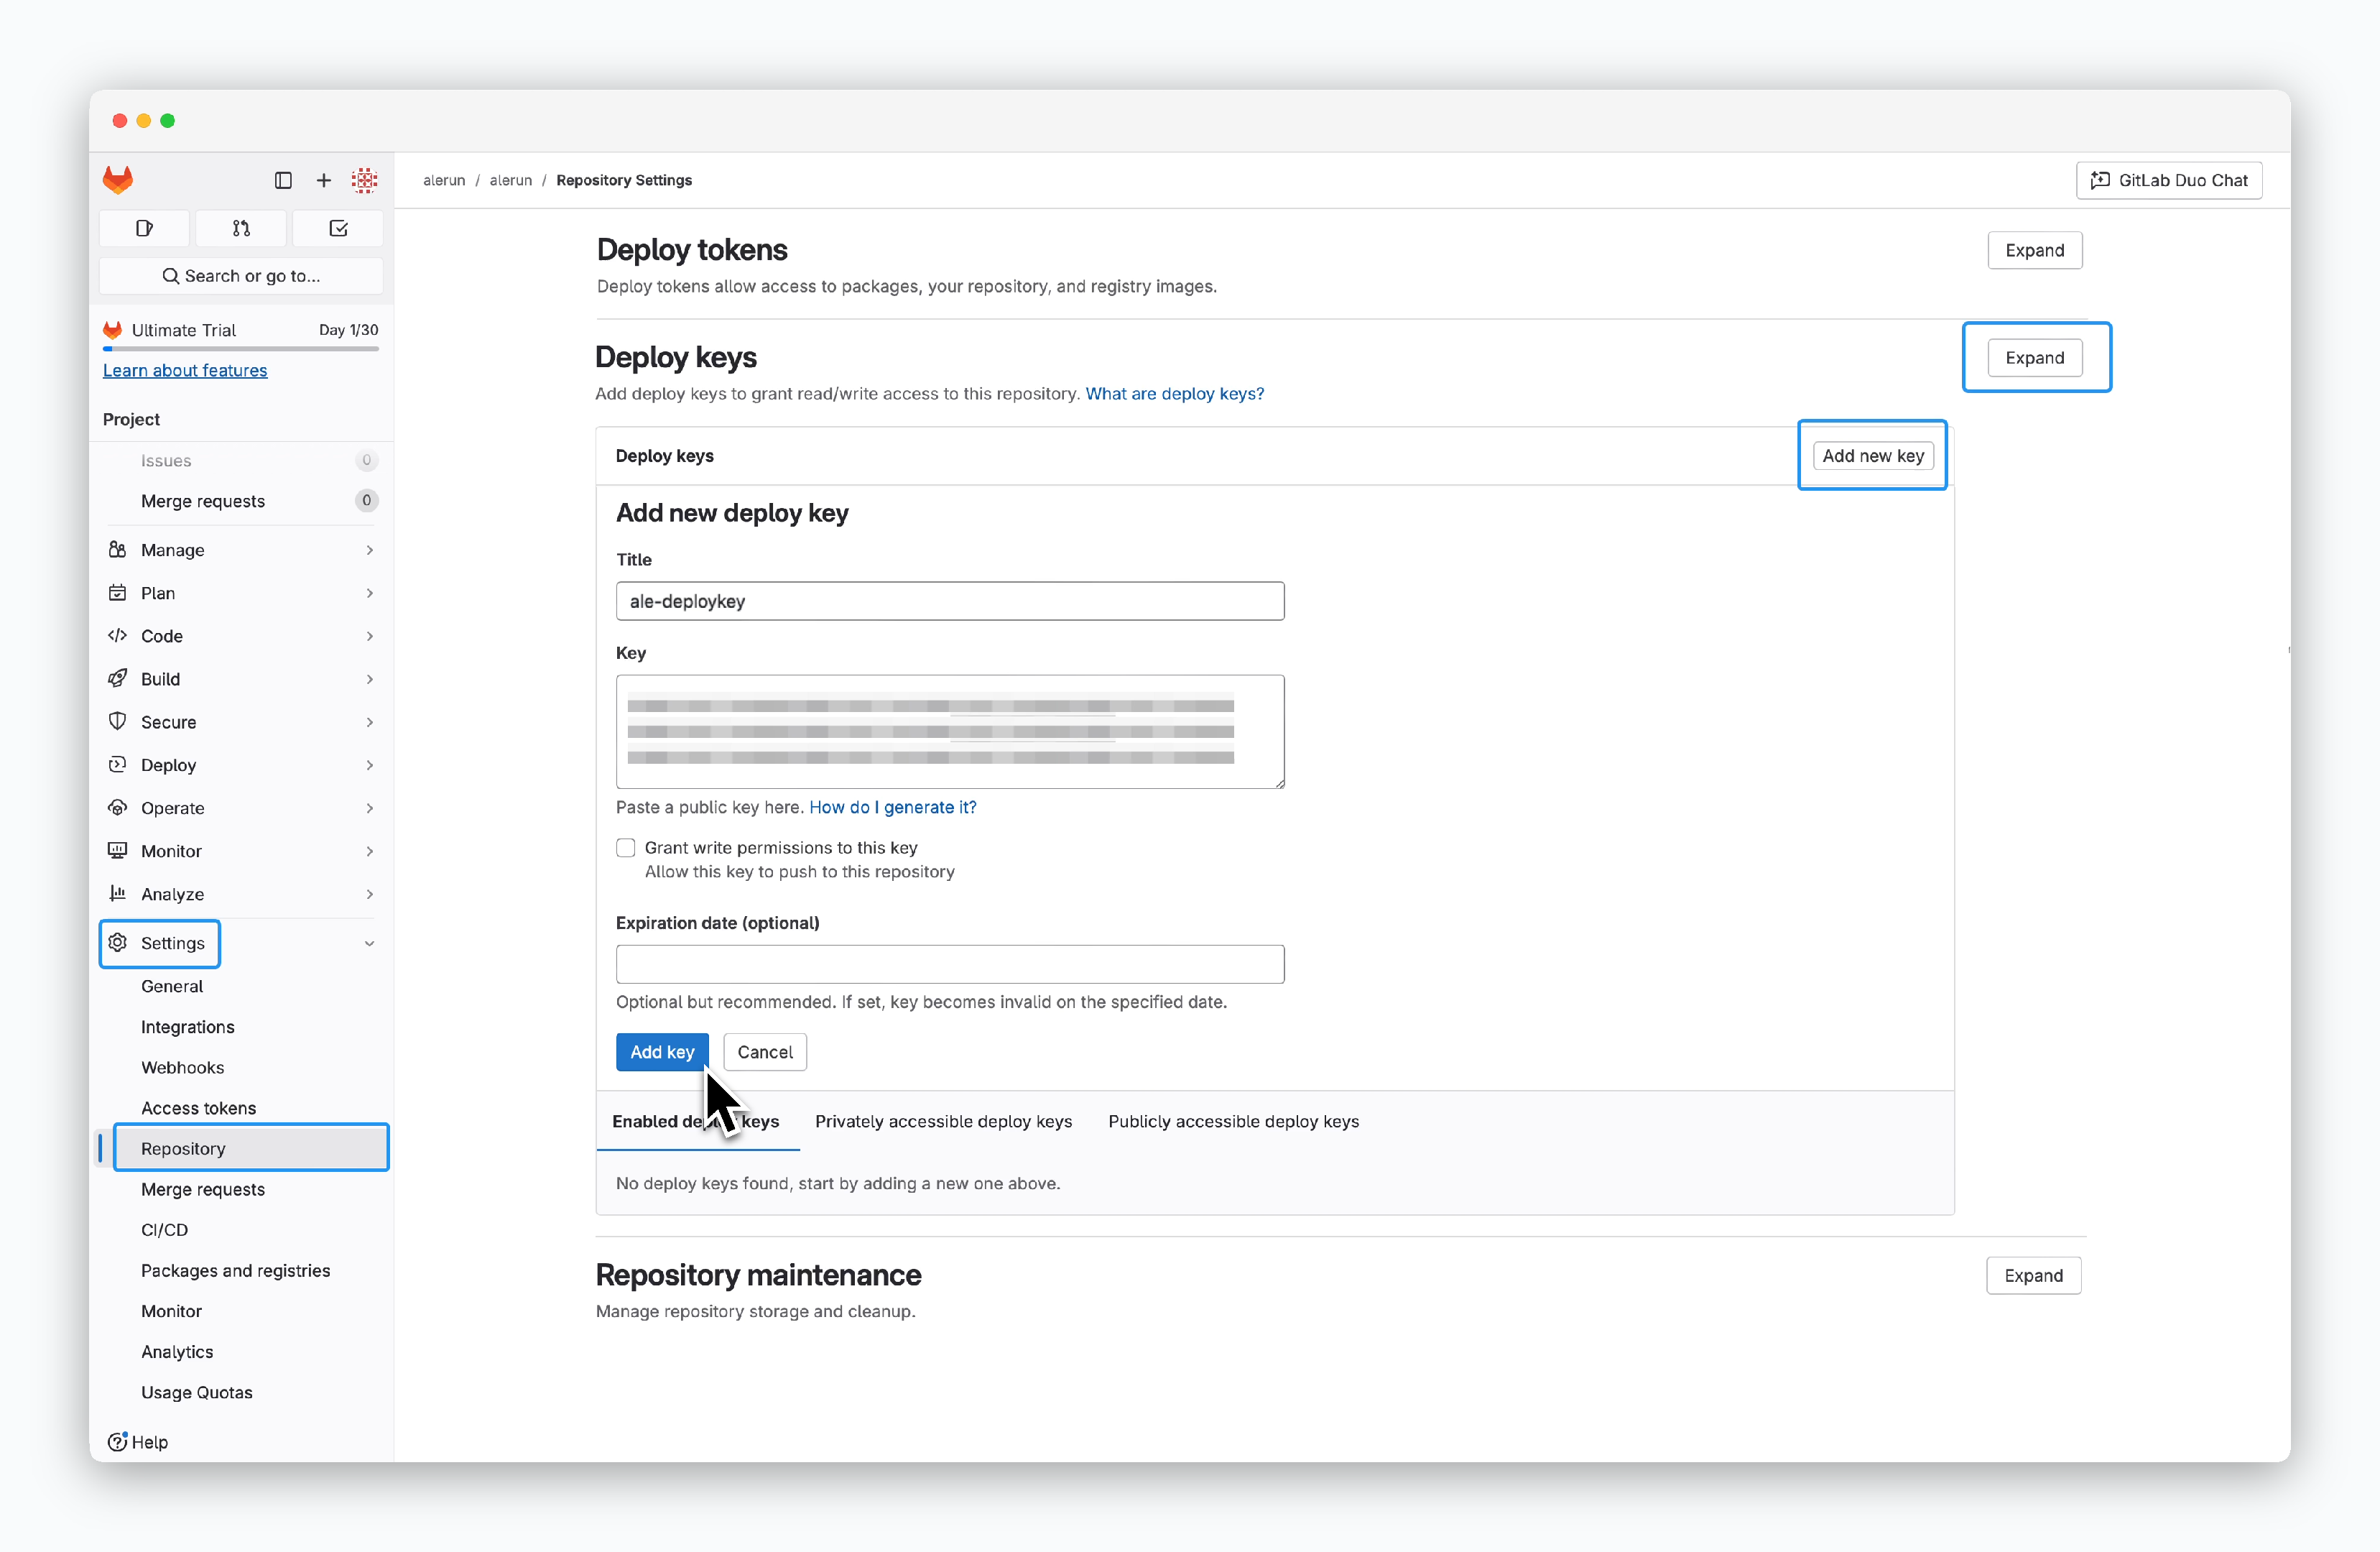
Go to Settings > Repository in your repository. Under the Deploy keys section, clickExpand, thenAdd new key, and paste the deploy key fromale.
Bitbucket
Bitbucket
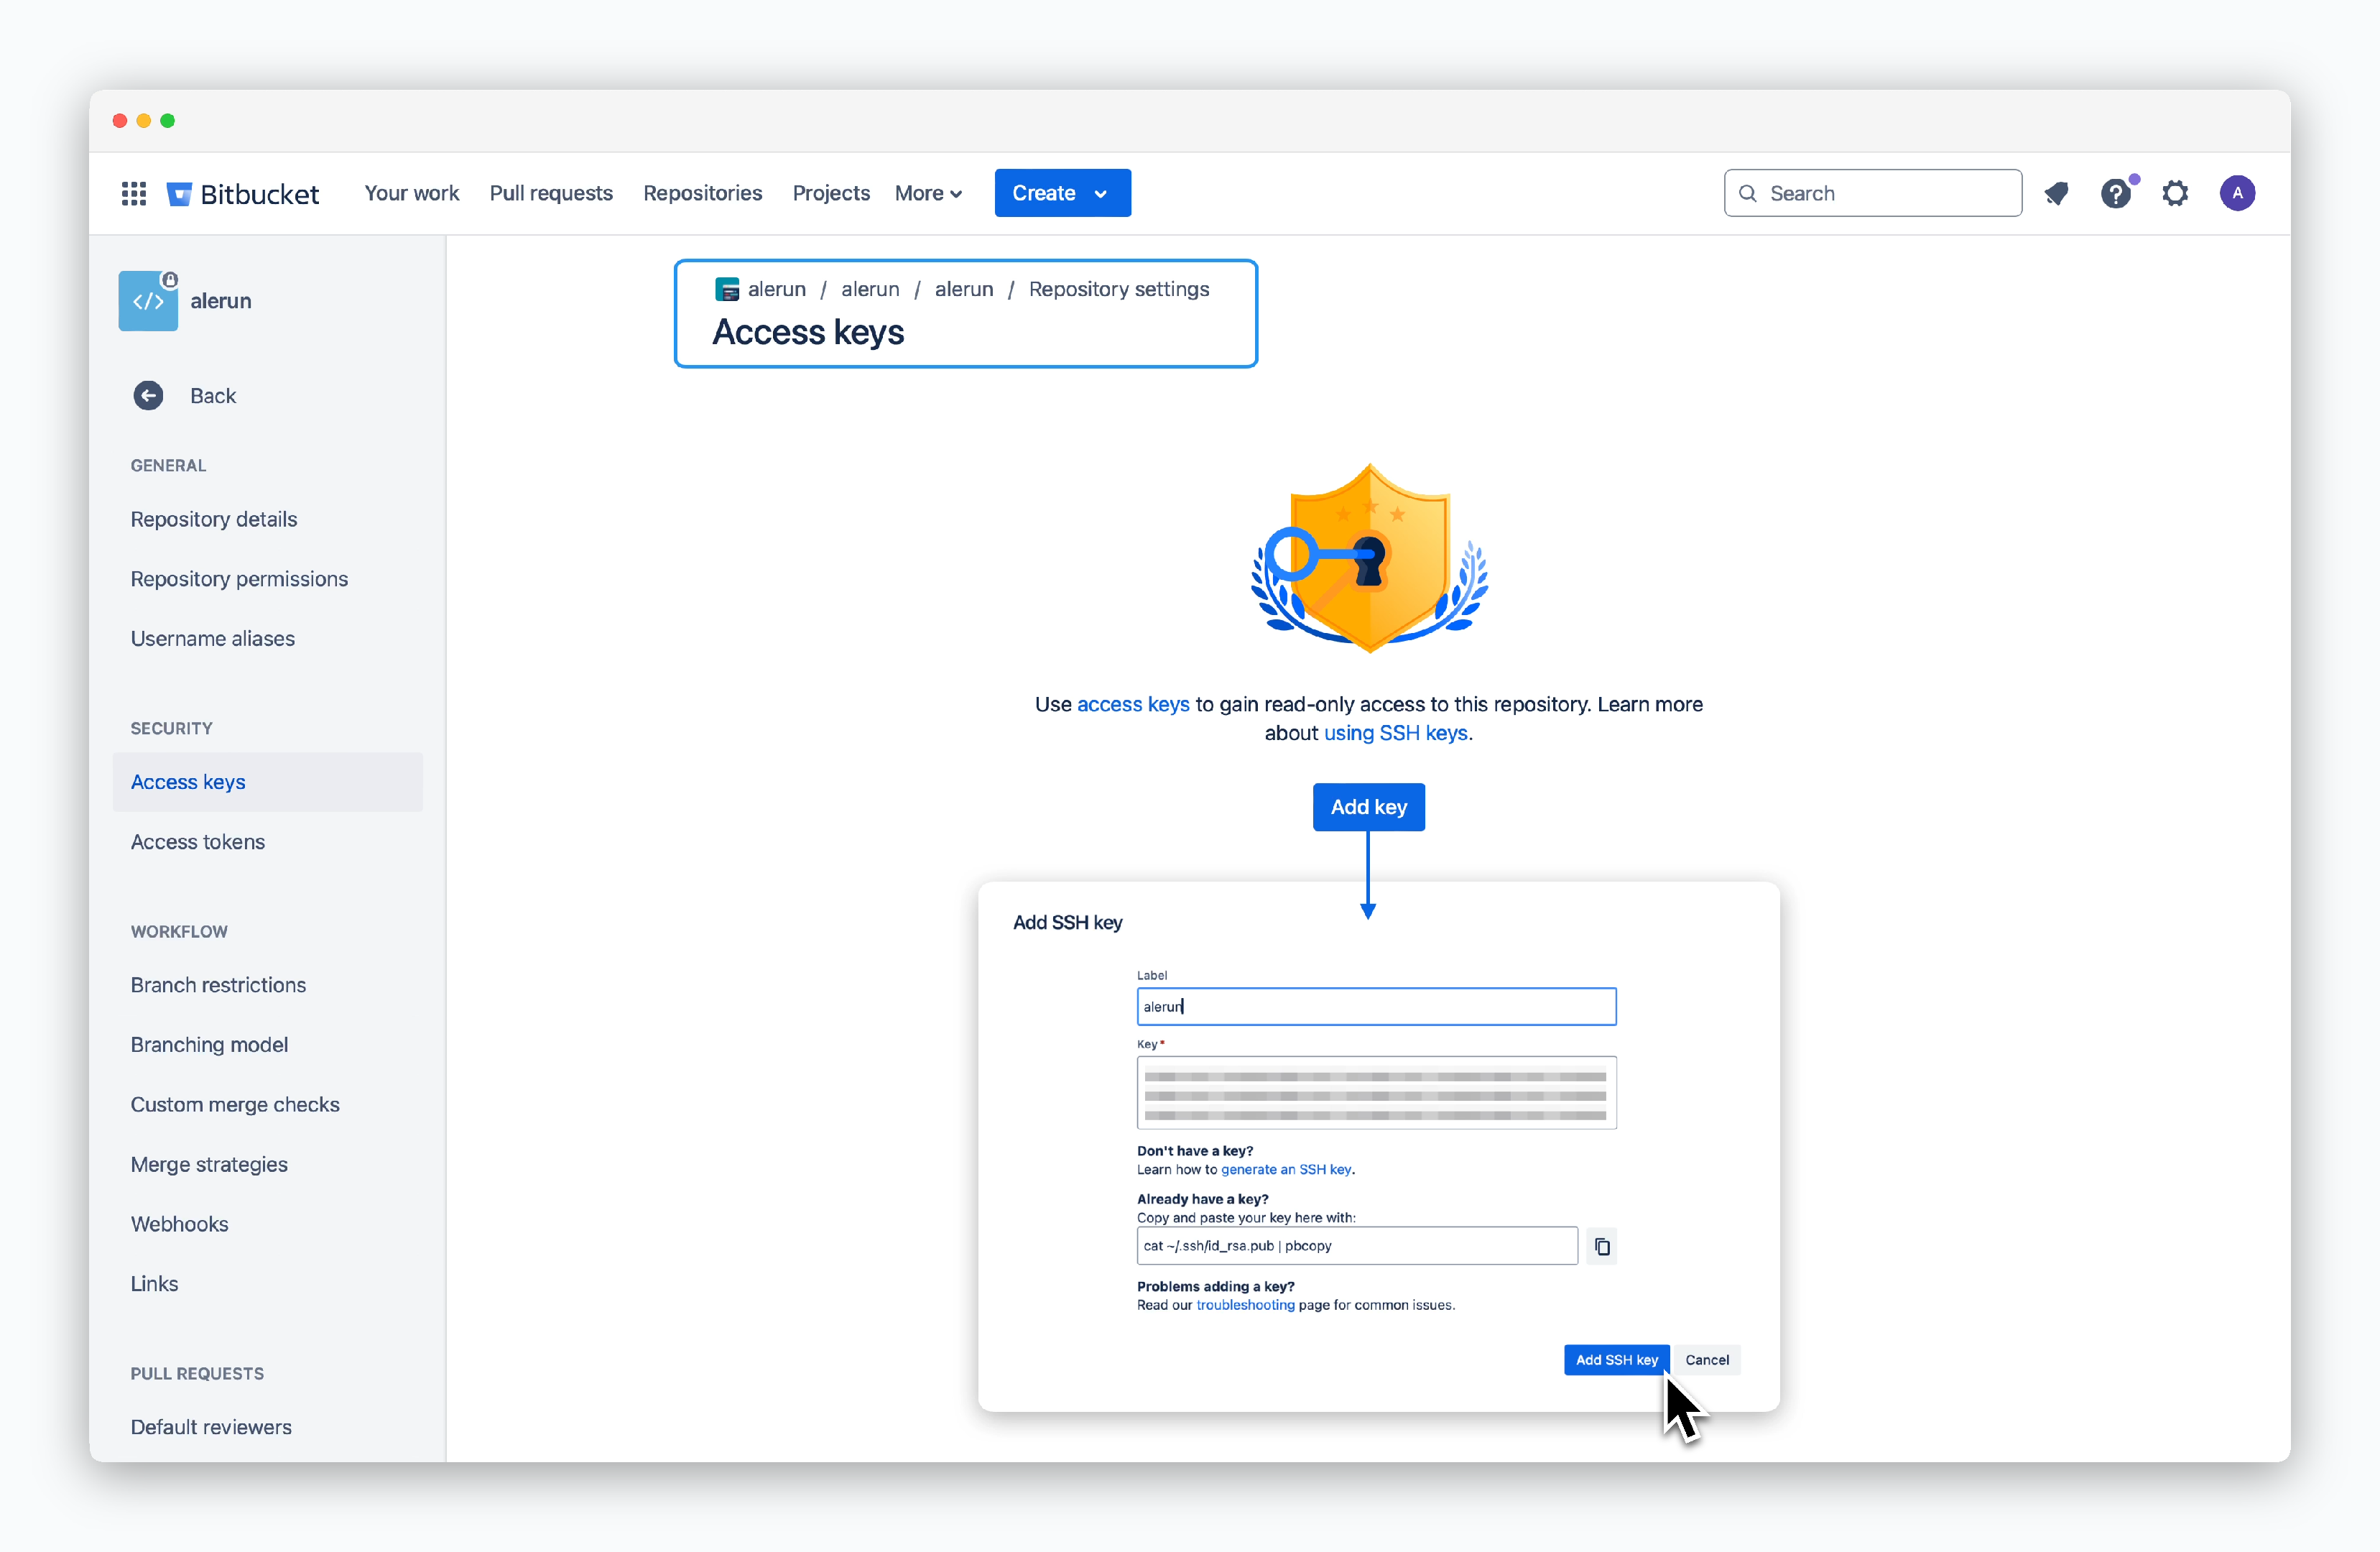
Go to Repository settings > Access keys in your repository. ClickAdd keyand paste the deploy key fromale.
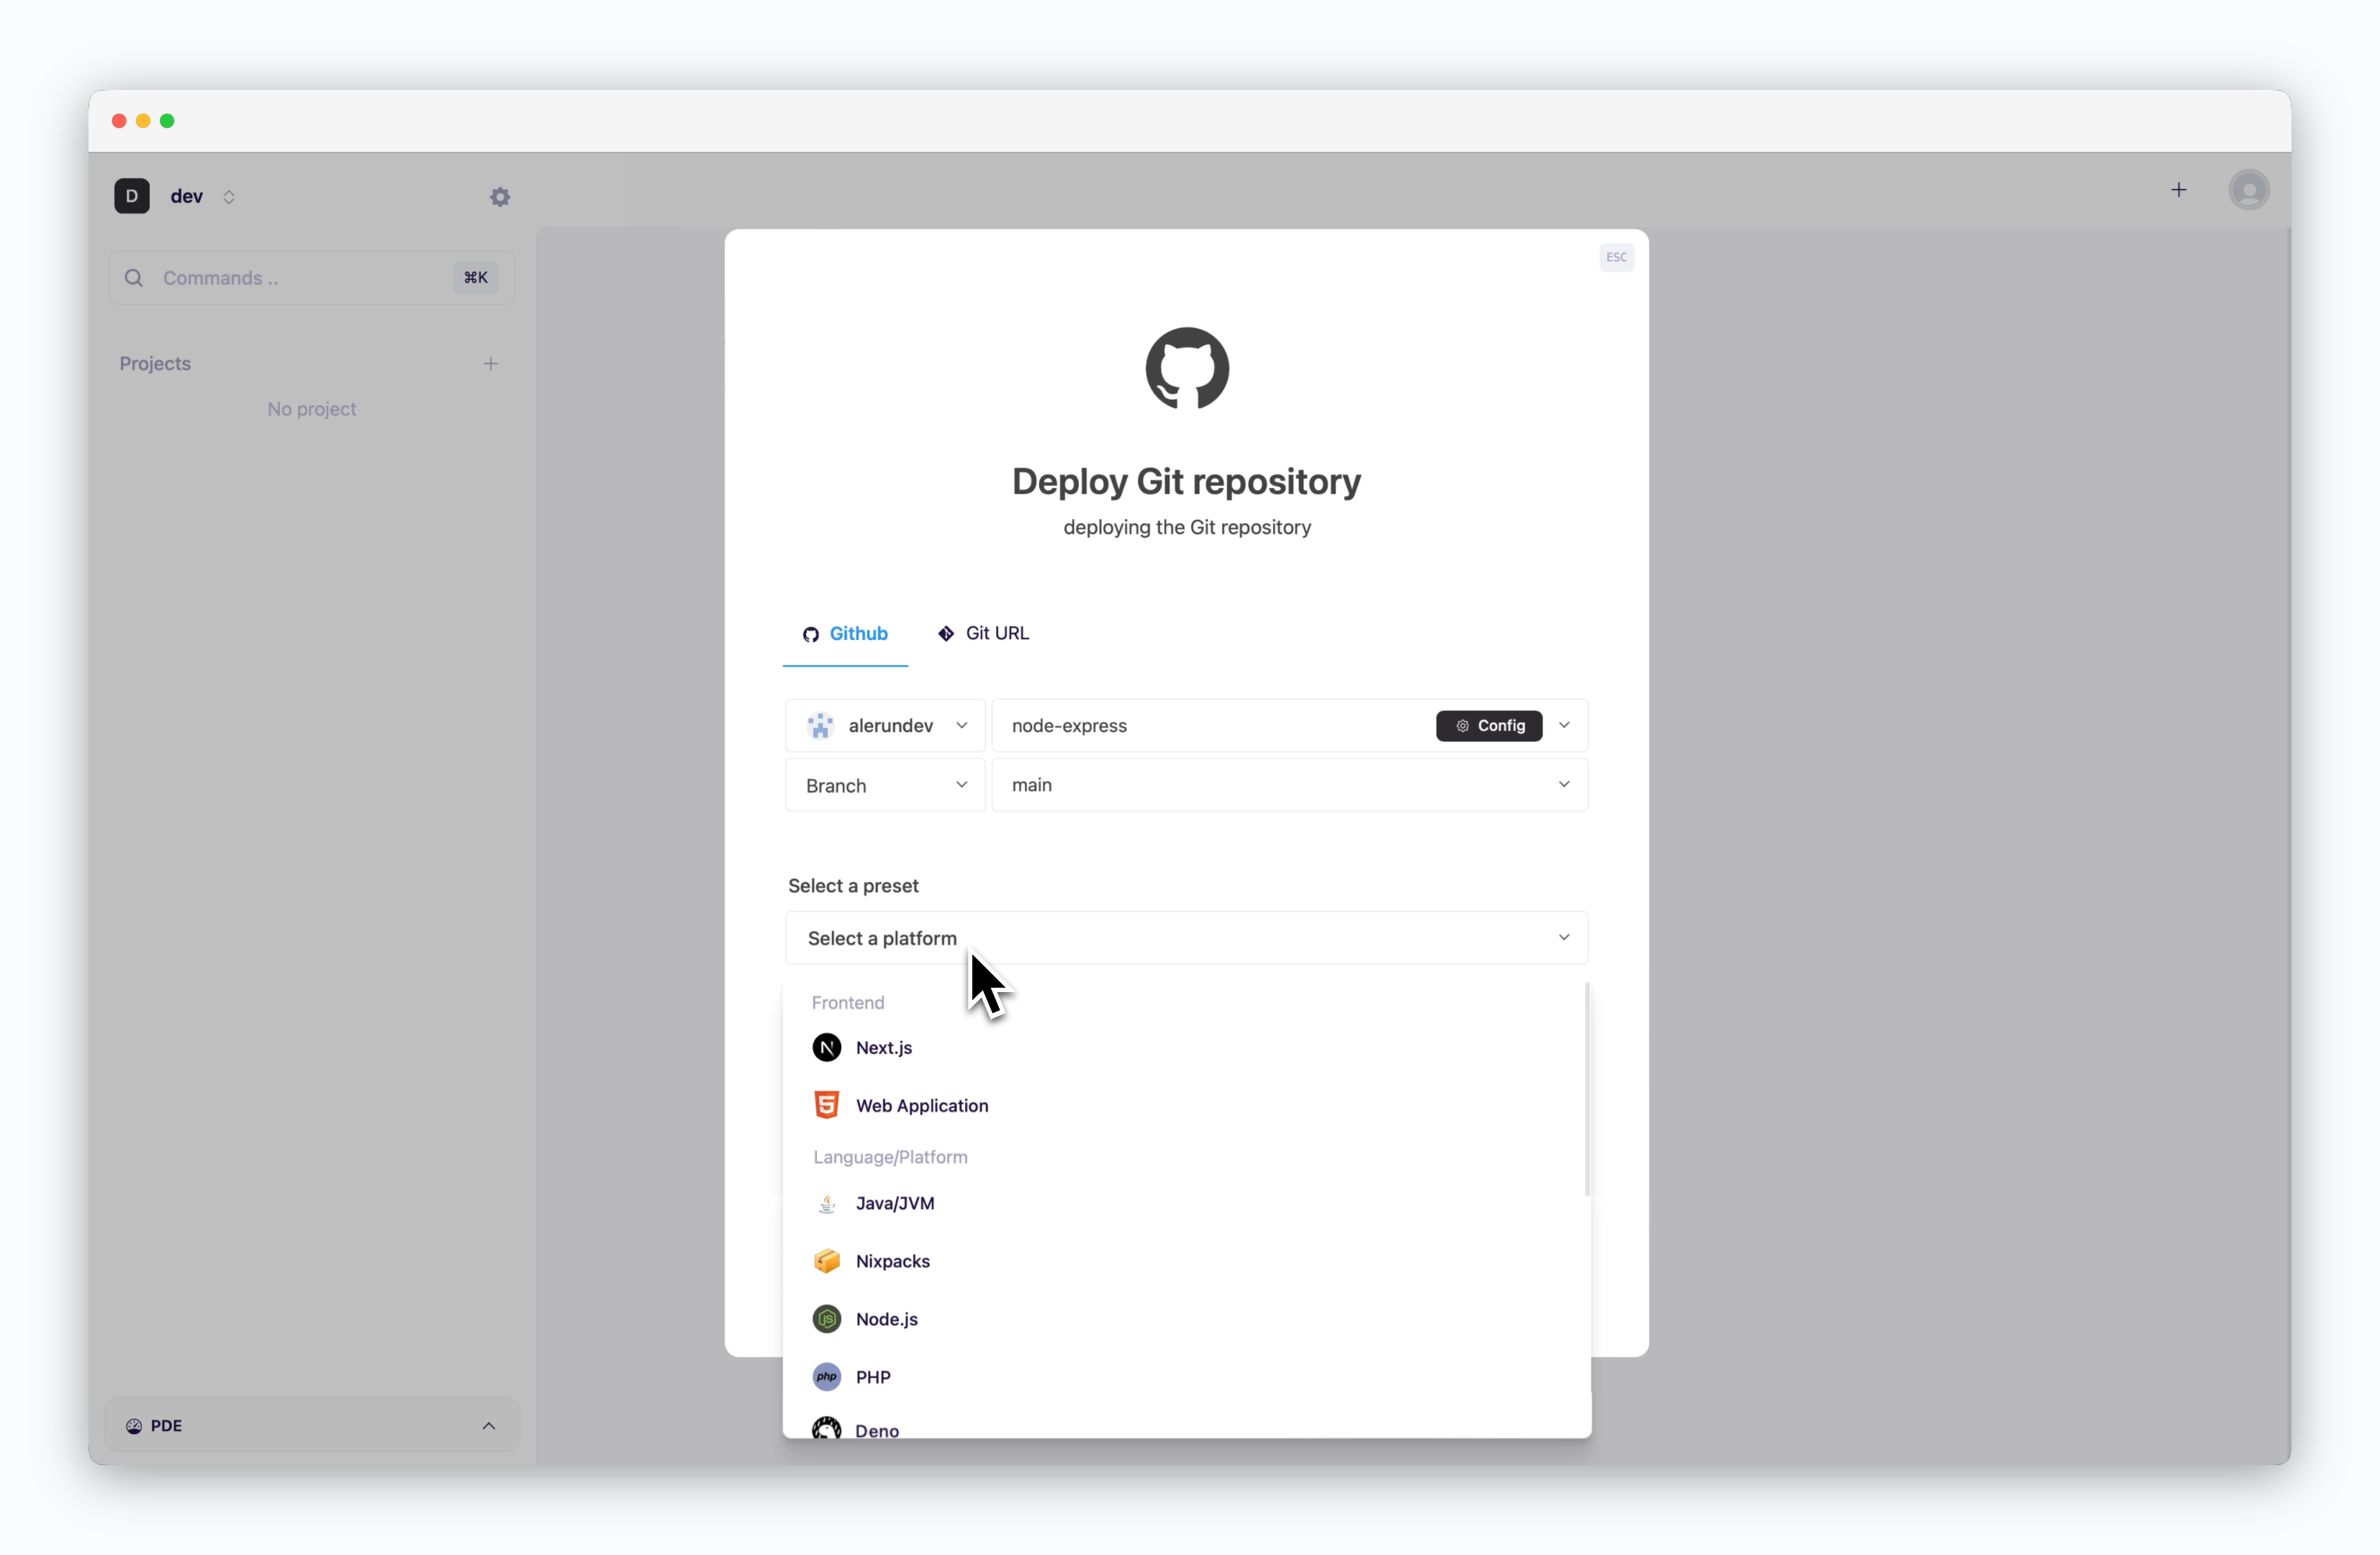
Select a Preset
Choose the preset that matches the repository.
Deploy from Template
Deploy from Template
Configure and Deploy
After selecting the source and preset, configure the deployment settings below and deploy.
Branch and Subdirectory
Branch and Subdirectory
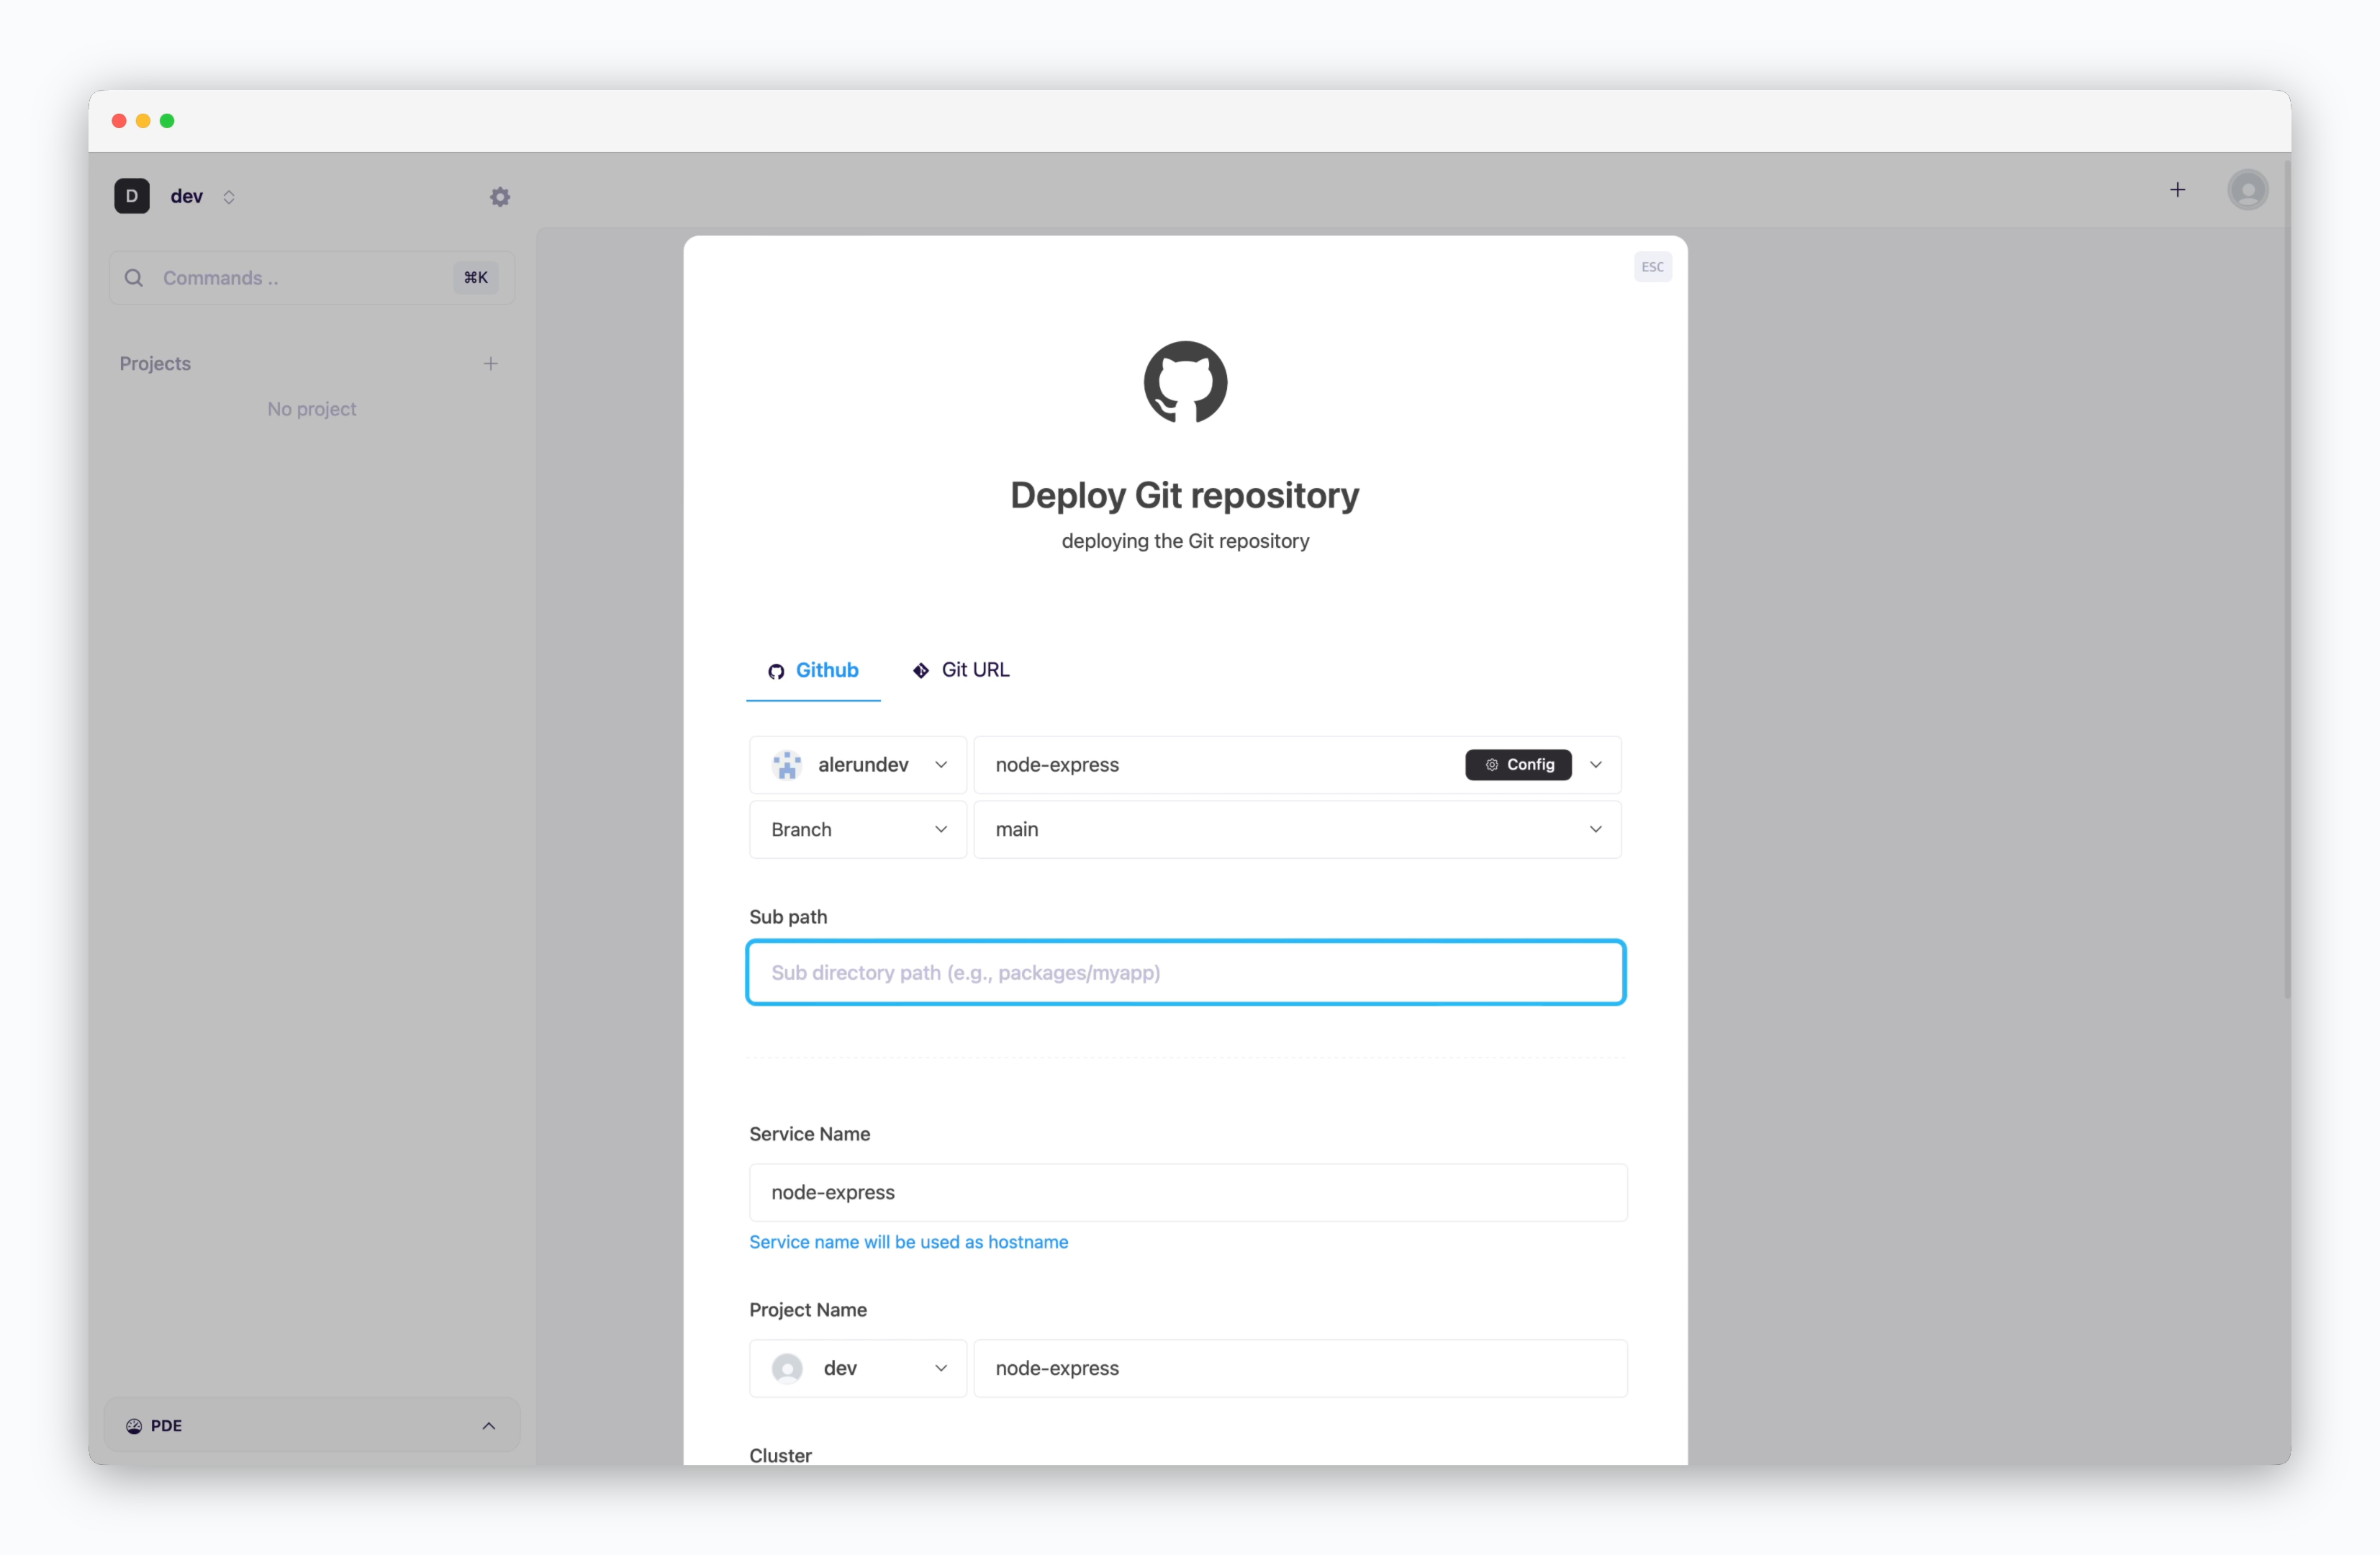
After selecting a repository, fields for configuring the branch and subdirectory will appear. If your service is located in a subfolder instead of the root directory—such as when managing multiple services in one repository—enter the subfolder path in the Subdirectory field.
If this field is left blank, the root directory will be used for build and deployment by default.
Version
Version
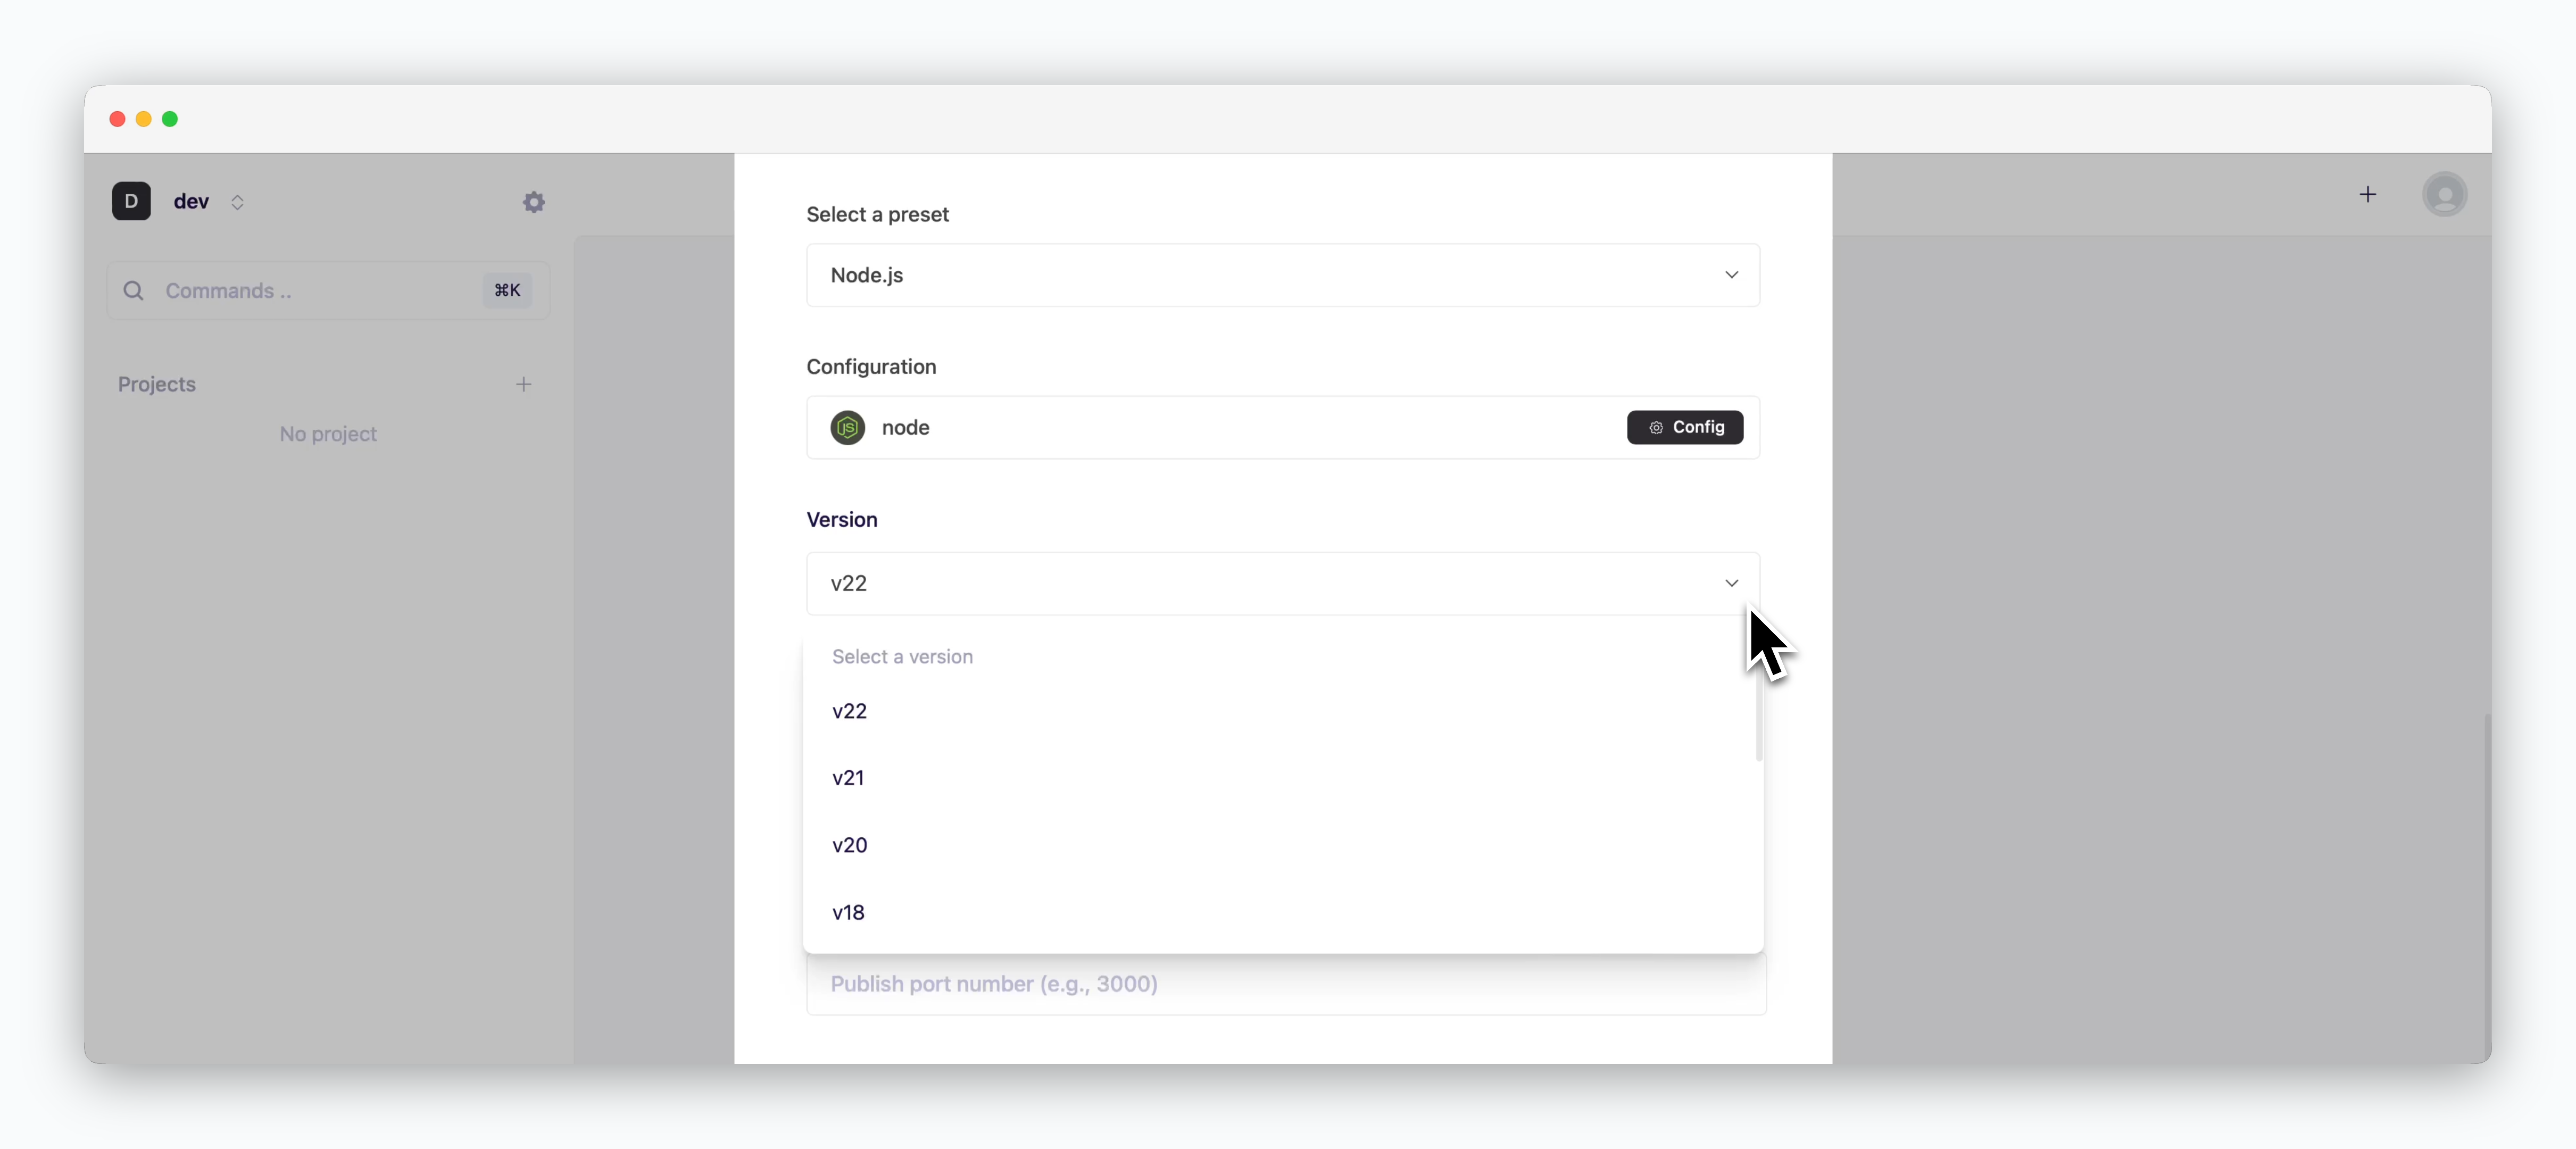
Select the preset version that matches the repository.
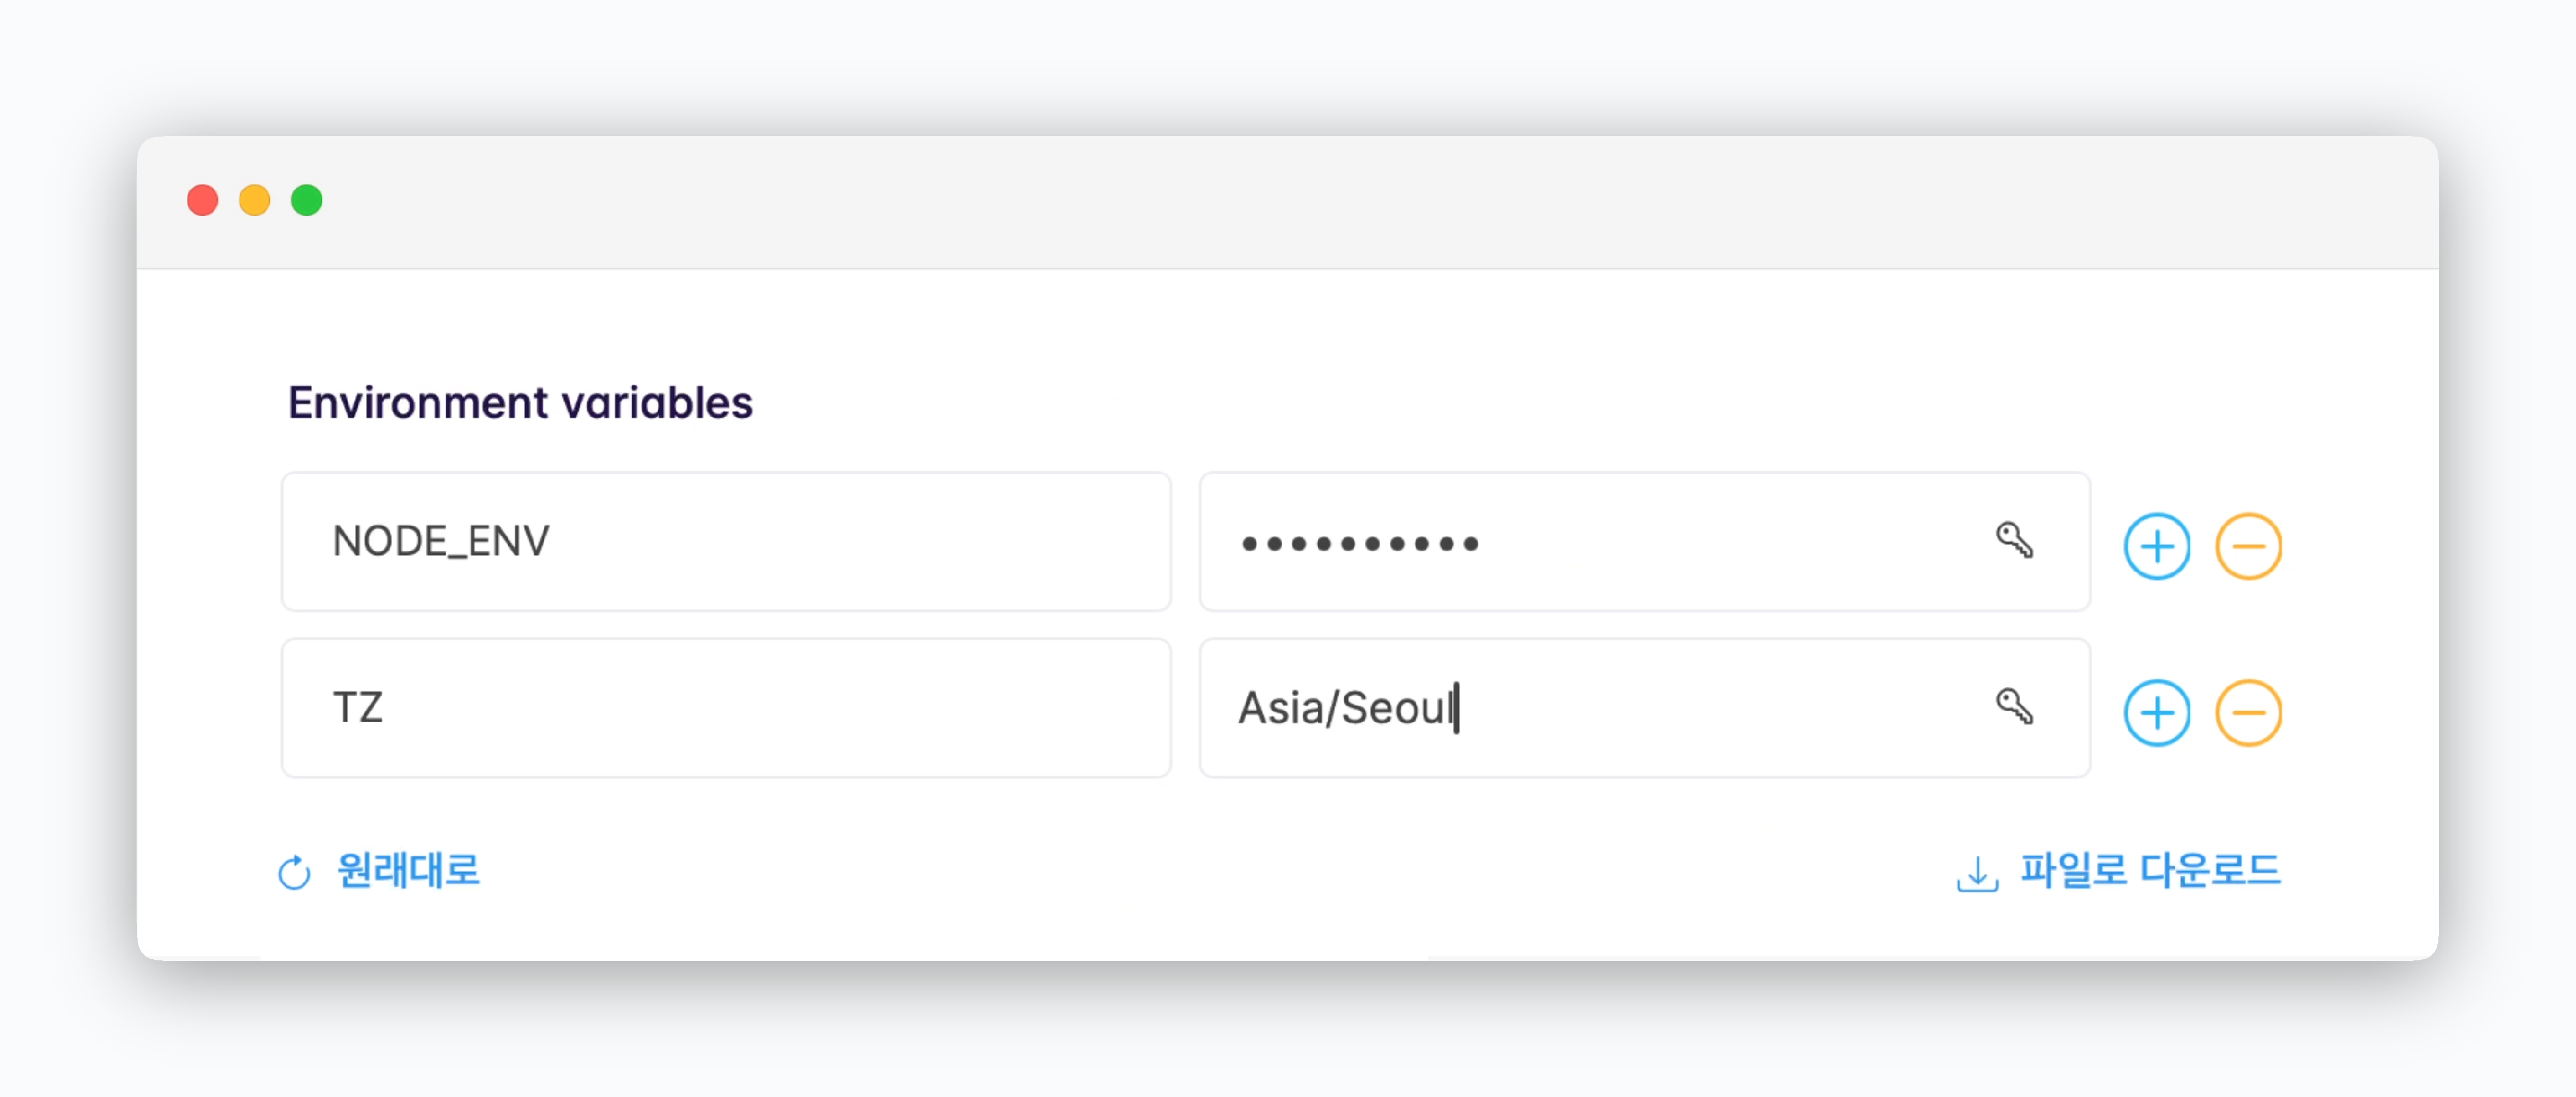
Environment Variables
Environment Variables
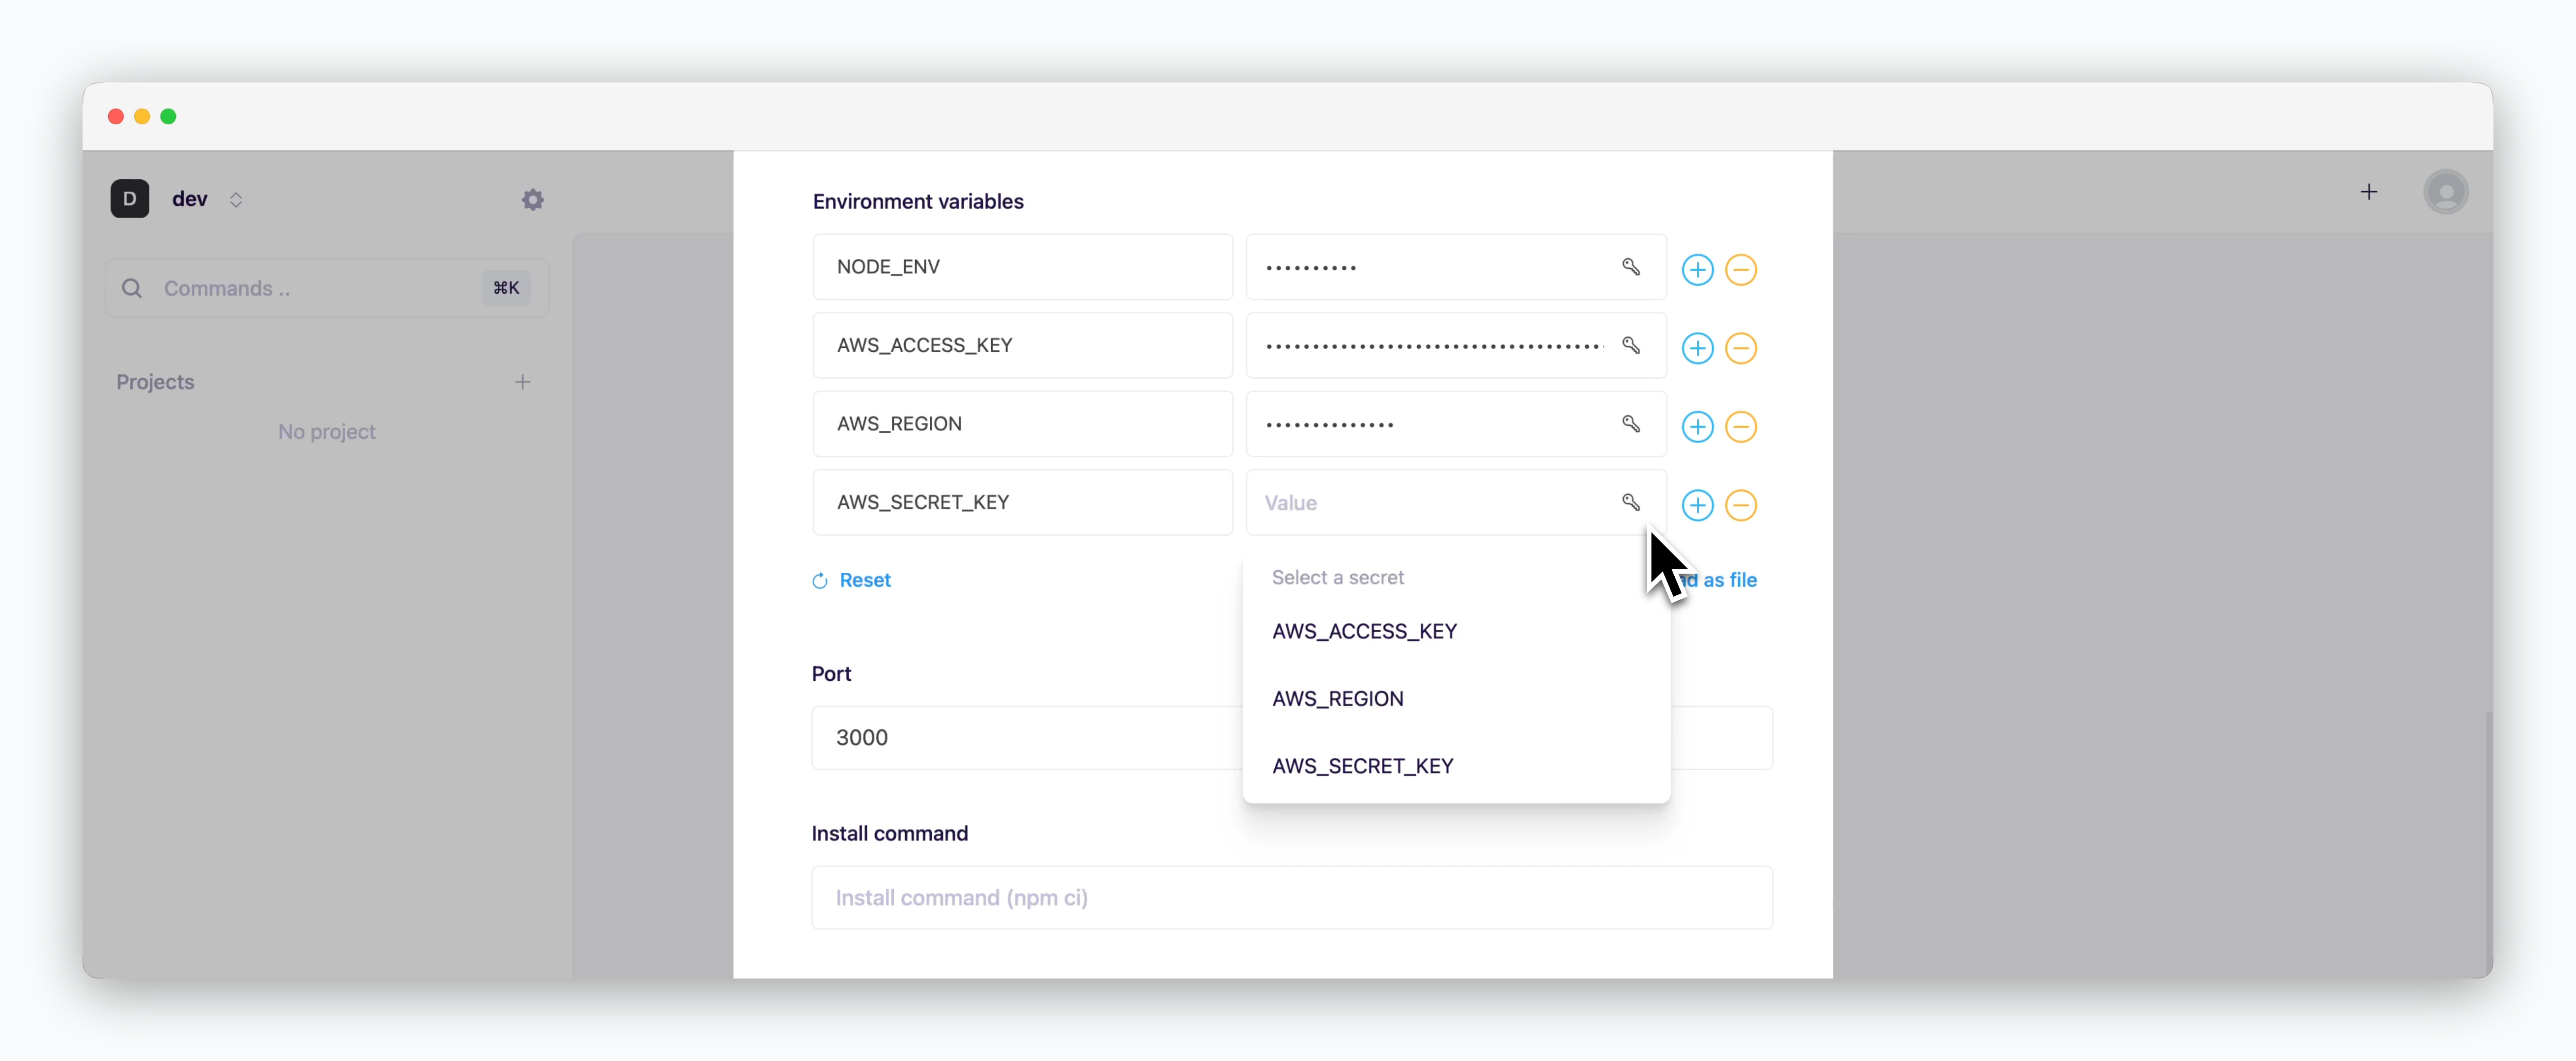
Environment variables can be added using any combination of the following methods:
- Drag and Drop ENV files
- Directly add variables using the
- Select from saved secrets using the
For more information about managing environment variables and secrets, see the Environment Variables page.
Port Number
Port Number
The port number must match the value specified in your source code or environment variables. If the port number is missing or incorrect, the service will fail to start.
Install, Build, Start Command
Install, Build, Start Command
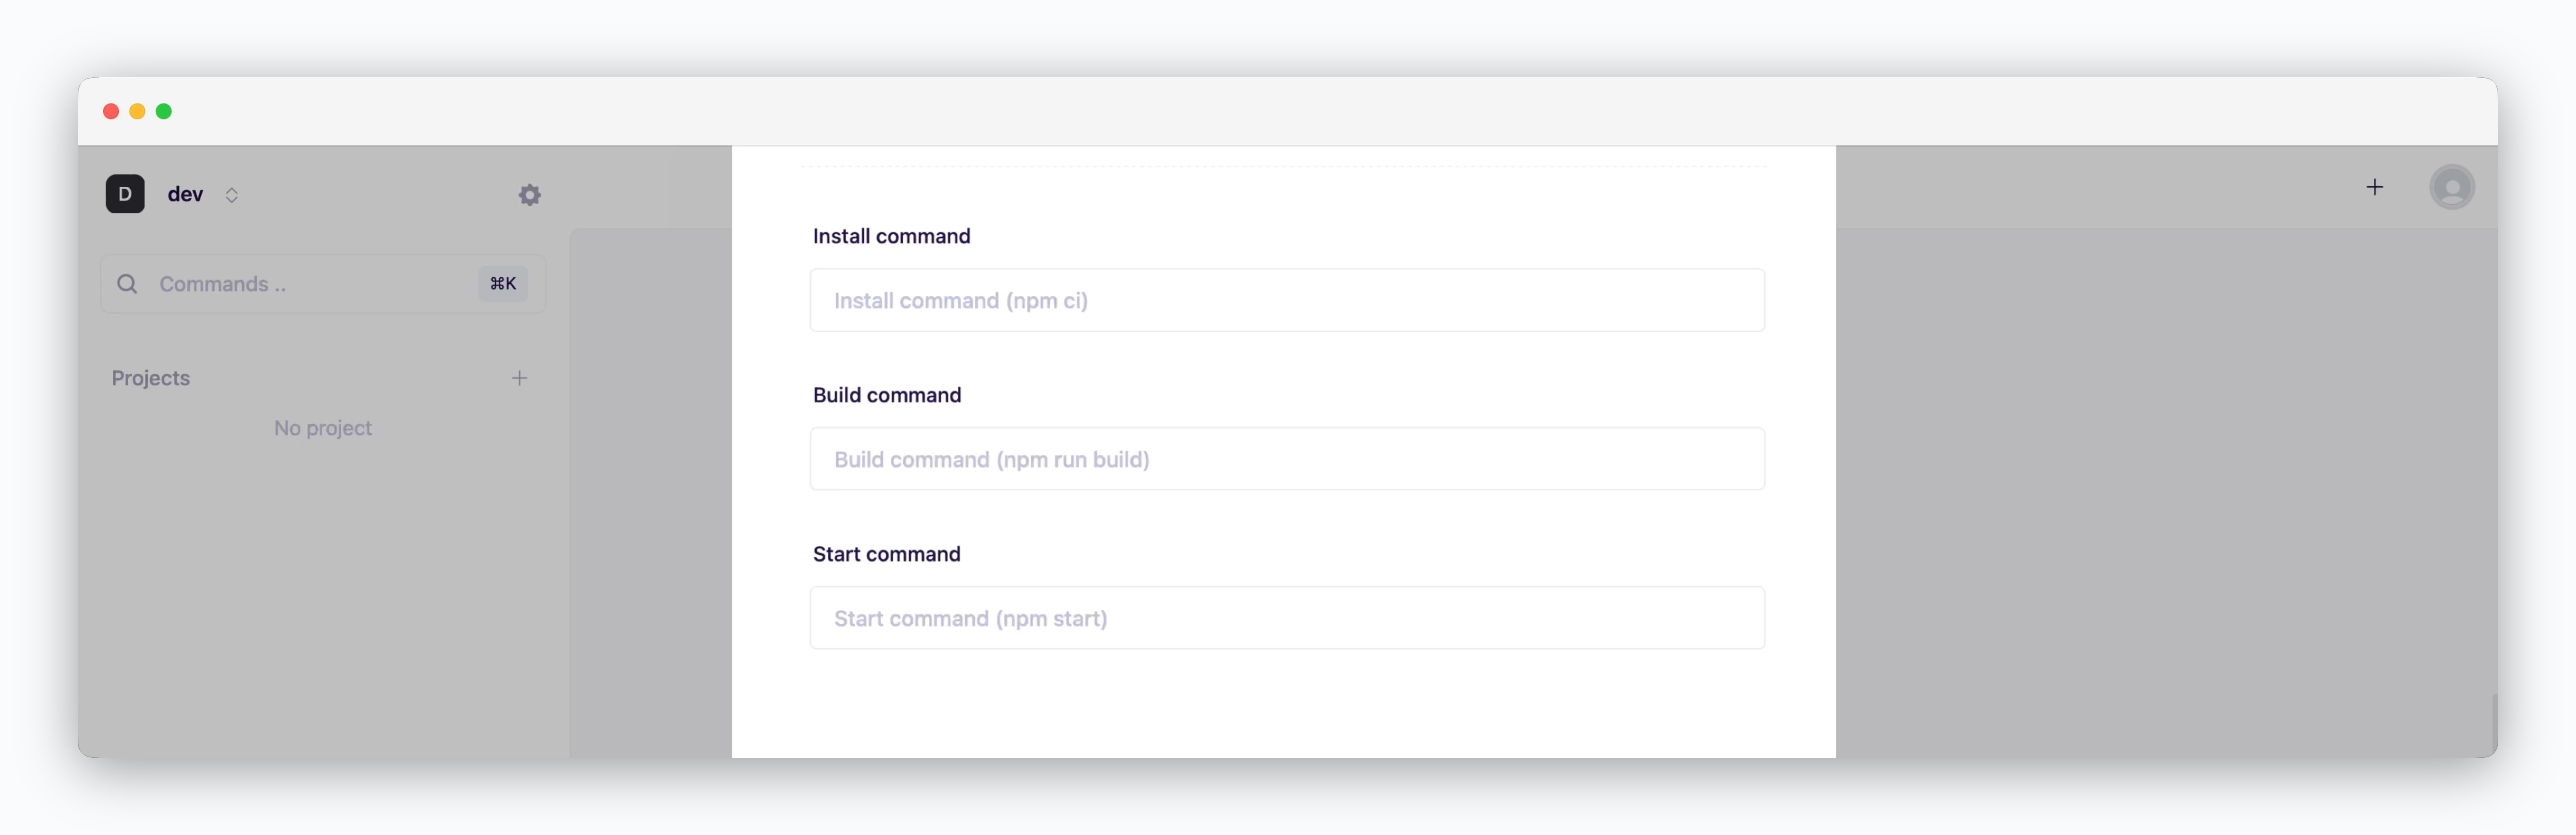
Configure the lifecycle commands for your service.
- Install Command: Enter the command to install dependencies (e.g.,
npm install,pip install -r requirements.txt) - Build Command: Enter the command to build your application (e.g.,
npm run build,gradle build) - Start Command: Enter the command to run your service (e.g.,
npm start,python app.py)
If left empty, the default command shown in the placeholder will be used.
More Options
More Options
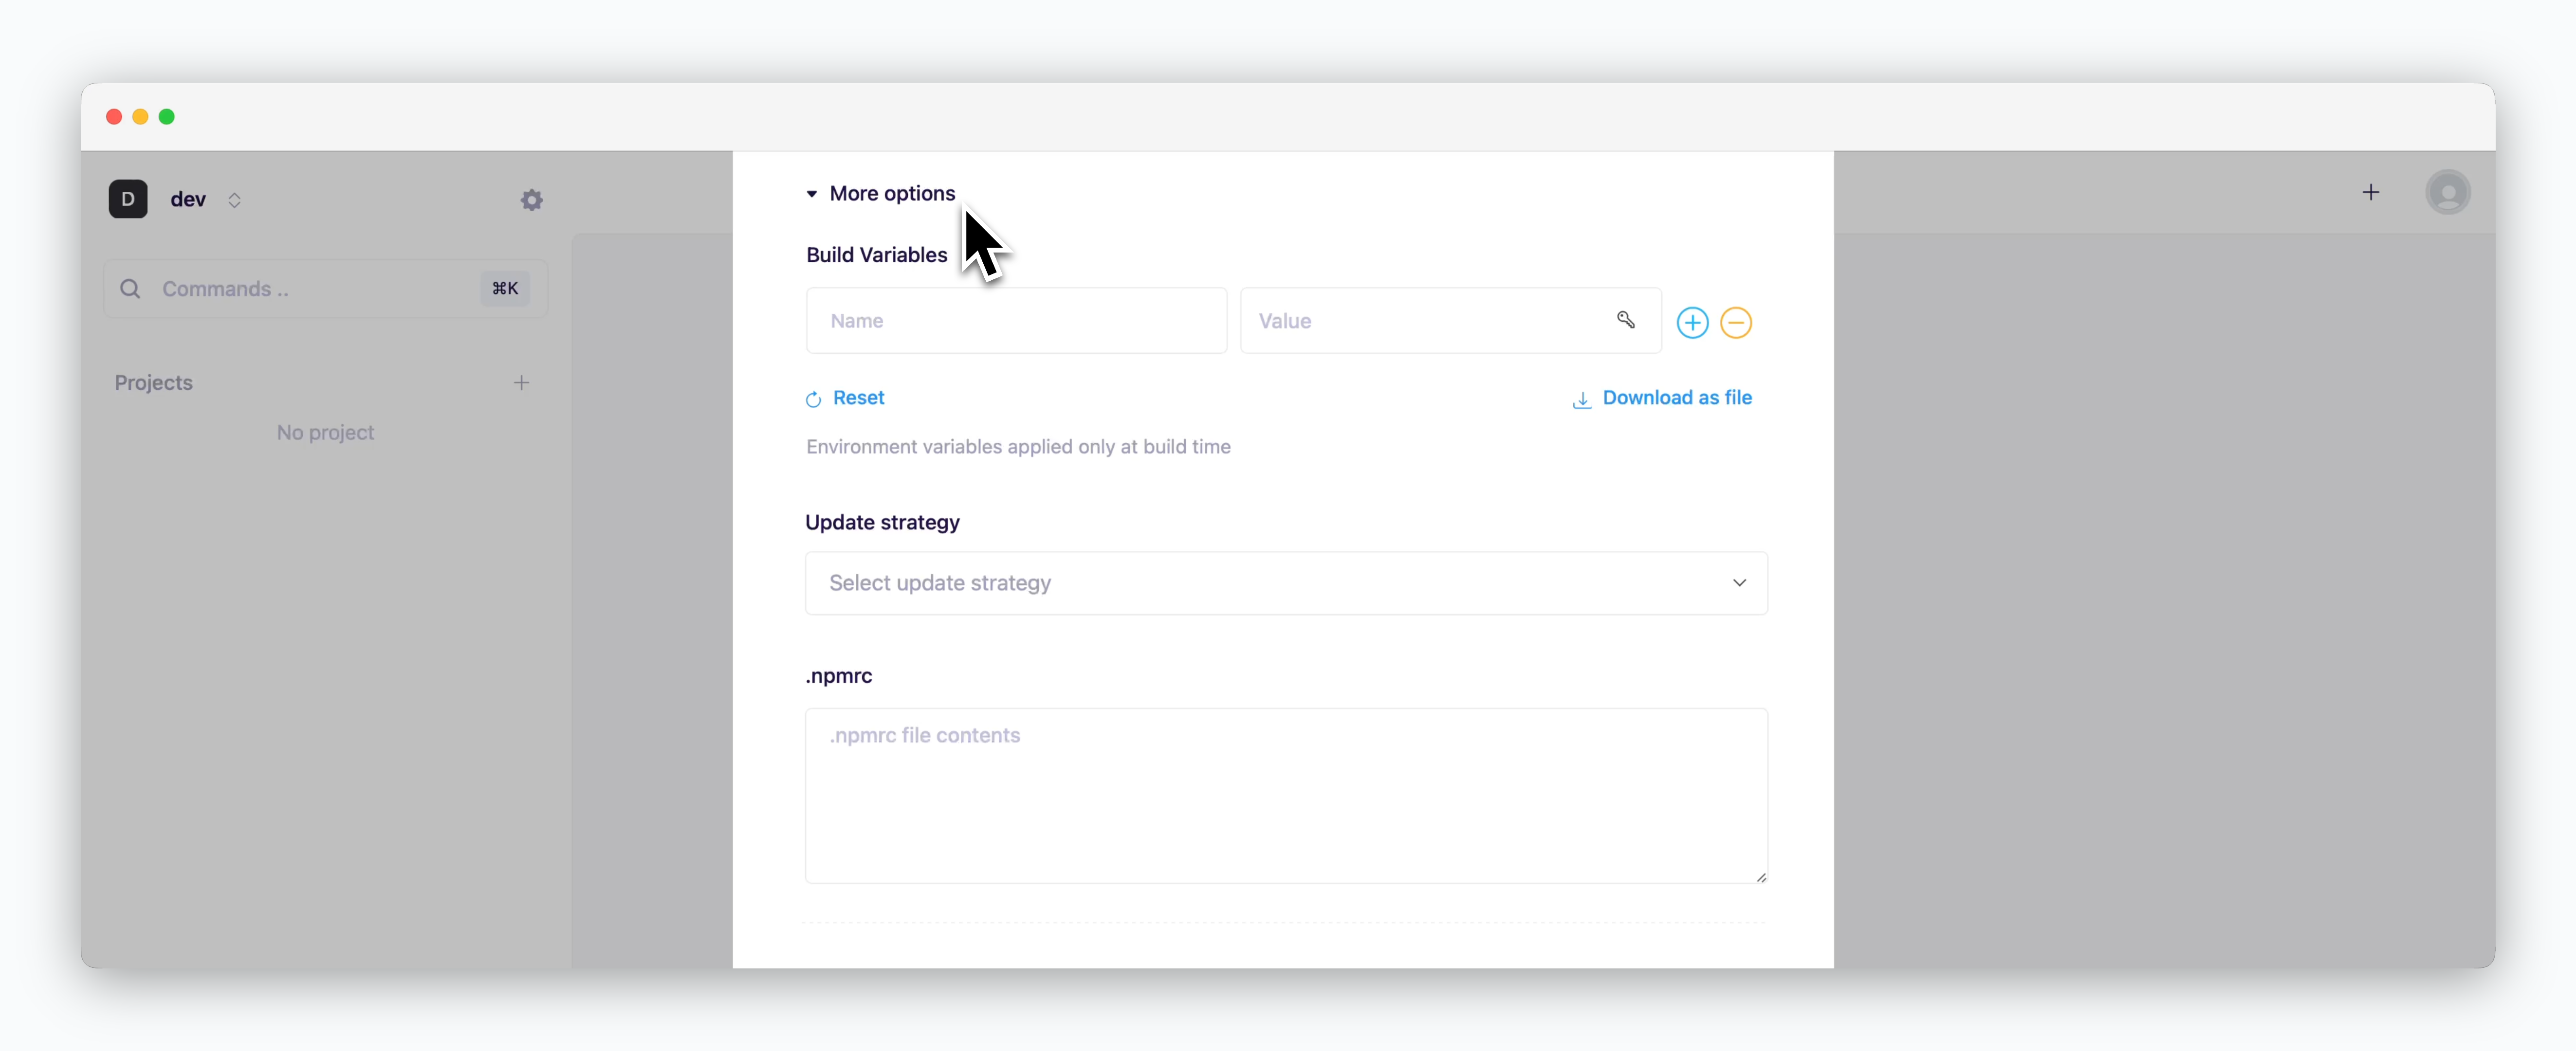
Configure additional deployment settings.
Available configuration fields will vary based on your selected template/preset. See below for language-specific settings.
springboot
node.js
Database
docker
Resource Settings and Deploy
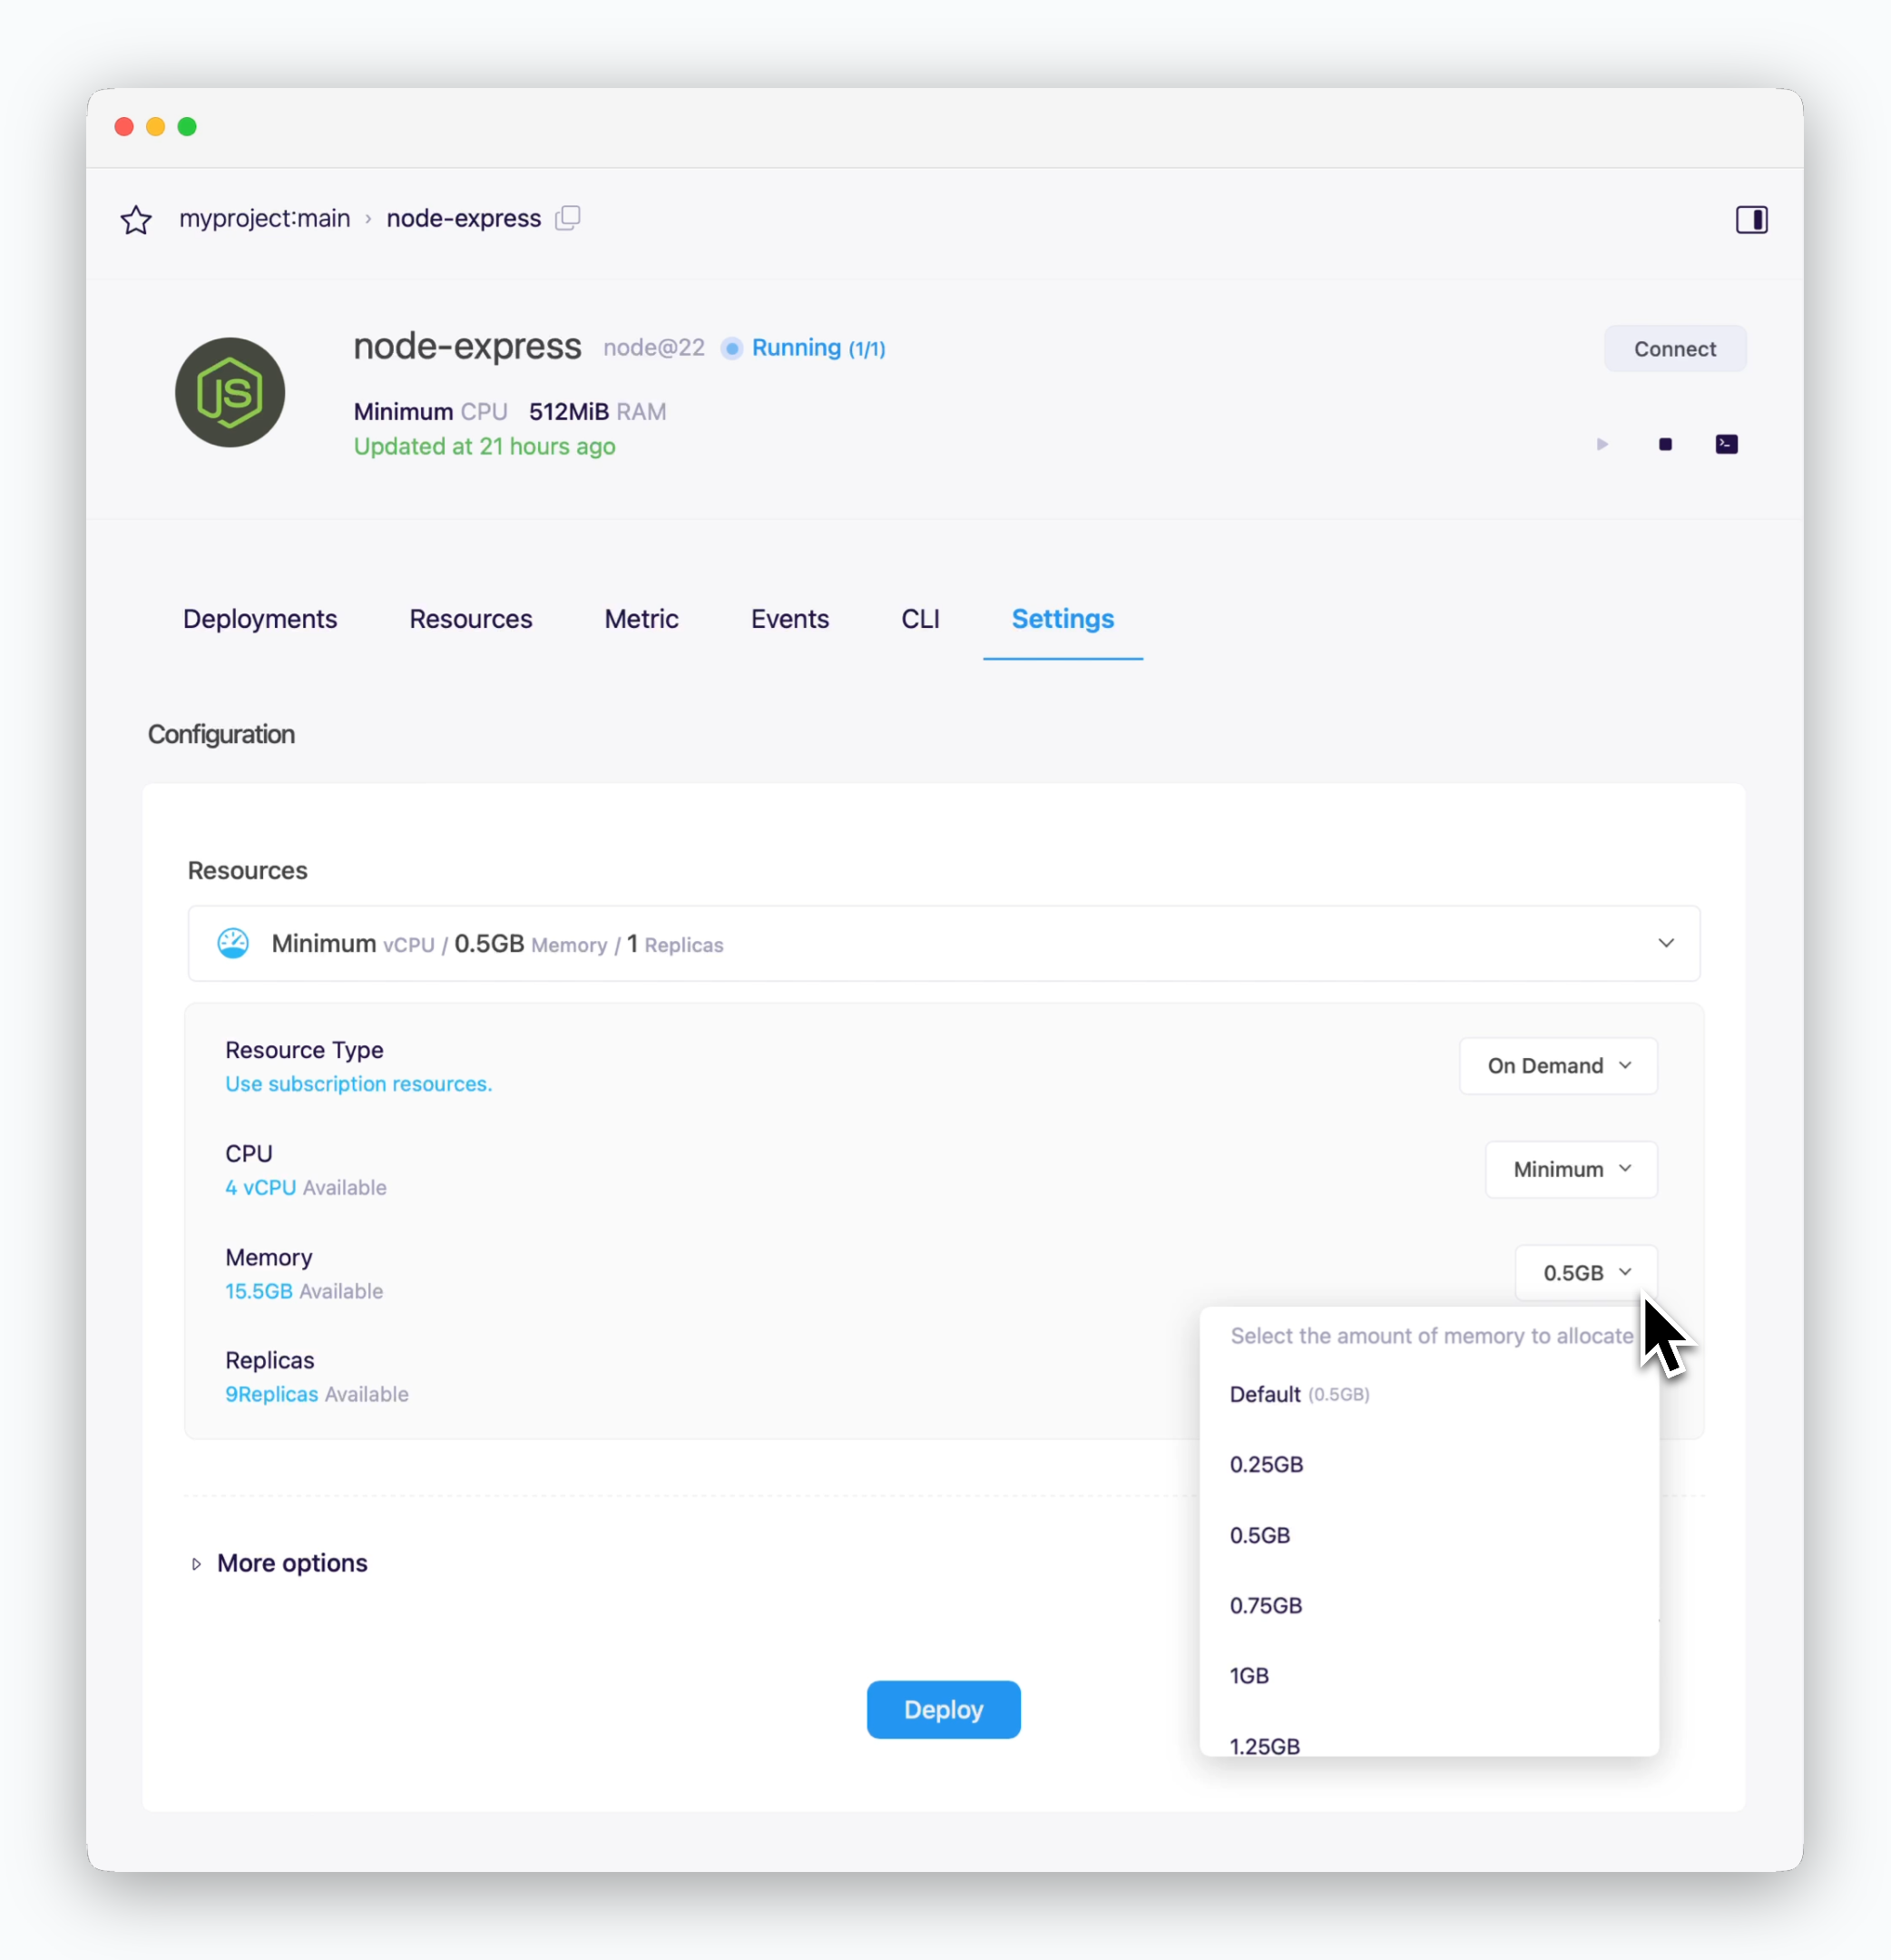
Resource Settings and Deploy
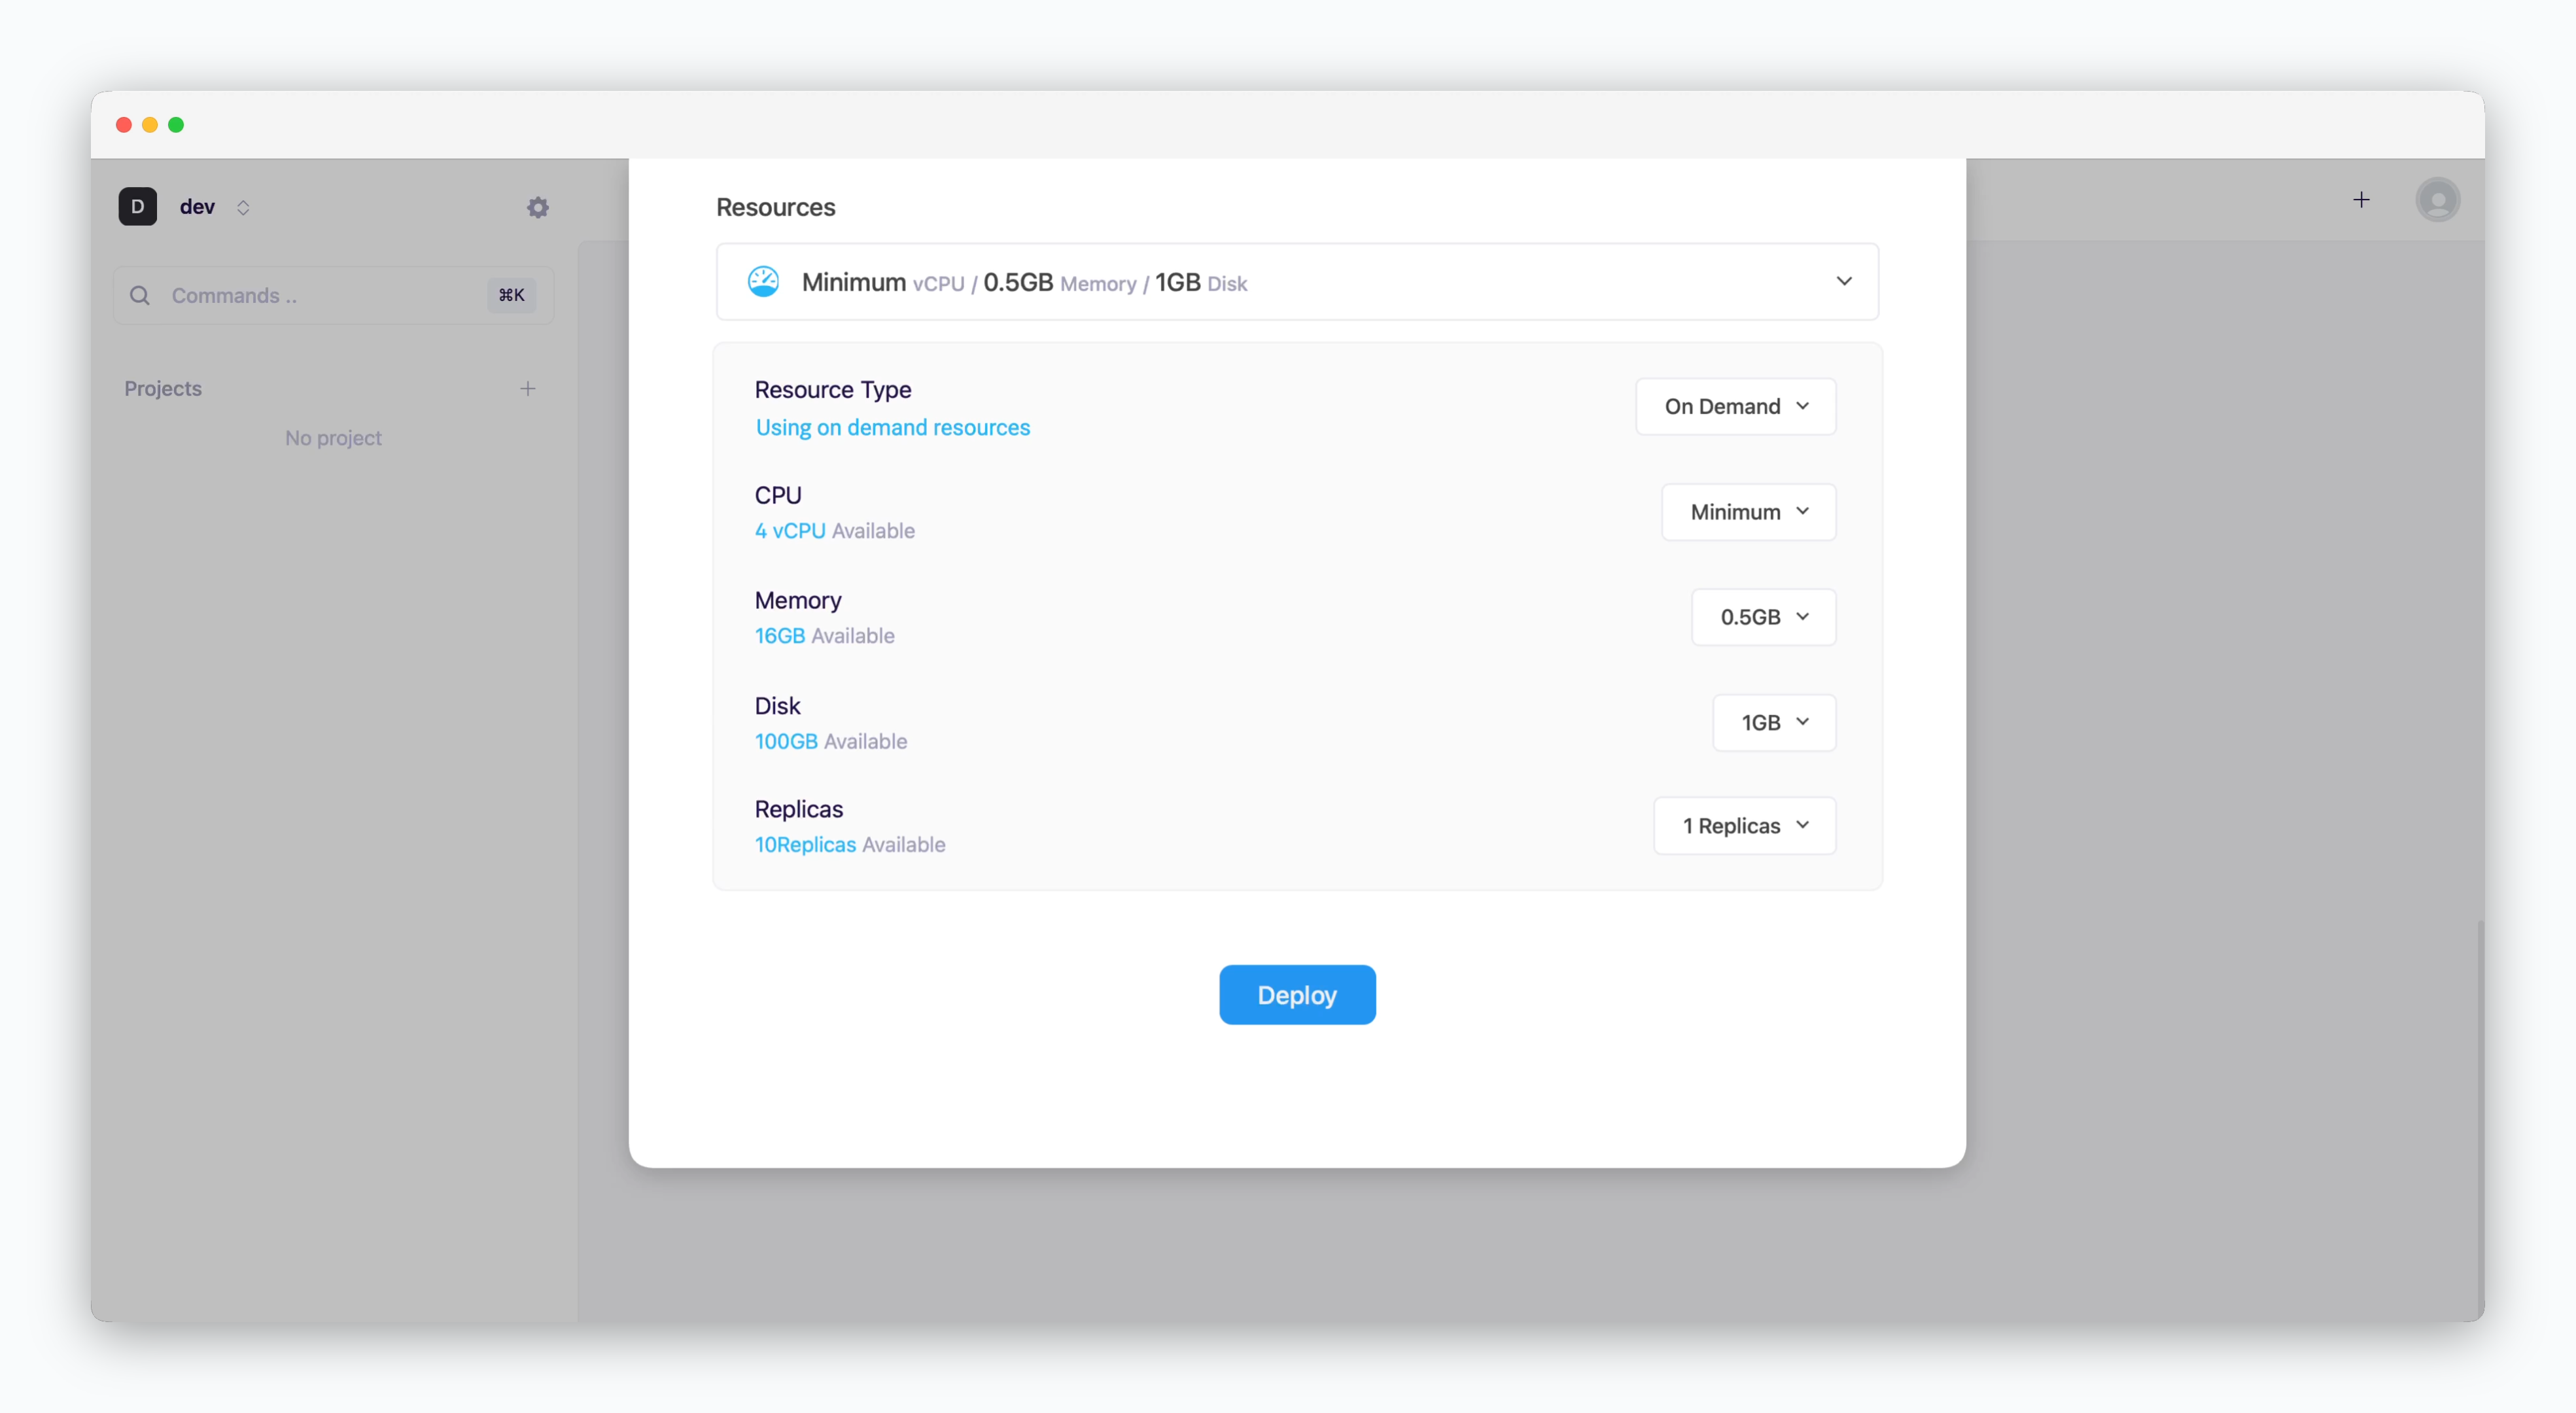
- Resource Type: Select between On-demand or Spot instance types
- CPU: Maximum vCPU resource for the service. Minimum vCPU means 0.1 vCPU
- Memory: Maximum memory size the service can use
- Disk: Database disk capacity (Available for database services only)
- Replica: Number of service replicas for high availability and load balancing
- Deploy: Click
Deploy
Available configuration fields will vary based on your selected template/preset. See below for language-specific settings.
springboot
node.js
Database
docker
Logs & Terminal
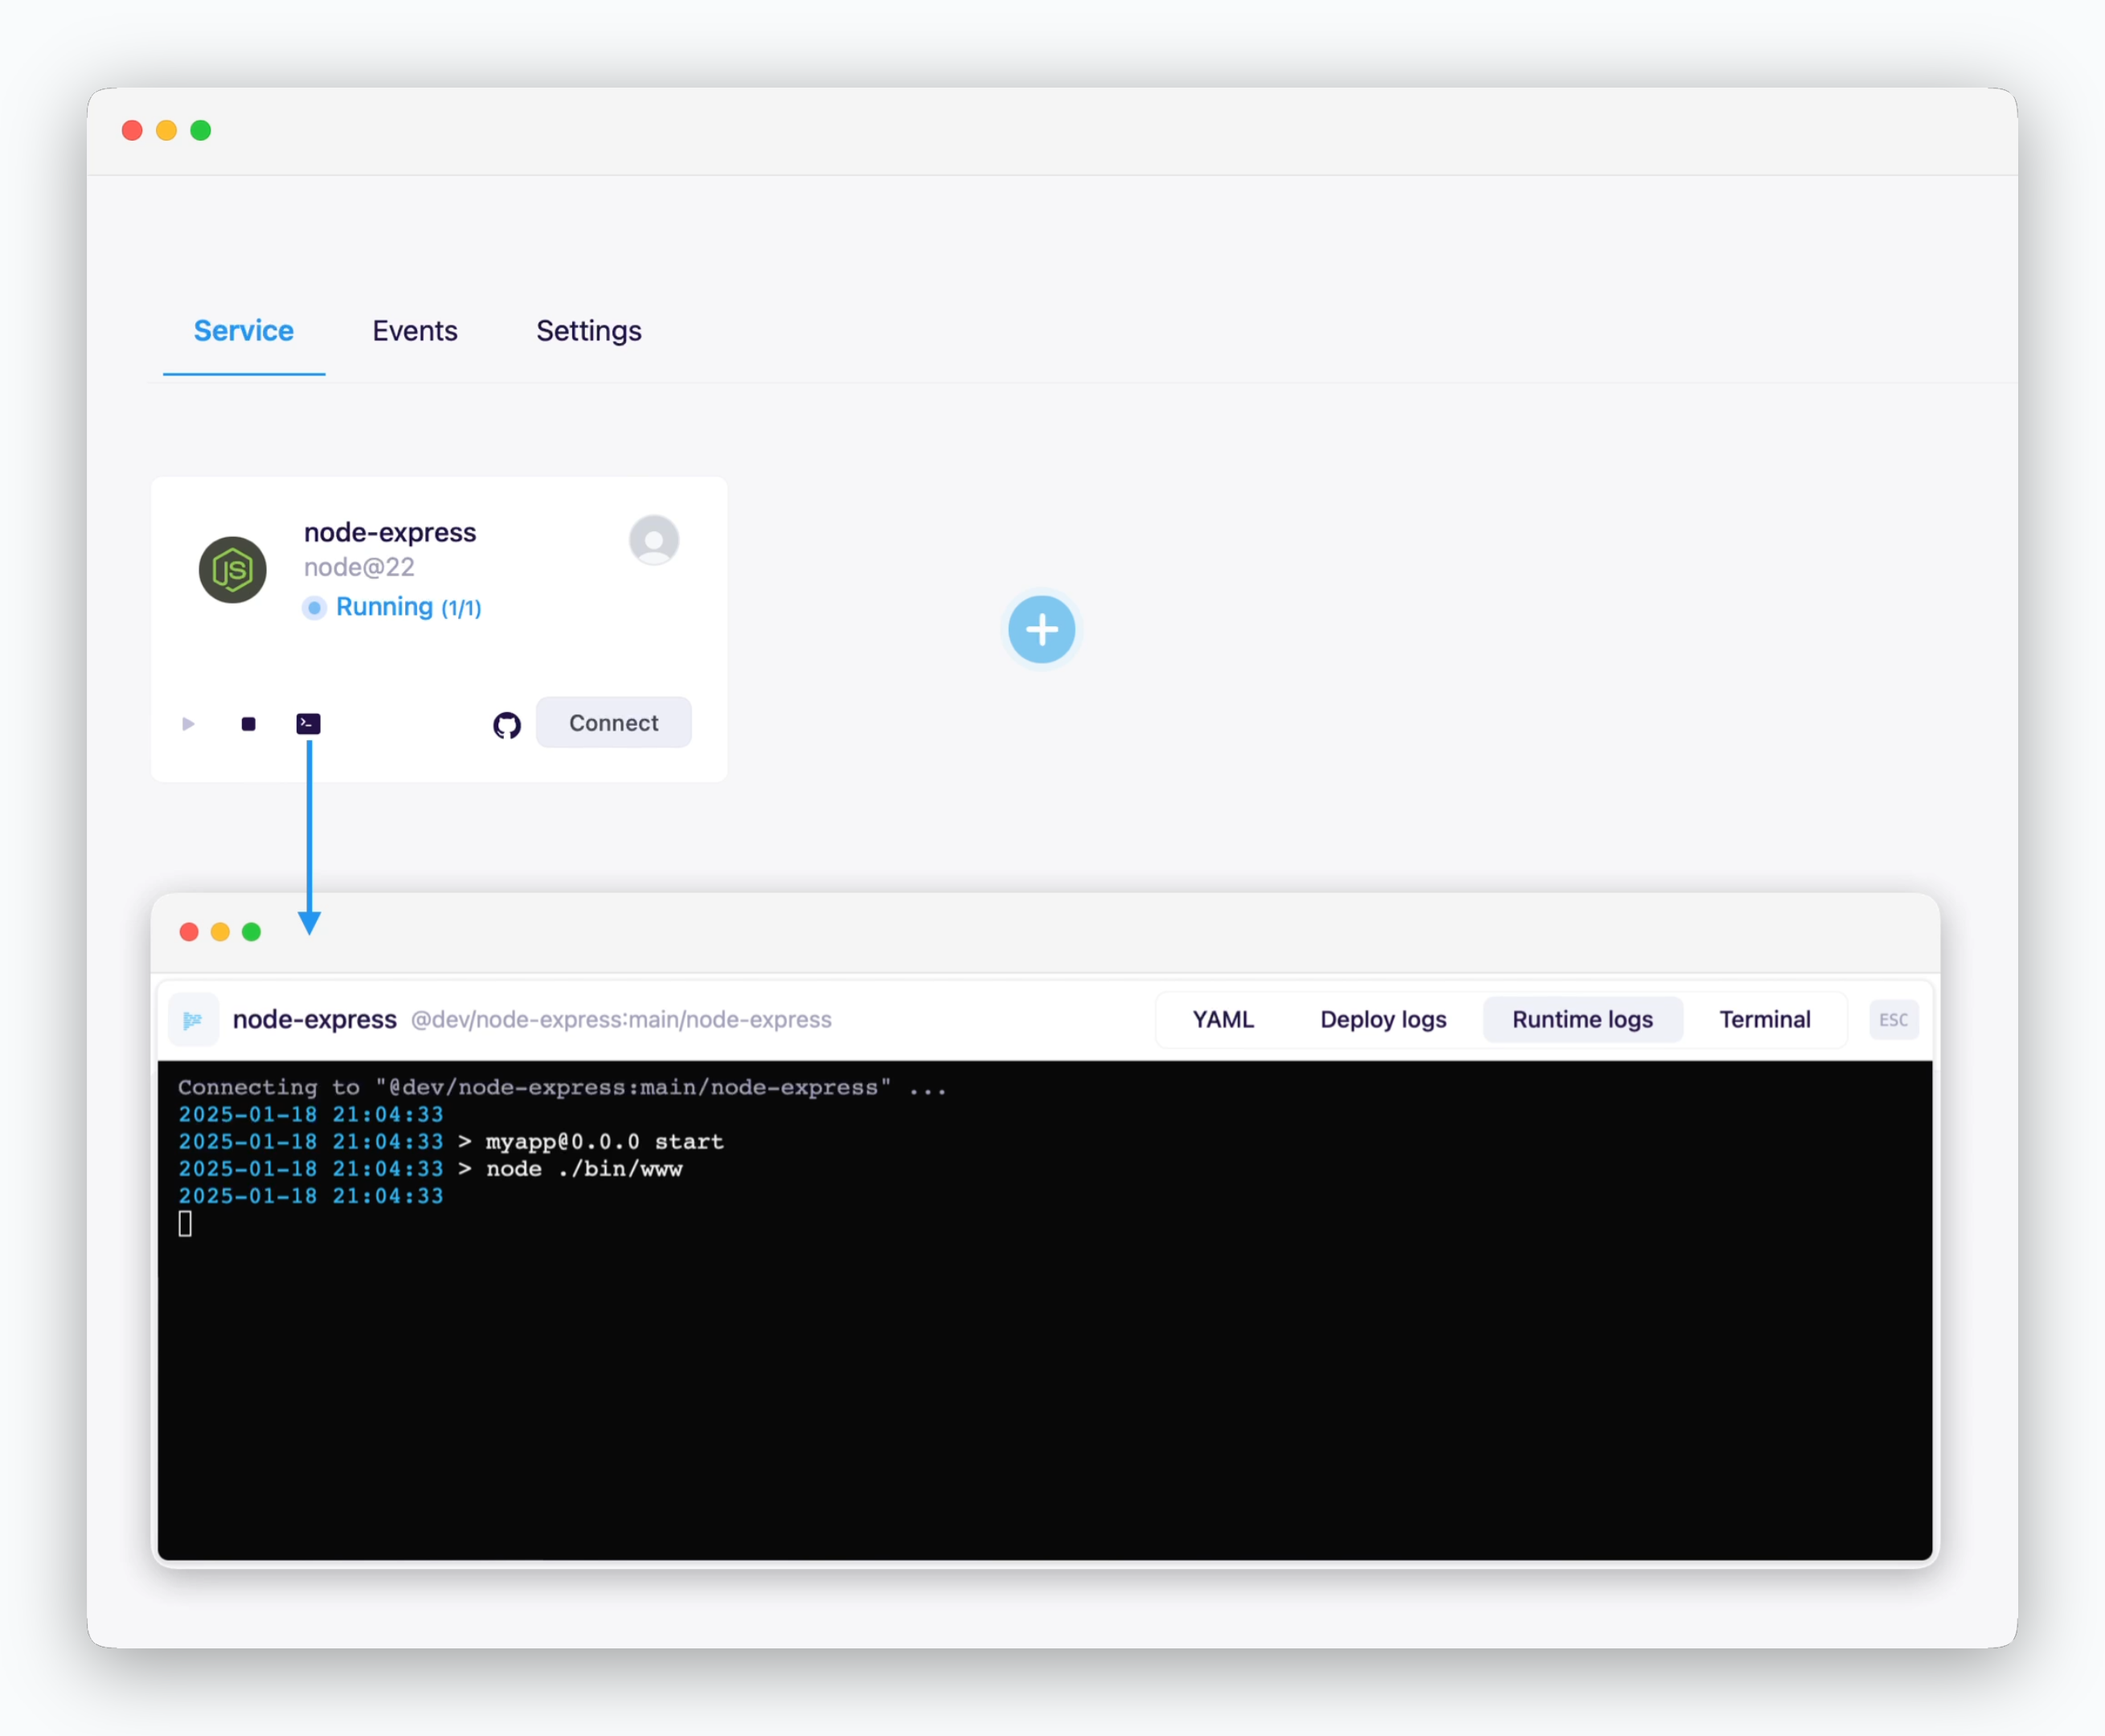
Click the icon in the service card or service page to check deployment/runtime logs or access the terminal.
Metrics
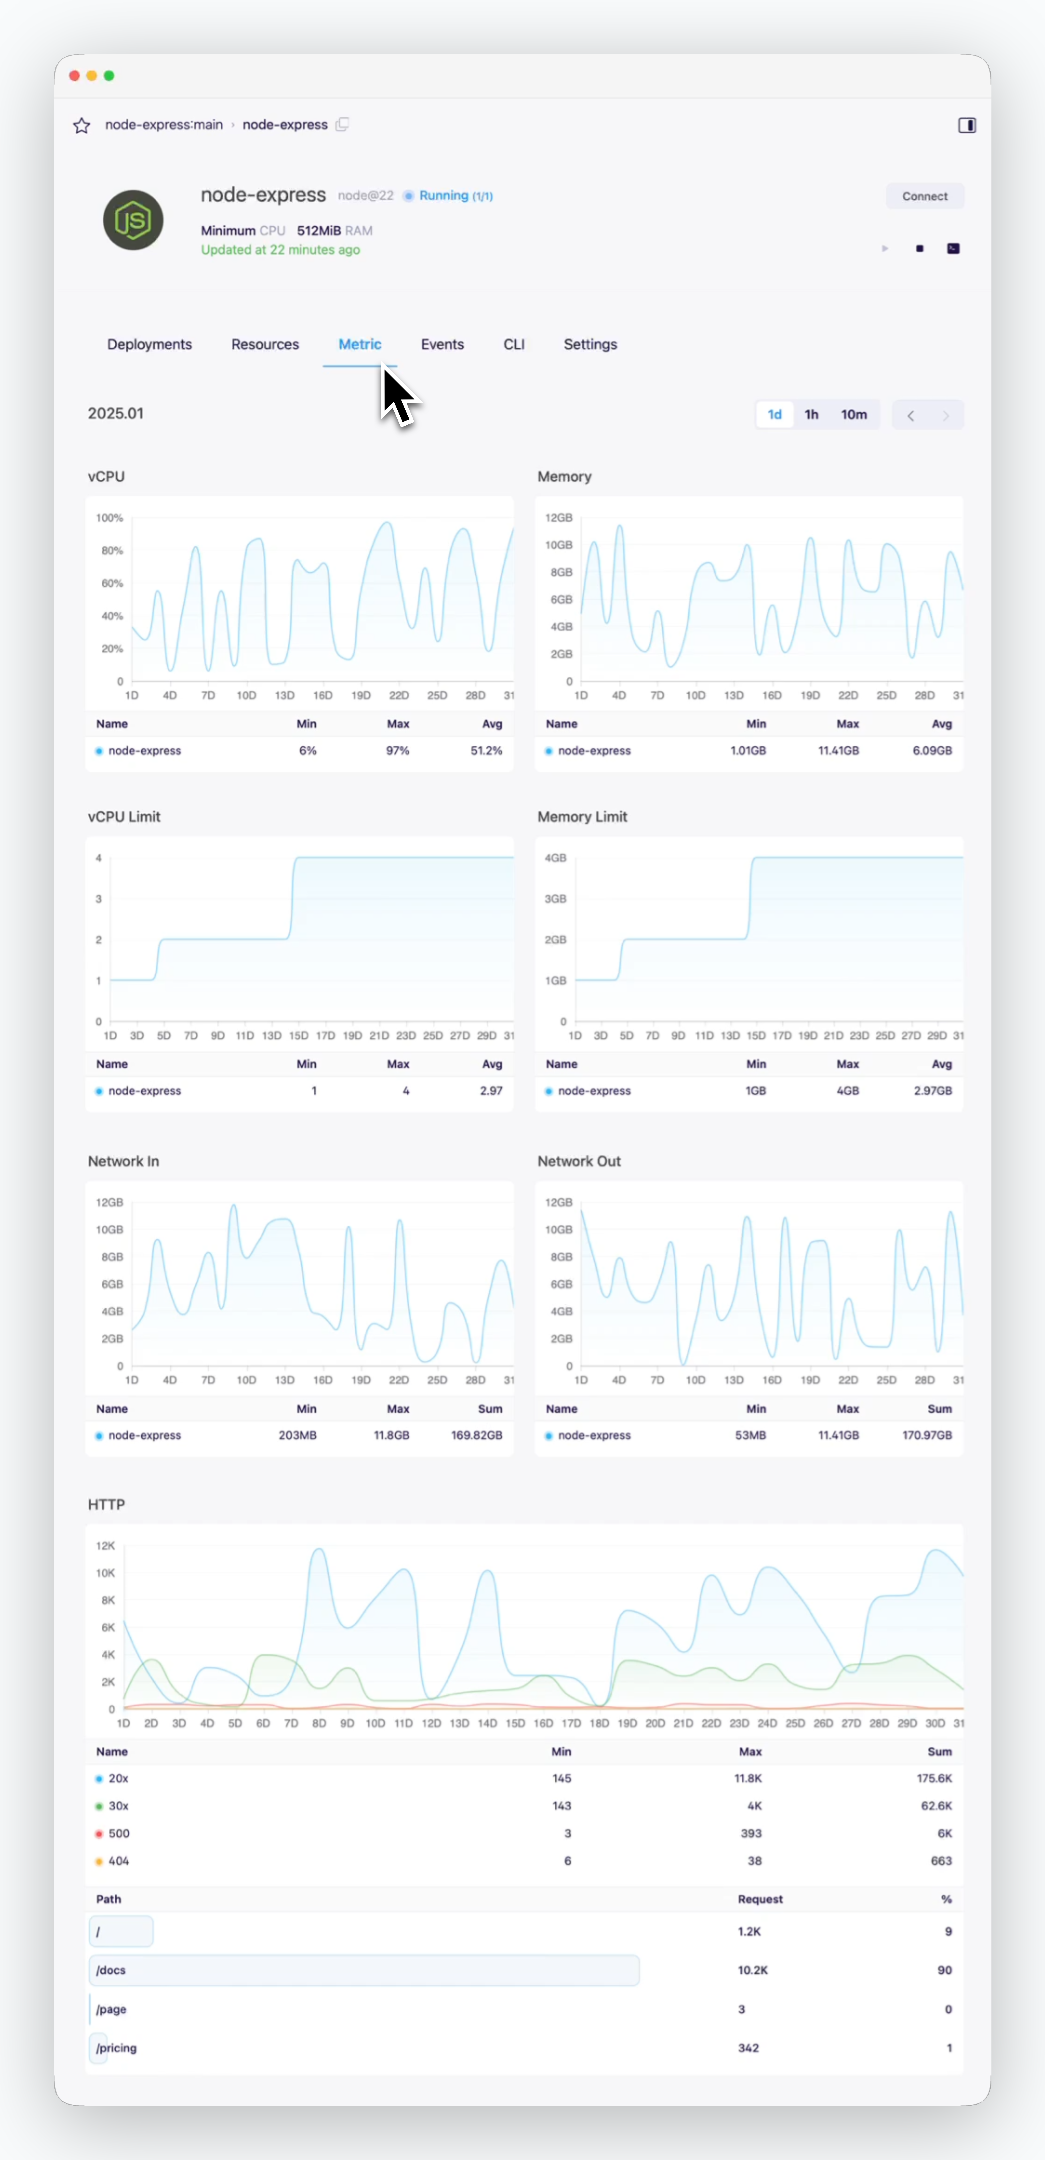
You can view service metrics in the Metrics tab of the service page.
Update
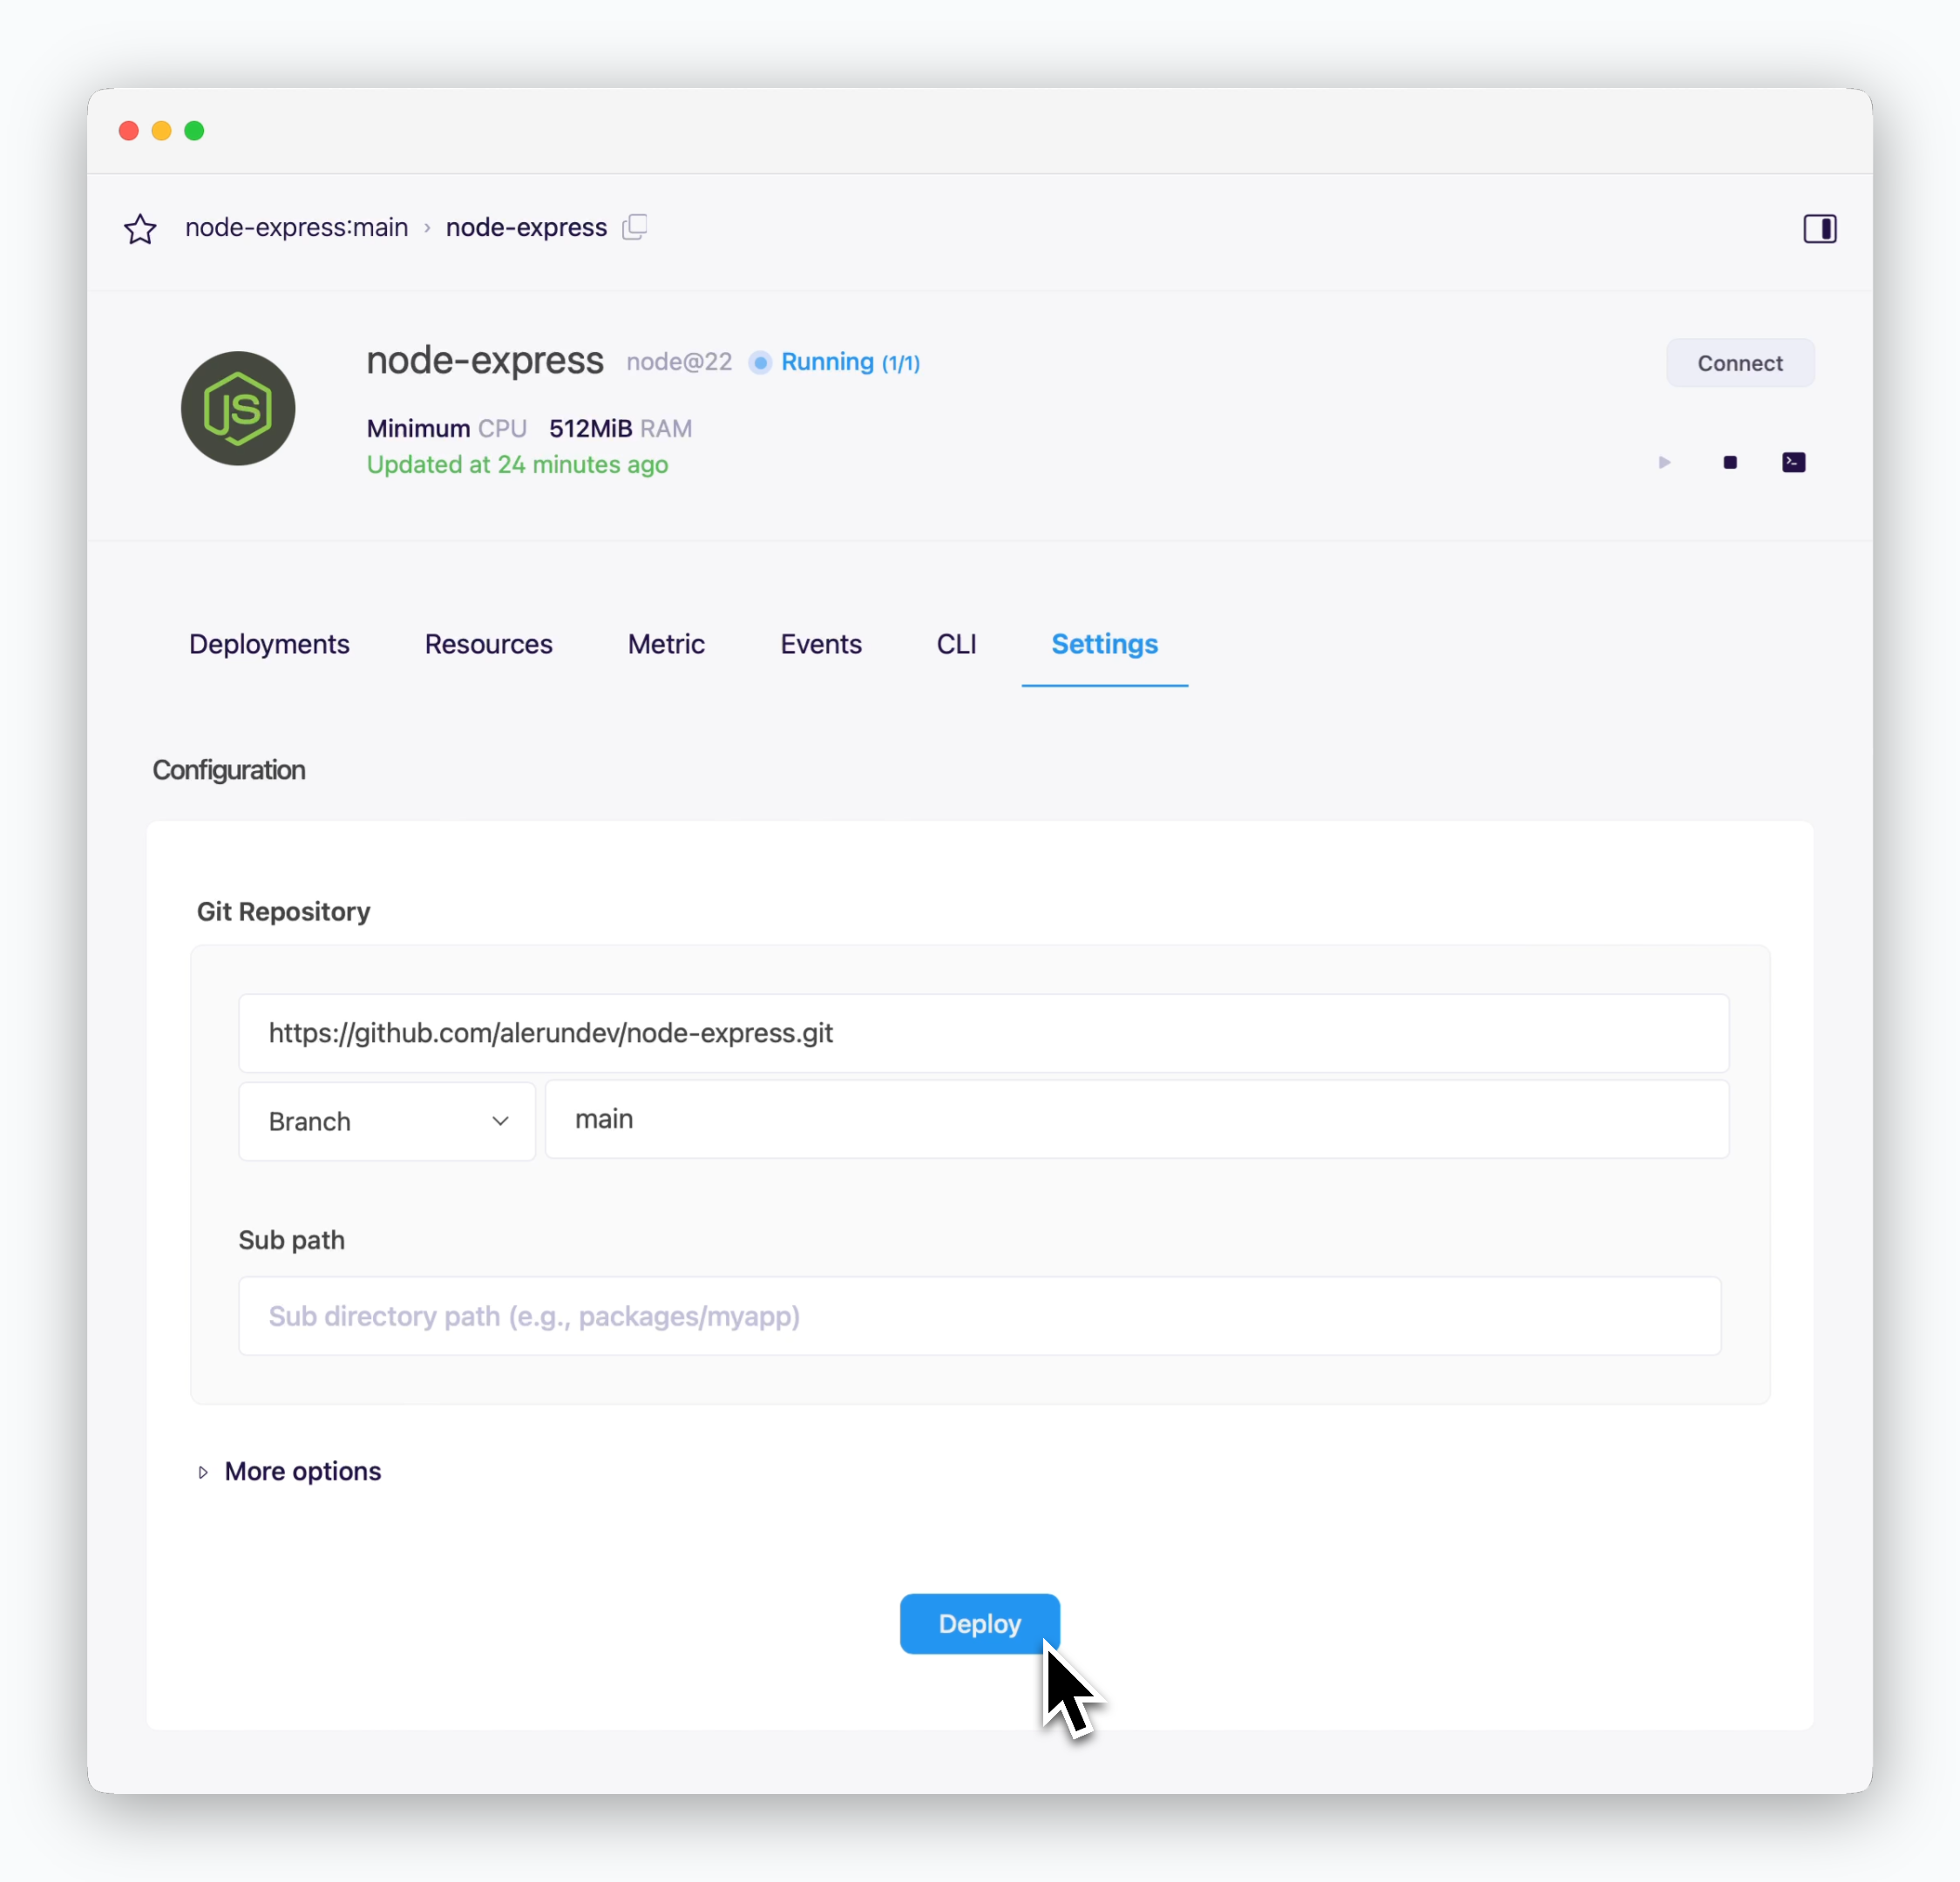
When you update your code or modify resource settings, click Deploy at the bottom of the service settings page to apply these changes with a new deployment.
Rollback
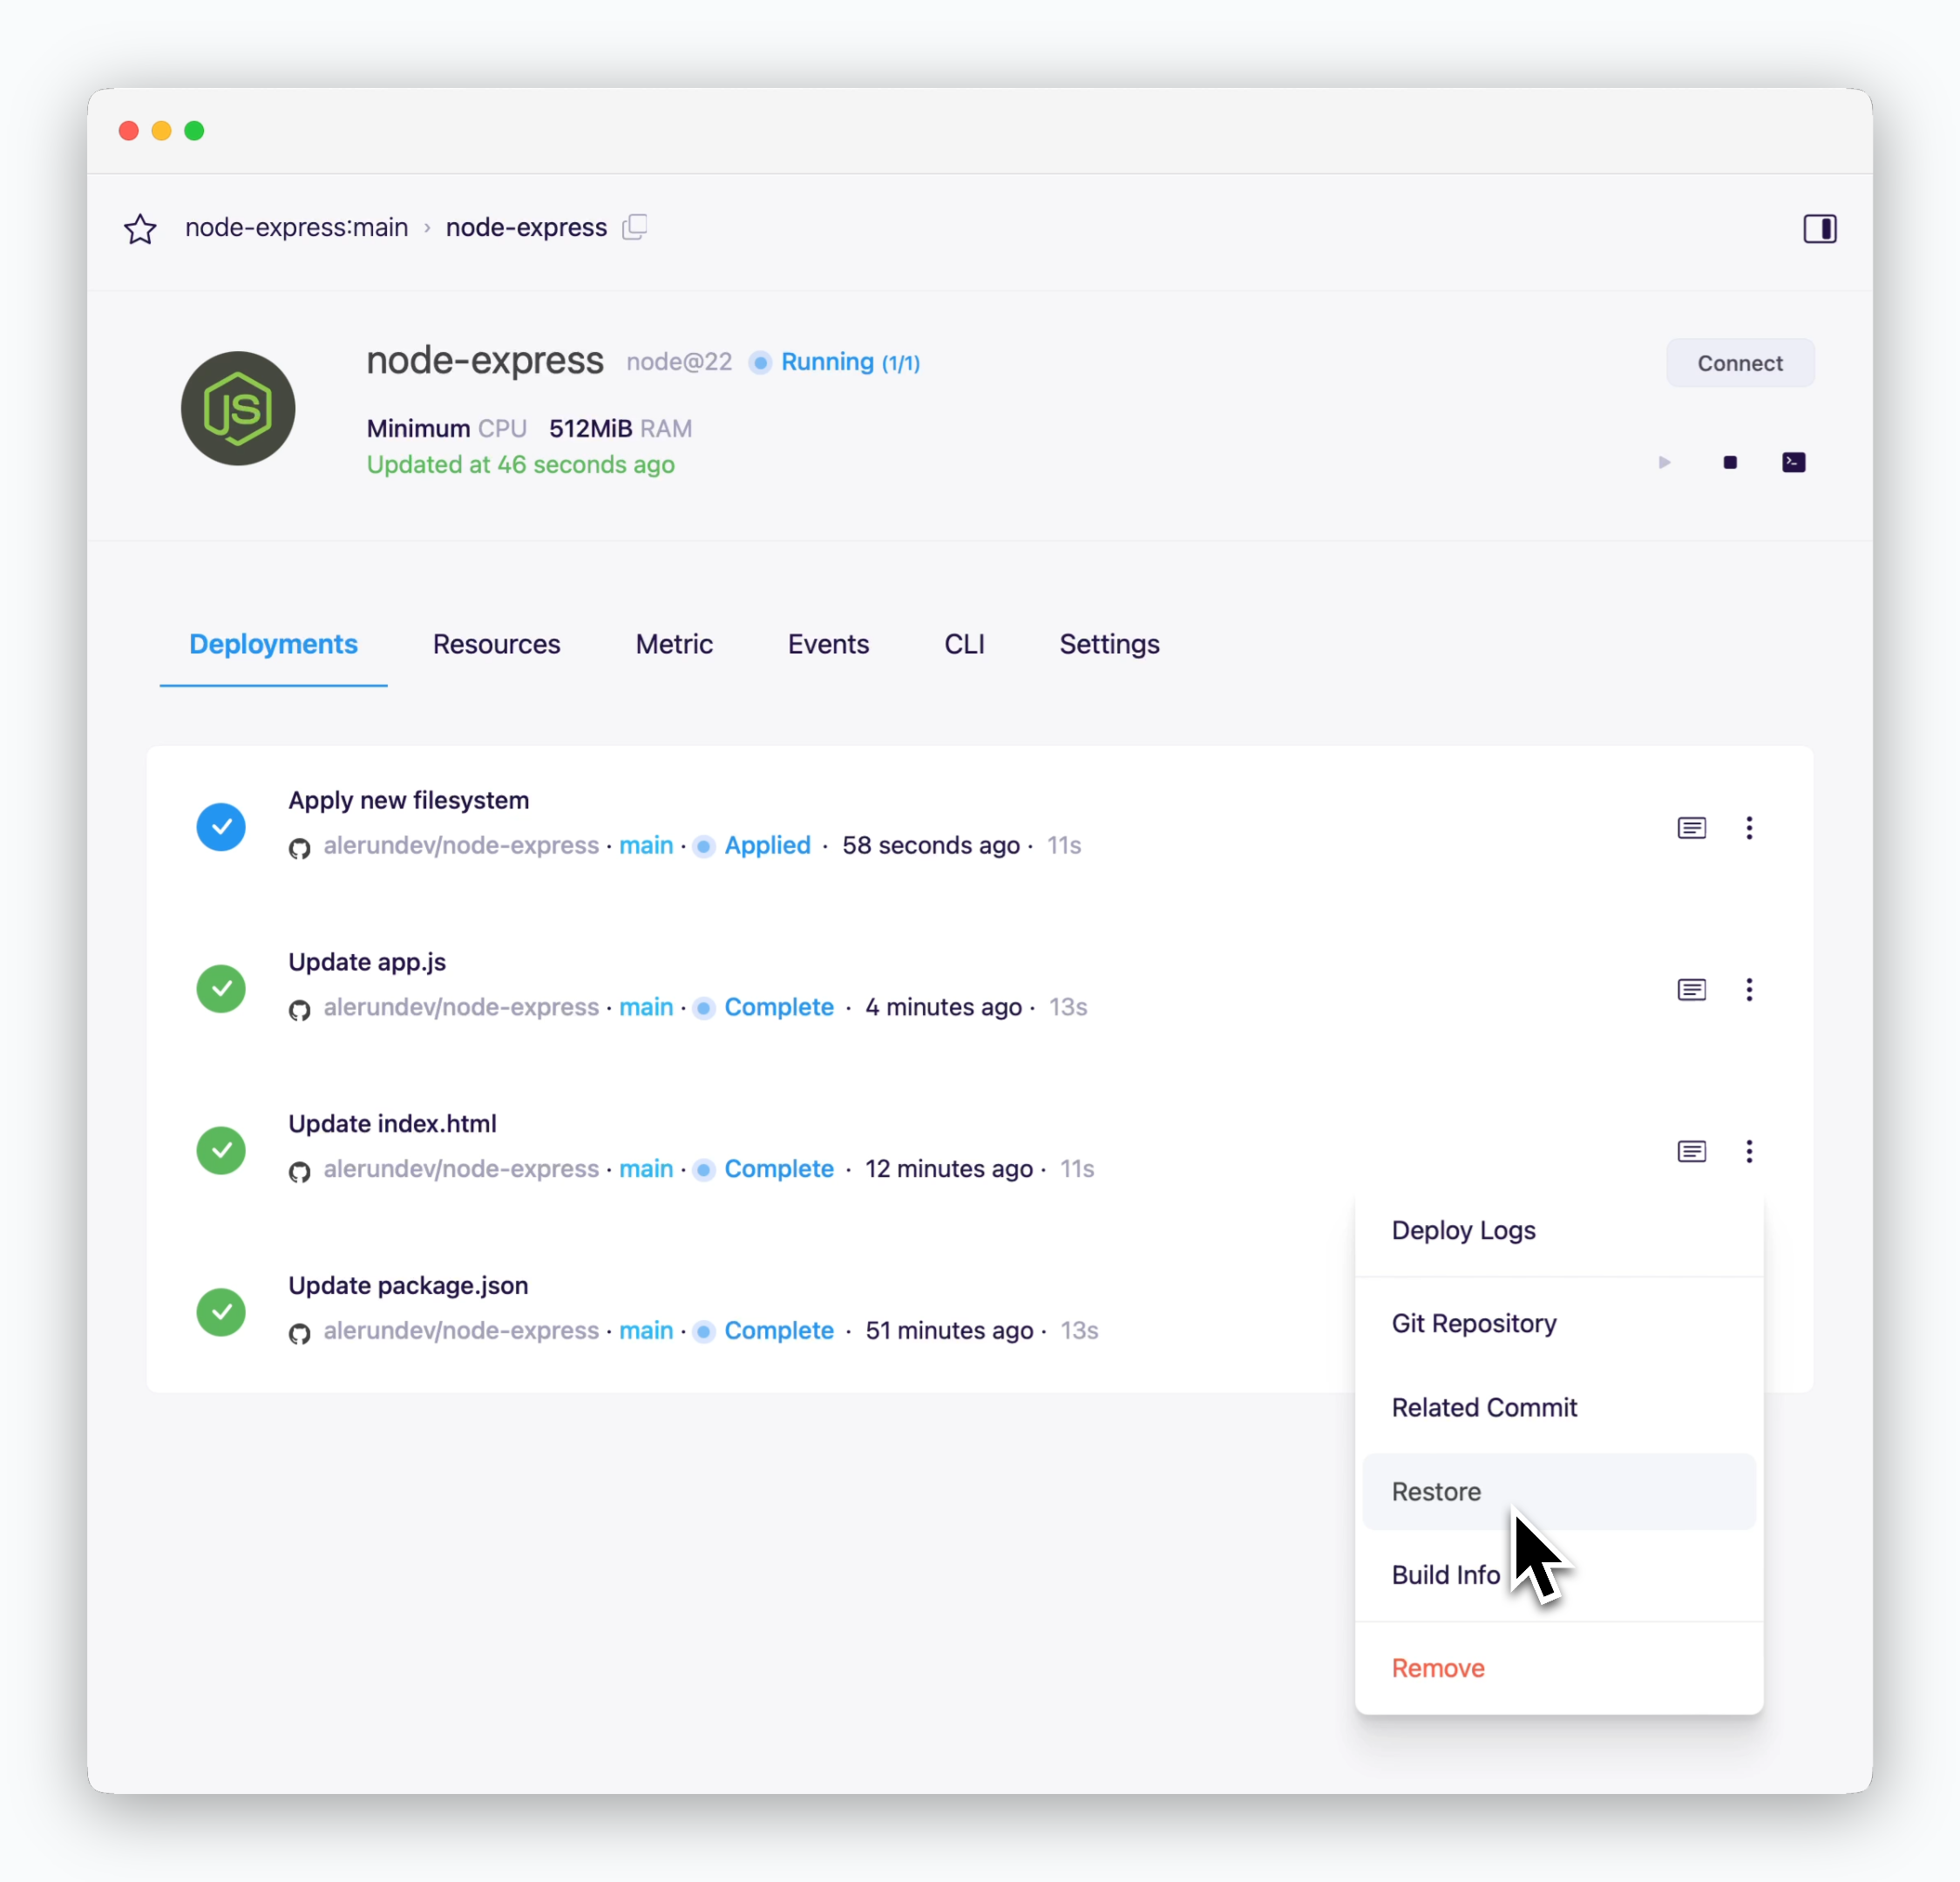
To restore your service to a previous version, navigate to the deployment history tab in the service page.
Troubleshooting
Subdirectory Not Applied (Error: Project files not found)
Subdirectory Not Applied (Error: Project files not found)
Builds are executed from the root directory during deployment. If your application source code is located in a subdirectory rather than the root directory of the repository, you need to configure the subdirectory path in your settings.
Version Mismatch
Version Mismatch
Build or runtime failures may occur if the version specified in the project configuration files (build.gradle, package.json, requirement.txt, etc.) doesn’t match the version selected. Set the appropriate versions according to your project and deploy again.
Port Number Issues
Port Number Issues
- To avoid runtime issues, ensure that the correct port numbers are set in your deployment settings for applications that require specific ports. If your application assigns ports dynamically, leave the port number field blank in the deployment settings.
Using Chrome Libraries like Selenium and Puppeteer
Using Chrome Libraries like Selenium and Puppeteer
- Templates provided by
alehave different default modules and libraries. If you need to use libraries that aren’t provided by default, such as Windows or Chrome libraries, you’ll need to deploy using a Dockerfile.
CORS Issues
CORS Issues
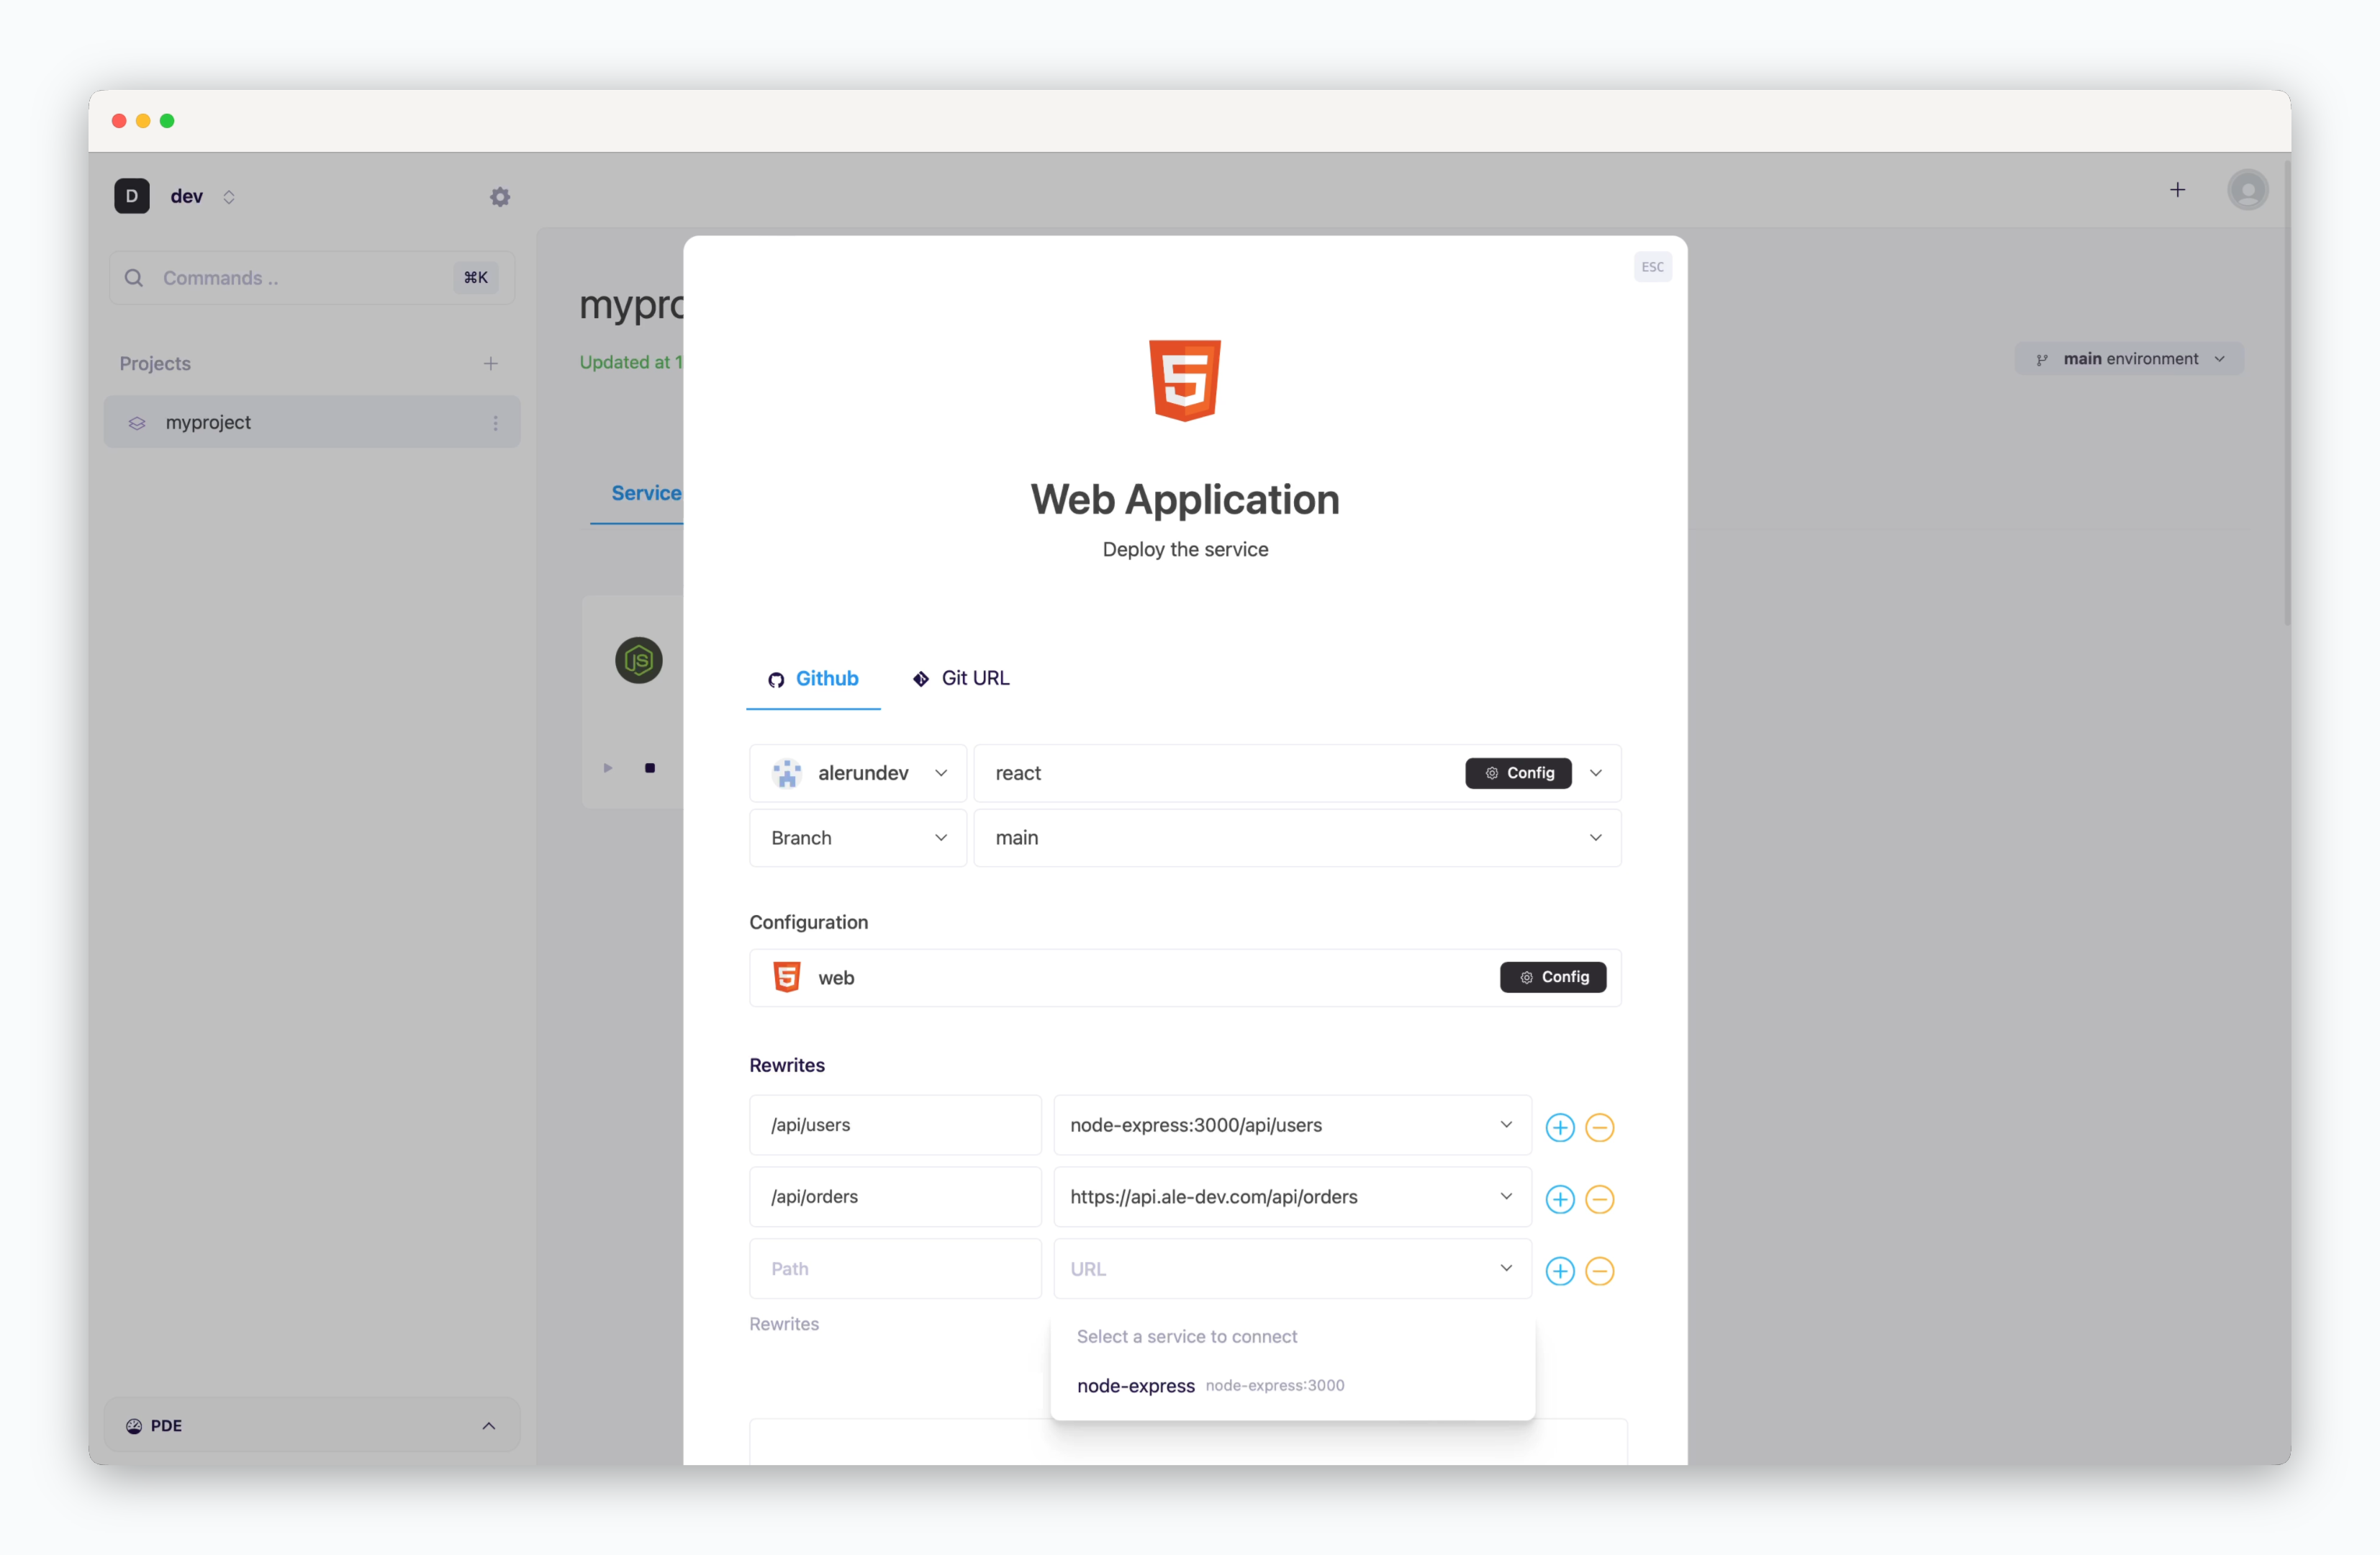
CORS solutions vary by framework, and issues can be resolved using framework-specific libraries or modules. While frameworks like Next.js offer built-in reverse proxy solutions through their Rewrites feature, you can use Rewrites configuration to set up reverse proxying when deploying web applications like React or Vue. See the reverse proxy page for detailed configuration guidelines.
Missing Runtime Logs
Missing Runtime Logs
- Click the
playbutton on the service card to restart the service and check the runtime logs. If logs are still not visible, check the Events tab on the service page to troubleshoot the issue.
Memory Resource Exhaustion (OOM)
Memory Resource Exhaustion (OOM)
- JVM applications may experience Out of Memory (OOM) errors when memory usage exceeds allocated resources. Node.js applications can similarly face heap memory limitations. To resolve this, either configure memory settings in your application or deploy with increased resource limits.
Timezone
Timezone
Set the timezone using the TZ environment variable. You can find the list of supported timezone formats here. For framework-specific configuration options, consult your framework’s documentation.