TLS certificates are automatically applied to the preview URLs and custom domains of services deployed with ale.


Cert Generator Install & Issue

1

Set the values used in the certificate generation script as environment variables.

export CLOUDFLARE_DOMAIN=<Cloudflare domain>
export CLOUDFLARE_EMAIL=<Cloudflare account email>
export CLOUDFLARE_API_TOKEN=<Cloudflare API token>
export ACME_EMAIL=<Certificate issuance email>

The Cloudflare API token must have DNS Edit permissions.

2

Install the cluster certificate generator using the following command.

cat <<EOF | kubectl apply -f -
apiVersion: v1
kind: Secret
metadata:
  name: cloudflare-api-token-secret
  namespace: cert-manager
type: Opaque
stringData:
  api-token: $CLOUDFLARE_API_TOKEN
---
apiVersion: cert-manager.io/v1
kind: ClusterIssuer
metadata:
  name: ale-issuer
  namespace: cert-manager
spec:
  acme:
    email: $ACME_EMAIL
    server: https://acme-v02.api.letsencrypt.org/directory
    privateKeySecretRef:
      name: ale-issuer
    solvers:
      - http01:
          ingress:
            class: nginx
      - dns01:
          cloudflare:
            email: $CLOUDFLARE_EMAIL
            apiTokenSecretRef:
              name: cloudflare-api-token-secret
              key: api-token
        selector:
          dnsZones:
            - $CLOUDFLARE_DOMAIN
EOF
3

Run the following command to issue a certificate.

cat <<EOF | kubectl apply -f -
apiVersion: cert-manager.io/v1
kind: Certificate
metadata:
  name: ale-app-tls
  namespace: cert-manager
spec:
  dnsNames:
    - "*.$CLOUDFLARE_DOMAIN"
  issuerRef:
    kind: ClusterIssuer
    name: ale-issuer
  secretName: ale-app-tls
EOF

Ingress Setup

1

Use the following command to install the Cluster Certificate Generator and Ingress.

cat <<EOF | kubectl apply -f -
apiVersion: networking.k8s.io/v1
kind: Ingress
metadata:
  name: ale
  namespace: ale
  annotations:
    nginx.ingress.kubernetes.io/whitelist-source-range: 0.0.0.0/0
    cert-manager.io/cluster-issuer: ale-issuer
spec:
  ingressClassName: nginx
  tls:
    - hosts:
        - app.$CLOUDFLARE_DOMAIN
      secretName: ale-controller-tls
  rules:
    - host: app.$CLOUDFLARE_DOMAIN
      http:
        paths:
          - path: /
            pathType: Prefix
            backend:
              service:
                name: ale-controller
                port:
                  number: 9001
EOF
2

Use the following command to verify that the certificates have been created and applied. If created successfully, the STATE field should show as valid.

kubectl get order -n ale \
  | awk '/ale-/{print $1}' \
  | xargs kubectl get order -n ale
NAME                              STATE   AGE
ale-controller-tls-1-1997619857   valid   103s
3

If you can access the following URLs, the certificate has been applied successfully. If access fails, check the status of the Cert Manager pod or the Cluster Issuer.

https://app.[Cloudflare_Domain]
4

Create an administrator account and complete the installation.

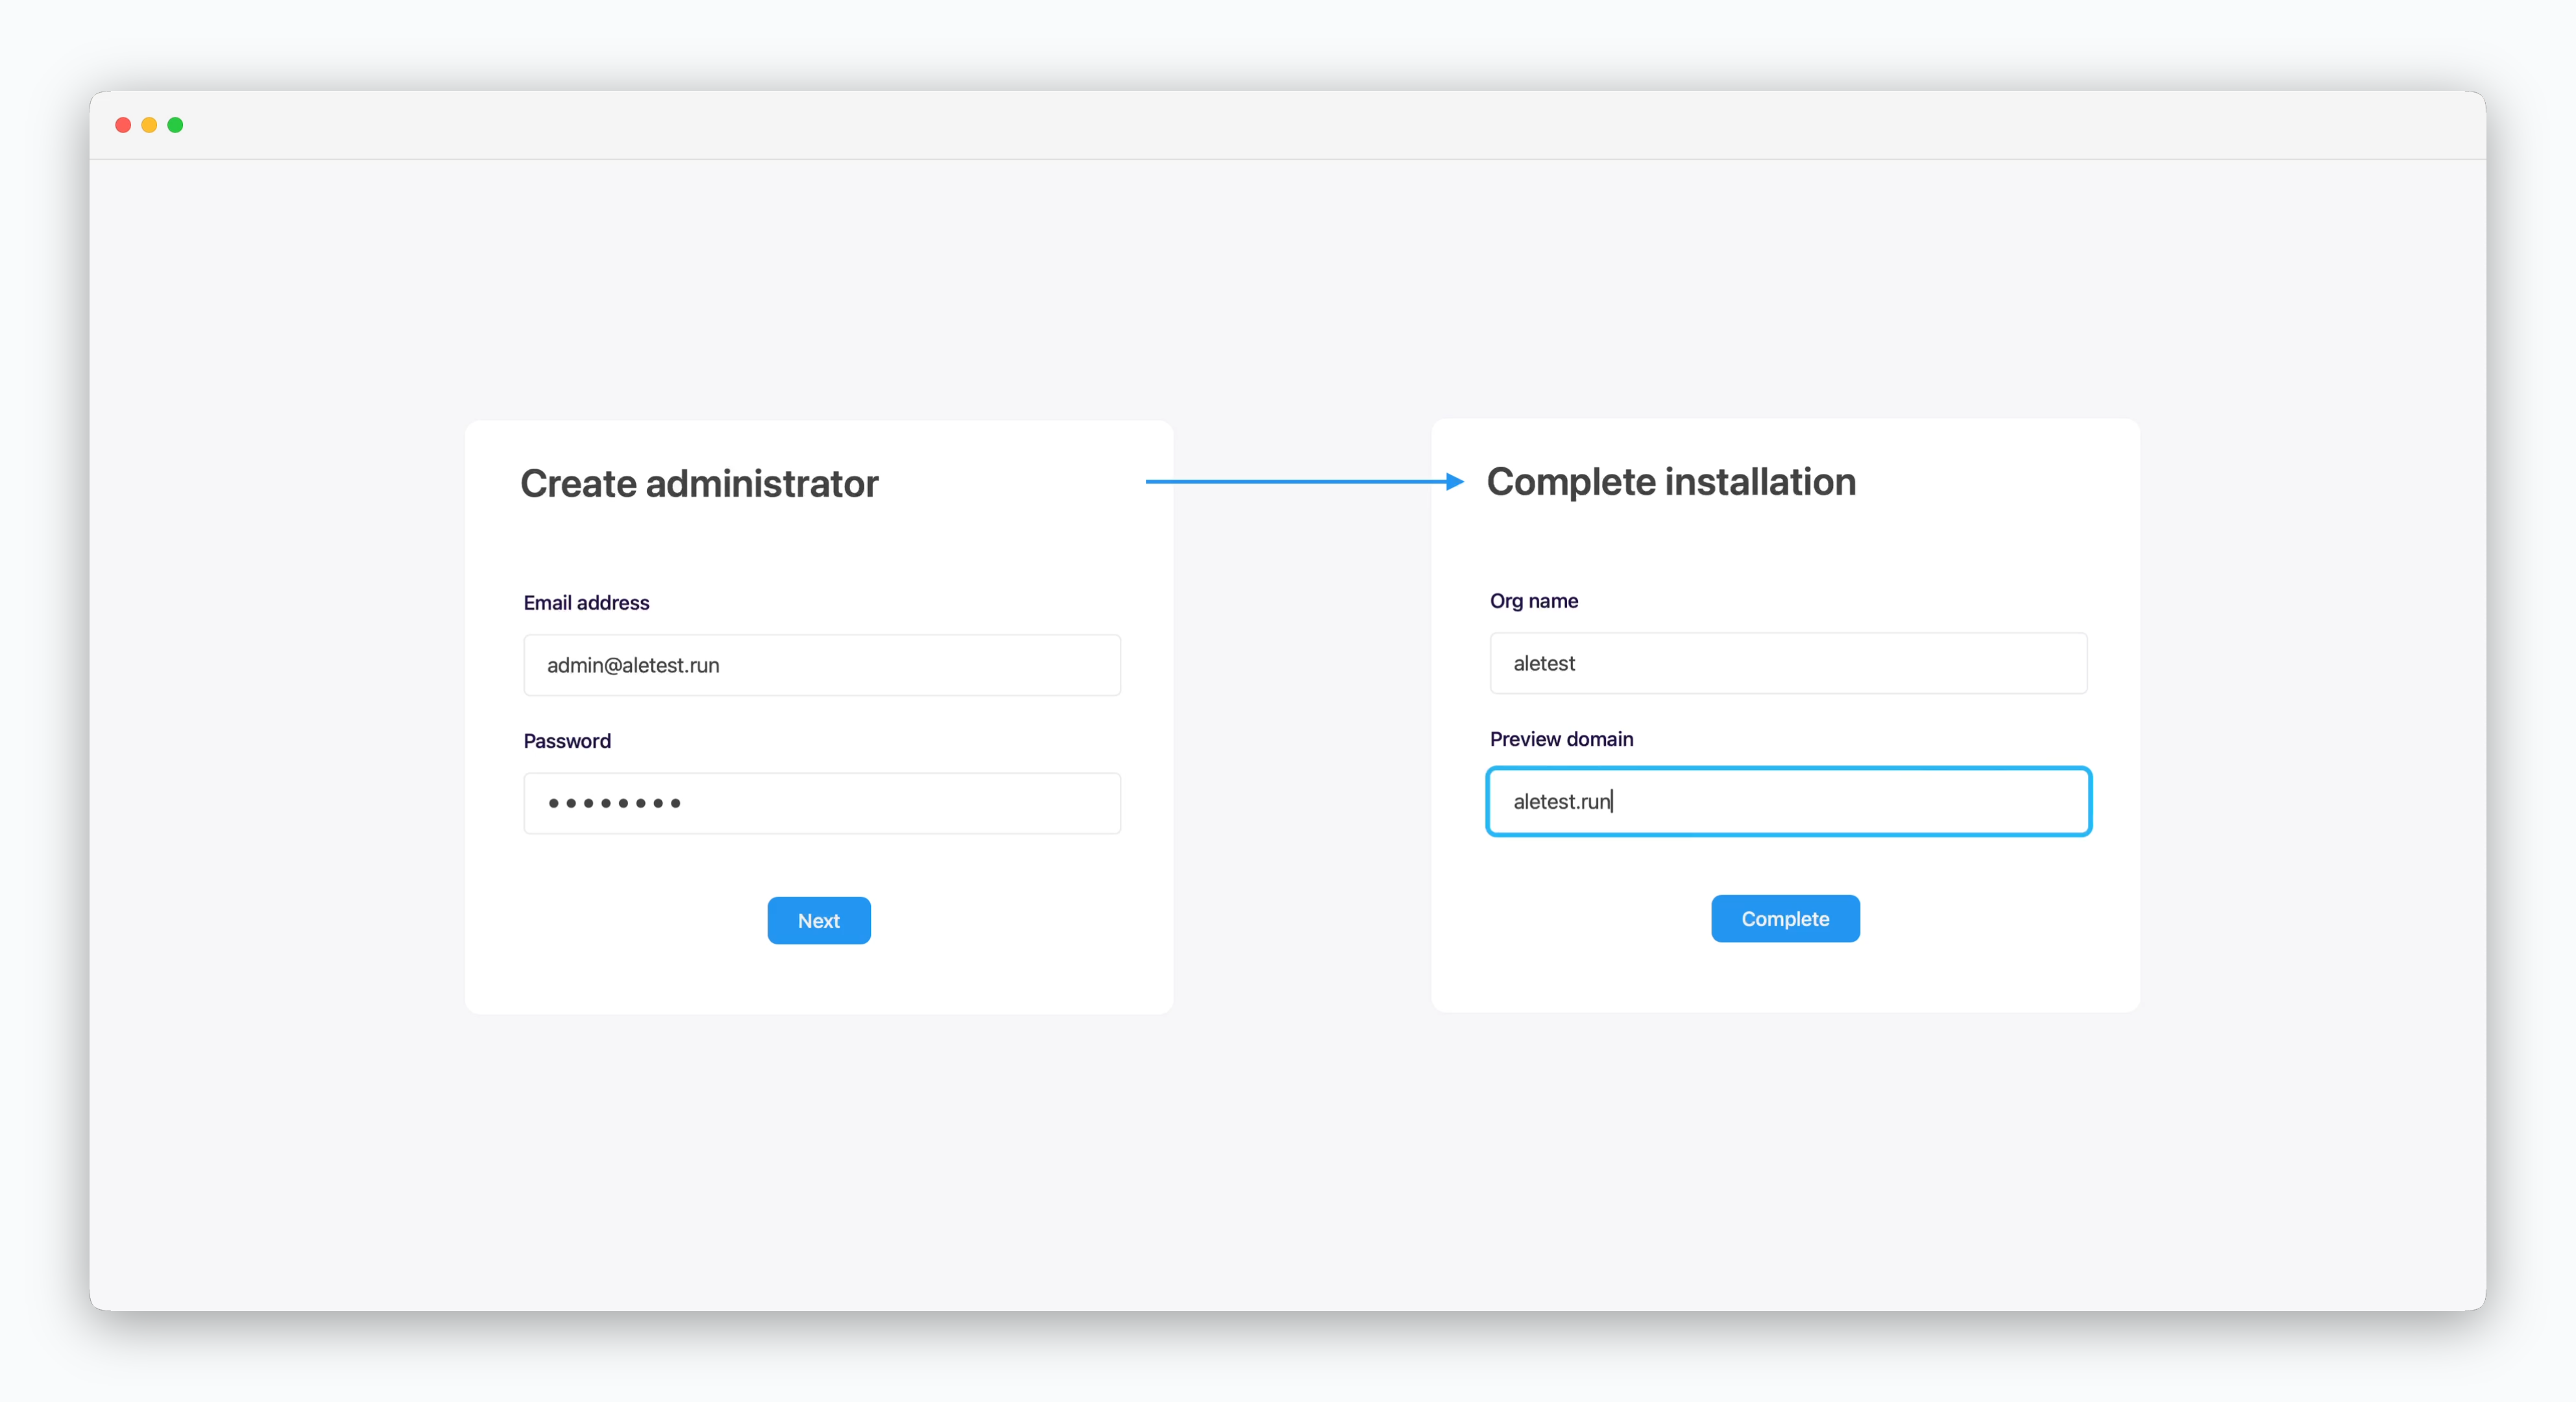
Enter the root domain in the preview domain field.

Cluster Network Configuration

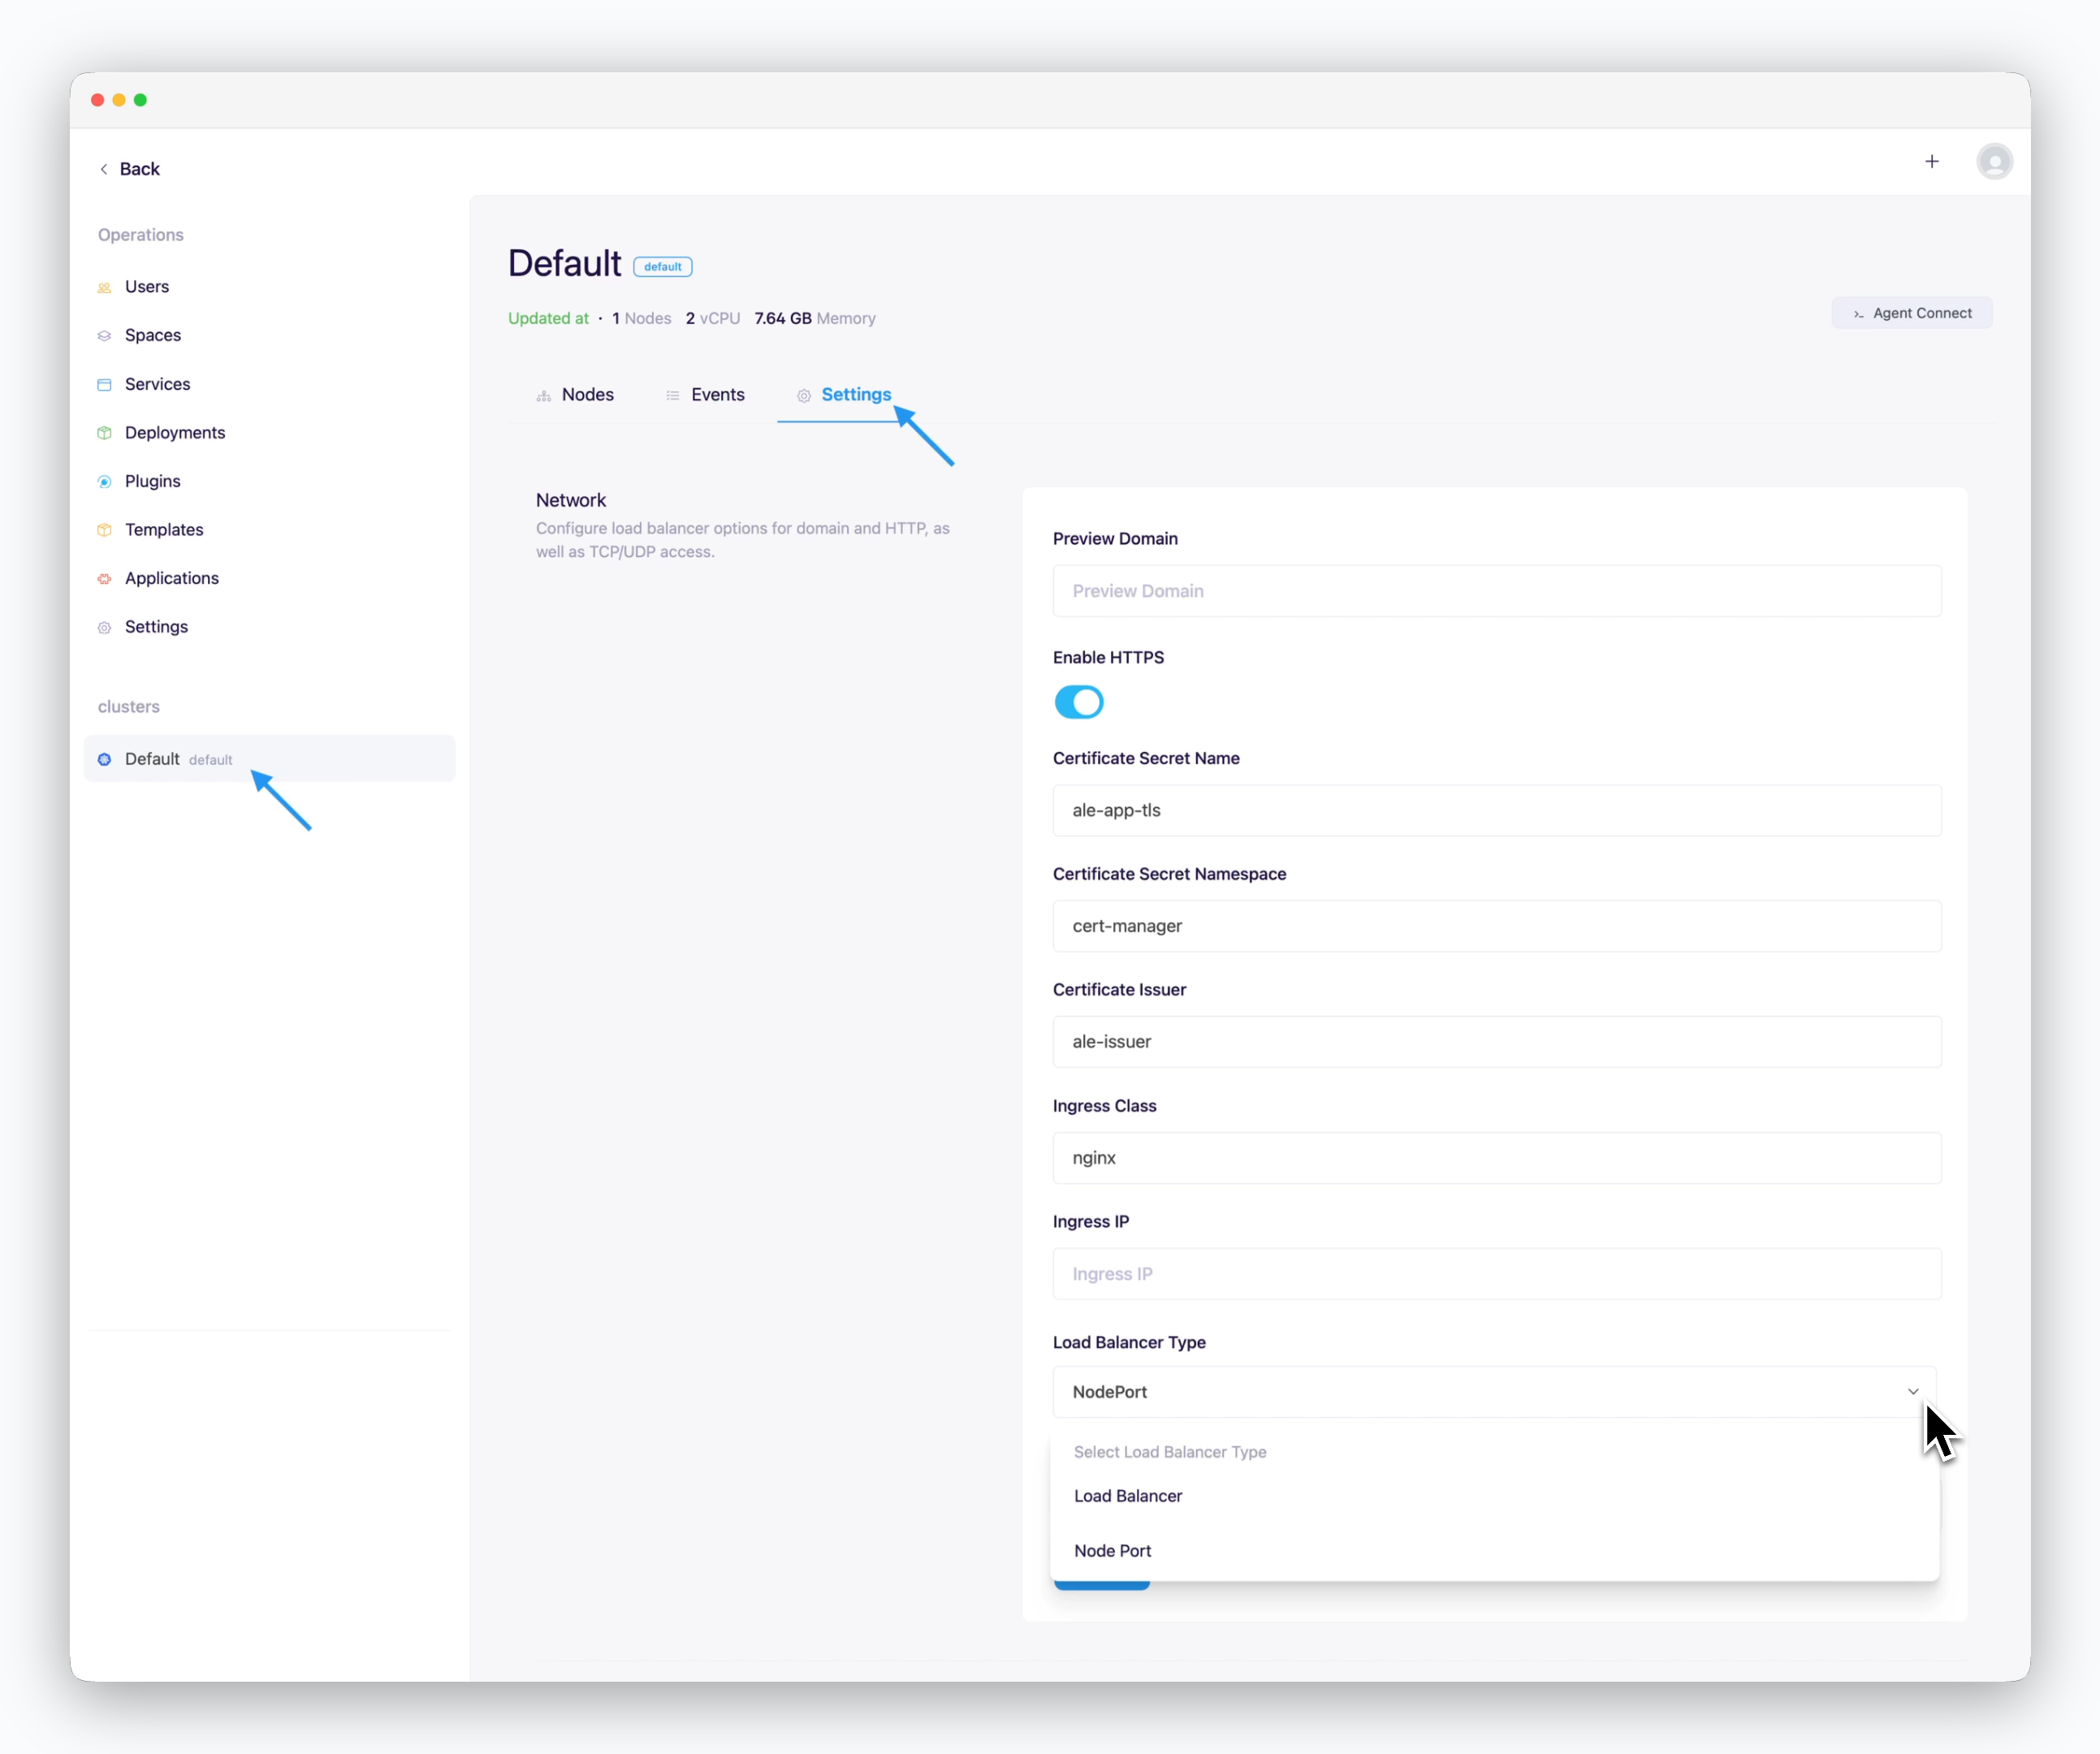
On the cluster page in the Operations System, navigate to the Settings tab and enter the following values in the Network section.

  • Preview Domain: Root domain
  • Use HTTPS
    • Checked: Internet environment
    • Unchecked: Intranet/closed network environment
  • Certificate Secret Name: ale-app-tls
  • Certificate Secret Namespace: cert-manager
  • Certificate Issuer: ale-issuer
  • Ingress Class: nginx
  • Ingress IP: Blank (Auto-detected)
  • Load Balancer Type
    • Load Balancer
    • NodePort
  • Ingress/Egress Bandwidth: Enter in Mbps

You can access the operations system by clicking the space name in the dashboard.

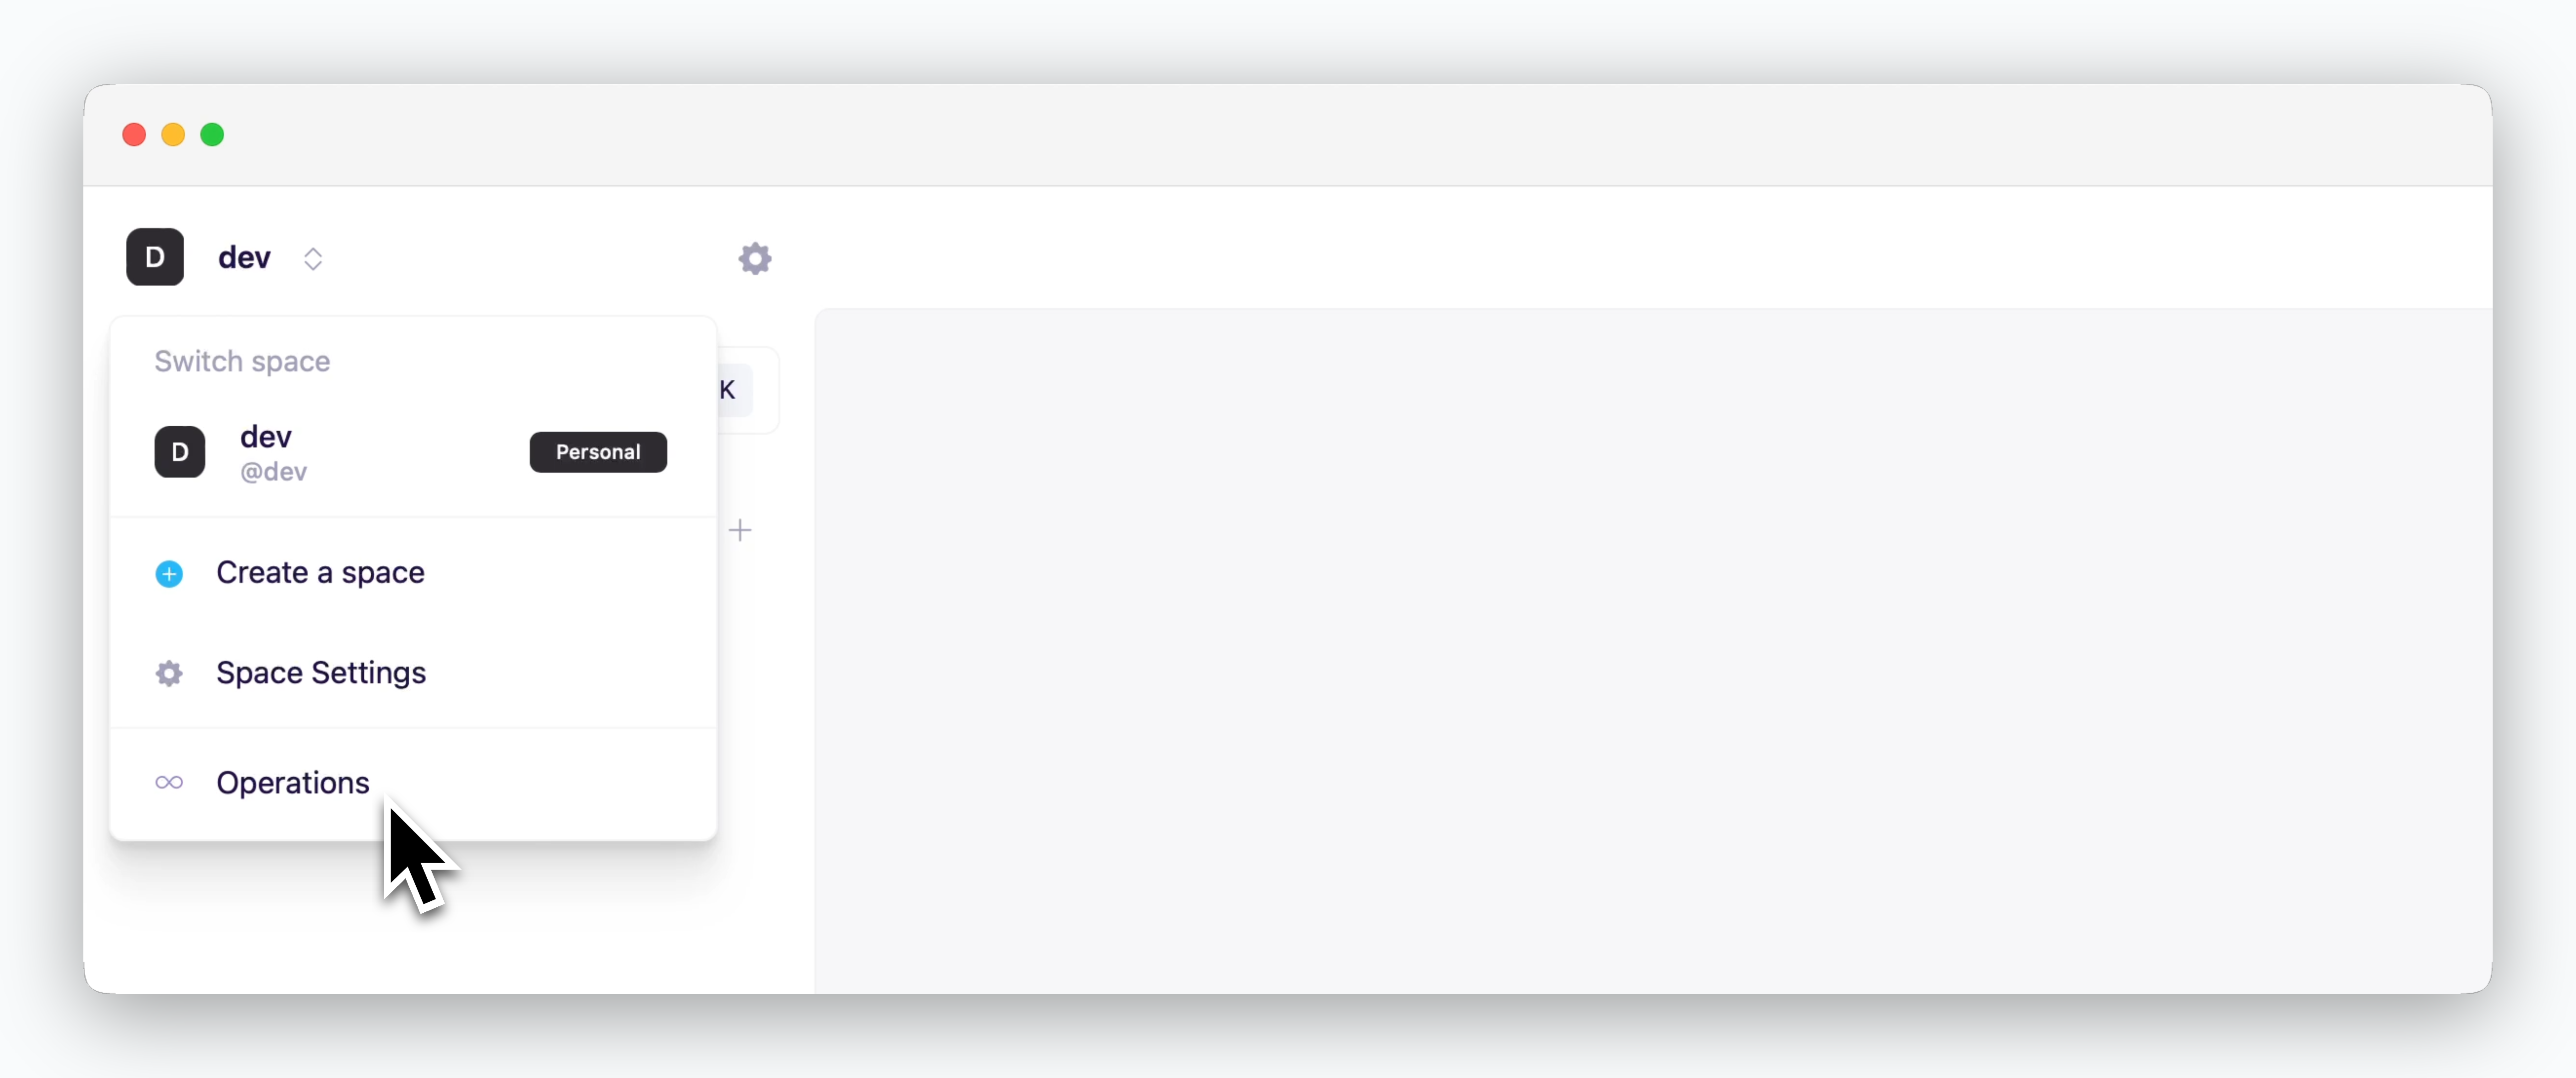
The operations system menu is only displayed for accounts with access permissions to the operations system.