For optimal performance of
ale, we recommend:- Instance type t3.large(2vCPU, 8GiB) or higher
- amd64(x86_64) architecture OS
- 60GiB or more storage
Launch EC2 Instance
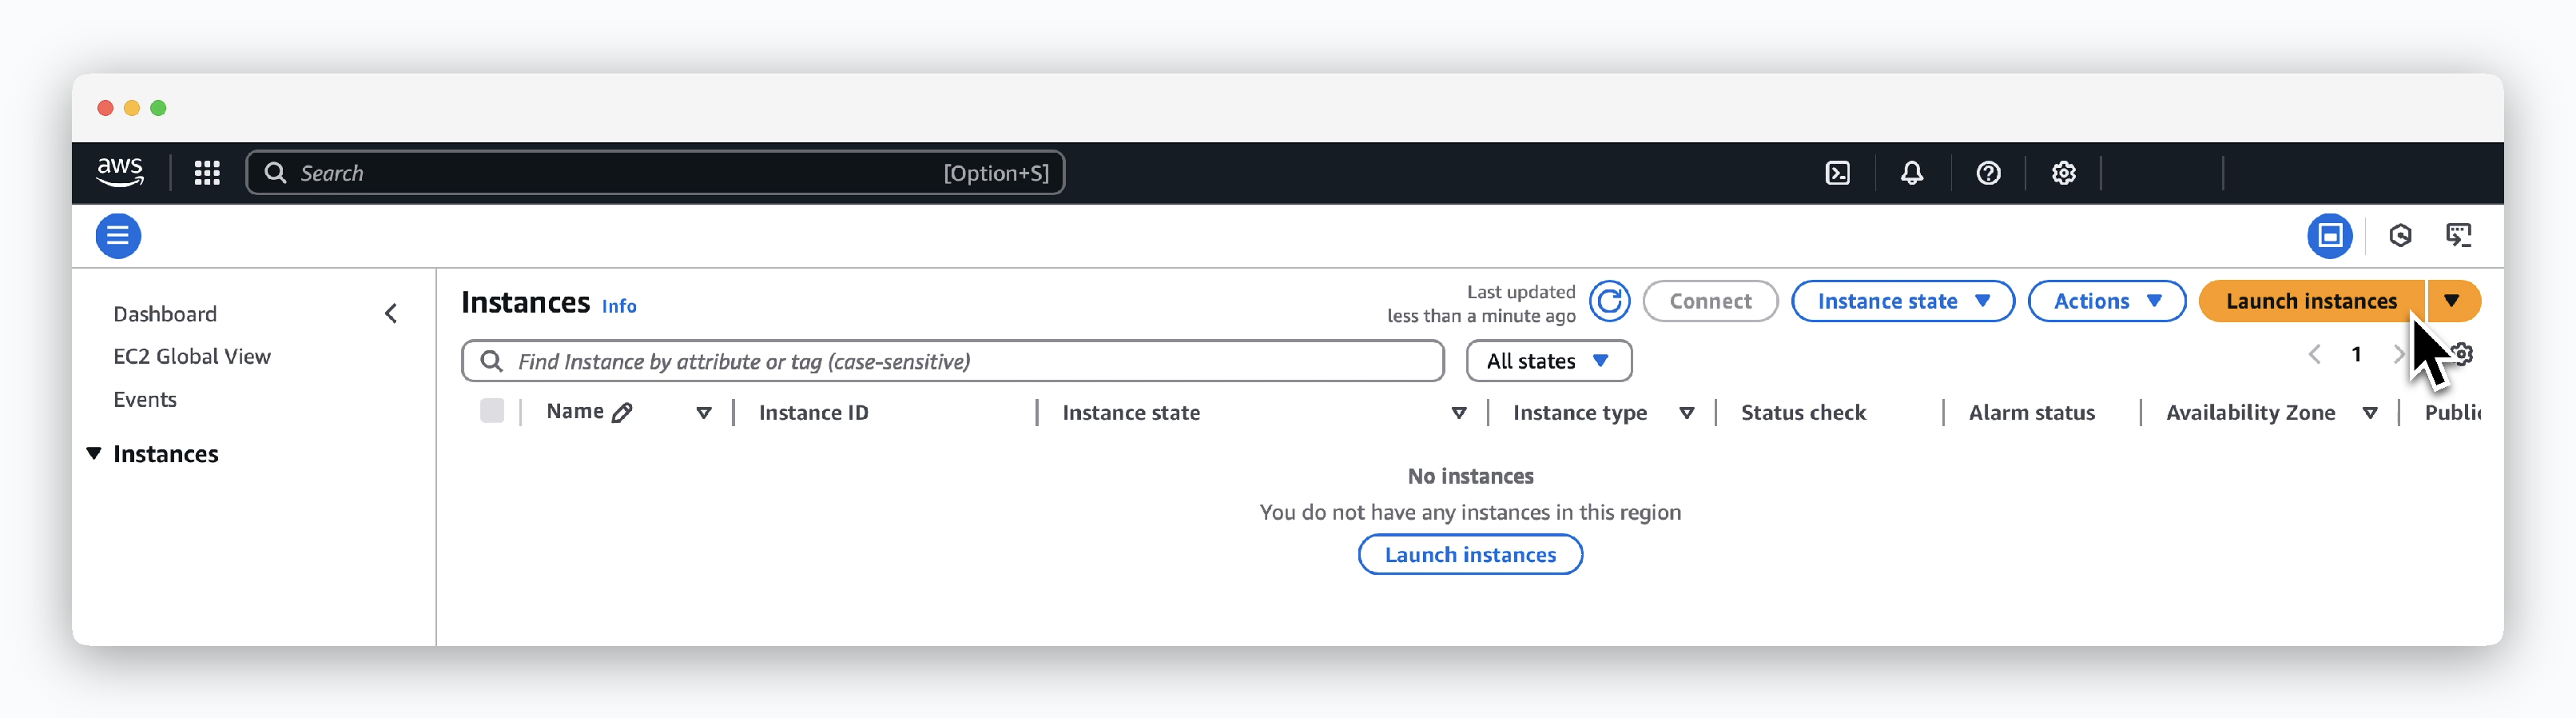
ClickLaunch instancesinEC2 > Instances.
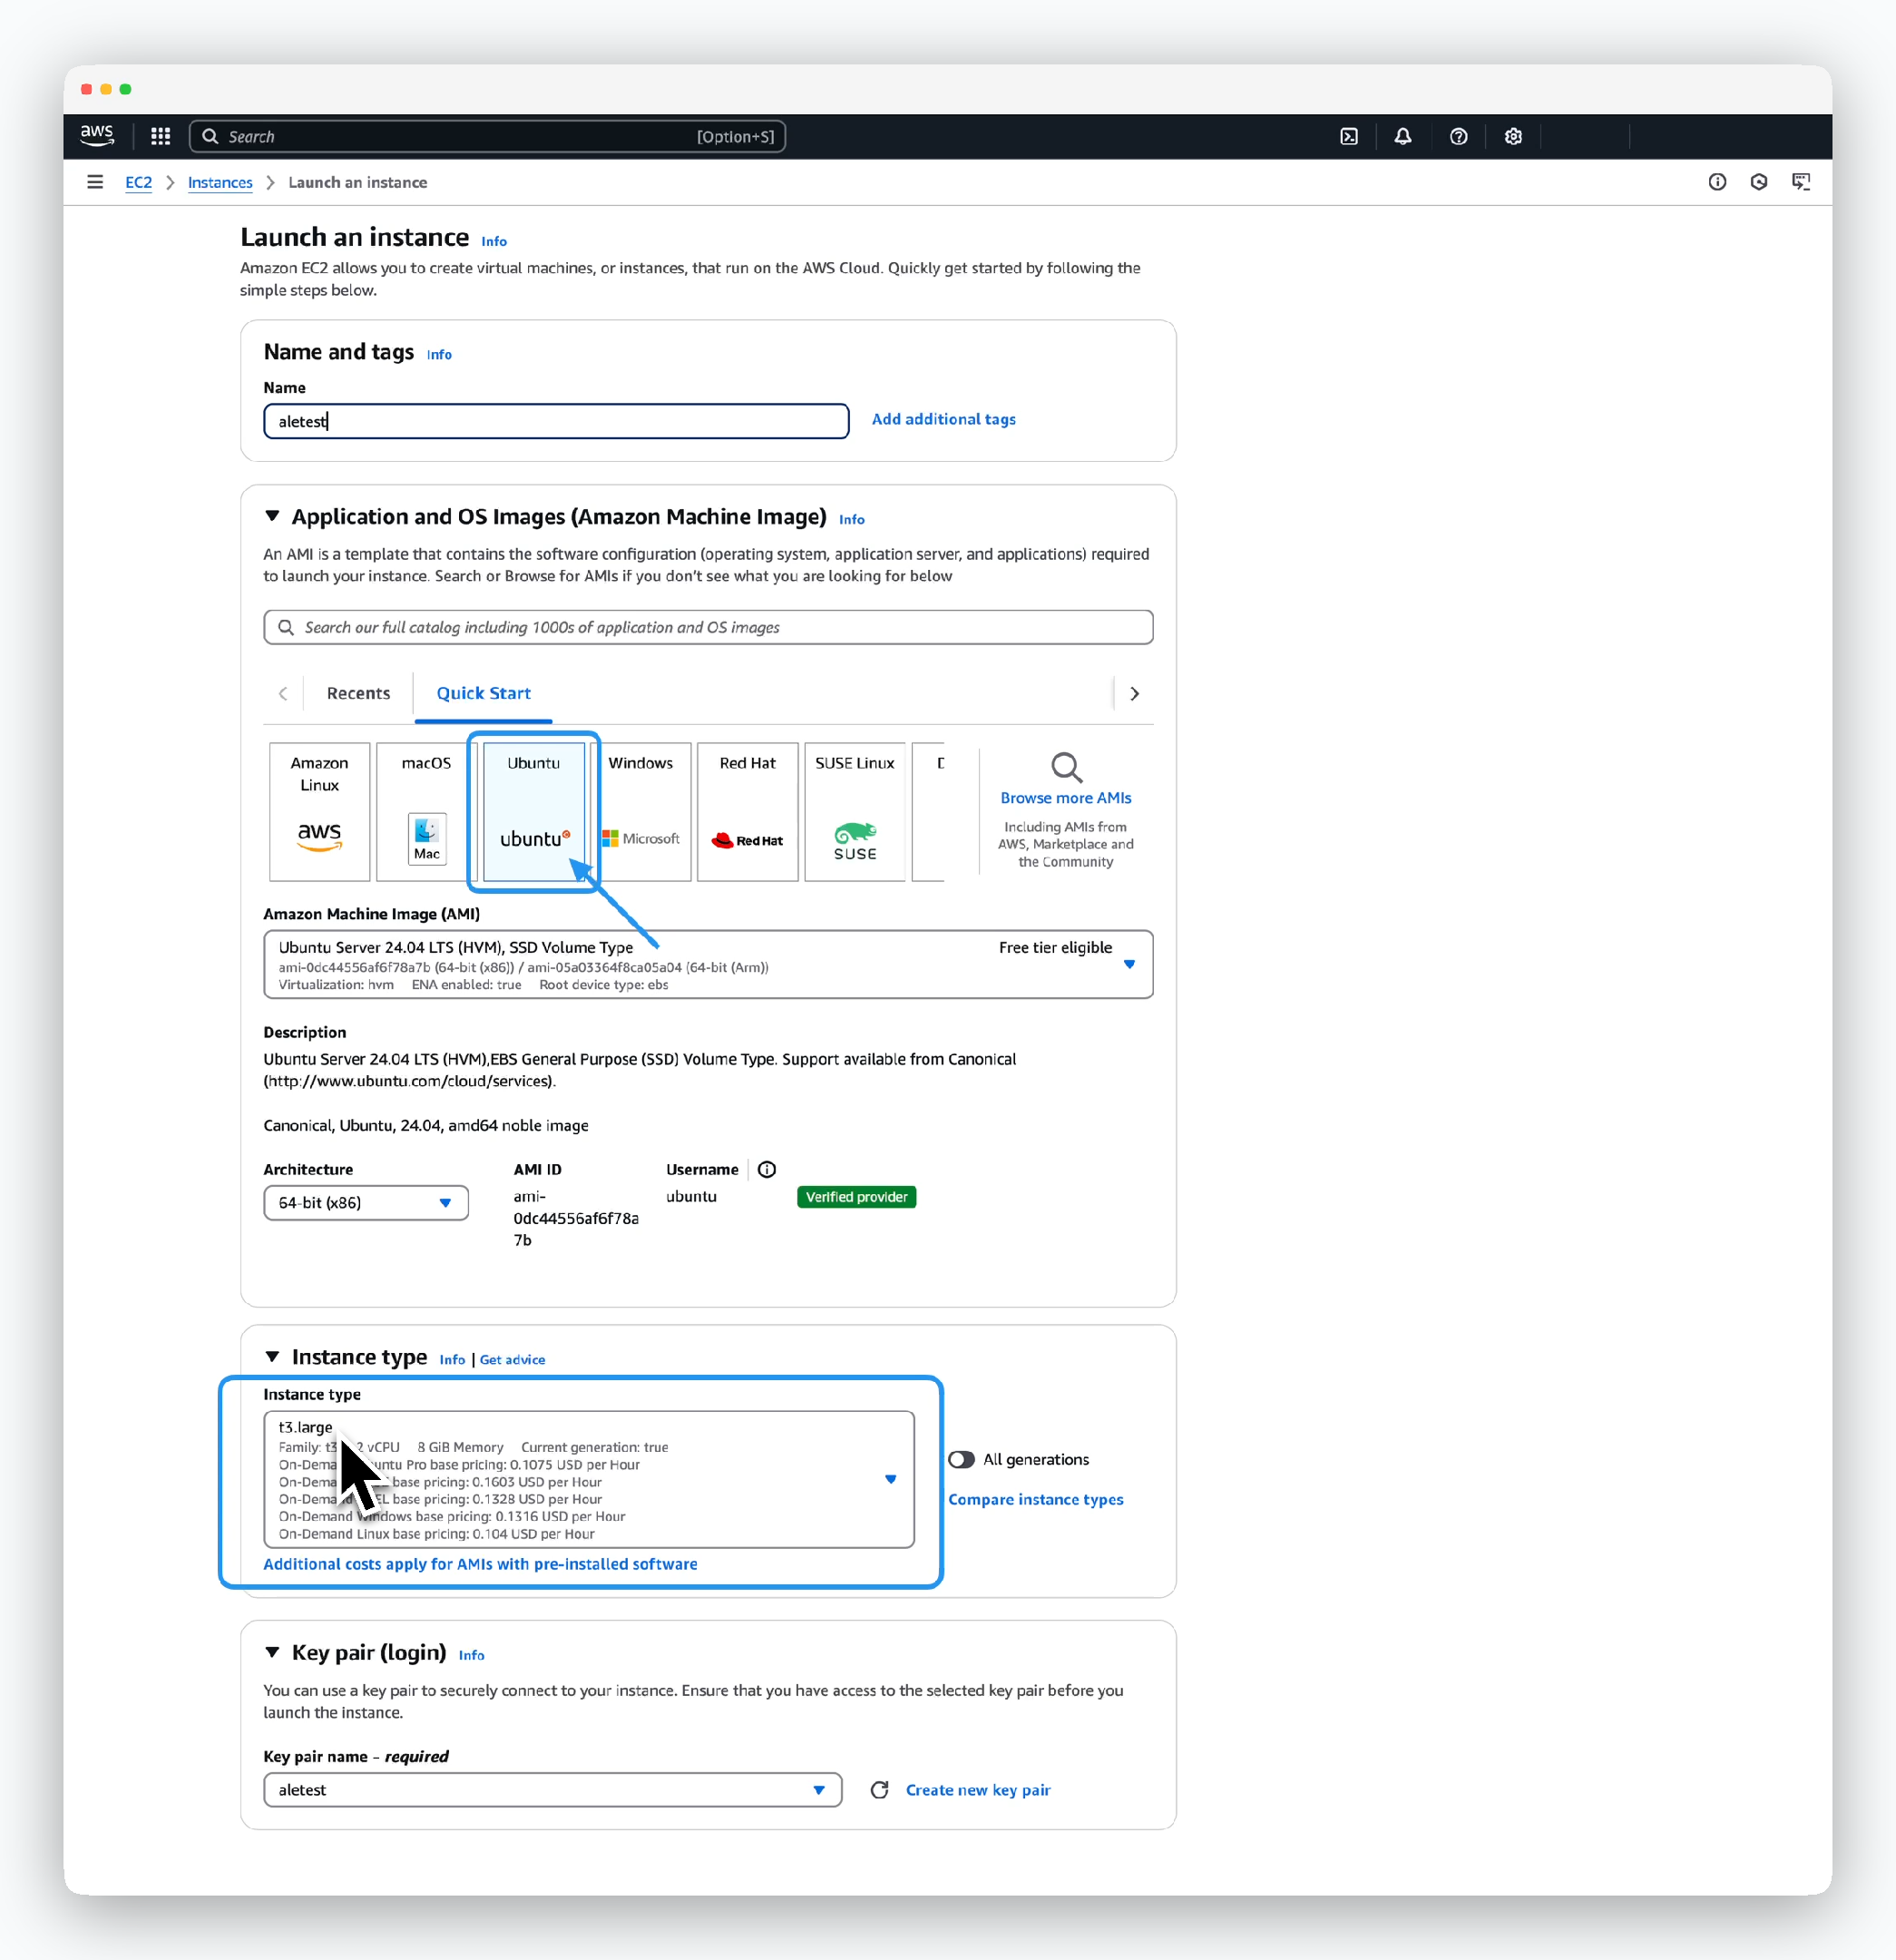
Enter or select the instance information as follows:
- Name and tags
- Name: Instance name
- Application and OS Images (Amazon Machine Image)
- Amazon Machine Image (AMI): Ubuntu Server 24.04 LTS (amd64)
- Instance type
- Select type t3.large or higher specification
- Key pair (login)
- Select the key pair created in the previous step
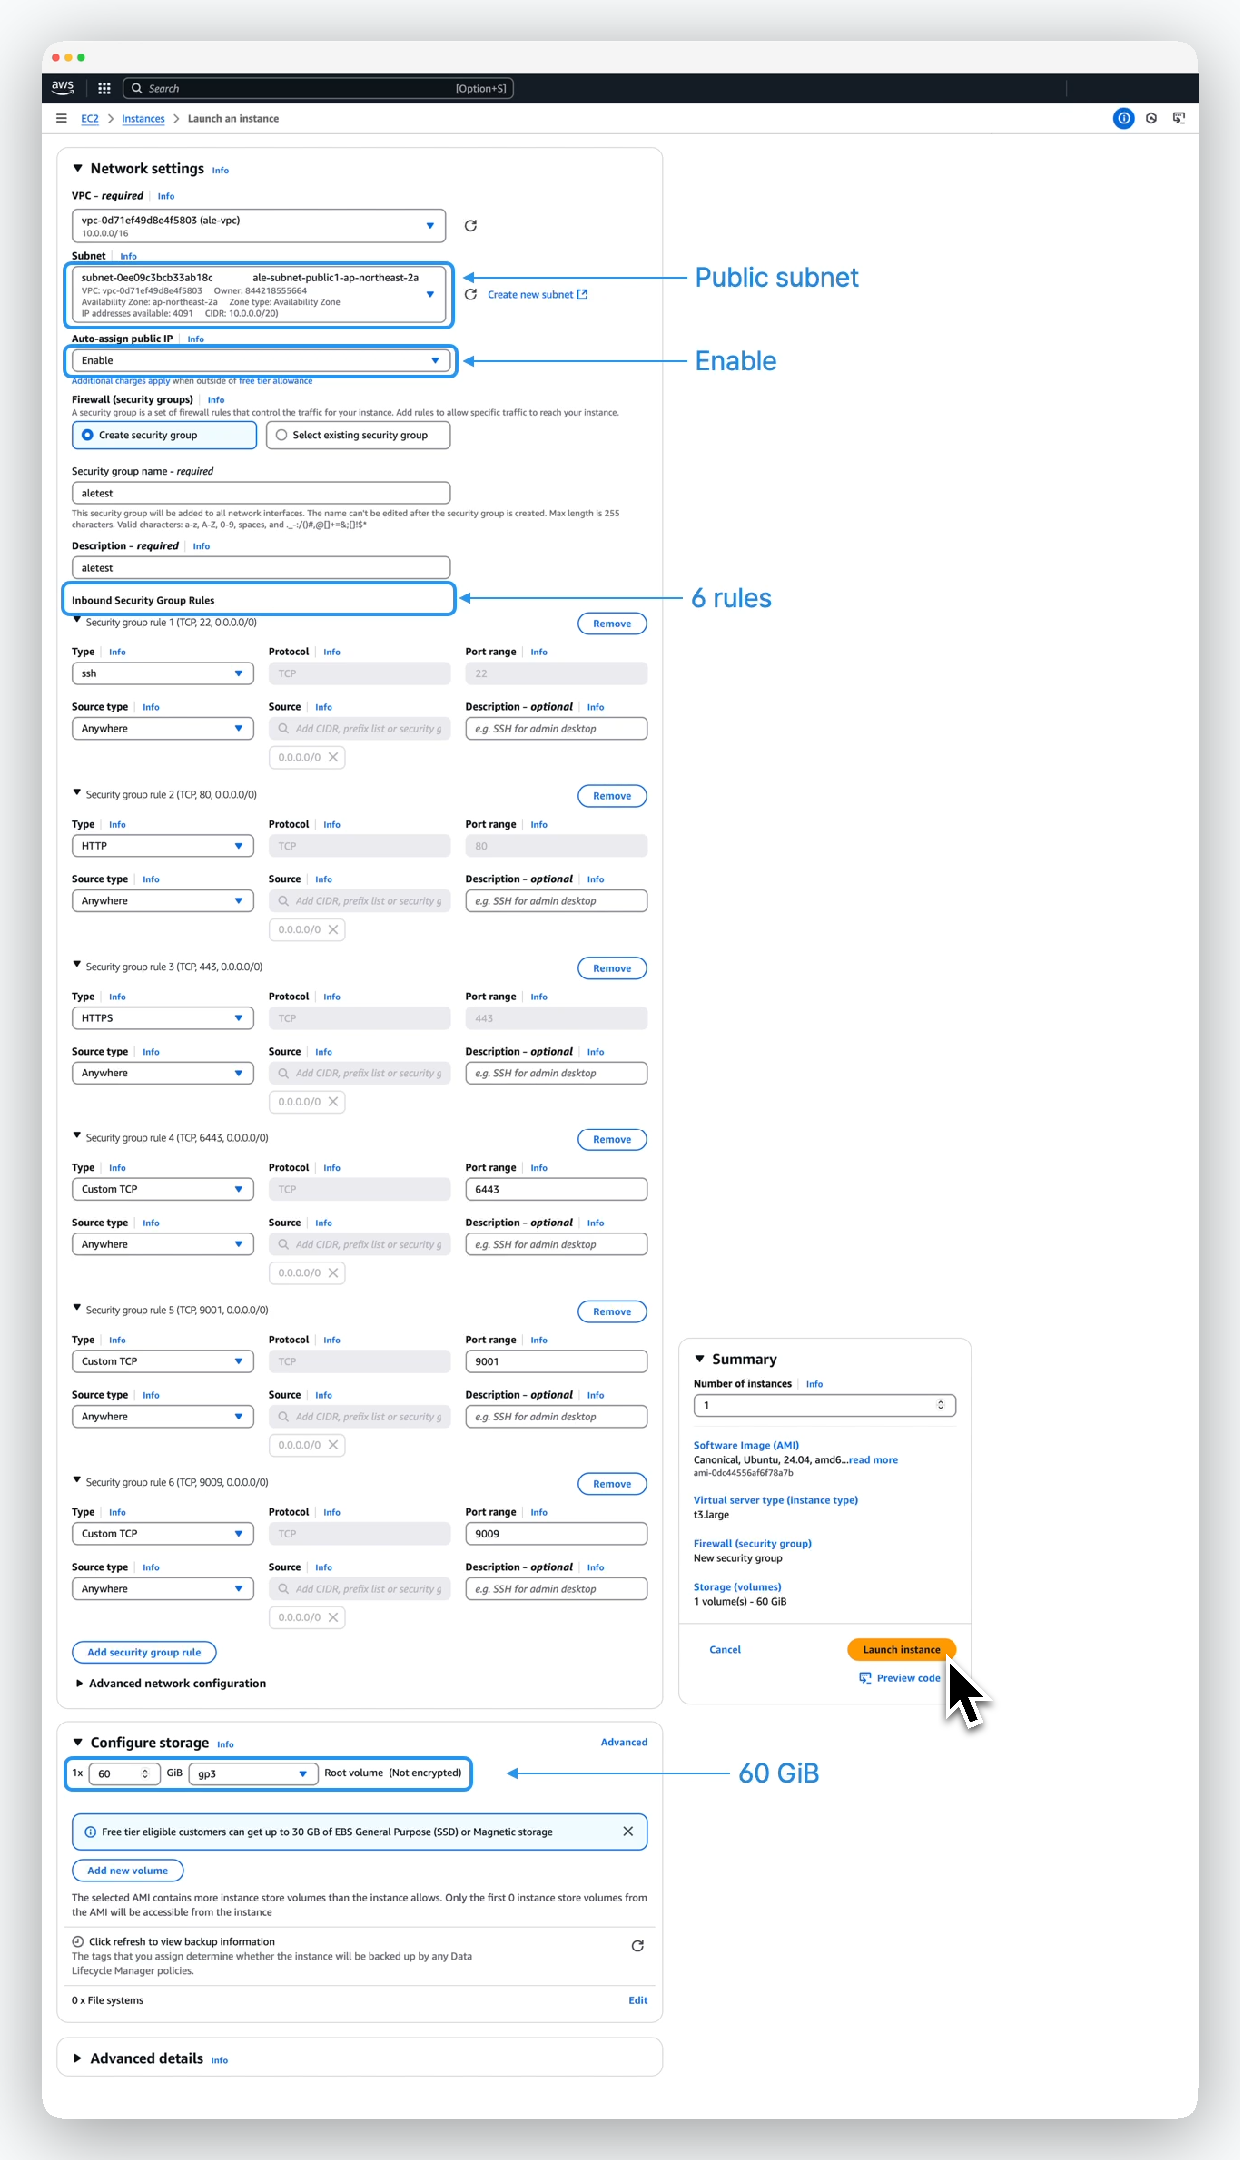
Configure 6 Security group rules and storage settings as follows:
-
Network settings
- VPC: Target VPC for EC2 provisioning. Must be able to communicate with the internet
- Subnet: Select public subnet with internet gateway connected
- Auto-assign public IP: Enable
-
Firewall (security groups)
- Select Create security group and enter appropriate security group name
- Security group name: Name for security group
- Description: Security group description
- Add security group rules
rule_01
- Type: SSH
- Protocol: TCP
- Port range: 22
- Source: 0.0.0.0/0
rule_02
- Type: HTTP
- Protocol: TCP
- Port range: 80
- Source: 0.0.0.0/0
rule_03
- Type: HTTPS
- Protocol: TCP
- Port range: 443
- Source: 0.0.0.0/0
rule_04
- Type: Custom TCP
- Protocol: TCP
- Port range: 6443
- Source: 0.0.0.0/0
rule_05
- Type: Custom TCP
- Protocol: TCP
- Port range: 9001
- Source: 0.0.0.0/0
rule_06
- Type: Custom TCP
- Protocol: TCP
- Port range: 9009
- Source: 0.0.0.0/0
-
Configure storage
- 1 x 60GiB, select gp3
Associate Elastic IP Address
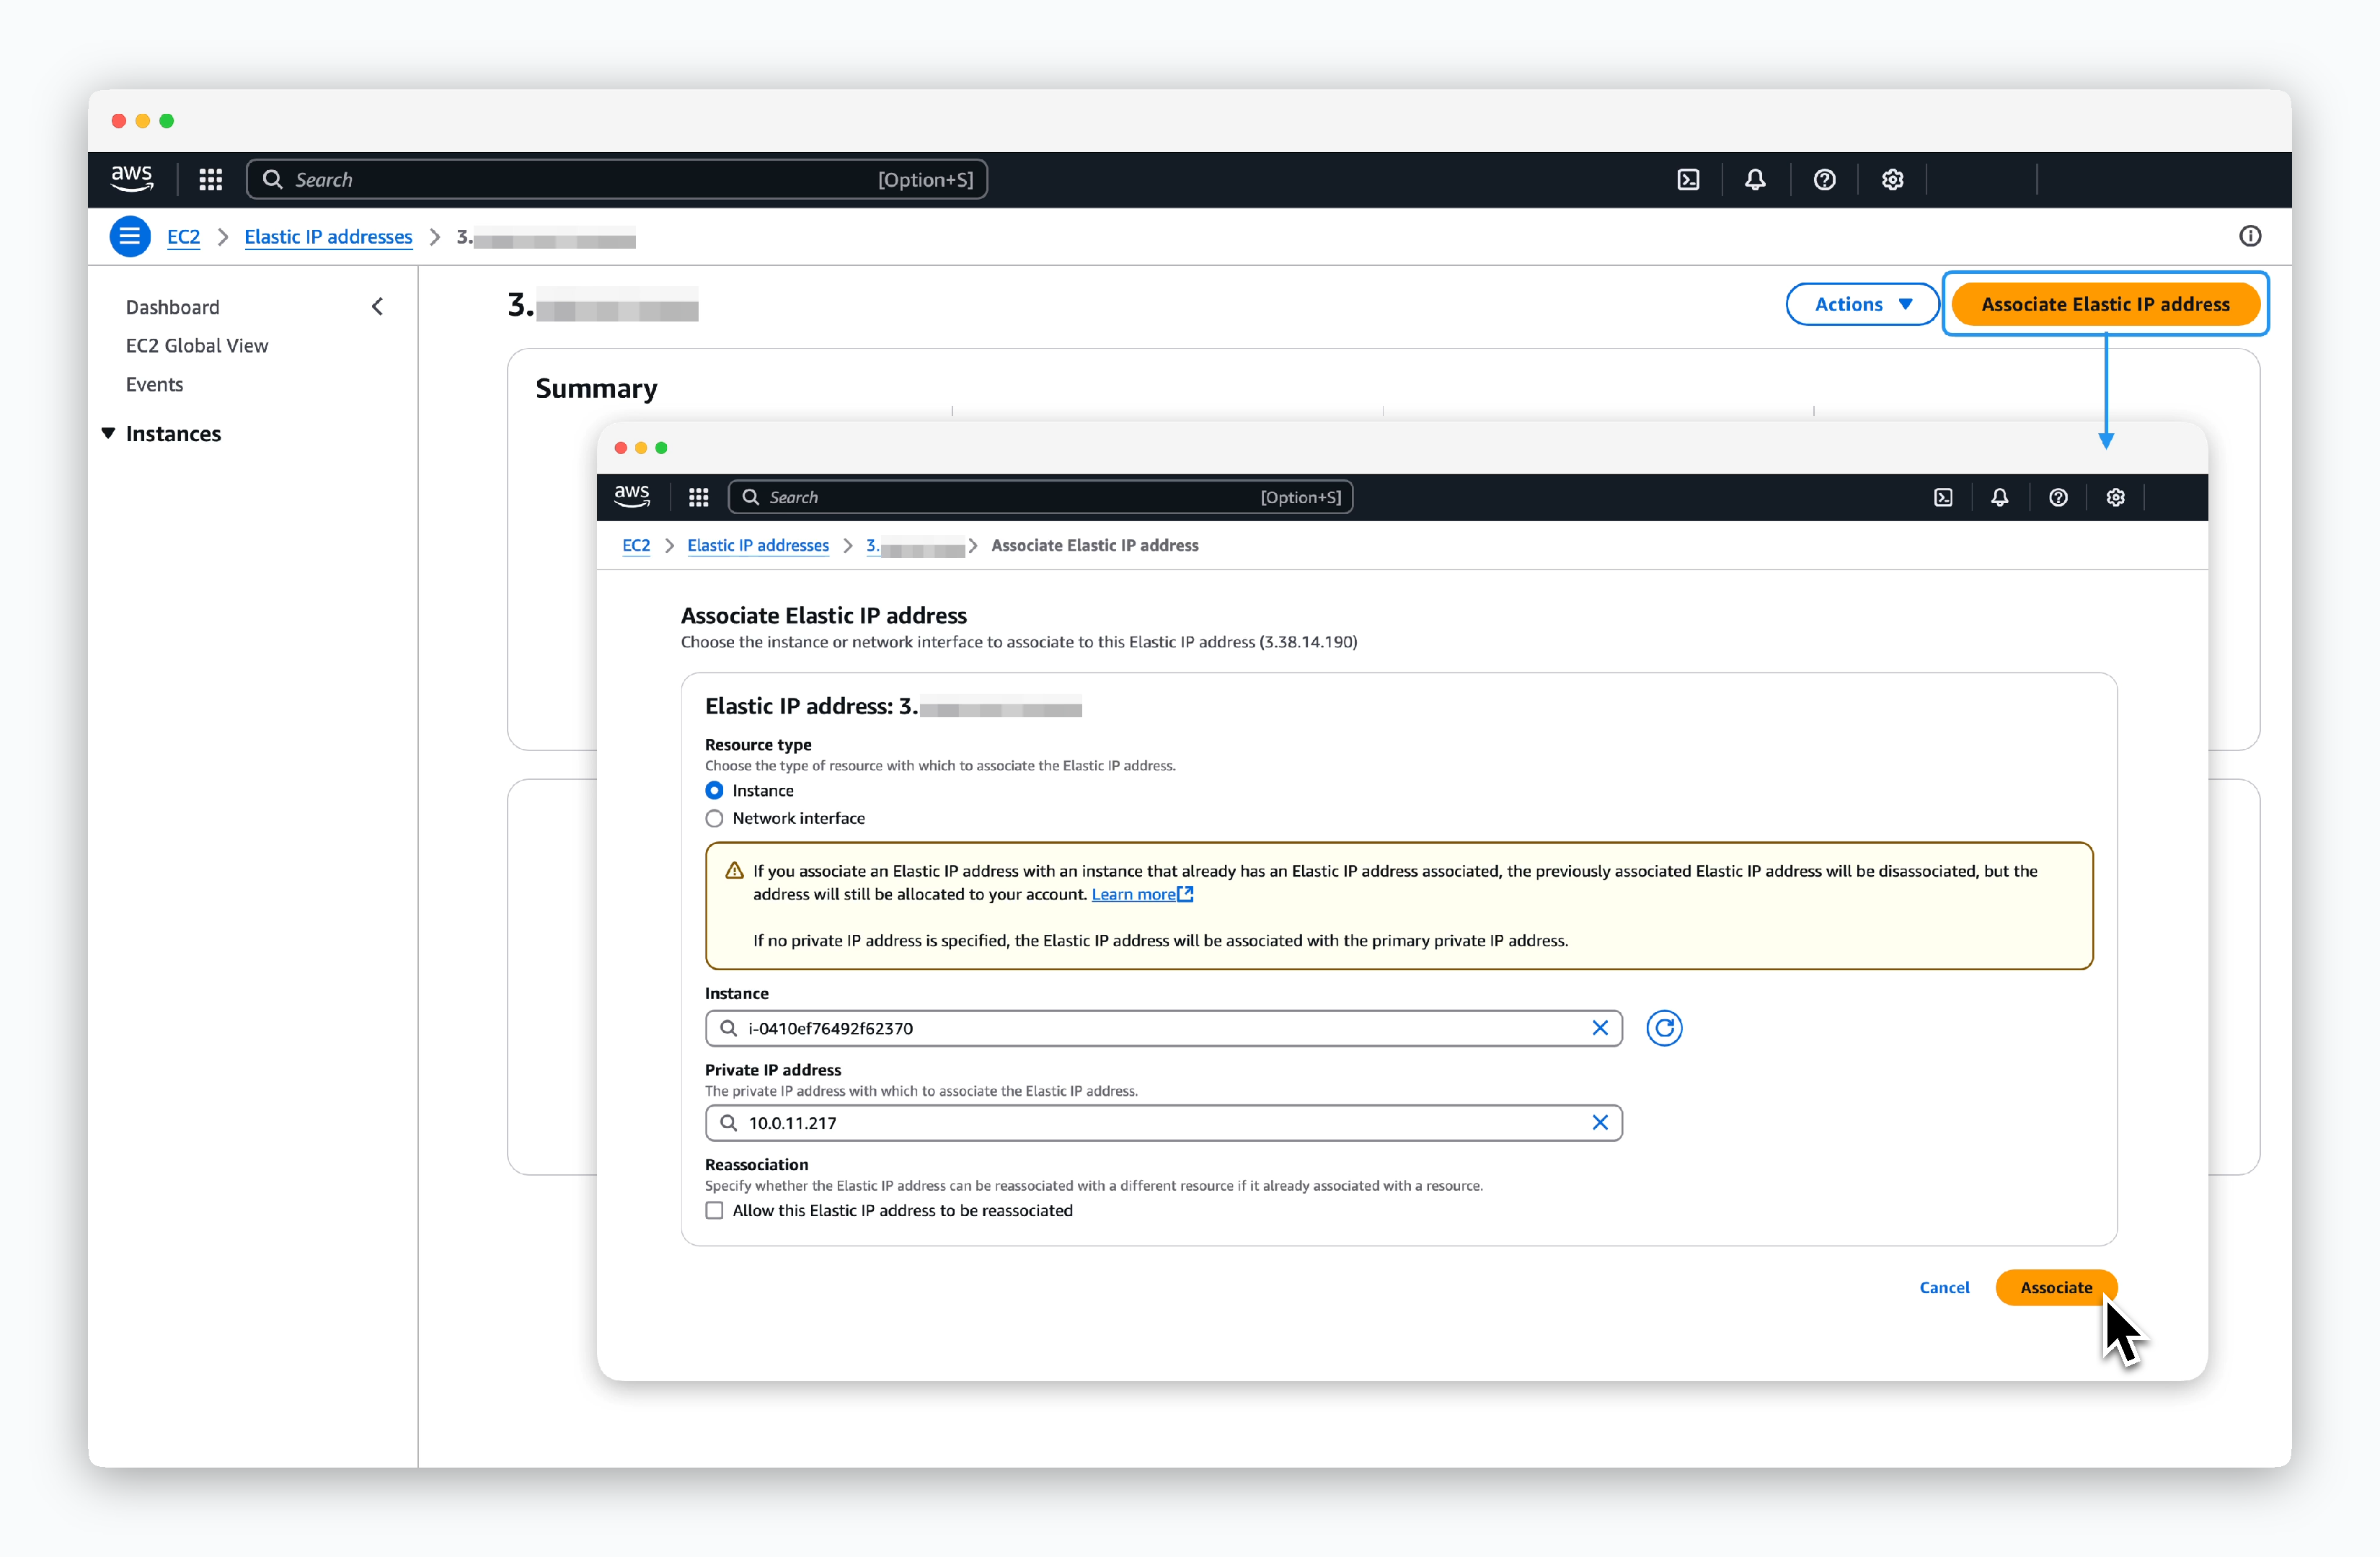
Go toEC2 > Network & Security > Elastic IPs, click the IP allocated in the previous step, then clickAssociate Elastic IP address. Enter the following information to associate:
- Resource type: Instance
- Instance: Select the EC2 instance created in the previous step
- Private IP: Private IP address of the EC2 instance
Connect to EC2 and Install Packages
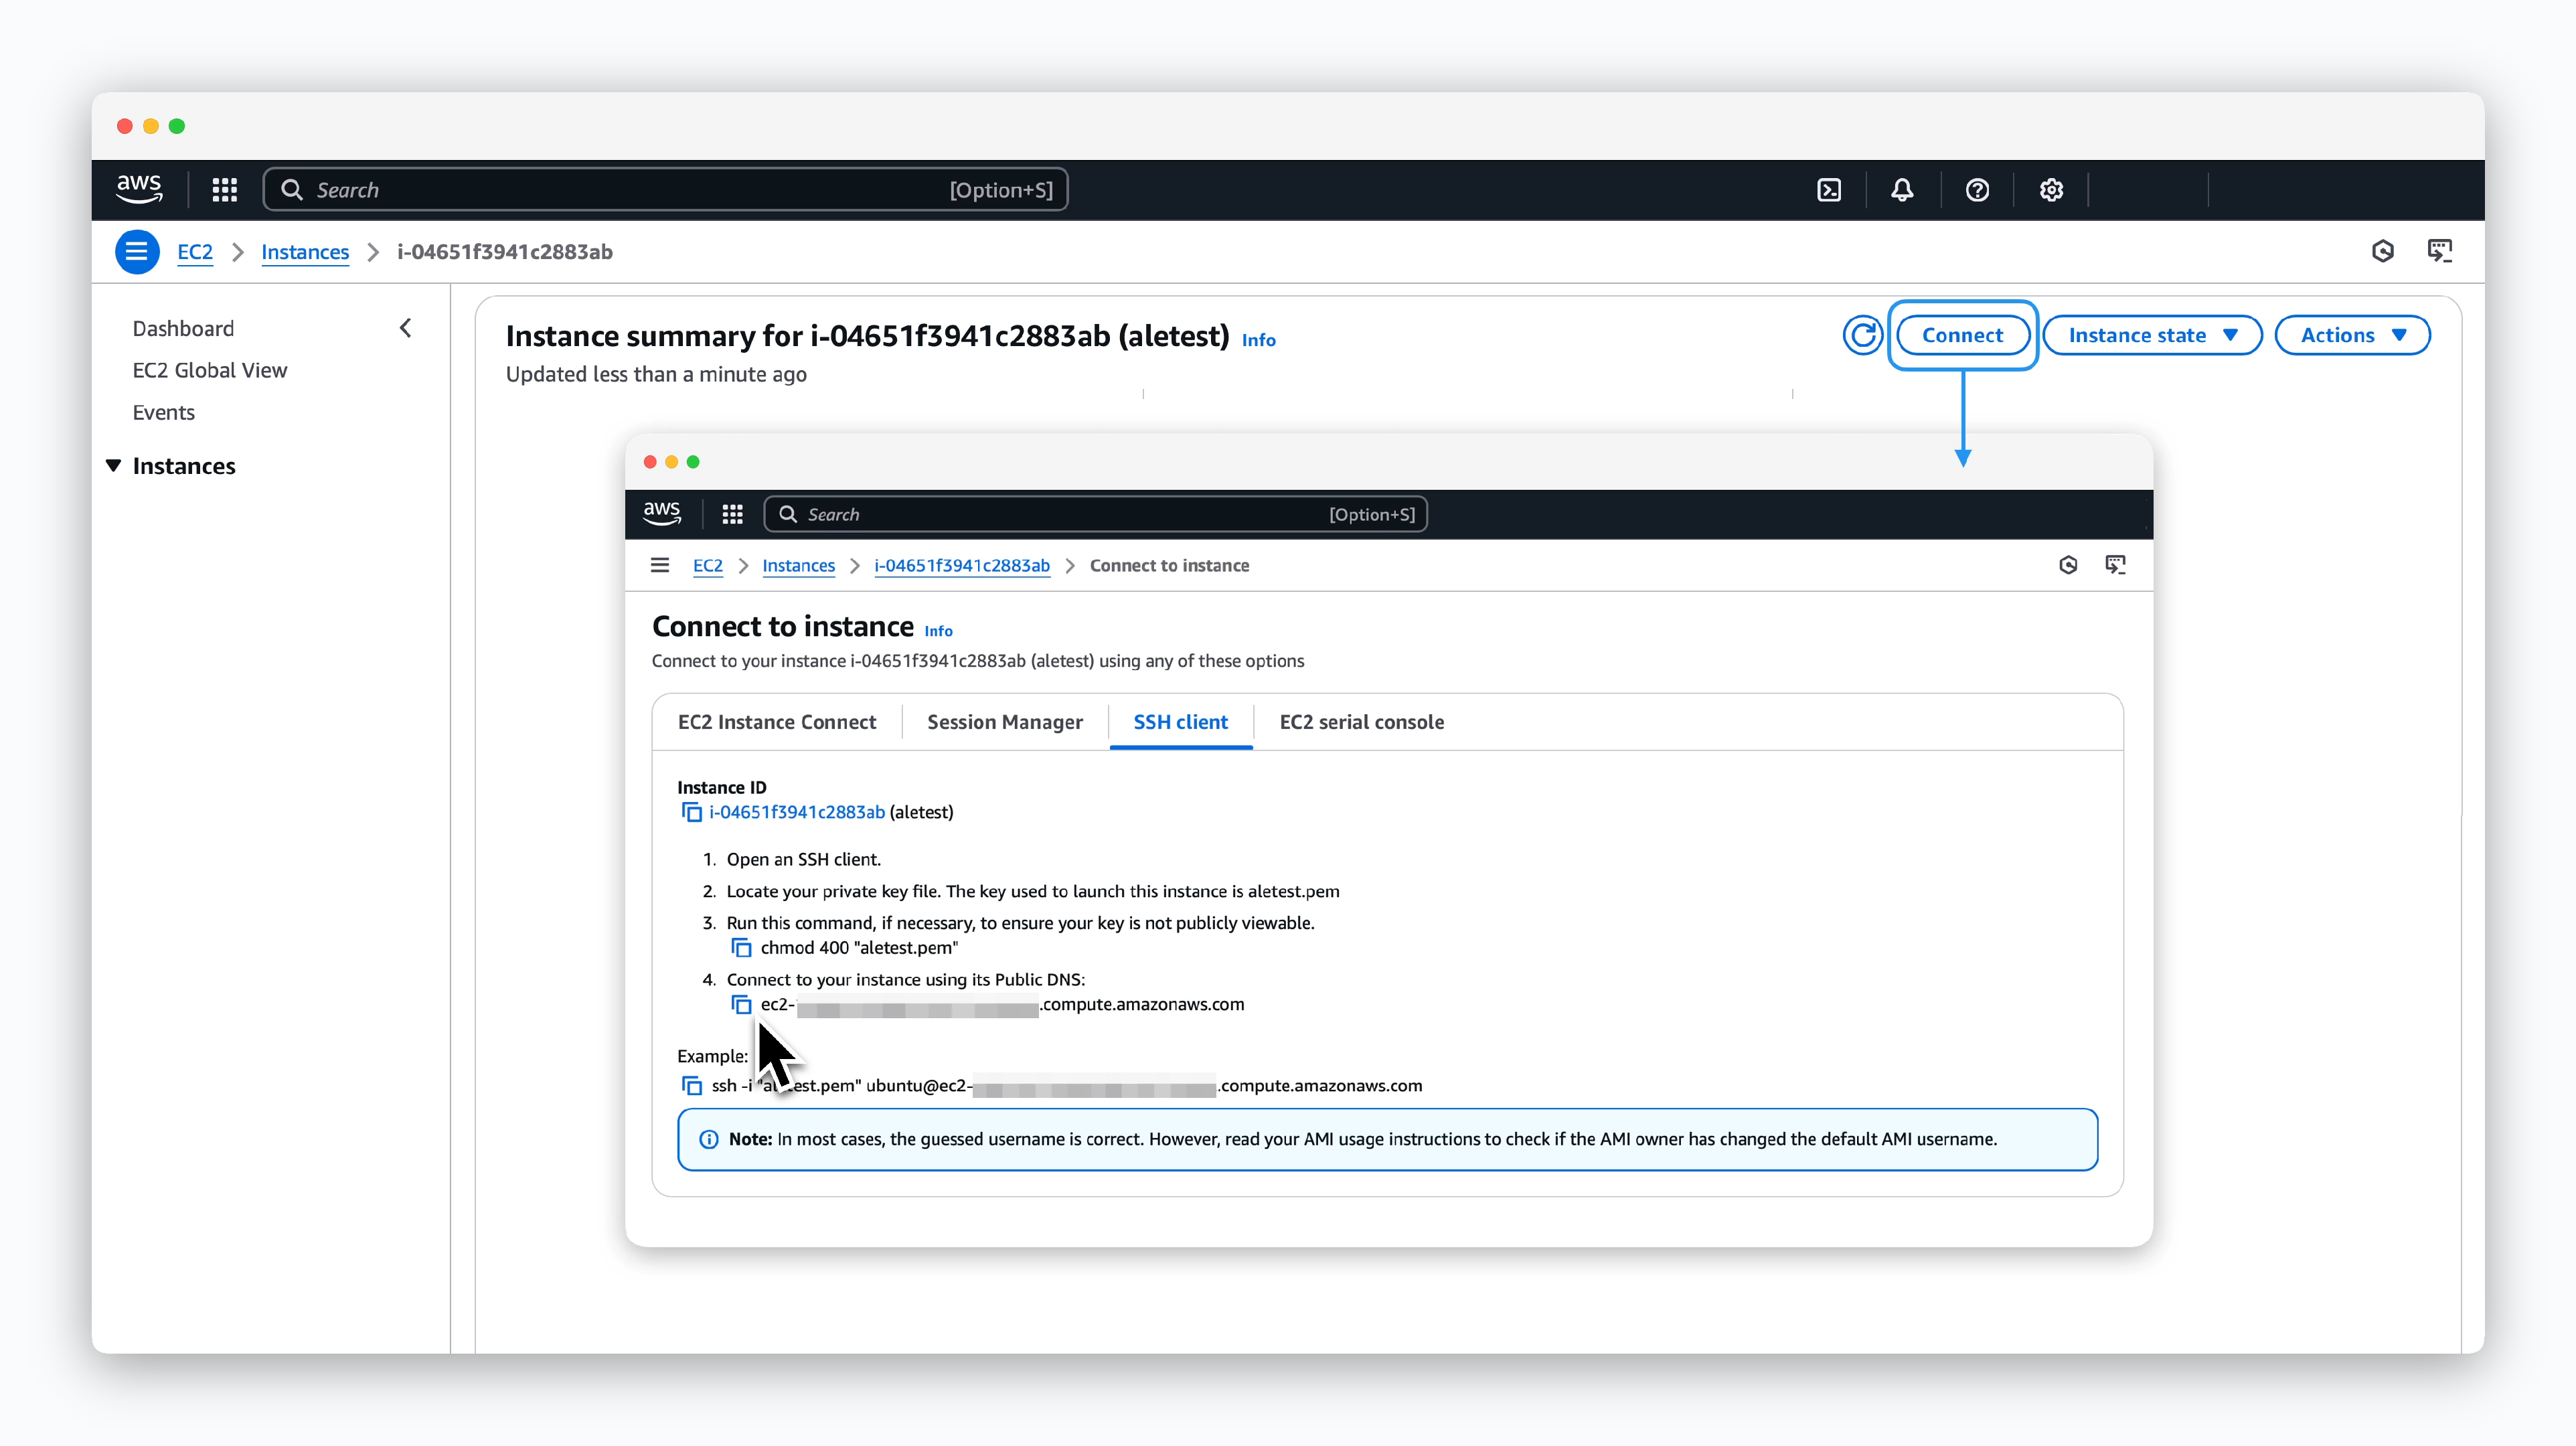
Click the Connect button on the EC2 details page and check the SSH connection command in the SSH Client tab. Then, run the command in your terminal to connect to the EC2 instance, and follow the instructions below to install the packages.
Export Environment Variables
AWS Route53 Hosted Zone ID
AWS Route53 Hosted Zone ID

You can find the Hosted Zone ID in Route53 > Hosted Zones > Hosted Zone Details.