Create Target Group
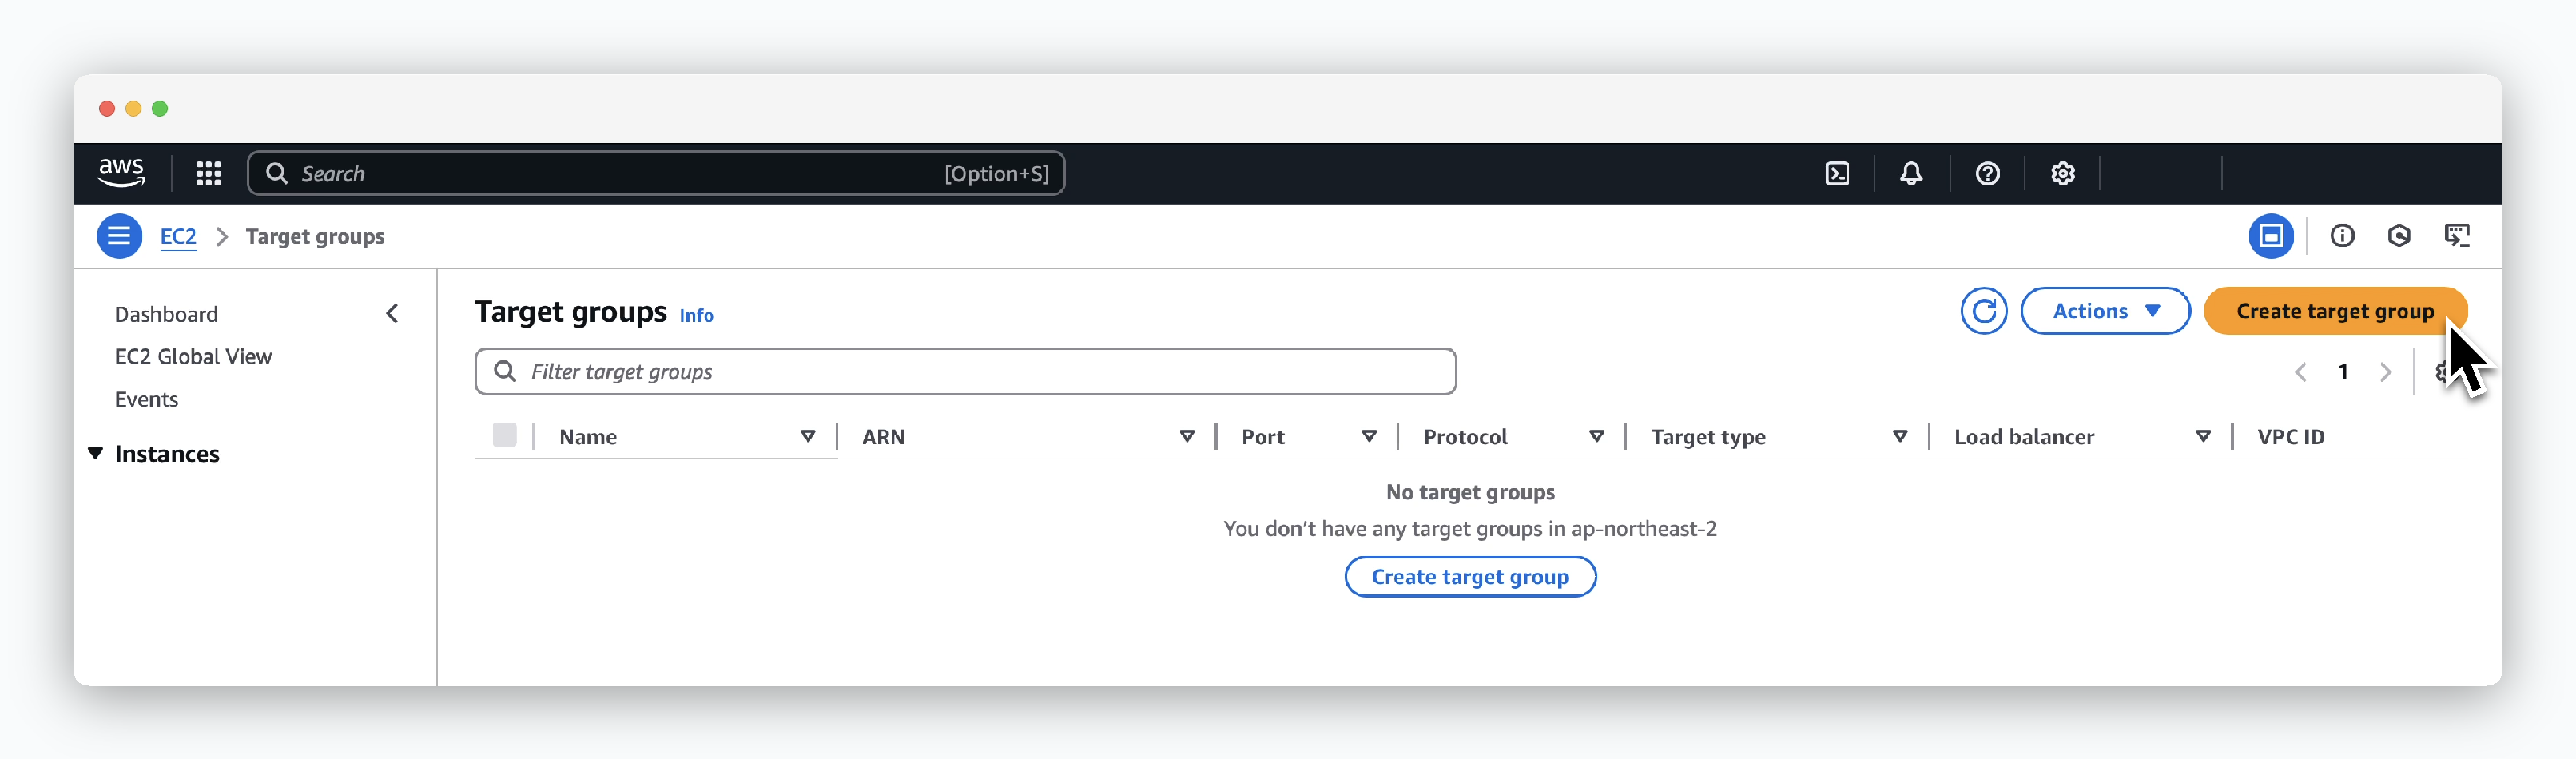
ClickCreate target groupinEC2 > Load Balancing > Target groups.
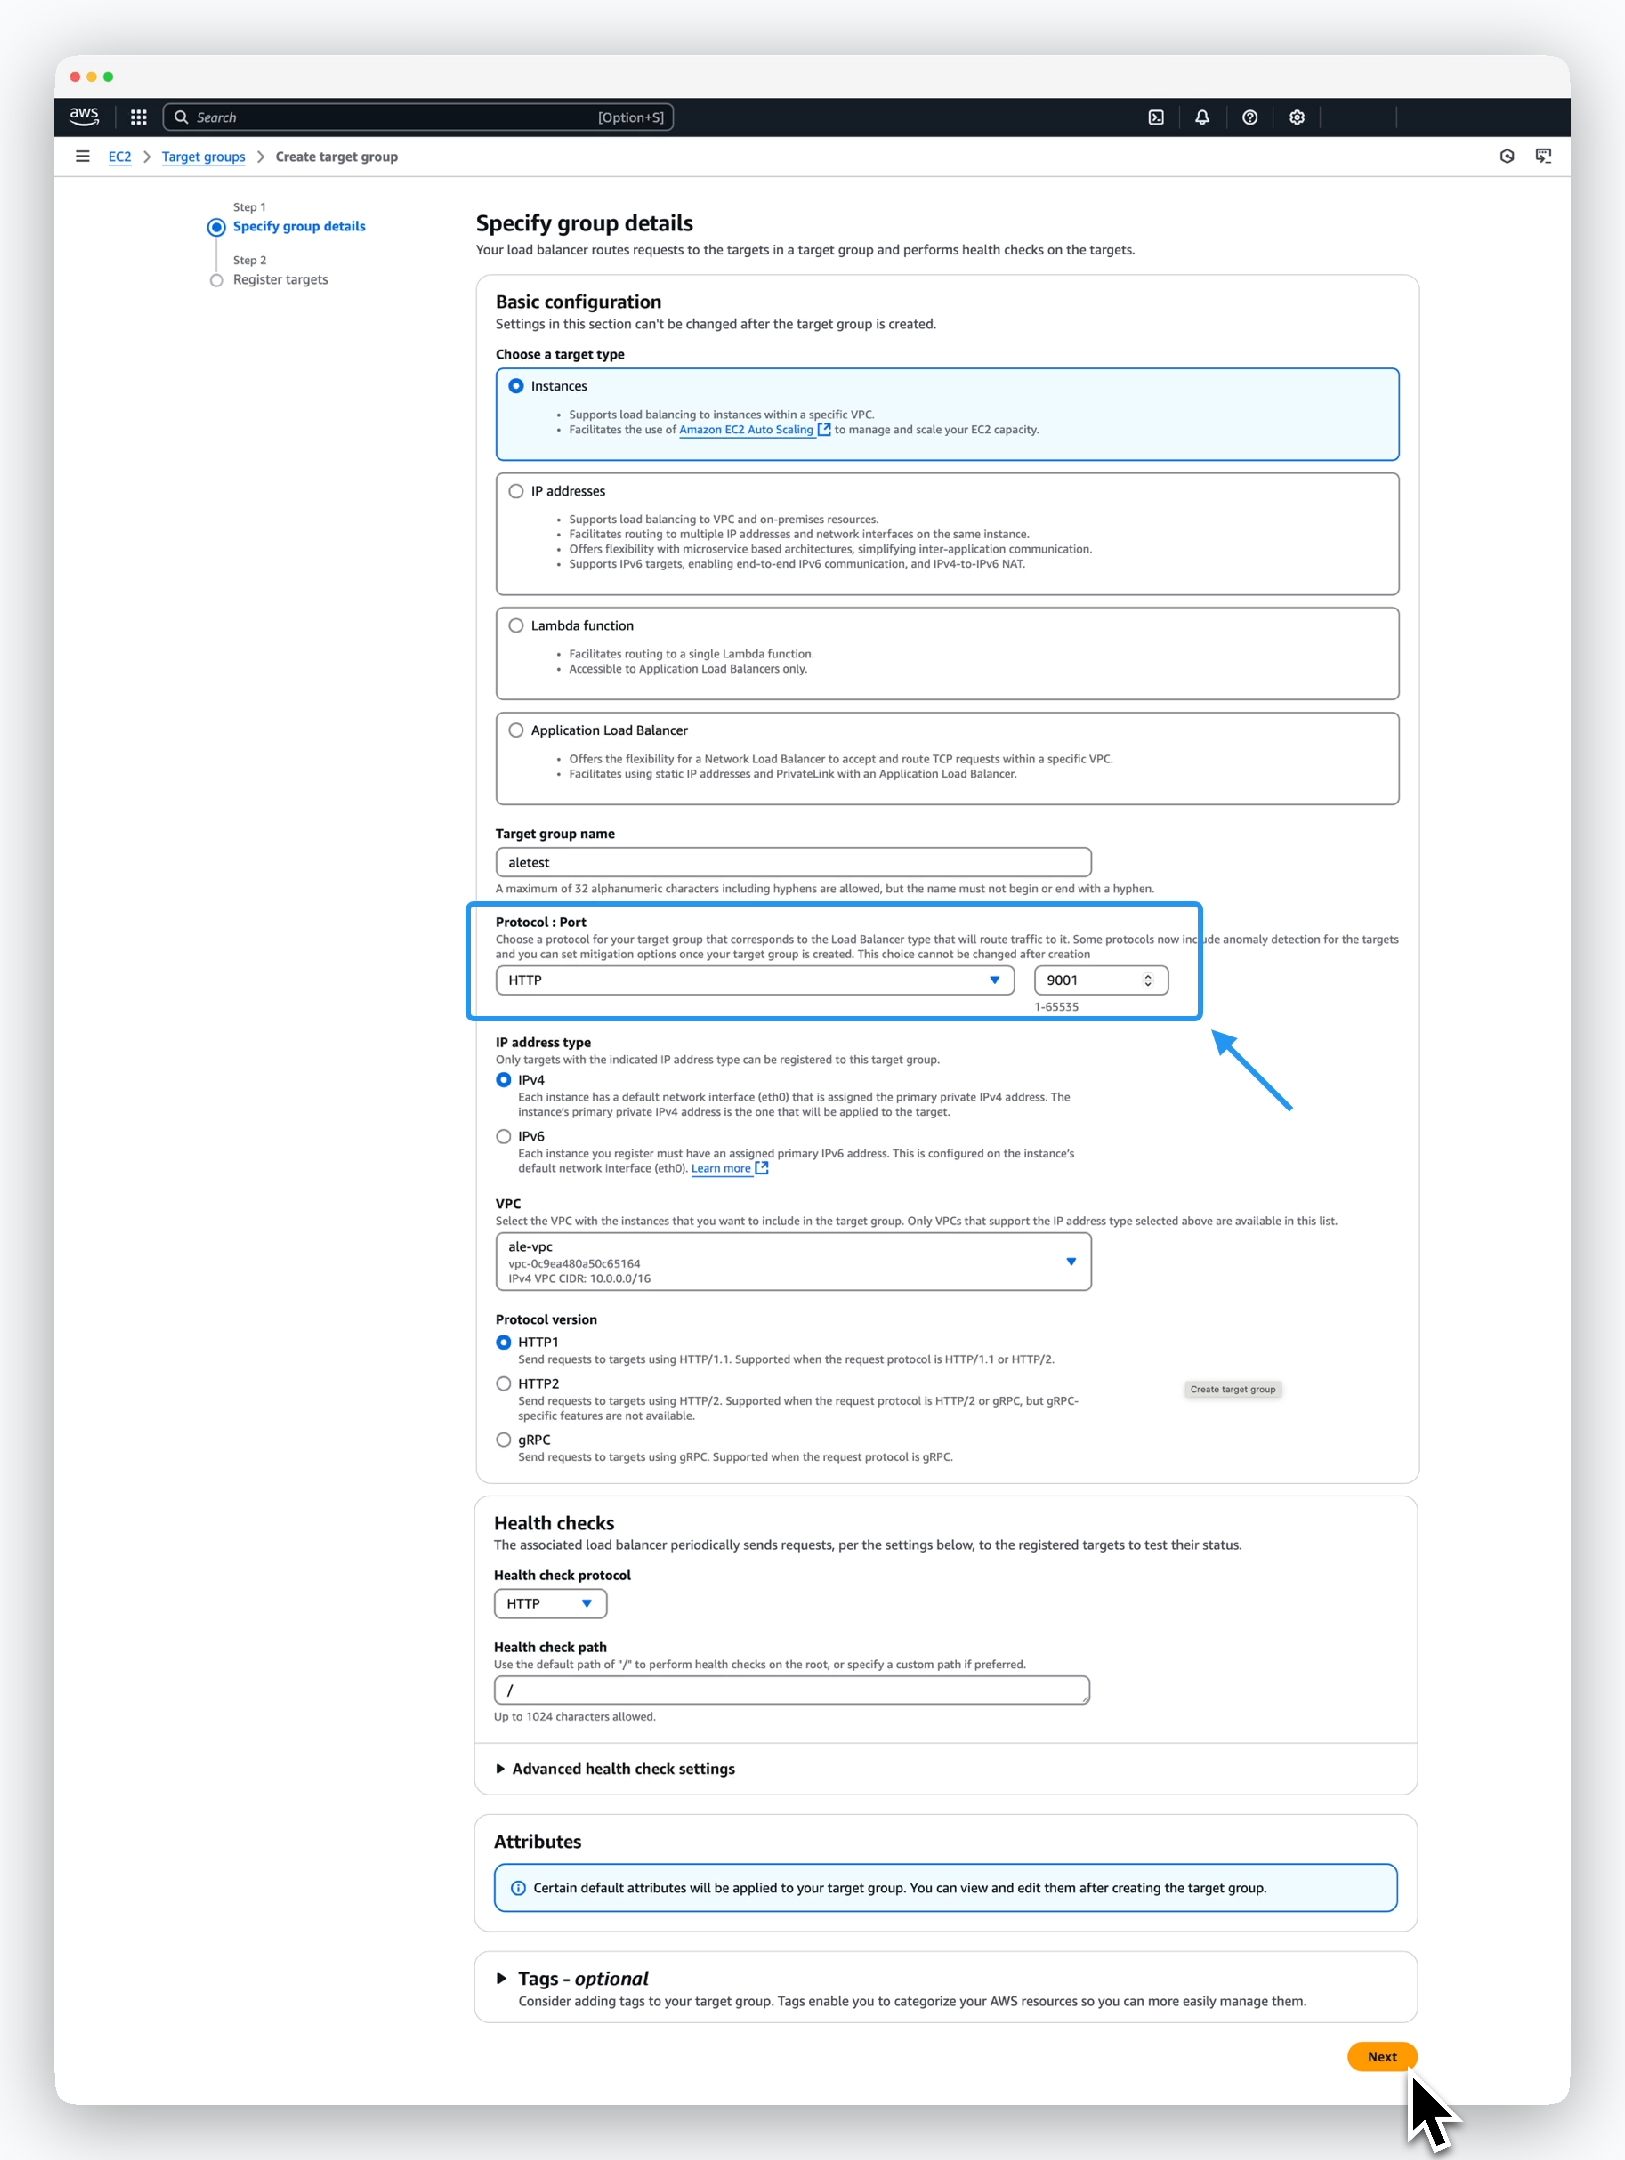
In the Specify group details menu, enter or select the target group information as follows and click Next.
- Basic configuration
- Choose a target type: Instances
- Target group name: Enter target group name
- Protocol-Port: HTTP, 9001
- IP address type: IPv4
- VPC: Select VPC containing the instance
- Protocol version: HTTP1
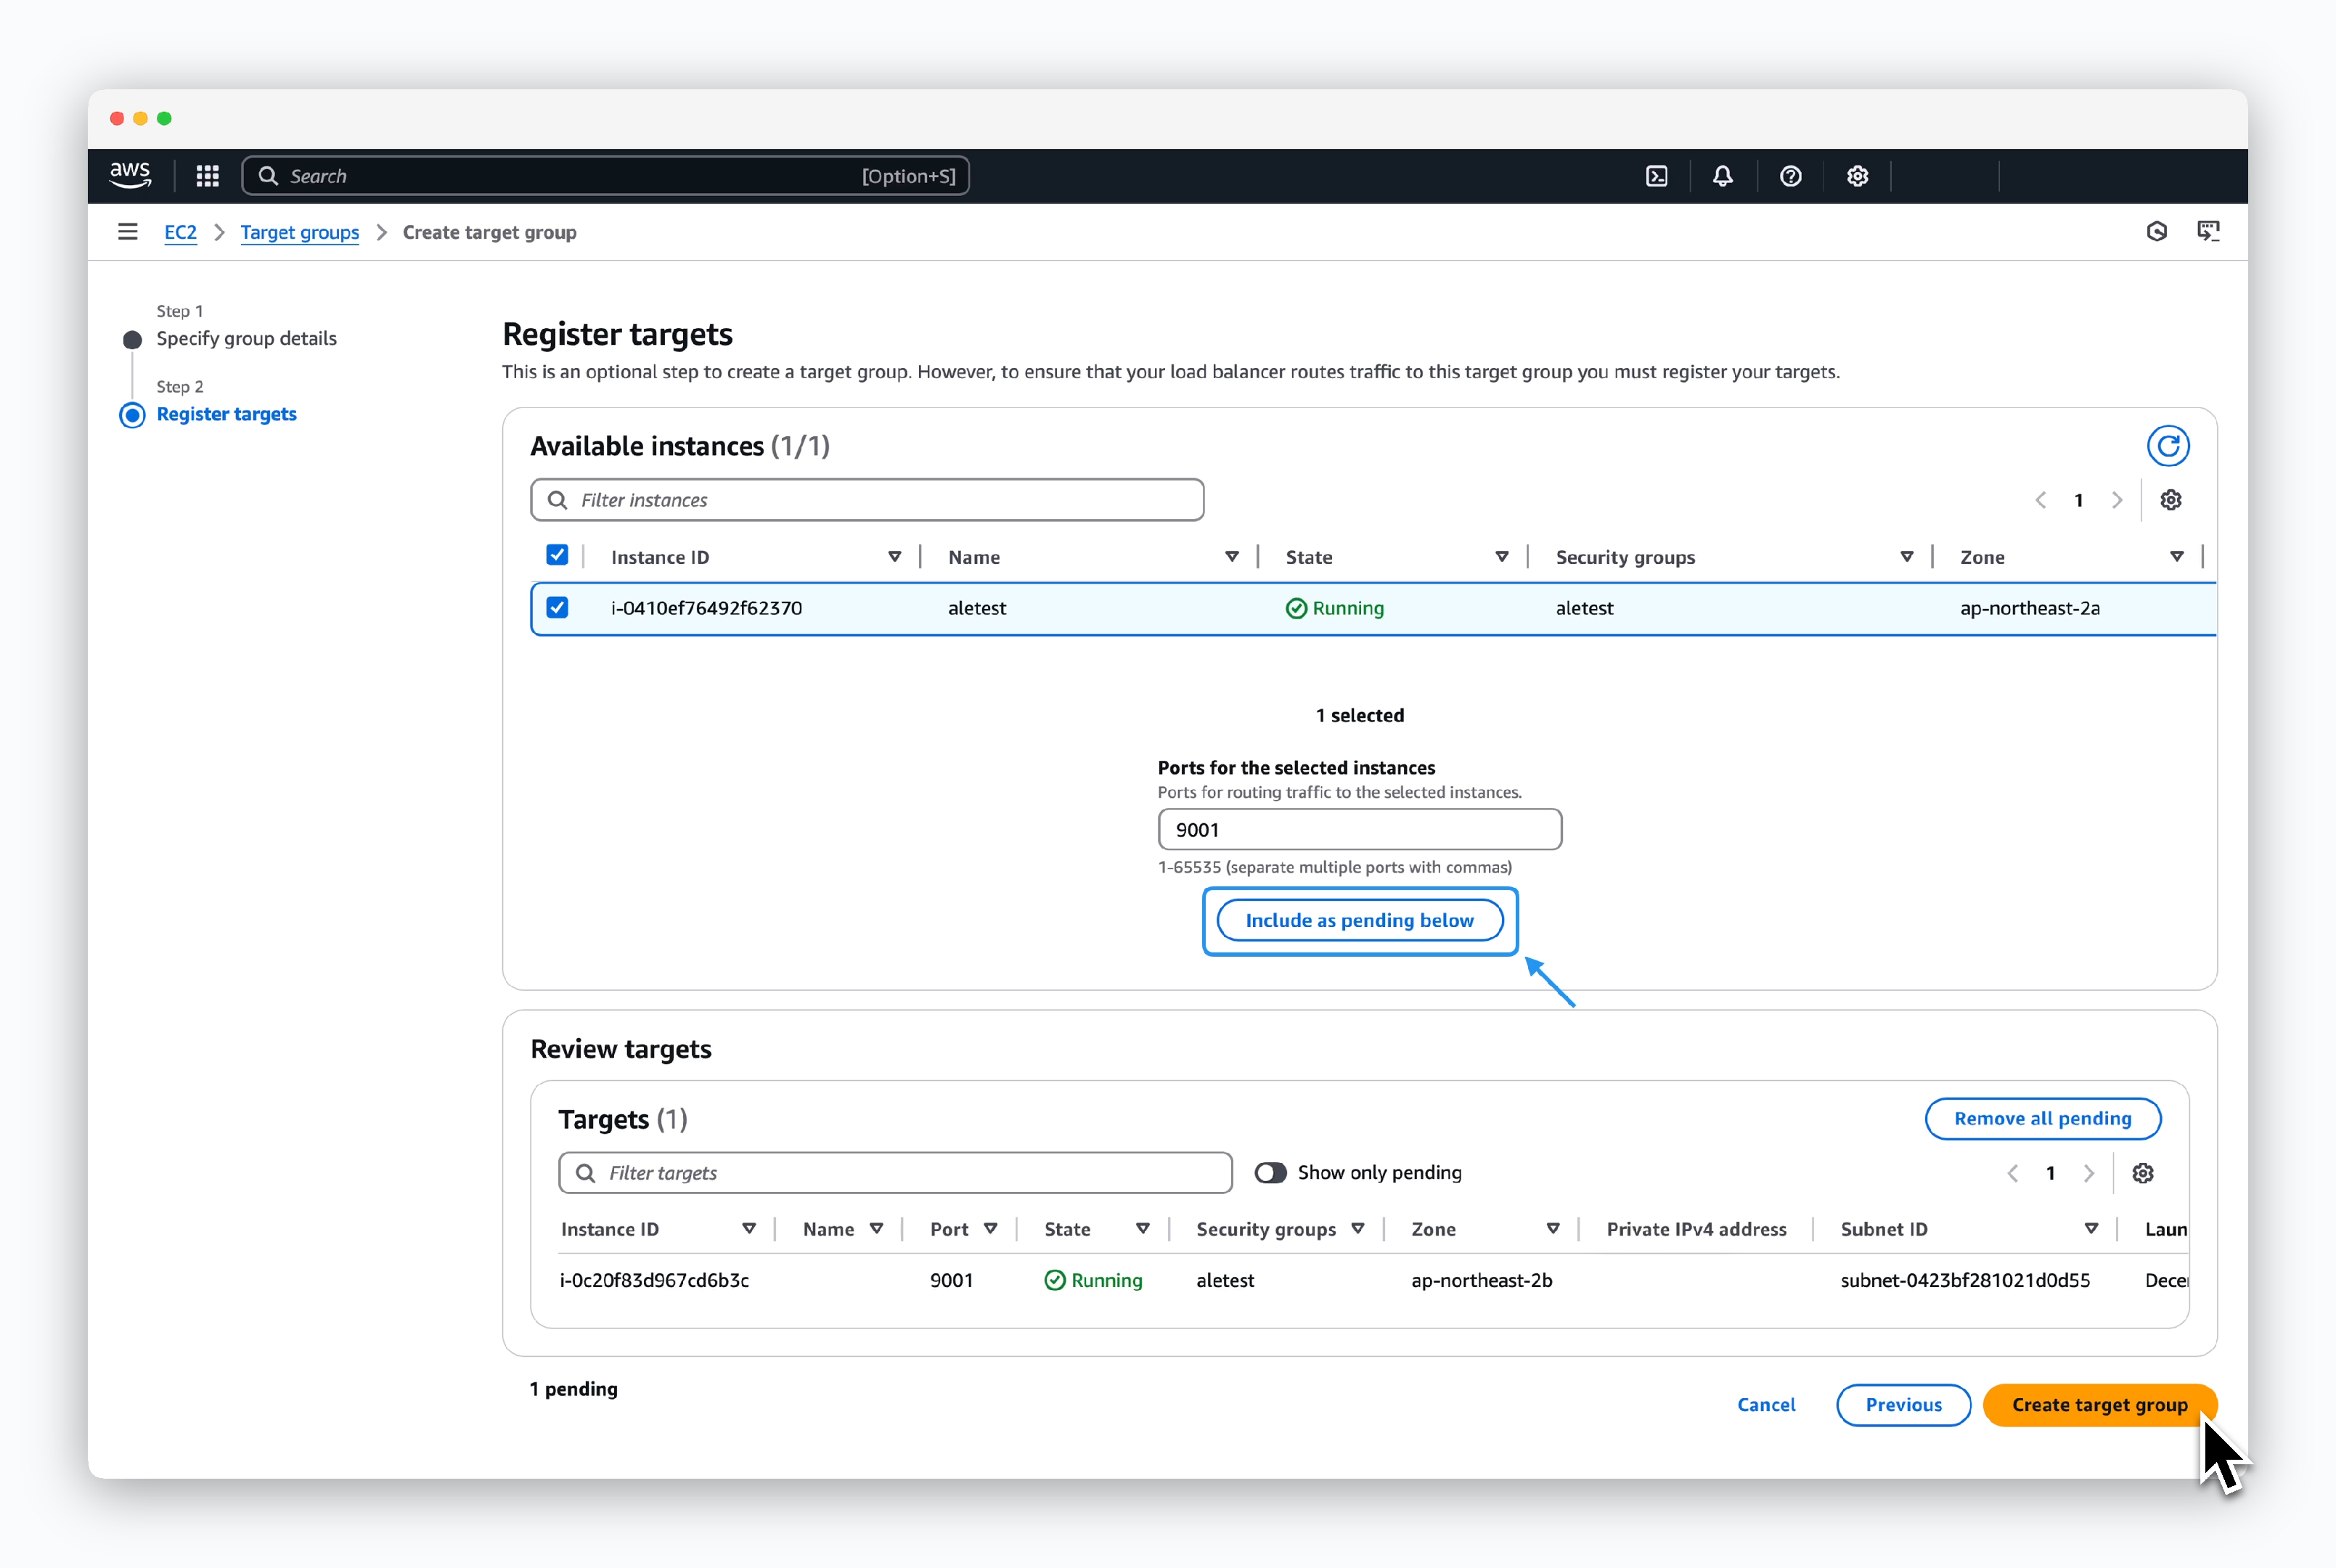
Select the instance wherealeis installed, enter 9001 in Ports for the selected instances, and click Include as pending below. Then clickCreate target group.
Create ALB
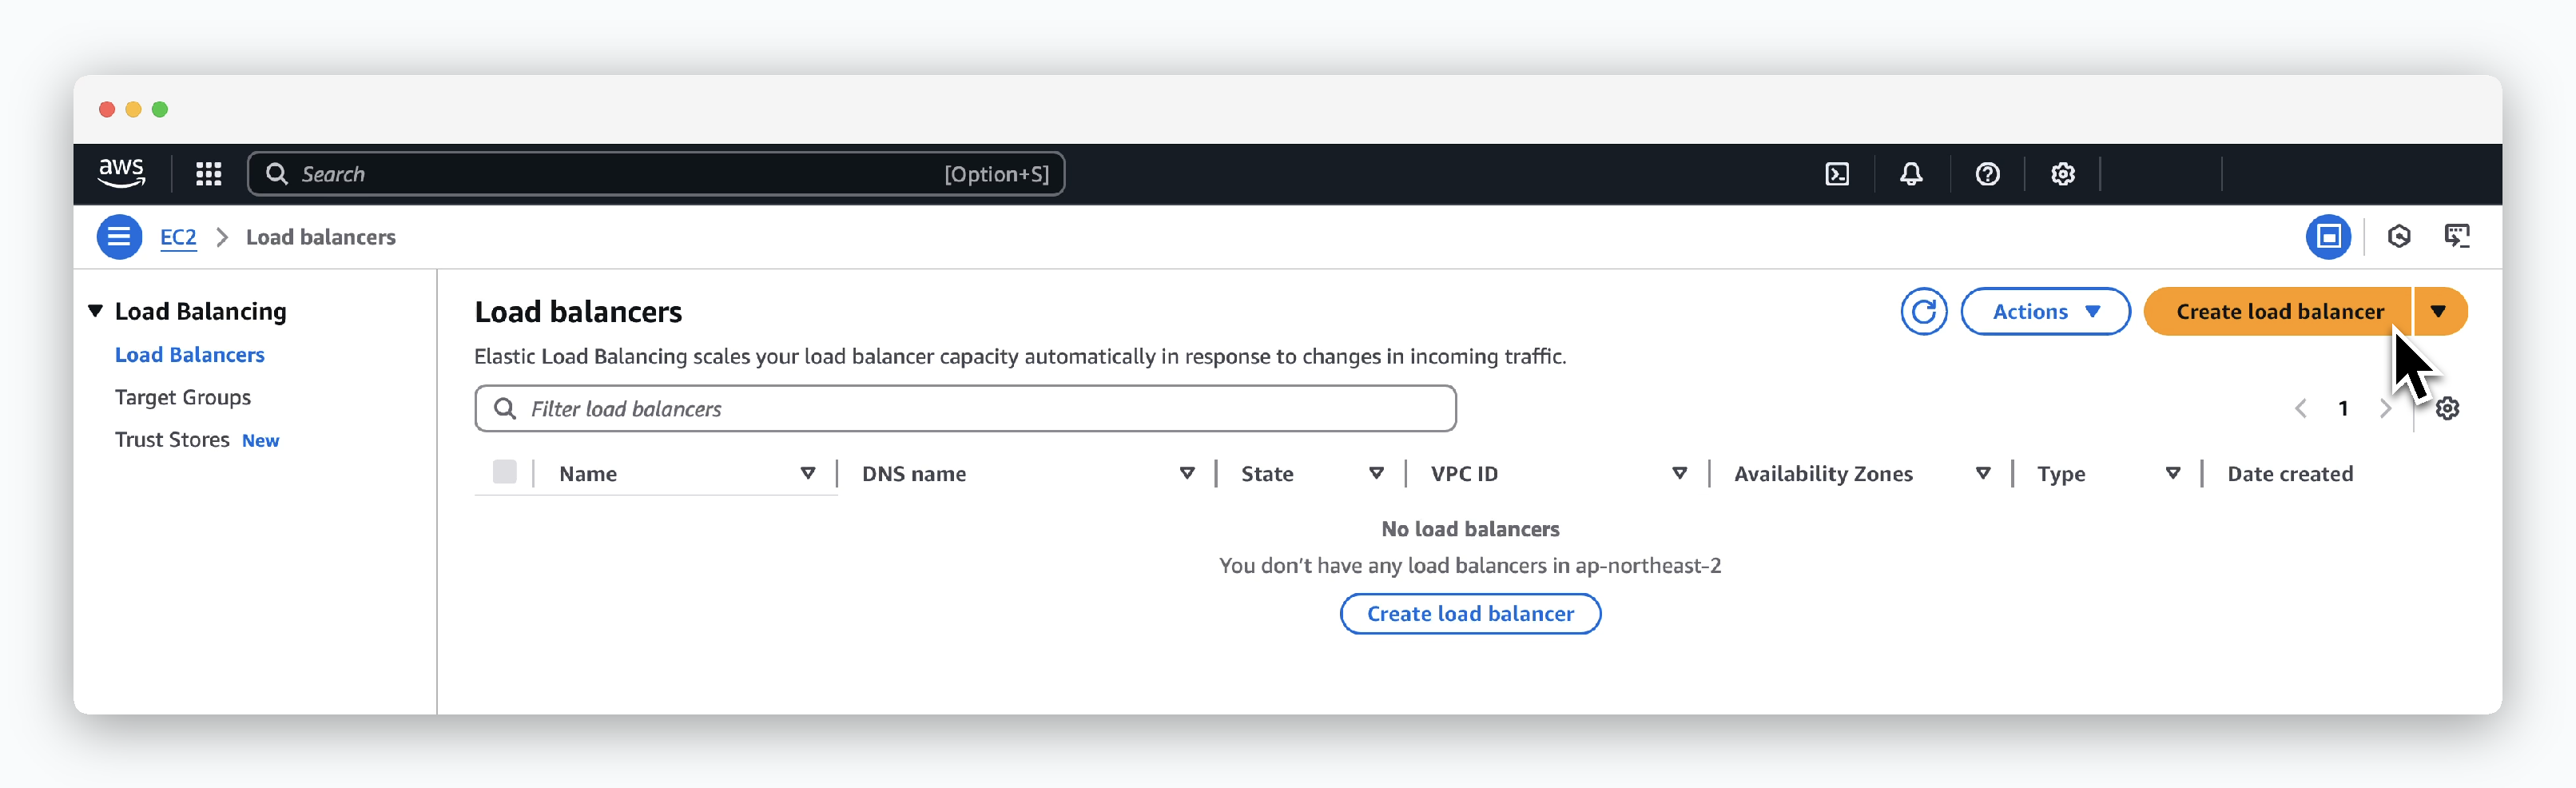
ClickCreate Load BalancerinEC2 > Load Balancing > Load balancers. Then select Application Load Balancer.
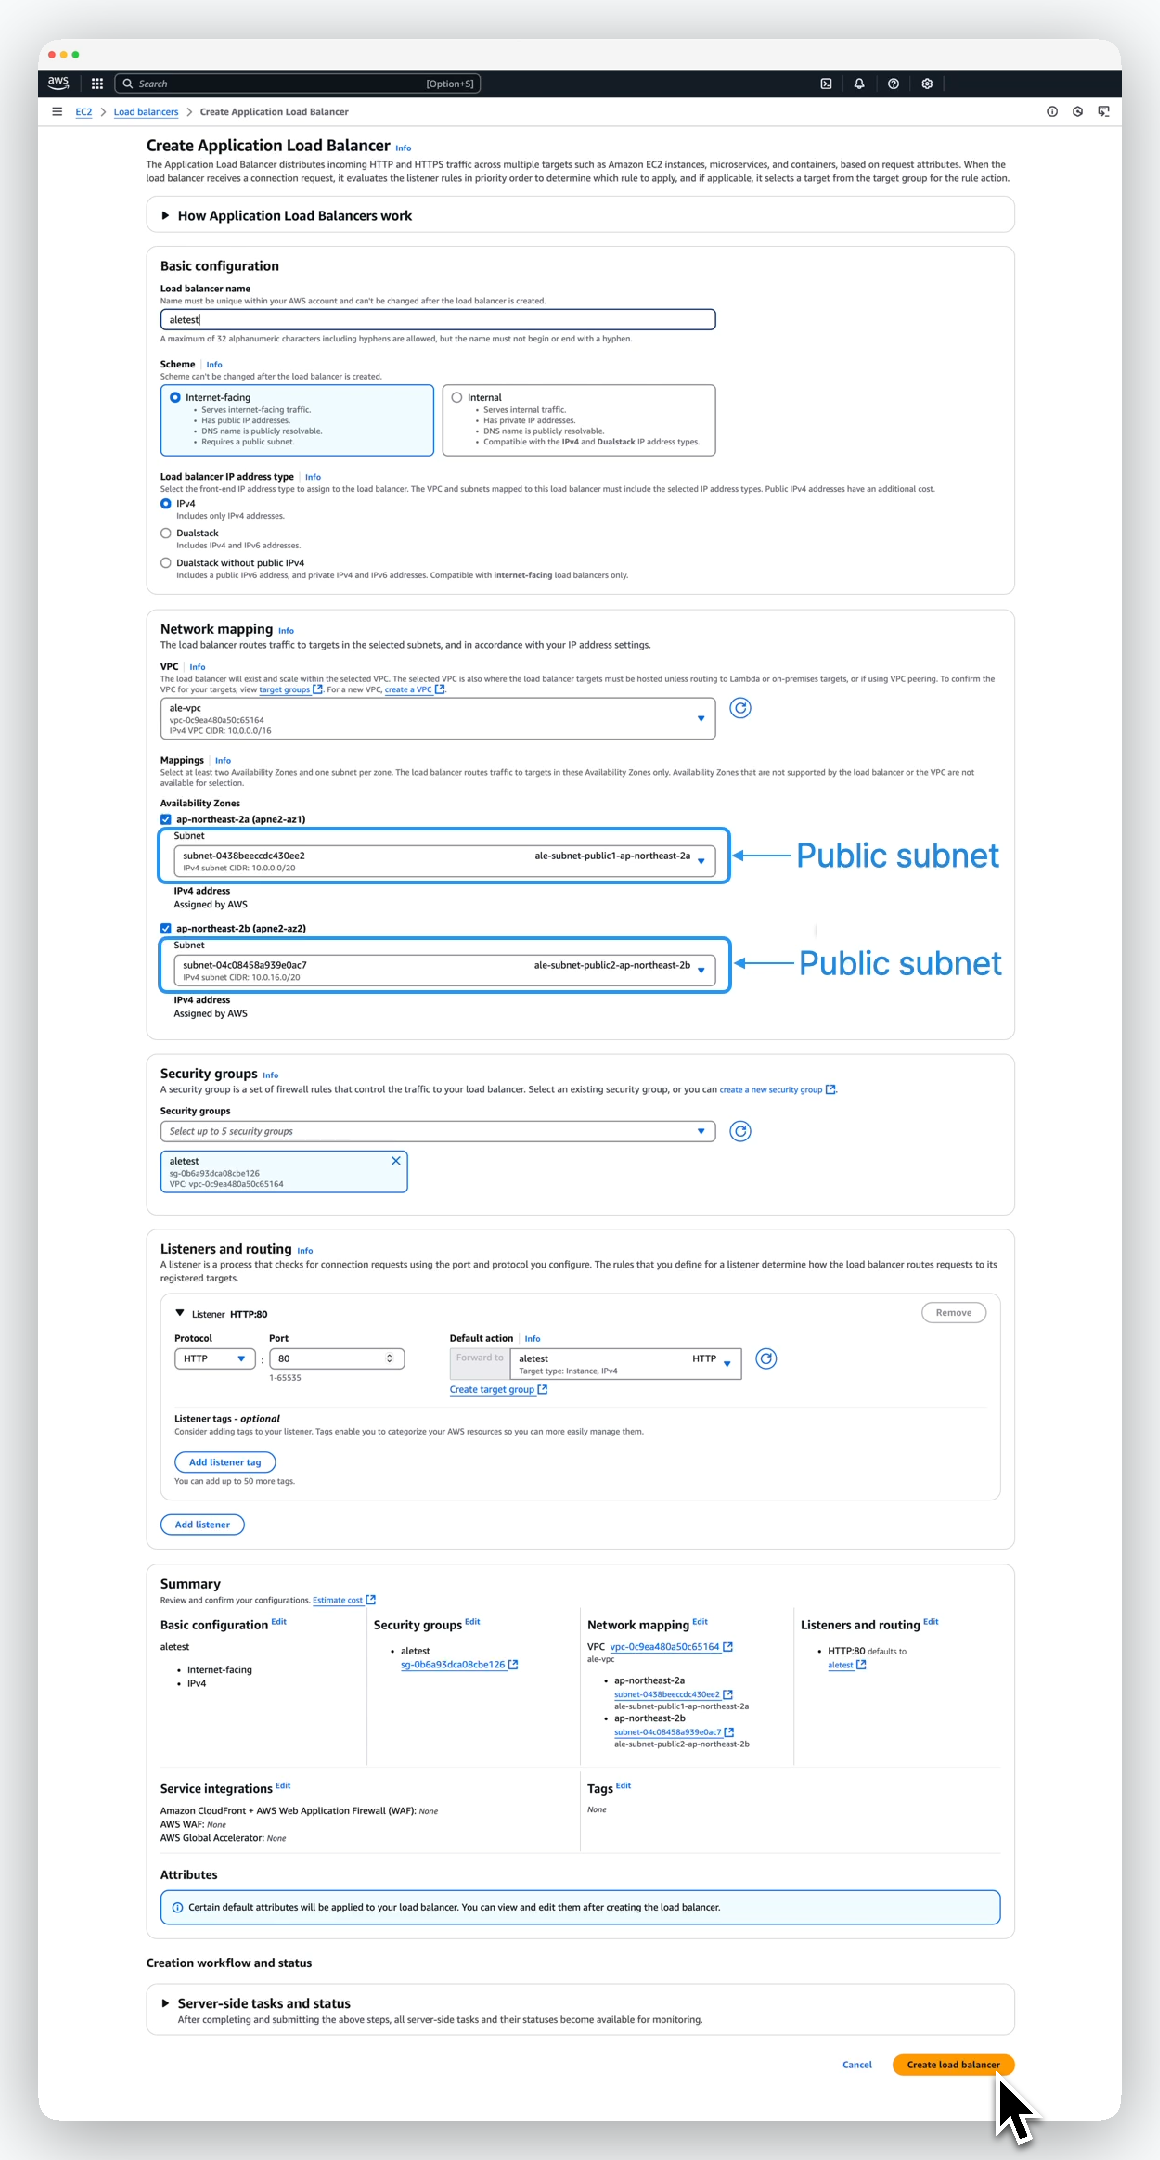
Enter or select the load balancer information as follows and click Create load balancer:
- Basic configuration
- Name: ALB name
- Scheme: internet-facing
- IP address type: ipv4
- Network mapping
- VPC: Select VPC containing the instance
- Availability Zones: Select all available subnets
- Security groups
- Security groups: Select security group applied to EC2 instance
- Listeners and routing
- Listener port: 80
- Target group: Select previously created target group
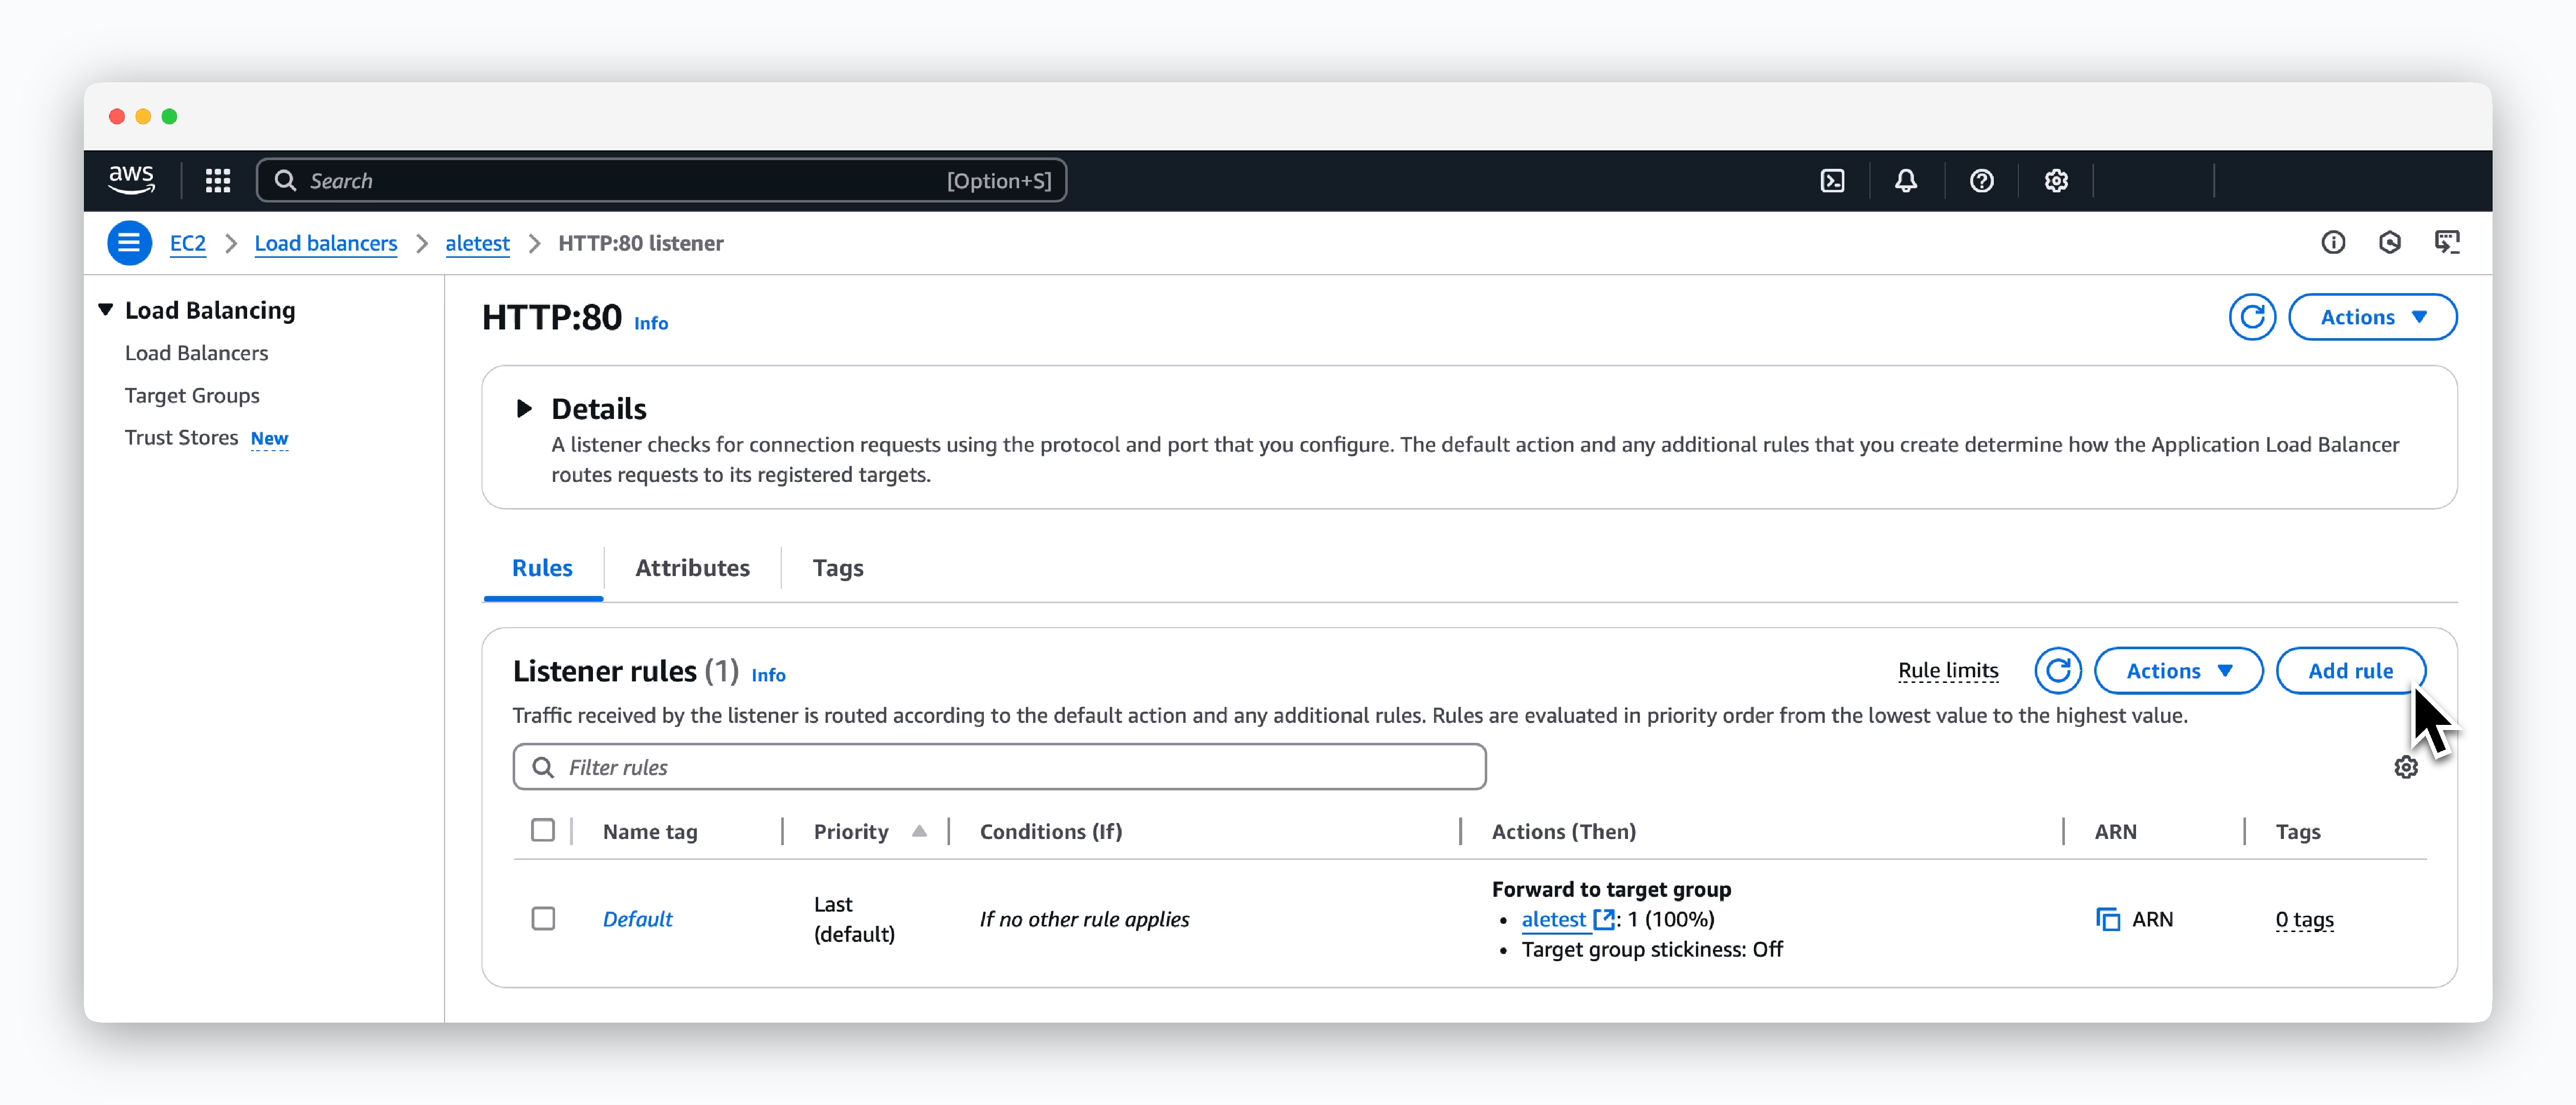
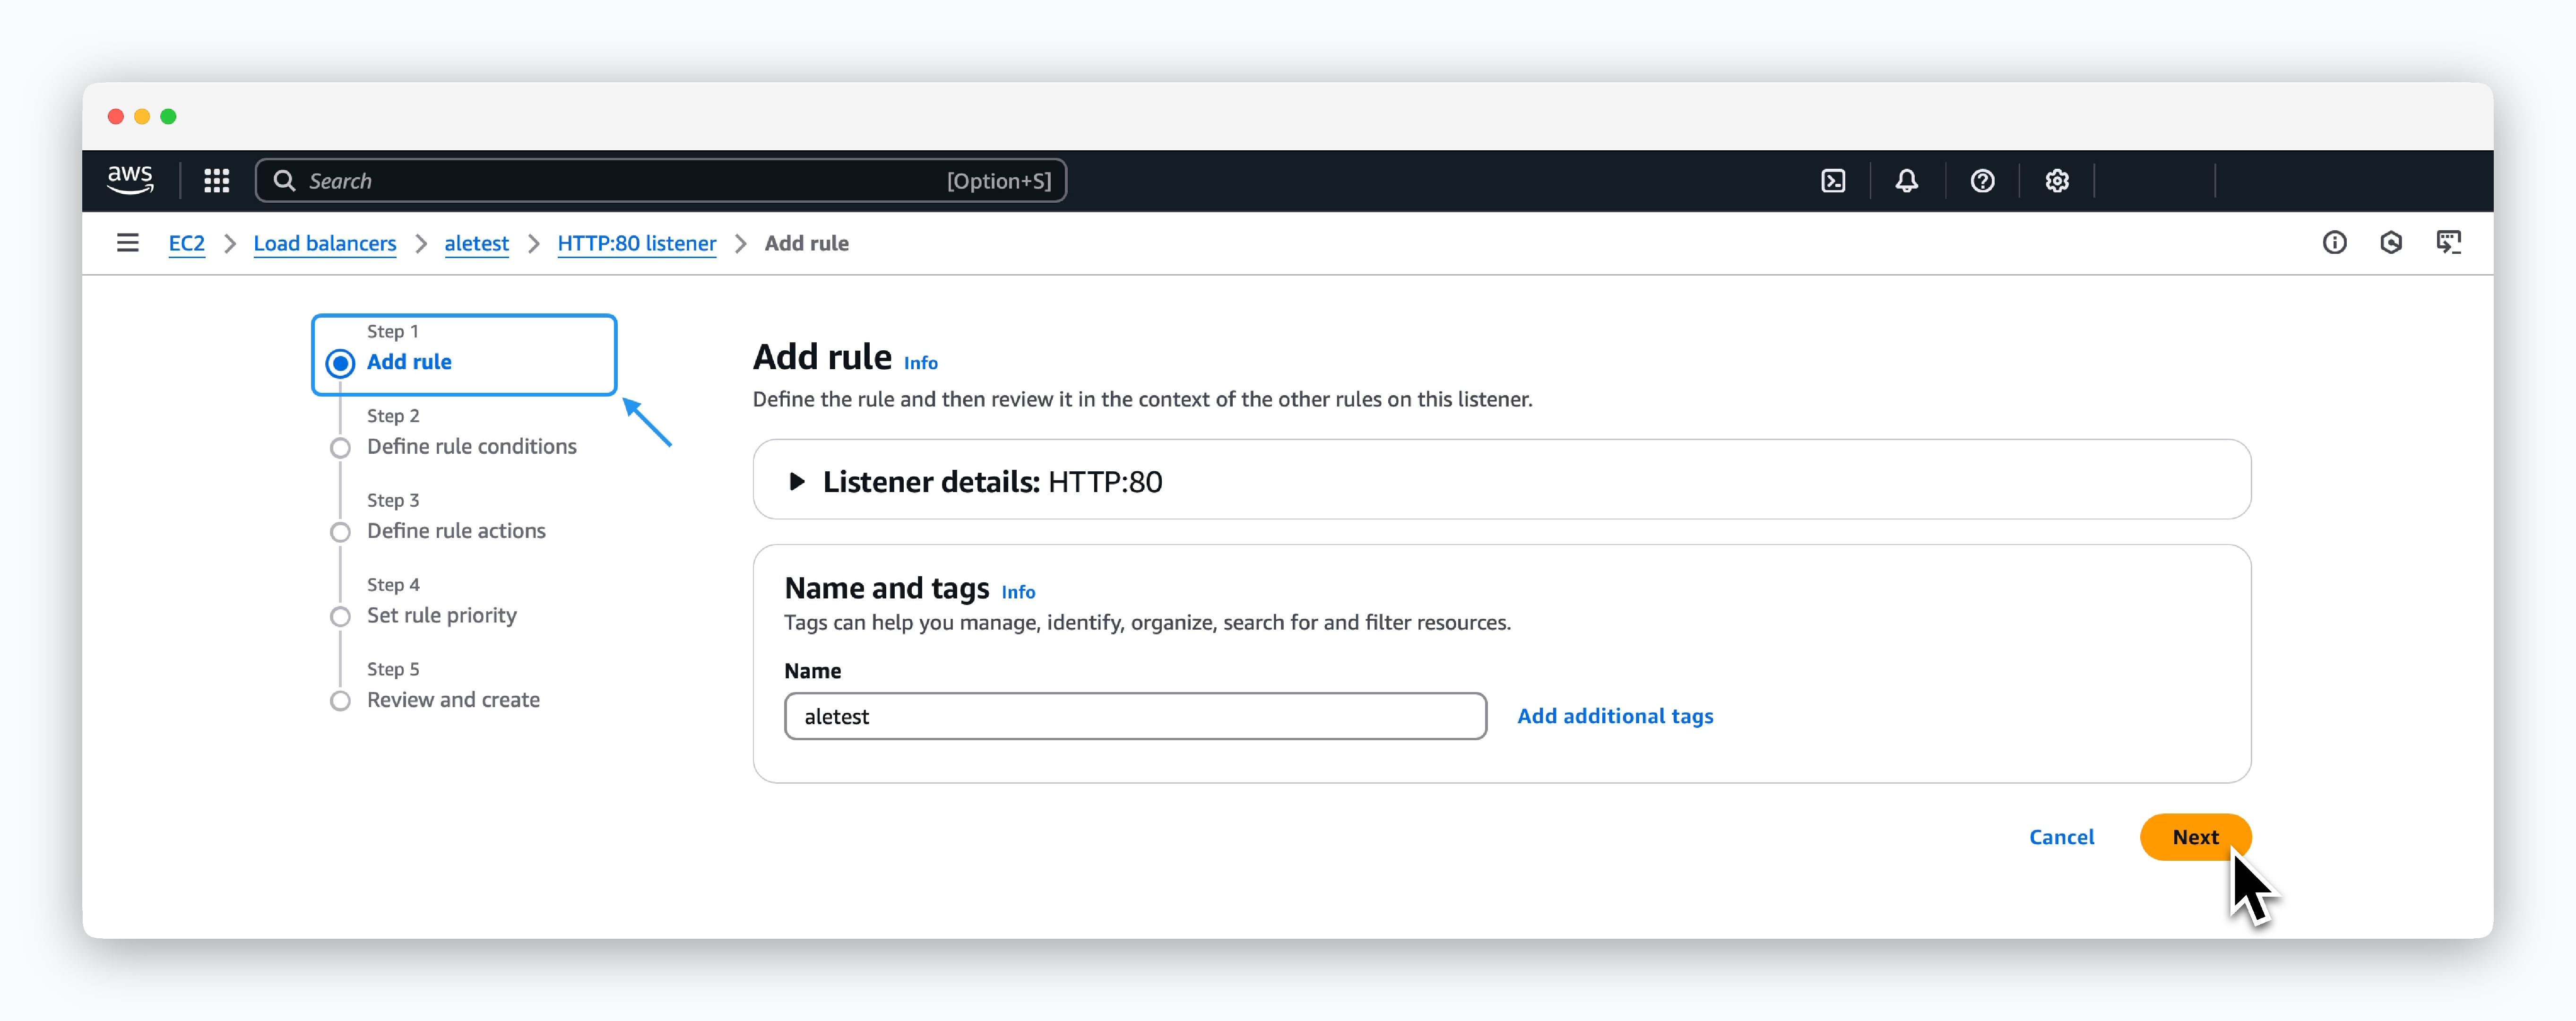
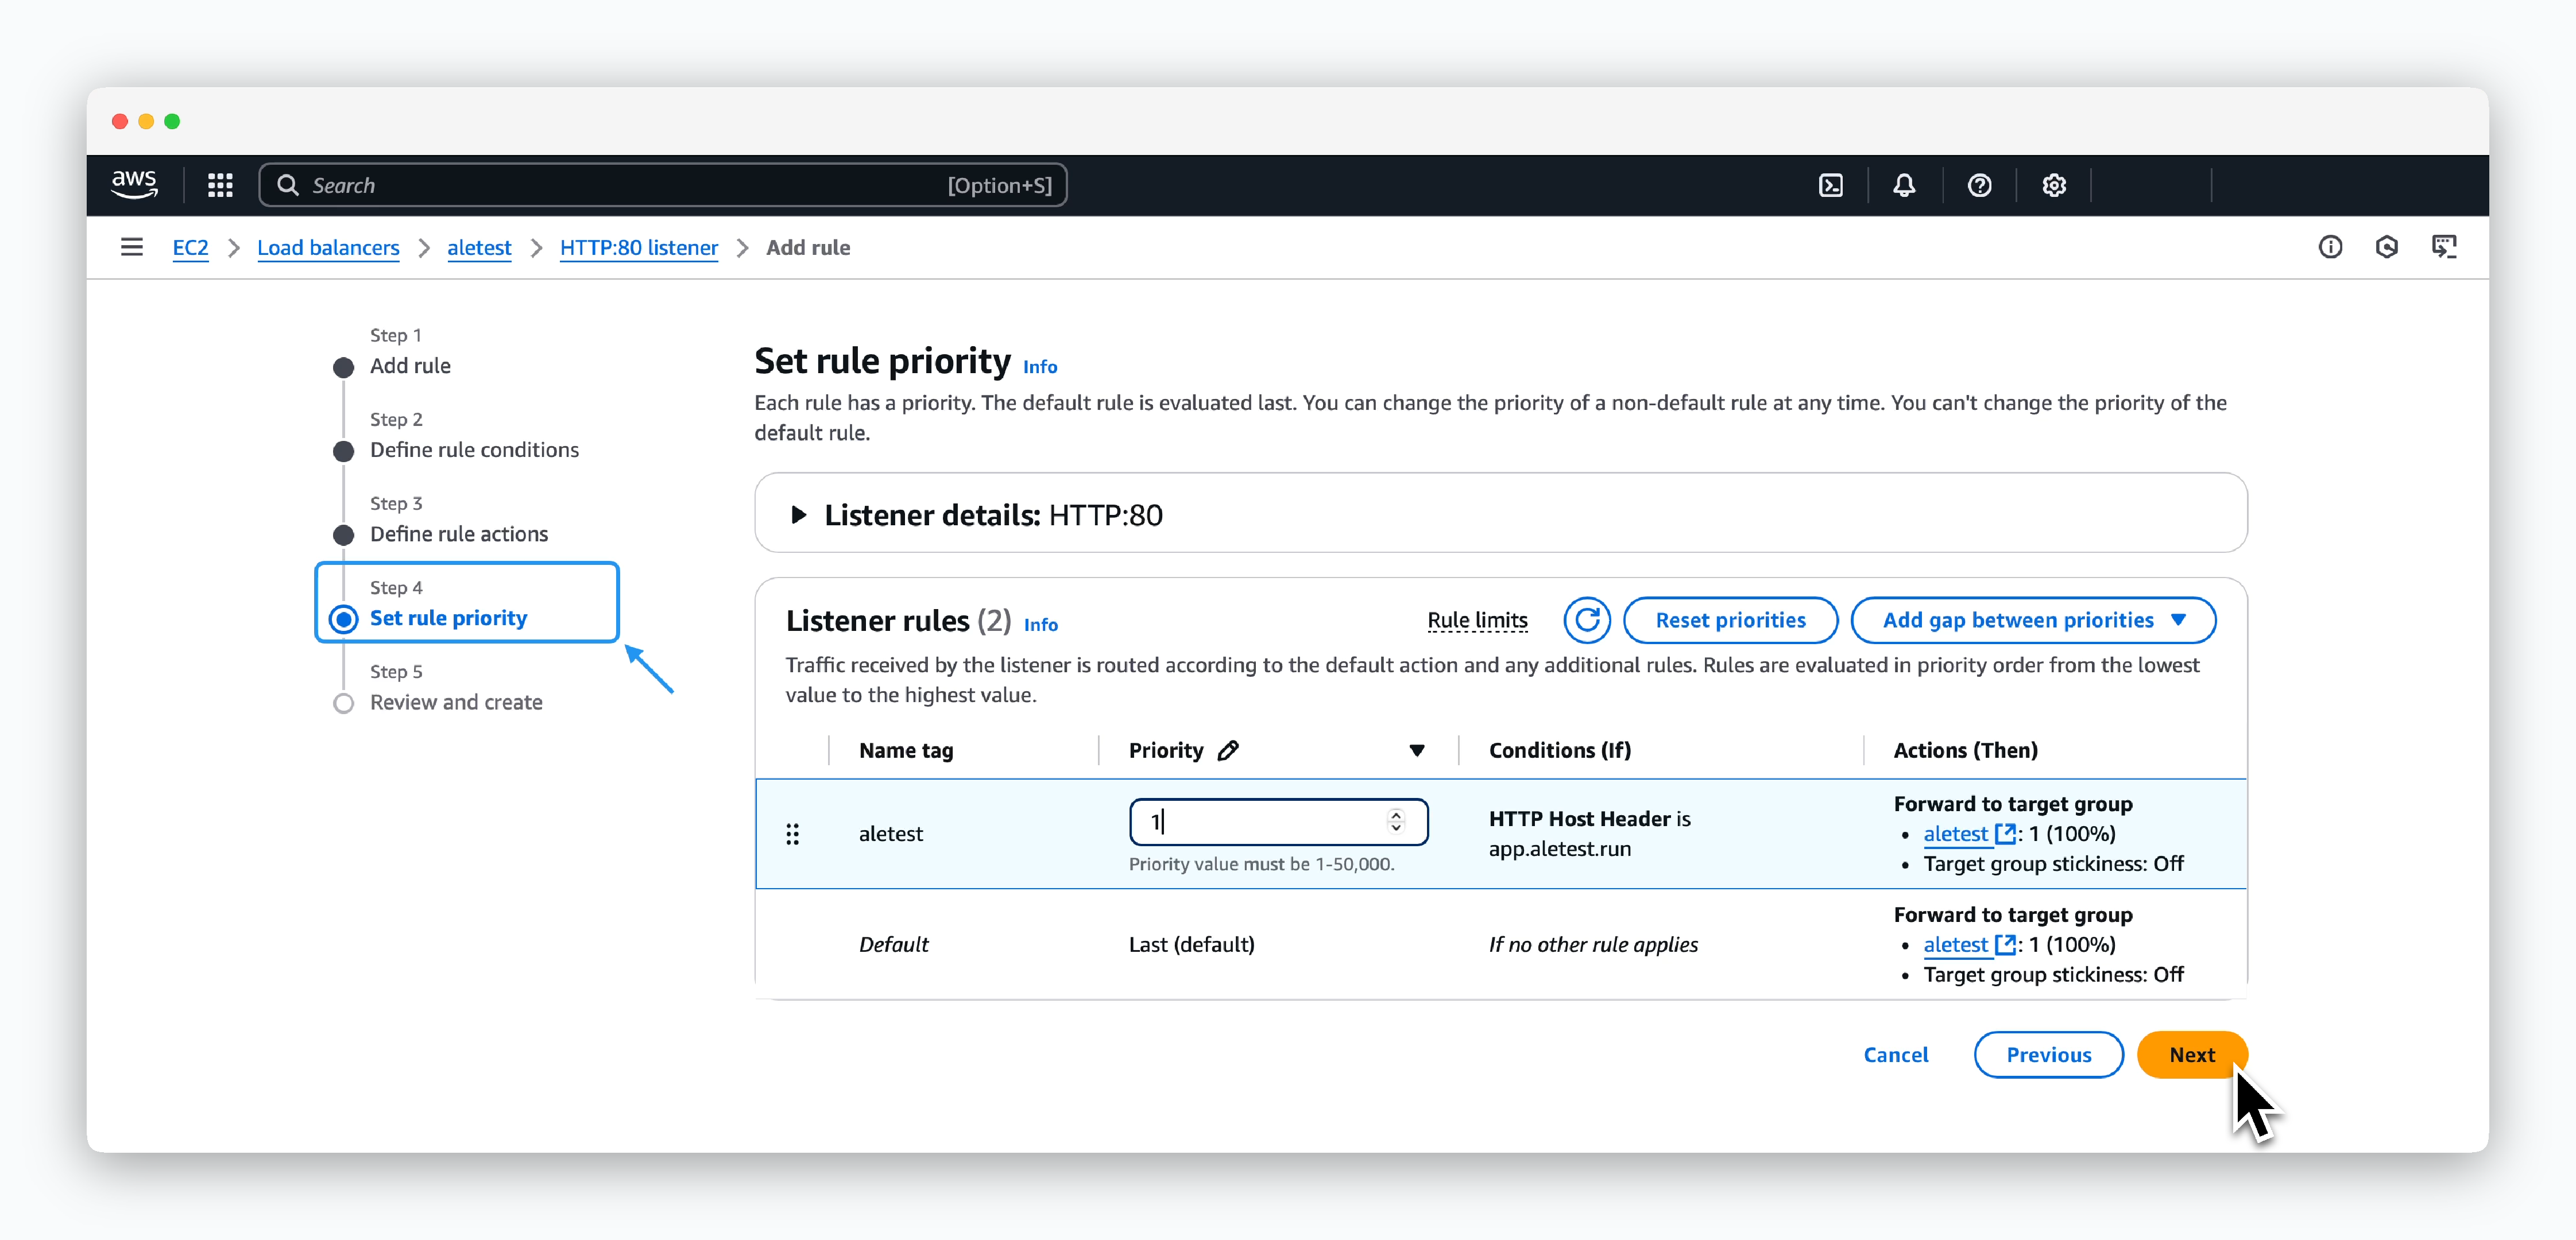
Click Add rule in the created Load balancer page, and create a rule following these 5 steps:
Define rule conditions
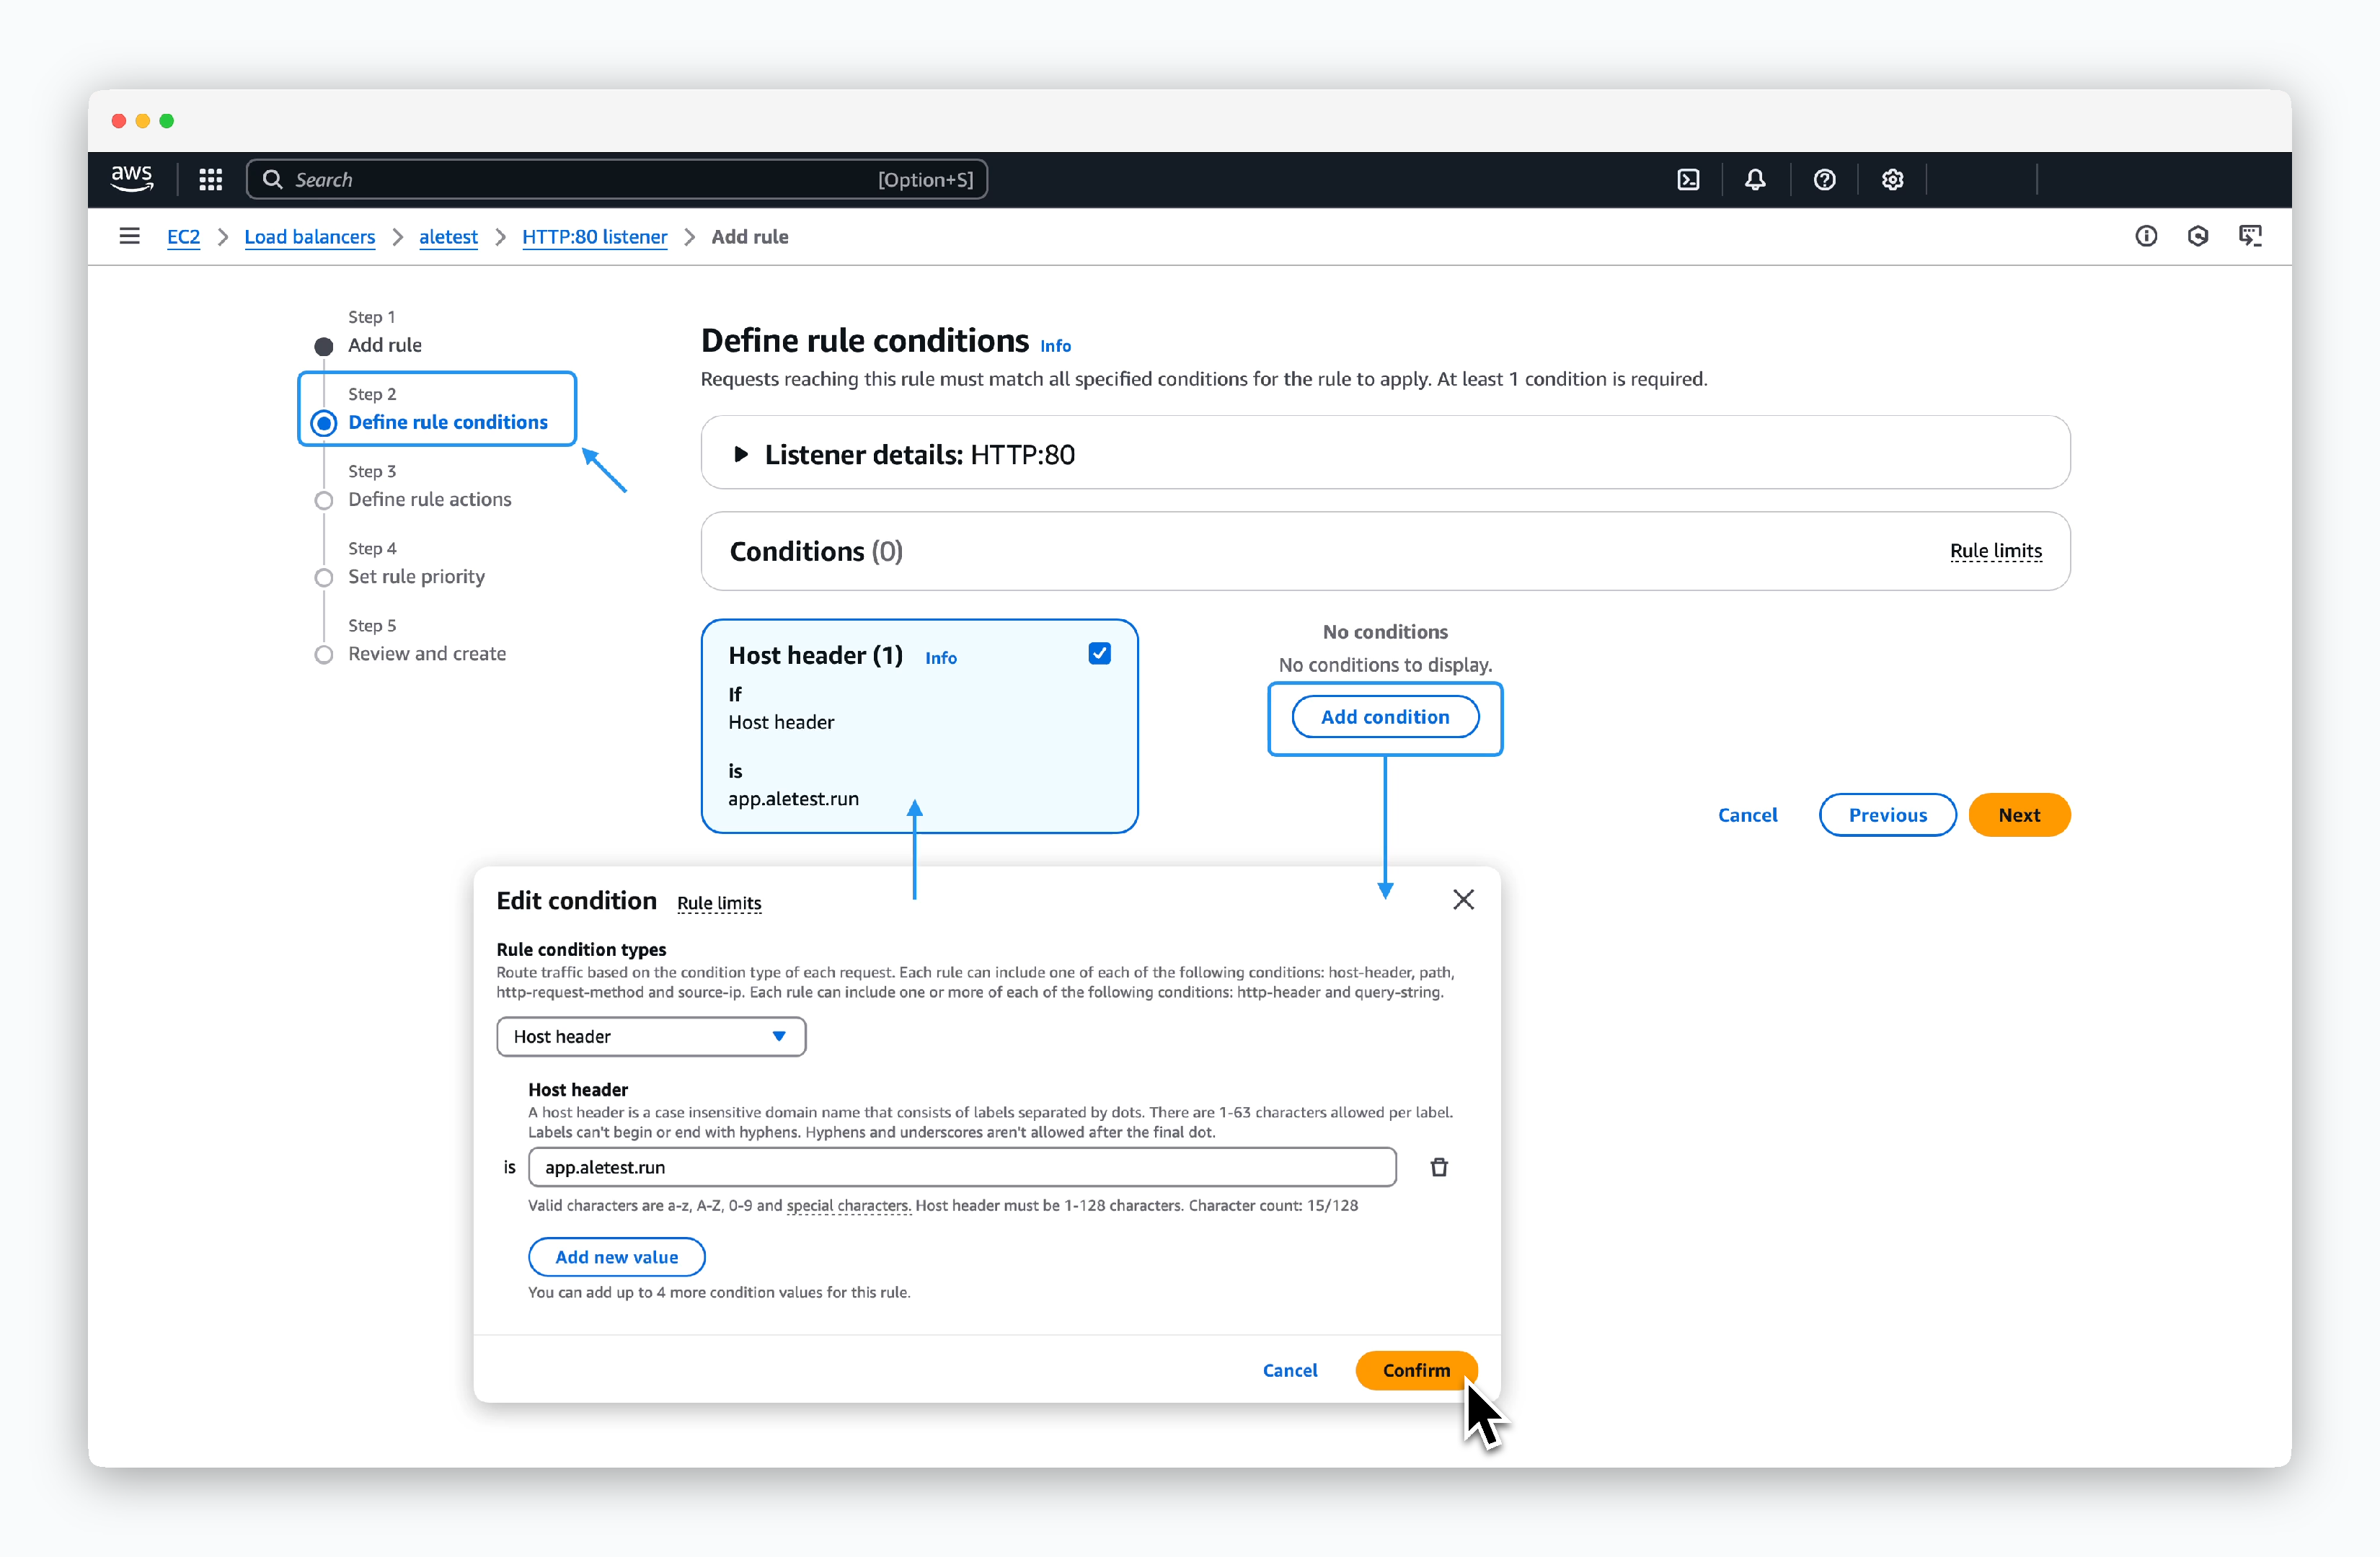
ClickAdd condition, select Host header in the modal, enterapp.[domain], and clickconfirmto create a Condition card. Then clickNext.
Define rule Actions
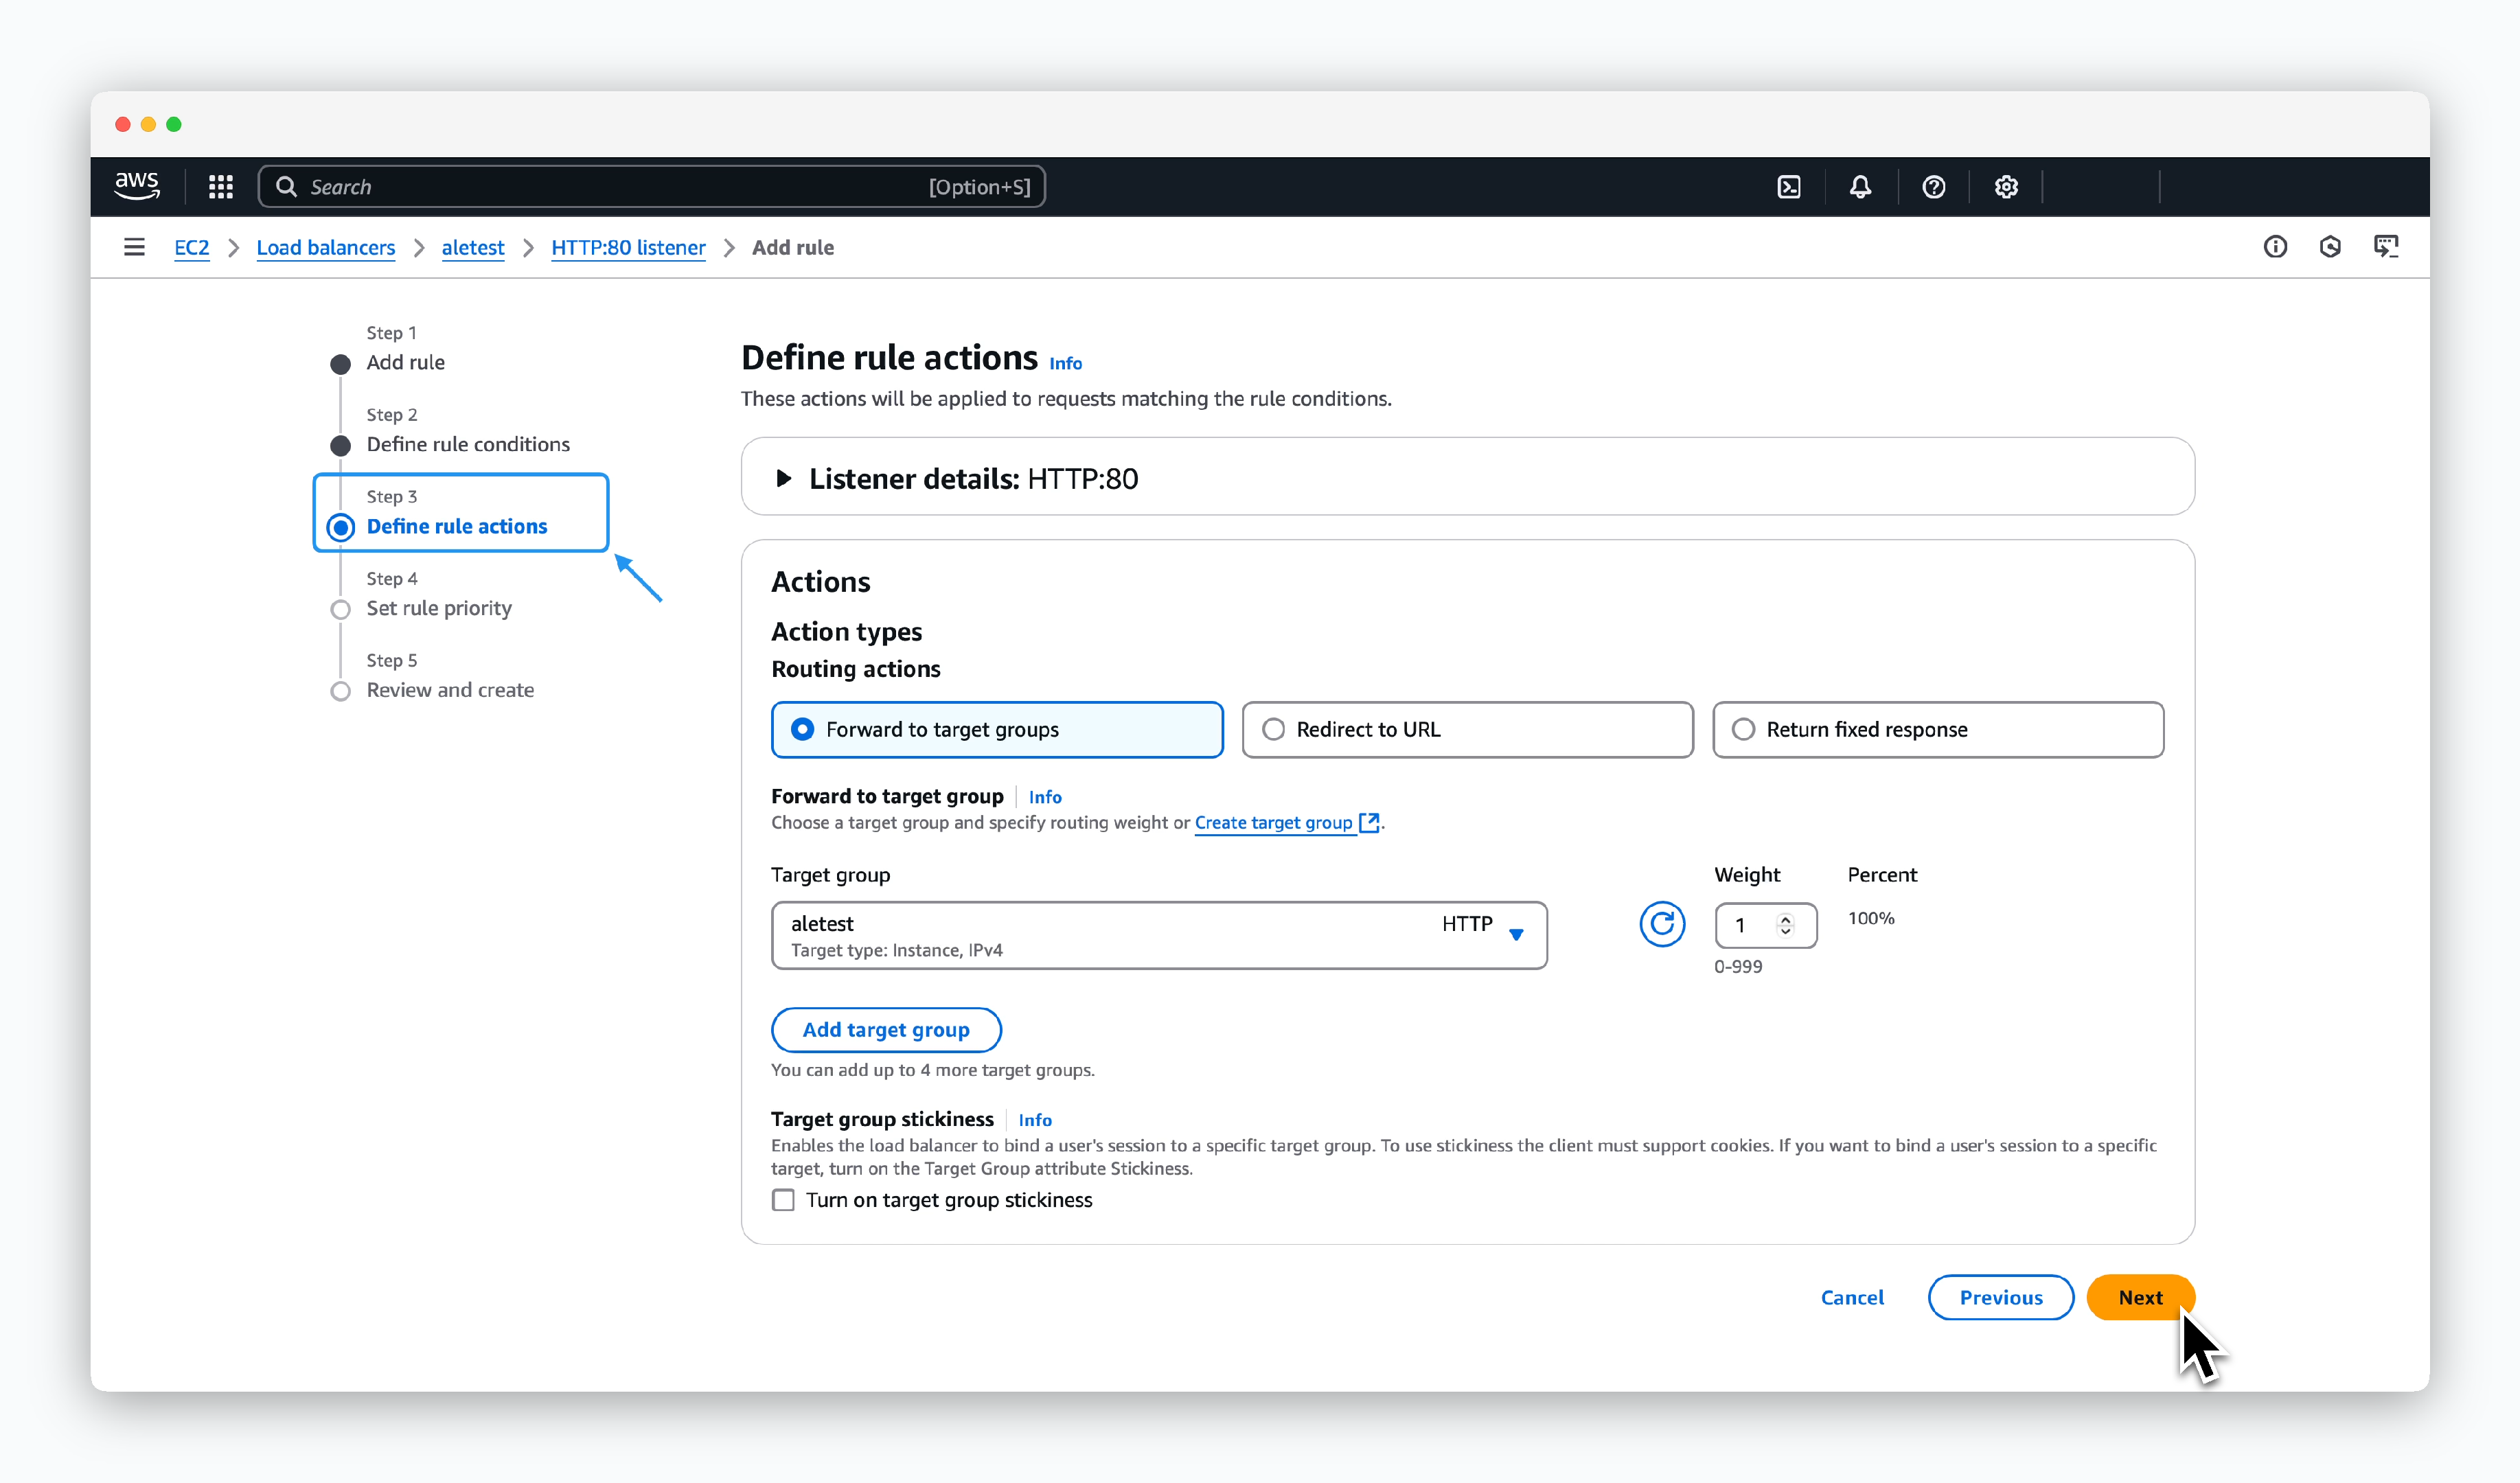
Select Forward to target groups for Action types, choose the previously created target group, and click Next.

After creating the rule, wait a moment. If 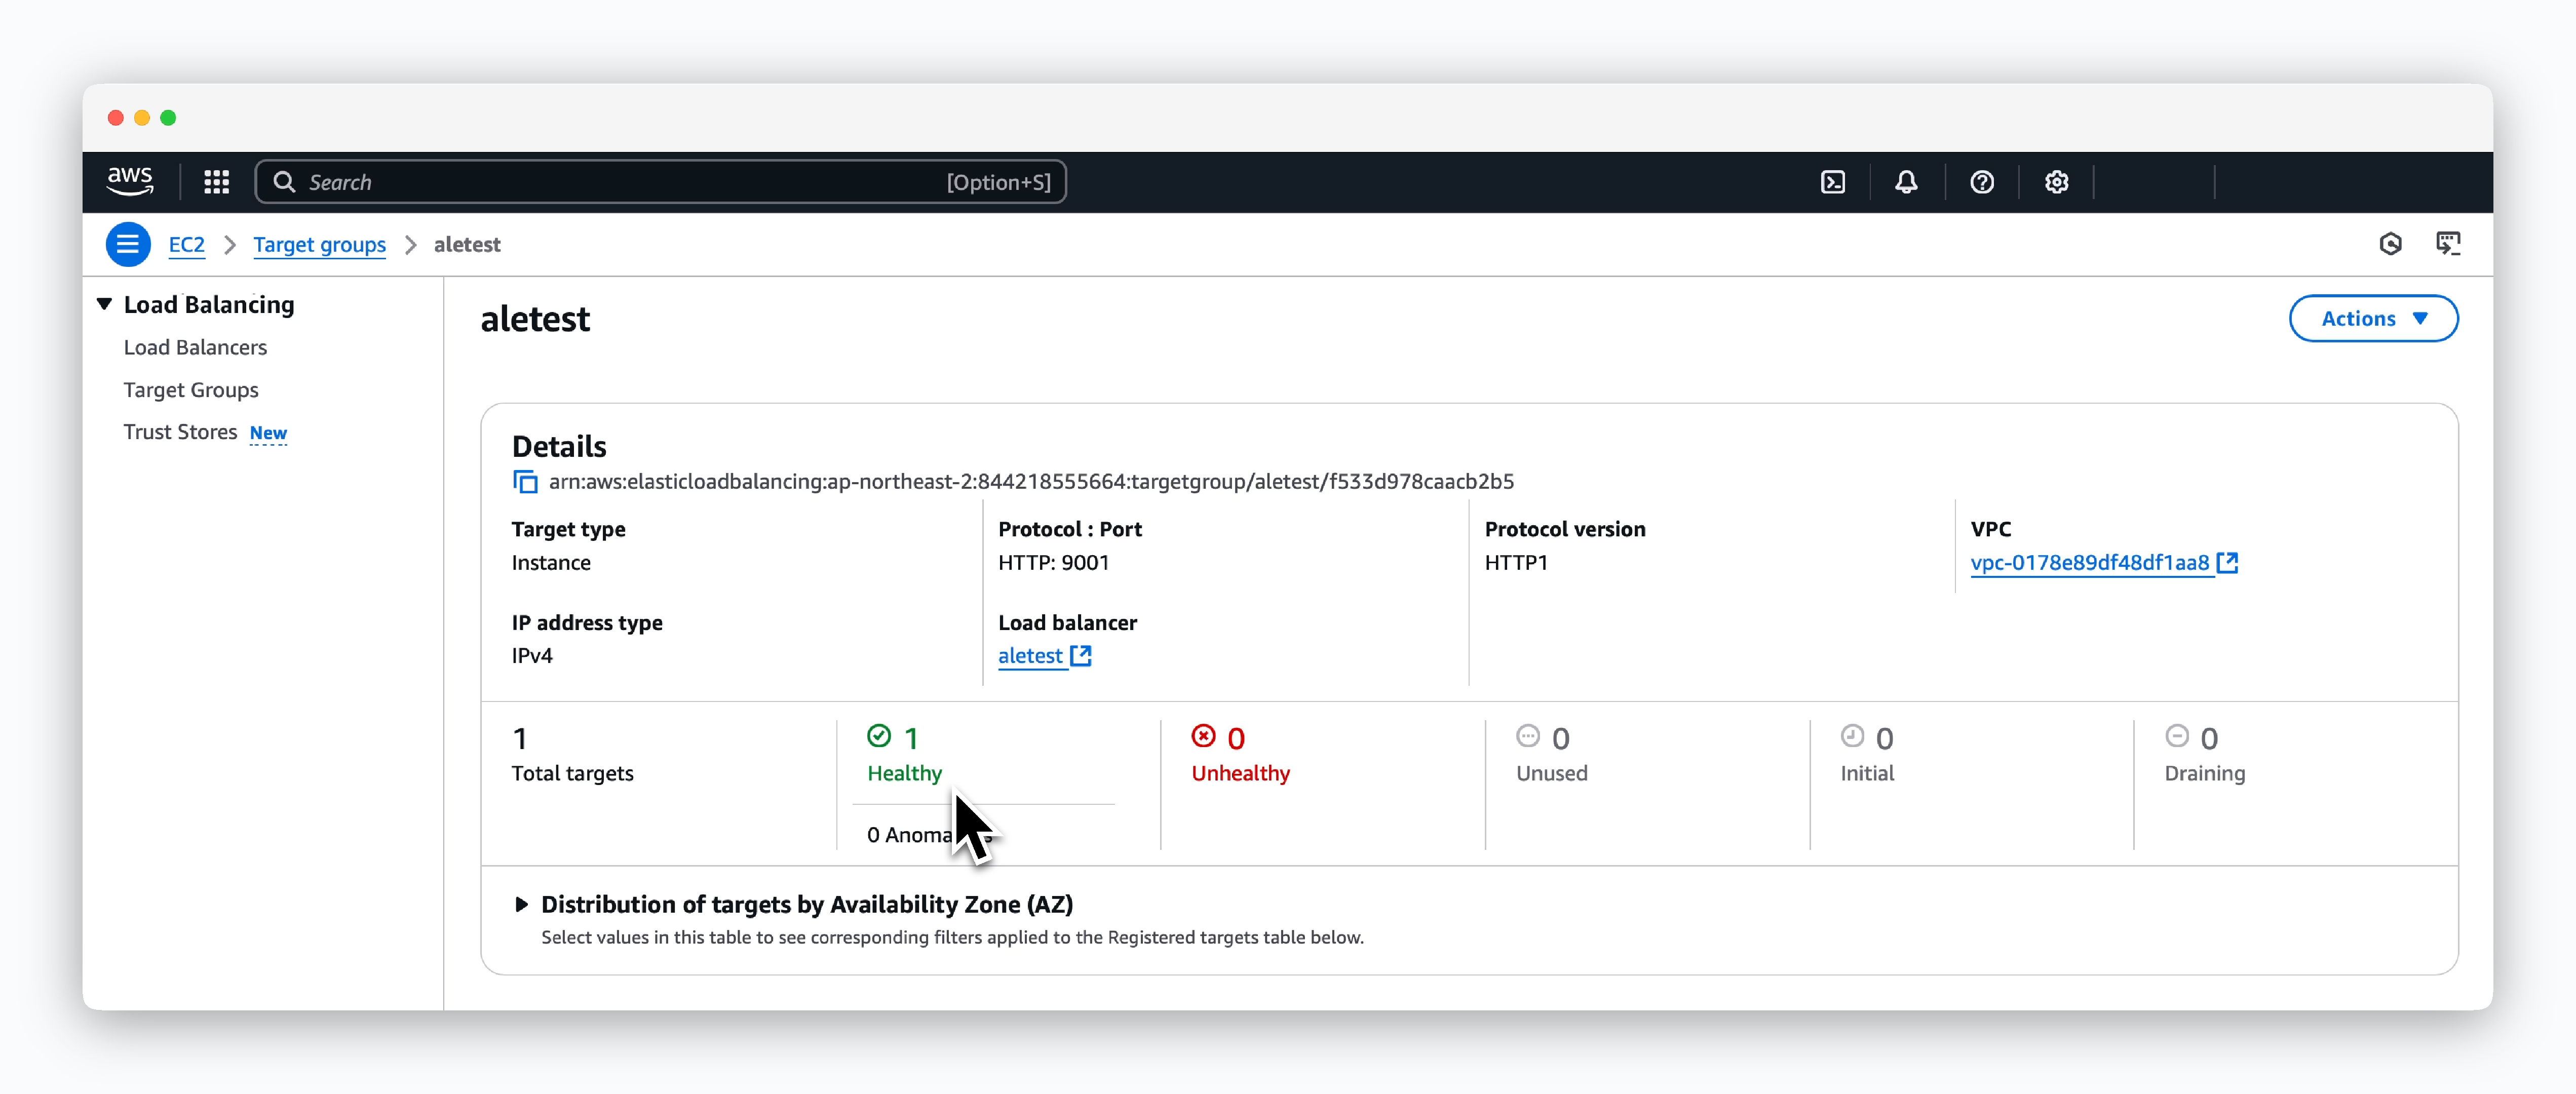
ale is running properly on the instance, the status of the target group routed by ALB will show as Healthy as in the image below.Create DNS Record for ale dashboard

Click Create record in Route53 > Hosted zones > Target domain page.
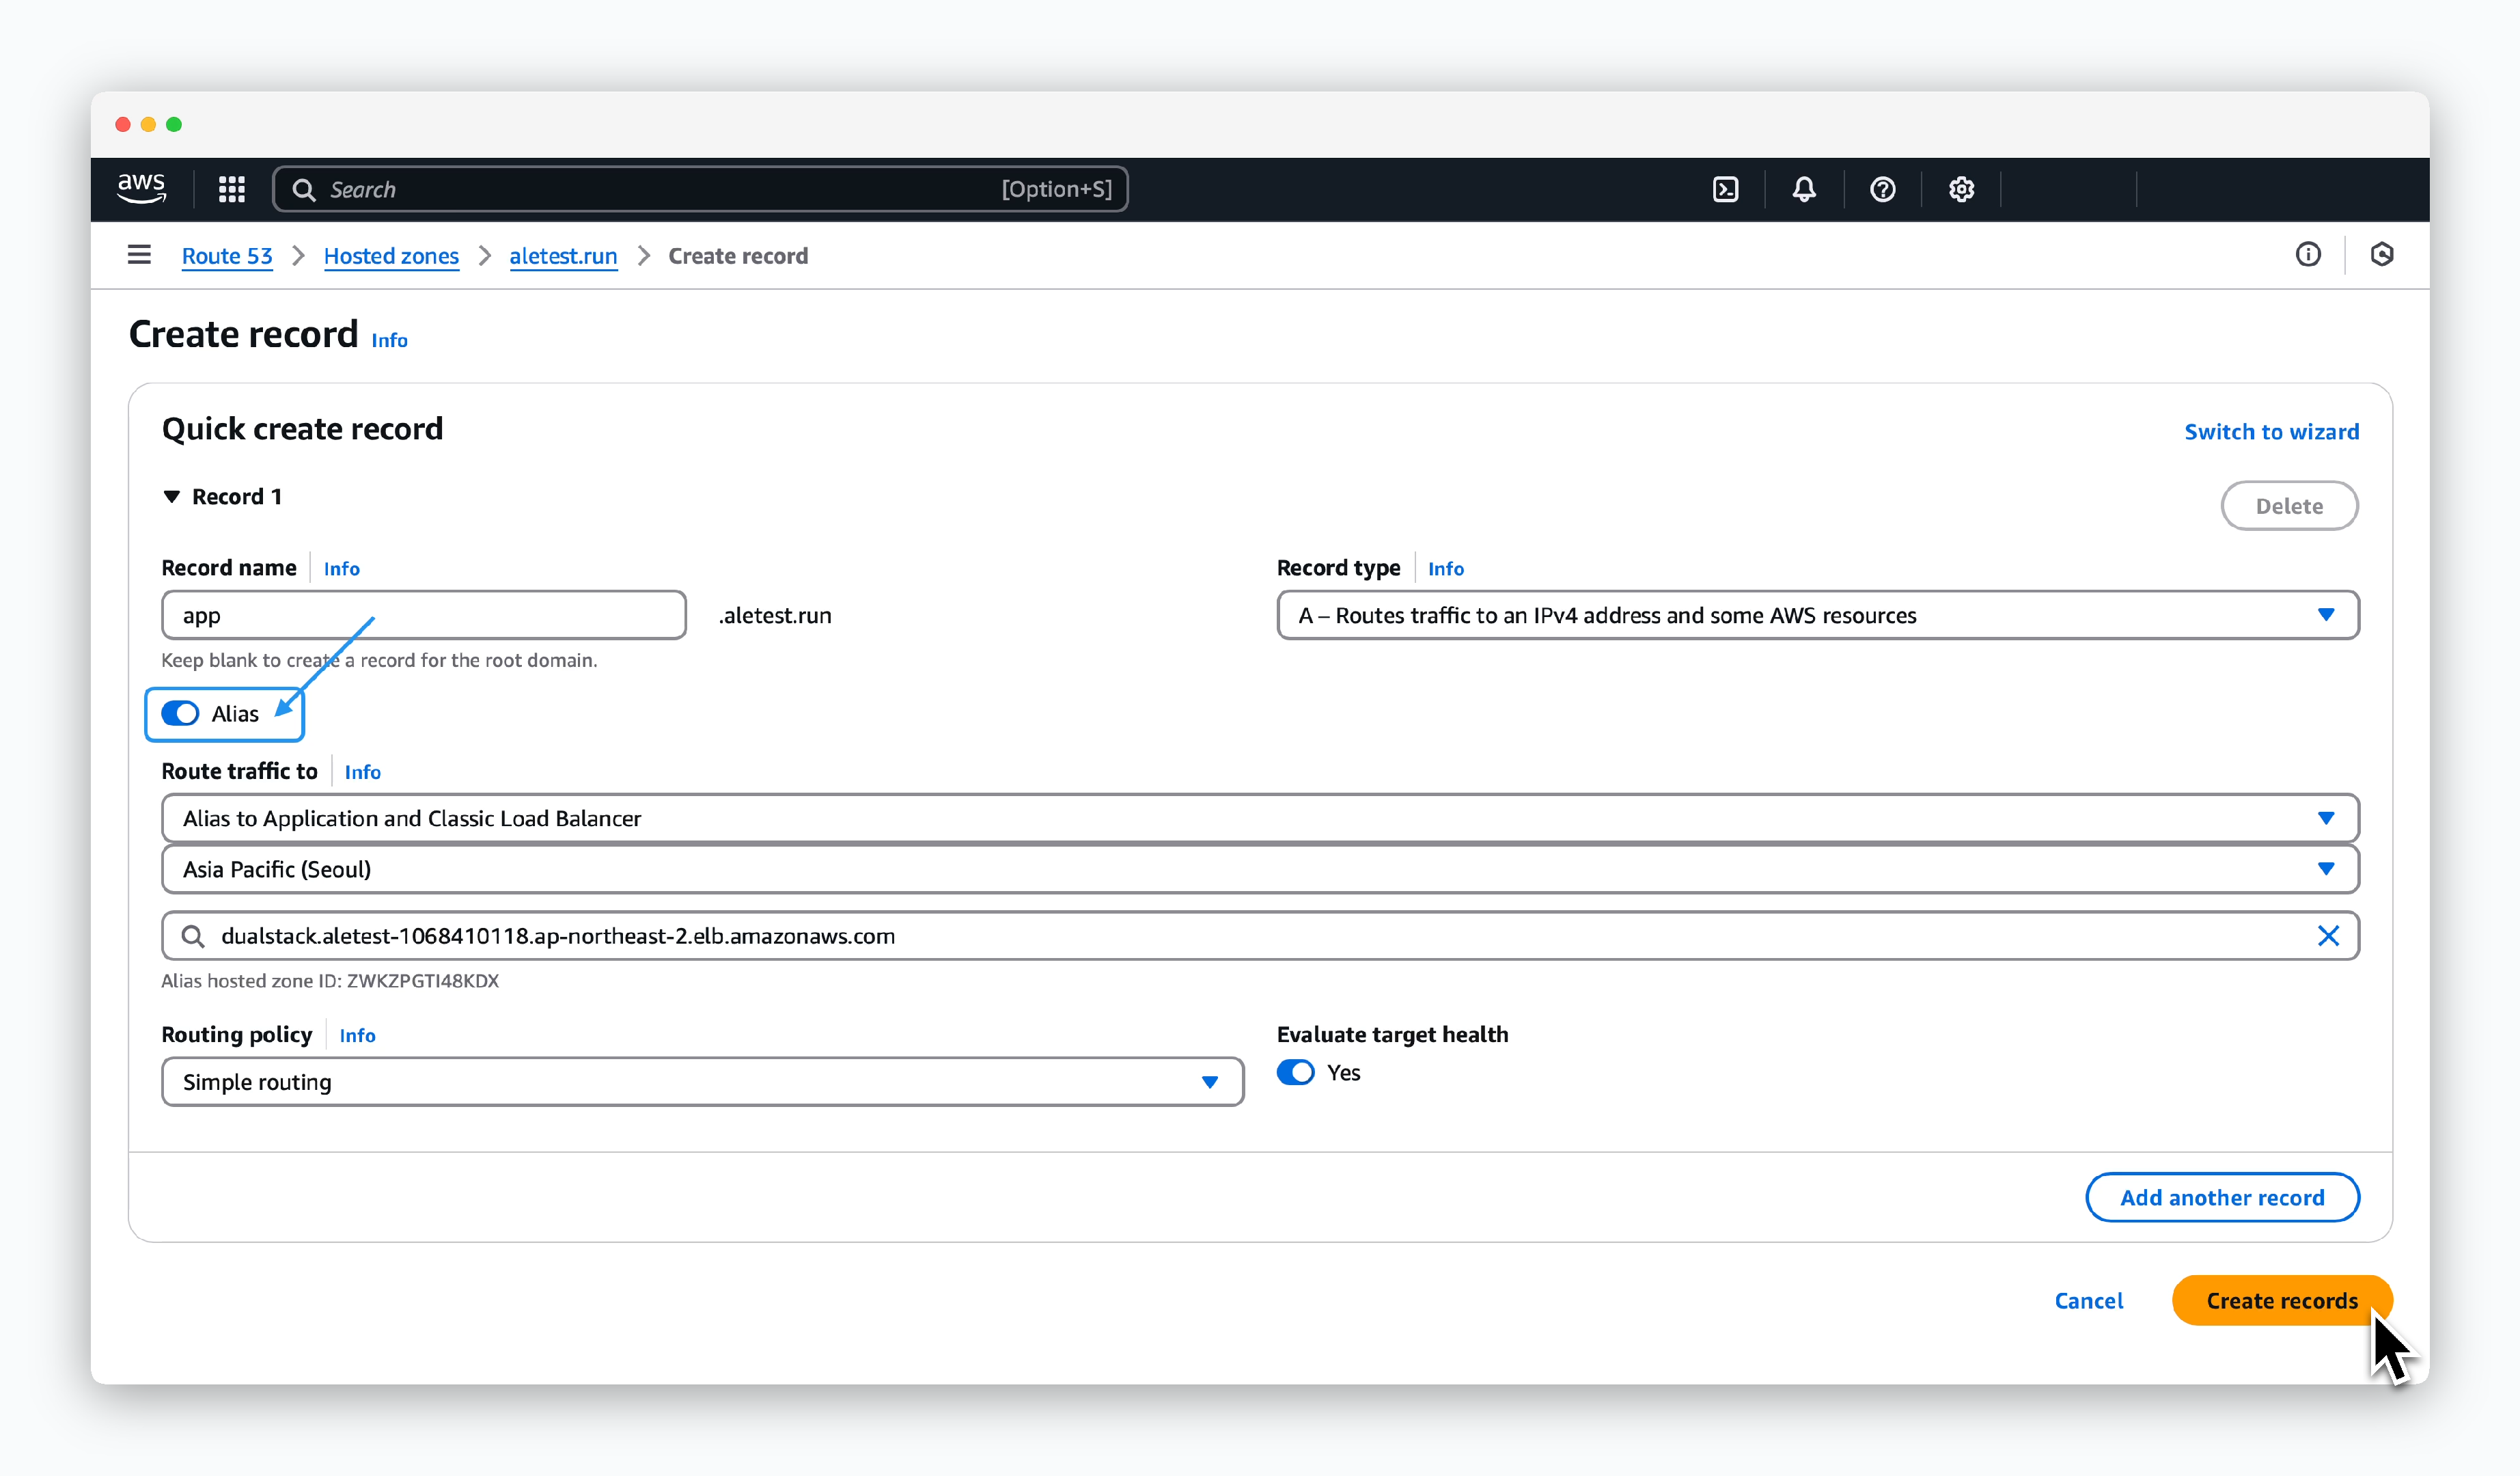
Enter the values as follows in the create record page and click Create record:
- Record name: app
- Record type: A
- Alias: Enable
- Route traffic to
- Alias to Application and Classic Load Balancer
- Region: VPC region
- ALB: Select previously created ALB
The domain with the configured record name (e.g., app.aletest.run) will be used as the access domain for
ale.Request ACM Certificate
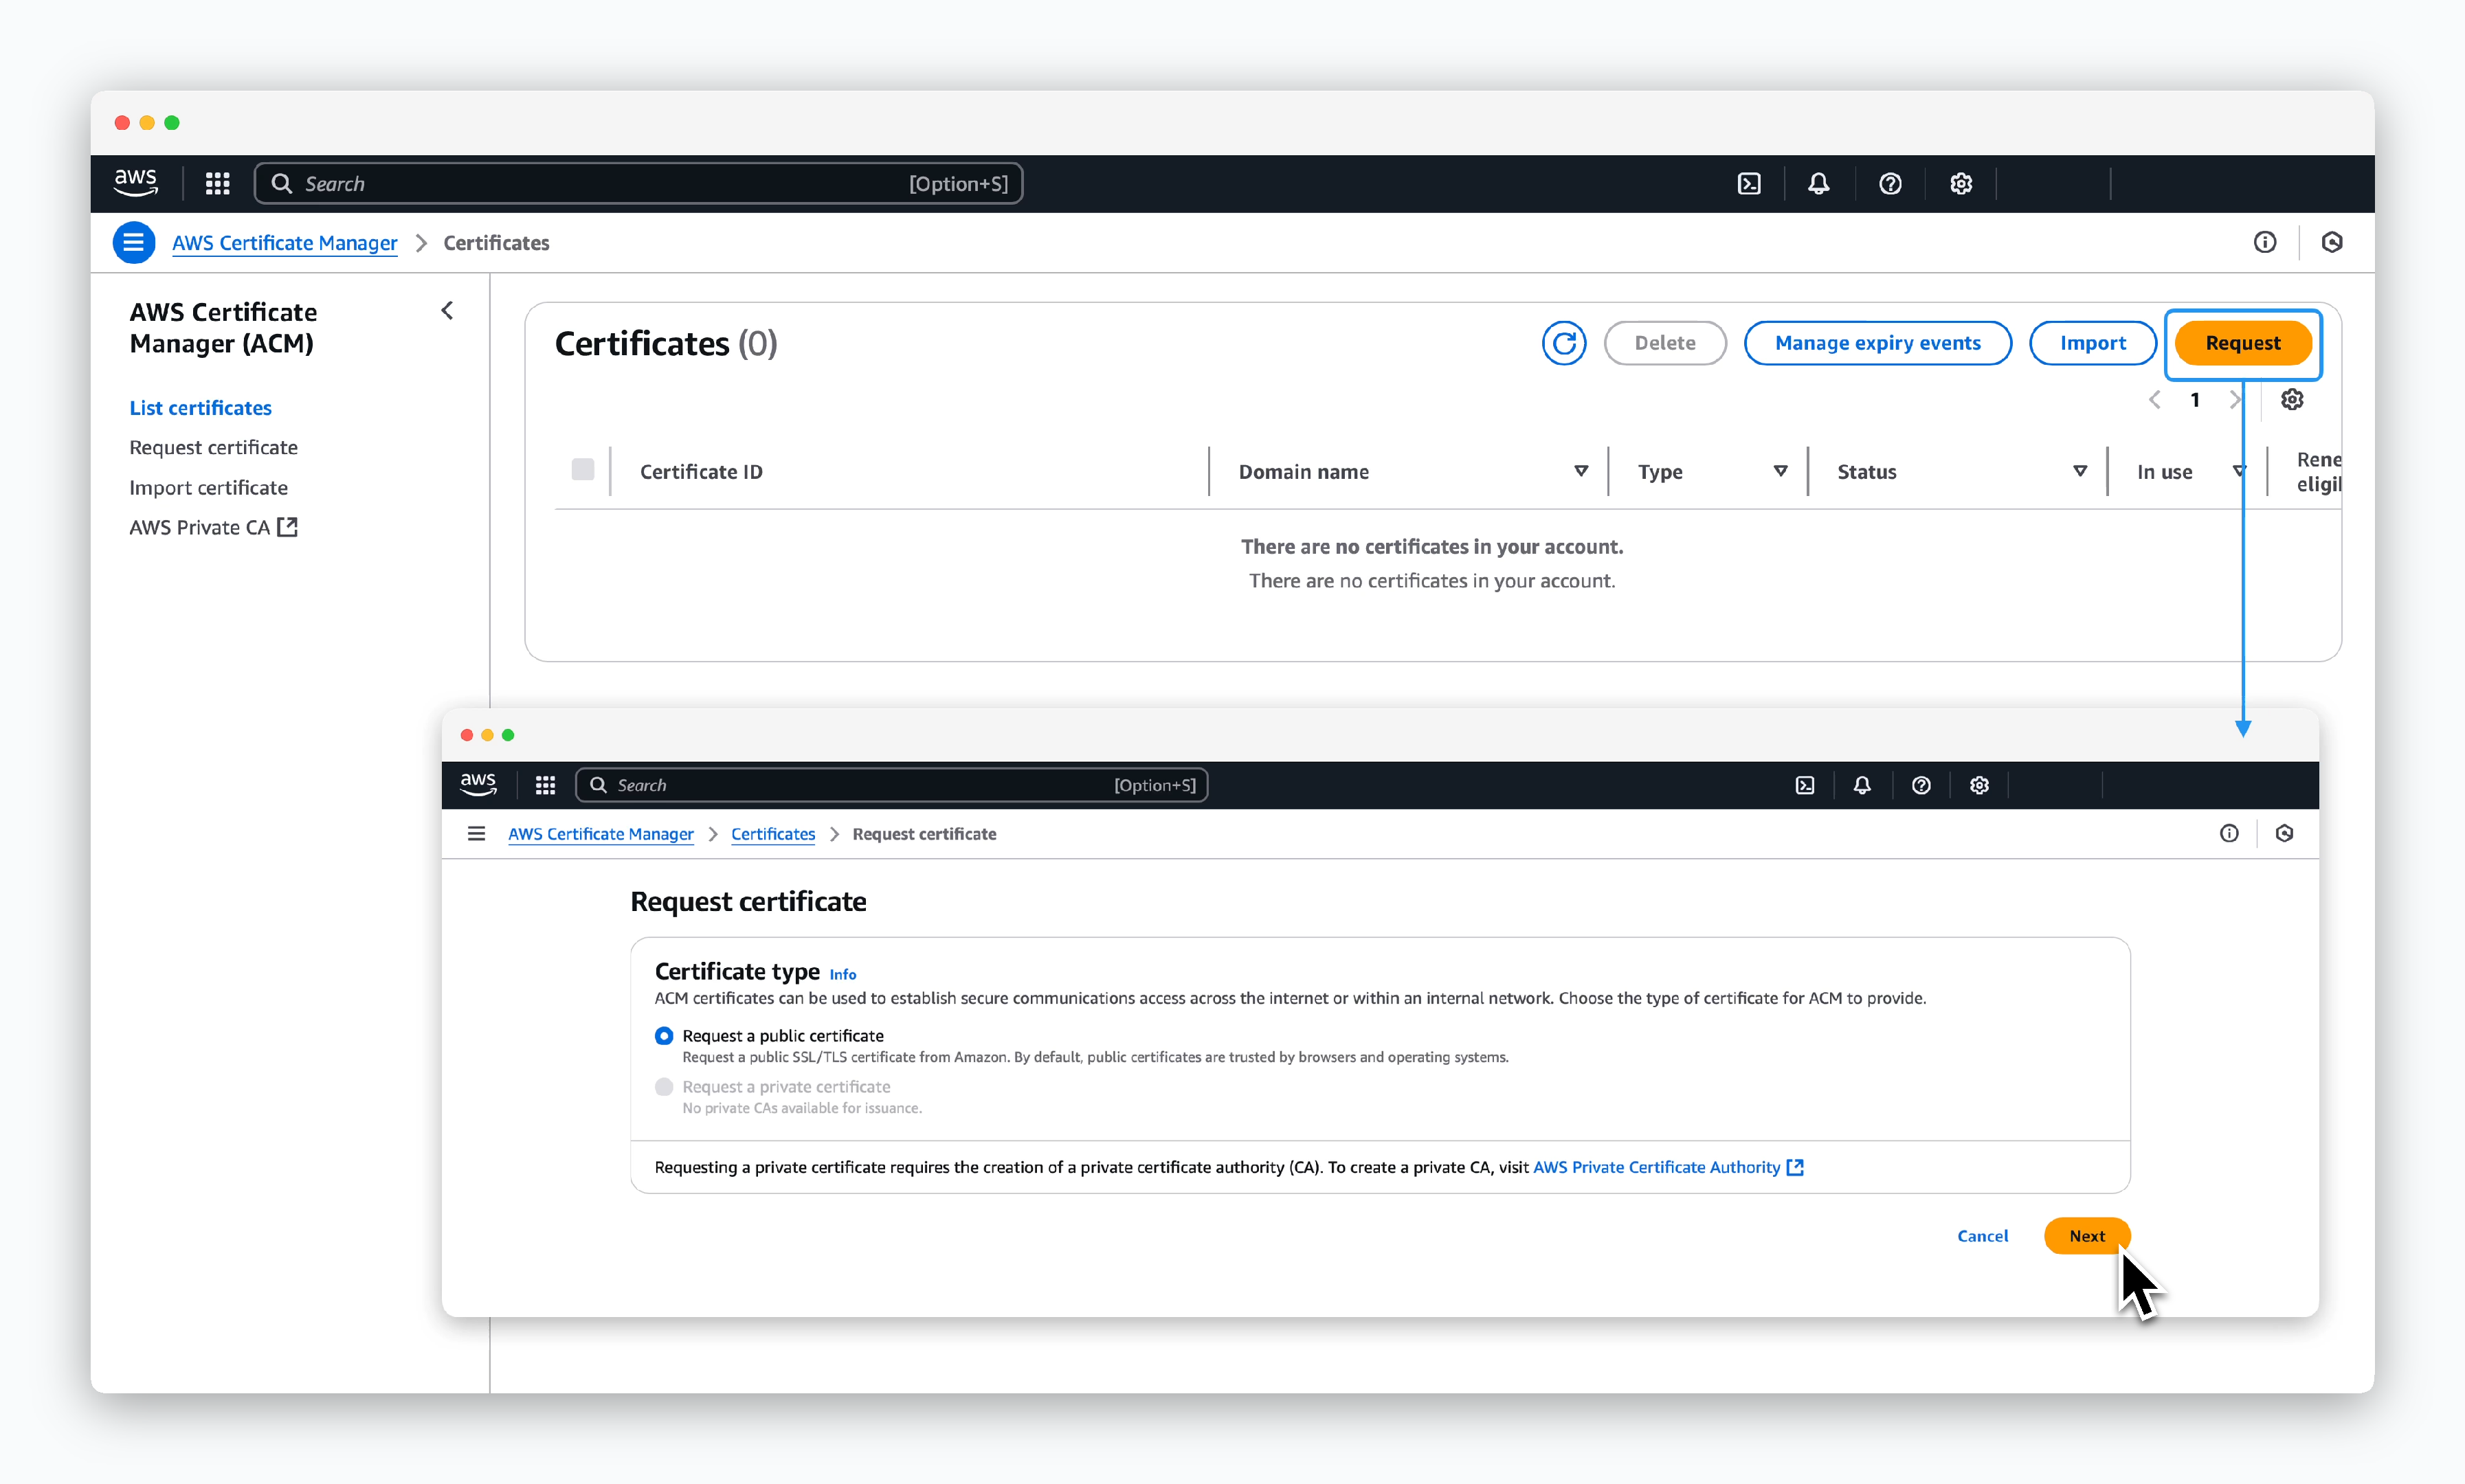
ClickRequestin the AWS Certificate Manager dashboard, select Request a public certificate on the following screen, and clickNext.
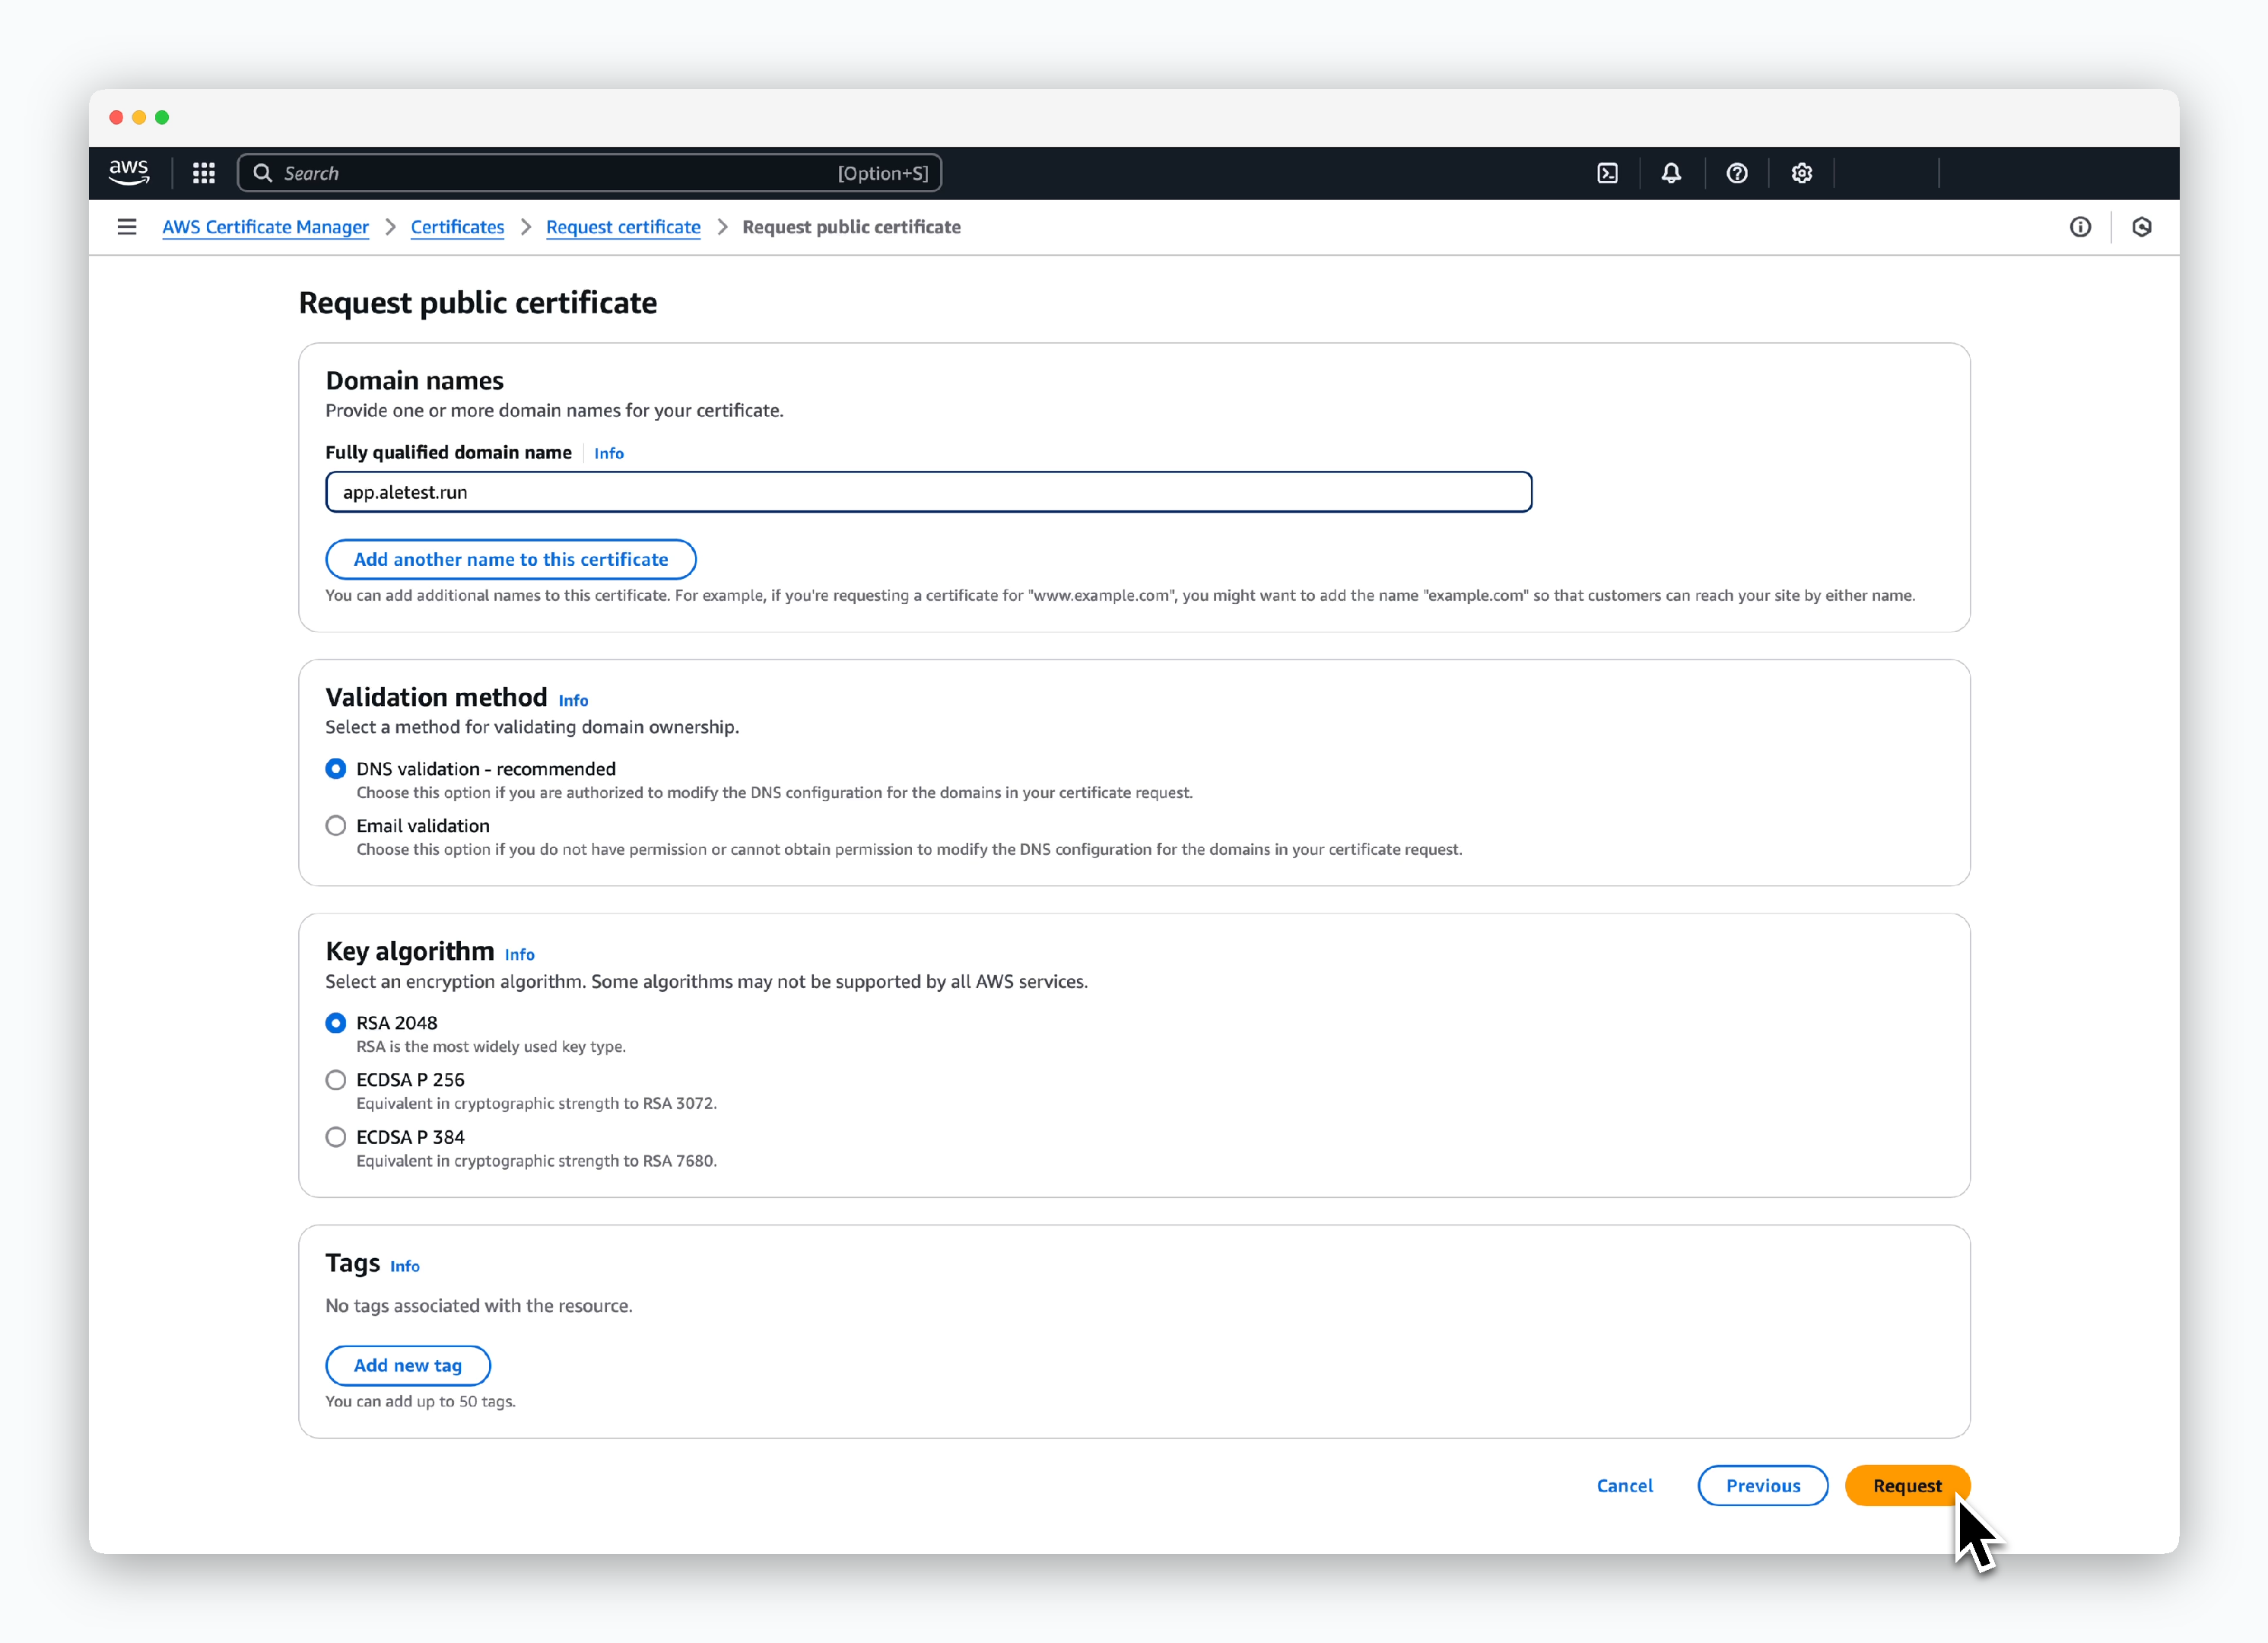
Enter the certificate information as follows and click Request:
- Domain names
- Fully qualified domain name: app.[domain]
- Validation method
- DNS validation
- Key configuration
- RSA 2048
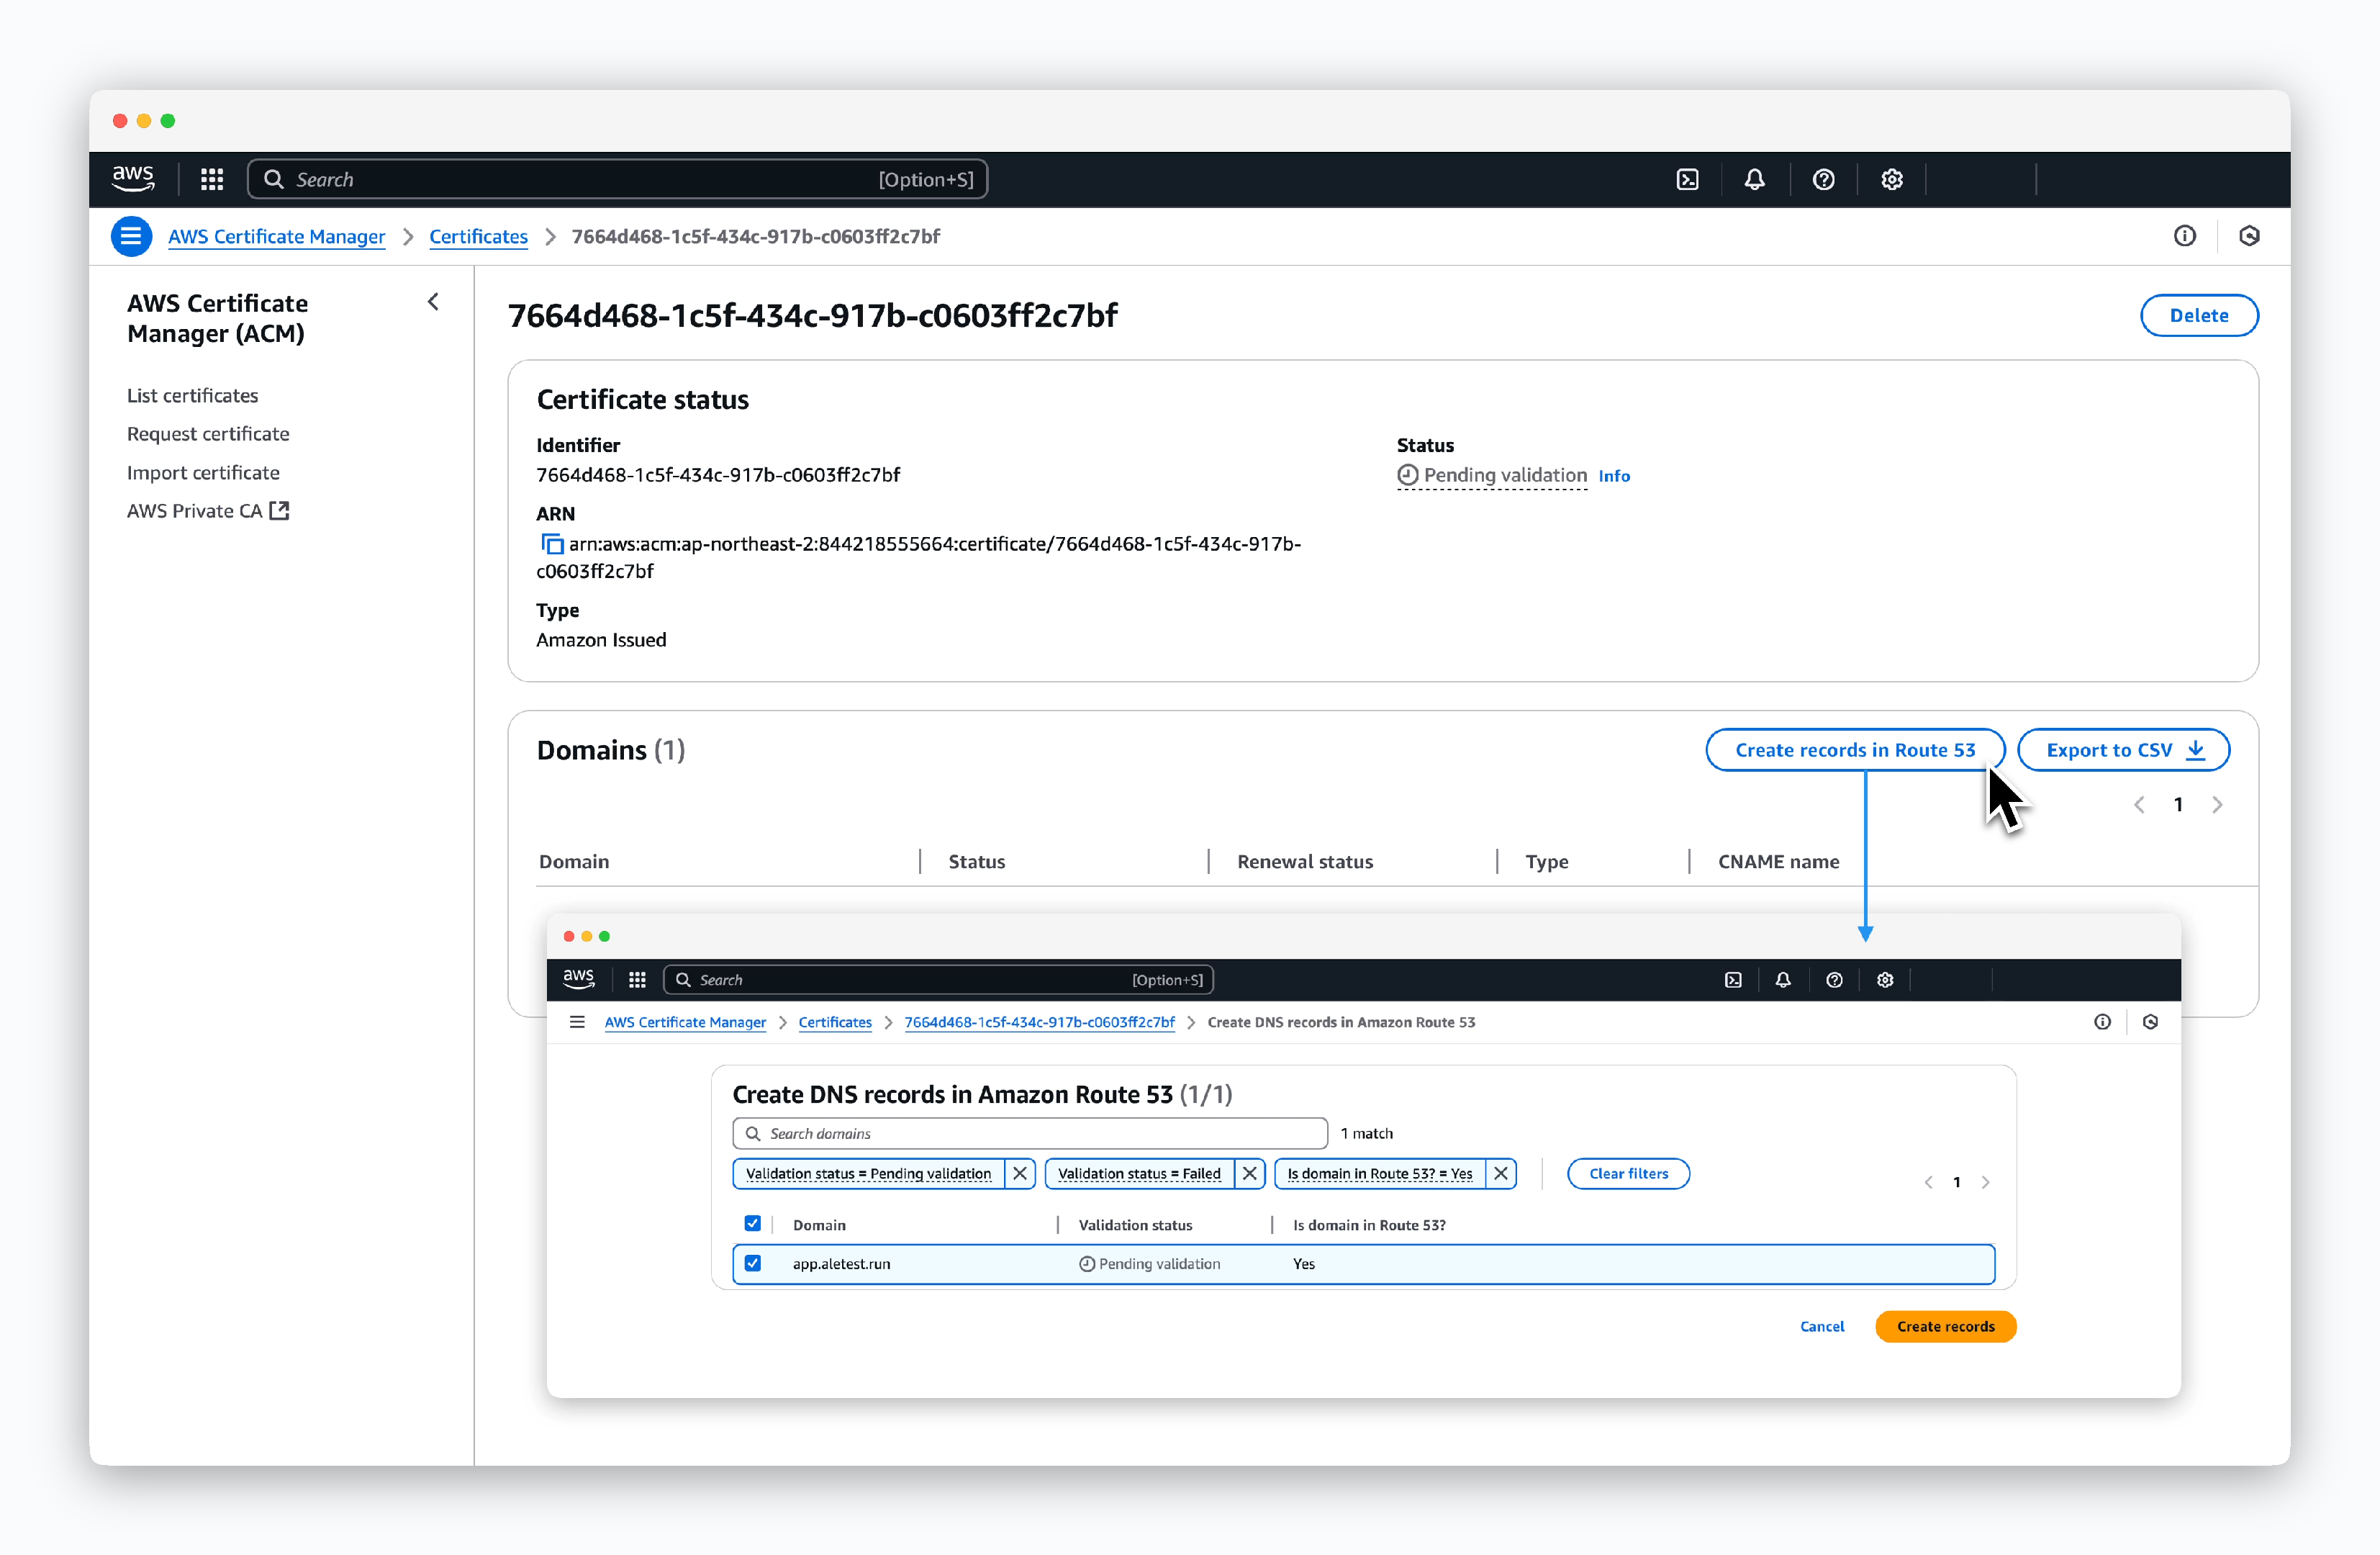
For DNS validation, clickCreate record in Route 53on the created certificate page, then clickCreate records.
Add HTTPS Listener to ALB
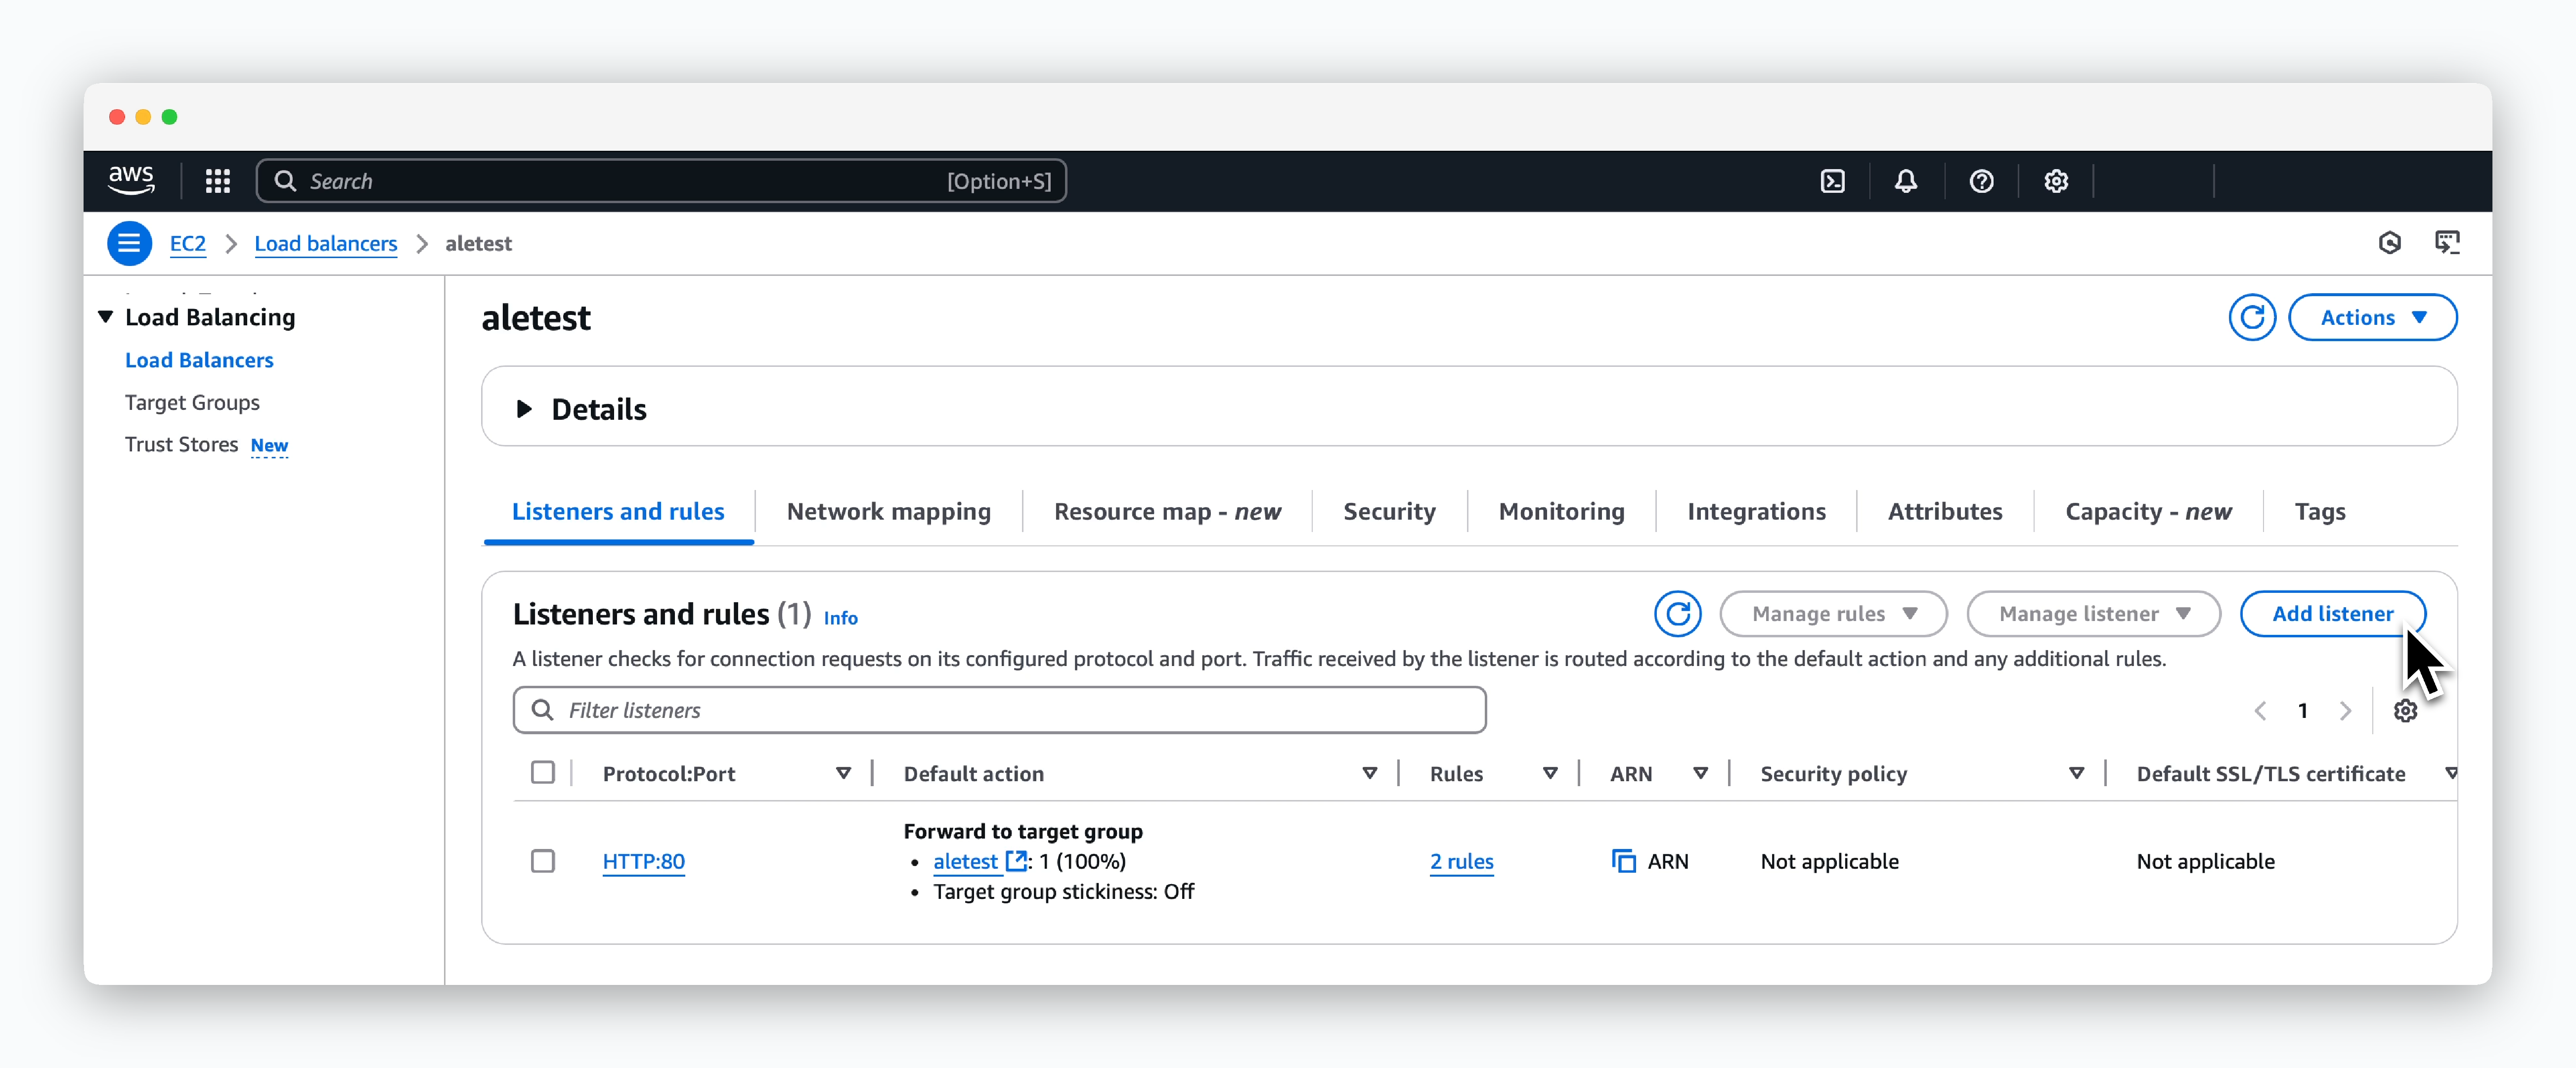
ClickAdd listeneron the created Load balancer page inEC2 > Load Balancing > Load Balancers.
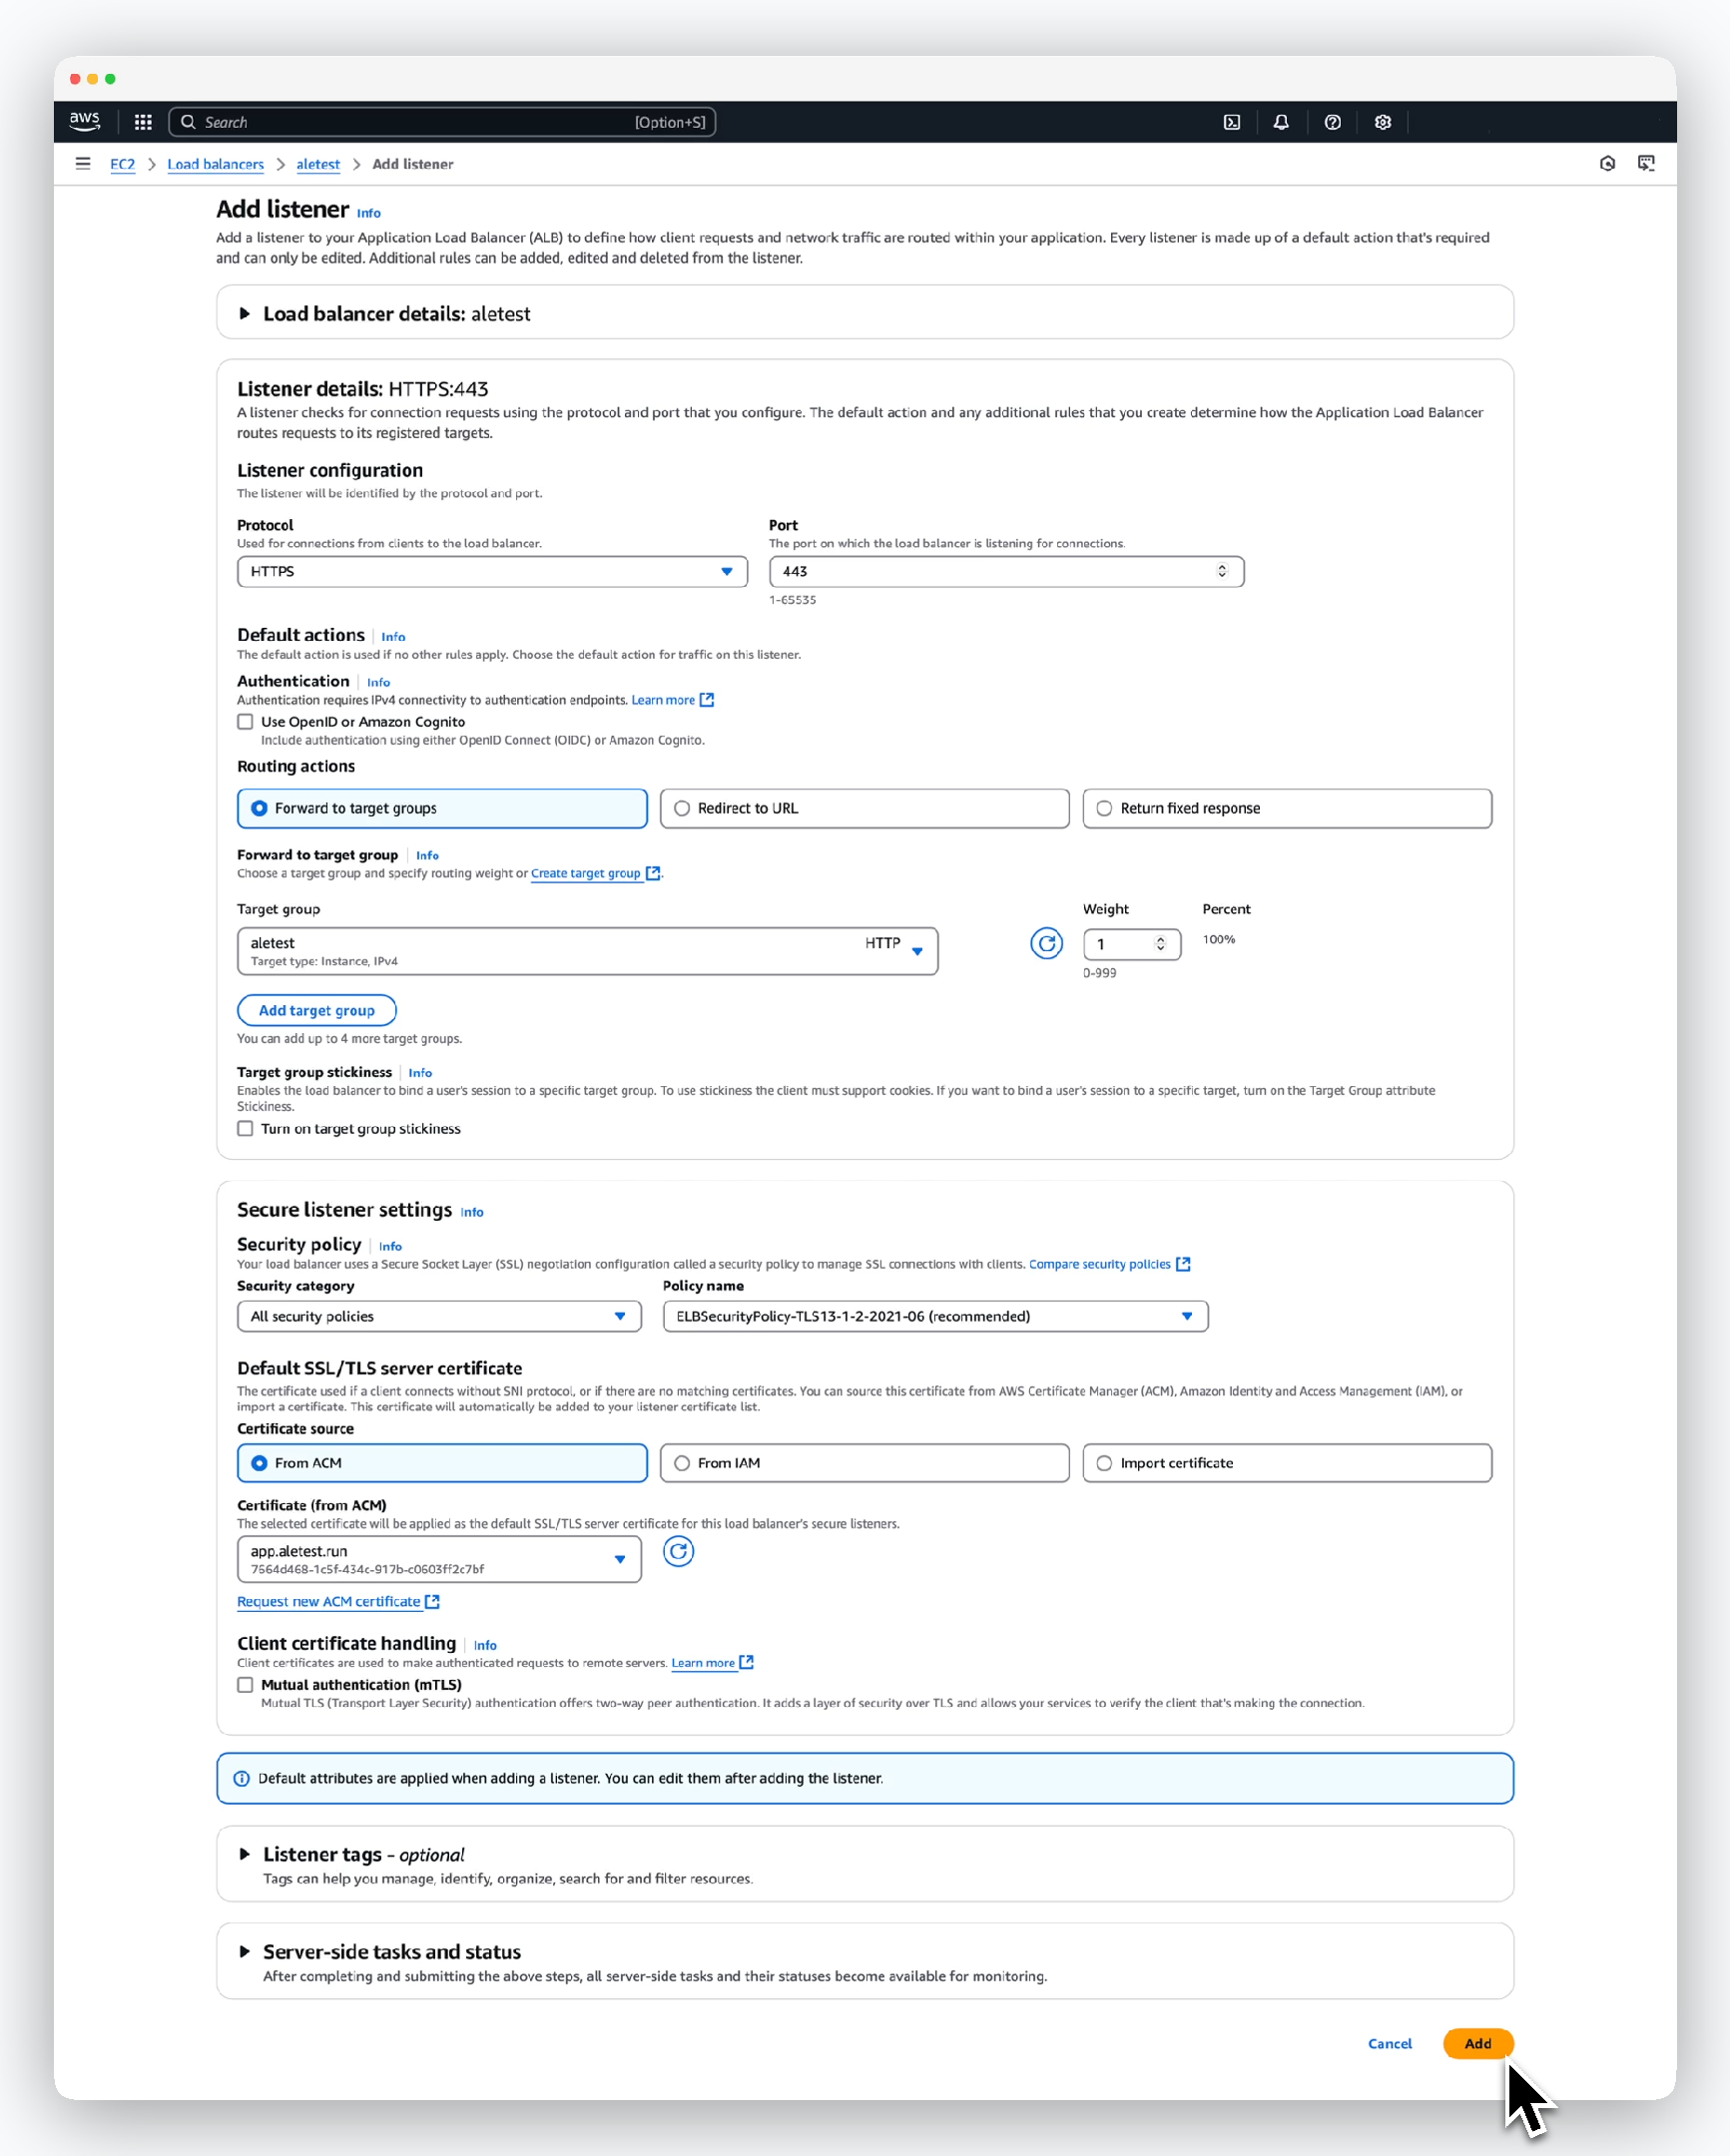
Enter the values as follows on the next screen and click Add:
- Listener configuration
- Protocol: HTTPS
- Port: 443
- Default actions
- Routing actions: Forward to target groups
- Target group: Select previously created target group
- Routing actions: Forward to target groups
- Security Policy
- Security category: All security policies
- Policy name: Apply policy marked as
recommended
- Default SSL/TLS server certificate
- Certificate source: From ACM
- Certificate: Select previously created ACM certificate
Test that you can access 
ale by visiting https://app.[domain].Ingress configuration is required for operation.