Network isolation is configured on a per-namespace basis, and you can manage the following settings within the environment.
Service-to-service communication using service names as hostnames
Service-to-service communication using service names as hostnames
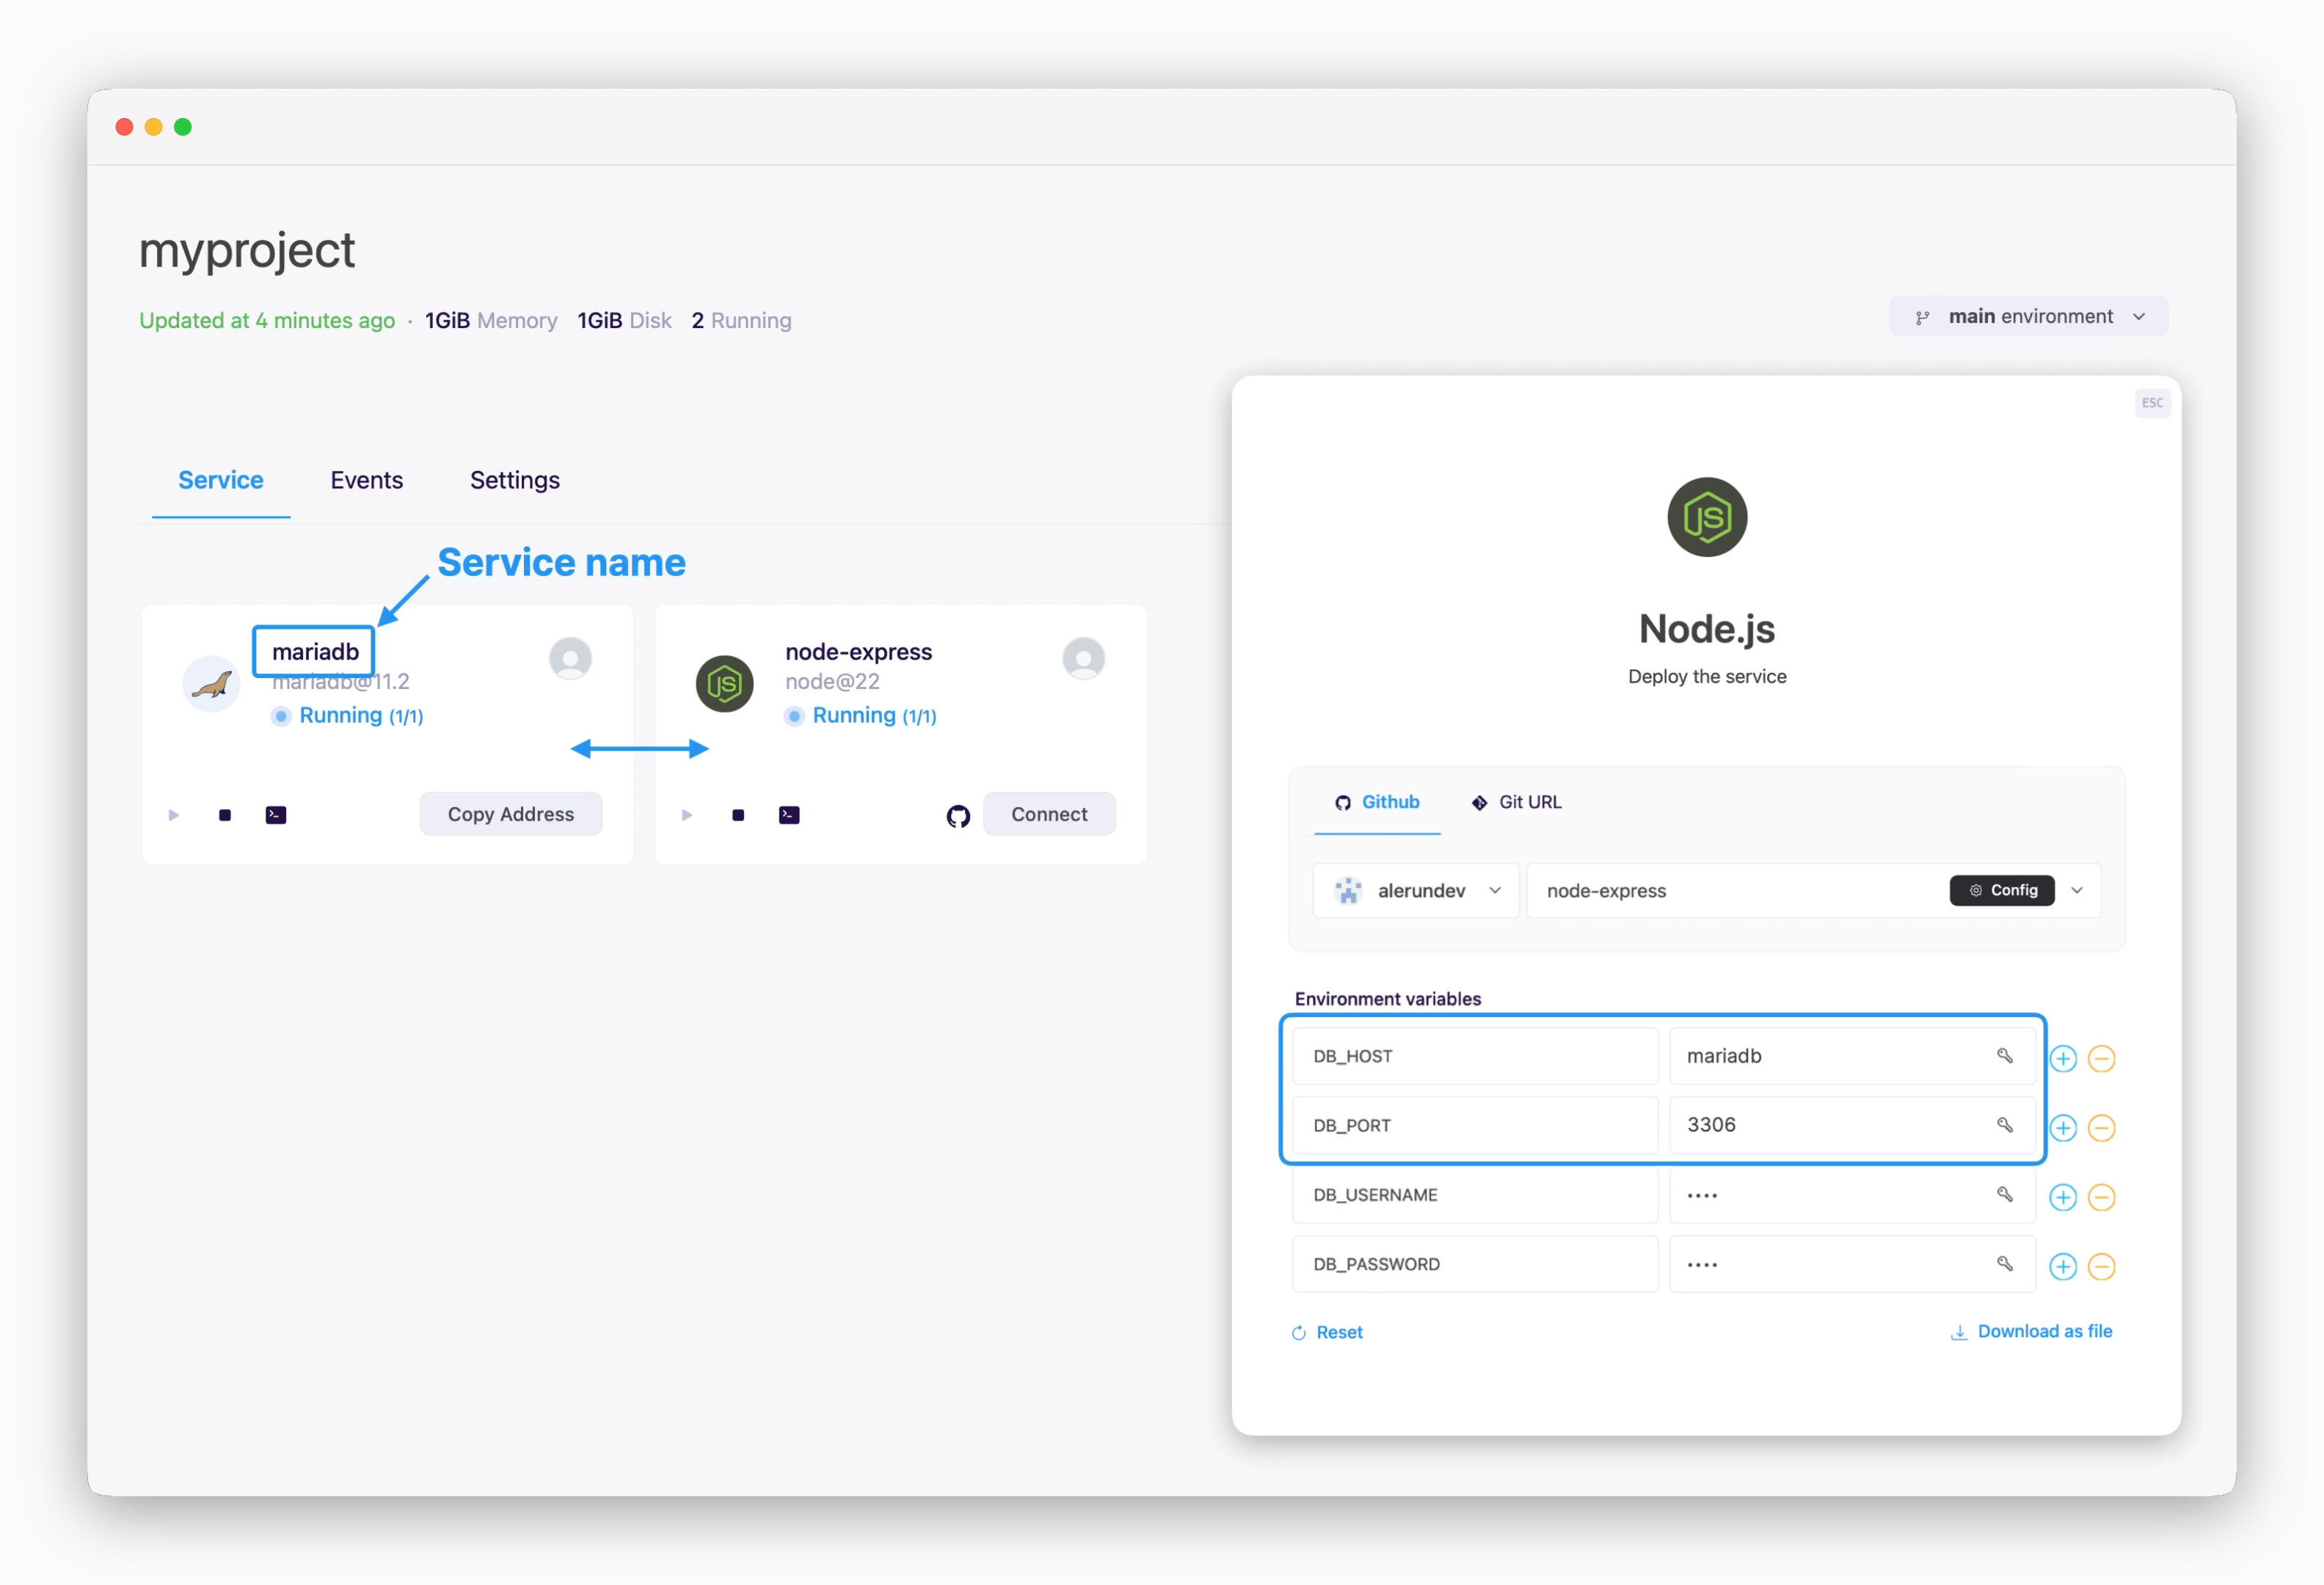
Services shown together belong to the same environment and can communicate using the private network address, service name and port number. No firewall rules are needed, and latency is minimized.
Multiple environments like Dev, QA, Staging, Prod within a single project
Multiple environments like Dev, QA, Staging, Prod within a single project
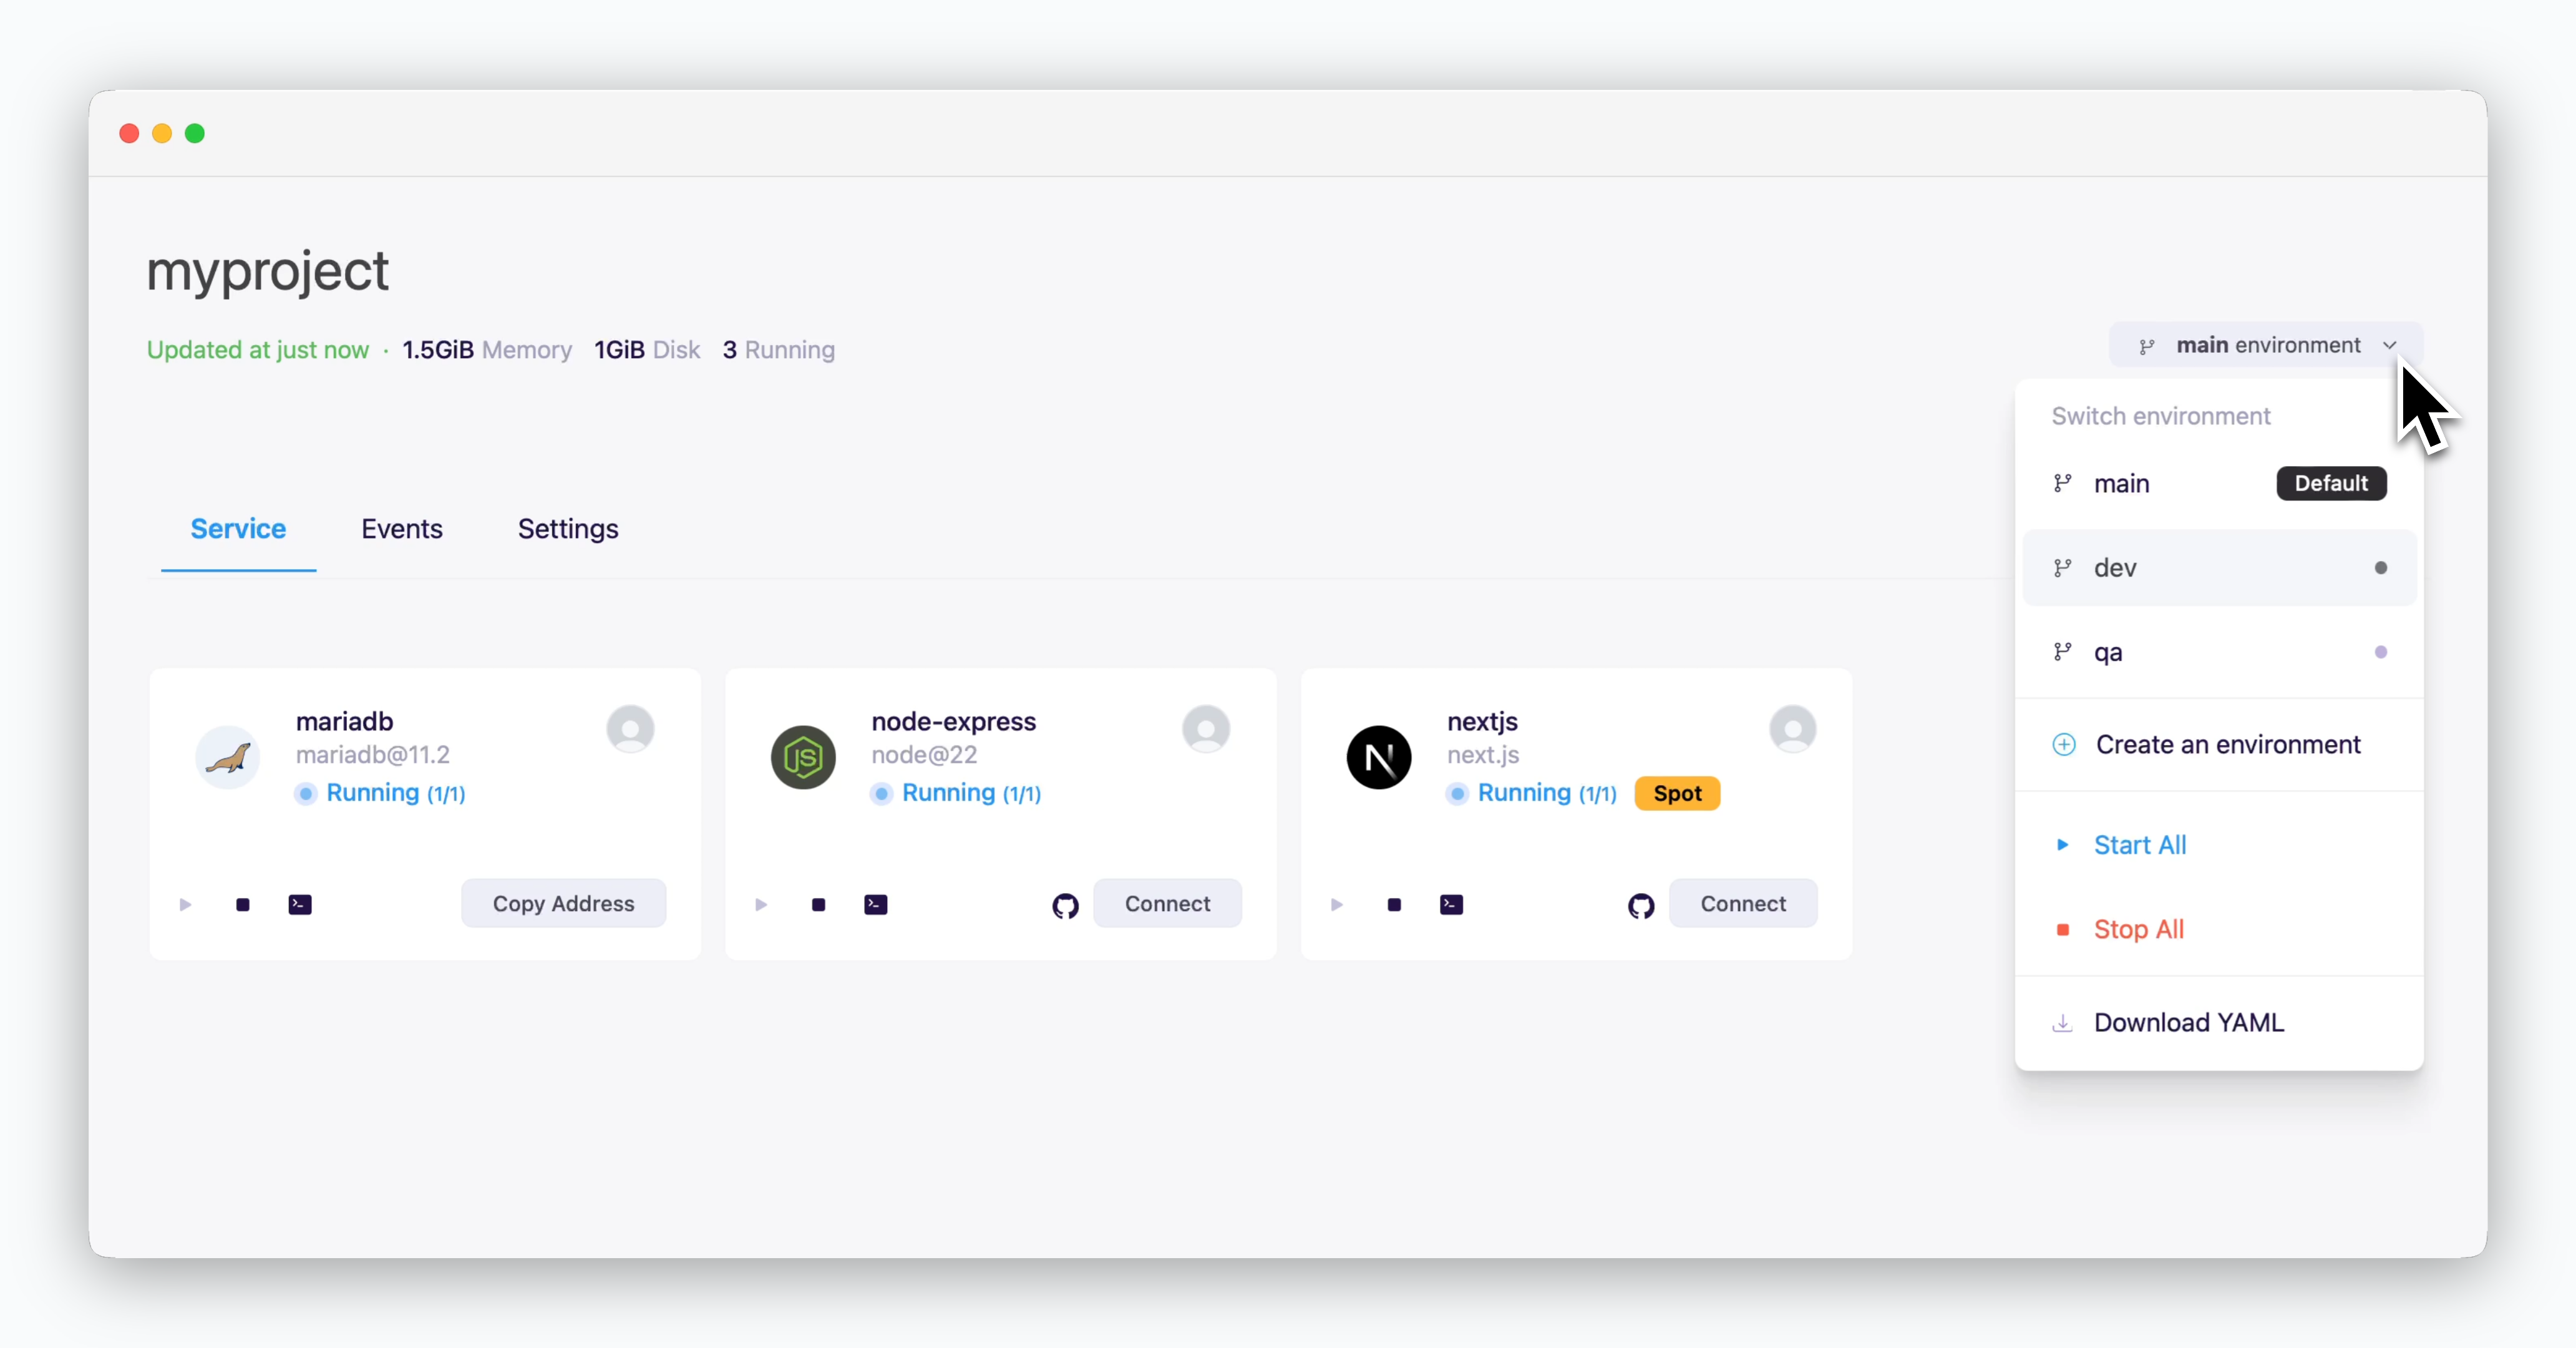
You can manage one or multiple environments (Dev, QA, Staging, Prod, etc.) within a single project.
Environment Replication via YAML File Drag & Drop
Environment Replication via YAML File Drag & Drop
Download a YAML file containing deployment settings for all deployed services and apply it to a new environment via Drag & Drop.
Manage secrets
Manage secrets
Store common variables and secrets under the Settings tab and apply them to services in the selected environment.
Firewall settings
Firewall settings

You can enable external TCP connections from other environments, projects, and external services via the firewall management section in the Settings tab. When enabled, this allows access from all IP addresses - configure with caution.
An environment corresponds to a namespace in a Kubernetes cluster.
Learn more about
ale’s work unit hierarchy, from spaces to services, in the following section.
Space
Space
A space is the top-level unit of the workspace hierarchy. Space owners can invite team members to collaborate on projects within the resources allocated by the operations system. Members can create and manage projects in a self-service manner.
Project
Project
A project is a display name that represents a collection of environments. It is designed for the management convenience of dashboard users, allowing them to manage one or more work-related environments (Dev, QA, Staging, Prod, and others) within a single project.
Environment
Environment
An environment corresponds to a namespace in a Kubernetes cluster. Network isolation is configured on a per-namespace basis, and services within the same environment (namespace) can communicate by referencing service names as hostnames. Frequently used environment variables can be stored as secrets at the environment level for management and application.
Service
Service
A service corresponds to a Deployment in Kubernetes. Each service can be accessed via terminal and connected to custom domains. For more details on deploying services, see the Deploying with ale page.
Create a New Environment
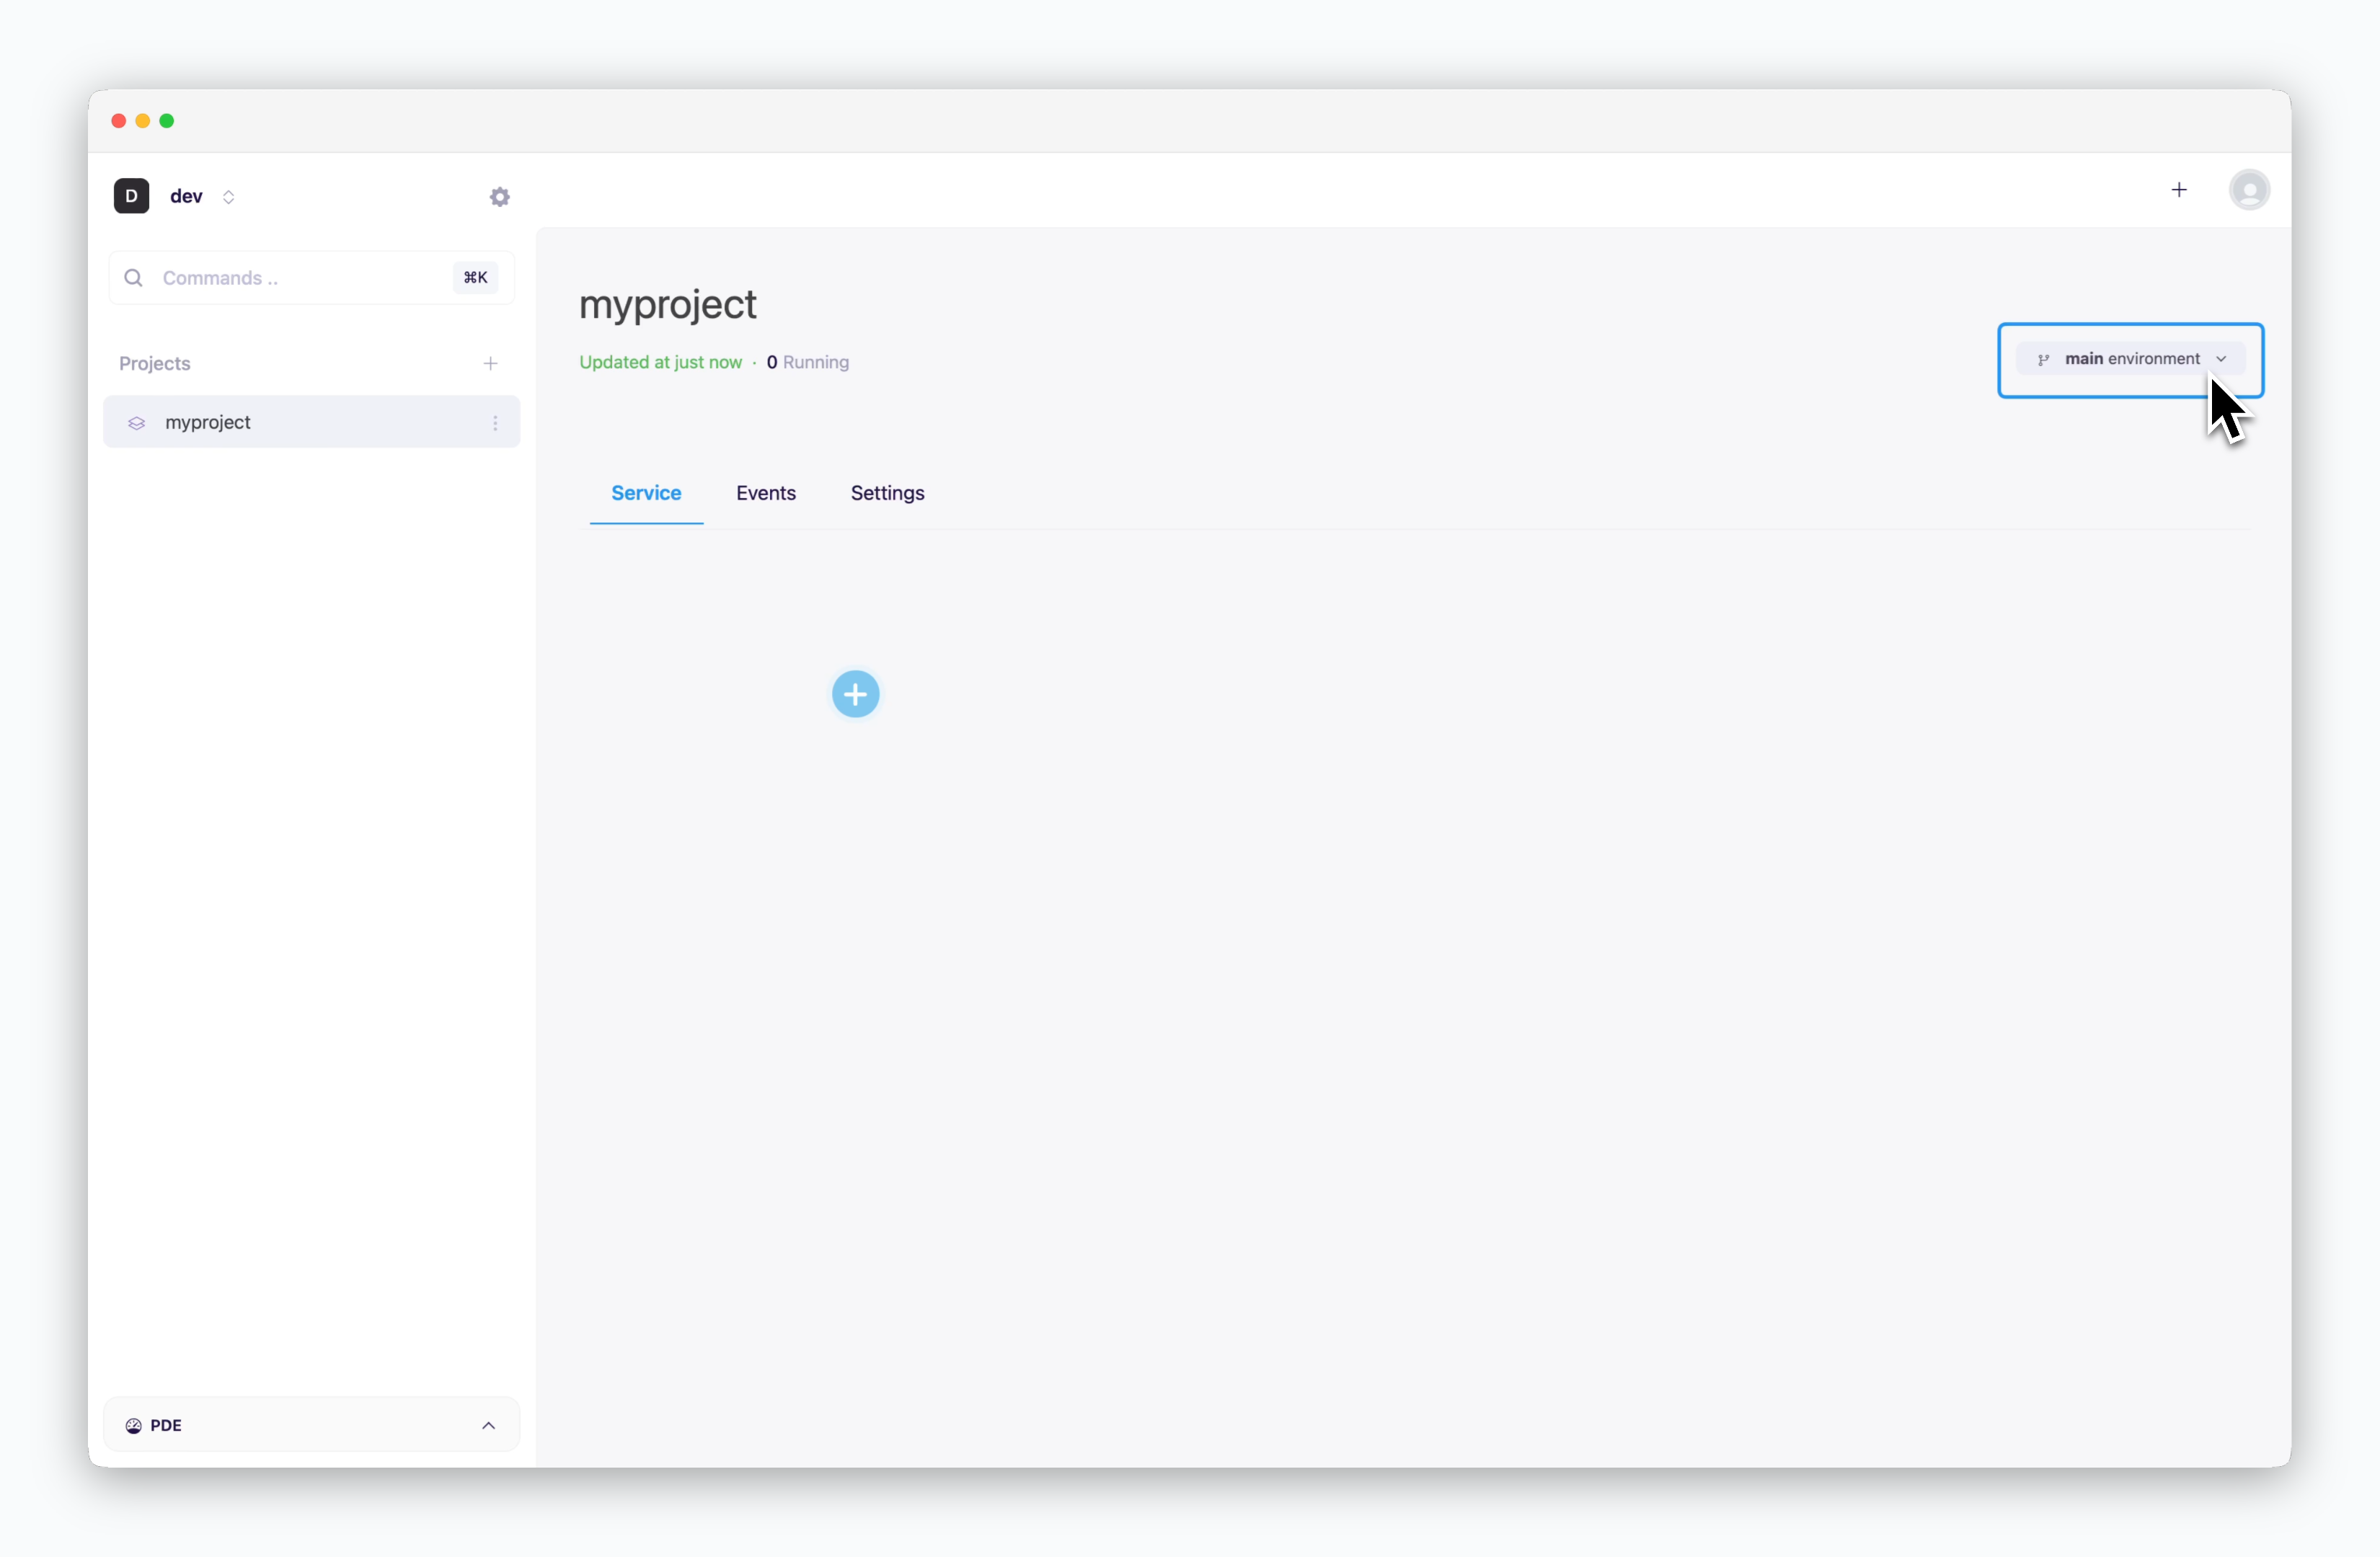
When creating a project, an environment named main is created simultaneously.
Environments can only be created as part of a project.
Environment Details
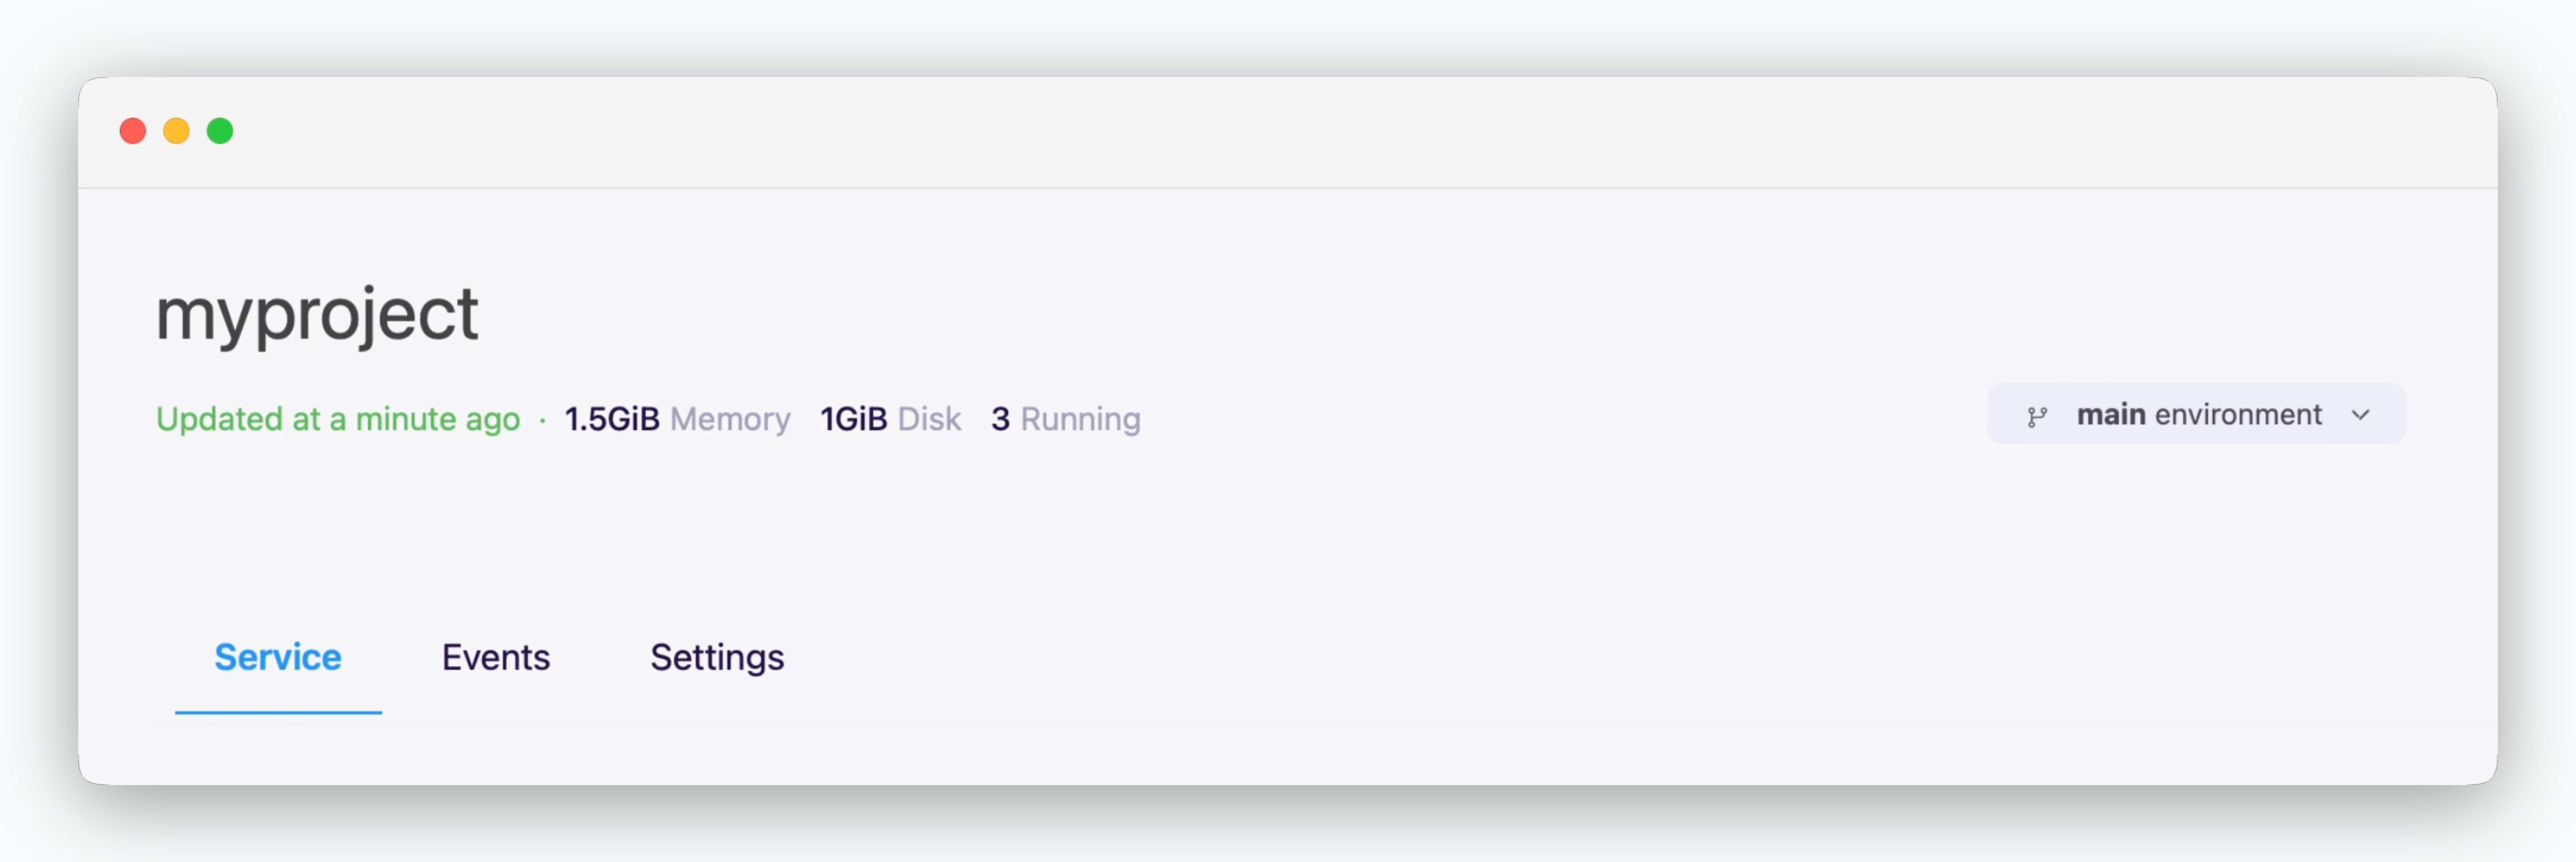
The header shows the parent project name of the current environment, with a selector in the top-right corner to switch environments. In the Information tab below, you can view details of services within the selected environment and manage the services directly.
Services
Services
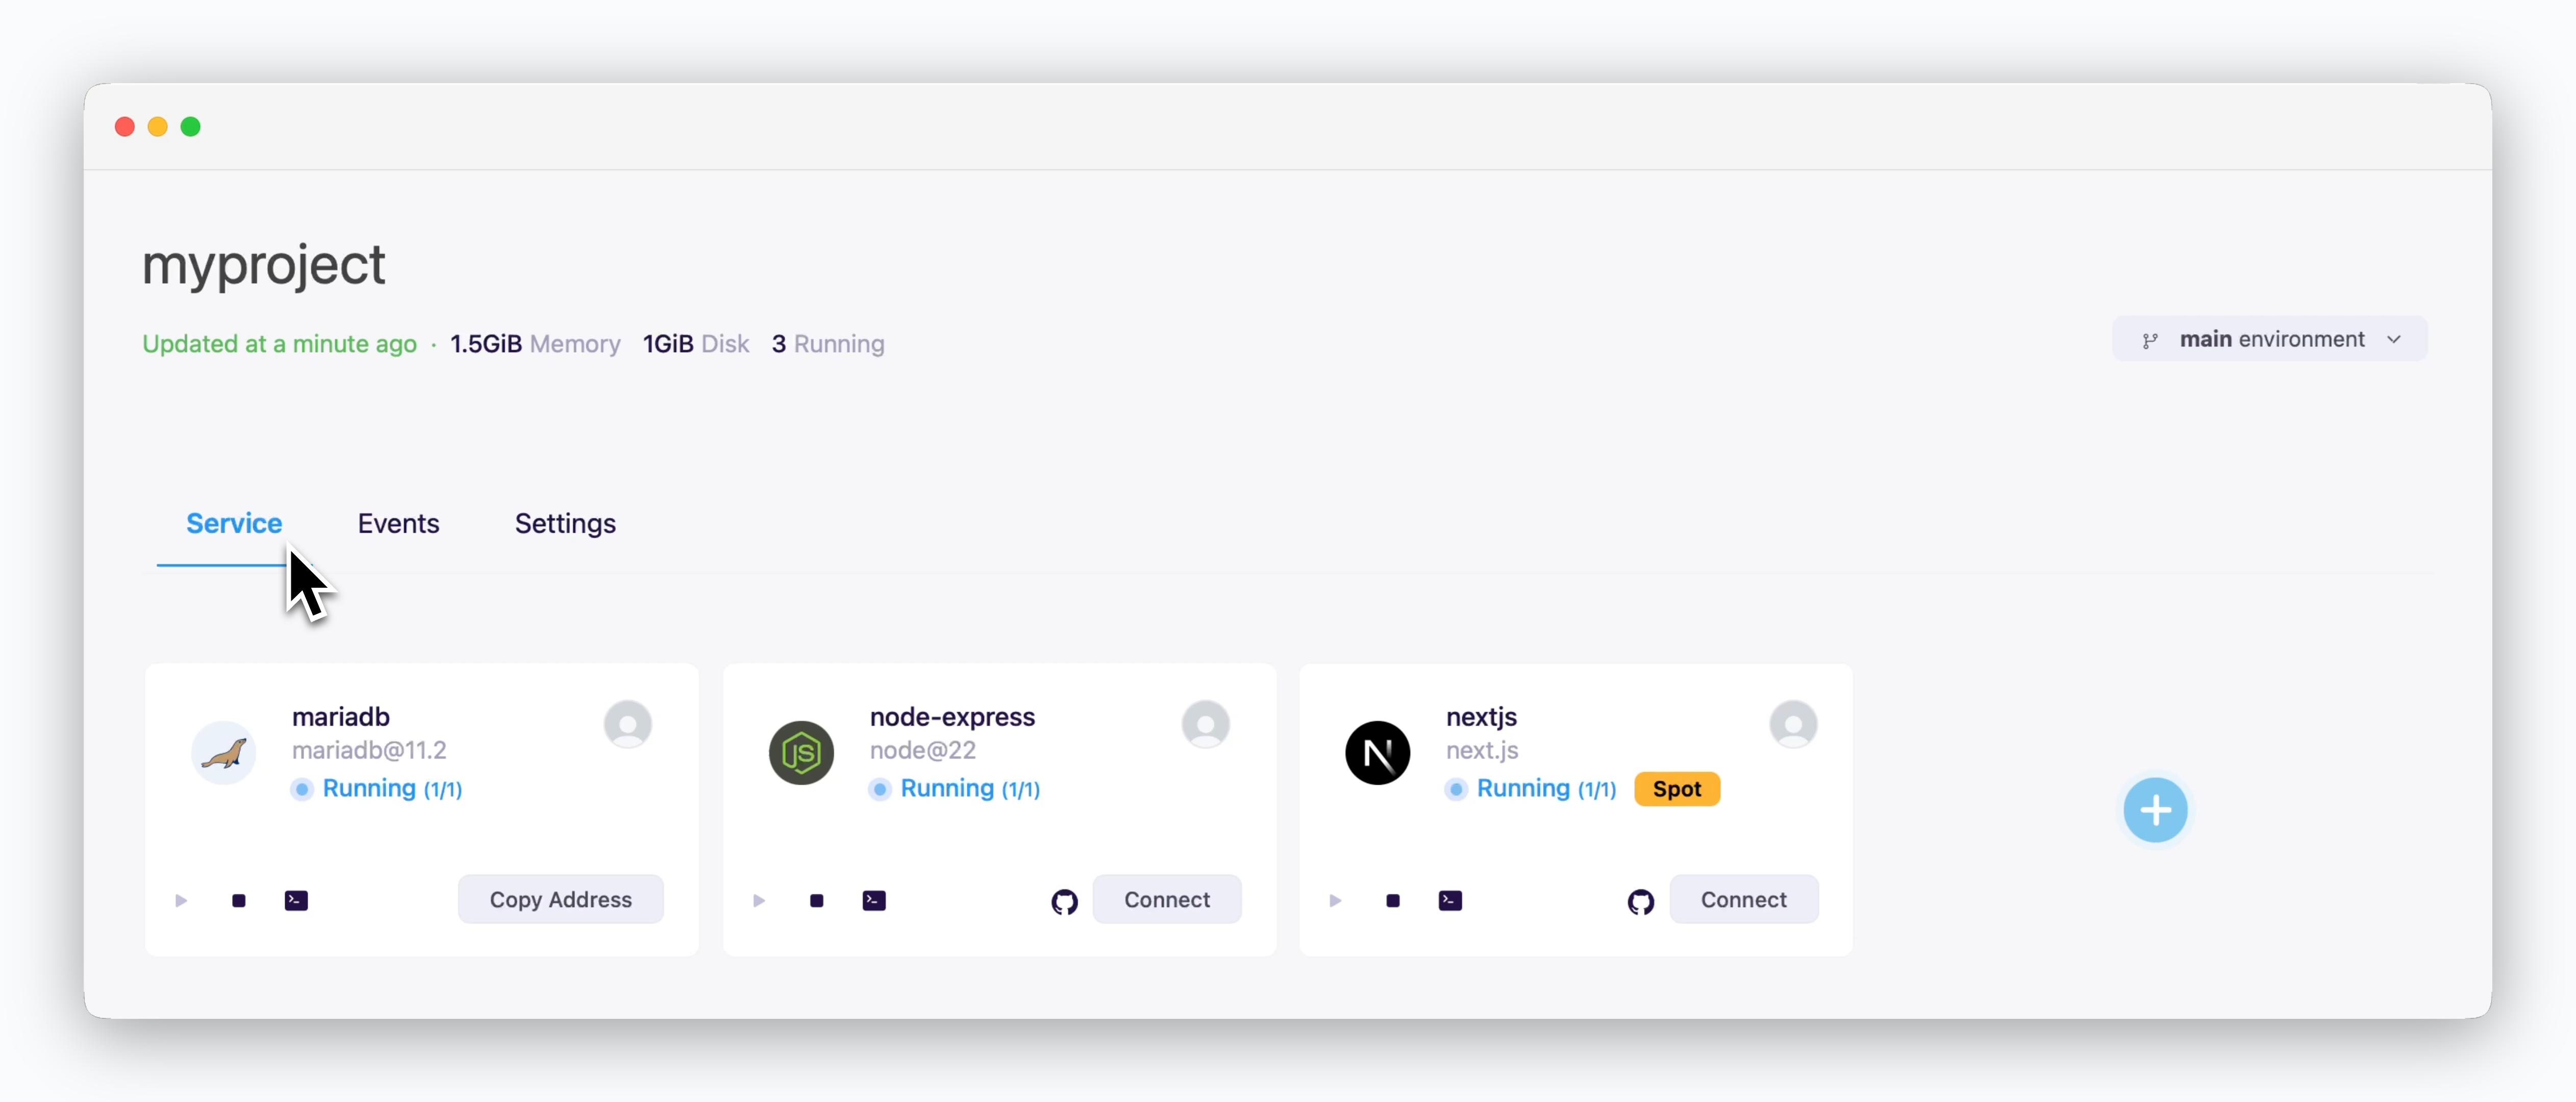
Each service is displayed as a card with controls for management and monitoring.
- Start( ) / Stop( ) : Start or stop the service
- Log View/Terminal( ) : View running logs, build logs, or access terminal
- Repository( ) : open source code repository
- Access : Open service URL(Web service)
- Copy Address : Copy Host and Port address for TCP connection (database)
- User Profile : View user who deployed the service
- Spot : Service running on spot resources
- : Open deploy modal
- Service Status : Display current service status such as building, running, etc.
Events
Events
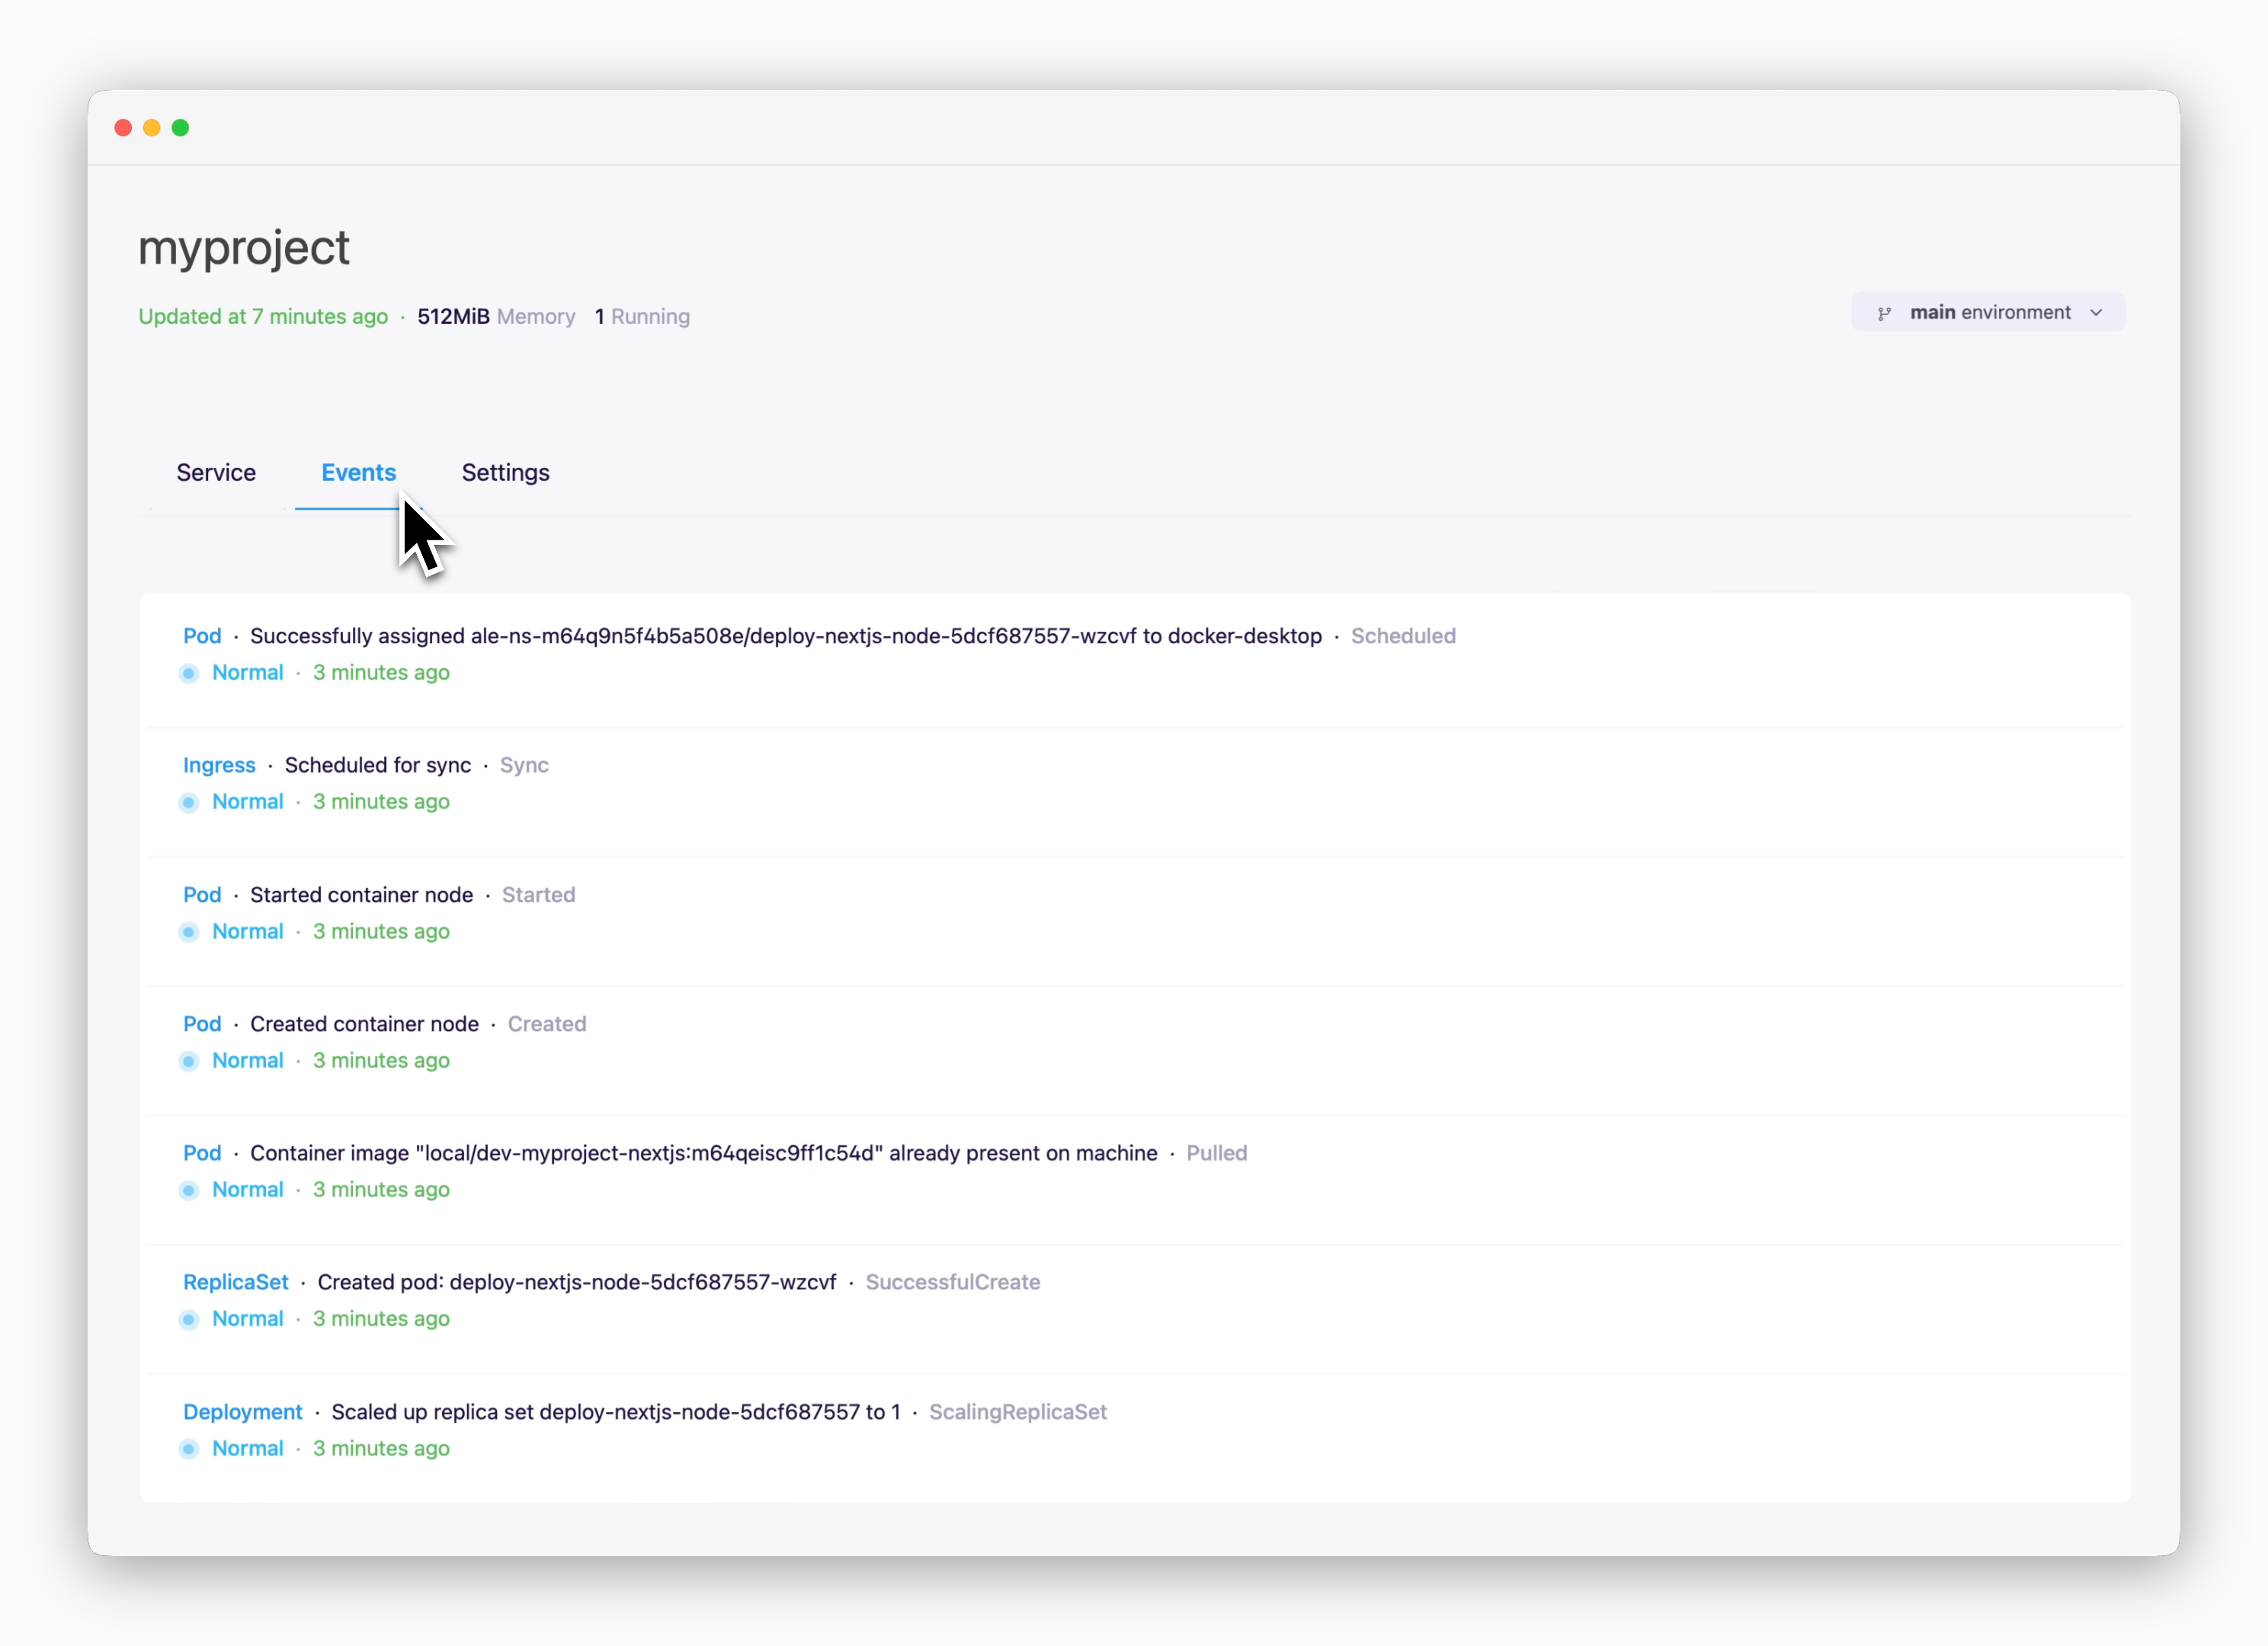
You can view Kubernetes cluster events generated by deployed services.
Events are retained for a limited time period.
Settings
Settings
Project Information
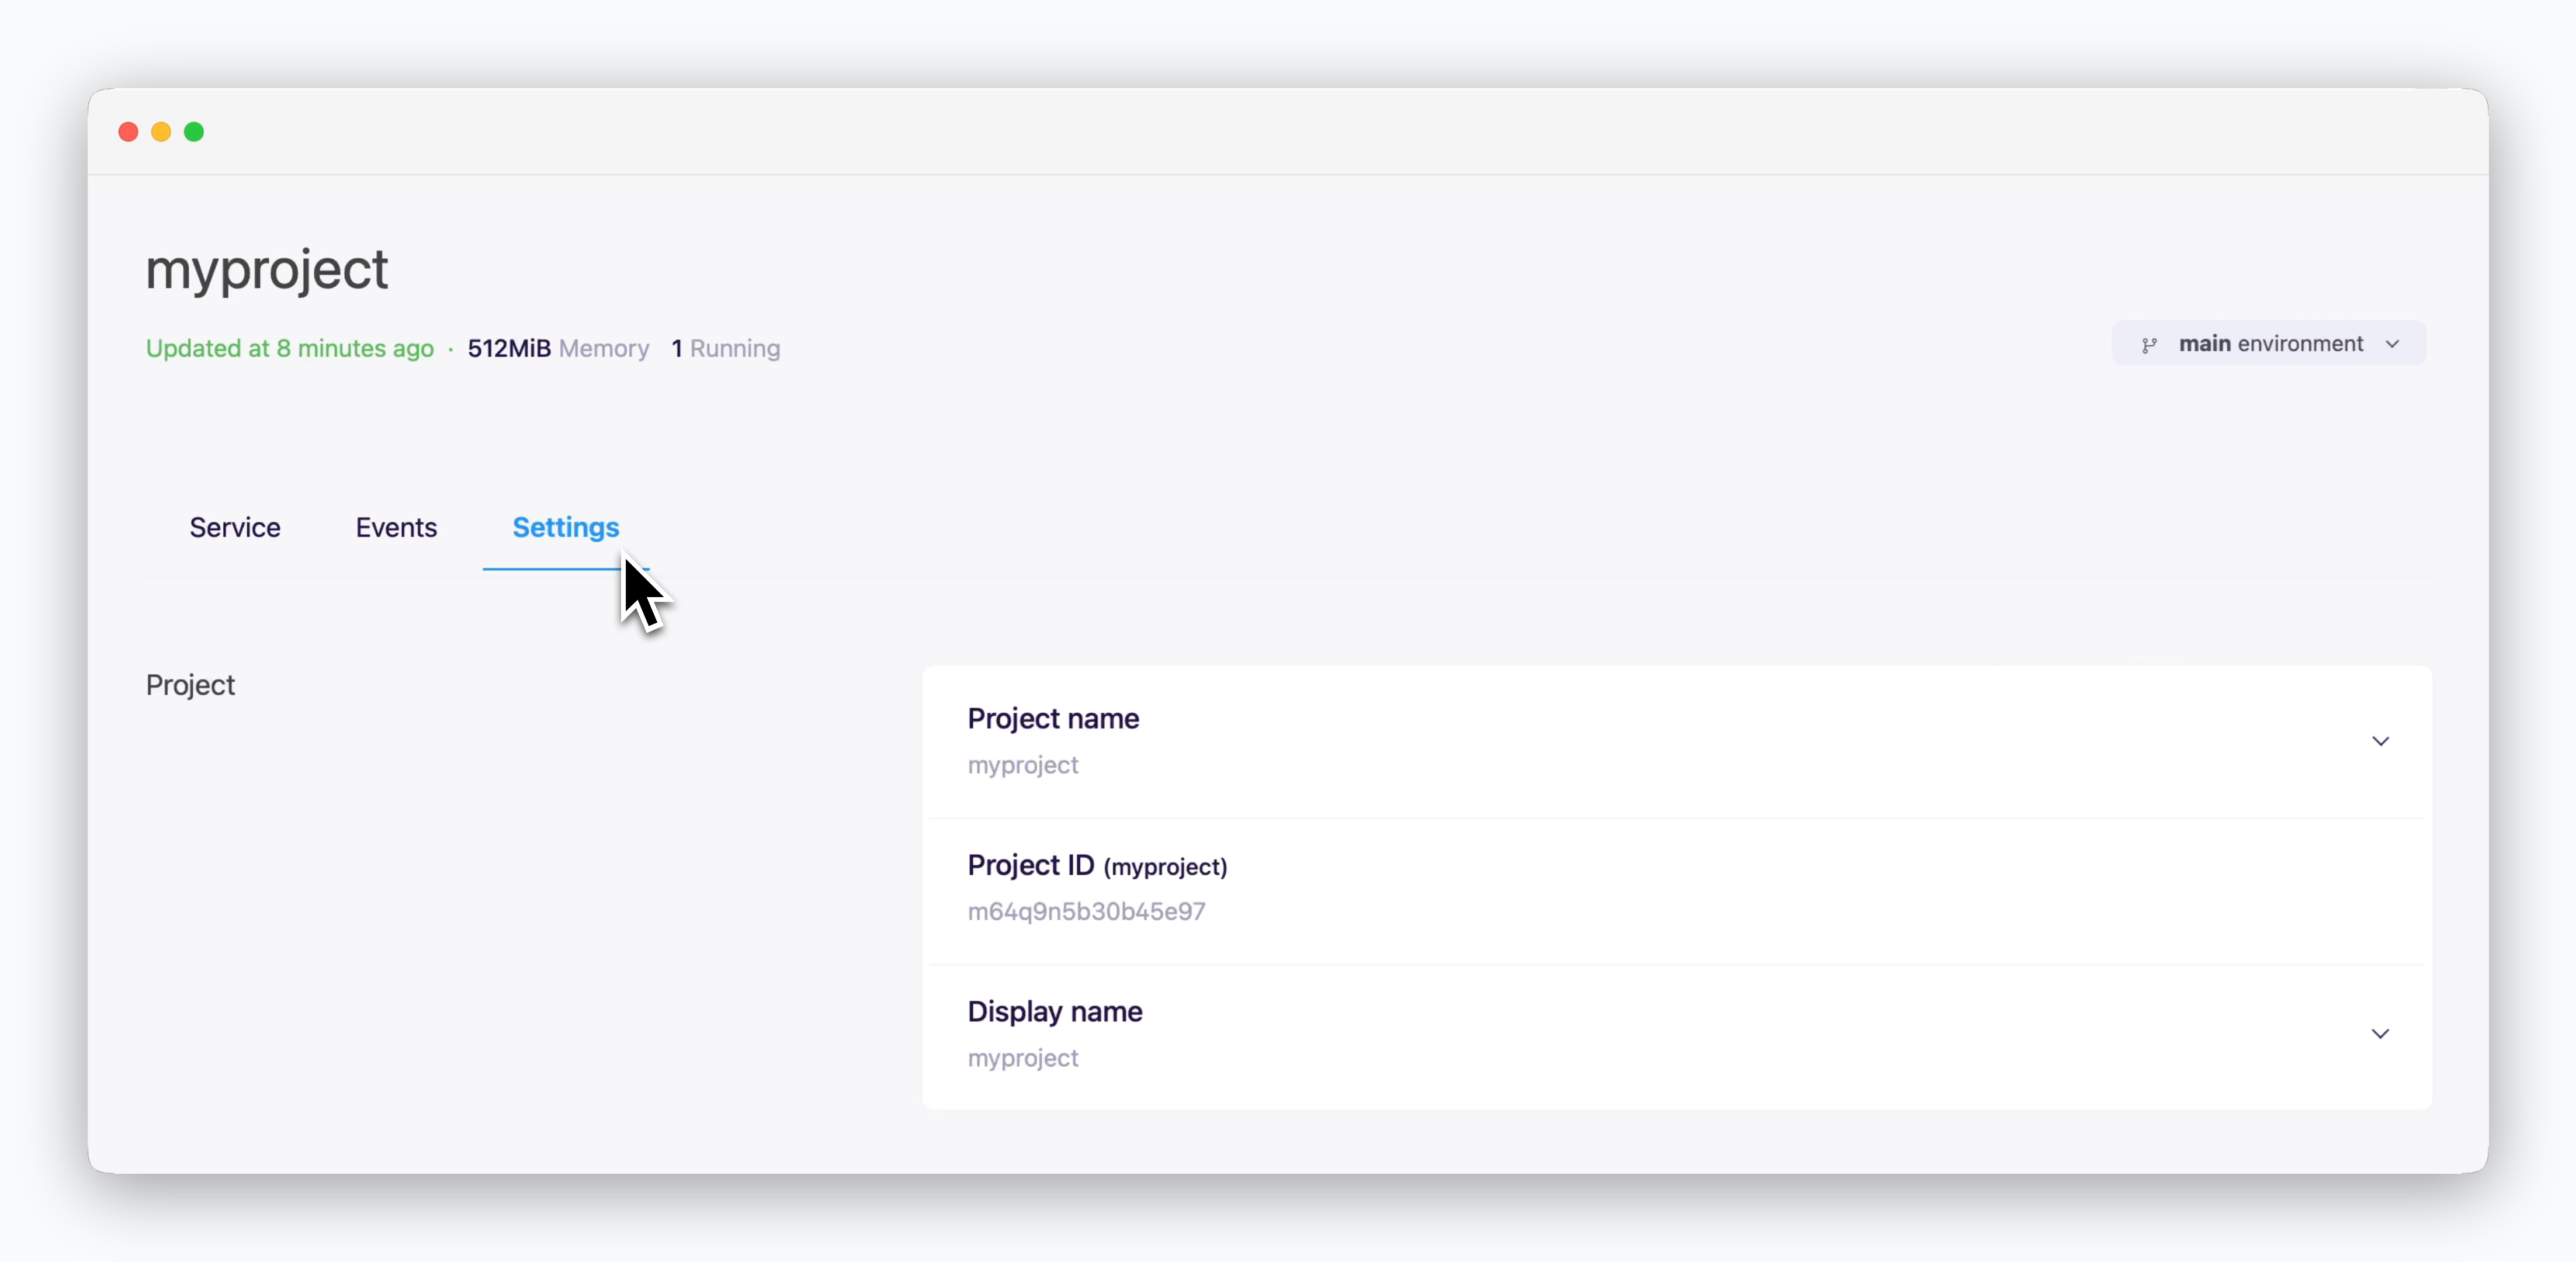
- Project Name : Project names can be set using 2-20 lowercase English letters and numbers.
- Project ID : A unique value used internally by the ale system for the project.
- Display Name : A user-friendly name for project identification. Supports all characters and languages.
Environment Information
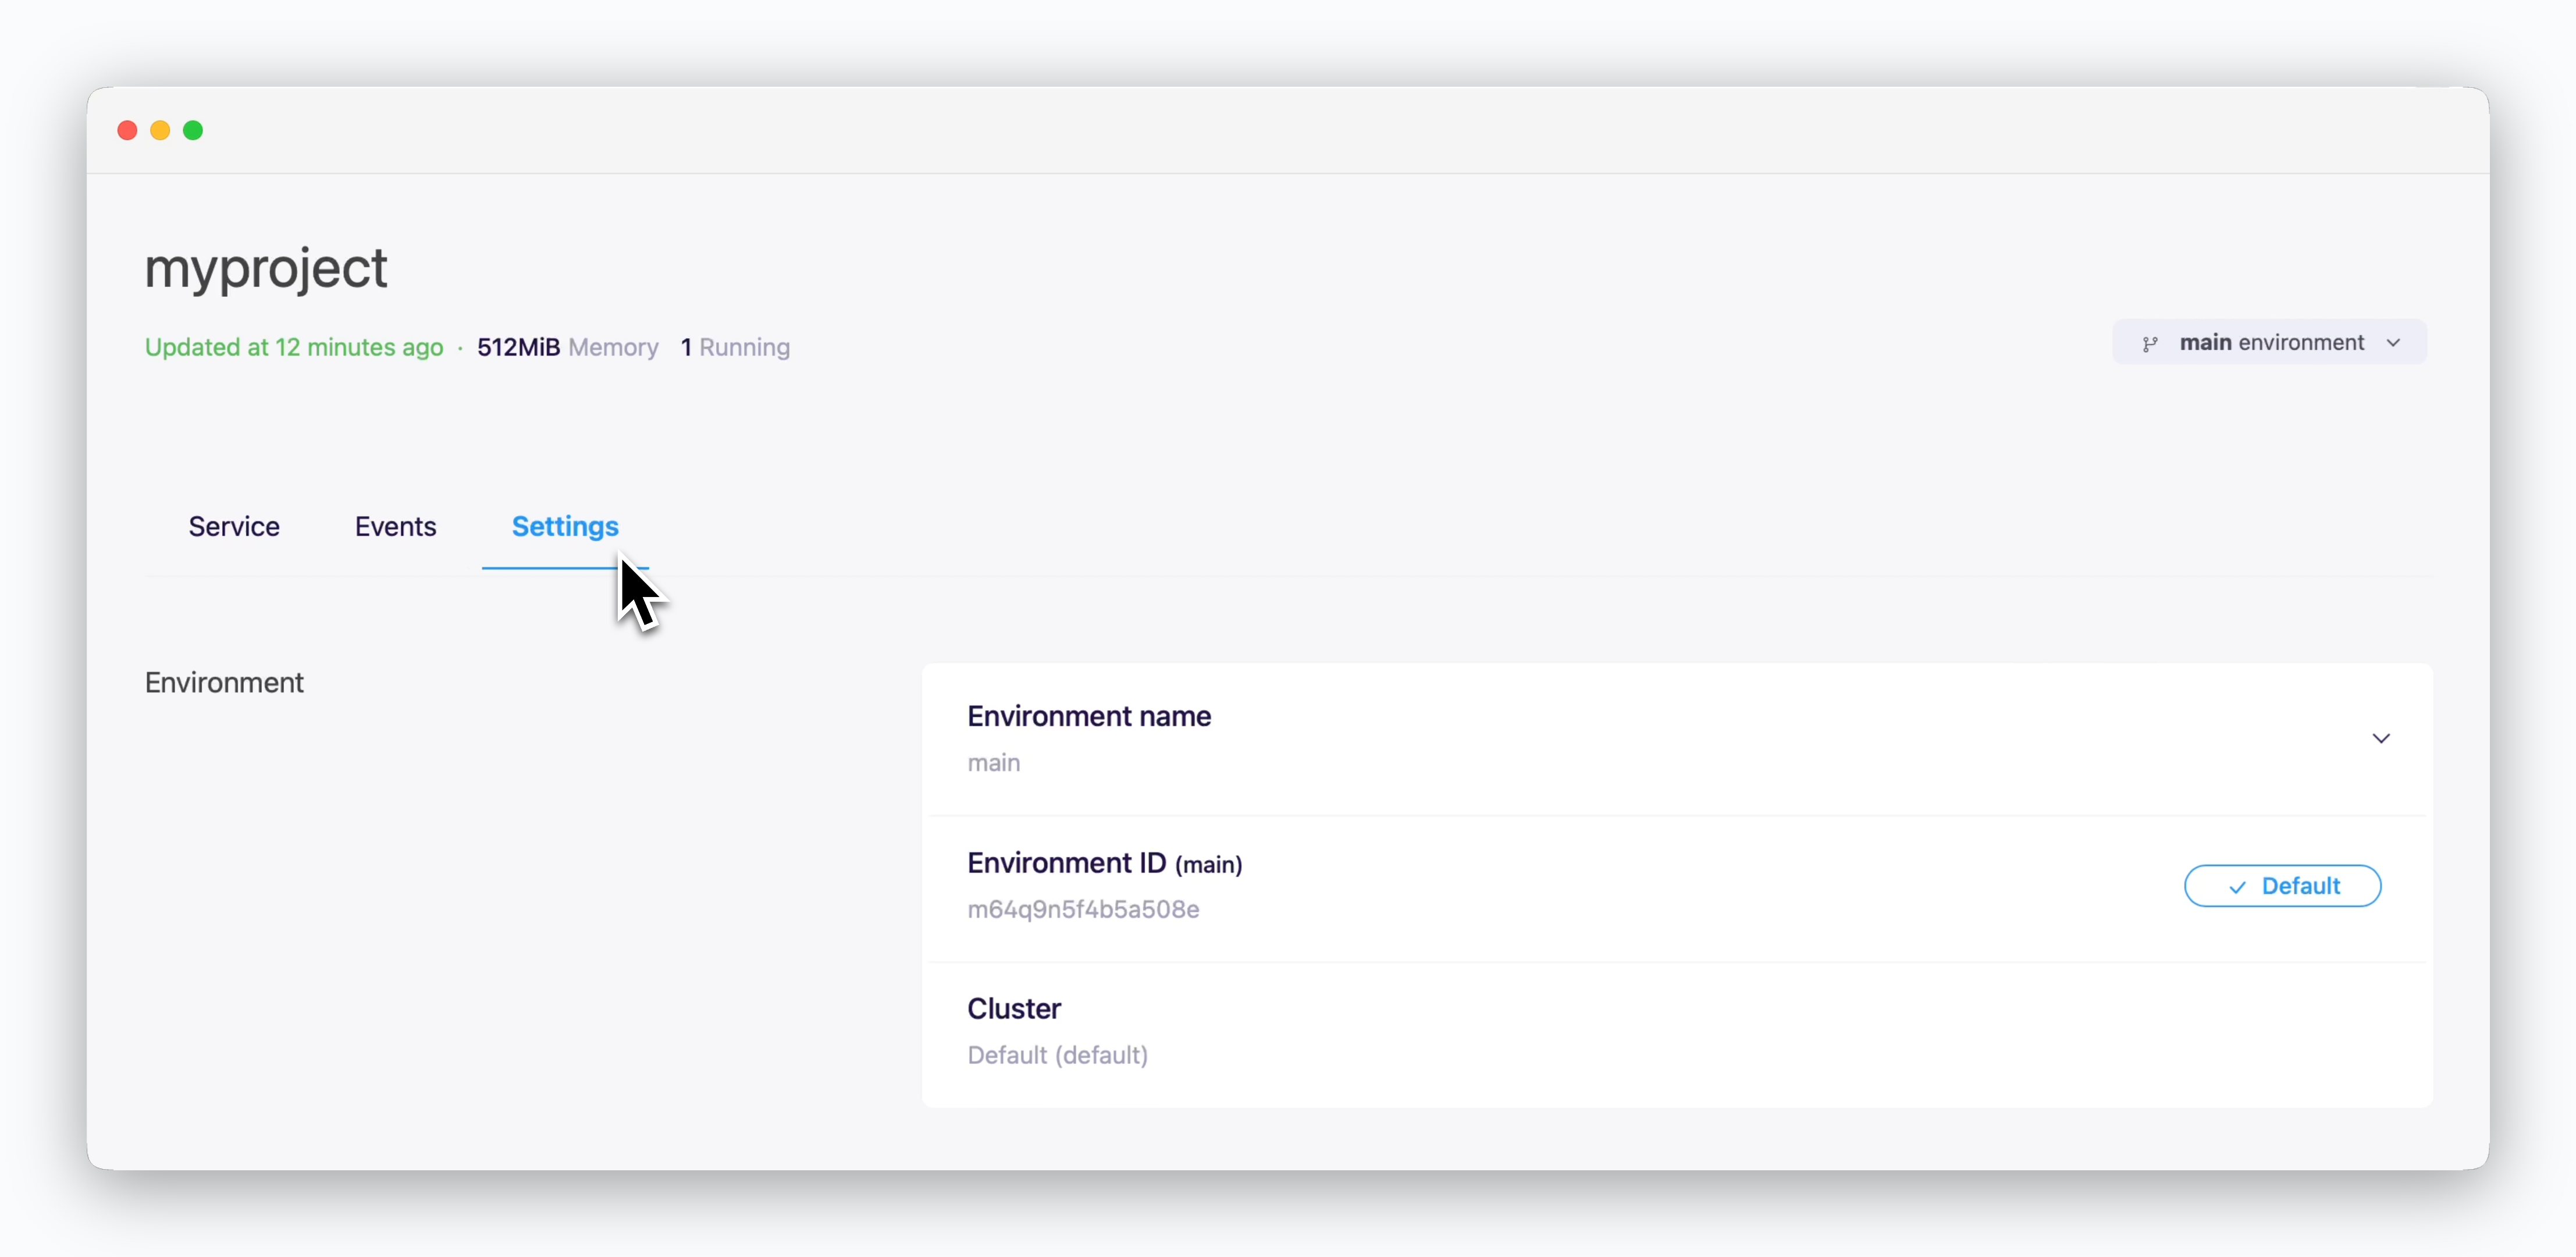
- Environment Name : Name used to distinguish environments within a project. You can freely customize this name.
- Environment ID : A unique system identifier for internal use.
- Cluster : Information about the cluster where services are deployed.
Add Environments
Add as Empty Environment
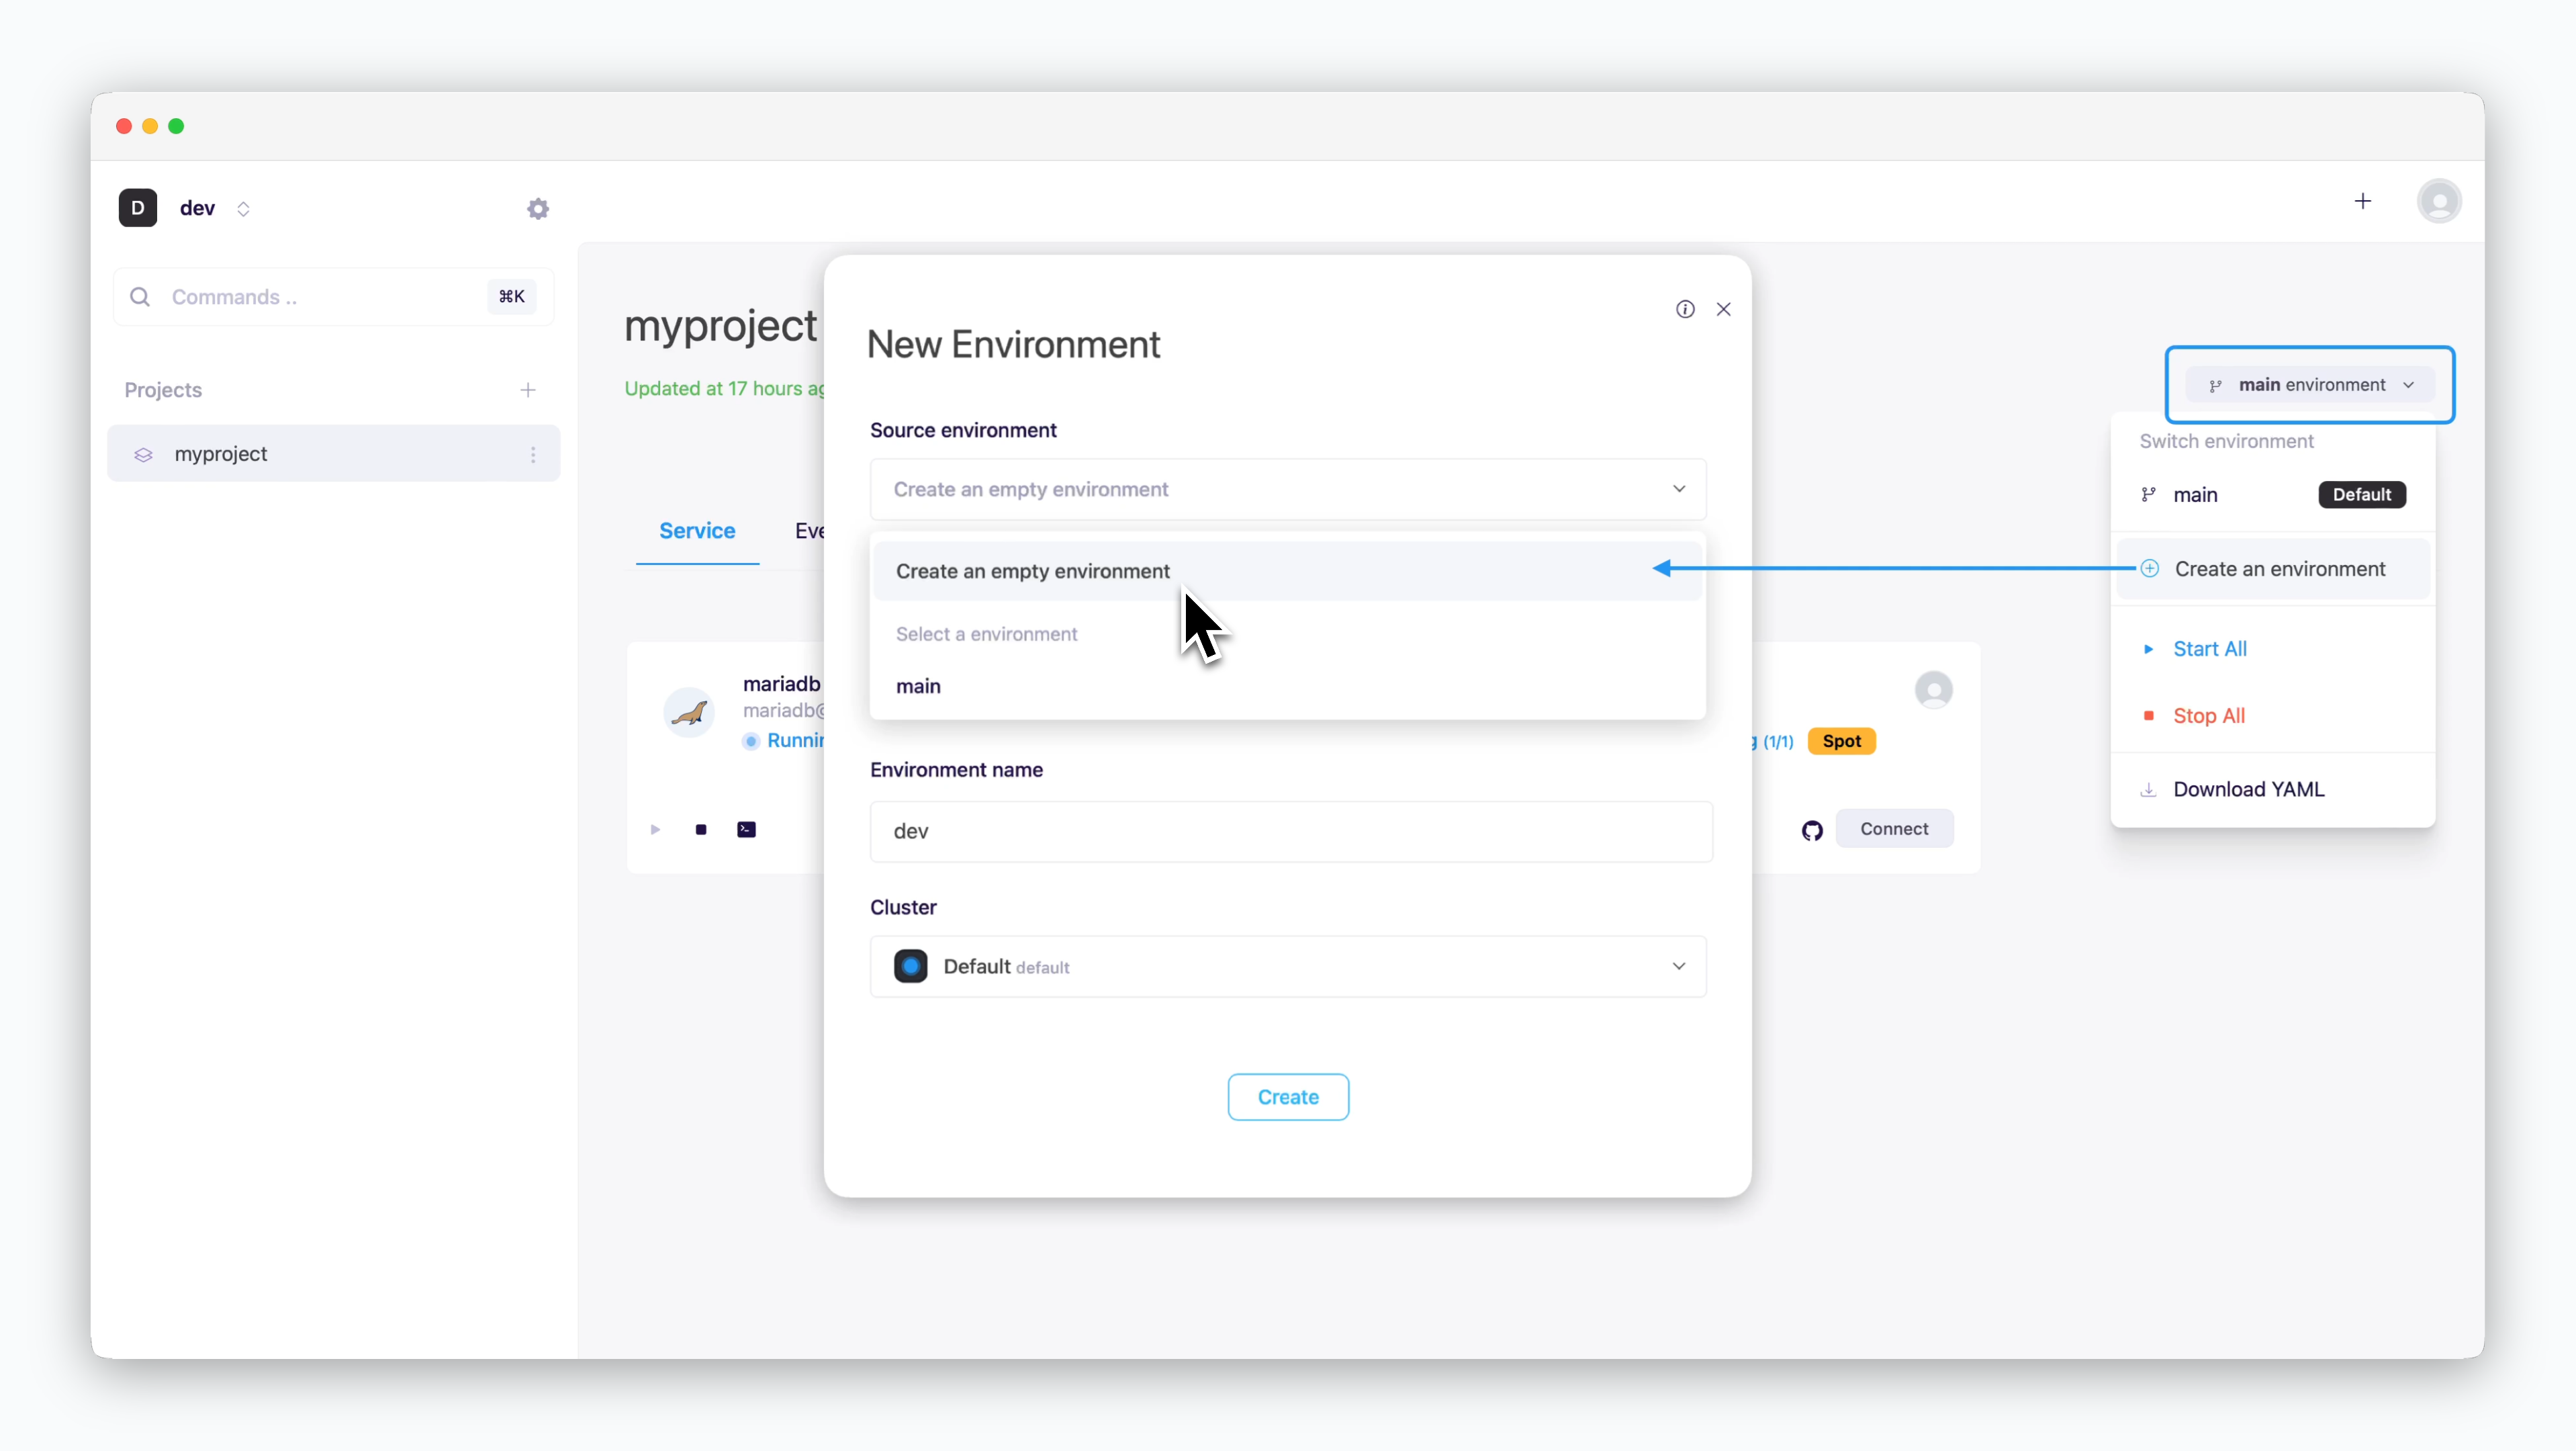
Navigate to the environment selector (top right) and click “Create New Environment”. Choose “Create as Empty Environment”, configure your environment name and select a cluster, then click Create to complete the process.
Add by Cloning
To clone an environment, select an environment with services as a source environment. The new environment will be created with all services cloned from the source environment.
Clone your source environment to easily create development, production, or QA environments. Newly cloned services are in a stopped state and can be launched all at once by clicking
Start All in the evnironment selector.Management
Switch Environments
To switch between environments, click the environment selector in the top right corner.
Each environment (except for main) is assigned a distinct color indicator. These color codes help you quickly identify which environment you’re working with when deploying or modifying services.
Deploy with YAML File
You can download YAML configuration files containing all service deployment settings from your environment and apply them to a new environment using drag & drop.
YAML deployment scripts simplify cloning environments. For more information, See the Environment Migration page.
Set as Default Environment
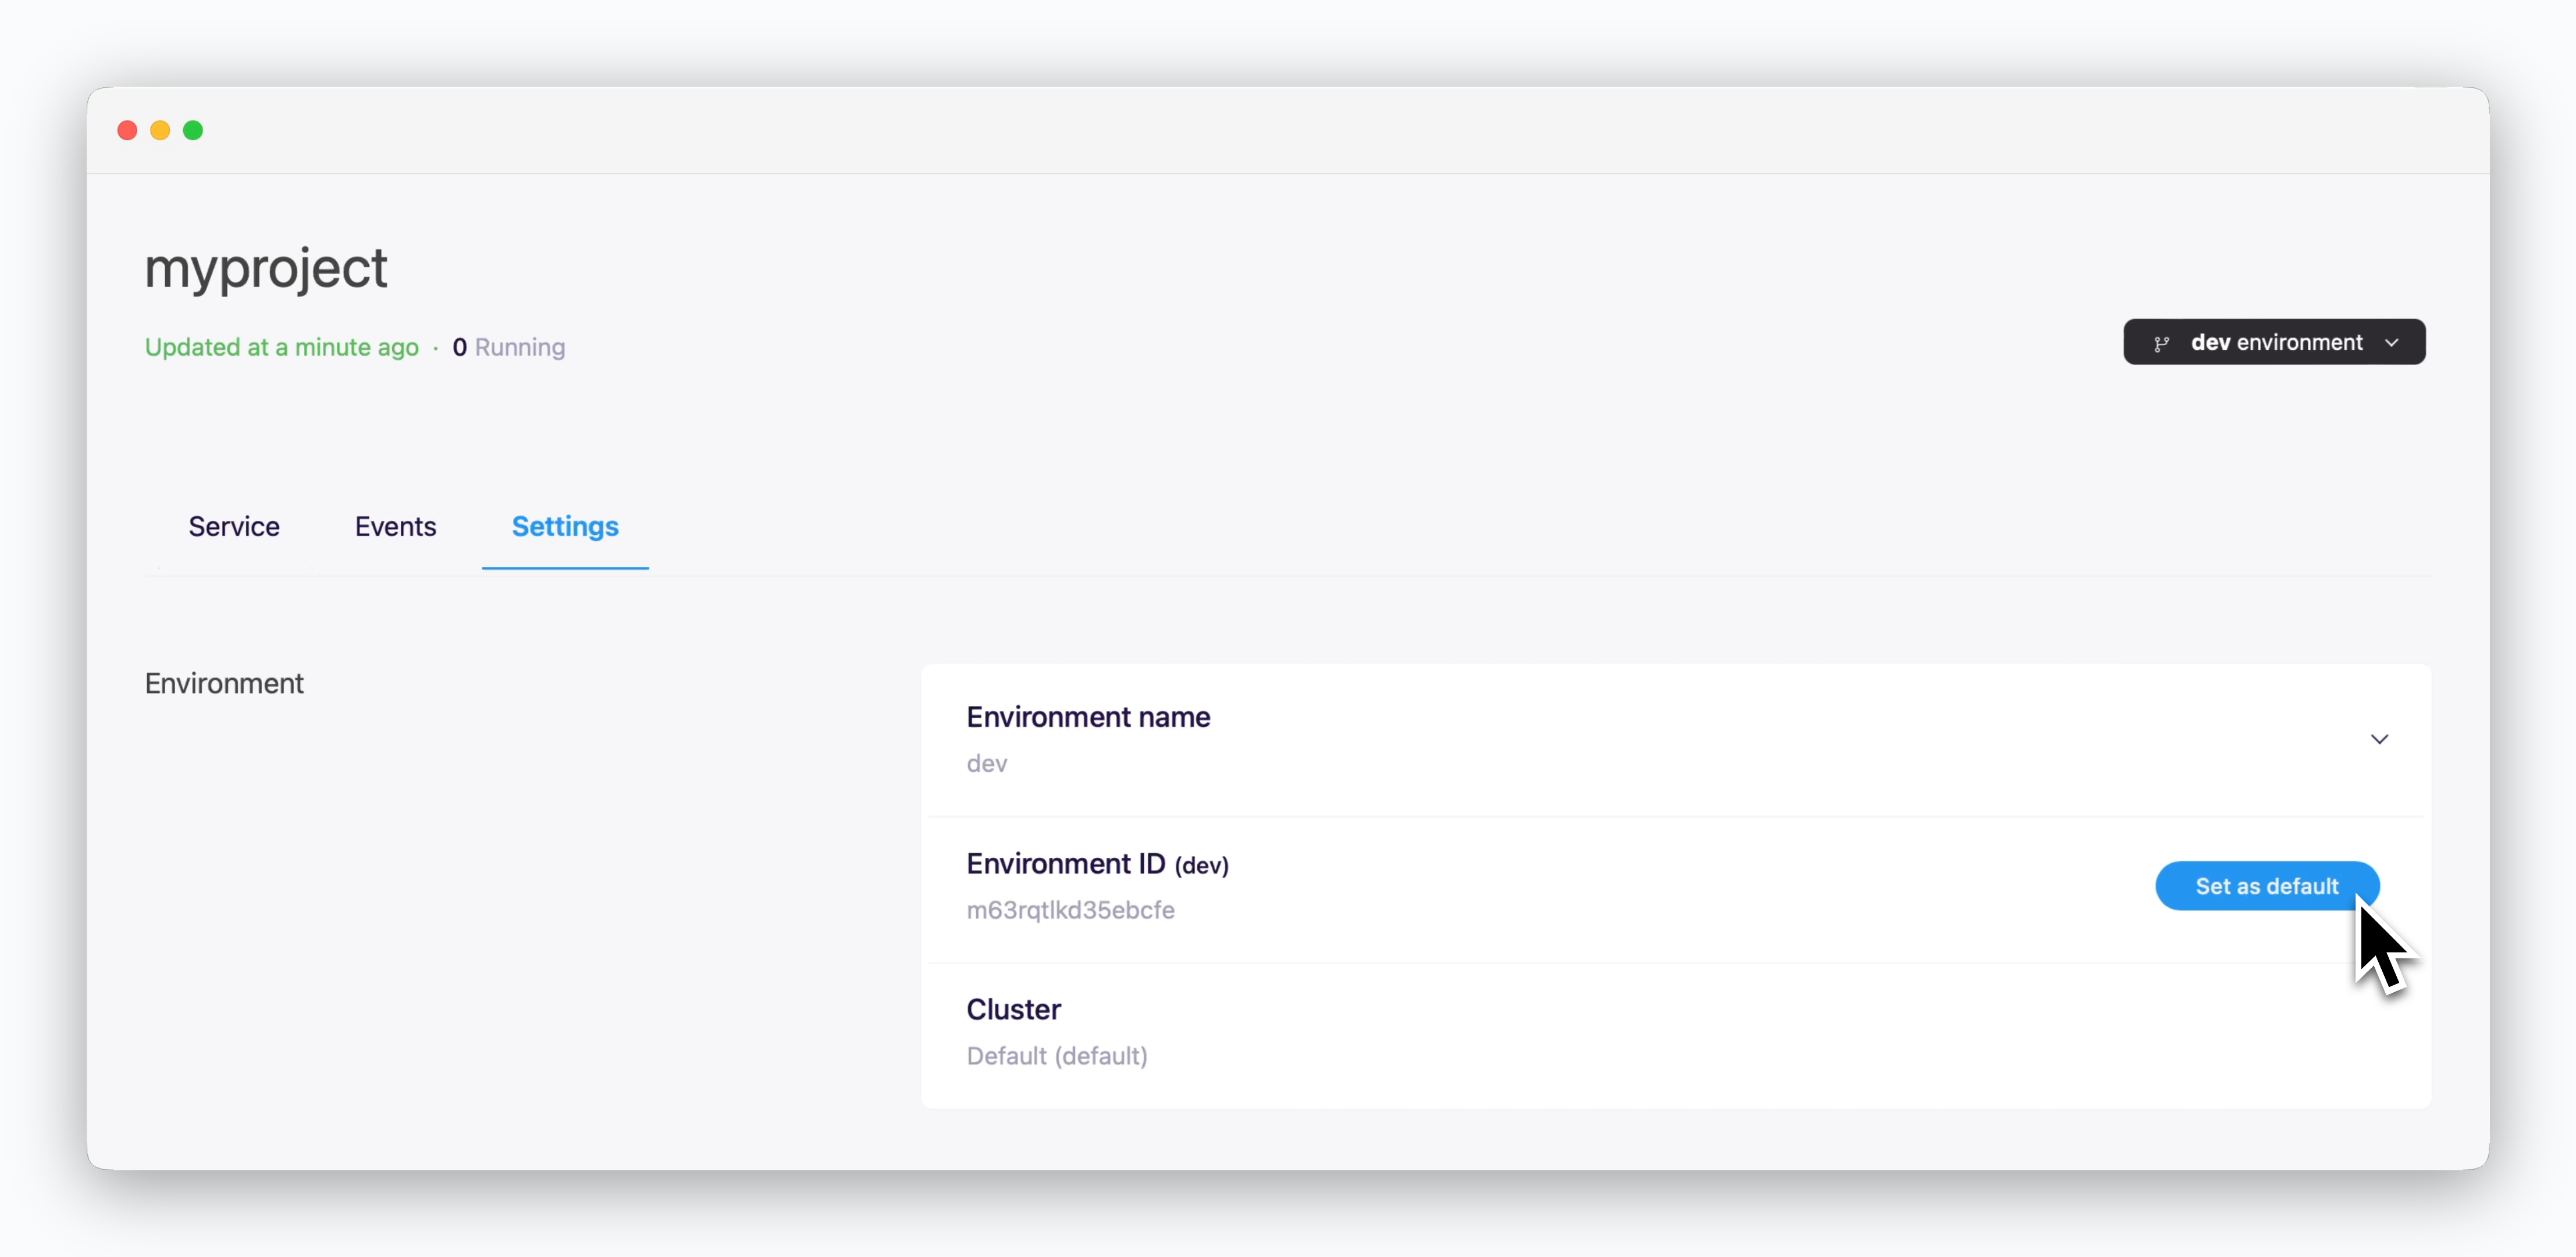
To set a default environment, click Set as Default Environment in the environment information section of the Settings tab. Since the default environment is automatically loaded when you select a project, it’s recommended to set your most frequently used environment as default.
Delete Environment
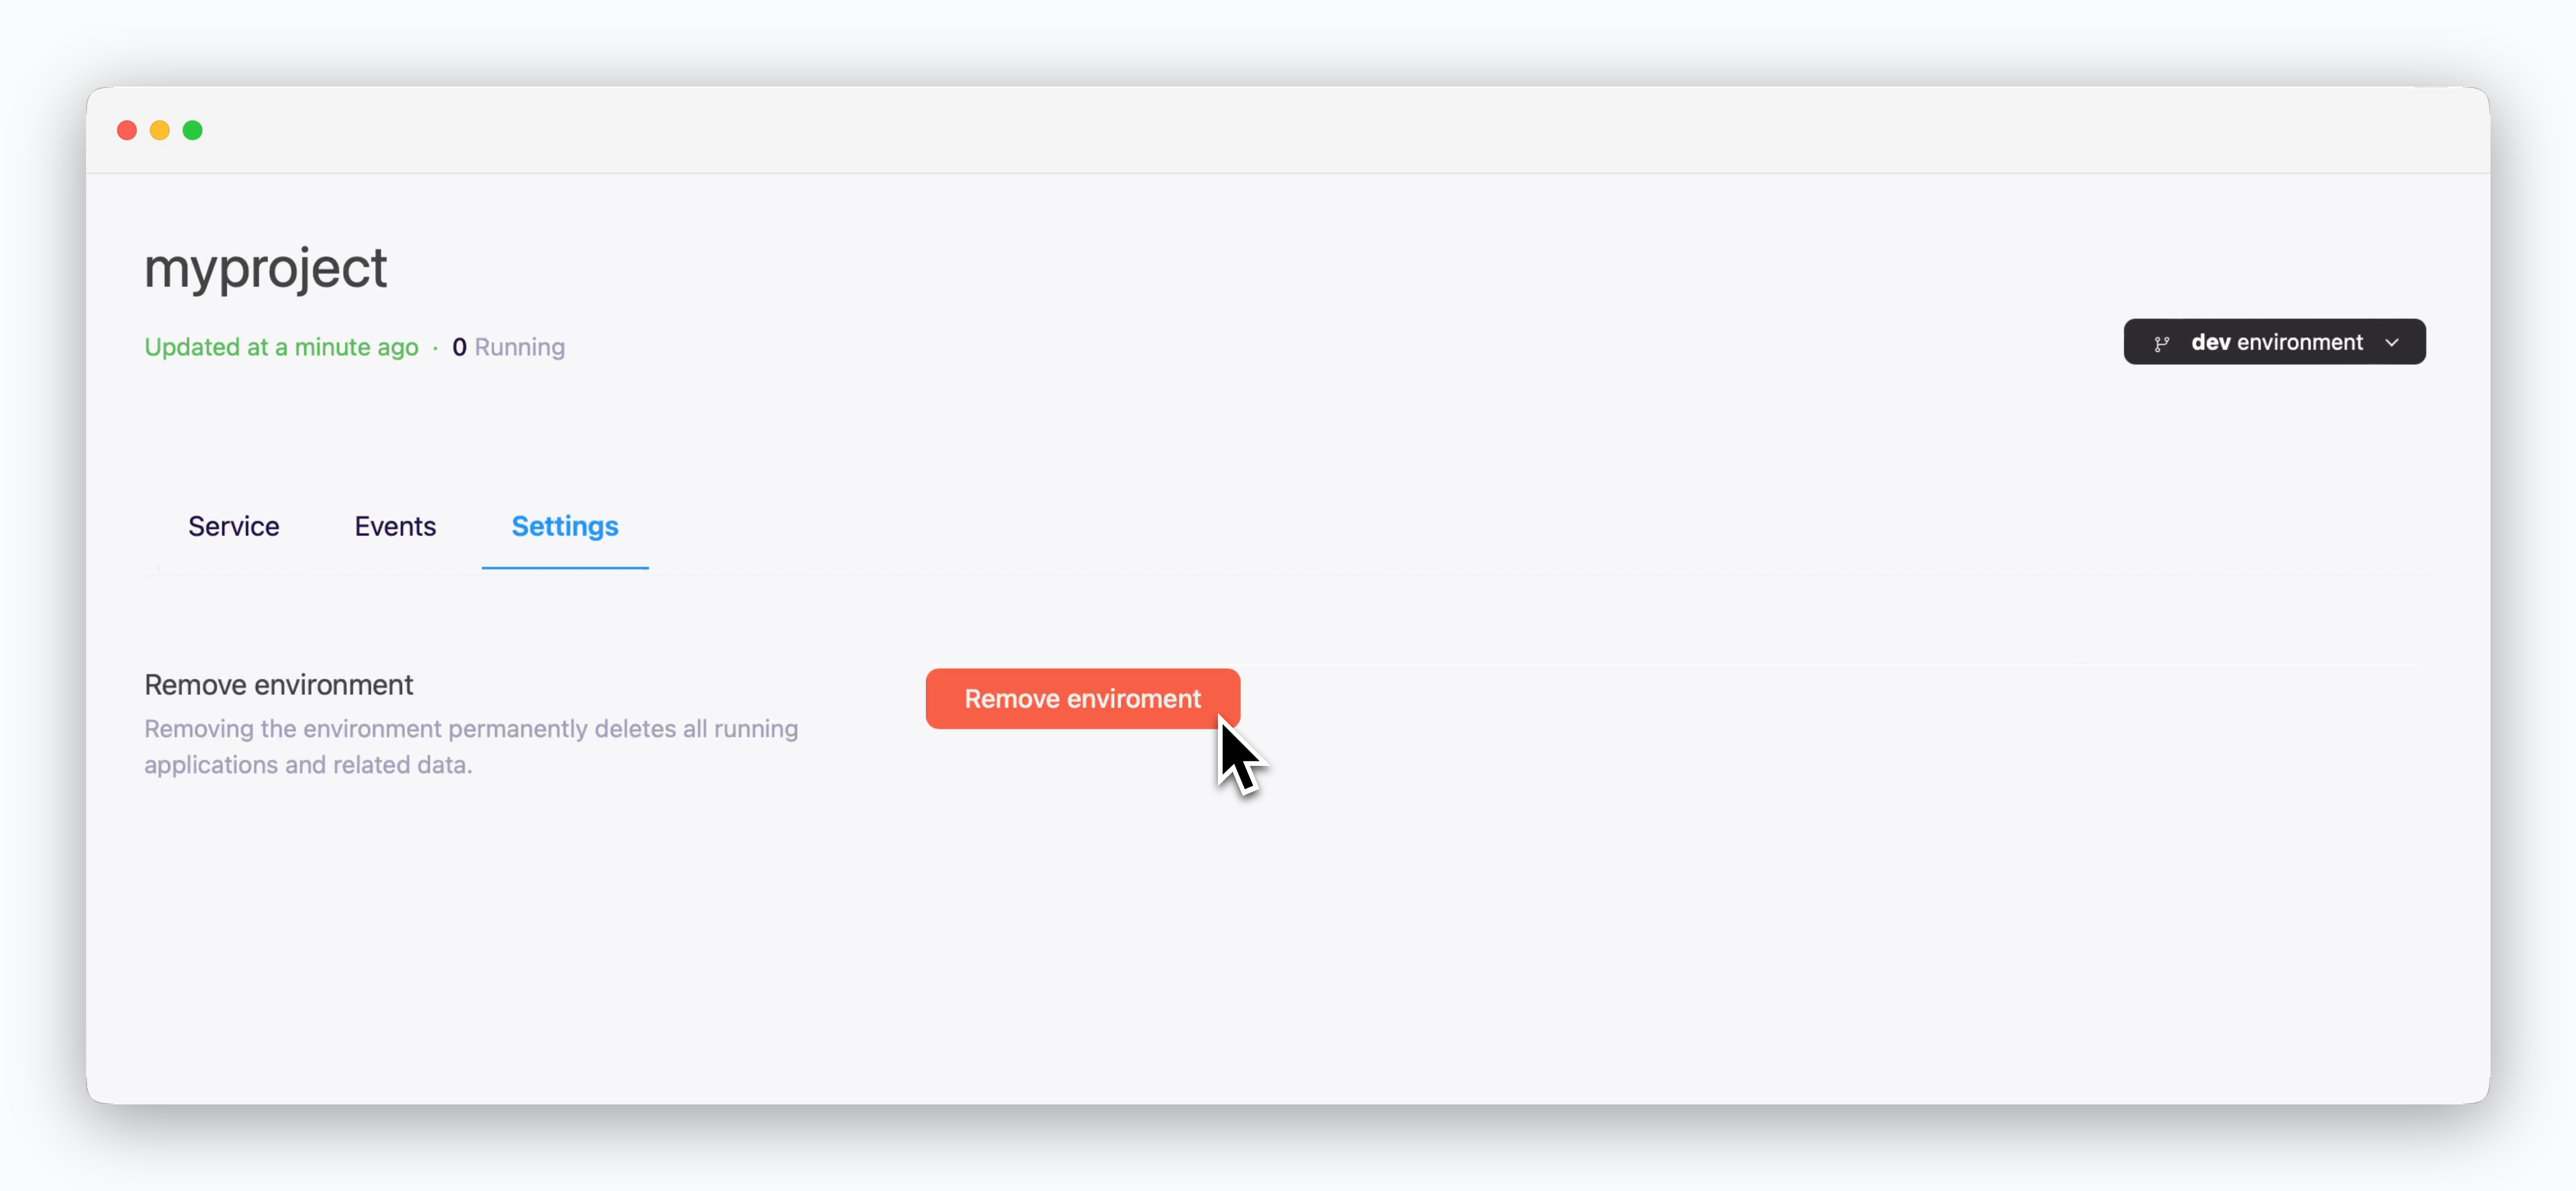
Click Delete a environment at the bottom of the Settings tab.
If only one environment exists in the project, the button will show as
Delete a project, and both the project and environment will be deleted.Secret Management
In the secret management section of the Settings tab, click the icon on the right to store common variables and secrets that can be used by services in the environment.
You can quickly configure secrets using drag & drop. For more details, see the Environment Variable Management page.
Firewall Settings
You can enable external TCP connections from other environments, projects, and external services via the firewall management section in the Settings tab. When enabled, this allows access from all IP addresses - configure with caution.
For more details on communication with other services, see the Service Connections page.