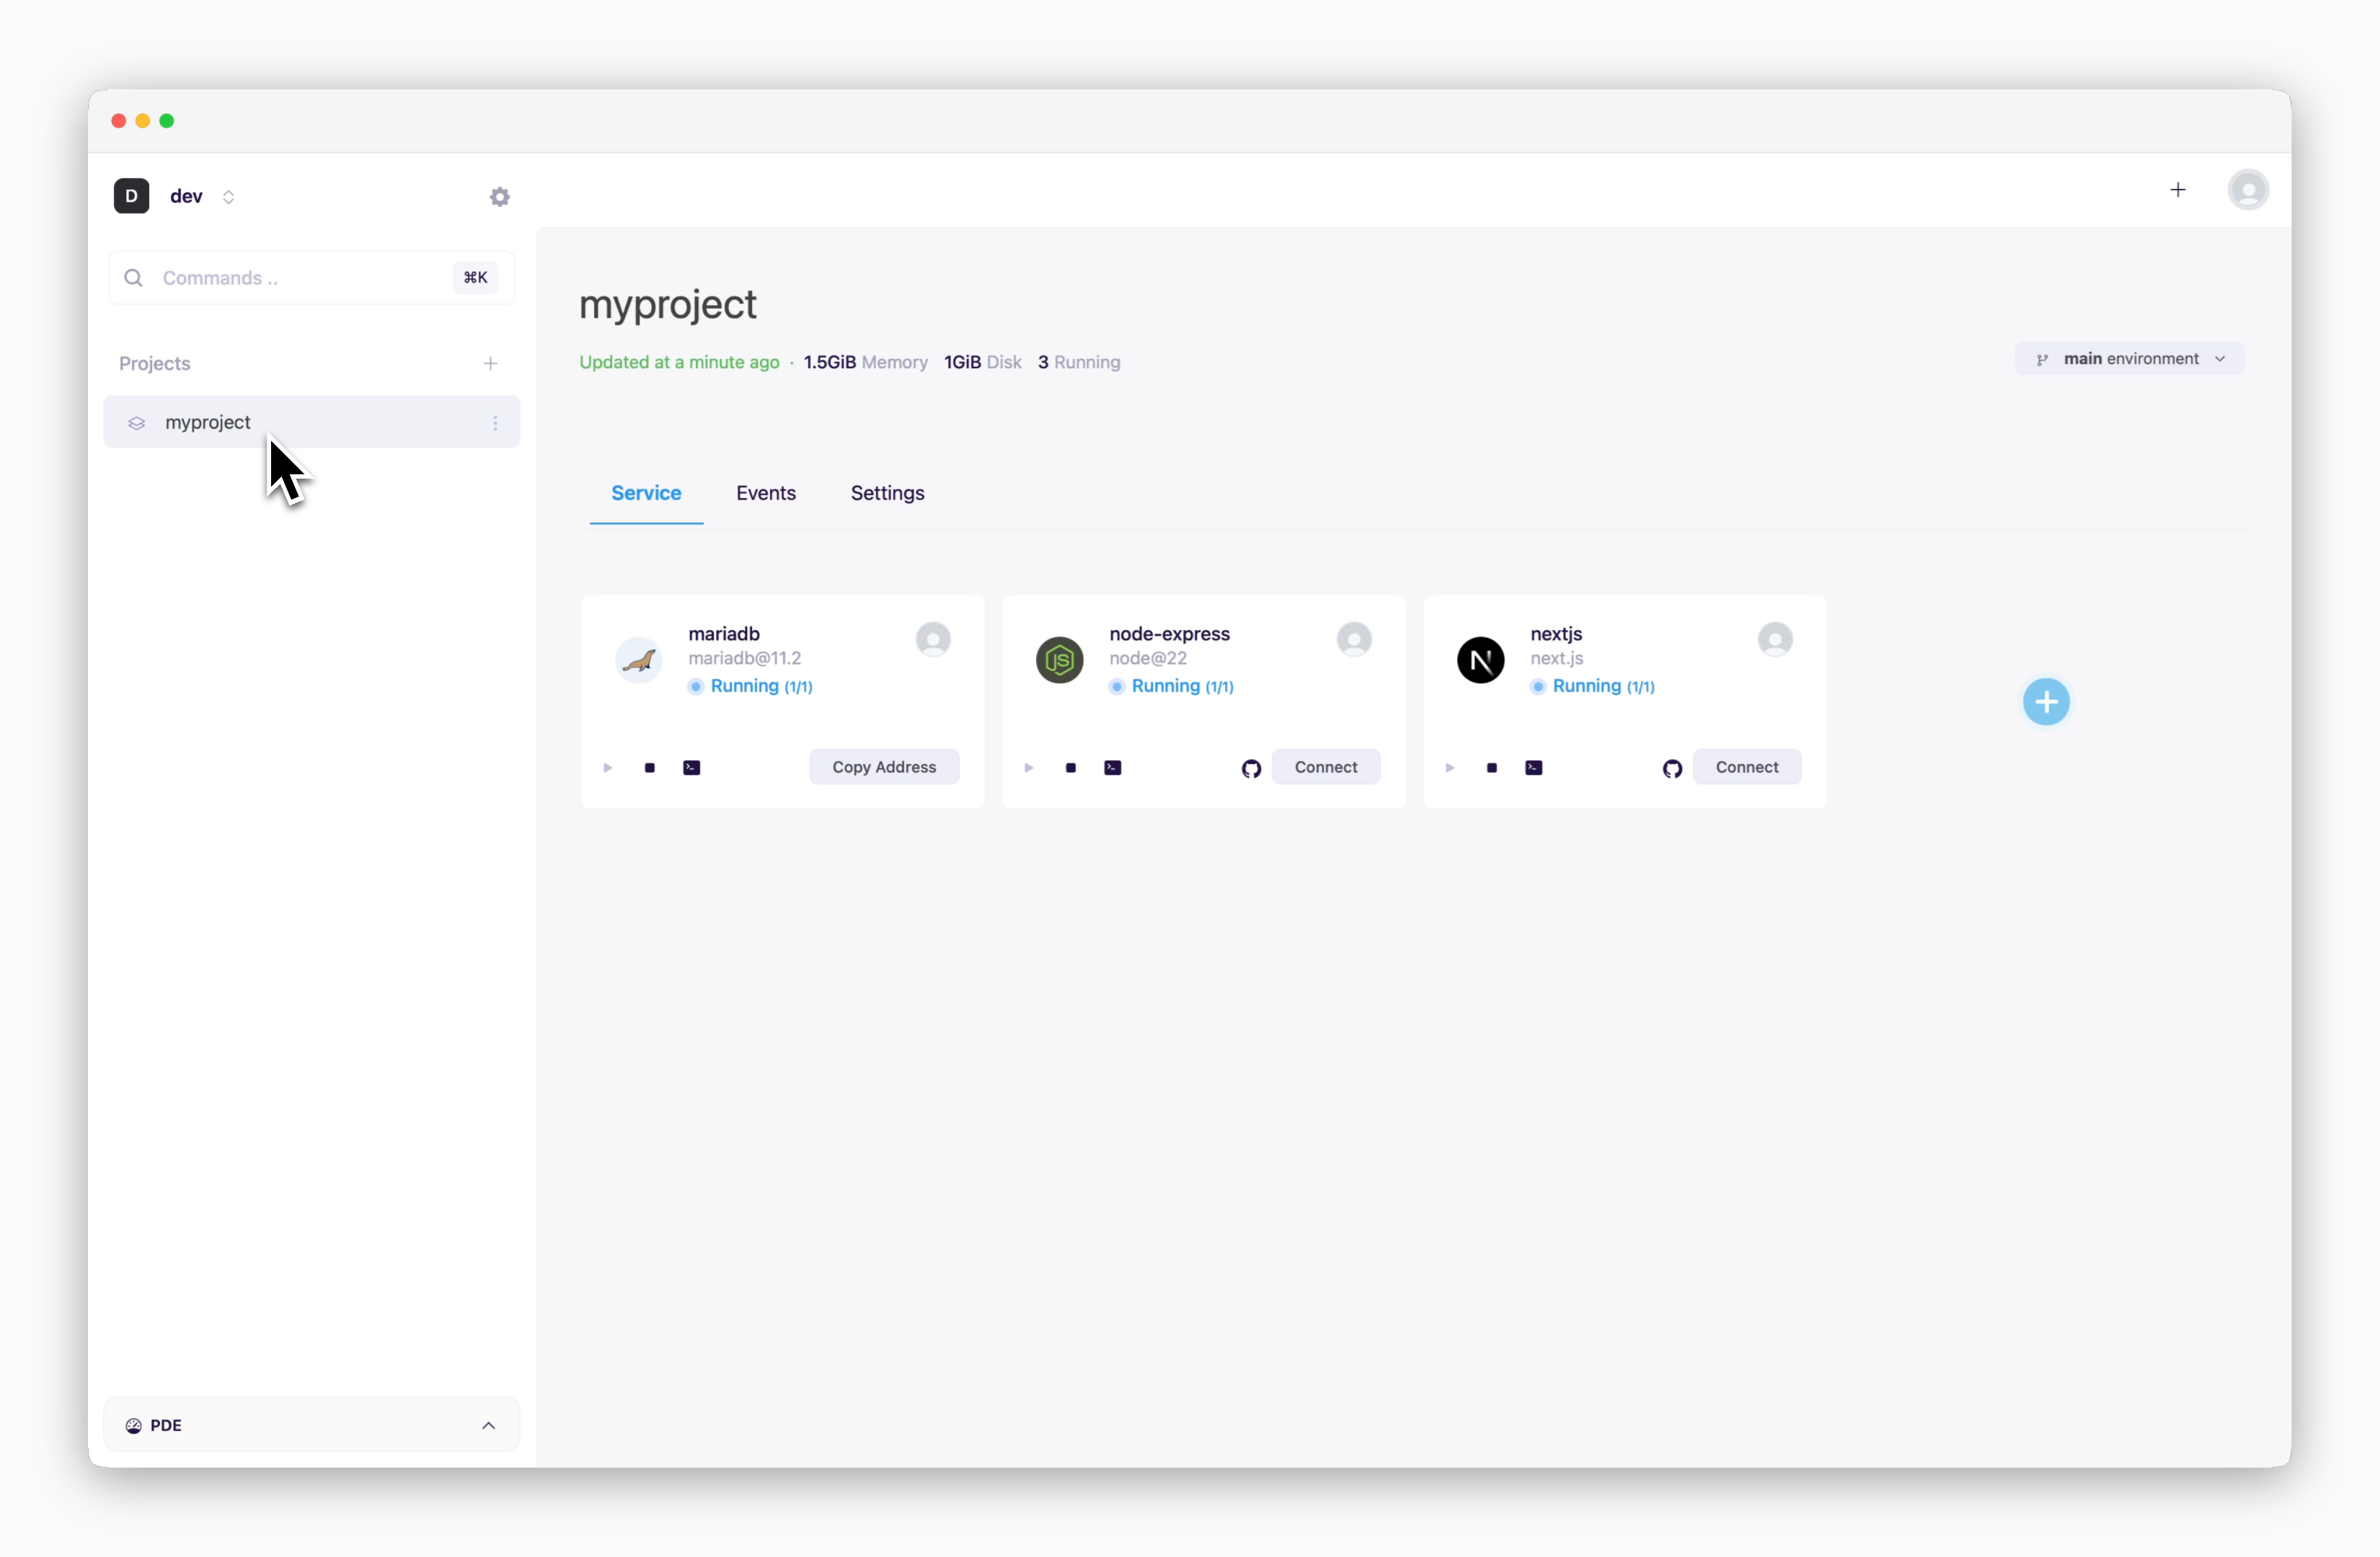
A project is a display name that represents a collection of environments. It is designed for the management convenience of dashboard users, allowing them to manage one or more work-related environments (Dev, QA, Staging, Prod, and others) within a single project. All information except the project name displays information for the selected environment.
This guide only covers project creation and deletion. In the Settings tab, you can configure the selected environment. For more details, see the Environment Management page.

Space
Space
A space is the top-level unit of the workspace hierarchy. Space owners can invite team members to collaborate on projects within the resources allocated by the operations system. Members can create and manage projects in a self-service manner.
Project
Project
A project is a display name that represents a collection of environments. It is designed for the management convenience of dashboard users, allowing them to manage one or more work-related environments (Dev, QA, Staging, Prod, and others) within a single project.
Environment
Environment
An environment corresponds to a namespace in a Kubernetes cluster. Network isolation is configured on a per-namespace basis, and services within the same environment (namespace) can communicate by referencing service names as hostnames. Frequently used environment variables can be stored as secrets at the environment level for management and application.
Service
Service
A service corresponds to a Deployment in Kubernetes. Each service can be accessed via terminal and connected to custom domains. For more details on deploying services, see the Deploying with ale page.
Create a Project
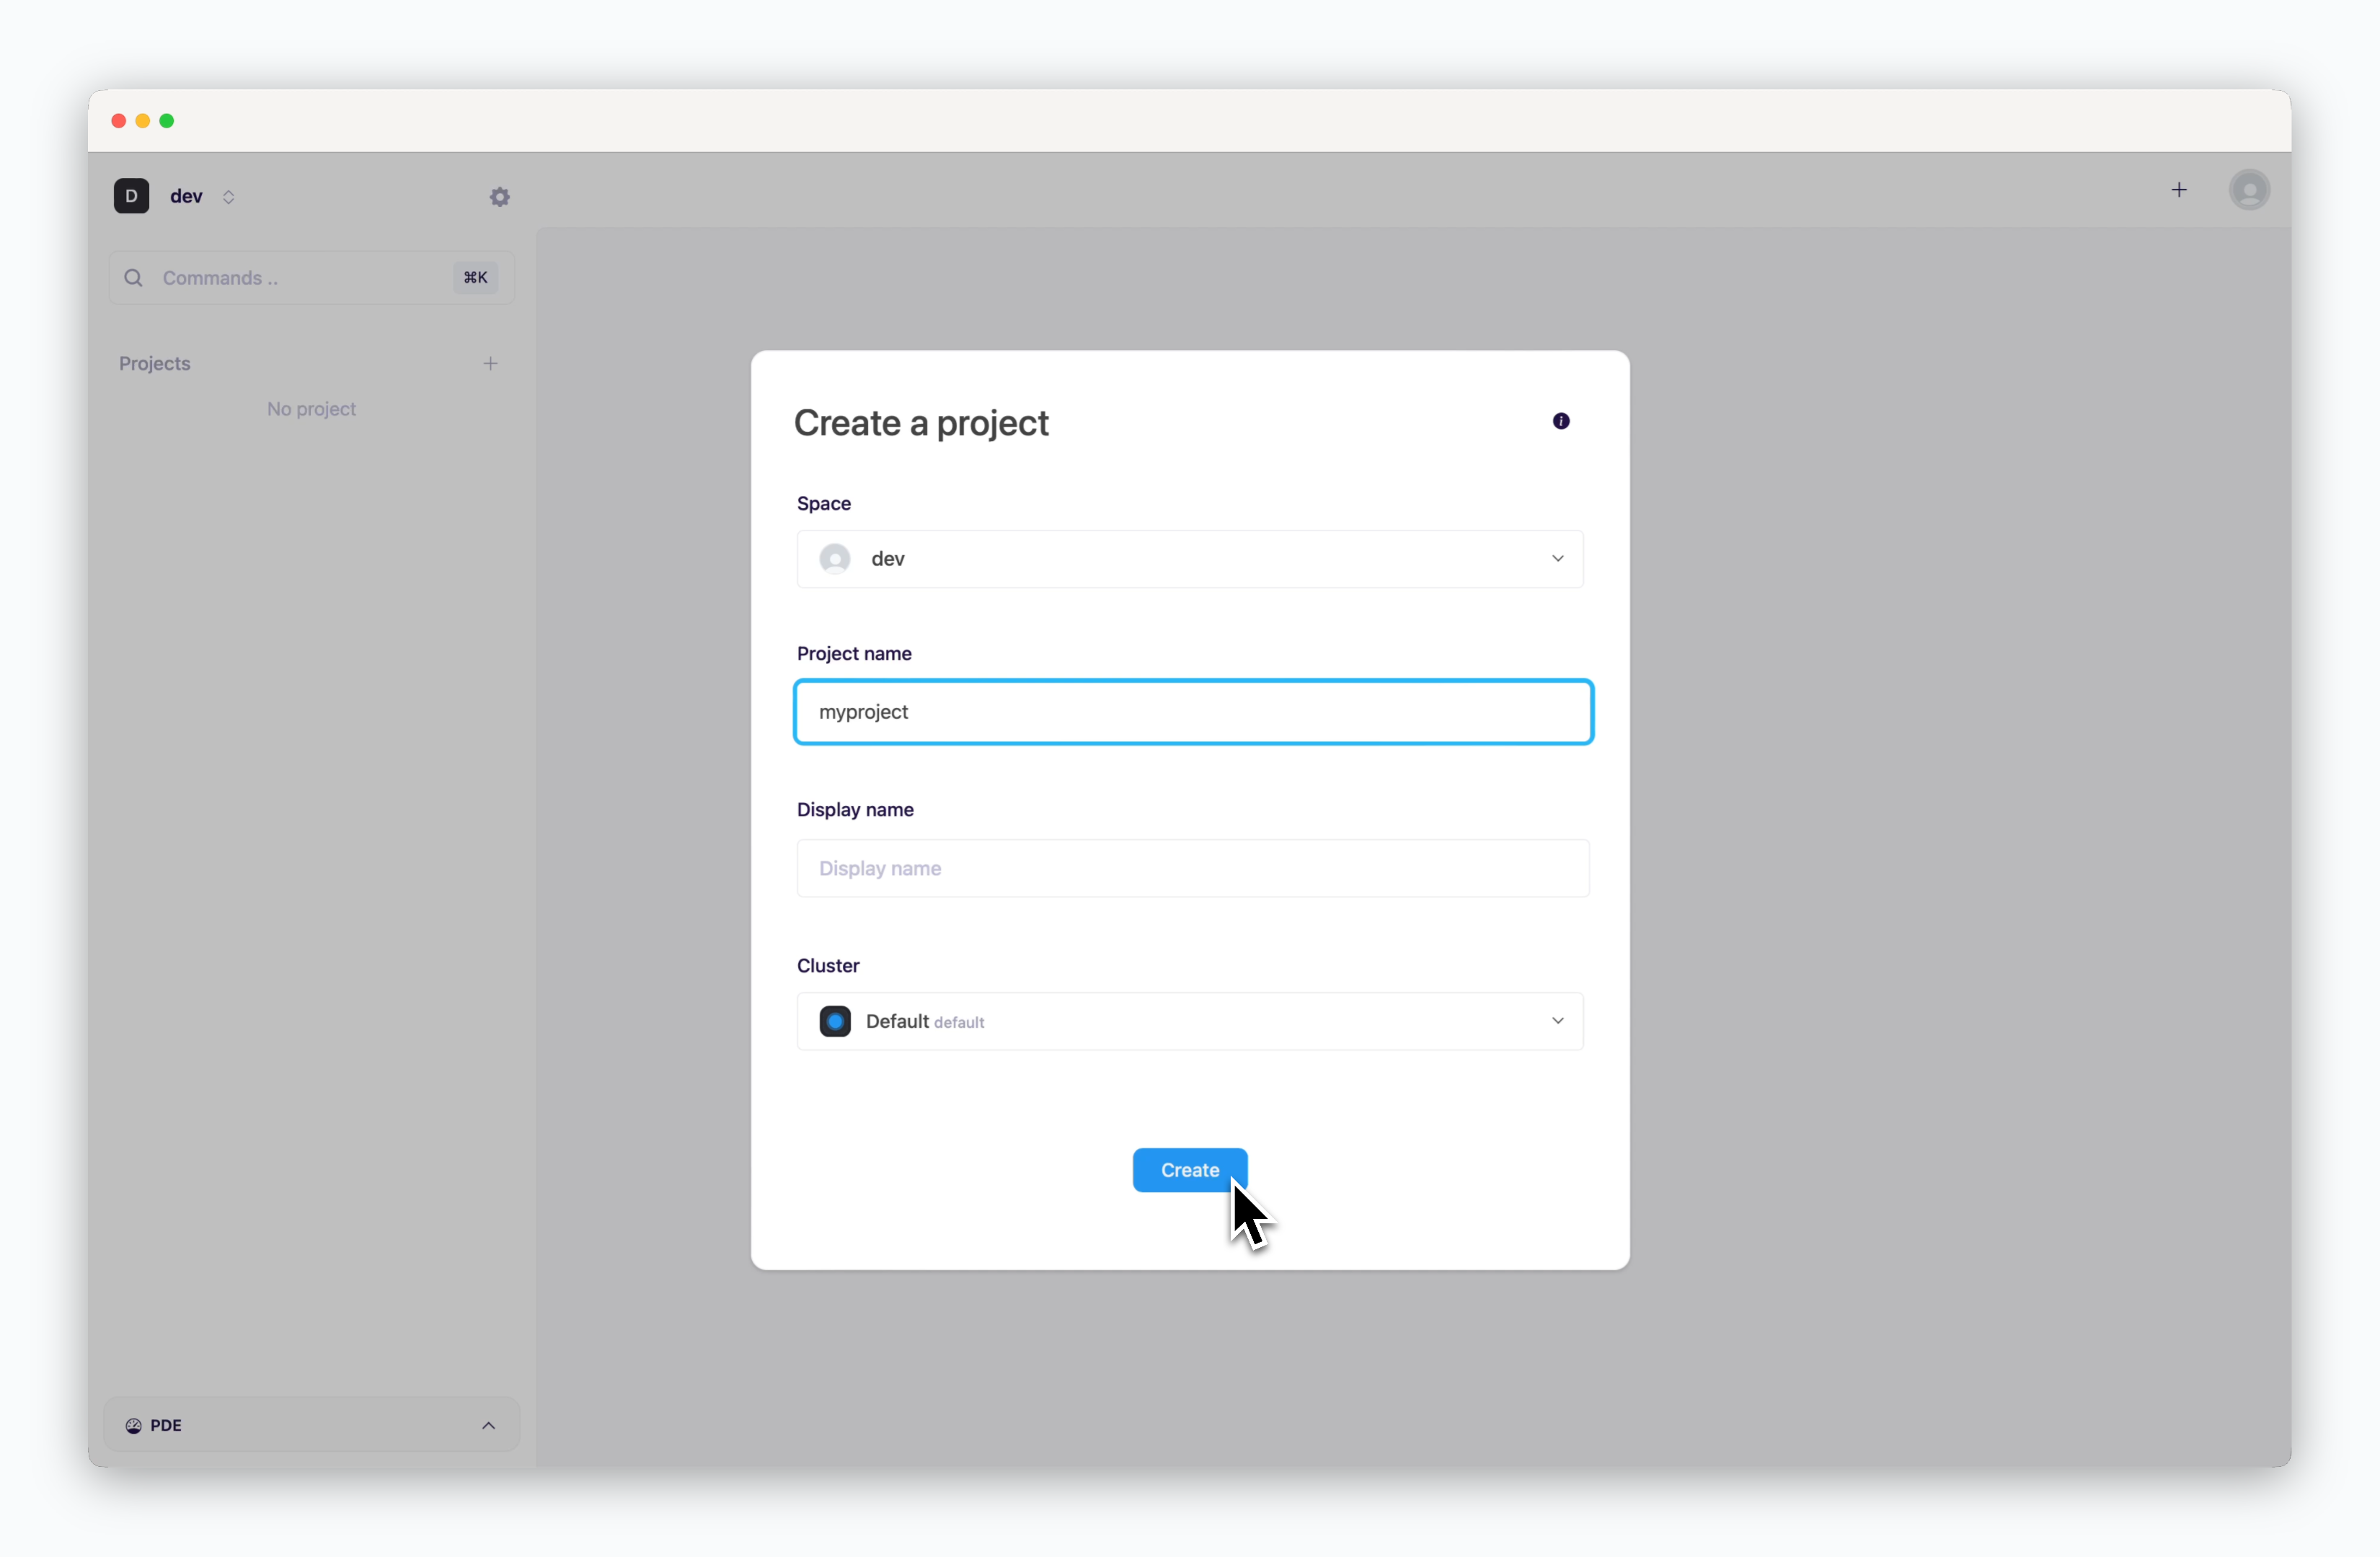
In the Projects section of the sidebar, click the button and enter the appropriate project information in each field.
- Space: Select the space where the project will belong.
- Project Name: lowercase English letters and numbers, between 2 and 20 characters.
- Display Name: Name used for user identification of projects; can include characters from other languages and special characters.
- Cluster: Select the cluster where services will be deployed within the project.
When creating a project, an environment named “main” is created at the same time.
Delete a Project
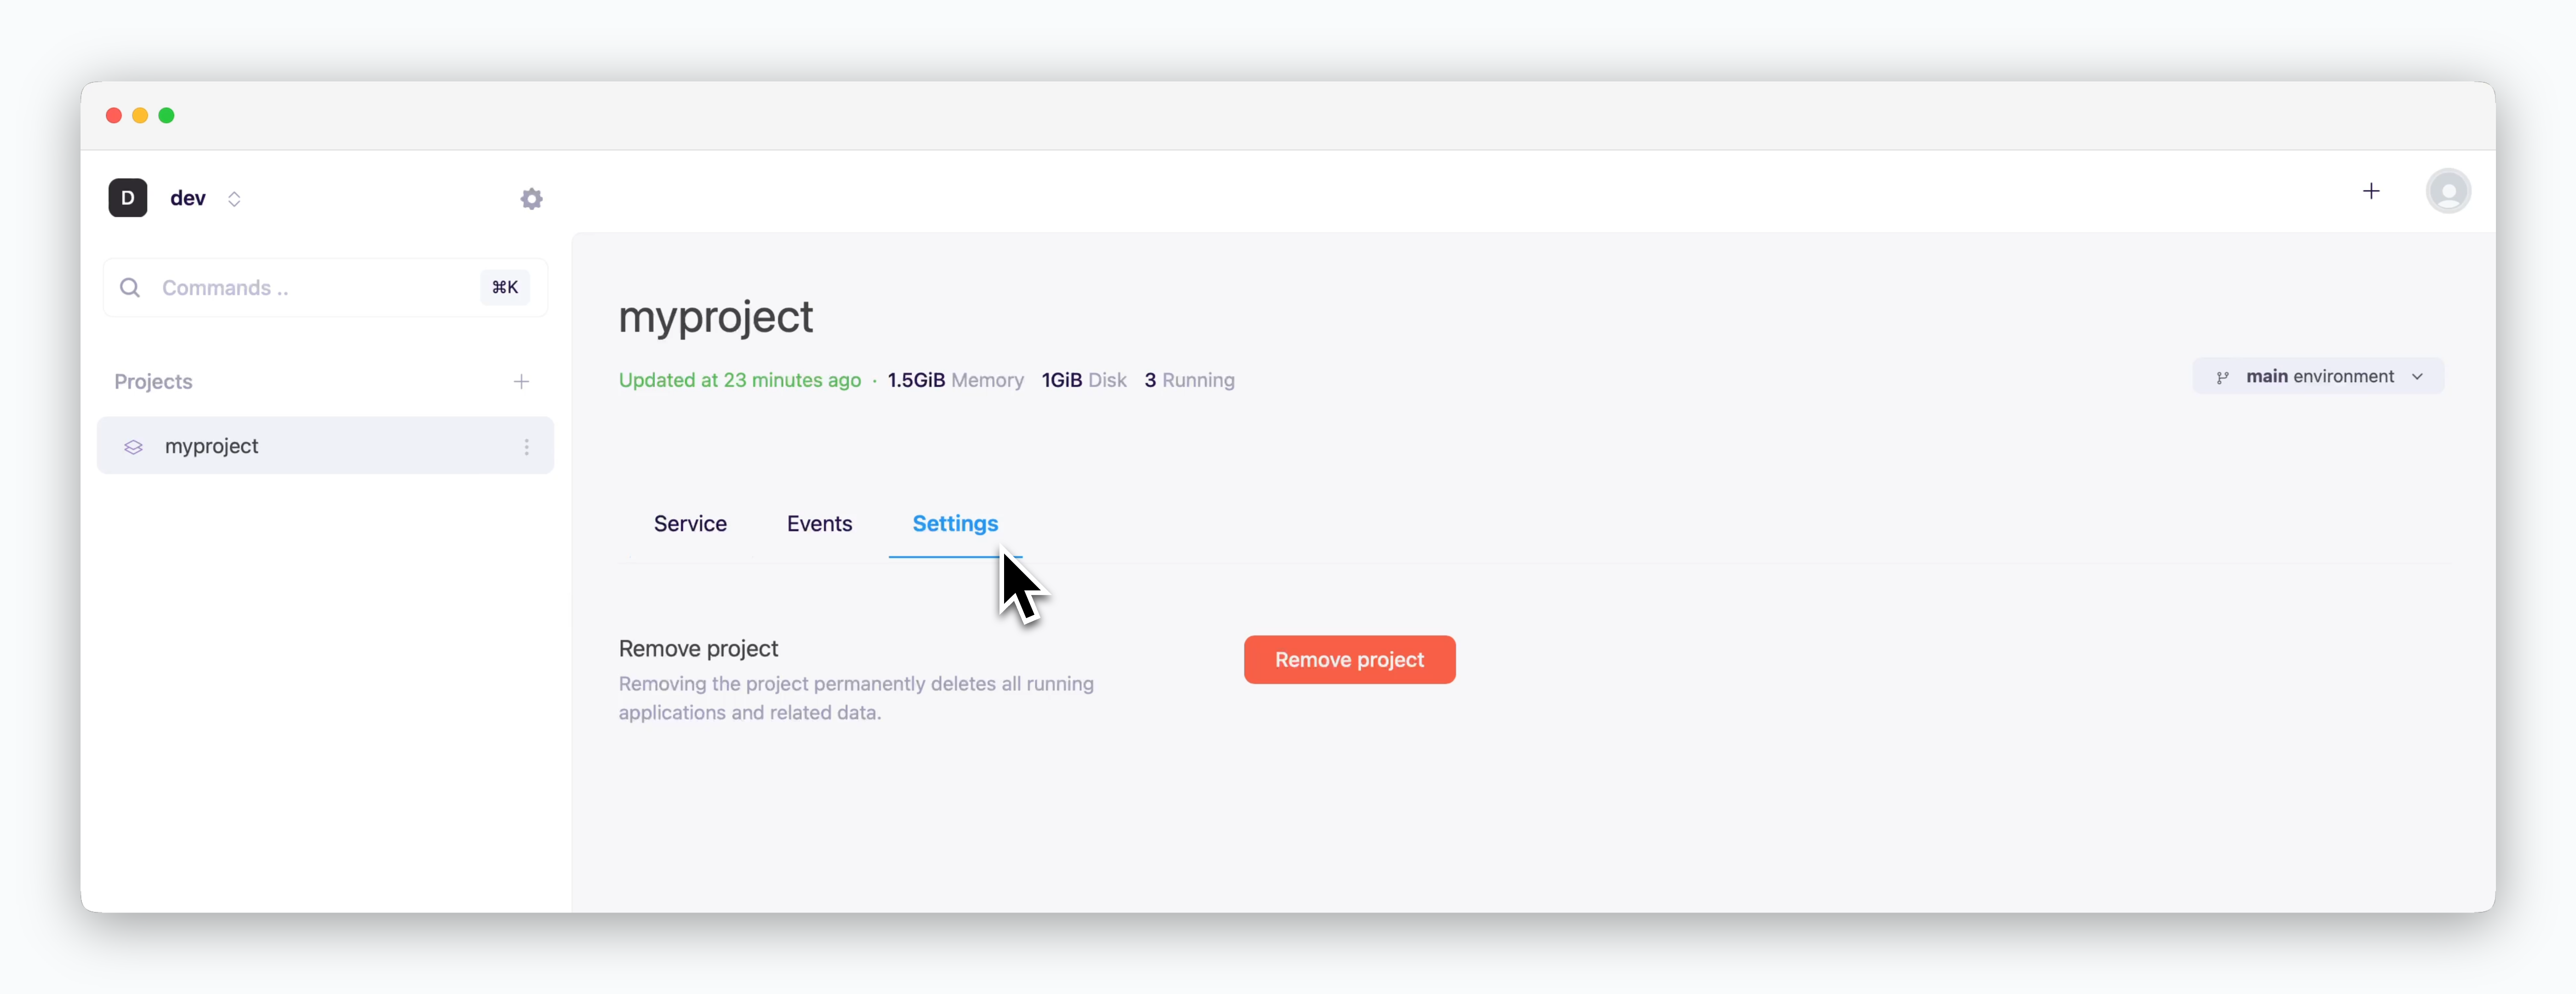
You can delete a project or environment by Delete a Project button at the bottom of the settings tab. All running applications and related data will be permanently deleted.
If a project has multiple environments, this menu will be displayed as Delete a Environment. Project deletion is possible when only one environment remains in the project.