By connecting a private container registry, you can deploy custom images using the Container template. This guide covers connecting to GitHub Container Registry, GCP Artifact Registry, and Docker Hub.
Connect Registry
GitHub Container Registry
GitHub Container Registry
Generate Personal Access Token
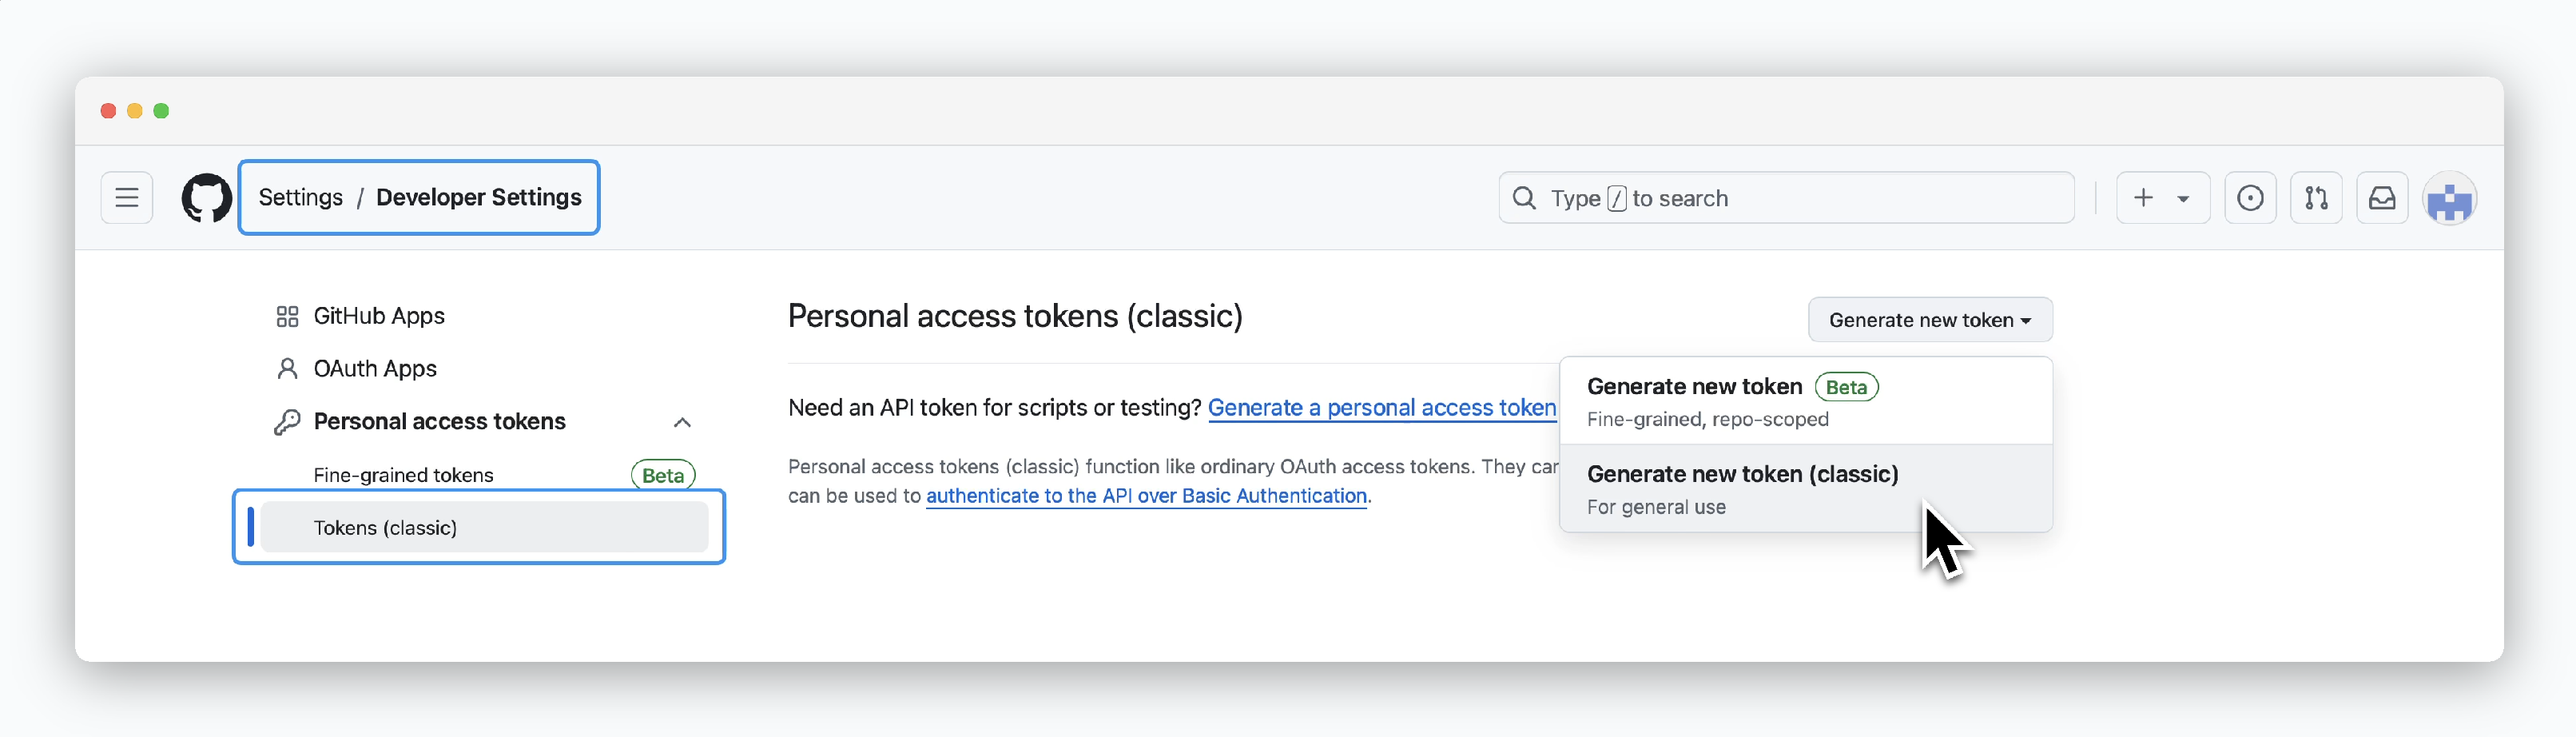
Go to your GitHub account Settings, then navigate to Developer settings > Personal access tokens (classic) page and click Generate new token > Generate new token(classic) to create a token.
Grant Permissions and Generate Token
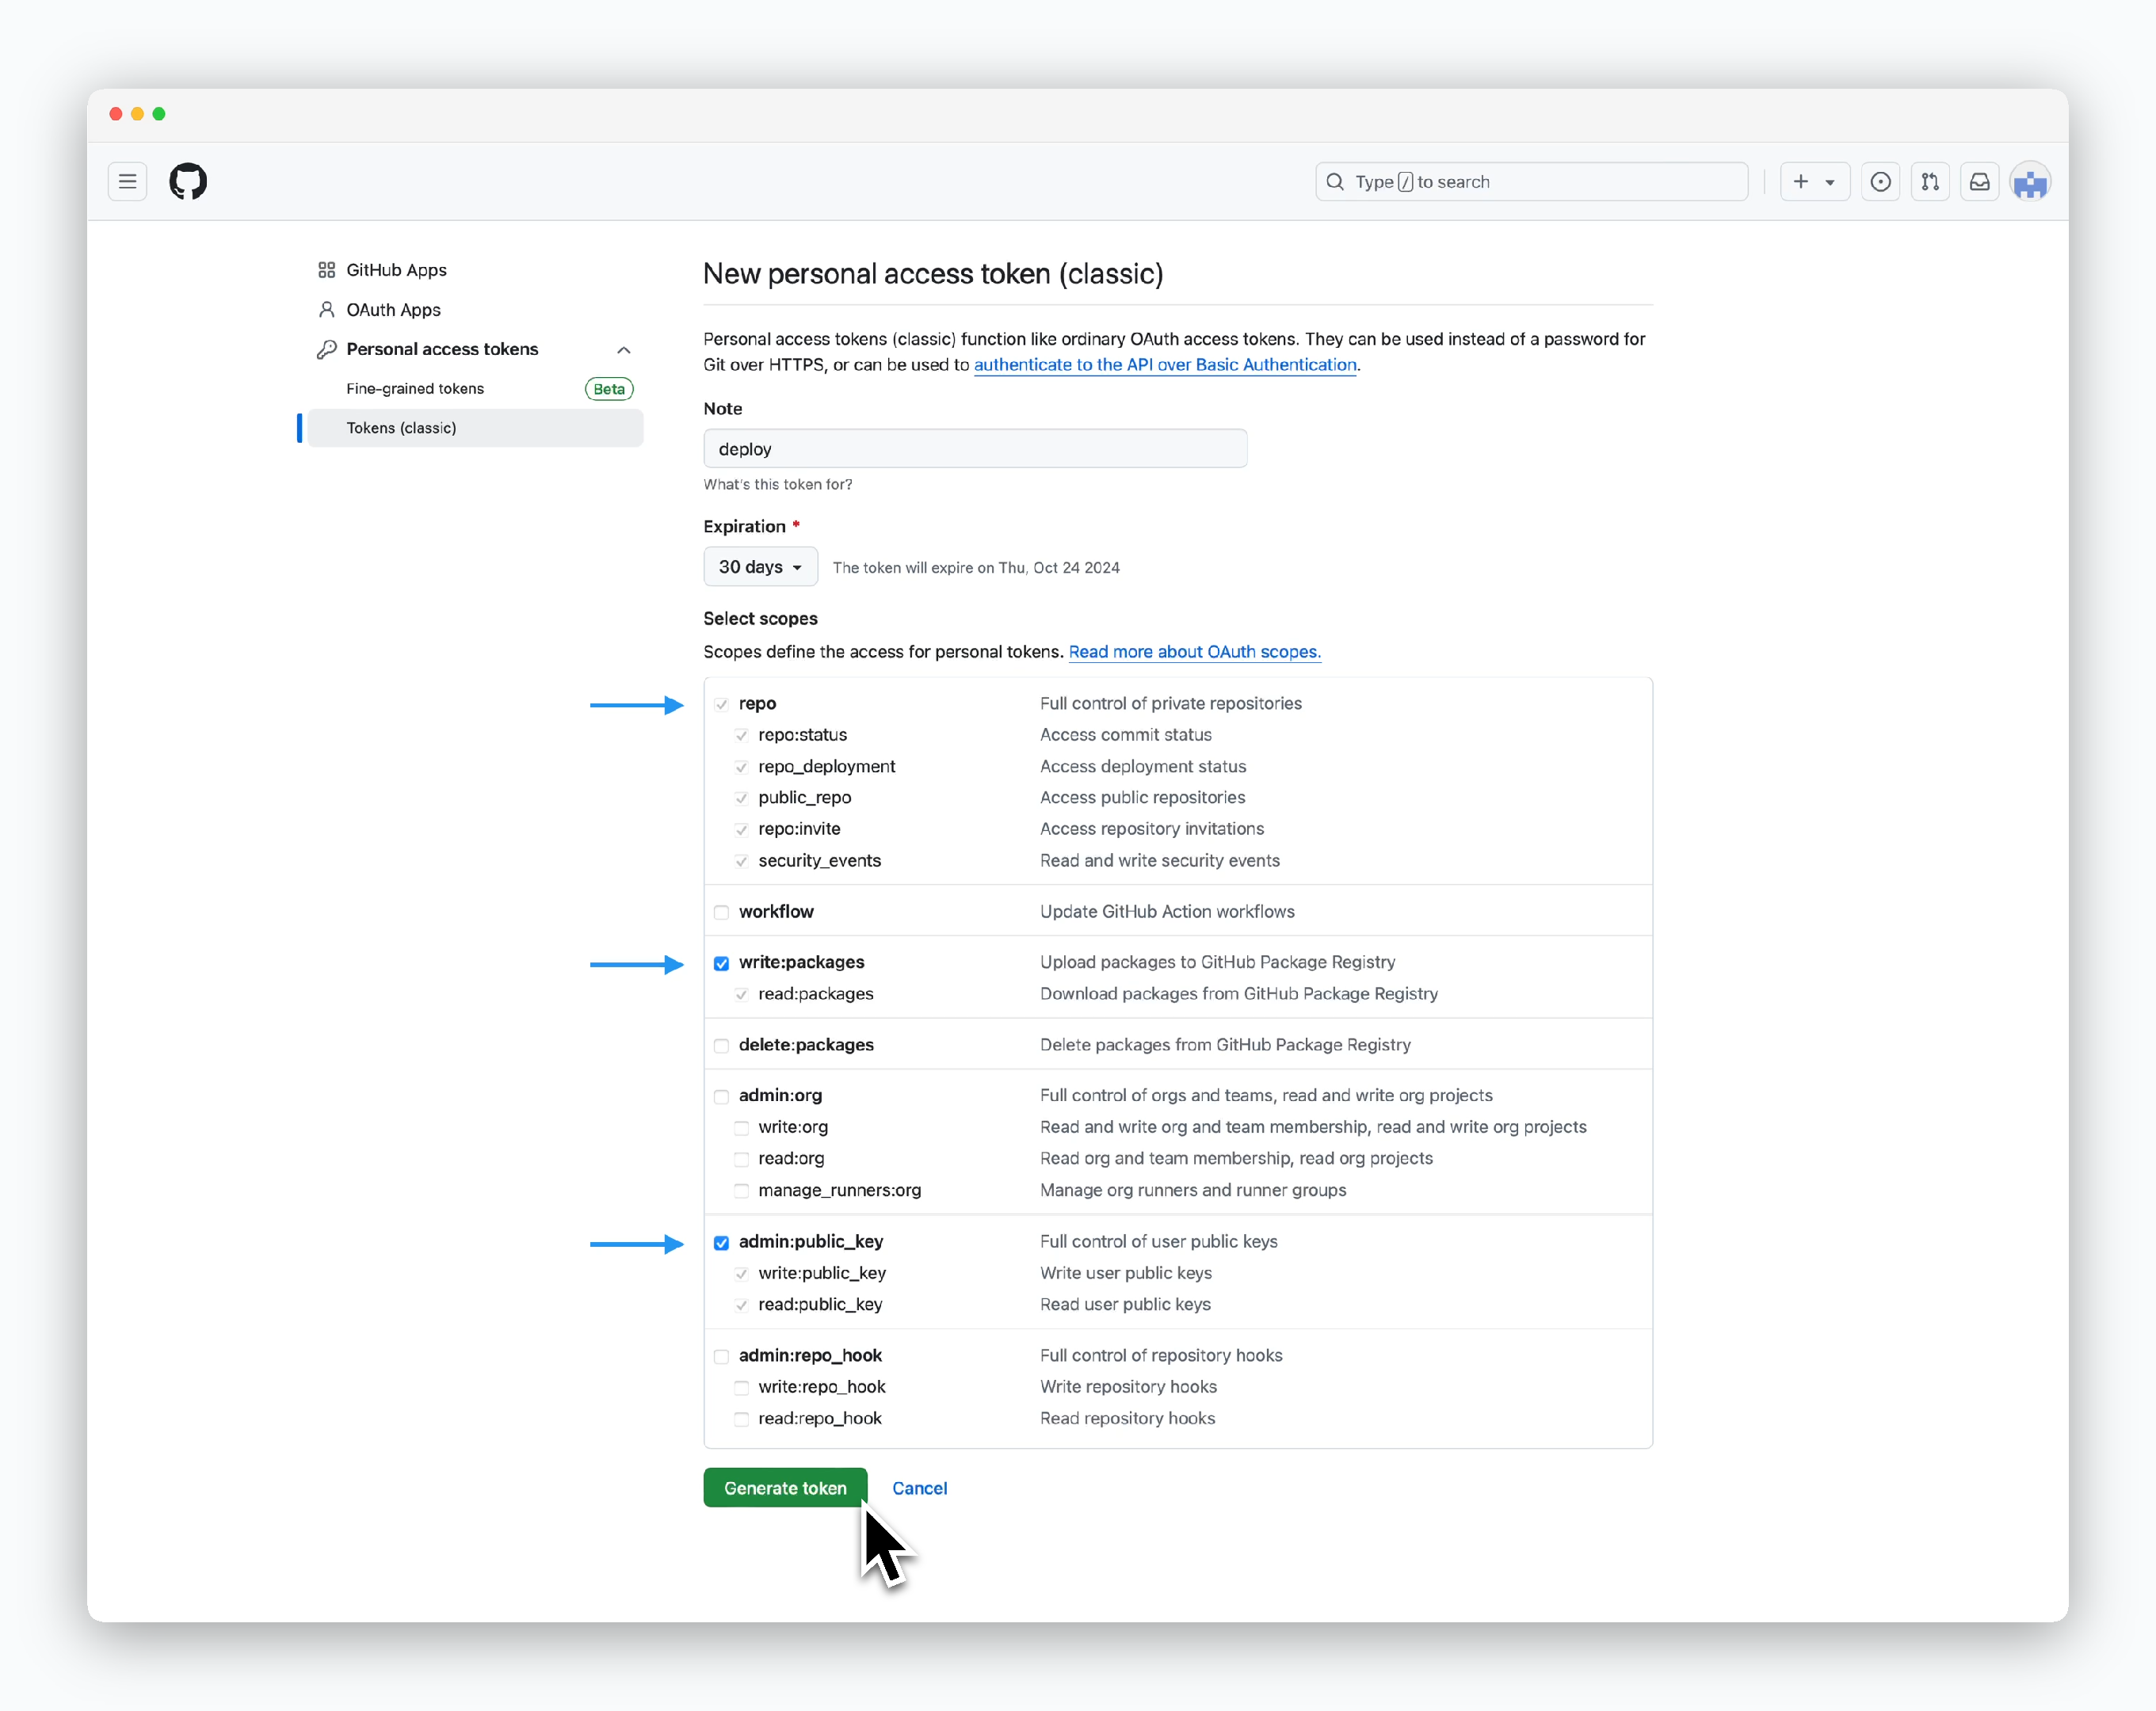
Grant the following permissions and click Generate token:
- repo
- write:packages
- admin:public_key
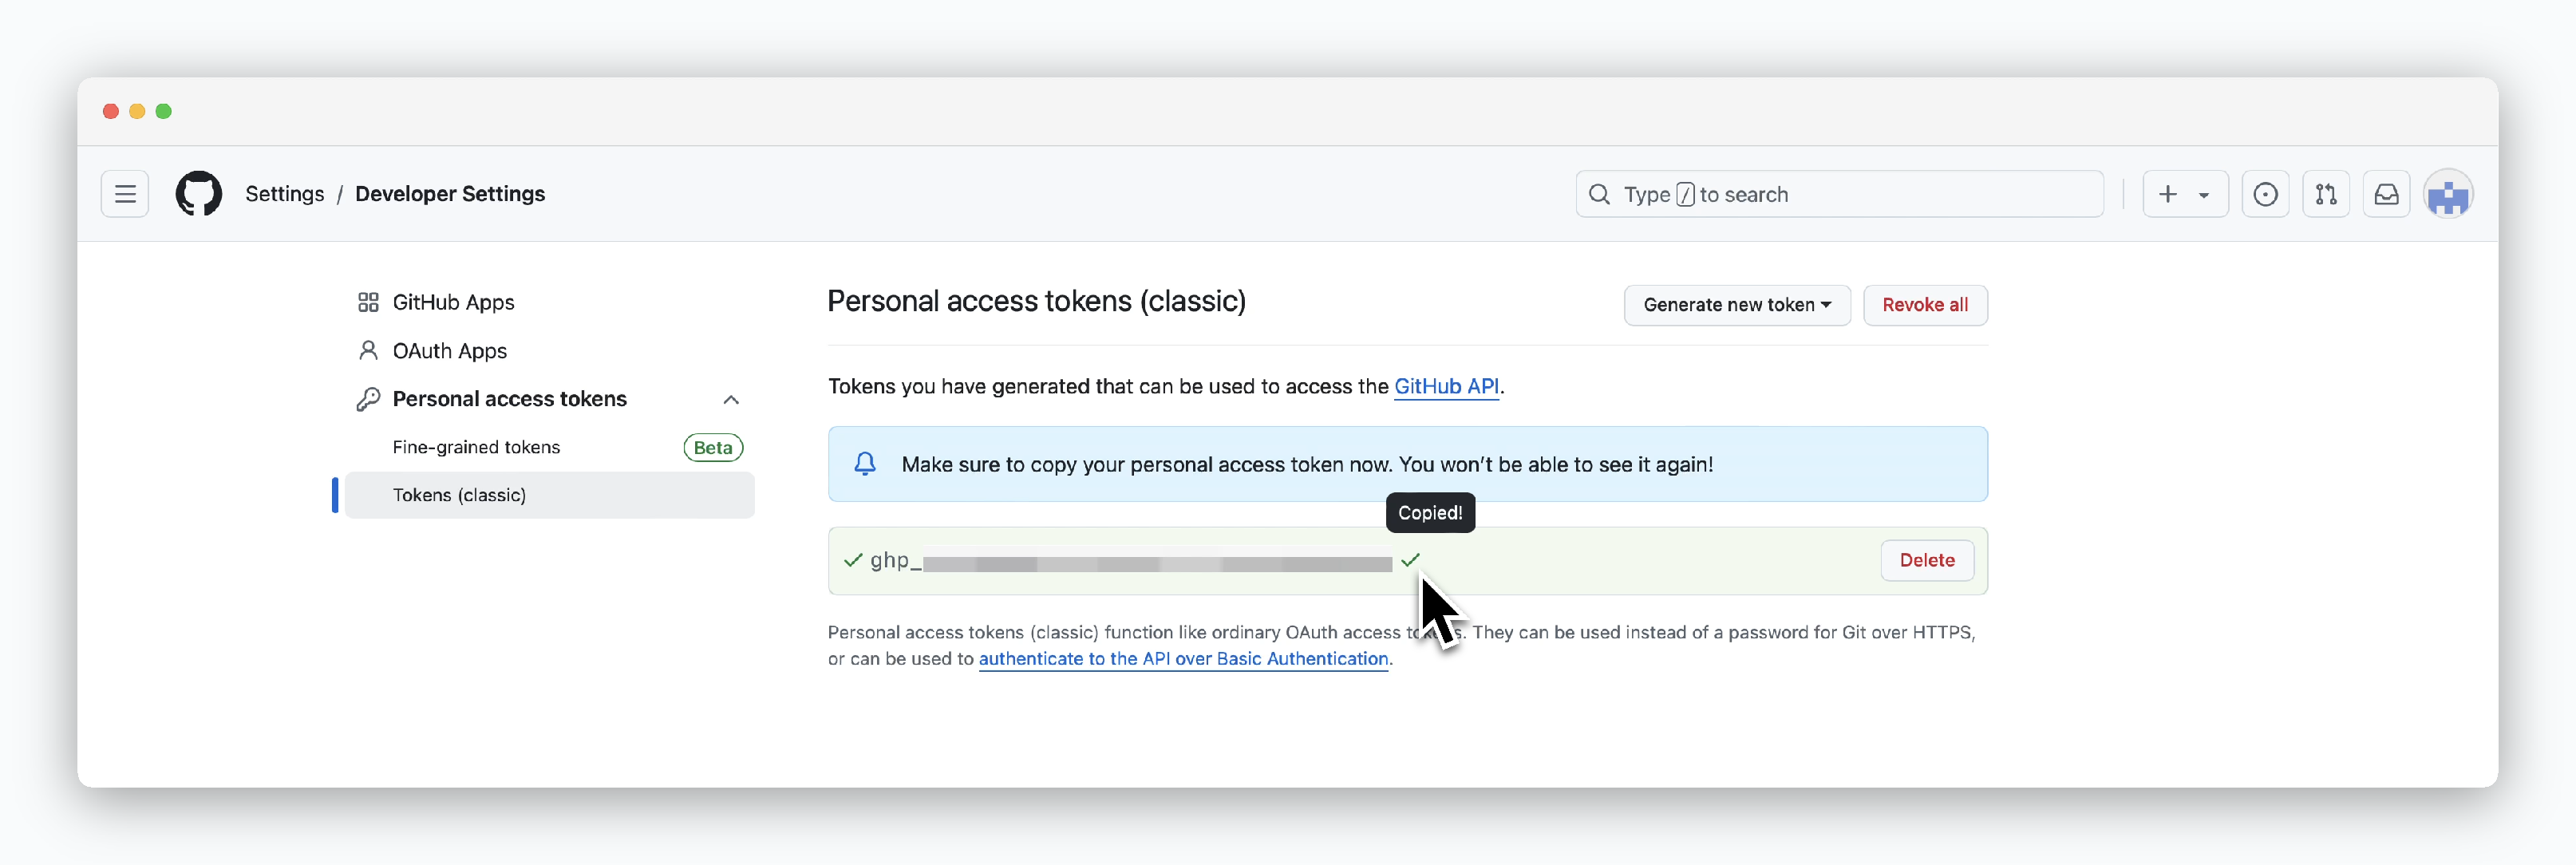
Once generated, the token will be displayed. Note that you can only view the token value once during creation.
Connect to ale

In the space settings’ add-on page, clickConnect Container Registry. In the Container Registry Settings modal, enter the following values and clickConnectto establish connection with GitHub Container Registry:
- Registry Provider: GitHub Container Registry
- GitHub ID: Your GitHub ID
- Personal Access Token(PAT): Personal Access Token generated from GitHub
GCP Artifact Registry
GCP Artifact Registry
Create a GCP Artifact Registry
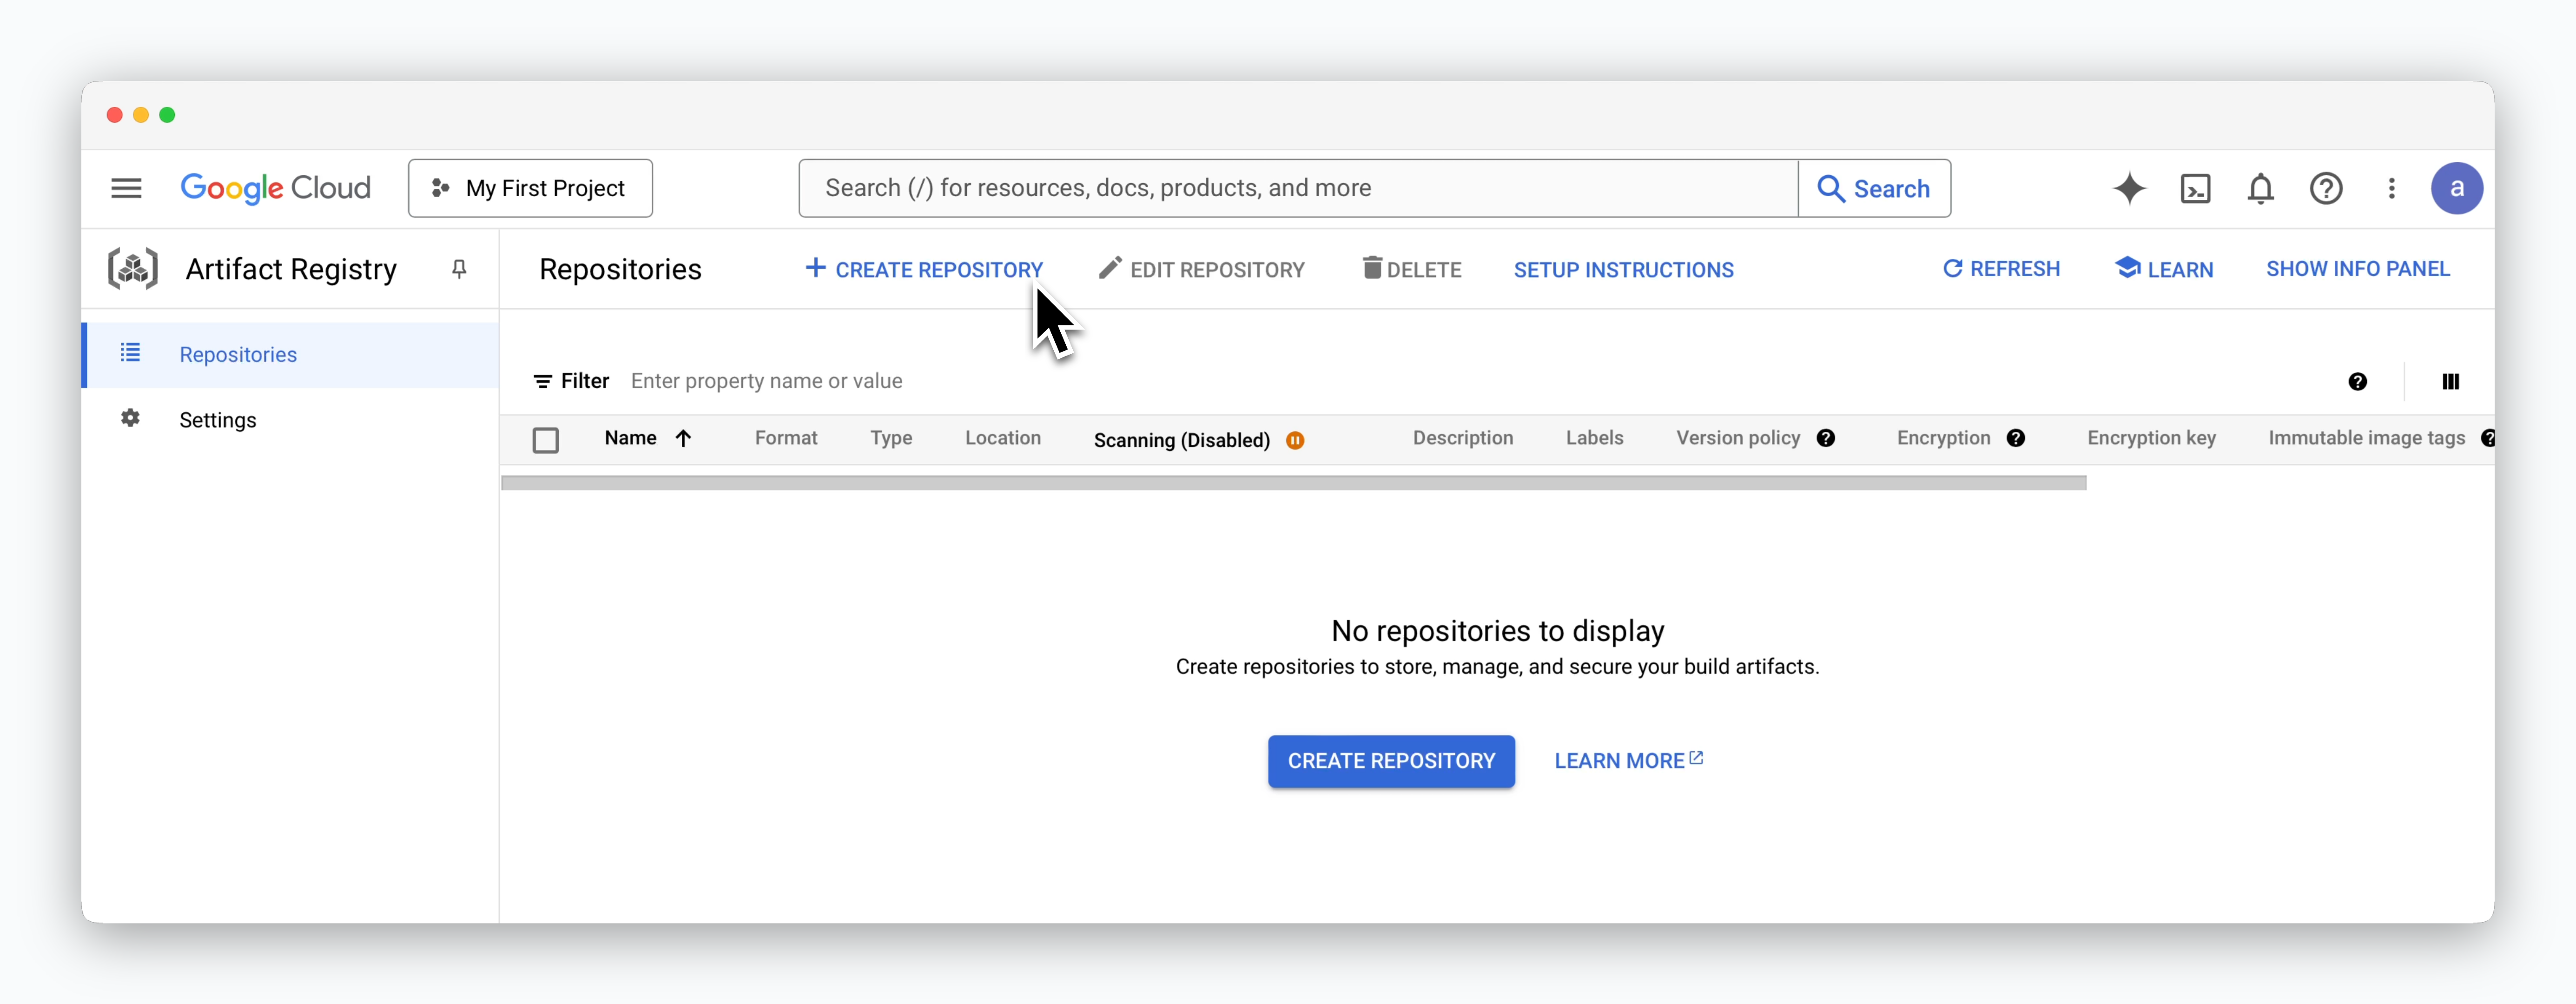
Access the Artifact Registry service in the Google Cloud Console and click CREATE REPOSITORY.

Enter a name for the repository and fill in the following values, then click CREATE to create the repository.
Use the default values except for the Region.
- Format : Docker
- Mode : Standard
- Location type : Region
- Region : Select a region that suits your needs
- Encryption : Google-managed encryption key
Retrieve the Repository Access URL
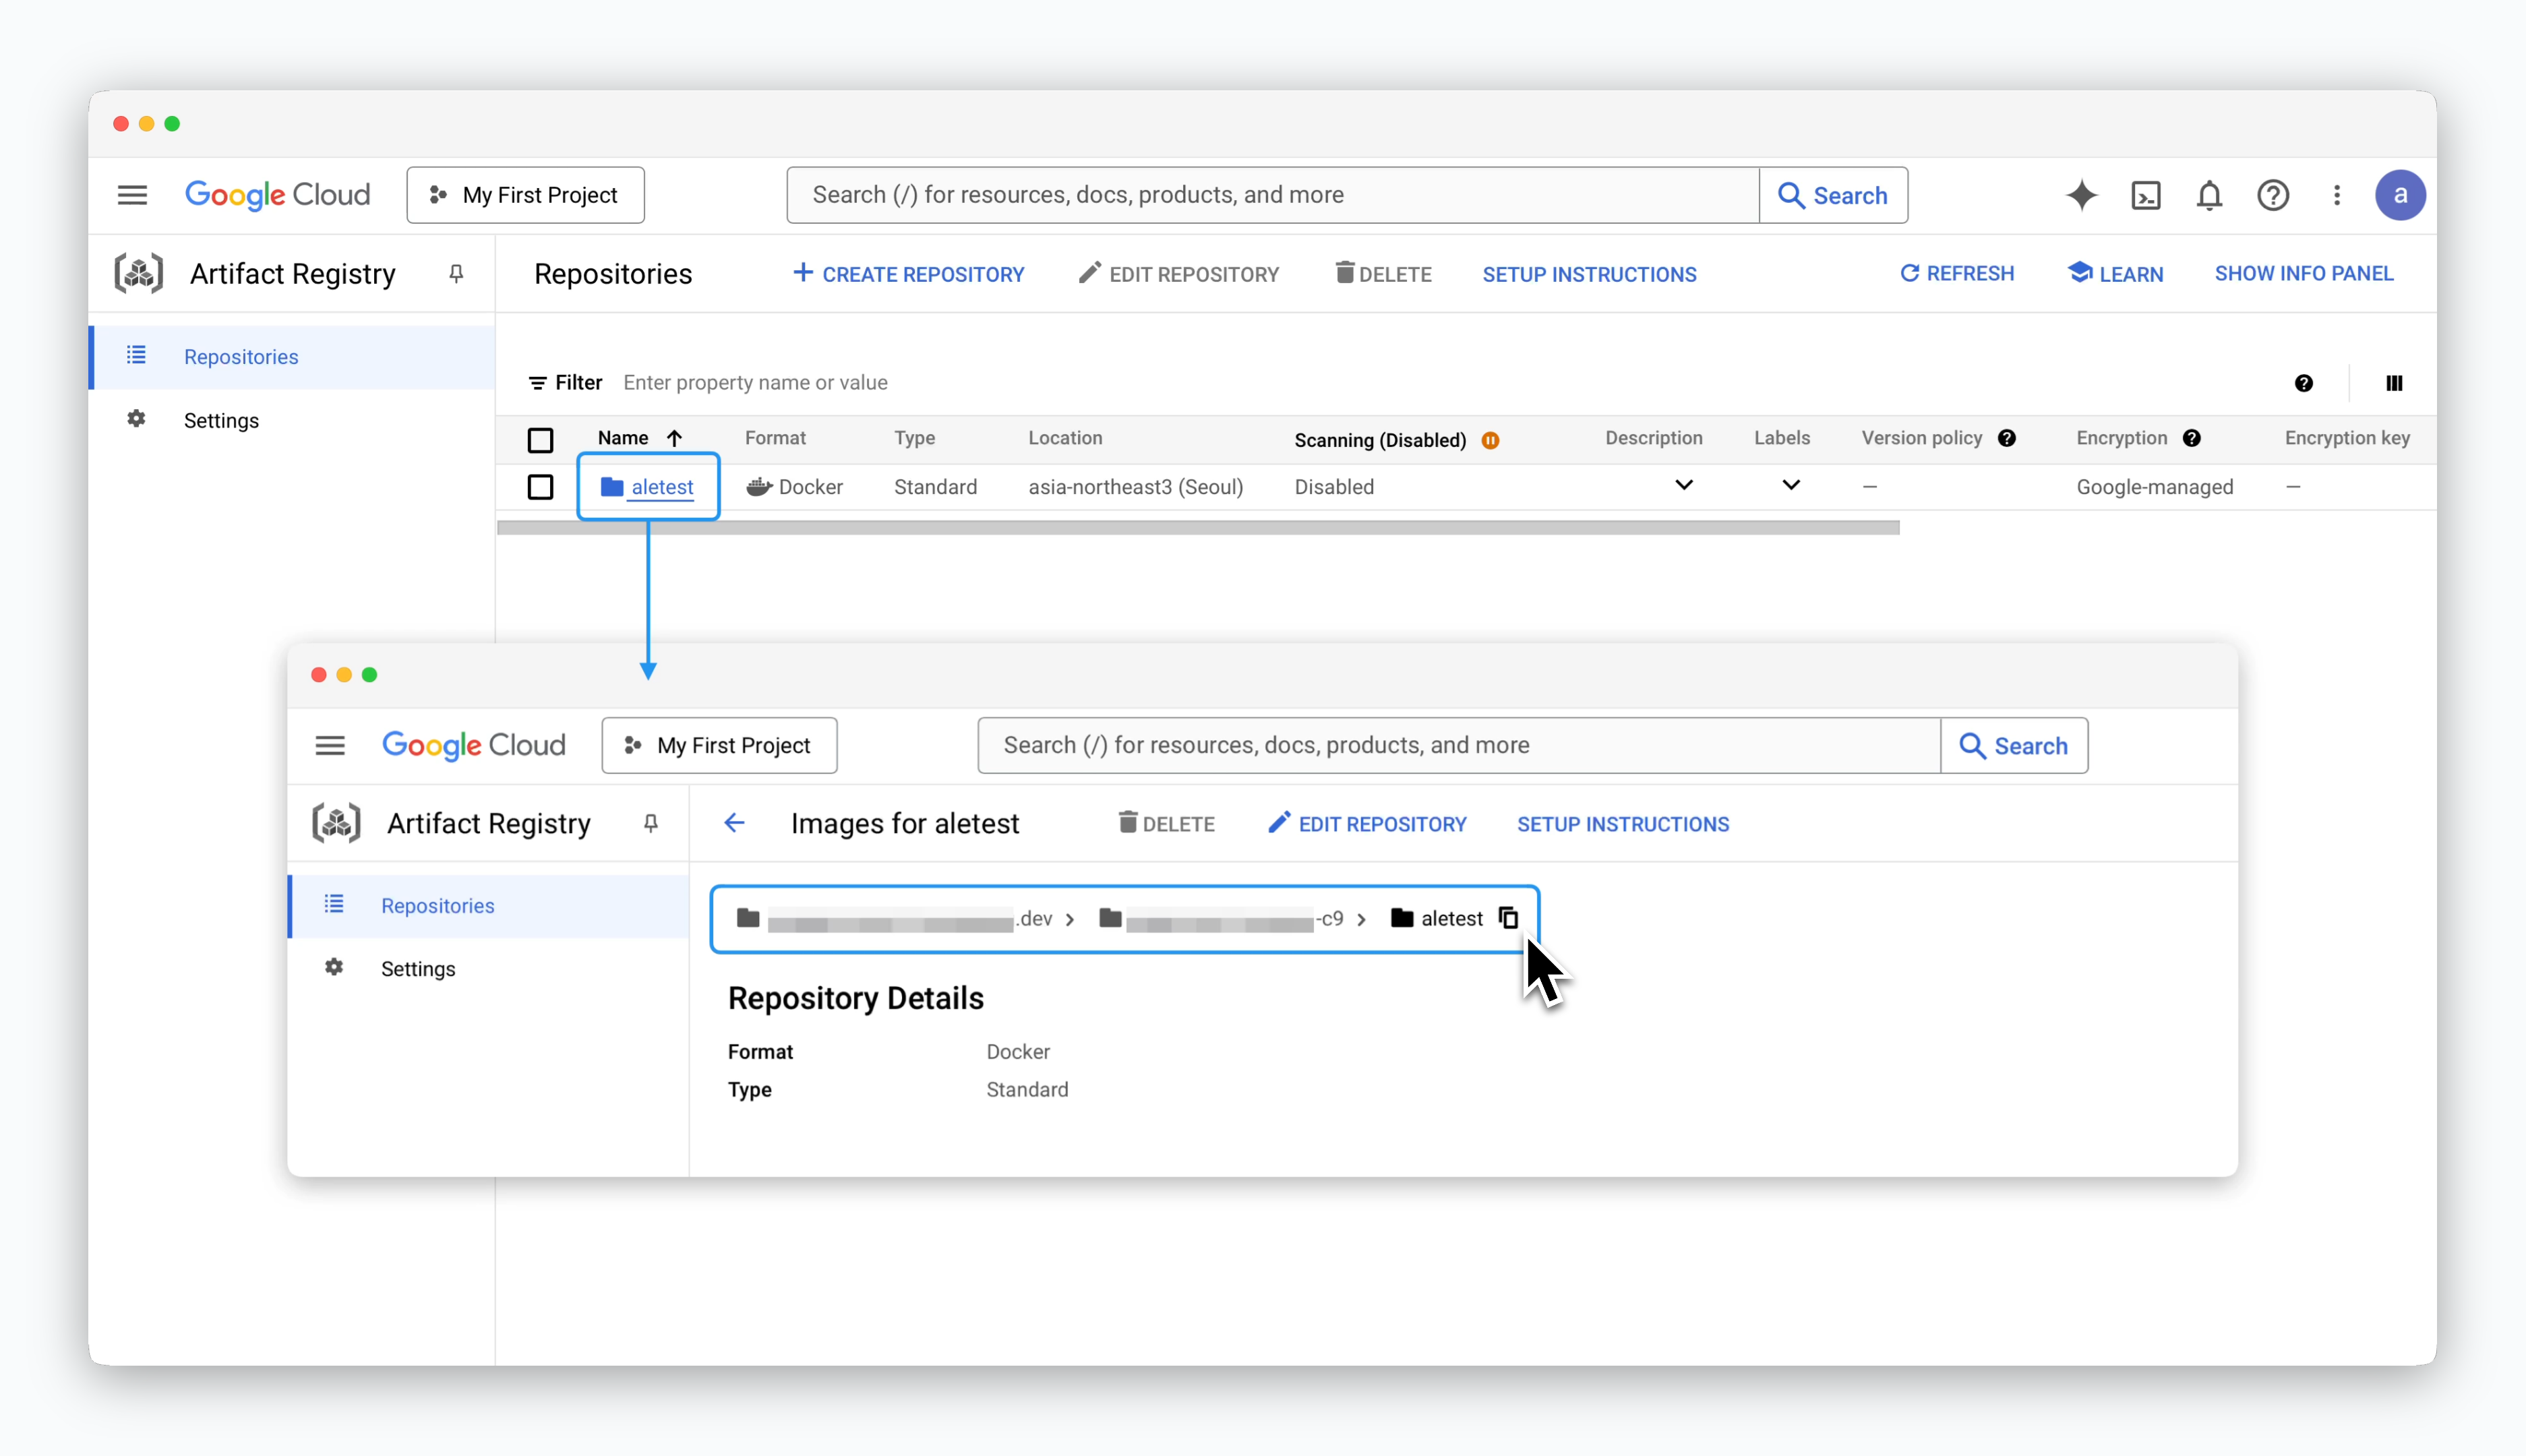
Click on the created repository to retrieve the access URL in the format [region]-docker.pkg.dev/[GCP Project ID]/[Repository Name].
This access URL will be used to connect the repository to
ale.Service Account and Permissions
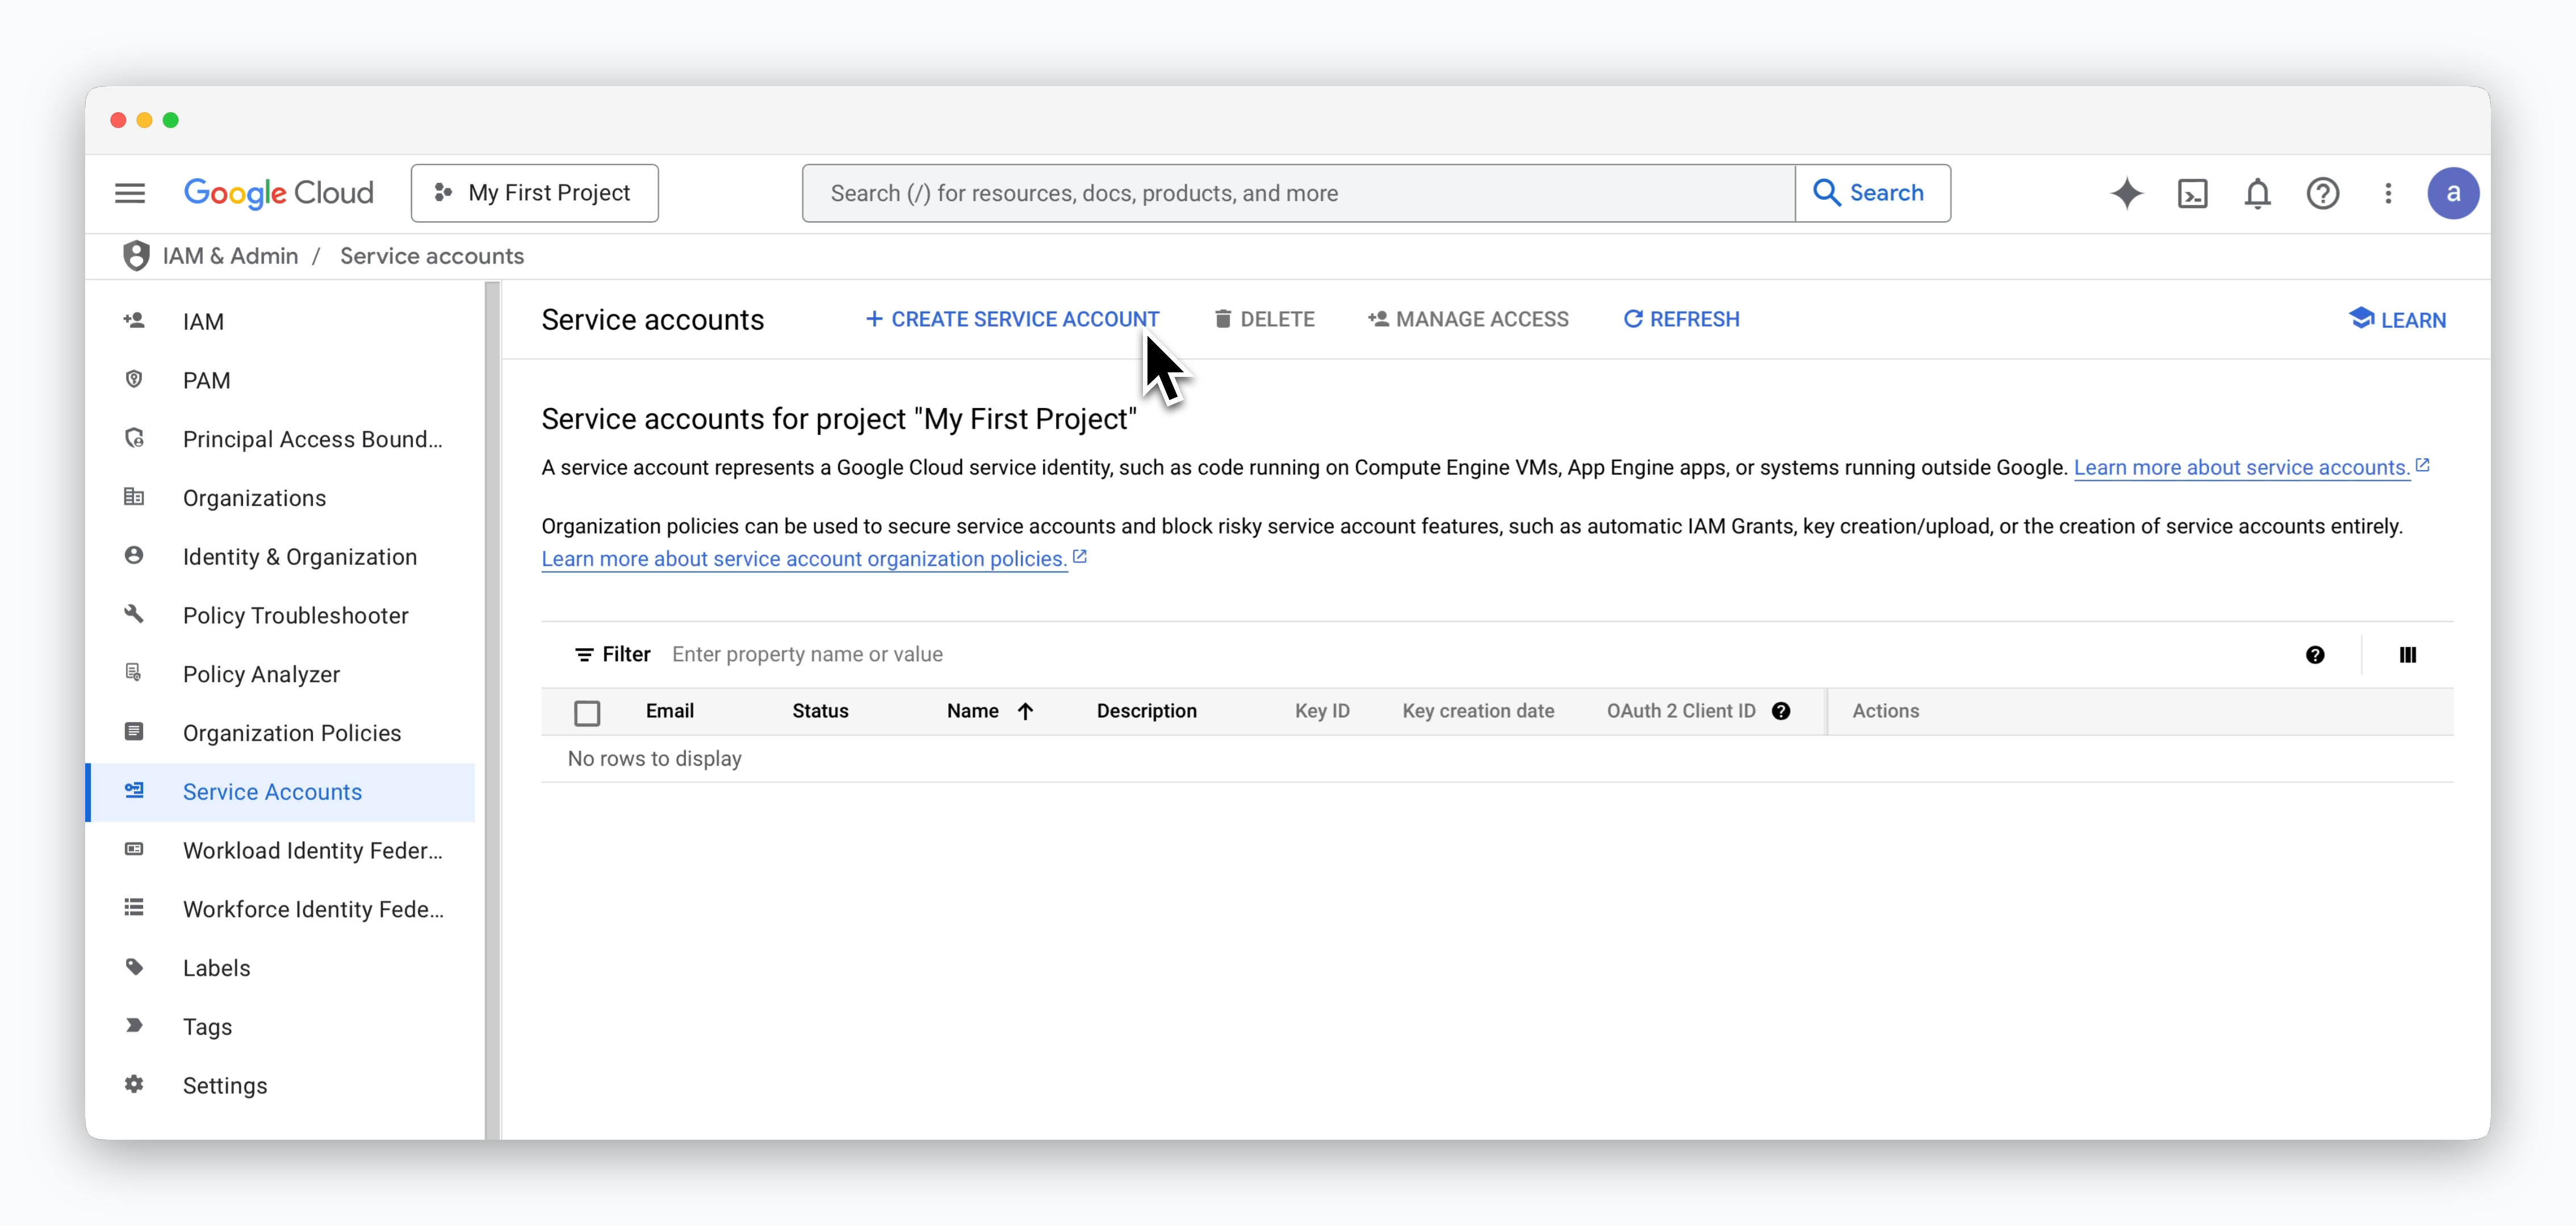
Go to the IAM & Admin > Service Accounts page and click CREATE SERVICE ACCOUNT.
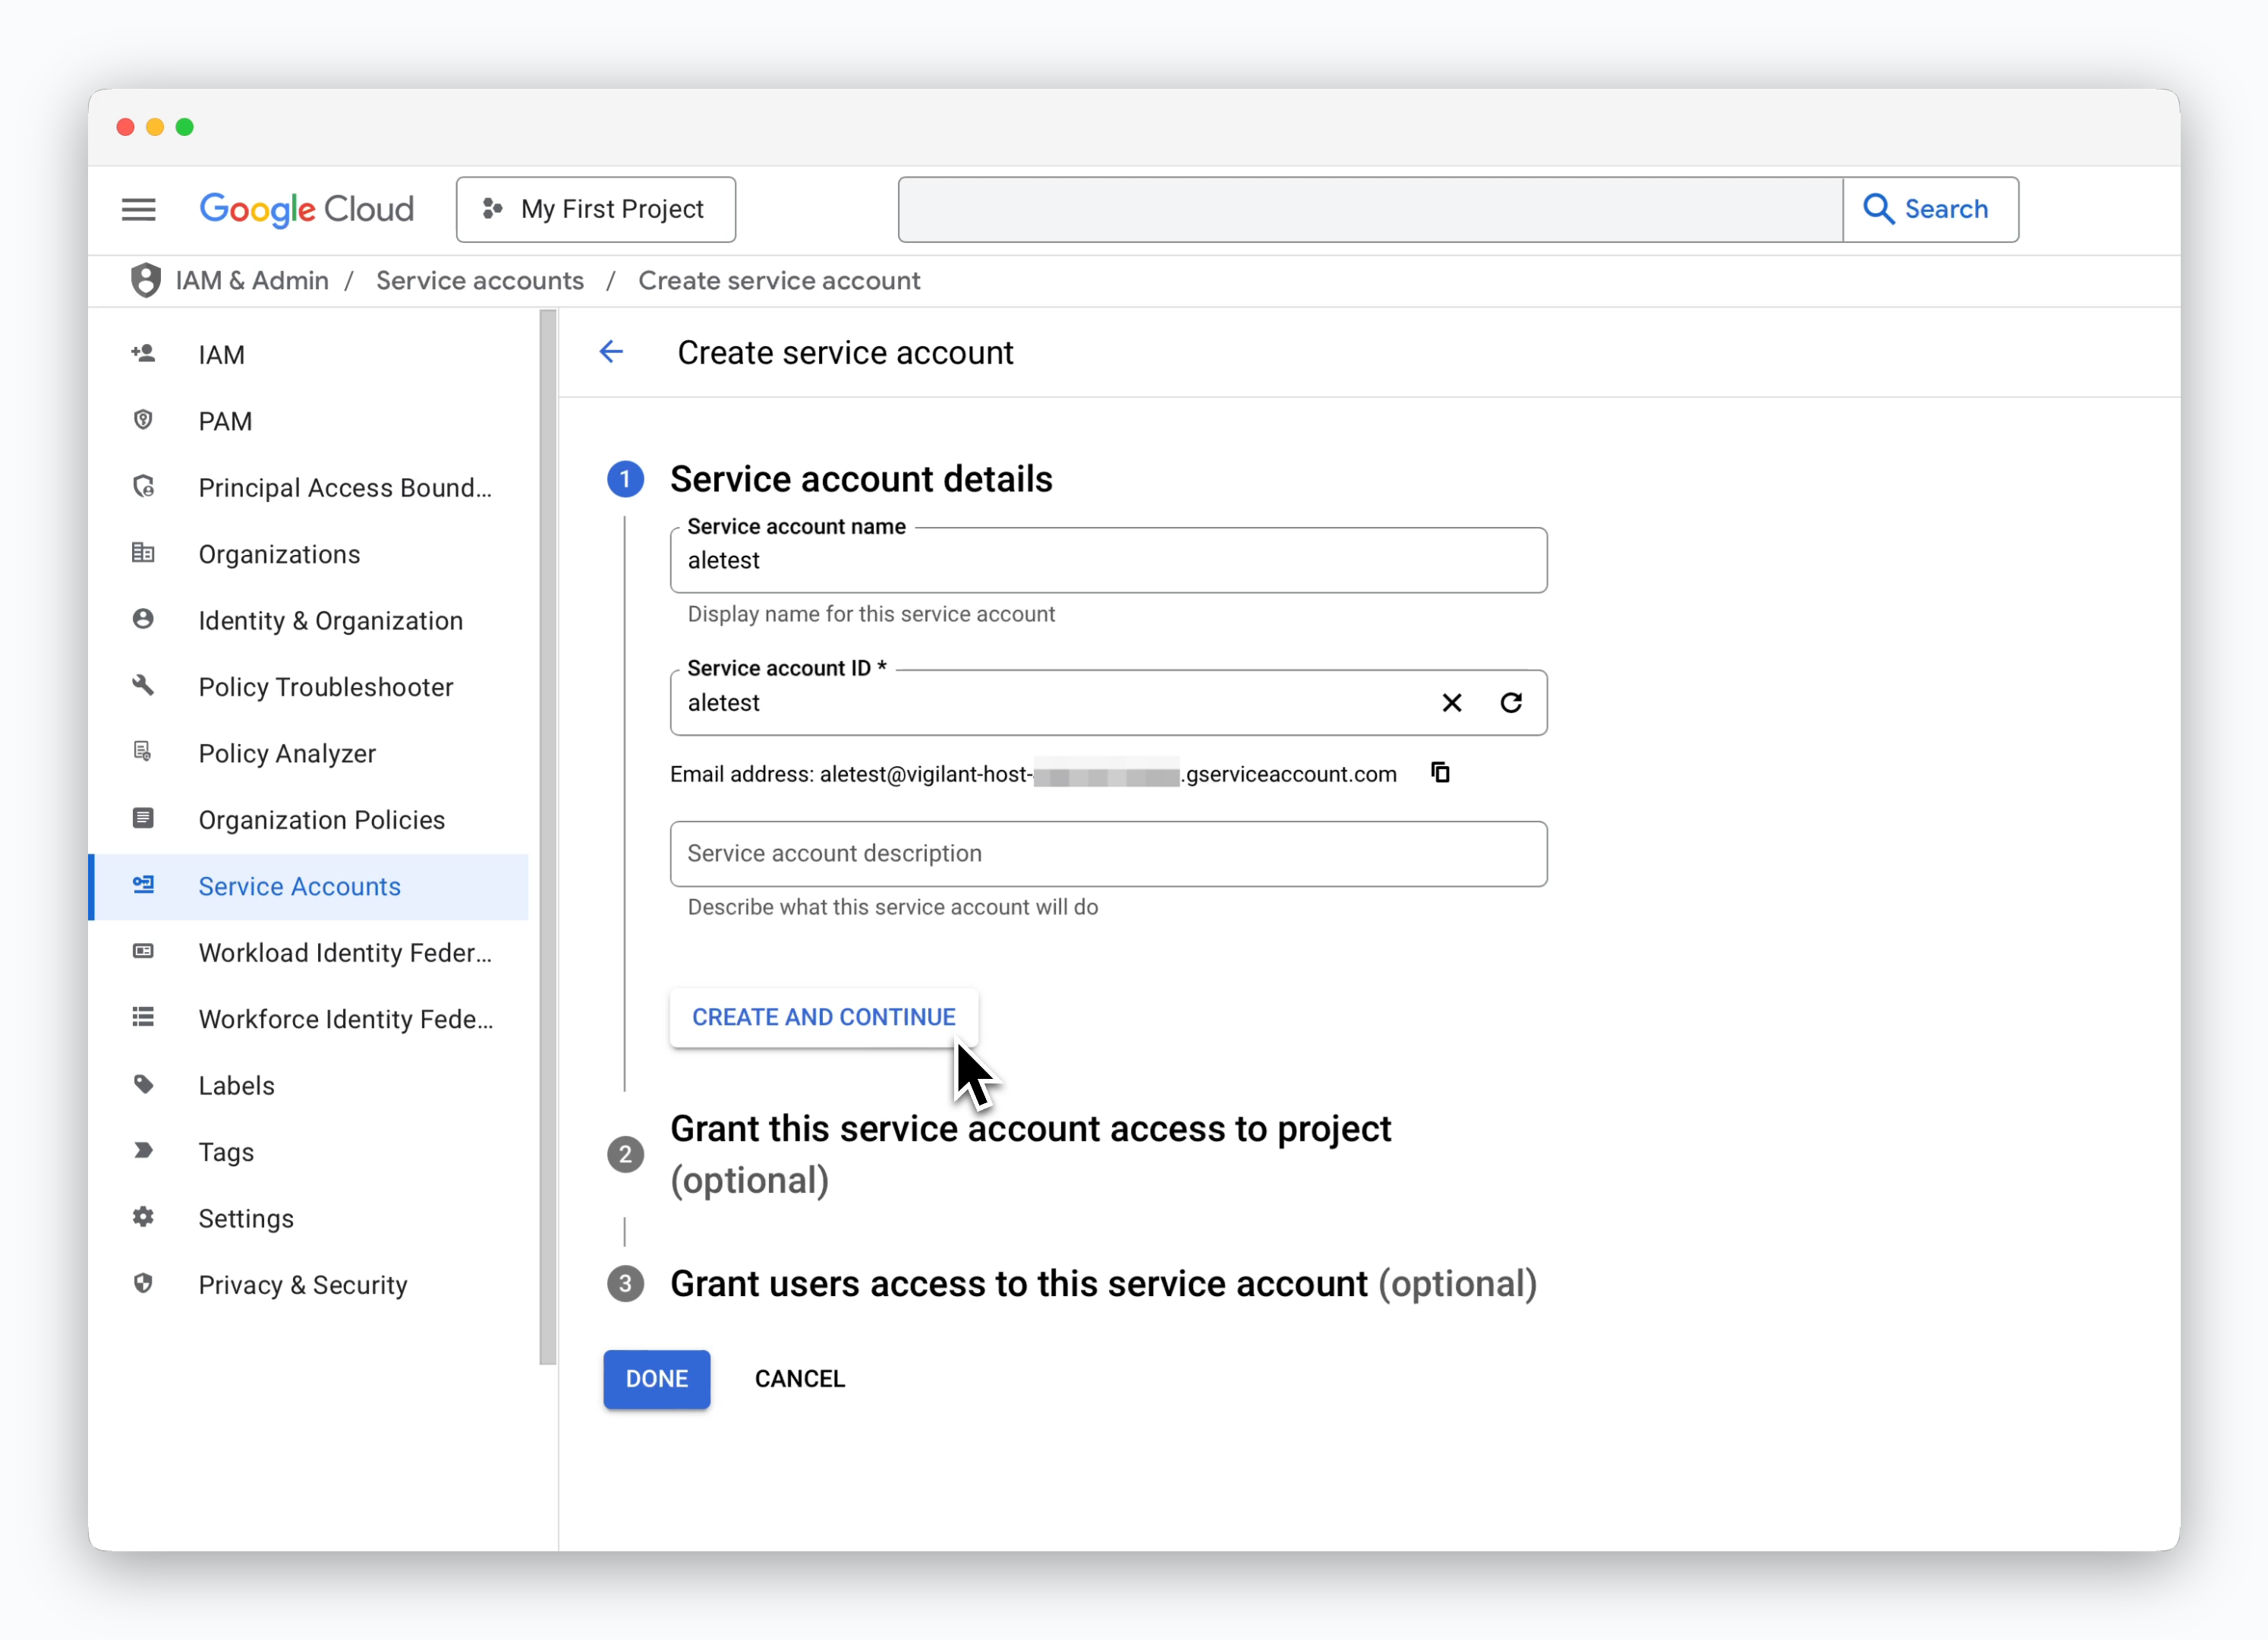
Enter a recognizable Service Account Name and click CREATE AND CONTINUE.
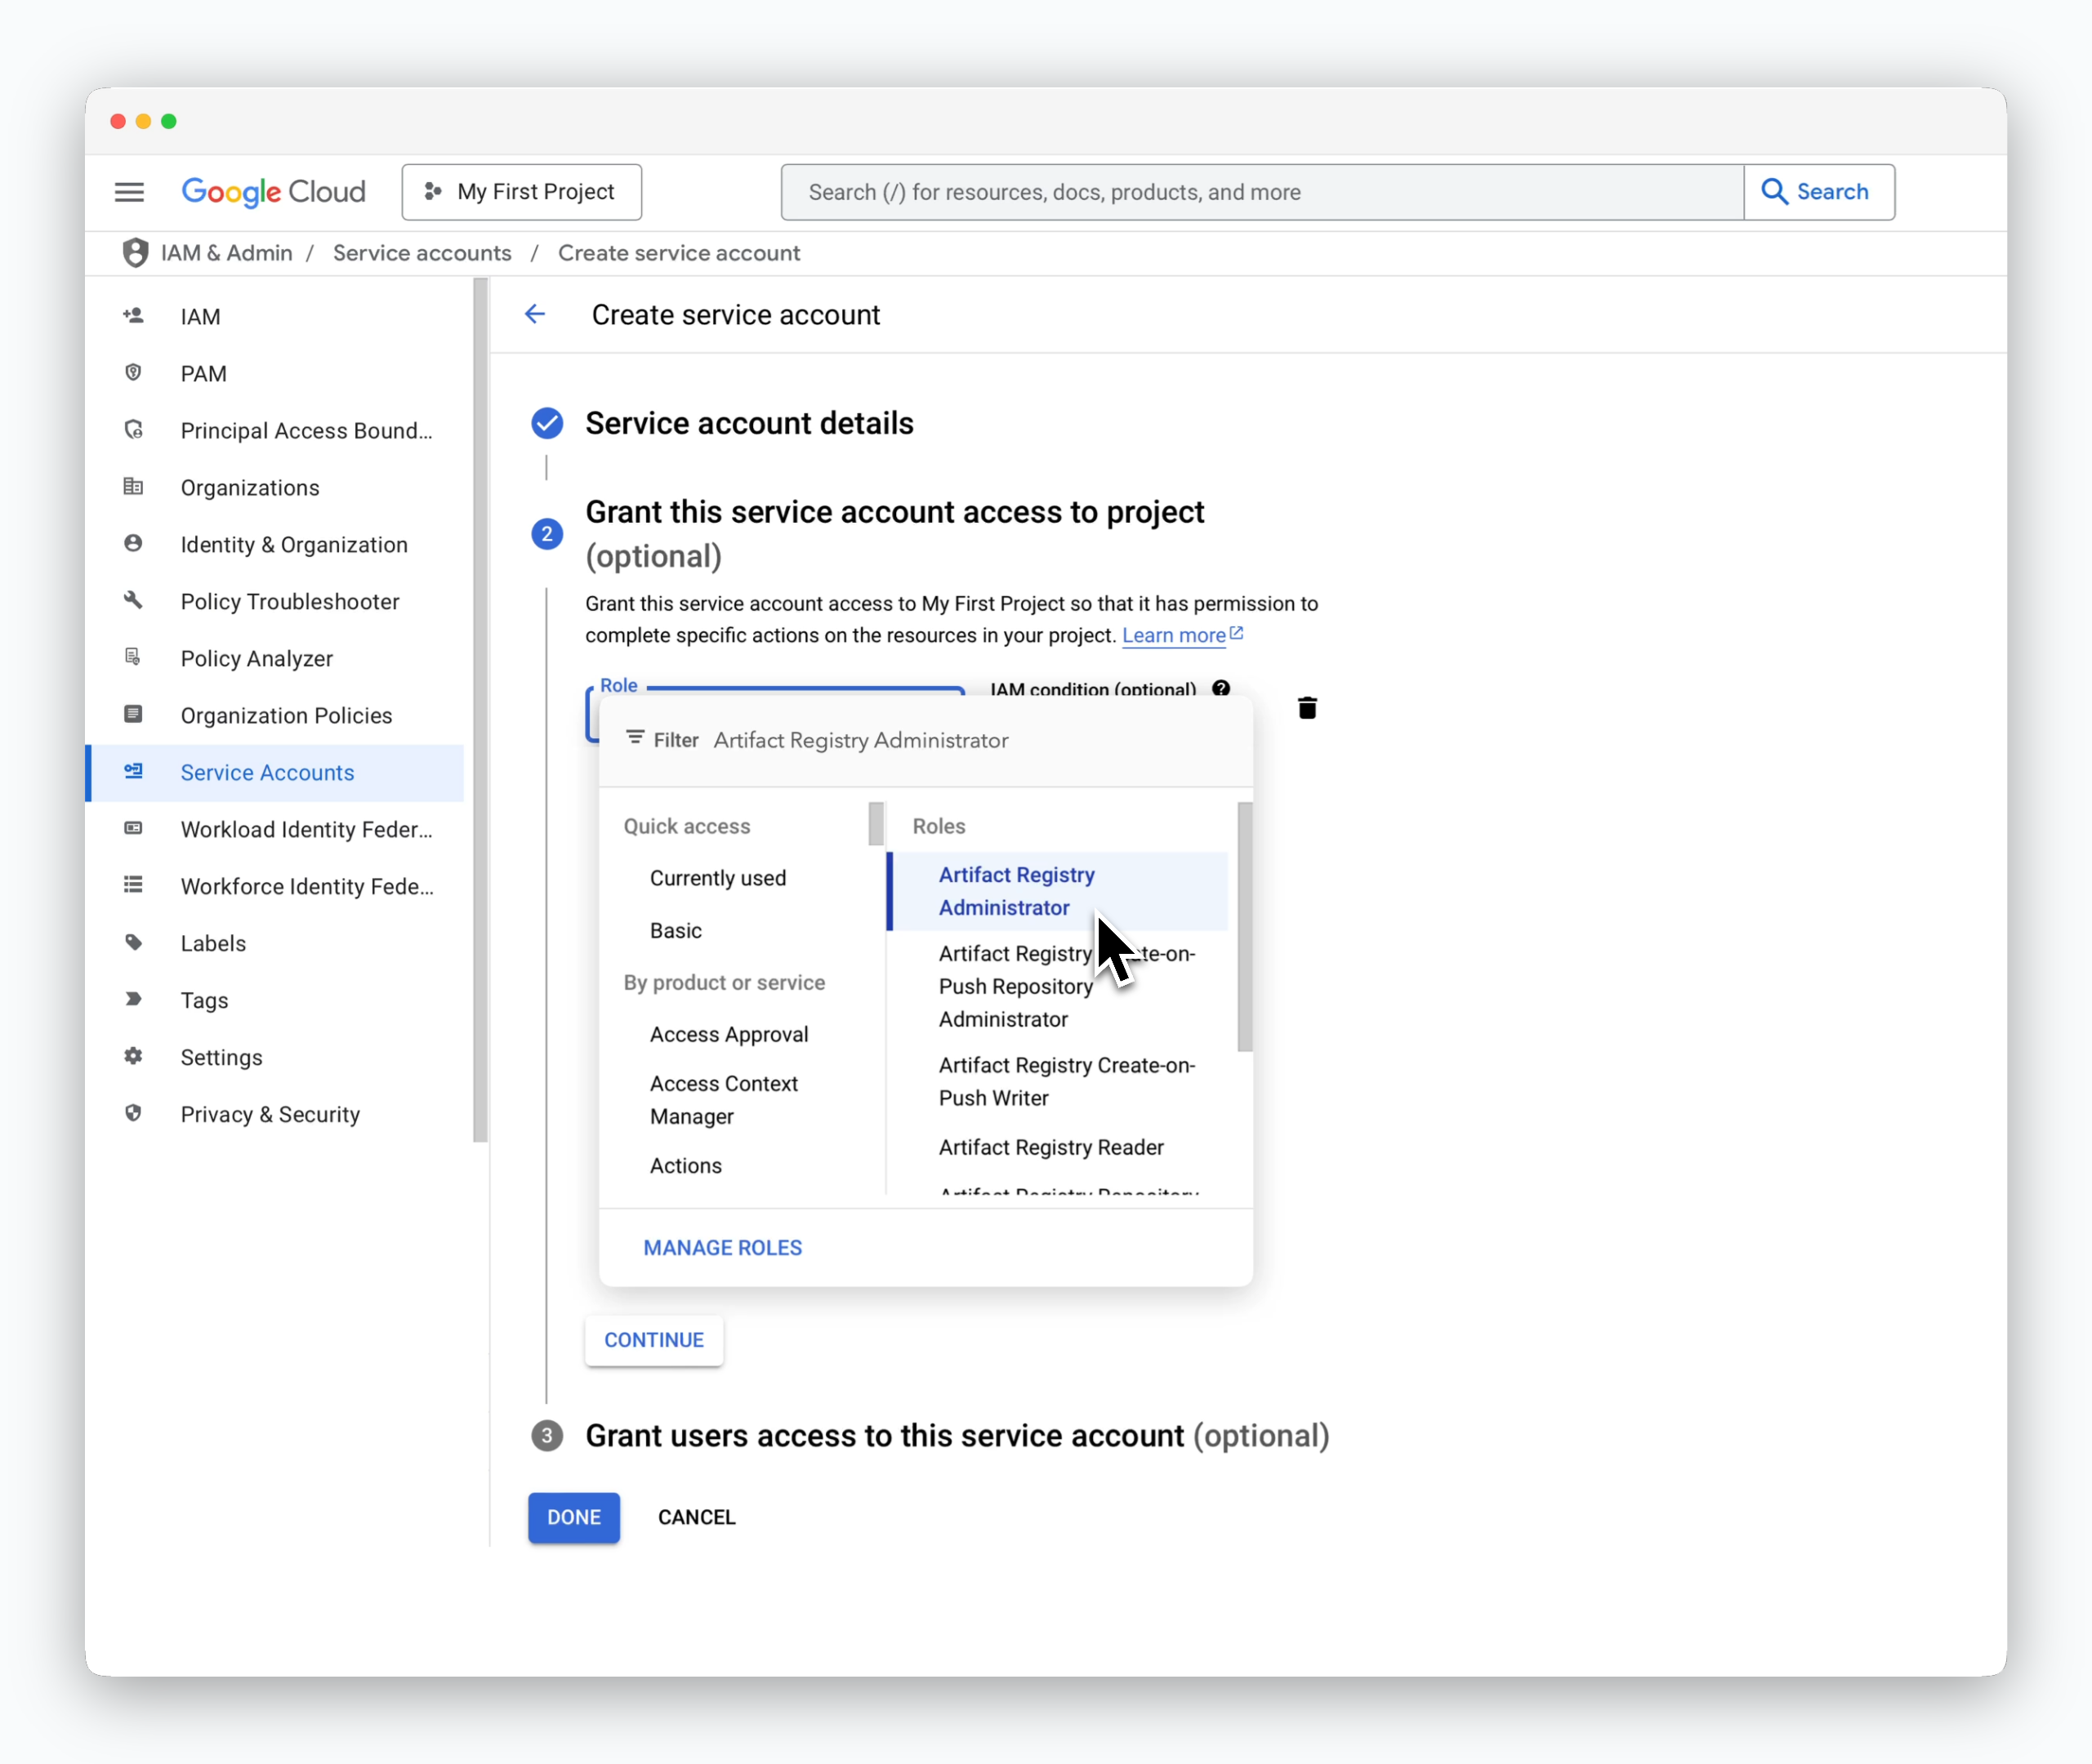
In the role selector, choose Artifact Registry Administrator and click DONE to create the service account.
Create a JSON Key
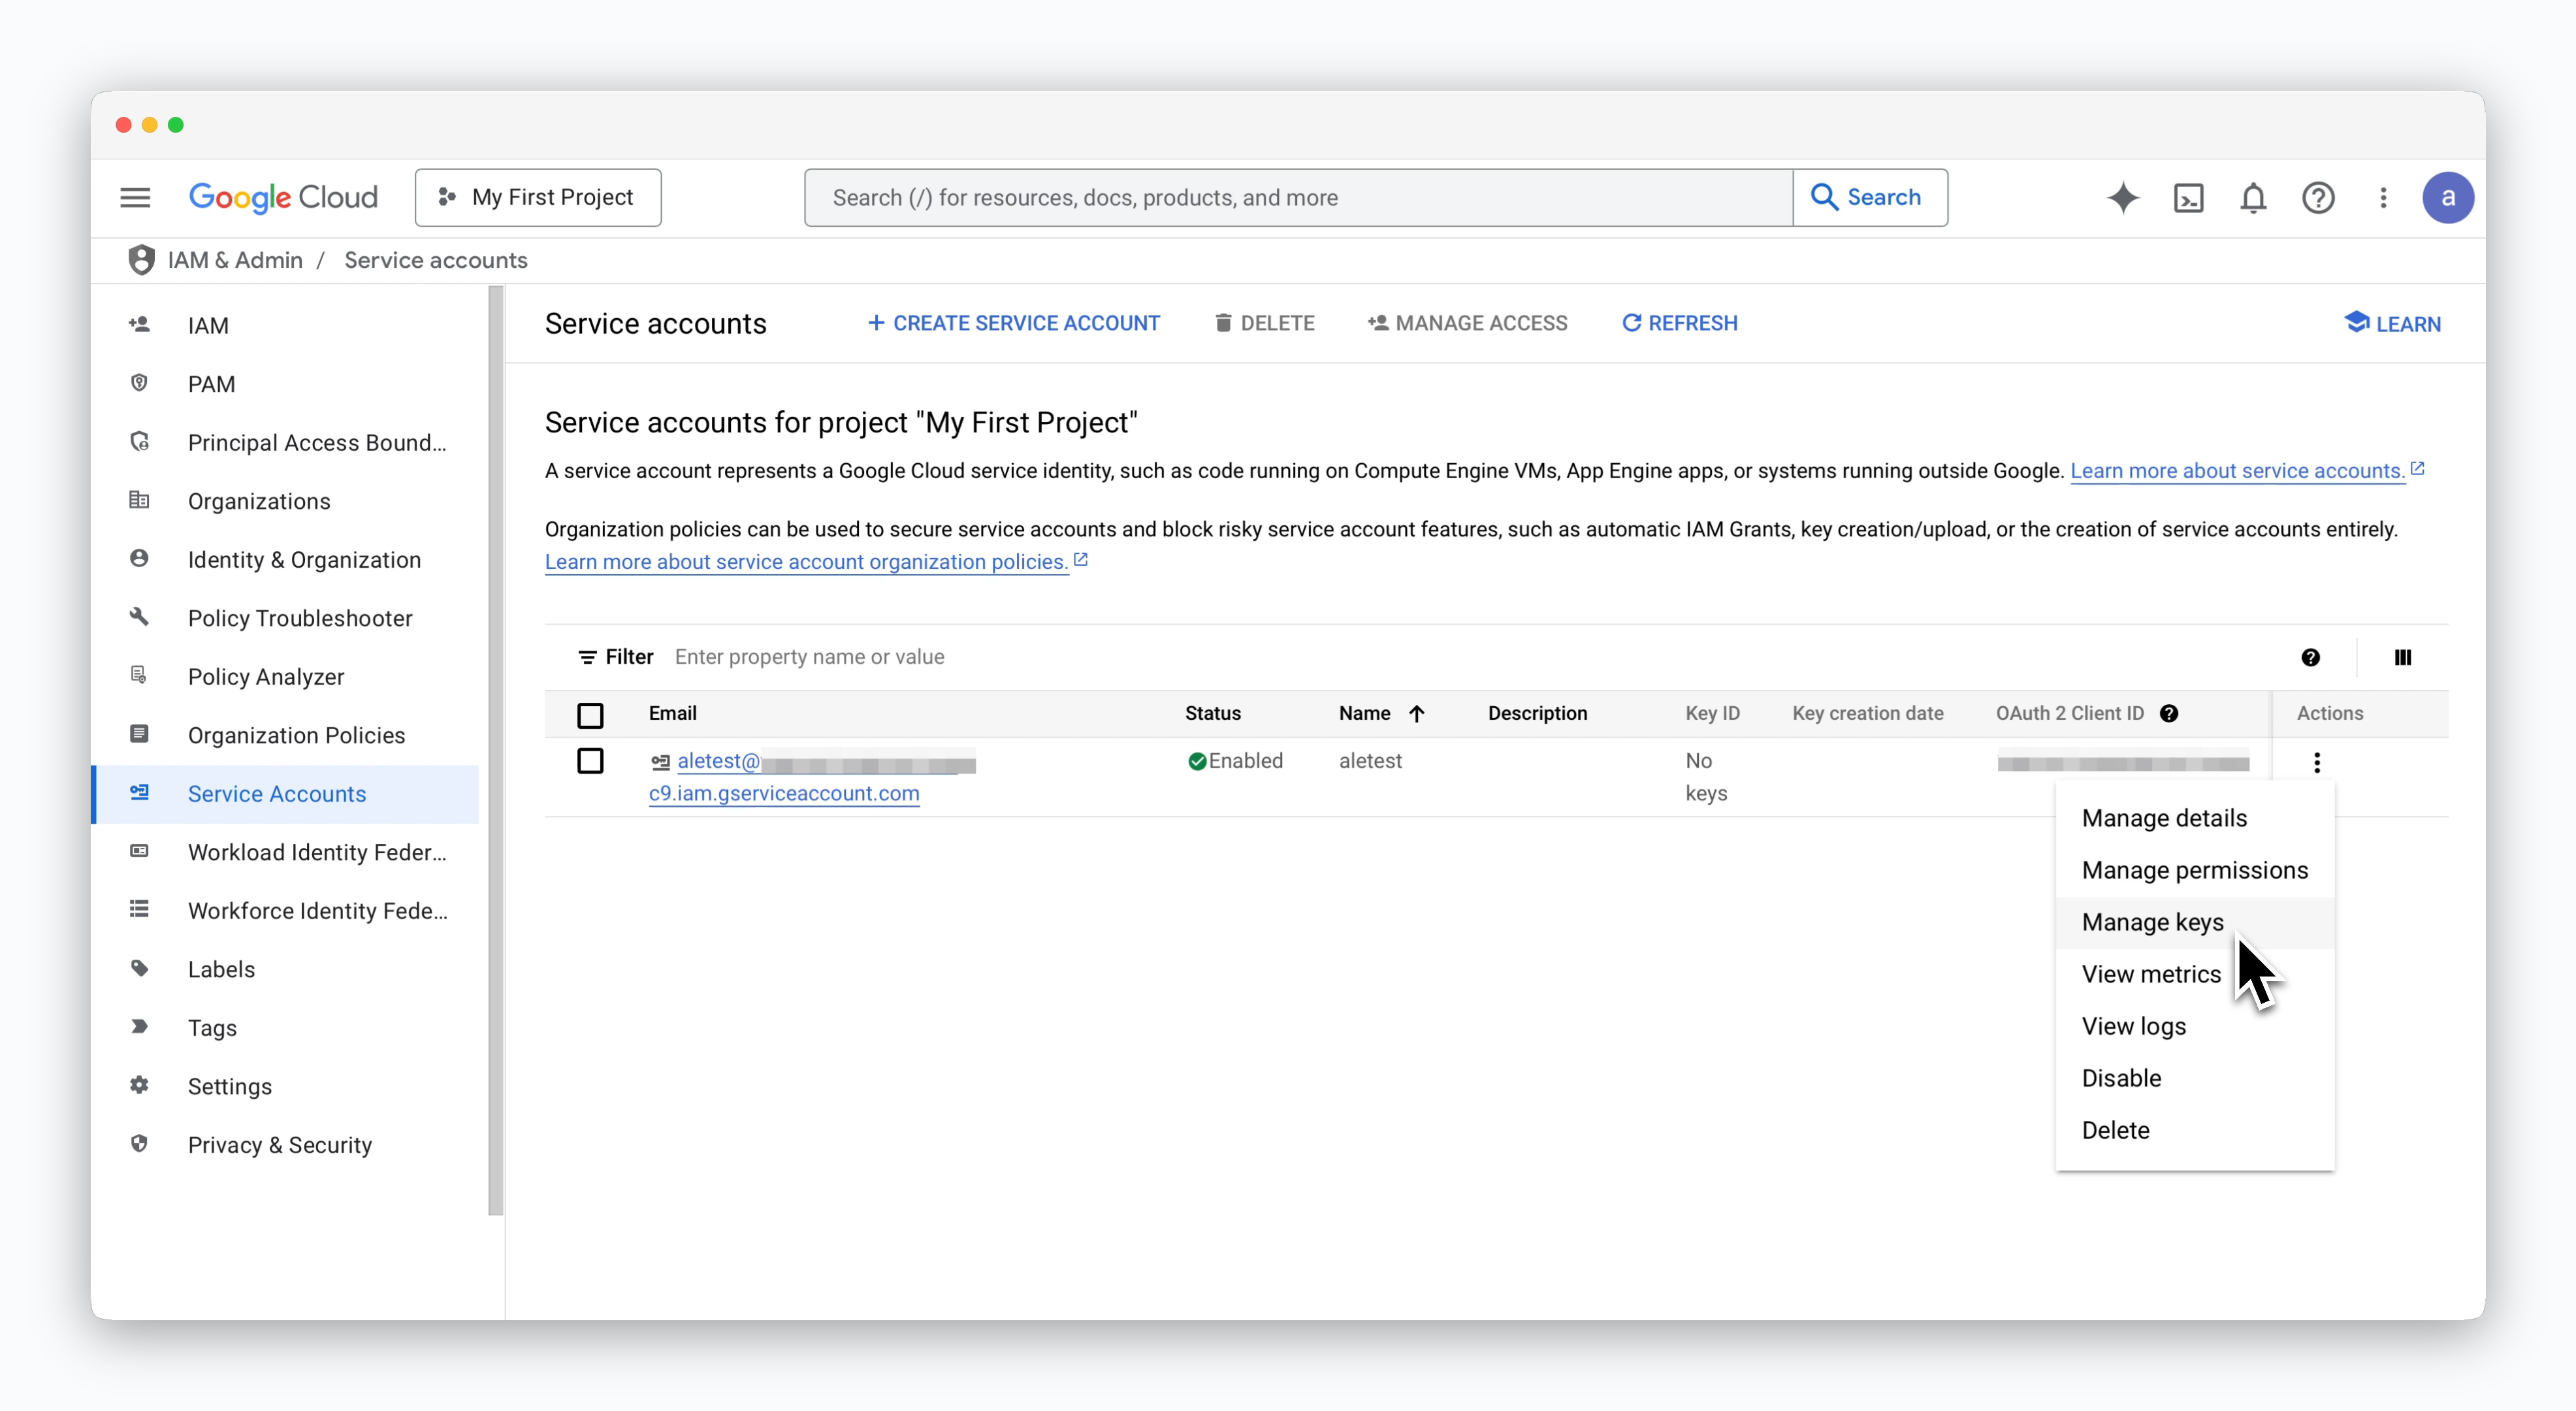
Click the icon on the right side of the service account and select Manage keys.
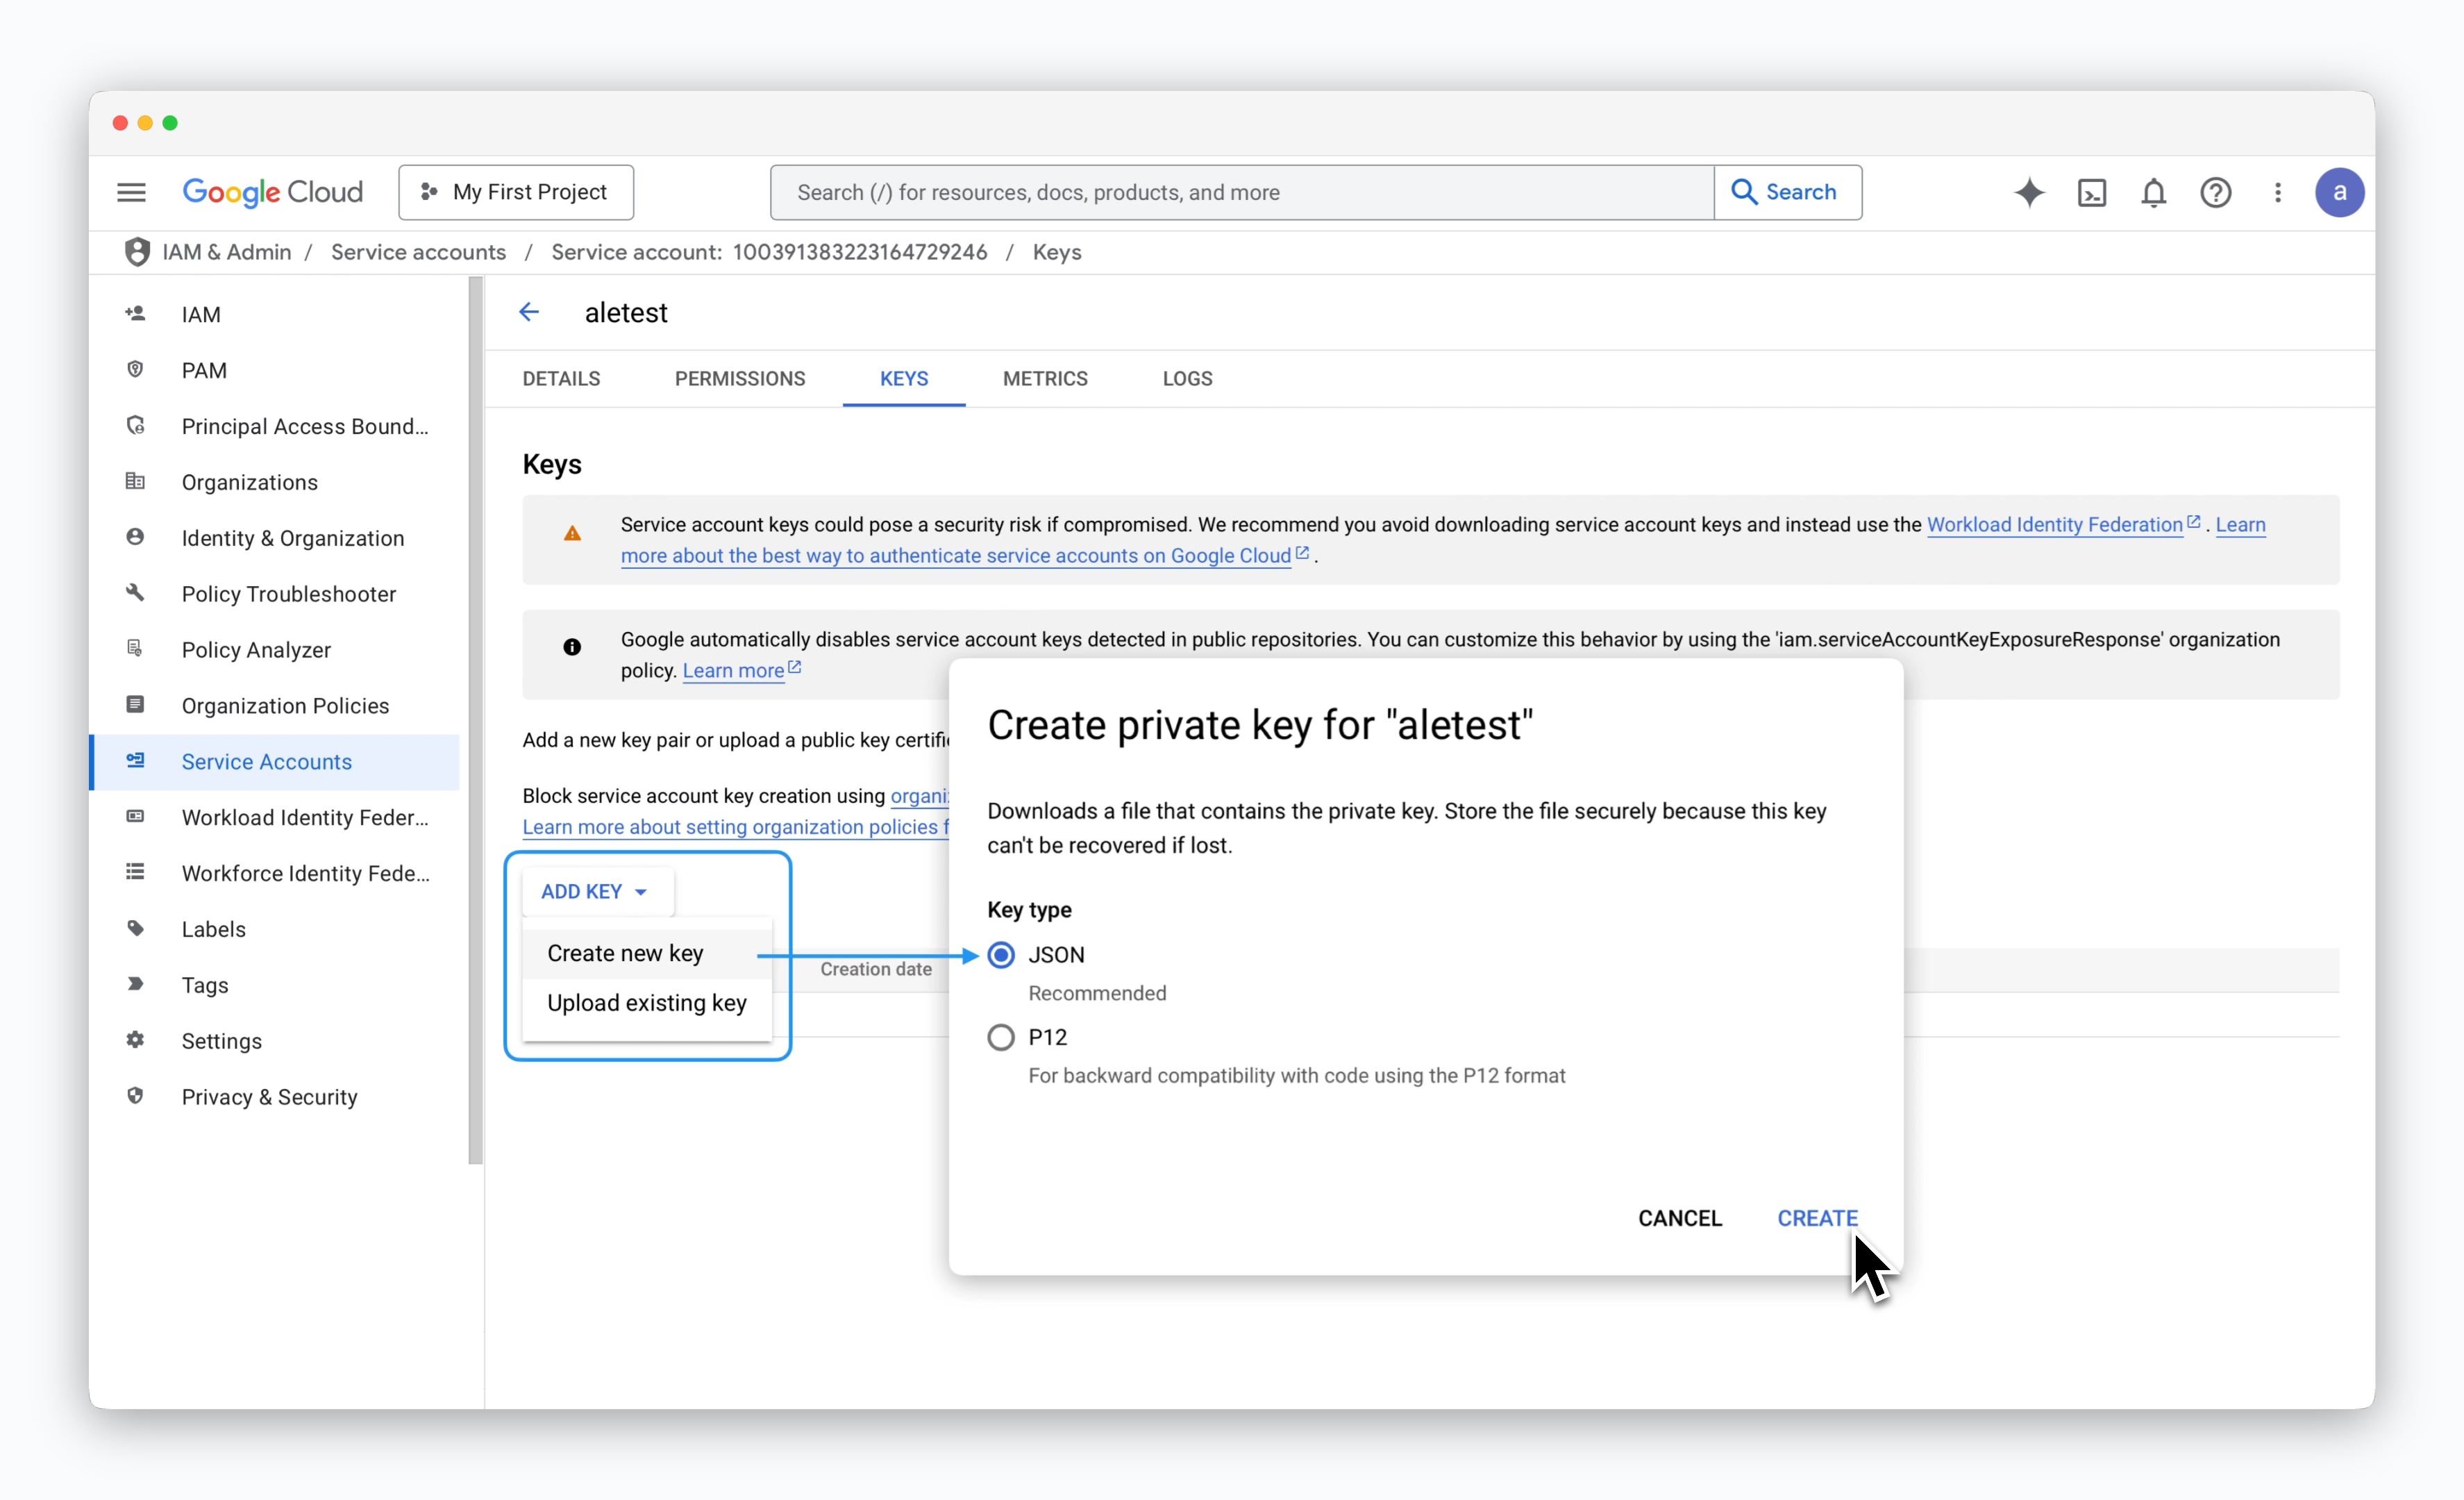
On the service account key management page, click ADD KEY > Create new key. In the modal, select JSON as the key type and click CREATE to download the JSON key file.
Connect to ale
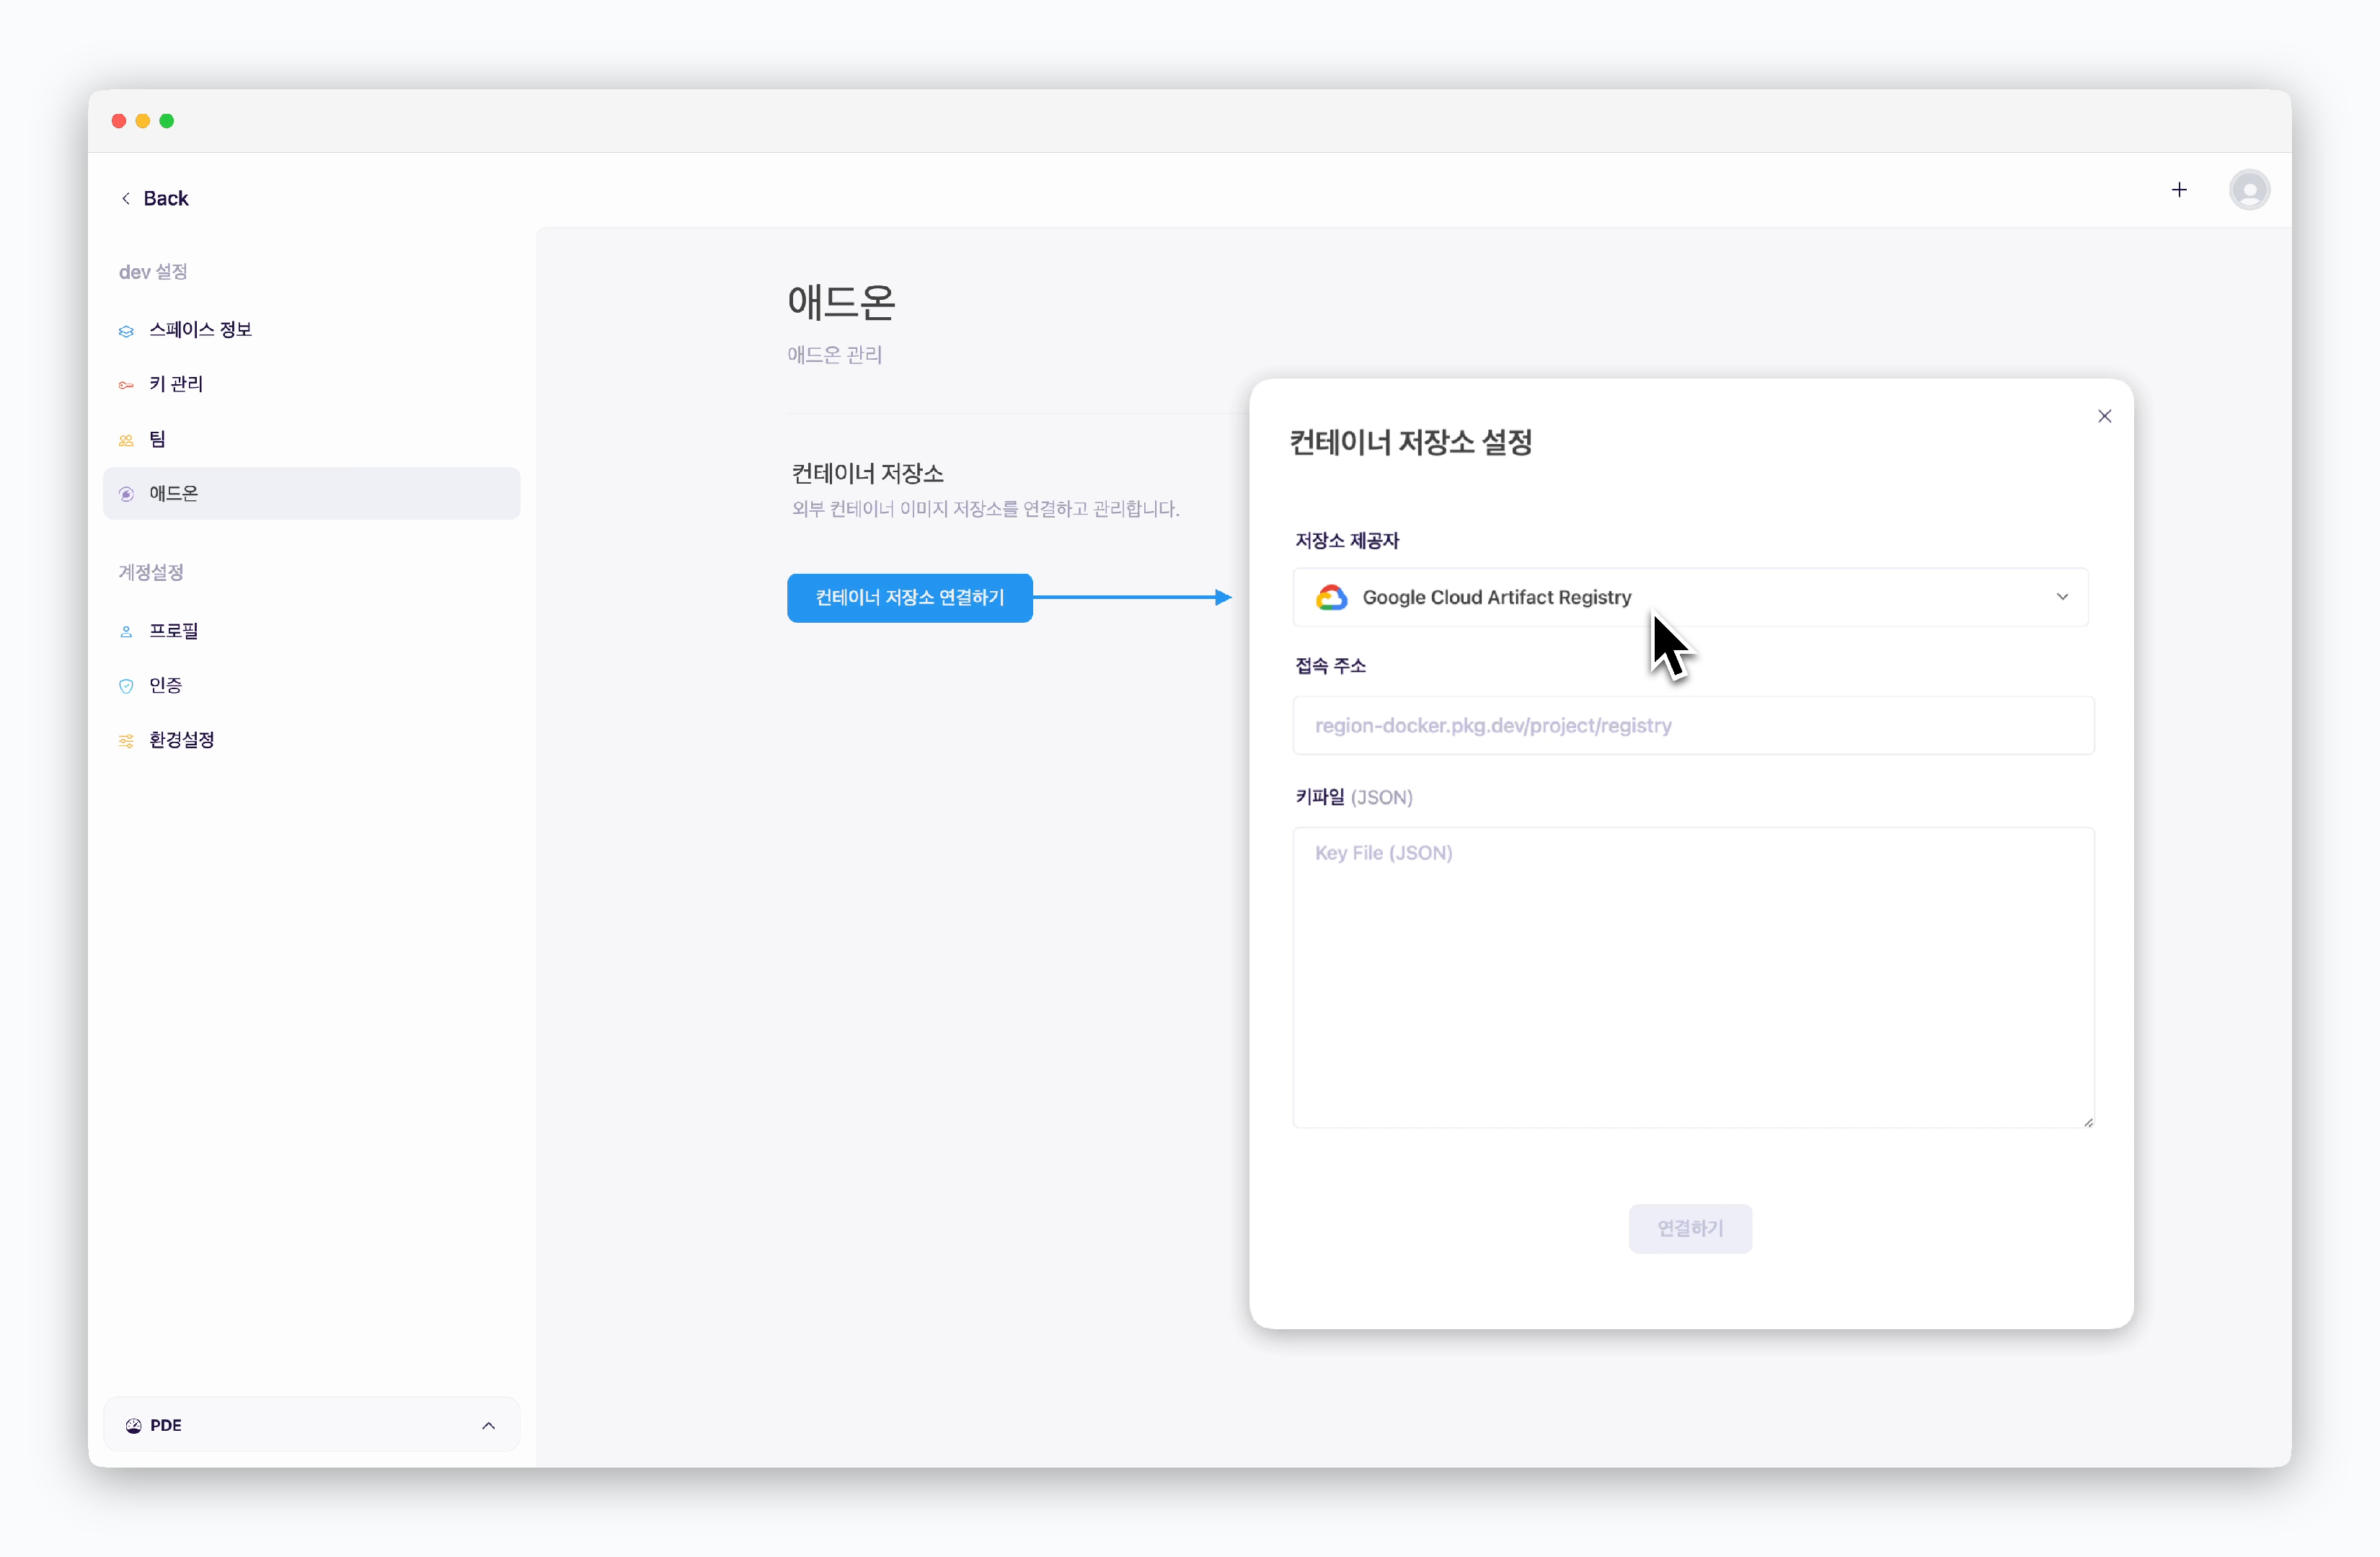
In the space settings’ add-on page, clickConnect Container Registry. In the Container Registry Settings modal, enter the following values and clickConnectto establish connection with Google Cloud Artifact Registry:
- Registry Provider: Google Cloud Artifact Registry
- Registry URL: The URL obtained after creating the repository
- Key File(JSON): Contents of the JSON key file
Docker Hub
Docker Hub
Generate Docker Hub Access Token
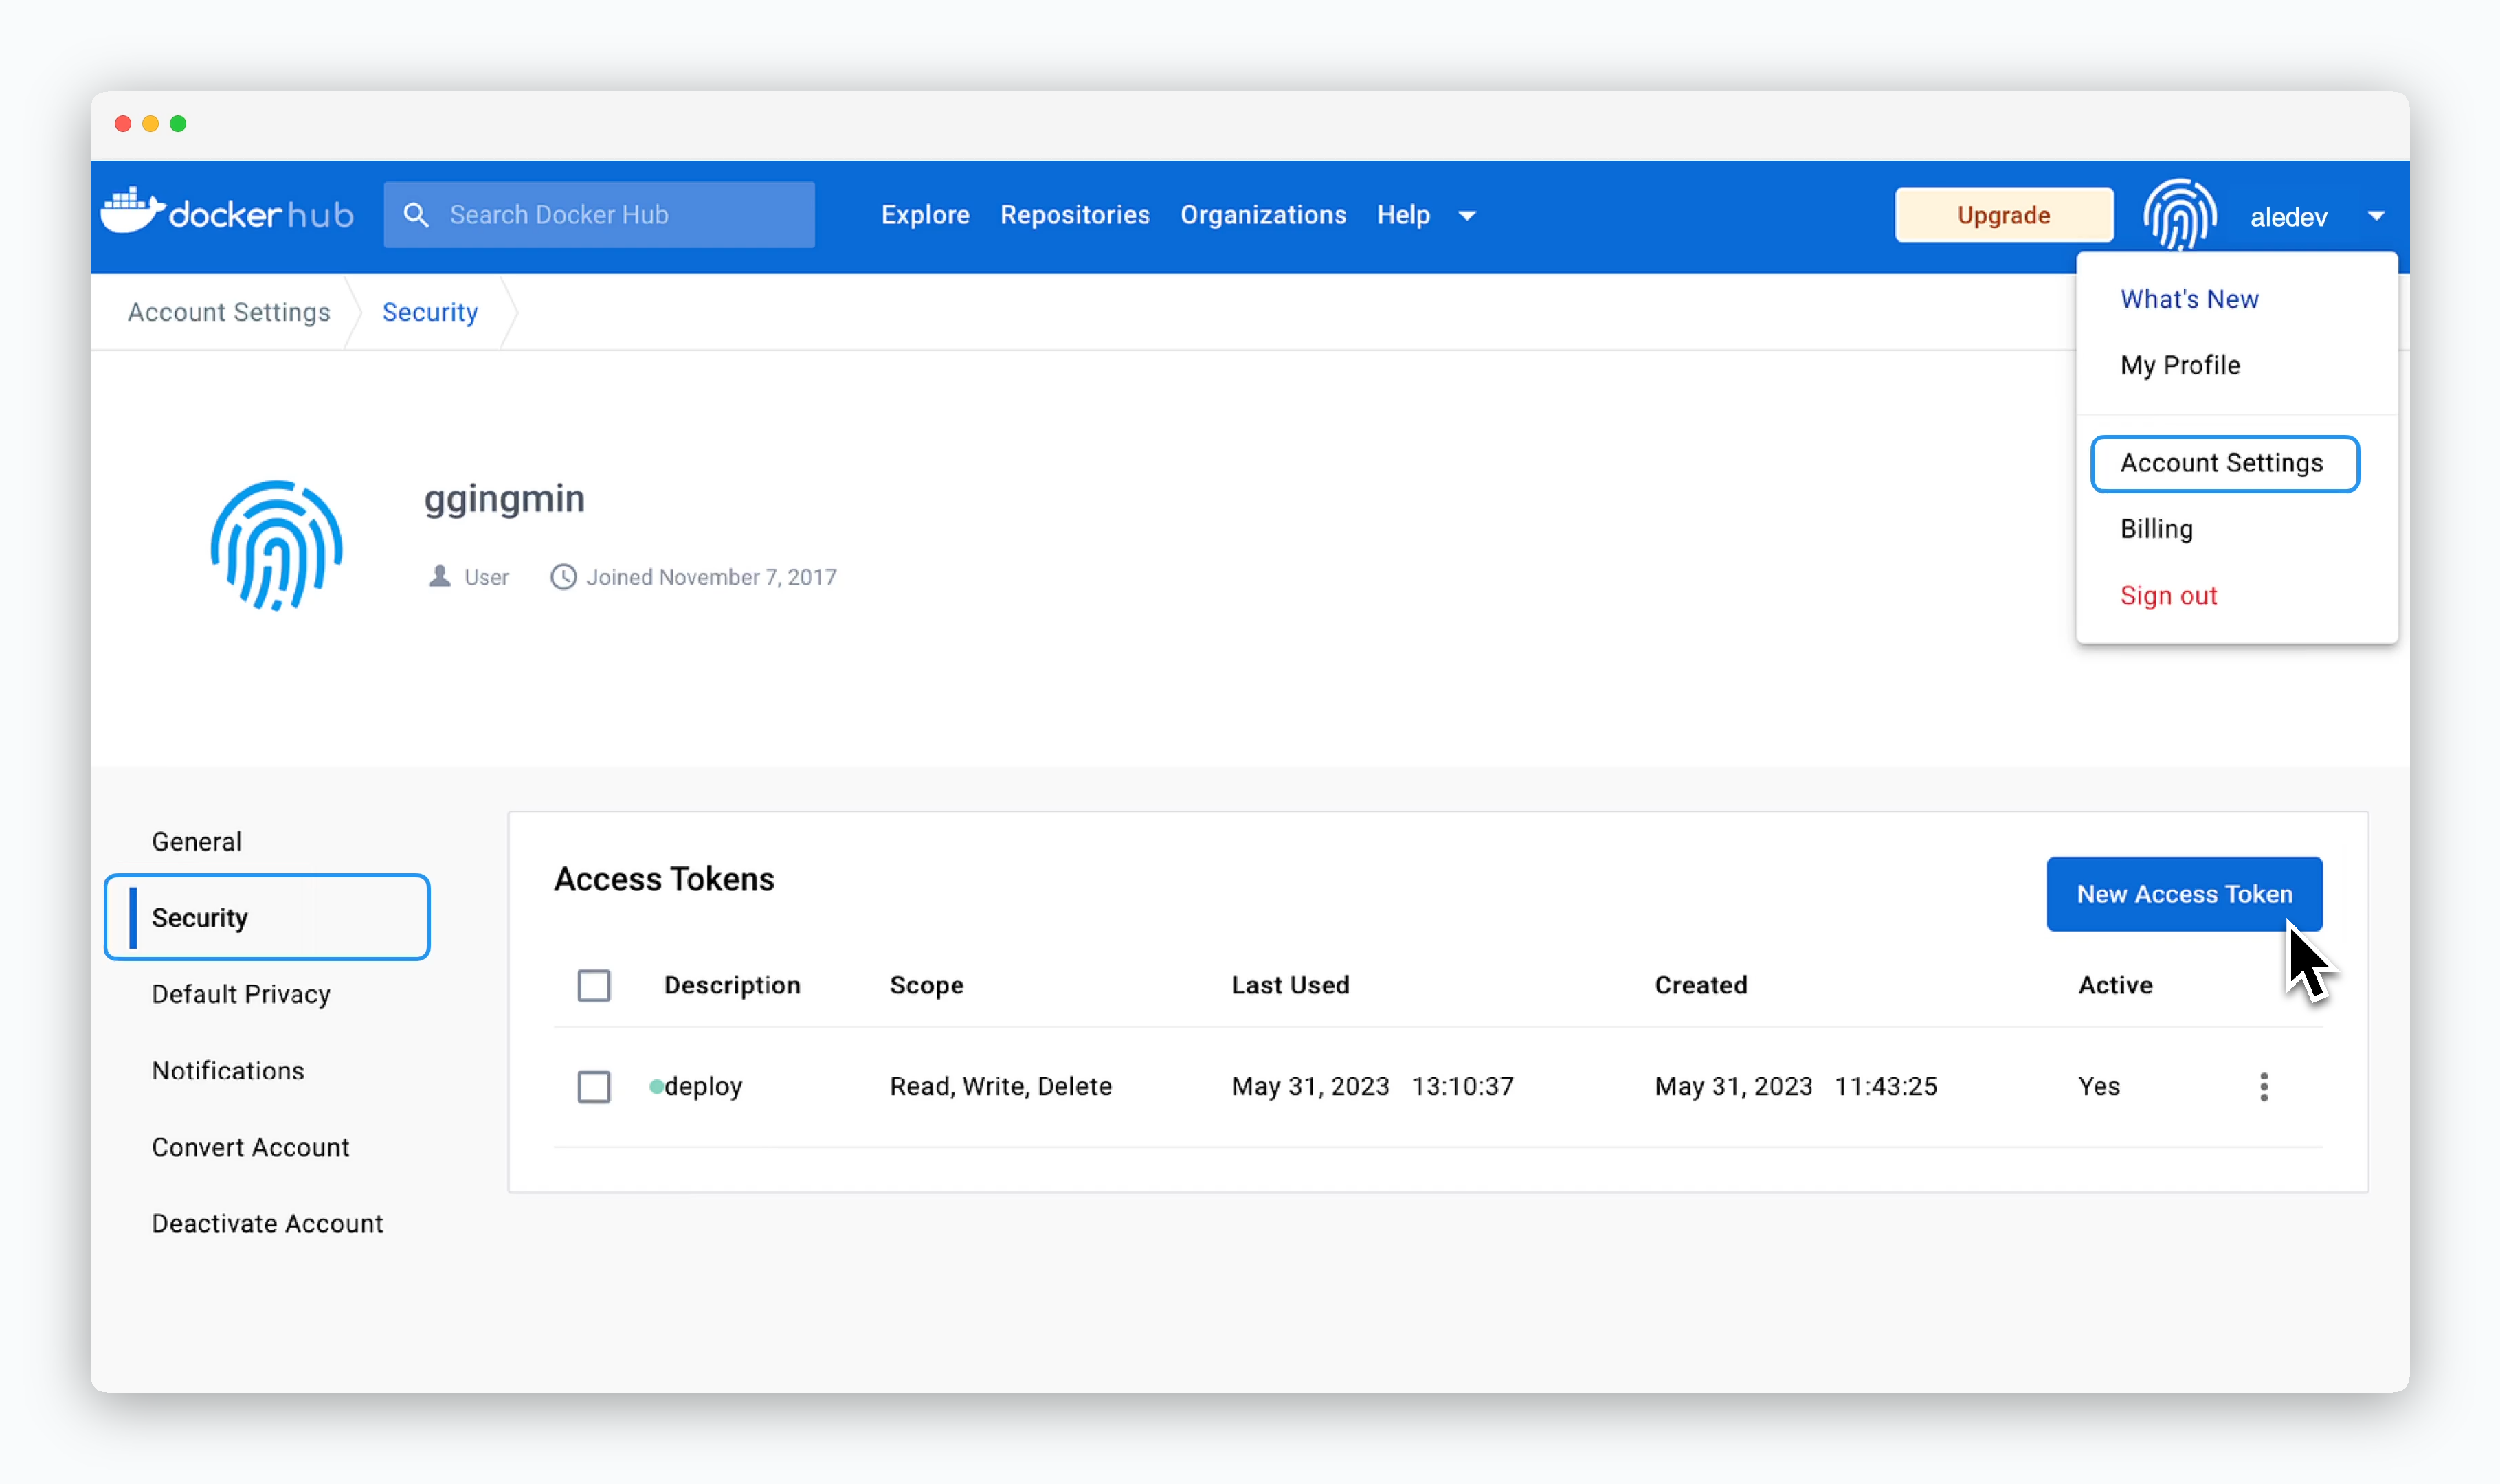
Create a Docker Hub account, then click your account name in the top right corner.
Navigate to Account Settings > Security and click New Access Token.
Grant Permissions and Generate Token
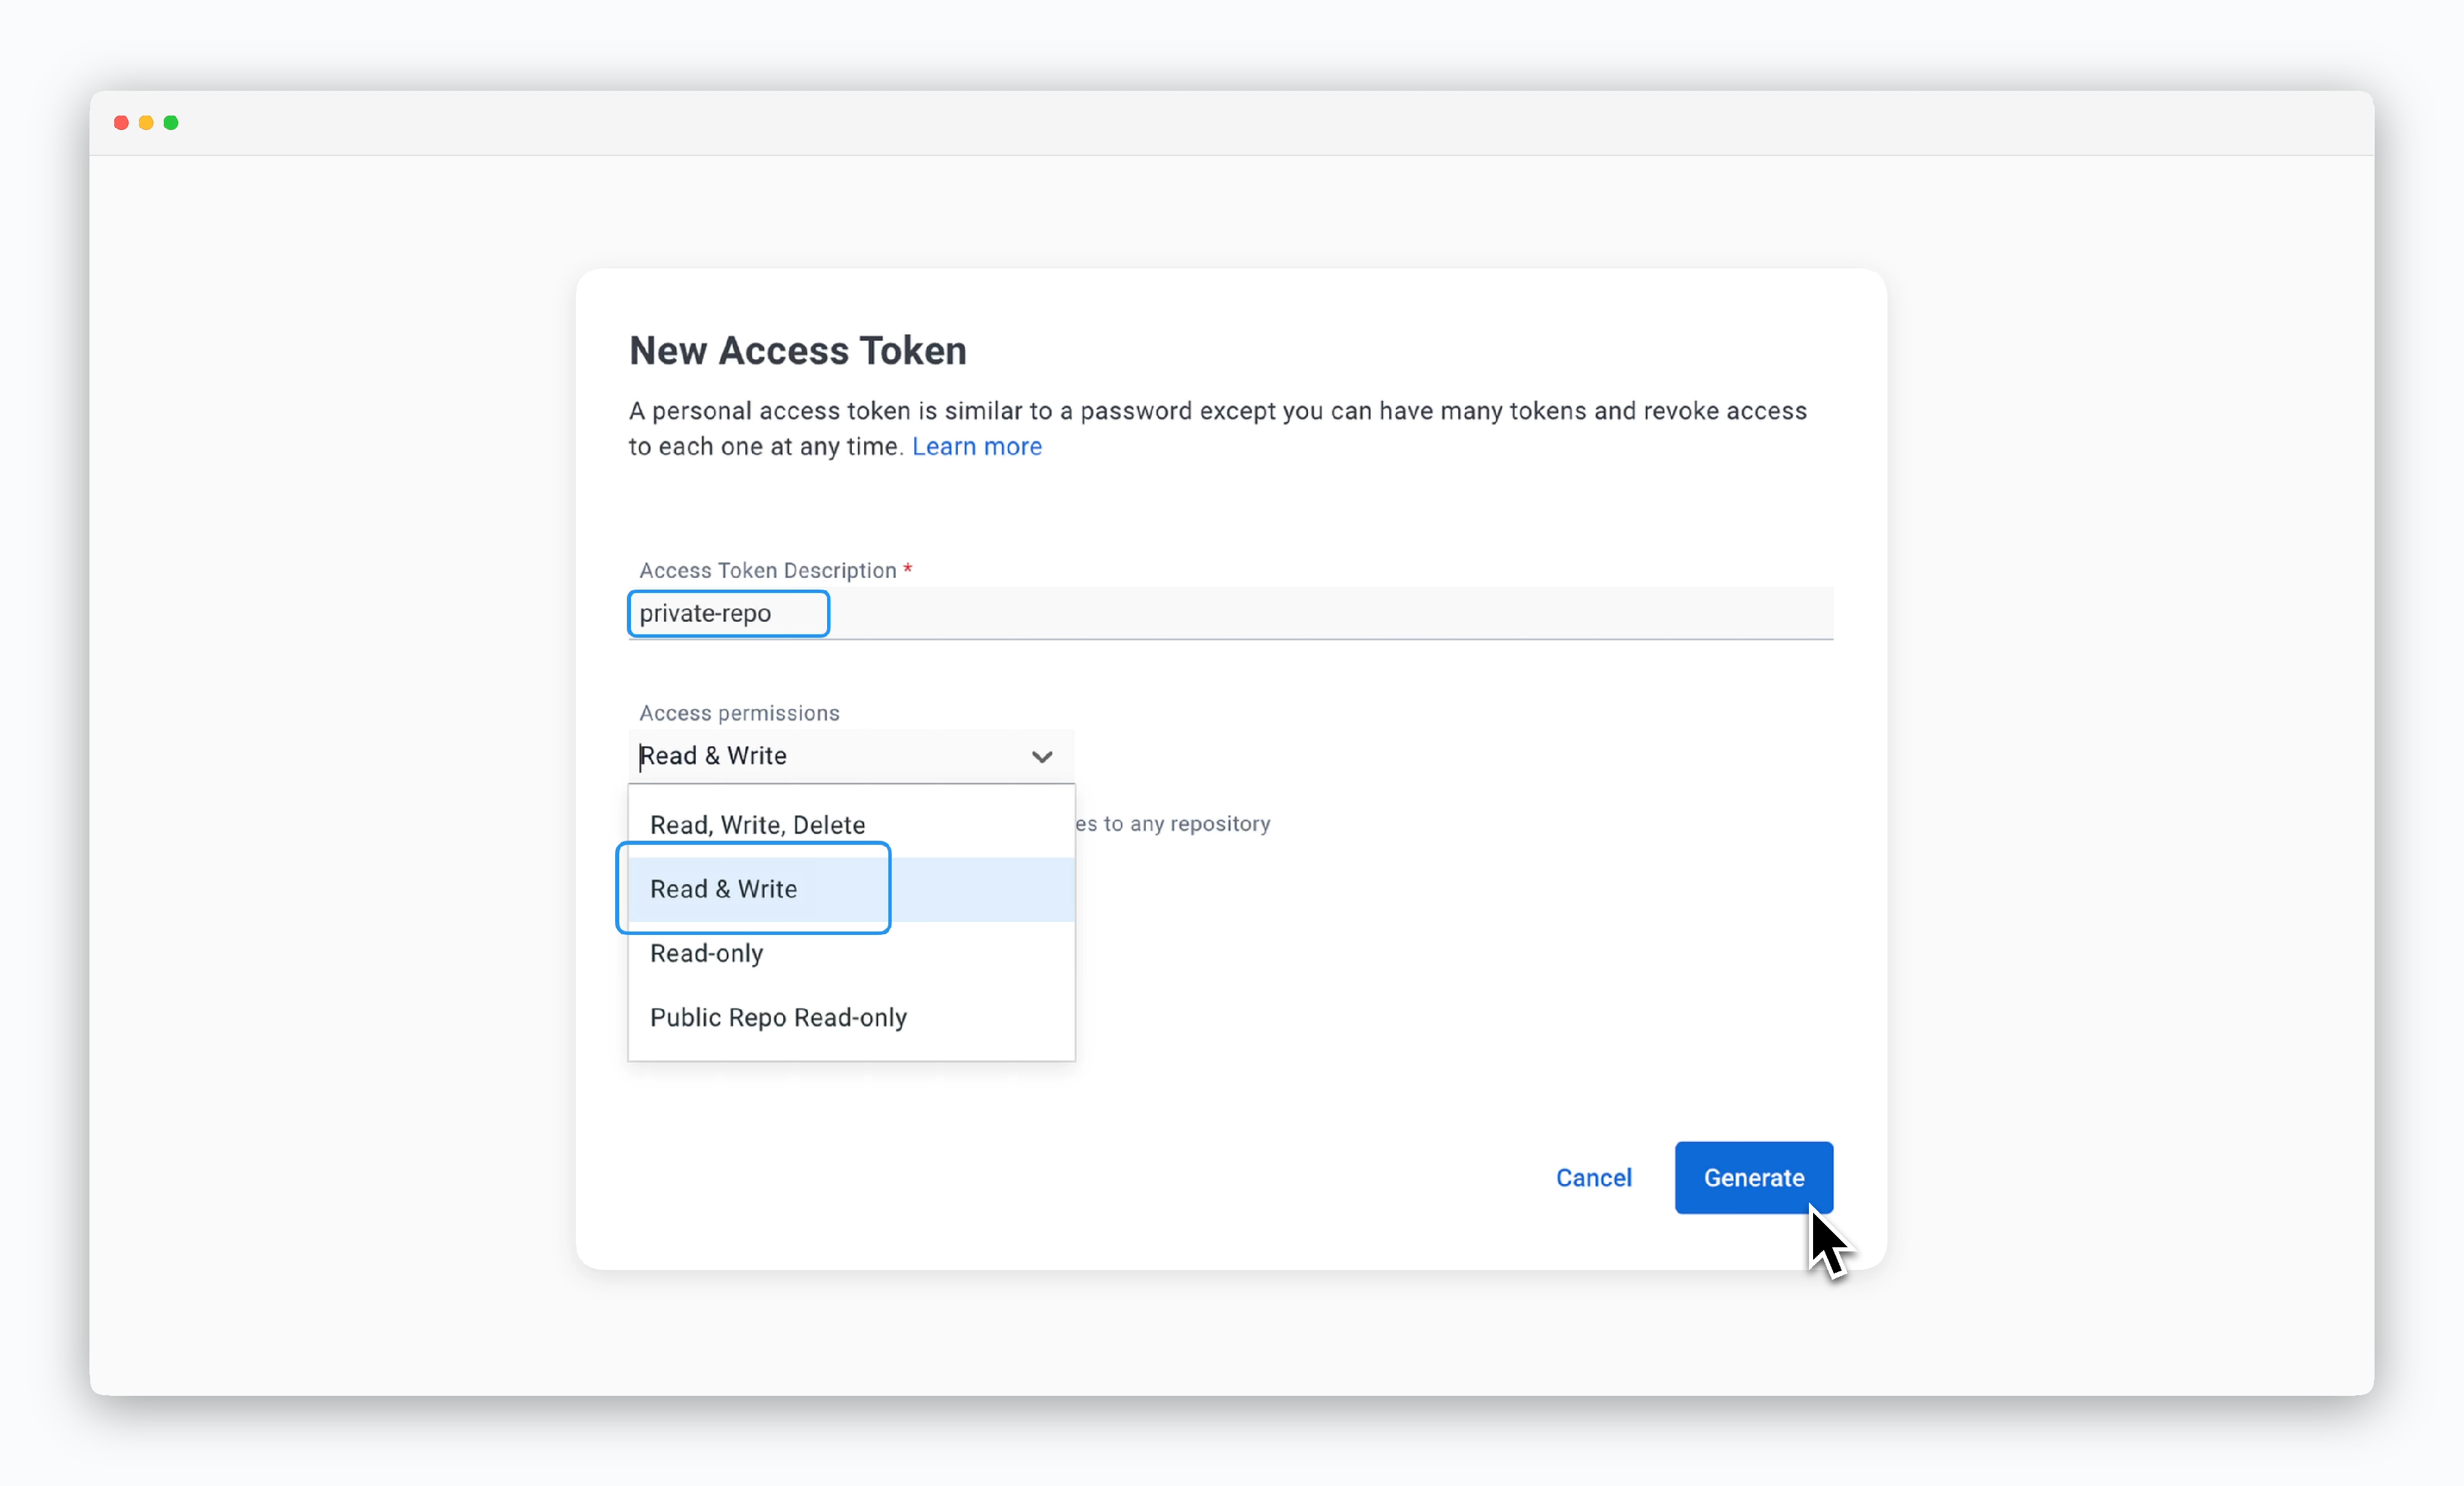
Enter a descriptive name in the Access Token Description field to identify the token’s purpose or role, and select Read & Write for Access permissions. Note that the generated token can only be viewed once upon creation.
Connect to ale
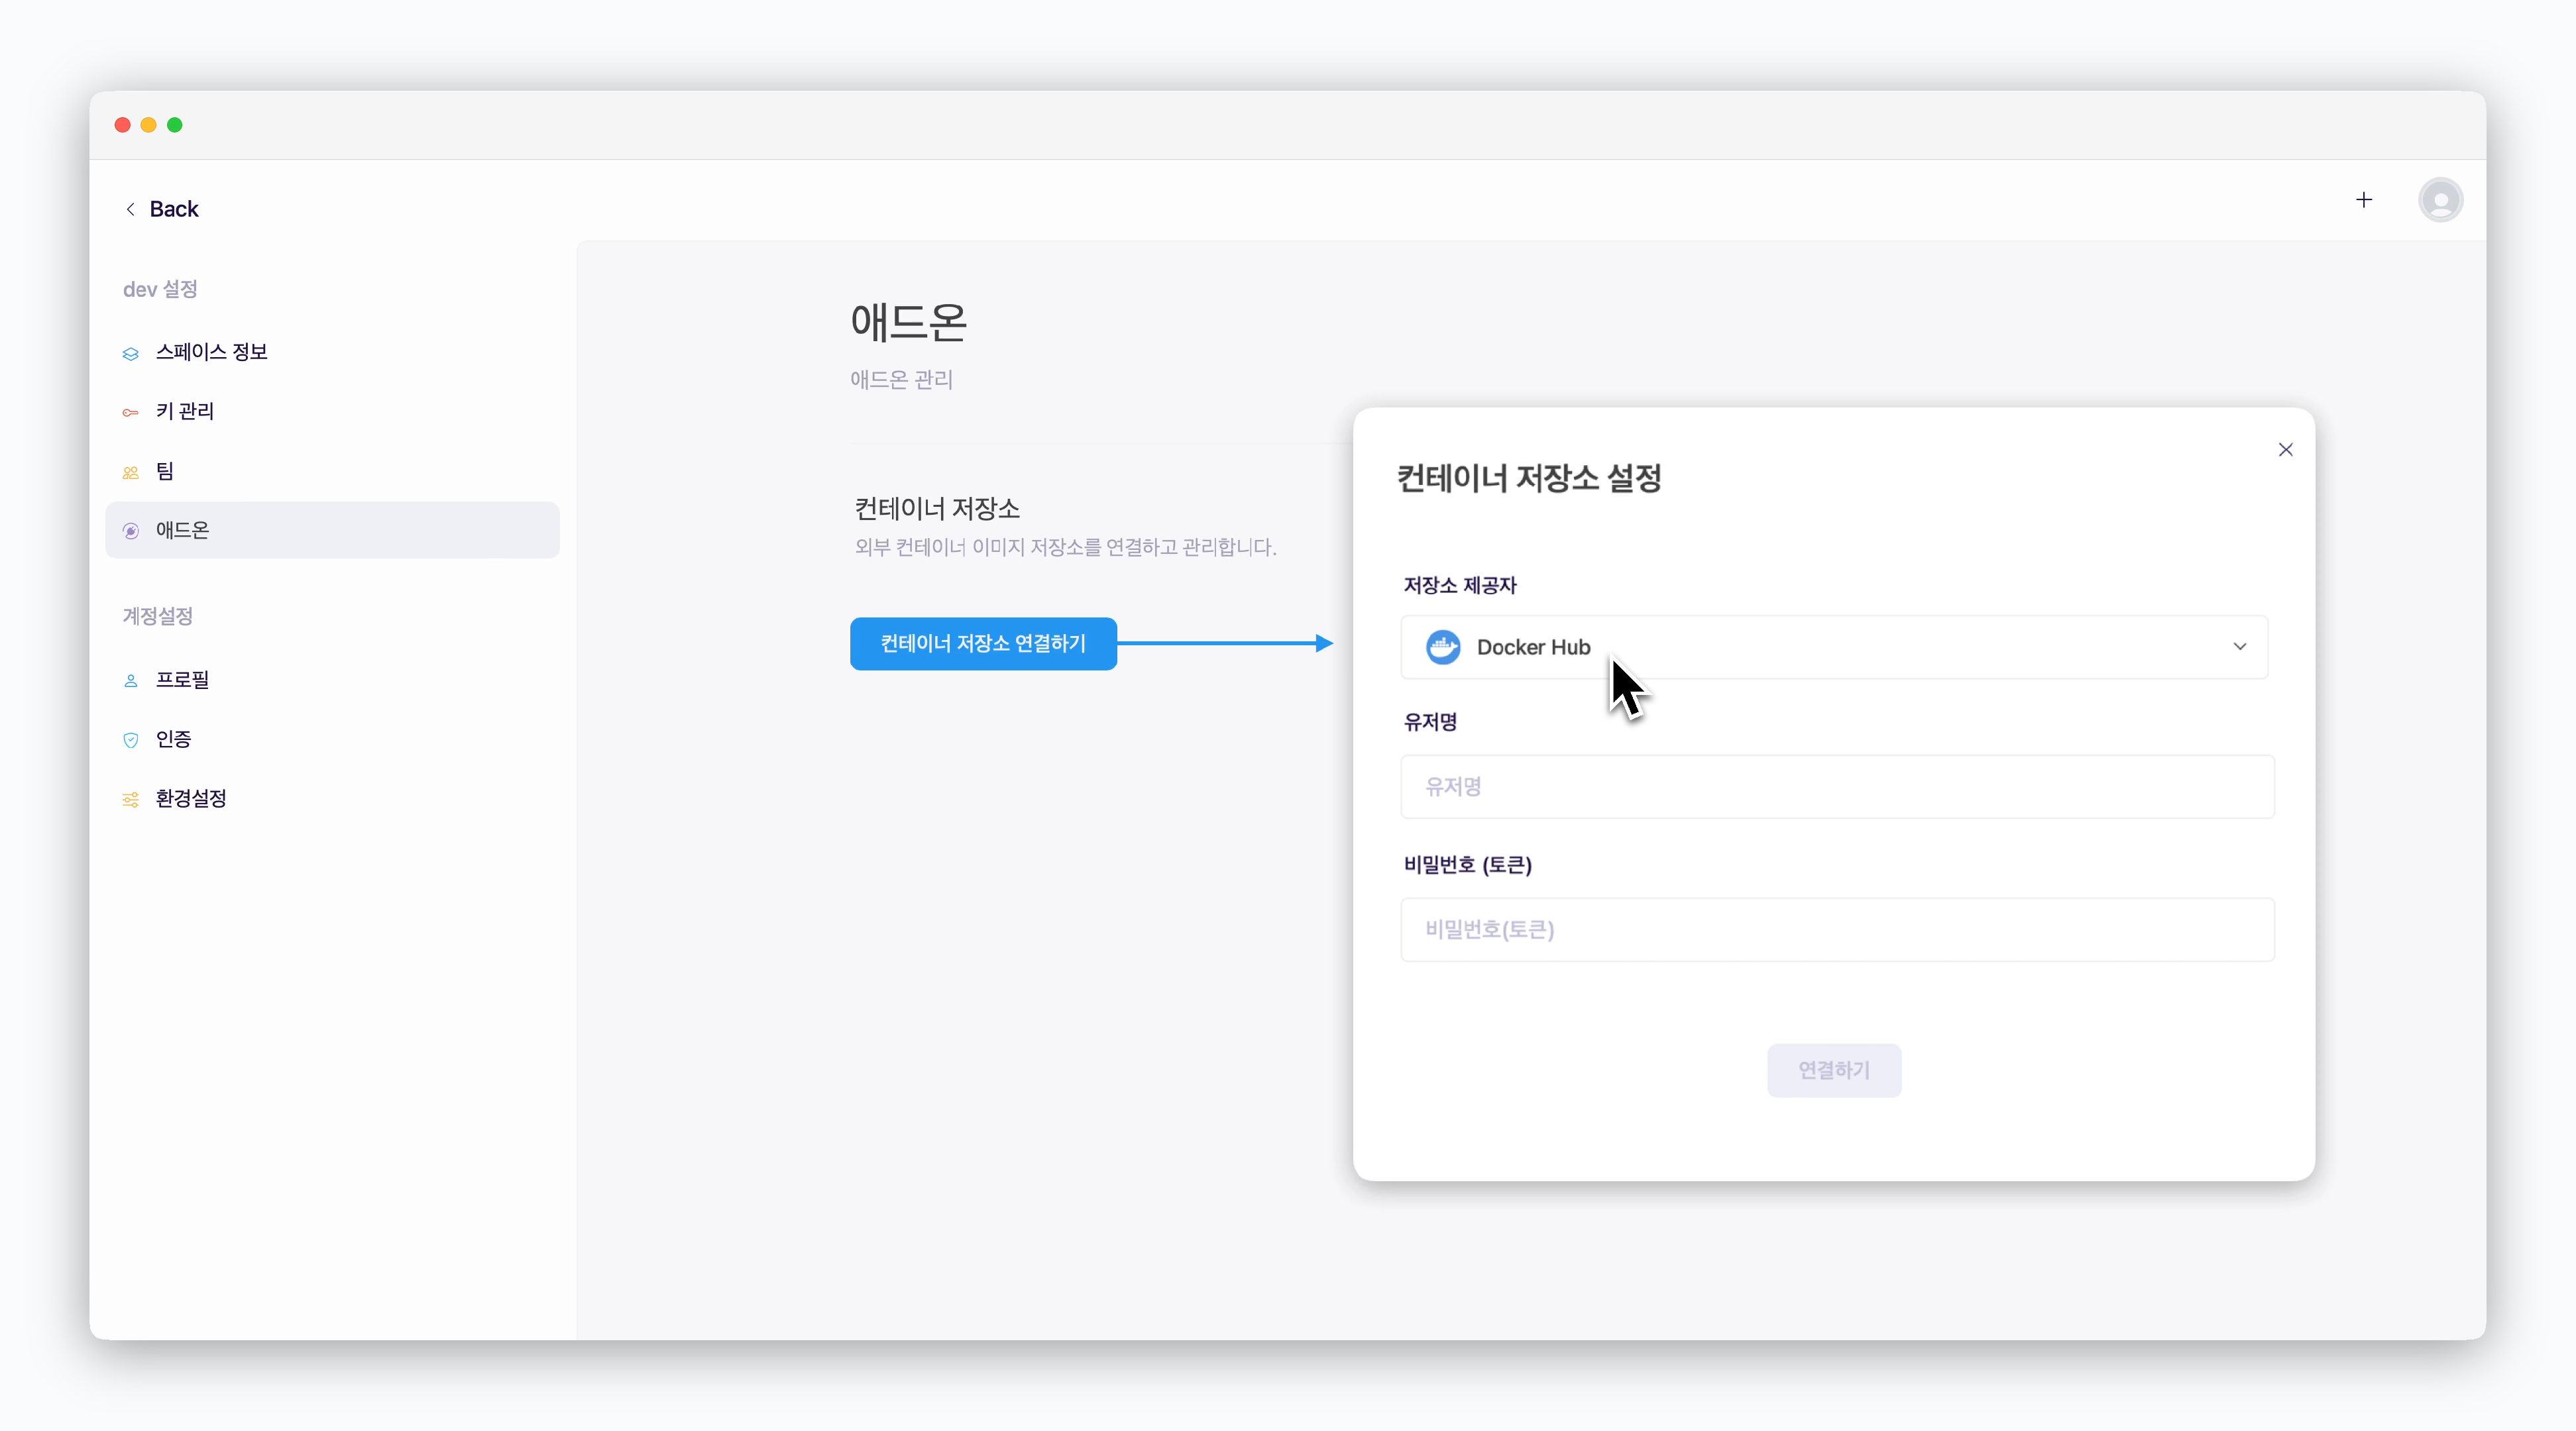
In the space settings’ add-on page, clickConnect Container Registry. In the Container Registry Settings modal, enter the following values and clickConnectto establish connection with Docker Hub:
- Registry Provider: Docker Hub
- Username: Your Docker Hub ID
- Password(Token): Docker Hub Access Token
Deploy Images
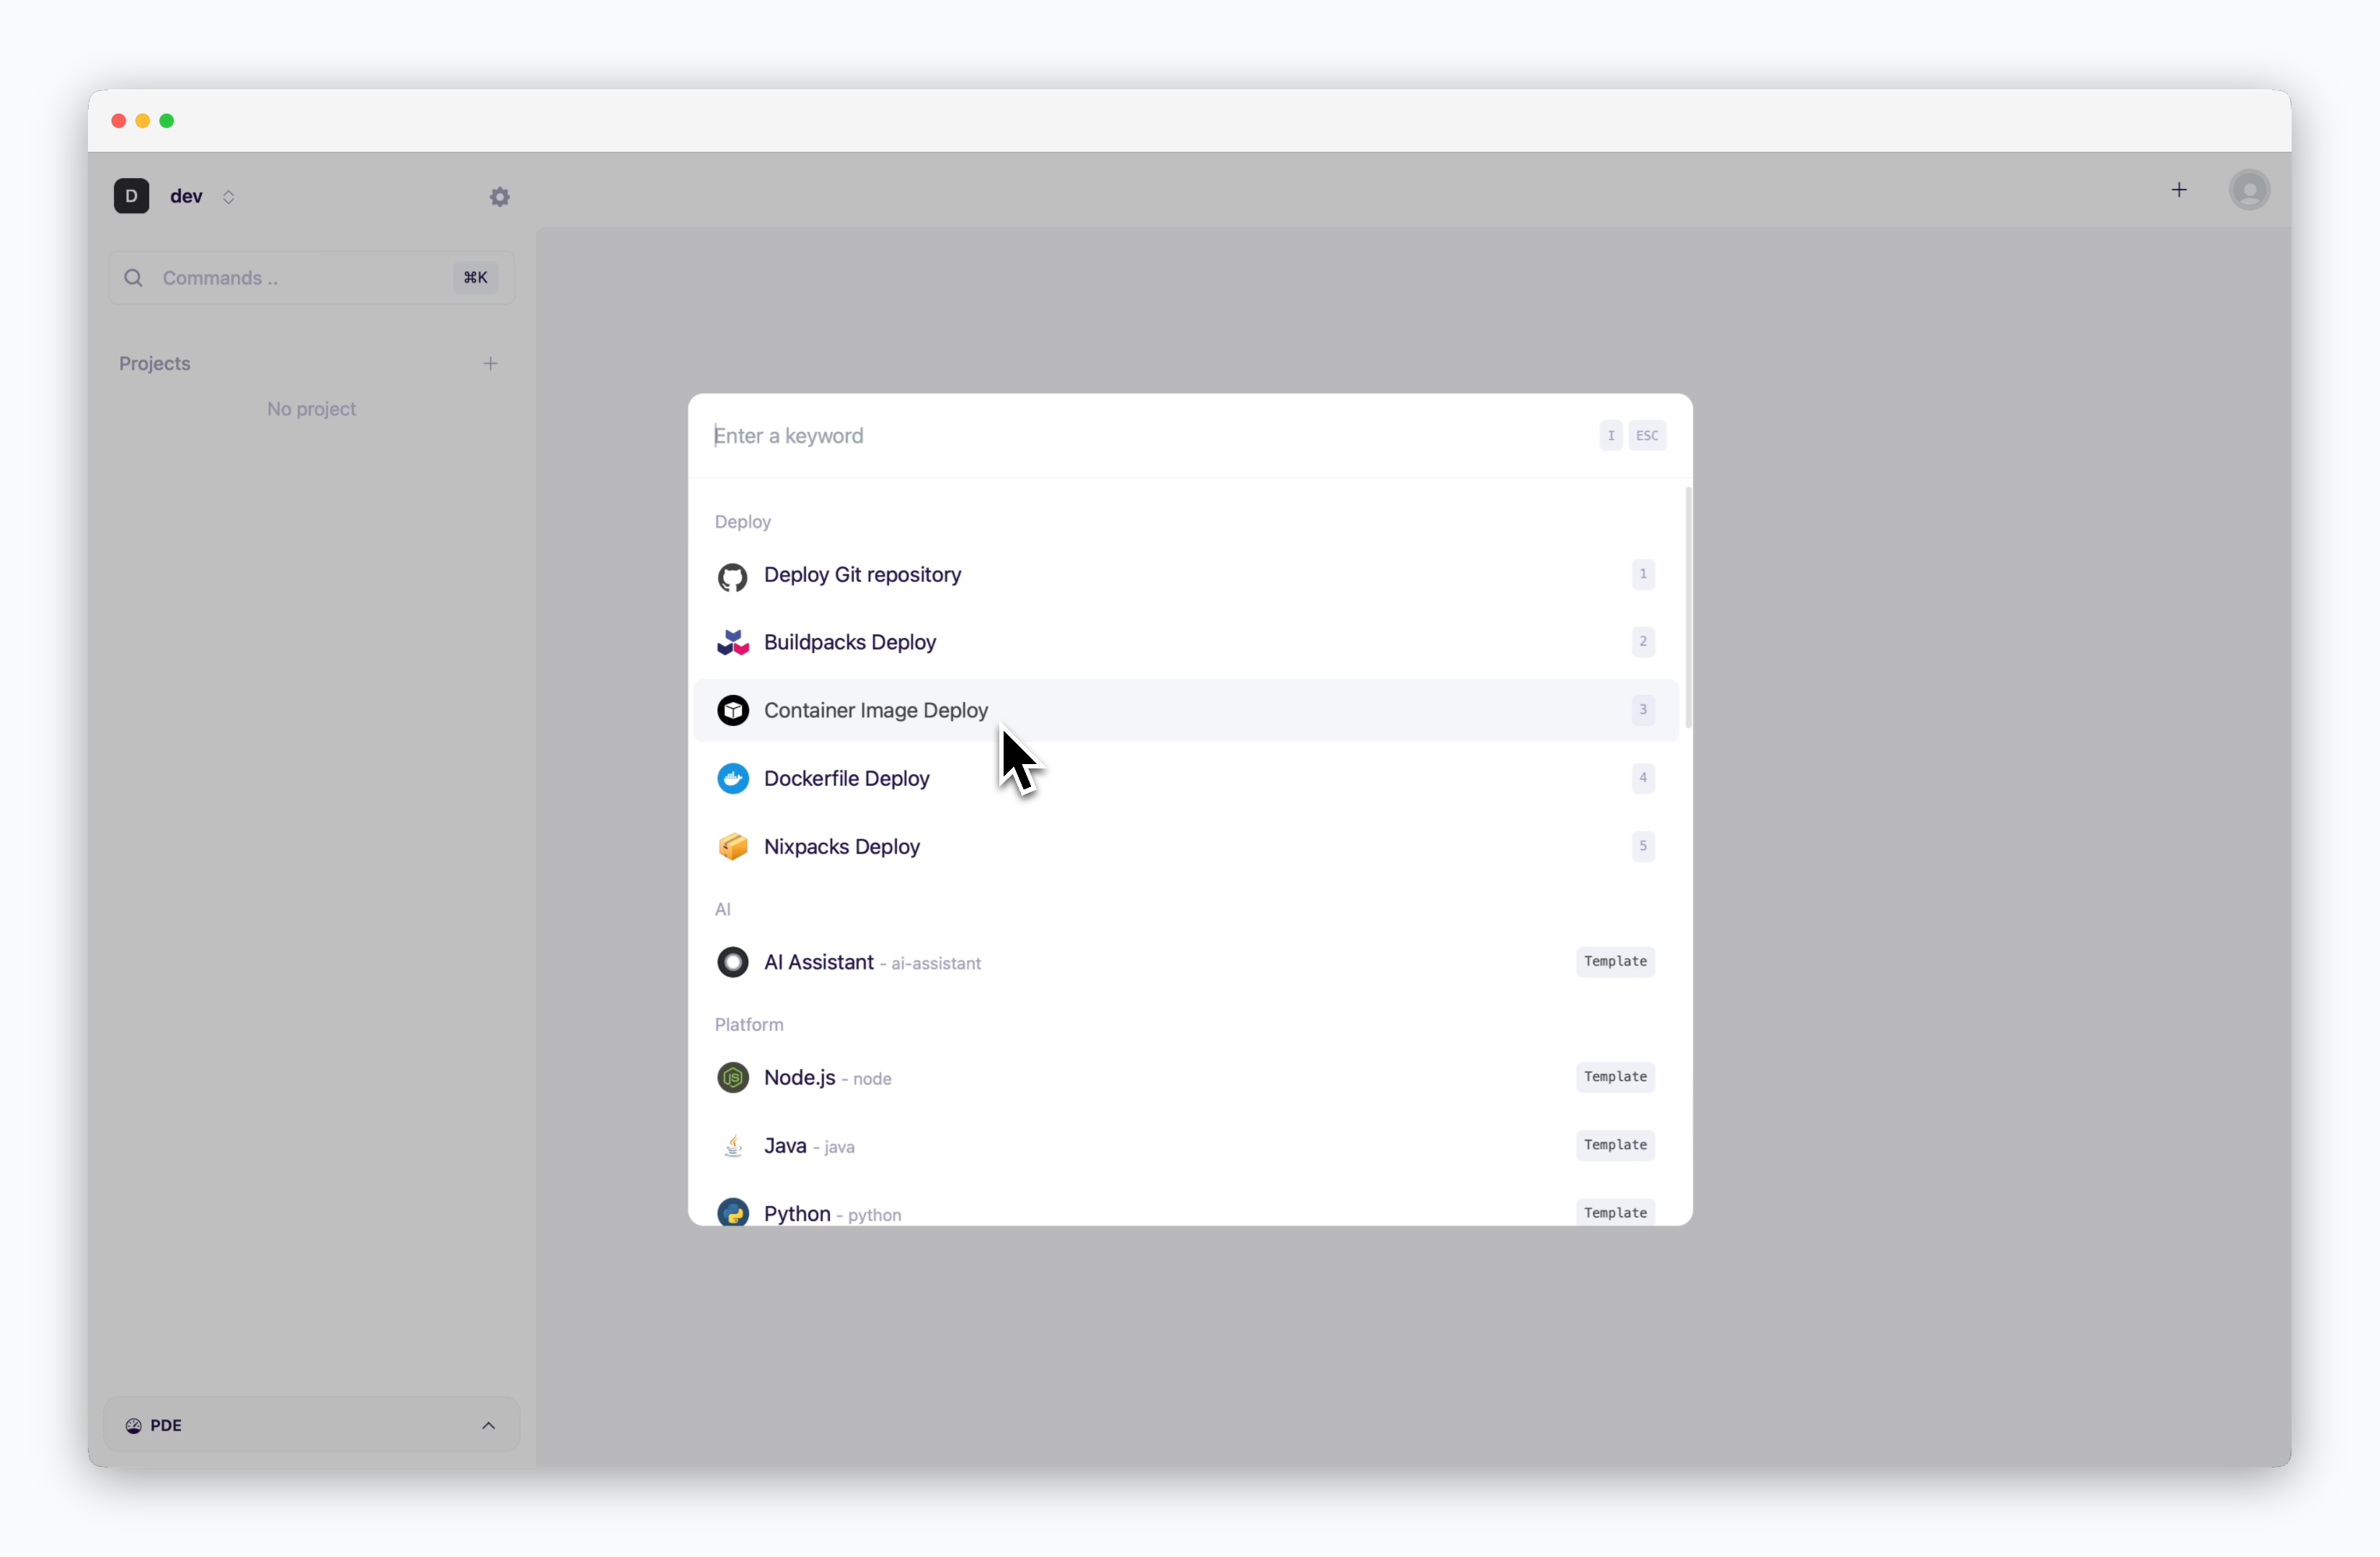
You can deploy custom images by selecting the Container template in the deployment modal, accessed via or ⌘ + K in the dashboard, and entering the required configuration values.
Container Image Address and Tag
Container Image Address and Tag
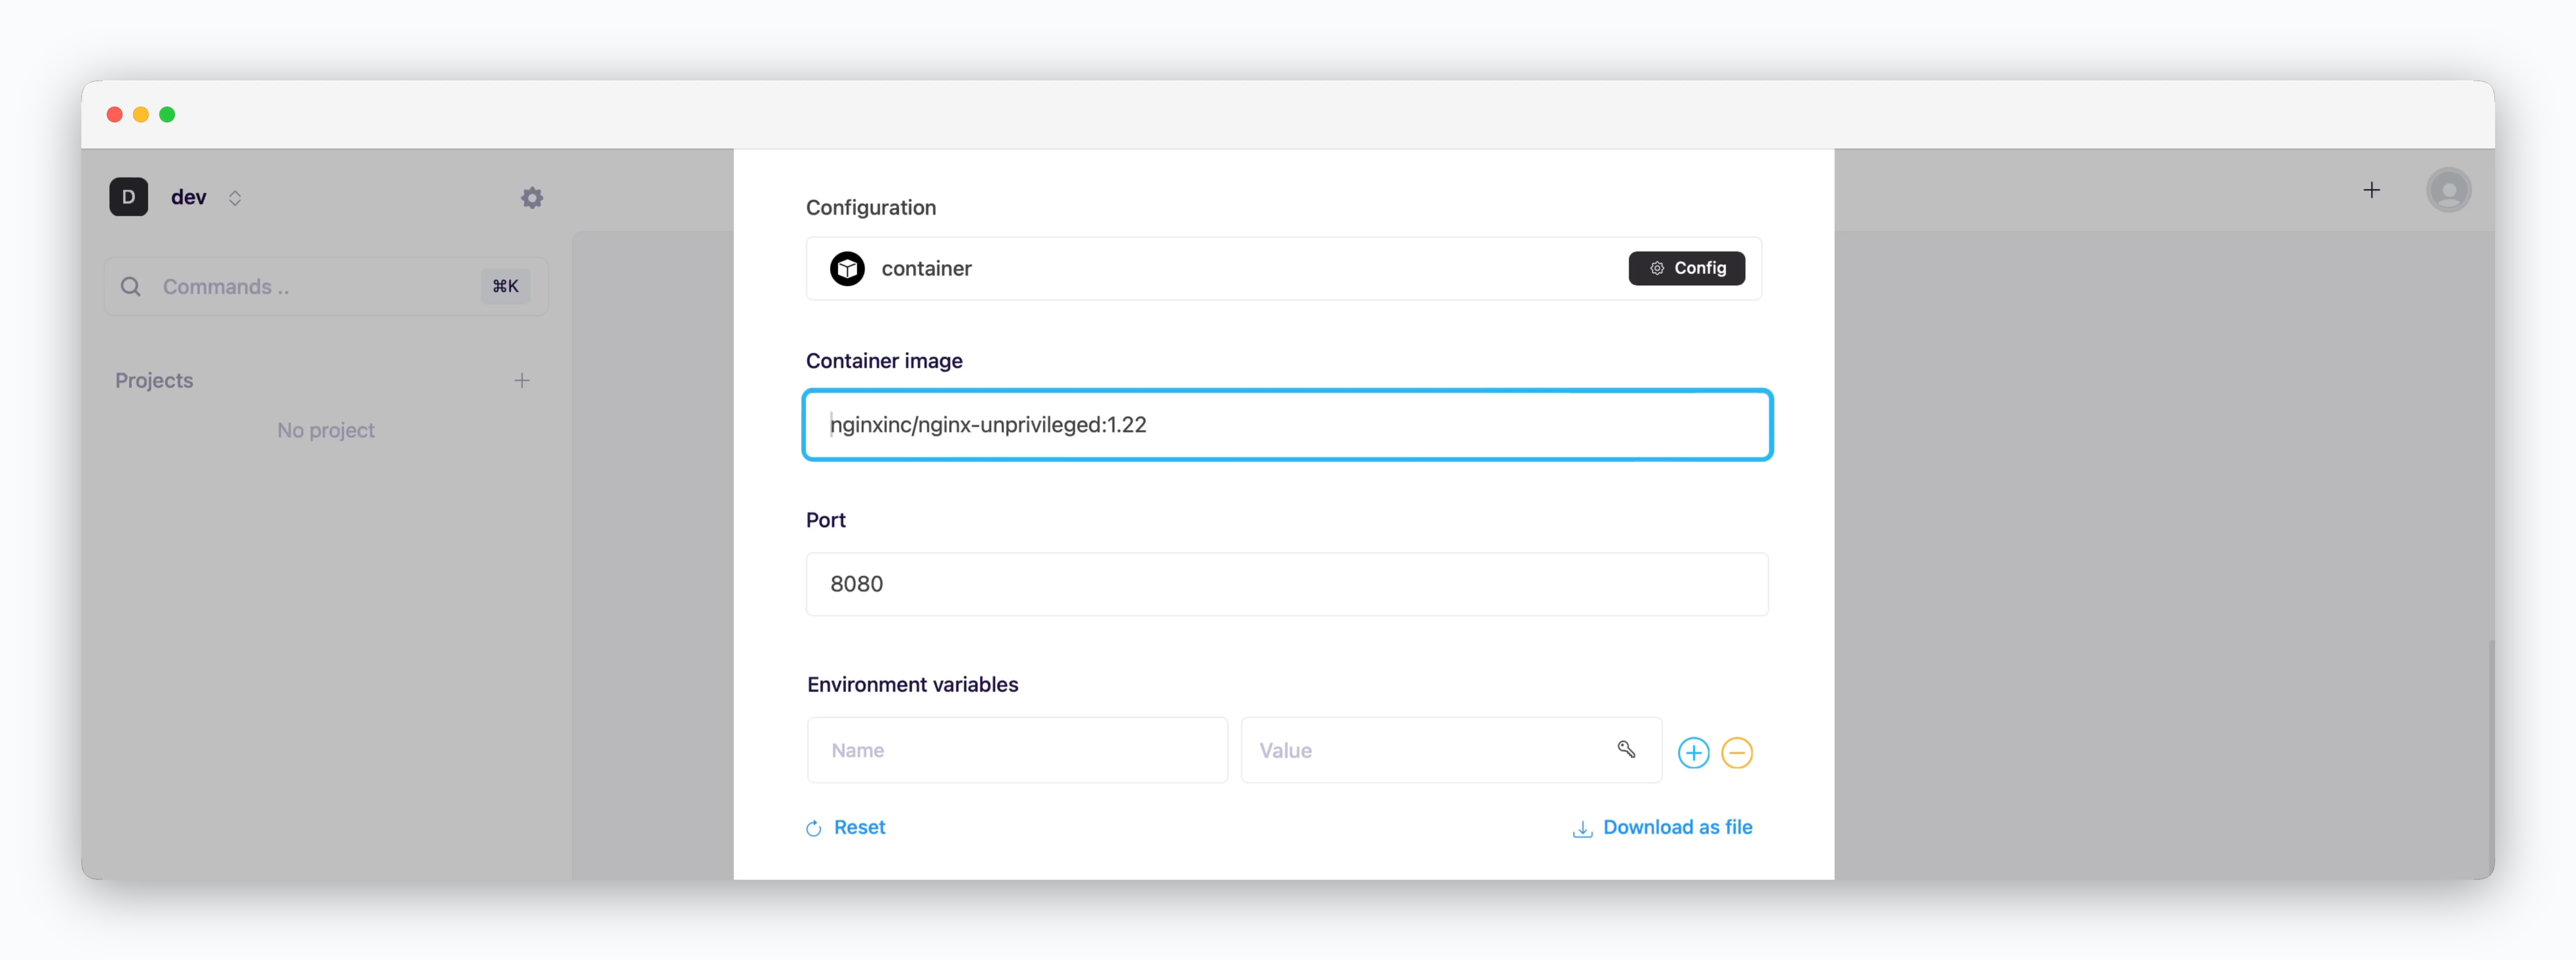
Enter the image URL and tag of your image from the connected registry.
Port Number, Environment Variables, Start Command
Port Number, Environment Variables, Start Command
Enter the settings for image deployment.
More Options
More Options
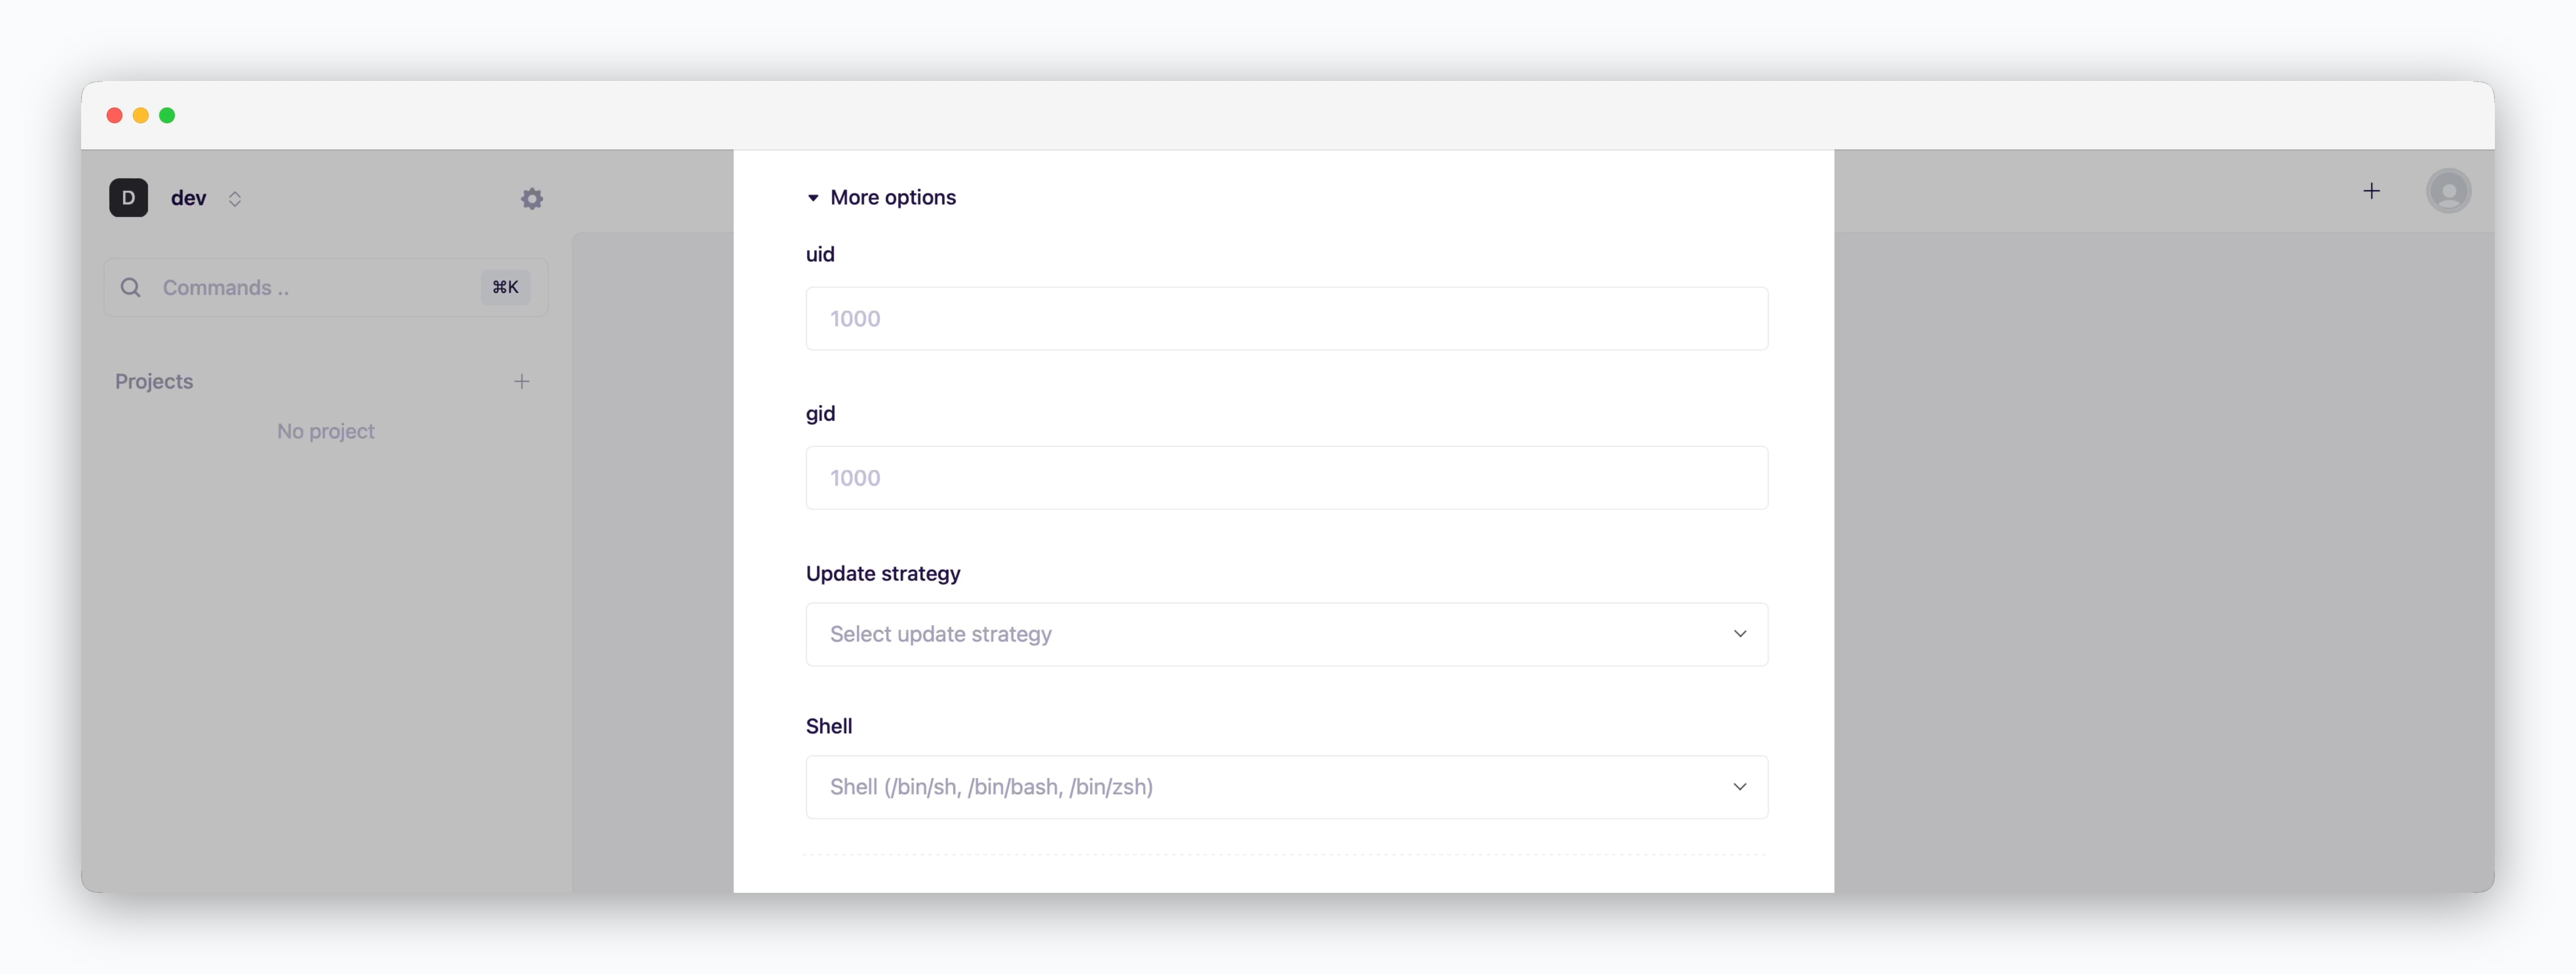
- uid: User ID for executing processes within the container (default: 1000)
- gid: Group ID for process ownership within the container (default: 1000)
-
Update strategy
- Rolling Update: Deploy new version incrementally while maintaining service availability. Requires sufficient node resources
- Recreate: Stop all instances before deploying new version. Results in downtime
- Shell: Specify the shell for container runtime execution (sh, bash, zsh, etc.)
Resource Settings and Deploy
Resource Settings and Deploy
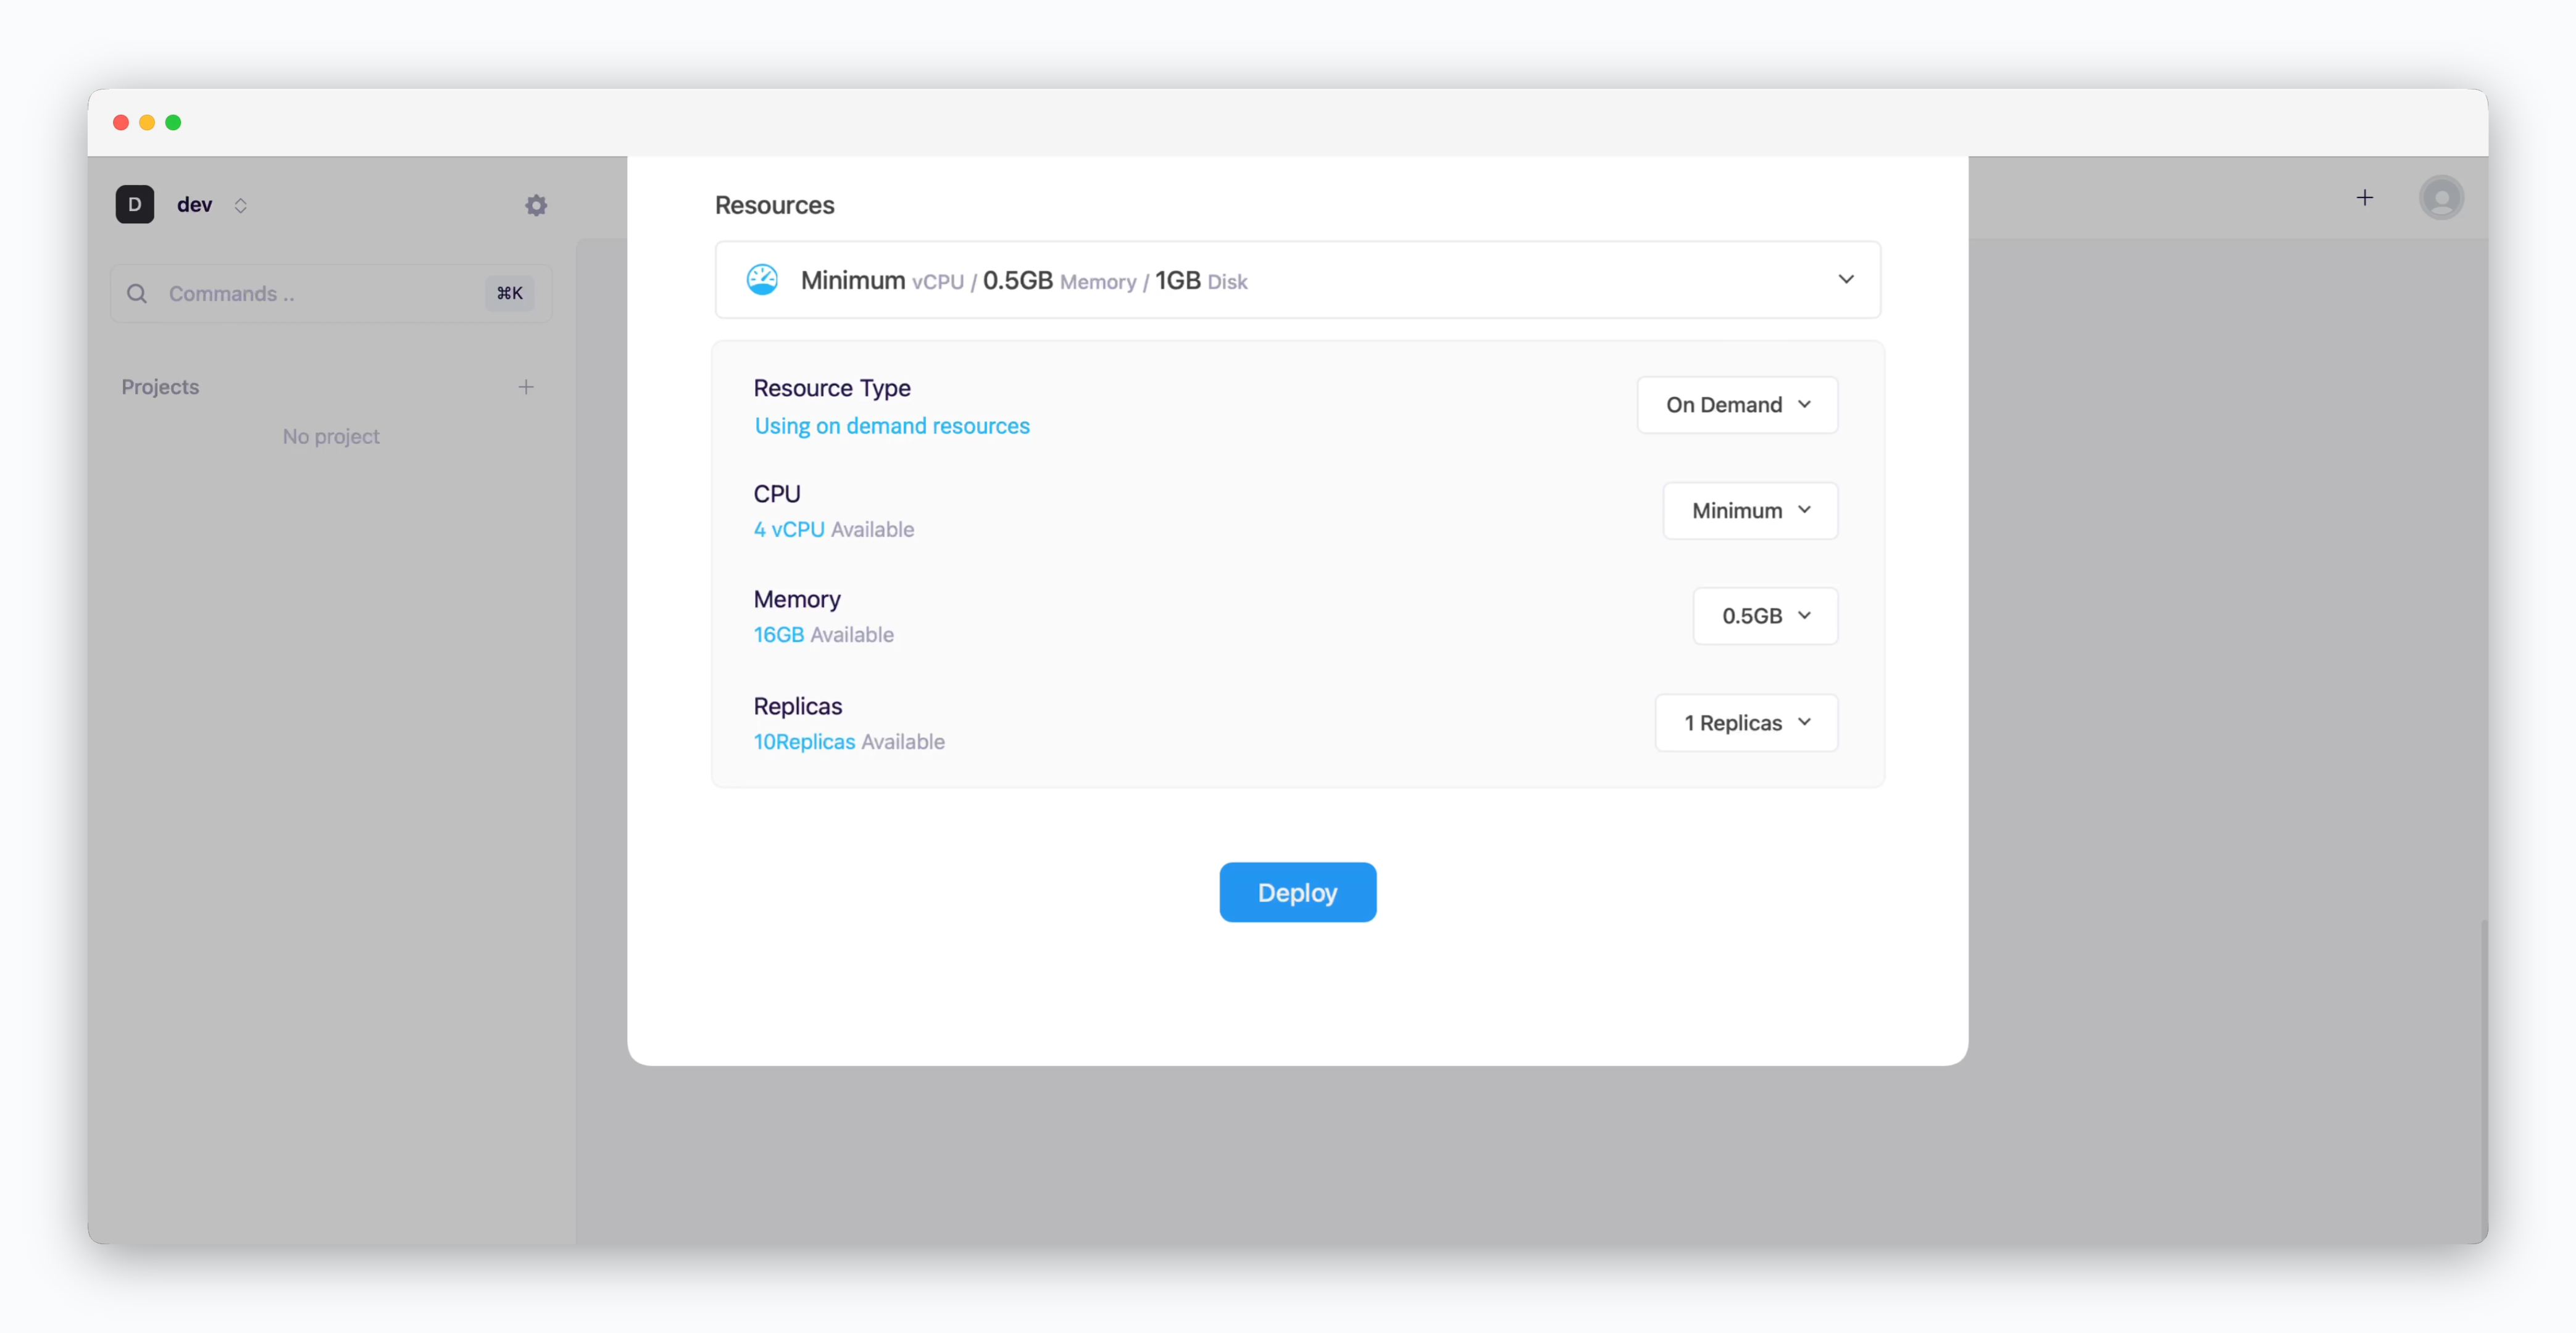
- Resource Type: Select between On-demand or Spot instance types
- CPU: Maximum vCPU resource for the service. Minimum vCPU means 0.1 vCPU
- Memory: Maximum memory size your service can use
- Replica: Number of service replicas for high availability and load balancing
-
Deploy: Click
Deploy